1
IMPORTANT: Before removing the filter holder, to
avoid puffs of steam, completely eliminate
residual steam left in the boiler by turning the
steam knob anticlockwise (fig. 20).
NB: For reasons of safety, when the boiler is hot, the
cap cannot be opened as it turns without catching.
If you need to remove it, vent all the steam in the boiler
using the steam knob as described above.
HOW TO USE THE TWO CUP ADAPTER
The adapter must be used whenever you want to make
coffee directly in the cups rather than in the small jug.
To mount, hook onto the bottom of the filter holder (fig.
21).
IMPORTANT: When you use the appliance for the first
time, all accessories and the internal circuits must be
washed as follows:
• FOR THE DRIP COFFEE MAKER: make at least two
jugs of coffee without using ground coffee
(following the instructions in the section HOW TO
PREPARE DRIP COFFEE).
• FOR THE ESPRESSO COFFEE MAKER: make at
least four cappuccinos without using ground
coffee and using water instead of milk (following
the instructions in the section HOW TO PREPARE
CAPPUCCINO COFFEE).
HOW TO PREPARE CAPPUCCINO COFFEE
1.To prepare two cappuccinos, make the espresso
coffee as described in the section “How to prepare
espresso coffee” from point 1 to point 11, but add
the quantity of water required to make two
cappuccinos up to the [steam] level on the WATER
LEVEL side of the jug as described in the table of
quantities at the end of the text. (Note that the
quantity of water to make cappuccinos is greater
than that needed to make coffees. The additional
water will be used to produce steam to froth the
milk).
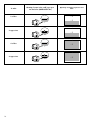
2.Pour the milk into the tank (fig. 22) up to level 2
(corresponding to 2 cappuccinos) marked on the
inside of the tank and corresponding to the second
step as shown in the table of quantities at the end of
the text.
NB: Use semi-skimmed (or preferably completely
skimmed) milk at refrigerator temperature.
3.Press the ON/OFF switch for espresso coffee. The
light above the switch comes on to indicate that the
espresso coffee maker is operating (fig. 23).
4.Run off the coffee into the small jug. When the dark
coffee below the light coloured cream reaches the
14
level 2 on the “COFFEE LEVEL” side of the small jug
(fig. 24), position the Vario System selector on
“cappuccino” (fig. 16).
This must be done with great care. If the coffee goes
above level 2, there will not be enough steam left to
froth the milk at the end.
5.Pour the coffee into two sufficiently large cups.
6.Make sure the milk tank is correctly in position and
hooked to the appliance, then place a cup containing
the coffee made previously under the milk tank tube
(fig. 20).
7.Make sure the OK light (30) is on (if off, wait for it to
come on), then turn the steam knob anticlockwise.
The frothed milk starts to run out from the tube (fig.
20). Allow it to flow into the cup until the level of the
milk in the tank drops one step (corresponding to
level 1 marked on the inside of the tank itself).
8.Prepare the second cappuccino by repeating
operations 6 and 7.
NB: Each step of the milk tank indicates the quantity
of milk necessary to make one cappuccino.
NB: For optimum frothing of the milk, after making
one cappuccino, wait until the OK light comes on
before making another.
NB: If you are using small cups, to avoid splashes of
milk, fit the splash hood onto the milk tank tube (fig.
25).
9.When you have finished, turn the appliance off by
pressing the ON/OFF switch for espresso coffee and
cappuccino.
Important: After preparing the last cappuccino,
before turning the appliance off, lift the intake tube
in the tank above the level of any milk left (as
shown in fig. 26) and allow steam to vent for a few
seconds.
Close the steam knob with the tube raised.
To ensure hygiene, you are recommended to follow
this procedure each time you make cappuccino to
avoid milk stagnating in the milk circuit.
10.To make four cappuccinos, repeat the previous
operations, paying attention to the quantity of water,
milk and ground coffee indicated in the table of
quantities at the end of the text.
Before positioning the Vario System selector in the
cappuccino position, run off the coffee into the jug
until it reaches level 4 on the “COFFEE LEVEL” side
as shown in figure 27.
NB: When pouring milk into the tank, never exceed
level 4, otherwise the milk may continue to drip from
the tube after you have finished making the
cappuccino.