Transcript
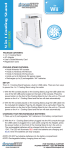
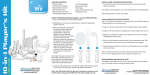
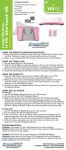
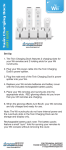
USER’S GUIDE
Rumble Blaster
BOX CONTENTS:
Rumble Blaster (can be separated into 2 parts)
User Guide
Warranty Card
SET-UP (Wii Remote)
1. Lift up the front and rear bars of the Rumble Blaster remote casing.
2. Place your Wii Remote into the Rumble Blaster casing with the top of the
Wii Remote going in first.
3. Snap bottom of Wii Remote into Rumble Blaster casing.
4. Press down on both bars until they click.
SET-UP (Wii Nunchuck)
1. Place Nunchuk into the back of casing sliding up top first.
Note: The bottom of the Nunchuk should snap into place when secured.
2. Wrap Nunchuk cable along the thin handle and into the bottom hole of
the middle part of the casing.
3. Lift up top blue cover.
4. Wrap cable around the 2 hooks starting with the bottom hook. (You
should be able to wrap the cable around each hook twice.)
5. Pull the excess of the cable through the top slit of the Nunchuk casing.
6. Replace the top blue cover.
The Rumble Blaster is designed for use on
the Nintendo Wii. It is compatible with all
light gun, target style and 1st person
shooters. It features rumble & dual triggers
that will enhance your gaming experience.
www.dreamgear.net
SET-UP (Attaching Rumble Blaster)
1. Lift up the blue bar at the bottom of the Wii Remote gun casing.
2. Take the end of the Nunchuk cable that is sticking out of the top of the
Nunchuk casing and slide it through the blue bar at the bottom of the Wii
Remote gun casing.
3. Plug in the end of the Nunchuk cable into the Wii Remote.
4. Press down on the blue bar at the bottom of the Wii Remote gun casing
until it clicks.
5. Attach the Wii Remote gun casing and the Nunchuk casing by sliding the
end of the Nunchuck casing over the end of the Wii Remote gun casing. (It
should snap into place.)
www.dreamgear.net
TO DETACH CASINGS TO FORM TWO (2) SEPARATE UNITS:
1. Slide the Nunchuk casing upward from the Wii Remote gun casing to
separate.
2. Lift up the blue bar at the bottom of the Wii Remote gun casing.
3. Unplug the Nunchuk cable from Wii Remote.
4. Press down on the blue bar at the bottom of the Wii Remote gun casing
until it clicks.
FOR RUMBLE FEATURE:
1. Detach the battery cover on the back of the handle of the Wii Remote
gun casing.
2. Place two (2) “AAA” batteries into battery slot.
3. Replace cover.
Note: Rumble feature will be activated by pressing on either trigger button
on the Wii Remote gun casing.
TROUBLESHOOTING:
Problem: The Rumble Blaster will not vibrate when triggers are pressed.
Solution: Make sure that you use fresh batteries and the batteries are
inserted properly and securely. Replace batteries.
Problem: The triggers do not activate the A and B buttons on the Wii
Remote.
Solution: Make sure that the blue bars are closed properly. They should be
pressed down until you hear a click to confirm that they have been closed
properly.
Problem: The Nunchuk doesn’t work.
Solution: Make sure that the end of the Nunchuk cable is attached properly
and securely to the bottom of the Wii Remote.
how to info goes here.
FOR TECHNICAL SUPPORT
PLEASE CONTACT: 1-877-999-DREAM
or [email protected]