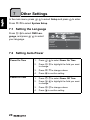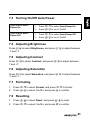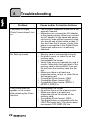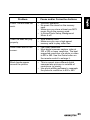
1
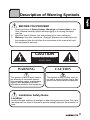
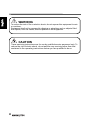
Table of Contents
Package Contents .............................................................................................. 8
Main Menu.......................................................................................................... 9
Selecting Your Source........................................................................................ 9
Photo ......................................................................................... 10
Viewing Photos................................................................................................. 10
Setting Photo Display Mode ............................................................................. 12
Configuring Photo Display Settings.................................................................. 12
Configuring Sildeshow Settings........................................................................ 13
Video.......................................................................................... 14
Playing Videos.................................................................................................. 14
Music ......................................................................................... 15
Playing Music ................................................................................................... 15
Calendar .................................................................................... 16
Displaying Calendar ......................................................................................... 16
Setting Calendar Display Mode........................................................................ 16
Setting Date & Time ......................................................................................... 17
Setting the Alarm.............................................................................................. 18
Turning the Alarm On/Off ................................................................................. 18
File Manager.............................................................................. 19
Deleting Files.................................................................................................... 19
Other Settings........................................................................... 20
Setting the Language ....................................................................................... 20
Setting Auto-Power .......................................................................................... 20
Turning On/Off Auto-Power.............................................................................. 21
Adjusting Brightness......................................................................................... 21
Adjusting Contrast ............................................................................................ 21
Adjusting Saturation ......................................................................................... 21
Formating ......................................................................................................... 21
Resetting .......................................................................................................... 21
Troubleshooting ....................................................................... 22
Specifications ........................................................................... 24
1
English
Regulatory Information ......................................................... 2
Description of Warning Symbols ......................................... 3
Important Safety Instructions............................................... 5
Preface.................................................................................... 7
Getting Started............................................................................ 8
English
Regulatory Information
FCC Compliance Statement1
This device complies with part 15 of the FCC Rules. Operation is subject to the following two conditions: (1) This device may not cause harmful interference, and (2)
this device must accept any interference received, including interference that may
cause undesired operation.
Additional Information
This equipment has been tested and found to comply with the limits for a Class B
digital device, pursuant to part 15 of the FCC Rules. These limits are designed to
provide reasonable protection against harmful interference in a residential installation. This equipment generates, uses and can radiate radio frequency energy and, if
not installed and used in accordance with the instructions, may cause harmful interference to radio communications. However, there is no guarantee that interference
will not occur in a particular installation. If this equipment does cause harmful interference to radio or television reception, which can be determined by turning the
equipment off and on, the user is encouraged to try to correct the interference by one
or more of the following measures:
• Reorient or relocate the receiving antenna
• Increase the separation between the equipment and receiver
• Connect the equipment into an outlet on a circuit different from that to which the
receiver is connected
• Consult the dealer or an experienced technician for help
Warning: The Federal Communications Commission warns that changes or modifications of the equipment not expressly approved by the party responsible for compliance could void your authority to operate the equipment.
1
applies only to products purchased in the United States of America
DOC Compliance Notice1
This digital apparatus does not exceed the Class B limits for radio noise emissions
from digital apparatus as set out in the Radio Interference Regulations of the Canadian Department of Communications.This device complies with Canada ICES-003
Class B.
CE Conformity Statement2
This device is in conformity with the requirements of EU Council Directive 2004/108/
EC on the approximation of the laws of the Member States relating to electromagnetic compatibility and Directive 2006/95/EC on the harmonization of the laws of
Member States relating to electrical equipment for use within certain voltage limits.
Hannspree cannot accept responsibility for any failure to satisfy the requirements
resulting from a non-recommended modification of the device.
1
2
applies only to products purchased in Canada
applies only to products purchased in the European Union
2
Description of Warning Symbols
English
BEFORE YOU PROCEED
1.
2.
3.
Read and follow all Safety Notices, Warnings and instructions in this
User’s Manual carefully before either plugging in or turning the equipment on.
Keep this User’s Manual, box and packaging for future reference.
Warranty. Any uses, operations, changes, alterations or modifications of
the equipment that do not follow the instructions in this manual will void
this equipment’s warranty.
CAUTION
RISK OF ELECTRIC SHOCK
DO NOT OPEN
WARNING
CAUTION
This symbol is used to alert users to
pay attention to important descriptions regarding usage, maintenance
(repair), and additional important
information related to this equipment.
This symbol is used to alert users to
the risk of electric shocks due to dangerous and uninsulated components.
Installation Safety Notes
Location
Avoid prolonged exposure to sunlight or other strong sources of heat. Don’t put
the equipment too close to the wall to provide enough space for the emission of
heat.
3
English
WARNING
To reduce the risk of fire or electric shock, do not expose this equipment to rain
or moisture.
Equipment shall not be exposed to dripping or splashing and no objects filled
with liquids, such as vases, shall be placed on the equipment.
CAUTION
These servicing instructions are for use by qualified service personnel only. To
reduce the risk of eletric shock, do not perform any servicing other than that
contained in the operating instructions unless you are qualified to do so.
4
Important Safety Instructions
8.
9.
10.
11.
12.
13.
14.
15.
English
1.
2.
3.
4.
5.
6.
7.
Read these instructions.
Keep these instructions.
Heed all warnings.
Follow all instructions.
Do not use this apparatus near water.
Clean only with dry cloth.
Do not block any ventilation openings. Install in accordance with
manufacturer’s instructions.
Do not install near any heat sources such as radiators, heat registers,
stoves, or other apparatus (including amplifiers) that produce heat.
Do not defeat the safety purpose of the polarized or grounding-type plug. A
polarized plug has two blades with one wider than the other. A groundingtype plug has two blades and a third grounding prong. The wide blade or the
third prong are provided for your safety. If the provided plug does not fit into
your outlet, consult an electrician for replacement of the obsolete outlet.
NOTE: Applies to US only.
Protect the power cord from being walked on or pinched, particularly at
plugs, convenience receptacles, and the point where they exit from the
apparatus.
Only use attachments/accessories specified by the manufacturer.
Unplug this apparatus during lightning storms or when unused for long
periods of time.
Refer all servicing to qualified service personnel. Servicing is required when
the apparatus has been damaged in any way, such as power-supply cord or
plug is damaged, liquid has been spilled or objects have fallen into the
apparatus, the apparatus has been exposed to rain or moisture, does not
operate normally, or has been dropped.
Where the MAINS plug or an appliance coupler is used as the disconnect
device, the disconnect device shall remain readily operable.
The apparatus should be used in moderate climate.
CAUTION
•
If the remote control is not used for a long period, remove the batteries and store
it properly.
5
English
•
•
•
•
•
•
Handle damaged batteries carefully, and wash hands with soap if they come in
contact with leaked chemical fluids.
If your remote control has two batteries, do not mix new and old batteries or the
life of the new battery will be shortened. Chemical fluids may leak from the old
batteries.
Danger of explosion if battery is incorrectly replaced. Replace only with the same
or equivalent type recommended by the equipment manufacturer. Discard used
batteries according to manufacturer’s instructions.
Refer to your local recycling or waste disposal rules and contact a local waste
disposal vendor to dispose of used batteries.
The remote control cover may have a magnet in it, so do not place magnetic sensitive items such as watches, credit cards, or flash media close to the cover.
Do not use force when pulling the remote control cover open; you may damage
the hinge.
Copyright
© Copyright 2008 Hannspree, Inc.
All rights reserved. This manual is protected by copyright and distributed under licenses
restricting its use, copying and distribution. No part of this manual may be reproduced in any
form by any means without the prior written authorization of Hannspree. The DPF described in
this manual may include copyrighted software of Hannspree (or other third parties). Hannspree
(or other third parties) preserves the exclusive rights for copyrighted software, such as the right
to distribute or reproduce the copyrighted software. Accordingly, and to the extent allowed by
applicable law, any copyrighted software contained in the product described herein shall not be
distributed, modified, reverse engineered, or reproduced in any manner without the prior written
authorization of Hannspree (or of other third parties).
The Hannspree logos presented herein are trademarks of Hannspree. All other product names,
trademarks or logos mentioned herein are used for identification purpose only, and may be the
trademarks or registered trademarks of their respective owners.
The purchase of the product described herein shall not be deemed to grant, either directly or by
implication, estoppel or otherwise, any license under the copyrights, patents, patent applications or trademarks of Hannspree, except for the normal, non-exclusive use that arises by operation of law in the sale of a
product.
Flash Card References
Please refer to the flash card websites below:
SD CARD: http://www.sdcard.org/
MS CARD: http:/www.memorystick.com/en/
MMC CARD: http:/www.mmcard.org/
6
Preface
Please carefully read this manual throughout before setting up, using or
operating your DPF. To ensure the safe and correct installation and operations of the DPF, it is important that the safety and operation instructions in
this manual are followed.
This instruction manual is designed to assist you in setting up and using the
DPF. The information in this manual has been carefully checked for accuracy; however, no guarantee is given to the correctness of the contents. The
information in this manual is subject to change without notice.
To the extent allowed by applicable law, Hannspree, Inc. (“Hannspree”) shall
not be liable for direct, indirect, special, exemplary, incidental or consequential damages arising from any defect or omission in this manual, even if
advised of the possibility of such damages in advance.
7
English
Thank you for purchasing a Hannspree Digital Photo Frame. Your new DPF
will allow you to view your favorite photographs, listen to various kinds of
music and watch videos while enriching your lifestyle with advanced technology.
English
1
Getting Started
1.1 Package Contents
Make sure all the following are present when you receive your digital
photo frame. If any parts are missing, contact your vendor immediately.
•
Digital Photo Frame
•
Power Adapter
•
USB Host Adapter
•
Quick Start Guide
•
User Manual
•
Warranty Card
•
Remote Controller
•
Stand
* For your referenece only. Actual product may vary. You may refer to the
description printed outside the box for the actual package contents.
8
Select your source
Left
English
1.2 Main Menu
Right
Enter
Video
Photo
Setup
Music
Photo
File Manager Calendar Current Source
1.3 Selecting Your Source
If there is no other source available,
the digital photo frame will access
the files saved in the internal memory directly. If you want to access
files from other sources, press
and a menu will be shown as the
picture on the right. Press
Internal Memory
to
select the source you inserted and then press
to enter.
9
English
2
Photo
2.1 Viewing Photos
In the main menu, press / to select Photo and press to enter.
The Photos are displayed in the display mode as what is already set
in Photo Setup/Display Mode. (If there is no instruction given, the
photos will be displayed automatically in a sequence of slide show.)
Browse:
•
•
•
•
•
•
•
10
Press /
to browse images.
Press
to rotate.
Press
to play photo slide
show.
Press
to change the display
mode.
Press
to go back to main
menu.
Press
to zoom an image.
Press / / /
to move the
image.
13:57:02
200%
•
•
•
•
Press
Press
Press
Press
menu.
/
/ /
to select.
to select an image.
to display the photo.
to go back to main
Photo
PHOTO 01
2048x1536
803KB
2008/05/27
1/15
Edit Photos:
1.
Press / / /
to select
an image you want to edit.
Slideshow
2.
Press
3.
Press
to display the Slideshow option.
4.
Press
Photo
Photo Edit
to confirm.
/
PHOTO 01
2048x1536
803KB
2008/05/27
Rotate
1/15
to select Slide-
show/Rotate and press
confirm.
to
Slide Show:
•
•
•
•
•
Press /
to skip to previous/
next image.
Press /
to adjust volume.
Press
to play/pause the
photo and music.
Press
to change the mode.
Press
to go back to main
menu.
13:57:02
*If there are audio files saved in the
same source, the audio files will be
played automatically during the slide
show.
Tip: This product supports JPEG (baseline) image files within 16 mega
pixels.
11
English
Thumbnail:
English
2.2 Setting Photo Display Mode
1. In the main menu, press
/
to select Setup and press
enter.
to
Photo Setup
Display Mode
Fit Screen
Transition Effect
Random
Interval Time
10 Sec.
Clock Display
On
2. Press /
Setup.
to select Photo
3. Press /
Mode.
to select Display
4. Press
to select Thumbnail/Slideshow.
/
Slideshow
Display Fit Mode
2.3 Configuring Photo Display Settings
In the main menu, press
Press
/
to select Setup and press
to enter.
to select Photo Setup.
Display Fit Mode
Clock Display On/Off
12
/
1.
Press
/
to select Display Fit Mode.
2.
Press /
Screen.
to select Full Screen/Fit
1.
Press
/
to select Clock Display.
2.
Press
/
to turn Clock Display On/Off.
In the main menu, press
Press
/
/
to select Setup and press
to enter.
to select Photo Setup.
Interval Time
Transition Effect
Repeat
Background Music
1.
Press
/
2.
Press /
to select 5 Sec./10 Sec./15
Sec./30 Sec./ 1 Min/3 Min./Off.
1.
Press
2.
Press /
to select Random/Fade-in
Fade-out/Block 9/Block 8/Block 7/Block 6/
Block 5/Block 4/Block 3/Block 2/Block 1/
Color Ration Hor./Color Ration Ver./Blind
Horizontal/Blind Vertical/No Effect.
1.
Press
/
to select Repeat.
2.
Press
/
to select On/Off.
1.
Press
/
to select Background Music.
2.
Press
Off.
/
to turn Background Music On/
/
to select Interval Time.
to select Transition Effect.
13
English
2.4 Configuring Sildeshow Settings
English
3
Video
3.1 Playing Videos
1. In the main menu, press
/
to select Video and press
enter.
2. Press
/
to
to select a video.
3. Press
to play. Or press
to
confirm your selection and then
select more video files to play.
4. While playing,
•Press
to exit.
•Press
to play/pause.
•Press
/
Video
MOVIES
VIDEO 01
1.9MB
2008/05/27
SUPERBIKE
VIDEO 01
VIDEO 02
VIDEO 03
VIDEO 04
VIDEO 05
3/15
i
to adjust volume.
•Press
to rewind.
•Press
to fast forward.
00:00:02
00:20:02
Tip: This product supports MPEG-1, MPEG-2, MPEG-4 video files with
encoded type YUV420, YUV422 and audio stream type MSPCM/MP3.
Caution:
To ensure smooth video playback, ensure that the code rate of the built-in
video file or the video file on a USB disk is less than or equal to 30fps. The
maximum supported resolution is 720 x 480 pixels.
14
4
Music
English
4.1 Playing Music
1. In the main menu, press
/
select Music and press
enter.
2. Press
file.
/
to
to
to select a music
Music
JAZZ
MUSIC 01
720KB
2008/05/27
ROCK
MUSIC 01
MUSIC 02
MUSIC 03
MUSIC 04
MUSIC 05
3/15
3. Press
to play. Or press
to
confirm your selection and then
select more music files to play.
4. While playing,
•Press
to exit.
JAZZ
•Press
to play/pause.
MUSIC 01
•Press
/
to adjust volume.
•Press
to previous.
•Press
to next.
Music
MUSIC 01
720KB
2008/05/27
ROCK
MUSIC 02
MUSIC 03
MUSIC 04
MUSIC 05
00:02
00:20
Tip: This product supports MP3 audio files (MPEG 1.0 Layer 3, with a sampling rate of 44.1kHz and a bit rate of 32kbps-320kbps).
15
English
5
Calendar
5.1 Displaying Calendar
In the main menu, press
/ to select Calendar and press
to
enter. The Calendar is displayed in the display mode as what is
already set in Calendar Setup/Display Mode.
Monthly Calendar:
•
•
•
•
•
D
Press /
to browse images.
Press /
to view the previous/next month.
Press
to play/pause photos
and music.
Press
to change the display
mode.
Press
to be back to main
menu.
June
2008
Mon Tue Wed Thu
•
•
Sat Sun
1
2
3
4
5
6
7
8
9
10
11
12
13
14
15
16
17
18
19
20
21
22
23
24
25
26
27
28
29
30
Calendar:
•
•
•
Fri
M
Press /
to browse images.
Press /
to adjust volume.
Press
to play/pause photos
and music.
Press
to change the display
mode.
Press
to go back to main
menu.
2008
June
24
Tuesday
5.2 Setting Calendar Display Mode
1. In the main menu, press
enter.
/
to select Setup and press
2. Press
/
to select Calendar Setup.
3. Press
/
to select Display Mode.
4. Press
/
to select Monthly Calendar/Calendar.
16
to
In the main menu, press
Press
/
/
to select Setup and press
to enter.
to select Calendar Setup.
Set Date:
1.
Press
/
to select Set
Date and /
highlight the
field you want to change.
2.
Press
3.
Press
/
to change values.
to confirm setting.
Calendar Setup
Display Mode
Calendar
Set Date
24/Jun/2008
Set Time
15:52:52
Clock Mode
24-hour
Alarm
Off
Calendar Setup
Display Mode
Set Date
Set Date
Calendar
24/Jun/2008
24:/Jun/2008
Set Time
15:52:52
Clock Mode
24-hour
Alarm
Off
Set Time:
1.
2.
Press /
to select Clock
Mode and choose 12-hour/24hour.
Press
/
to select Set
Time and /
highlight the
field you want to change.
3.
Press
4.
Press
/
Calendar Setup
Display Mode
Calendar
Set Date
24/Jun/2008
Set Time
15:52:52
Clock Mode
24-hour
Alarm
Off
to change values.
Calendar Setup
to confirm setting.
Display Mode
Set Date
Set Time
Set Time
Calendar
24/Jun/2008
13 :54:36
15:52:52
Clock Mode
24-hour
Alarm
Off
17
English
5.3 Setting Date & Time
English
5.4 Setting the Alarm
1. In the main menu, press
/
to select Setup and press
enter.
to
2. Press /
Setup.
to select Calendar
3. Press
to select Alarm
/
Calendar Setup
Set Date
24/Jun/2008
Set Time
15:52:52
Clock Mode
24-hour
Alarm
Off
Alarm Time
00:00
Time and /
highlight the
field you want to change.
4. Press
/
5. Press
to change values.
to confirm setting.
Calendar Setup
Set Date
24/Jun/2008
Set Time
15:52:52
Clock Mode
24-hour
Alarm
Off
Alarm Time
00:00
5.5 Turning the Alarm On/Off
1. In the main menu, press
to select Setup and press
enter.
/
to
Calendar Setup
Set Date
24/Jun/2008
Set Time
15:52:52
2. Press /
Setup.
to select Calendar
3. Press
/
to select Alarm and
press
/
to turn the alarm On/Off.
18
Clock Mode
24-hour
Alarm
Off
Alarm Time
00:00
6
File Manager
6.1 Deleting Files
1. In the main menu, press /
to select File Manager and
press
2. Press
to enter.
/
to select a file.
3. Press
to check the file.
4. Press
to delete the file.
5. Press
/
6. Press
File Manager
MOVIES
MUSIC 01
720KB
2008/05/27
SUPERBIKE
PHOTO 01
PHOTO 02
MUSIC 01
MUSIC 02
VIDEO 01
5/15
to select Yes/No.
to confirm the deletion.
File Manager
MOVIES
SUPERBIKE Delete it
PHOTO 01
Delete the files?
PHOTO 02
MUSIC 01
720KB
2008/05/27
Yes
MUSIC 01
No
MUSIC 02
VIDEO 01
5/15
19
English
The delete function is only available for files in the internal memory of
the Digital Photo Frame.
English
7
Other Settings
In the main menu, press
Press
/
/
to select Setup and press
to enter.
to select System Setup.
7.1 Setting the Language
Press
/
to select OSD Lan-
guage, and press
your language.
/
to select
System Setup
OSD Language
English
Brightness
0
Contrast
0
Saturation
0
Auto-Power On
Off
7.2 Setting Auto-Power
Power On Time
Power Off Time
20
1.
Press
/
2.
Press /
to change.
to highlight the field you want
3.
Press
to change values.
4.
Press
to confirm setting.
1.
Press
/
2.
Press /
to change.
to highlight the field you want
3.
Press
to change values.
4.
Press
/
/
to select Power On Time.
to select Power Off Time.
to confirm setting.
Turn On/Off AutoPower On
1.
Press
/
to select Auto-Power On.
2.
Press
/
to turn it On/Off.
Turn On/Off AutoPower Off
1.
Press
/
to select Auto-Power Off.
2.
Press
/
to turn it On/Off.
English
7.3 Turning On/Off Auto-Power
7.4 Adjusting Brightness
Press / to select Brightness, and press
-7 and +7.
/
to adjust between
7.5 Adjusting Contrast
Press /
7 and +7.
to select Contrast, and press
/
to adjust between -
7.6 Adjusting Saturation
Press /
-7 and +7.
to select Saturation, and press
/
to adjust between
7.7 Formating
1. Press
/
to select Format, and press
/
to format.
2. Press
/
to select Yes/No, and press
to confirm.
7.8 Resetting
1. Press
/
to select Reset, and press
2. Press
/
to select Yes/No, and press
/
to reset.
to confirm.
21
English
8
Troubleshooting
Problem
Cause and/or Corrective Actions
The power of Digital
Photo Frame doesn’t turn
on.
•
No Start-up screen.
•
•
•
•
•
•
•
•
•
The picture does not
appear on the screen
after selecting the Photo
function.
•
•
•
•
•
22
The POWER connector to the unit is not
securely inserted.
Make sure you connect the AC adapter
to the frame properly. When you connect
the AC adapter to the frame and power
up the unit, even without a memory card,
you should see a blank white screen. If
you don't see the lit screen, check if the
power is connected to the Digital Photo
Frame and make sure it is securely
attached.
Memory card is not inserted correctly.
No photo, music, or video file on the
memory card.
Incompatible file format.
Verify if the way you inserted the card is
correct. Make sure the front label of the
memory card is facing AWAY from you.
Do not force the memory card into the
slot.
Make sure there is at least one
supported photo, music, or video file on
the memory card.
Compatible Photo format: JPEG.
Compatible Music format: MP3.
Compatible Video format: MPEG-1,
MPEG-2, MPEG-4.
Incompatible file format.
No picture file is on the memory card.
Make sure there is at least one
supported picture file stored on the
memory card.
Compatible Photo format: JPEG.
The digital frame is compatible with the
JPEG file format only. The device does
not support TIFF, BMP, GIF etc.
Photo + Music does not
work.
Cause and/or Corrective Actions
•
•
•
•
English
Problem
Incorrect operation.
No music file stored on the memory
card.
Make sure you store at least one MP3
music file on the memory card.
In Setup/Photo Setup, Background
Music is off.
Video file does not play
properly.
•
•
Slow memory card.
Make sure you use a high-speed
memory card to play video files.
Small video size on the
screen.
•
•
Low video resolution.
Most digital cameras capture video at
320 x 240 or lower resolution. The best
supported resolution of a photo or video
is 800 x 480. Use the Zoom button on
the remote control to enlarge it.
Black bands appear
around the picture.
•
This is normal since different digital
cameras take pictures in varieties of
resolutions (or pixels).
Use photo editing software to resample
the picture's resolution to 800 x 480.
•
23
English
9
Specifications
Display
Power Adapter
8” TFT LCD
10” TFT LCD
100-240V, 47-63Hz, 5V DC
2A
3A
Power Consumption
9.5W Maximum
12W Maximum
Earphone
3.5 φ Earphone jack x 1
Built-in Speakers Output
1W x 2
Max. Resolution
800 x 480
Support
Image Files: JPEG
Music: MP3
Video: MPEG-1,MPEG-2, MPEG-4
Memory Card
SD/SDHC/MS/MS-Pro/xD/CF
USB
USB 2.0
1024 x 600
Note: All the specifications above depend on the actual product, and
may be changed without prior notification.
24