1
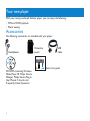
Philips GoGear audio player
User manual
SA9100
SA9200
Need help?
Please visit
www.philips.com/usasupport
where you can access to a full set of supporting materials
such as user manual, flash tutorial, the latest software
upgrades and answers to frequently asked questions.
Or call our Customer Care Helpline,
1-888-744-5477
where our professional support team will be pleased to assist
you in solving any issues you may have with your player.
ii
Country
Helpdesk
Tariff / min
Keep ready
Europe
Austria
Belgium
Czech Republic
Denmark
Finland
France
Germany
Greek
0820 901115
070 253 010
800142100
3525 8761
09 2290 1908
08 9165 0006
0180 5 007 532
0 0800 3122 1223
€0.20
€0.17
Místní tarif
Lokal tarif
Paikallinen hinta
€0.23
€0,12
1 a a
Hungary
Ireland
Italy
Luxemburg
Netherlands
Norway
Poland
06 80 018544
01 601 1161
199 404 042
26 84 30 00
0900 0400 063
2270 8250
022 3491504
Portugal
Russia
2 1359 1440
(495) 961-1111
8 800 200-0880
Helyi tarifa
Local tariff
€0.25
Tarification locale
€0.20
Lokal tariff
Cena połączenia
lokalnego
Preço local
Slovakia
Spain
Sweden
Switzerland
UK
Das Kaufdatum. Modellnummer und Serial nummer
La date d’achat la référence et le numéro de série du produit
Datum zakoupení, číslo modelu a sériové číslo
Indkøbsdato, type-, model- og serienummer
Ostopäivä ja tarkka mallinumero ja sarjanumero
La date d’achat la référence et le numéro de série du produit
Das Kaufdatum. Modellnummer und Serial nummer
A vásárlás dátuma, modell szám és szériaszám
Date of Purchase. Model number and Serial number
La data di acquisto, numero di modello e numero di serie
La date d’achat, la référence et le numéro de série du produit
De datum van aankoop, modelnummer en serienummer
Datoen da du kjøpte produktet & modellnummer & serienummeret
Data zakupu, Numer modelu i numer seryjny
A data de compra, número do modelo e número de série
Дата покупки, Номер модели и Серийный номер
по России звонок
бесплатный
Miestna tarifa
€0,15
Lokal kostnad
Ortstarif
£0.15
Dátum zakúpenia, číslo modelu a sériové číslo
Fecha de compra y número del modelo y número de serie
Inköpsdatum, modellnummer och serienummer
Das Kaufdatum. Modellnummer und Serial nummer
Date of Purchase, Model number and Serial number
0820 901115
(Francophone)
1-888-744-5477
(English / Spanish)
1-888-744-5477
€0.20
Date of Purchase, Model number and Serial number
€0.17
Date of Purchase, Model number and Serial number
11 4544 2047
0800 701 02 03
(Except Sao Paulo)
2121 0203
(Sao Paulo)
600 744 5477
01 800 504 6200
Tarifa local
Grátis
Fecha de compra y número del modelo y número de serie
A data de compra, número do modelo e número de série
0800004551
902 888 785
08 632 0016
02 2310 2116
0906 1010 017
North America
Canada
USA
South America
Argentina
Brazil
Chile
Mexico
Asia
China
Hong Kong
Korea
4008 800 008
2619 9663
02 709 1200
Preço local
Tarifa local
Gratis
Fecha de compra y número del modelo y número de serie
Fecha de compra y número del modelo y número de serie
Contents
2
2
3
3
4
4
5
6
7
8
8
9
10
10
10
11
Your new player
Accessories
Optional accessories
Register your product
Getting started
Overview of controls and connections
Main menu
Vertical touch strip navigation
Install
Connect and charge
Use the supplied USB cable
Battery level indication
Transfer
Enjoy
Power on and off
Demo mode
12 Organize and transfer photos and music with
Windows Media Player 10
12
13
16
20
21
22
22
23
23
iv
Music transfer
Add songs to Windows Media Player Library
Synchronize Windows Media contents with your player
Manage your Windows Media Player Playlist
Manage your songs and playlists in Windows Media Player
Photo transfer
Enable photo support
Add photos to Windows Media Player Library
Transfer photos to your player
Contents
26 Detailed operation
26
Music mode
26
27
28
29
30
Controls
Find your music
Album art
Play mode
Use the Sampler
31
31
Sound settings
Playlist on the go
32
32
33
33
34
34
35
35
36
36
37
Add songs to playlist on the go
Play back playlist on the go
Save Playlist on the go
Clear playlist on the go
Remove songs from Playlist on the go
Most played
Other playlists
Delete playlist from your player
Rate your songs
Now playing
Photos
37
38
38
39
39
39
Transfer photos from your computer to your player
Transfer photos from your player to your computer
Find photos on your player
Personal Image
Philips Photo Fixer
Slideshow
41
44
Settings
Use your player to store and carry data files
v
Contents
45 Upgrade your player
45
Manually verify whether your firmware is up to date
47 Troubleshooting
52 Important safety information
58 Technical data
60 Glossary
vi
Your new player
With your newly purchased GoGear player, you can enjoy the following:
• MP3 and WMA playback
• Photo viewing
Accessories
The following accessories are included with your player:
Headphones
USB
cable
Protective
pouch
Philips Micro Jukebox
SA9100
SA9200
Quick start guide
EN
FR
ES
DE
NL
IT
SV
DA
Quick start guide
Guide de démarrage rapide
Guía de inicio rápido
Kurzanleitung
Handleiding voor snel gebruik
Guida di riferimento rapido
Snabbguide
Hurtig start
1
11
21
31
41
51
61
71
SU
PO
EL
RU
PL
CS
SL
HU
Nopea aloitus
Início rápido
qcoqg maqng
Быстрый запуск
Krótka instrukcja obsługi
Rychlý přehled
Rýchly prehľad
Gyors áttekintés
81
91
101
111
121
131
141
151
1 Install
2 Connect
and charge
3 Transfer
4 Enjoy
CD-ROM containing Windows
Media Player 10, Philips Device
Manager, Philips Device Plug-in,
User Manual, Tutorials and
Frequently Asked Questions
2
Quick start guide
Optional accessories
The following accessories are not included with your player, but can be bought separately.
You can find them at www.philips.com/GoGearshop (Europe) or www.store.philips.com (US).
GoGear travel charger
(PAC011)
Multi voltage power adaptor /
charger with various plugs
Register your product
We strongly recommend that you register your product in order to gain access to free
upgrades. To register your product, please log on to www.philips.com/register or
www.philips.com/usasupport (for US residents) so that we can inform you as soon as new
updates become available.
3
Getting started
Overview of controls and connections
Left Side View
On/Off/Lock slider
(key lock)
Left/Back key
Rewind/Previous key
Right Side view
Volume Up/Down bar
Right/Select key
Forward/Next key
Menu key
Reset
Play/Pause key
Vertical touch strip
Headphone plug
Cable/dock/adaptor
connector
4
Press
ON/OFF LOCK
2;
J(
)K
+ VOLUME 1
2
Vertical touch strip
MENU
To
Power On/Off (slide down and hold for about 1 second)
Lock all touch control keys (slide up)
Play/Pause songs
Move back to previous song
Fast rewind
Jump to next song
Fast forward
Control volume
Return to previous menu/option
Select option
Go to next option
Scroll through lists
Access list of menu options
Main menu
Menu
Music
Picture
Settings
Now Playing
To
Play your digital music tracks
View pictures
Customize the settings of your player
Go to the play screen
5
Vertical touch strip navigation
Your player has touch sensitive controls that respond to the touch of your fingers. The
VERTICAL TOUCH STRIP (see picture) is used to scroll through lists. It responds to the
following finger movements.
Tap
Hold
Swipe
Action
Function
Tap the top or bottom of the strip
Hold on the top or bottom of the strip
Stroke from top to bottom or bottom to top
Swipe up or down
Move up or down step by step
Scroll through a list at increasing speed
Scroll through list
List will scroll quickly like a wheel (Fly
wheel) and then slow down gradually
To stop list from spinning
To Play/Pause music
Scroll through list at constant speed and
gradually increase the scroll speed. The
scroll speed will decrease and stop when
finger releases.
Add speed to the wheel or maintain the
fast list scrolling speed if maximum
scrolling speed is reached.
Tap in the middle
Stroke and hold on the end of the strip
Continuous swipe
6
Stroke
Install
IMPORTANT Make sure to install the software supplied in the by-packed CD for music
and photo transfer.
System requirements:
•
•
•
•
•
•
•
Windows XP (SP2 or above)
Pentium Class 300MHz processor or higher
128MB RAM
500MB hard disk space
Internet connection (preferable)
Microsoft Internet Explorer 6.0 or later
USB port
1 Insert the CD supplied with your product into the CD ROM drive of your PC.
2 Follow the on-screen instructions to complete the installation of Windows Media Player
(including necessary plug-ins) and Philips Device Manager.
3 If the installation program does not start automatically, browse the CD contents via
Windows Explorer and run the program by double clicking on the file ending with .exe.
Lost your CD? Don’t worry, you can download the CD contents from
www.philips.com/support or www.philips.com/usasupport (for U.S. residents).
7
Connect and charge
Your player will be charged when connected to the PC.
Use the supplied USB cable
Connect the supplied USB cable to PC for charging and data transfer. However, your PC
must have hi-power capability in order to perform charging.
Charge your player for at least 5 hours before using it for the first time.
The battery** will be fully charged (100%) in 5 hours and 70% charged in one hour for
quick charge.
The player is fully charged when the charging animation stops and
is displayed.
Your fully charged player will allow up to 14 hours** of music playback.
** Rechargeable batteries have a limited number of charge cycles and may eventually need to be
replaced. Battery life and number of charge cycles vary by use and settings.
8
Battery level indication
The approximate power levels of your battery are indicated as follows:
Battery is full
Battery is two-thirds full
Battery is half full
Battery is low
Battery is empty
When the battery is nearly empty, the following power low warning screen will blink and
emit a beep tone. When you hear a double beep, your player will power down in less than
60 seconds.
All settings will be saved before the player shuts down.
9
Transfer
You can transfer music and photos to your player using Windows Media Player. See
Organize and transfer photos and music with Windows Media Player 10 section of
this user manual for more details.
Enjoy
Power on and off
To power on, slide down and hold ON/OFF LOCK slider to ON/OFF position until the
player powers on.
To power off, slide down and hold ON/OFF LOCK slider to ON/OFF position until the
player powers off.
Your player automatically powers off if there is no operation or music played for 10
minutes. The last playback status and screen will be resumed the next time it is powered
on unless the player has been powered off for a long period of time or the battery level
was low when the player was powered off.
10
Demo mode
The Demo mode is a screensaver to give you a quick introduction to the product.
You may not need the demo mode after some use or you may prefer not to have the
screensaver to increase your battery lifetime.
The Demo mode can be turned off by accessing the Demo mode under the Settings menu
and unchecking the box as shown.
11
Organize and transfer photos and music with
Windows Media Player 10
This chapter describes the steps that you need to follow to successfully transfer music and
photos to your player. For more information, see Windows Media Player (WMP) Help
on your computer.
IMPORTANT Make sure you have installed the software provided in the by-packed CD
for music and photo transfer.
Music transfer
You can add songs, organize songs into your playlists and manage your playlist using
Windows Media Player 10.
TIP We recommend that you always use Windows Media Player to transfer music to
your player. However, if you prefer to use Windows Explorer, always make sure to
copy your music into the Media > Music folder, otherwise the songs will neither show
nor play on your player.
12
Add songs to Windows Media Player Library
Songs that are already on your computer
1 Start Windows Media Player by double clicking the following icon on your desktop.
2
3
2 Select Library tab to access media library
3 Click Add to Library on the bottom left of the screen.
> You can choose to add files from folder, URL, by searching your computer, etc.
4 Select the desired files and add them to the library.
13
Rip songs from a CD
If you want to transfer music from a CD to your player, you need to create a digital copy of
the music on your PC first. This is called ripping.
1 Start Windows Media Player.
4
3
2 Insert the Audio CD.
3 Select Rip tab to display a list of music tracks on your CD.
If your computer is connected to the Internet, the album information will be automatically
obtained so that you don’t have to enter the song titles and other information manually.
If this does not happen, verify that you are connected to the Internet and click Find
Album Info.
4 Select the songs that you would like to rip and click Rip Music on the top menu bar.
> The songs will be converted into digital copies and added to Windows Media Player library.
14
Buy songs online
If you want to buy music online, you need to select a music store.
1
2
1 Click the little triangle on the top right of the screen and select Browse all Online
Stores.
2 Choose a store and follow the on-screen instructions.
> After you have bought a song or an album, it will appear in Windows Media Player library.
15
Synchronize Windows Media contents with your player
When you connect the player to your computer for the first time, Windows Media Player
will start Device Setup Wizard. You can choose to synchronize your player with
Windows Media Player library automatically or manually.
TIP
When your player is connected for the first time, WMP10 gives you this option.
Automatic Synchronization:
Choosing Automatic will automatically synchronize your player with your content each
time you connect your GoGear to your computer. Be aware that this option allows you
to auto sync with one PC only.
Manual Synchronization:
Choosing Manual allows you to select the content that you want to synchronize each time.
16
Set up automatic synchronization
1 Start Windows Media Player.
2 Connect the player to your computer using the supplied USB cable.
4
3
5
3 Select Sync tab
4 Click Set up Sync.
> Synchronization settings dialog box will be displayed.
5 Select Synchronize device automatically check box.
6 Select the check boxes that correspond to the playlists you want to synchronize.
7 Click OK.
IMPORTANT Do not disconnect your player while transferring is in progress.
17
Set up manual synchronization
3
4
Philips GoGear
1 Start Windows Media Player.
2 Connect the player to your computer using the supplied USB cable.
3 Select Sync tab.
4 In the pull-down menu on the right pane, select Philips or Philips GoGear as the
destination.
5 If they are not in the list, press F5 to refresh and try again.
18
7
6
8
9
6 Select the Library tab to access the media library.
7 Click to highlight the song you want to copy.
8 Right click on the song and select Add to > Sync List.
OR
Drag and drop the song into the Sync List on the right pane.
9 Click Start Sync button at the bottom of the screen to start synchronization.
> The progress will be displayed just above the Start Sync button.
19
Manage your Windows Media Player Playlist
Create a Playlist
1 Start Windows Media Player.
2 Select the Library tab to access the media library.
3 Click to highlight a song.
4 Right click on the track and select Add to > Additional Playlist...
5 In the Add to Playlist dialog box, select an existing playlist or click New to add a new
playlist.
> The song you have selected will be added to the playlist.
TIP To select more than one song, press and hold Ctrl of your keyboard, then click to
select any number of songs.
To select consecutive songs in a list, click the first song, then press and hold Shift of your
keyboard and click the last song in the list you want to select.
Transfer playlists
You can transfer playlists to your player via the automatic synchronization option of
Windows Media Player. (See Set up automatic synchronization section in this user
manual for step by step instructions.)
1 Select Sync tab.
2 Click Sync settings or Setup Sync, select Synchronize device automatically check
box and select the playlists to be synchronized with the player.
20
Manage your songs and playlists in Windows Media Player
Delete songs and playlists from Windows Media Player library
1 Click to highlight an item.
2 Right click and select Delete to delete the item.
TIP It is not possible to delete playlists that are on your GoGear player via Windows Media
Player. You can only delete the playlist via the player itself or via Windows Explorer.
Delete playlists via Windows Explorer
1 Connect the player to your computer.
2 Open Windows Explorer.
3 Select Philips GoGear > Media > Music.
4 Highlight the playlist you want to delete, right click and select Delete.
Edit song information via Windows Media Player
1 Select Library tab.
2 Highlight the song you want to edit, right click and select Edit.
3 Edit on the text box directly.
Search for songs via Windows Media Player
1 Select Library tab.
2 Type a search string in the search field.
3 Click Search to start searching.
4 A list of songs containing the search string will be displayed.
5 You can play, transfer, delete, add to sync list, etc.
21
Photo transfer
IMPORTANT Make sure Philips Device Plug-in has been installed on your computer.
This Plug-in is crucial to enable image support on your player. It is automatically installed
from the supplied CD when you click Install in the Install software dialog box.
To check whether this Plug-in has been installed, go to Control Panel > Add or Remove
Programs and verify if Philips Device Plug-in is listed.
Enable photo support
1 Start Windows Media Player.
2 Go to Tools > Options > Player.
3
3 Make sure the Enable picture support for devices check box is selected.
22
Add photos to Windows Media Player Library
1 Start Windows Media Player.
2 Select the Library tab to access the media library.
3 Click Add to Library on the bottom left corner of the screen.
4 Choose Add Folder.
5 Select the folder in which you have kept your photos and press OK.
Transfer photos to your player
IMPORTANT Photos can only be transferred using Windows Media Player. You
cannot transfer photos with Windows Explorer. Photos will not show on your player.
1 Connect the player to your computer.
2 Start Windows Media Player.
3 4
Philips GoGear
3 Select Sync tab.
4 In the pull-down menu on the right pane, select Philips or Philips GoGear as the destination.
If they are not in the list, click F5 to refresh and try again.
23
5
7
8
6
9
5 Select Library tab to access media library.
6 Click All Pictures on the left pane to display the list of photos.
7 Click to highlight a photo you want to copy to your player.
TIP To select multiple photos, you can highlight one of the photo you want first, press
and hold CTRL key on your computer keyboard and highlight the other photos you want.
To select all photos, you can highlight the first photo you want, press and hold SHIFT key
on your computer keyboard and click the last photo you want.
8 Right click on the photo and select Add to > Sync List.
OR
Drag and drop the photo into the Sync List on the right pane.
9 Click Start Sync at the bottom of the screen to start synchronization.
> The progress will be displayed just above the Start Sync.
A pop-up message will be displayed, notifying you of the synchronization progress.
When the pop-up message disappears, the transfer is completed and you can disconnect your
player.
24
1
3
To get the complete contents of your library for newly added content via WMP, you can
perform:
1 Select Tools > Options.
2 Select Library tab.
3 Select Monitor Folders option.
4 Add folders that you usually keep your music and photos in.
25
Detailed operation
Music mode
Your player is preloaded with some songs. You can transfer your digital music and photo
collection from your computer to your player using Windows Media Player. More
information on music transfer can be found in Organize and transfer photos and music
with Windows Media Player 10 section in this user manual.
Controls
During music playback, you can do the following:
To
Do this
Play / Pause music
Go to next song
Go to previous song
Forward search
Backward search
Access options menu
Return to browsing
Press
Press
Press
Press
Press
Press
Press
Increase volume
Decrease volume
Press VOL +
Press VOL -
2;
)K
J(
and hold )K
and hold J(
MENU key
1
See Vertical touch strip navigation section for detailed instructions in accessing options
menu.
26
Find your music
1
1 From the main menu, select Music to enter music mode.
You can search from the following music options:
Shuffle All
All songs
Alphabetically
listed tracks
Playlists
Playlists
collections
Tracks listed in
play order
Artists
Alphabetically
listed artists
Alphabetically
listed albums
Tracks listed in
album order
Albums
Alphabetically
listed genres
Alphabetically
listed artists
Alphabetically
listed albums
Genres
Alphabetically
listed albums
Tracks listed in
album order
Tracks listed in
album order
27
2 Use the vertical touch strip to scroll up or down the menu. (See Vertical touch strip
navigation section in this user manual for details about how to access menu items by vertical
touch strip.)
3 Press 2 to select or press 1 to return to previous level.
4 Press 2; to play your selection.
TIP Superplay™ allows you to playback the selected music or album immediately at any
point by pressing 2; on the selection.
Album art
Your GoGear displays the album artwork for the song you are currently playing or when you
are browsing through a list of songs or albums. You can choose to switch on / off the album
art display feature in the Settings sub menu.
If no album artwork is available, it will show a standard CD cover icon.
Press 2 to view album art in full screen mode or 1 to return to normal play screen.
28
Play mode
You can set your player to play songs randomly (Shuffle All
One
or Repeat All
).
) or repeatedly (Repeat
1 From the main menu, select Settings > Play mode.
2 Use the vertical touch strip to scroll up or down the options.
3 Press 2 to select an option.
4 Press 2 again to deselect an option.
While you are playing music, you can see the above active play mode screen.
TIP You can also access the above play mode while you are playing music by pressing
MENU key.
Digital Rights Management (DRM) Information
If you have songs that have been bought online stored on your player, from time to time you
may see a message pop up “Licence problem”. It is because the license for the song on the
player may have expired and synchronizing with the computer will help to update this license
with the latest information.
29
Use the Sampler
The Sampler is an exciting way of discovering music on your player. It can be started by
accessing the contextual menu from the music library. This is available only from certain
options.
The Sampler can allow you to play all the items in your selection (Playlists, Albums, Artists,
etc.) once. The playtime will be limited to 10 seconds. In case you have a licensed song with
a limited playcount, using the sampler will reduce the available playcount for this song.
1 You can skip forwarding or replay a song by pressing J( or )K in the sampler.
2 Once you reach a song that you like, press 2; in Sampler mode will stop the Sampler
function and start normal playback.
3 Press 1 to exit the Sampler mode.
Songs are played in the order from the level that you have entered the Sampler.
30
Sound settings
Set your player to play songs with different EQ (equalizers) settings.
2
1
1 From the main menu, select Settings > Sound settings.
2 Use the vertical touch strip to scroll through the list of options: SRS WOW, Rock, Funk,
Techno, HipHop, Classical, Jazz, Spoken Word, Custom, or Off. You can select one of
them.
Custom settings allow you to specify your desired equalizer settings by adjusting the
individual settings for bass (B), low (L), mid (M), high (H) and treble (T).
3 Press 2 to select.
TIP While you are playing the music, you can also change the EQ settings (except
Custom settings) by pressing MENU > Sound settings.
Playlist on the go
Playlist on the go is a playlist that can be created on the player while on the move.
All songs will be displayed and listed in play order in the playlist. New songs are automatically
added to the end of the playlist.
31
Add songs to playlist on the go
You can add your favorite songs, albums, artists and genres to Playlist on the go during
music playback.
2
1 Press MENU key.
2 Select Add to Playlist on the go.
> A message [item name] added to playlist on the go will be displayed.
Alternatively, you can add songs, albums, artists and genres to Playlist on the go from the
music library of your GoGear player.
1 Press MENU key and select Add to Playlist on the go.
> A message [item name] added to playlist on the go will be displayed.
Play back playlist on the go
1 Select Music > Playlists> Playlist on the go.
2 Select your playlist and press 2;.
32
Save Playlist on the go
You can save Playlist on the go. It will be saved under a different name and Playlist on the
go will be emptied.
2
3
1 During music playback, press MENU key.
2 Select Save ‘playlist on the go’.
> A message Save ‘playlist on the go’? will be displayed.
3 Select Save to confirm.
> A message ‘Playlist on the go’ saved as: ‘Playlist-on-the-go’[date-number]! will be displayed.
Clear playlist on the go
You can clear all the songs in Playlist on the go.
1 Select Music > Playlists > Playlist on the go.
2 Press MENU key and select Clear ‘Playlist on the go’.
3 Select Clear to confirm clearing all the songs in the selected Playlist on the go, or select
Cancel to return to the previous menu.
TIP This will empty Playlist on the go but will not delete those songs from your player.
33
Remove songs from Playlist on the go
You can delete specific songs from Playlist on the go.
2
3
1 Select the song from Music > Playlists > Playlist on the go.
2 Press MENU key and select Remove song from list.
> A message Remove [song name] from playlist? will be displayed.
3 Select Remove to delete the song from Playlist on the go.
> A message [song name] removed from playlist will be displayed.
The song is removed from the playlist only, it will not be deleted from the player.
Most played
You can playback your top 100 most played songs by selecting this playlist.
1 From the main menu, select Music > Playlists > Most played.
> The list shows the 100 most played songs on your player. The first song in the list is the most
played song.
2 Reset the play count to 0 via Settings > Music library settings > Reset play count.
34
Other playlists
You can transfer playlists to the player using Windows Media Player. See Manage your
Windows Media Player playlist - Transfer playlists section in this user manual for
details.
Delete playlist from your player
You cannot delete the playlist on your player via Windows Media Player. You have to do
it via the player itself.
1 Play the playlist you want to delete.
2 Press MENU key.
3 Select Delete playlist.
> A message Delete [playlist name]? will be displayed.
4 Select Delete.
> A message [playlist name] deleted! will be displayed.
35
Rate your songs
You can rate a song with 1 to 5 stars.
3
1
2
3
>
Select the song from the music library.
Press MENU key and select Rate.
Rate the song from to
.
Next time when you connect your player to your computer and start Windows Media Player,
the rating of your songs in Windows Media Player will be updated with the information from
your player.
Now playing
You can browse your music library or photos while you are listening to music.
To go back to the play screen, press 1 to navigate back to the main menu and select Now playing.
36
Photos
You can view your favorite photos on your player. While you are browsing your photos, you
can listen to music at the same time.
Transfer photos from your computer to your player
You can transfer photos from your computer to your player using Windows Media
Player. See Organize and transfer photos and music with Windows Media
Player 10 section in this user manual for details.
37
Transfer photos from your player to your computer
1 Connect the player to your computer.
> Your player will be identified as Philips or Philips GoGear in Windows Explorer.
2 Go to Media > Pictures.
3 Drag and drop your photos to any desired location on your computer.
Find photos on your player
Photos on your player are organized in albums which are similar to the way they are
organized in Windows Media Player.
1
Fig1
Fig2
1 From the main menu, select Photos.
> You will see a list of all photo albums.
2 Select the photo album you wish to view.
> You will see a thumbnail view (Fig1) of all photos in that album.
3 Use the vertical touch strip to scroll and select a photo to see its full view (Fig2).
4 Tap on the top or the bottom end of the VERTICAL TOUCH STRIP to go to the next or
previous photo.
38
Personal Image
When the personal image function is enabled in Settings > Personalization > Personal
image, the currently highlighted photo in the photo album of your player will be set as the
personal image.
Setting personal image is only available through the contextual menu.
Philips Photo Fixer
If you have checked that all the above but do still have problems in viewing your pictures on
your player, you can use the Philips Photo Fixer.
On your computer:
1 Go to Start > Programs > Philips > Philips Photo Fixer.
2 Connect your player to the computer.
3 Follow the on-screen instructions.
Slideshow
A slideshow will display all photos inside an album in full view. It will automatically go to the
next photo at a specified interval. Background music can be played from a specified playlist
during a slideshow.
Start a slideshow
1 From the main menu, select Photos.
2 Select the photo album you wish to view.
3 Press MENU key and select Start slideshow.
You can start slideshow in album list, thumbnail view or full view.
You can stop the slideshow by pressing 1.
39
Customize slideshow settings
Settings
Options
Descriptions
Slideshow music
Alphabetical playlists / None
Choose which playlist to play in
the background while playing
slideshow
Transitions
Off / Vertical wipe / Fade
Choose the transition effect
between slides
Set time per slide
2 Seconds / 4 Seconds /
6 Seconds / 8 Seconds /
10 Seconds / 20 Seconds
40 Seconds / 60 Seconds
Choose to set time between
slides
Shuffle slideshow
On / Off
Choose to show slides at
random or in album order
Repeat slideshow
On / Off
Choose to repeat slides
Slideshow music
You can play background music during a slideshow by assigning a playlist in Slideshow
settings. You can choose to play any playlist during a slideshow.
1 From the main menu, select Photos.
2 Press MENU key and select Slideshow settings >Slideshow music and choose one of the playlists.
During a slideshow, you cannot pause, skip or fast forward / rewind your music.
TIP The slideshow settings allow for timed slideshows. In case you would like to control
your slideshow, we suggest that you view your images in full screens and move forward
and backward as you like. The music you played earlier will continue to play.
40
Settings
The settings menu allows you to make adjustments and personal preferences on your GoGear player.
1
1 From the main menu, select Settings.
2 Use the vertical touch strip to select an option.
3 Press 2 to go to the next level or 1 to return to previous level.
4 Press 2 to confirm your selection.
5 Press 1 to exit the Settings menu.
In the Settings menu, the following options are available:
Settings
Language
Options
More options
Description
English, French, Italian, German, Spanish, Dutch, Choose the language for
Swedish, Portuguese, Simplified Chinese,
display on screen.
Traditional Chinese, Korean, Japanese
41
Settings
Play mode
Options
Shuffle All
More options
Repeat
Description
Enable the checkbox to play
selected songs at random.
Choose Repeat one or
Repeat all to keep
looping selected songs.
Sound settings Off, SRS WOW, Rock, Funk, Techno, HipHop,
Classical, Jazz, Spoken word, Custom
Choose the equalizer for
best music experience.
Display settings Backlight
10 Sec. / 30 Sec. /
45 Sec. / 60 Sec.
Choose the time for
backlight display.
25 levels
Choose the contrast level
to adjust the brightness.
Skin 1 / Skin 2
Personalize your player
with your favorite skin.
On / Off
Display an image of your
choice every time you
switch on your player.
Brightness
Personalization Skins
Personal Image
Album Art
On / Off
Enable the checkbox to
display album art for the
song that you are playing.
Sleep timer
Off /15 Min / 30 Min / 1 Hour / 1.5 Hour /
2 Hours
Choose sleep timer to turn
off your player
automatically after 15, 30,
60, 90 or 120 minutes.
42
Settings
Options
Date and time Set date
Set time
Clicker sound
Information
Reset play
count
More options
Day / Month / Year
Hour / Minute / Second
Description
Enter day, month and
year to set the date in
your player.
Enter hour, minute and
2 time in
second to set the
your player.
Show time in header
Enable the checkbox to
display the time at the
top of the screen.
Device
Enable the checkbox to hear
clicker sound from the
player when you touch the
touchpad or buttons.
Headphones
Enable the checkbox to
hear clicker sound via the
headphones when you
touch the touchpad or
buttons.
Information summary Capacity, Available space, Display information of
Device ID, FW version, your player.
Support site
Call centers
Display call center
contact numbers.
Reset / Cancel
Select Reset to reset play
count for “Most played”
playlist to zero.
43
Settings
Demo mode
Options
Demo mode
More options
Srart / Cancel
Press 2 to start demo
mode. You can simply
touch any key on the
front of the player to exit
this mode.
Start demo
Factory settings Restore factory
settings
Description
Uncheck this option to
disable demo mode.
Restore / Cancel
Choose Restore to clear
your player’s current
settings and restore to
default factory settings.
Use your player to store and carry data files
You can use your player to store and carry data files by
copying data files into the Data folder of your player
via Windows Explorer.
Data files stored in the Data folder cannot be read directly from your player. These data
files can only be read in your computer after you transfer them from your player to your
computer.
44
Upgrade your player
Your player is controlled by an internal program called firmware. New versions of the
firmware may be released after you have purchased your player.
A software program called Philips Device Manager will monitor the firmware status of
your player and notify you if new firmware is available. You need an Internet connection for
this.
Install Philips Device Manager from the supplied CD or download the latest version from
www.philips.com/support or www.philips.com/usasupport (for U.S. residents)
After the installation of Philips Device Manager, every time you connect your player to
your computer, Philips Device Manager will automatically connect to the Internet and
check for updates.
Manually verify whether your firmware is up to date
Make sure your player is charged fully.
1 Connect your player to the computer.
2 Launch Philips Device Manager from Start > Programs > Philips Device Manager.
45
3
4
5
3 Select your device.
4 Click Update.
> Philips Device Manager will check whether a new firmware is available on the Internet and
install it on your player.
5 When Update completed appears on the screen, click OK and disconnect the player.
> A message Updating firmware will be displayed.
The player will automatically restart after firmware is completely updated. Your player is now
ready to use again.
46
Troubleshooting
My player skips songs.
The skipped song may be protected. You may not have sufficient rights to play the skipped
song on your player. Check the music rights with the song provider.
My player is not recognized by Windows.
Make sure your computer is running Windows XP (SP2 or higher).
My player cannot power on.
Your device battery may be out of power due to long period of non-usage. Please charge
your player.
In case of device error, connect your player to the computer and use Philips Device
Manager to restore your player.
IMPORTANT All your contents will be erased from your player after completion of
repair process. Therefore, please backup your files before repairing. After repair, simply
synchronize your player again to transfer music to your player.
1 Launch Philips Device Manager from Start > Programs > Philips Device Manager.
47
2
3
5
4
2 Select your device.
3 Select Repair tab.
4 Click Repair.
> The repair process will start.
5 Click Yes to proceed.
6 After the repair process is completed, click OK and disconnect your player.
> The player will automatically restart after firmware is completely updated. Your player is now
ready to use again.
There is no music on my player after transfer.
If you cannot find the songs that you have transferred to your player, check the following:
• Did you transfer using Windows Media Player? Files transferred via other means will
only be recognized as data files. They will neither appear in the music library of your
player nor can the songs be played.
• Are your songs in MP3 or WMA format? Other formats will not playback on the player.
48
There are no photos on my player after transfer.
If you cannot find the photos that you have transferred to your player, check the following:
• Did you transfer your photos using Windows Media Player? Files transferred via other
means will not appear on your device.
• Is the Philips Device Plug-in installed on your computer? Immediately after you have
transferred your photos in Windows Media Player, you should see a Philips screen
pop-up. If it does not appear, then the Plug-in is probably missing. To check whether this
Plug-in is available on your computer, go to Control Panel > Add or Remove
Programs and check if Philips Device Plug-in is listed. If not, re-install the software
from the supplied CD.
• You may have disconnected your device too soon after the photo transfer in Windows
Media Player was finished. Always wait for the Philips pop-up message to show and
disappear before you disconnect your device.
• Are your photos in JPEG format? Photos in other formats cannot be transferred to your
player.
49
I cannot see album art on my GoGear player.
2
1
1 Make sure Retrieve additional information from the Internet tab is selected. This will
ensure that your songs have the album art information also updated.
2 Connect your device and in the device properties pane, select Quality tab and ensure
that Convert files as required by this device checkbox is deselected.
My GoGear player hangs.
1 In the unlikely event that your player hangs, do not panic. Insert a small pin or other sharp
object into the reset hole located at the back of the player. Hold until the player shuts down.
The existing contents on your player will not be erased.
2 If nothing happens, recharge the battery for at least 4 hours and try to power on or reset
again. If this does not work, you might have to repair your player with Philips Device
Manager. (See Upgrade your player section in this user manual for details.)
50
My player is full and I have fewer songs on my player than I expected.
Your player has an internal memory to store songs. Check your model number to see the
actual memory size. You will be able to store more songs on your player if you use WMA
formatted songs in 64kbps+ with variable bitrate.
+Storage capacity based on 4 minutes per song and 64kbps WMA encoding.
51
Important safety information
General maintenance
To avoid damage or malfunction:
• Do not expose the player to excessive heat caused by heating equipment or direct
sunlight.
• Do not drop your player or allow objects to fall on your player.
• Do not allow your player to be submerged in water. Do not expose headphone socket or
battery compartment to water, as water entering the set may cause major damage.
• Do not use any cleaning agents containing alcohol, ammonia, benzene, or abrasives as
these may harm the set.
• Active mobile phones in the vicinity may cause interference.
• Backup your files. Please ensure that you retain the original files you have downloaded to
your device. Philips is not responsible for any loss of data if the product becomes damaged
or not readable / legible.
• Manage (transfer, delete, etc.) your music files only with the supplied music software to
avoid problems!
About operating and storage temperatures
• Operate in a place where temperature is always between 0 and 35ºC (32 to 95ºF)
• Store in a place where temperature is always between -20 and 45ºC (-4 to 113ºF)
• Battery life may be shortened in low temperature conditions.
52
Hearing Safety
Listen at a moderate volume.
• Using headphones at a high volume can impair your hearing. This product can
produce sounds in decibel ranges that may cause hearing loss for a normal person,
even for exposure less than a minute. The higher decibel ranges are offered for
those that may have already experienced some hearing loss.
• Sound can be deceiving. Over time your hearing “comfort level” adapts to higher volumes
of sound. So after prolonged listening, what sounds “normal” can actually be loud and
harmful to your hearing. To guard against this, set your volume to a safe level before your
hearing adapts and leave it there.
To establish a safe volume level:
• Set your volume control at a low setting.
• Slowly increase the sound until you can hear it comfortably and clearly, without distortion.
Listen for reasonable periods of time:
• Prolonged exposure to sound, even at normally “safe” levels, can also cause hearing loss.
• Be sure to use your equipment reasonably and take appropriate breaks.
Be sure to observe the following guidelines when using your headphones.
• Listen at reasonable volumes for reasonable periods of time.
• Be careful not to adjust the volume as your hearing adapts.
• Do not turn up the volume so high that you can’t hear what’s around you.
• You should use caution or temporarily discontinue use in potentially hazardous situations.
• Do not use headphones while operating a motorized vehicle, cycling, skateboarding, etc.; it
may create a traffic hazard and is illegal in many areas.
Important (for models supplied with headphones):
Philips guarantees compliance with the maximum sound power of its audio players as
determined by relevant regulatory bodies only with the original model of provided
headphones. In case this one needs replacement, we recommend that you contact your
retailer to order a model identical to that of the original, provided by Philips.
53
Copyright information
All other brands and product names are trademarks of their respective companies or organizations.
Unauthorized duplication of any recordings whether downloaded from the Internet or made from
audio CDs is a violation of copyright laws and international treaties.
The making of unauthorized copies of copy-protected material, including computer programmes,
files, broadcasts and sound recordings, may be an infringement of copyrights and constitute a
criminal offence. This equipment should not be used for such purposes.
This product is protected by certain intellectual property rights of Microsoft Corporation. Use or
distribution of such technology outside of this product is prohibited without a license from
Microsoft or an authorized Microsoft subsidiary.
Content providers are using the digital rights management technology for Windows Media
contained in this device (“WM-DRM”) to protect the integrity of their content (“Secure
Content”) so that their intellectual property, including copyright, in such content is not
misappropriated. This device uses WM-DRM software to play Secure Content (“WM-DRM
Software”). If the security of the WM-DRM Software in this device has been compromised,
Microsoft may revoke (either on its own or upon the request of the owners of Secure Content
(“Secure Content Owners”)) the WM-DRM Software’s right to acquire new licenses to copy,
display and/or play Secure Content. Revocation may also prevent your device’s ability to transfer,
store, copy, display and/or play Secure Content which you have previously stored on your
Device. Revocation does not alter the WM-DRM Software’s ability to play unprotected content.
A list of revoked WM-DRM Software is sent to your device whenever you download a license for
Secure Content from the Internet or from a PC. Microsoft may, in conjunction with such license,
also download revocation lists onto your device on behalf of Secure Content Owners, which may
disable your device’s ability to copy, display and/or play Secure Content.
In the event of revocation, Philips will attempt to make available software updates to restore
some or all of your device’s ability to transfer, store, access, copy, display and/or play Secure
Content. However, the ability to make such updates available does not rest solely with Philips.
Philips does not guarantee that, after revocation, such software updates will be available. If such
updates are not available, your device will not have the ability to transfer, store, copy, display
and/or play Secure Content - even Secure Content which you have previously stored on your
54
device.
In addition, even if such software updates are available, they may not enable your Device to
transfer, store, copy, display, and/or play Secure Content which was previously stored on your
Device. In some cases you may be able to transfer the content from the PC. In other cases, you
may have to repurchase previously obtained Secure Content.
To summarize - Microsoft, Secure Content Owners, and Secure Content distributors may
deny you access, or restrict your access, to Secure Content. They may also disable your
device’s ability to transfer, store, copy, display and/or play Secure Content even after you
have paid for and obtained it. Neither your consent nor the consent or approval of Philips is
necessary for any of them to deny, withhold or otherwise restrict your access to Secure
Content or to disable your device’s ability to transfer, store, access, copy, display, and/or
play Secure Content. Philips does not guaranty that you will be able to transfer, store, access,
copy, display, and/or play Secure Content.
The PlaysForSure, Windows Media and the Windows logo are registered trademarks of
Microsoft Corporation in the United States and/or other countries.
Data logging
Philips is committed to improving the quality of your product and enhancing the Philips user
experience. To understand the usage profile of this device, this device logs some info / data
to the non-volatile memory region of the device. These data are used to identify and detect
any failures or problems you as a user may experience while using the device. The data
stored, for example, will be the duration of playback in music mode, duration of playback in
turner mode, how many times battery low was encountered, etc. The data stored do not
reveal the content or media used on the device or the source of downloads. The data stored
on the device are retrieved and used ONLY if the user returns the device to the Philips
service centre and ONLY to simplify error detection and prevention. The data stored shall
be made available to user on user’s first request.
55
Disposal of your old product
Your product is designed and manufactured with high quality materials and components,
which can be recycled and reused.
When this crossed-out wheeled bin symbol is attached to a product, it means the
product is covered by the European Directive 2002/96/EC.
Please be informed about the local separate collection system for electrical and
electronic products.
Please act according to your local rules and do not dispose of your old product with your
normal household waste. The correct disposal of your old product will help prevent potential
negative consequences to the environment and human health.
Modifications
Modifications not authorized by the manufacturer may void user authority to operate this
device.
56
Notice for USA
Philips
SA9100
SA9200
Note:
This equipment has been tested and found to comply with the limits for a Class B digital
device, pursuant to part 15 of the FCC Rules. These limits are designed to provide reasonable
protection against harmful interference in a residential installation. This equipment generates,
uses, and can radiate radio frequency energy and, if not installed and used in accordance with
the instruction manual, may cause harmful interference to radio communications.
However, there is no guarantee that interference will not occur in a particular installation. If
this equipment does cause harmful interference to radio or television reception, which can
be determined by turning the equipment off and on, the user is encouraged to try to correct
the interference by one or more of the following measures:
- Relocate the receiving antenna.
- Increase the separation between the equipment and receiver.
- Connect the equipment into an outlet on a circuit different from that to which the
receiver is connected.
- Consult the dealer or an experienced radio/ TV technician for help.
Notice for Canada
This Class B digital apparatus complies with Canadian ICES-003.
The set complies with the FCC-Rules, Part 15 and with 21 CFR 1040.10. Operation is
subject to the following two conditions:
• This device may not cause harmful interference, and
• This device must accept any interference received, including interference that may cause
undesired operation.
Notice for the European Union
This product complies with the radio interference requirements of the European Union.
57
Technical data
Power supply
Multi-voltage charger / adaptor:
600mAh Li-ion internal rechargeable battery**
4 hours full charge; 1 hour fast charge
Dimensions
90 x 46 x 9mm
Weight
48g
Picture / Display
White backlight LCD 128 x 160 pixels 65K colors
Sound
Channel separation
35dB
Equalizer settings
SRS WOW, Rock, Funk,
Techno, HipHop, Classical, Jazz,
Spoken word, Custom
Frequency response
20-16000Hz
Signal to noise ratio
> 82dB
Output Power (RMS)
2x10mW
Audio Playback
Play time
20 hours**
Compression format
MP3 (8-320kbps and VBR)
WAV
WMA (32-192kbps; Sample rates: 8, 11.025, 16, 22.050,
24, 32, 44.1, 48kHz)
ID3-tag support
Album title, Genre title, Track title and artist name
58
Storage Media
Built-in memory capacity
SA9100 1GB NAND Flash+
SA9200 2GB NAND Flash+
Connectivity
Headphone 3.5mm, USB 2.0++, Philips dock connector,
5V DC
Music and photo transfer
Via Windows Media Player 10
Data transfer
Via Windows Explorer
System Requirements
Windows® XP (SP2 or above)
Pentium Class 300MHz processor or higher
128MB RAM
500MB hard disk space
Internet connection
Microsoft Internet Explorer 6.0 or later
Video display card
Sound card
USB port
** Rechargeable batteries have a limited number of charge cycles and may eventually need to be replaced. Battery
life and number of charge cycles vary by use and settings.
+ 1MB = 1 million bytes; available storage capacity will be less.
1GB = 1 billion bytes; available storage capacity will be less.
Full memory capacity may not be available as some memory will be reserved for the player.
Storage capacity based on 4 minutes per song and 64kbps WMA encoding.
++ Actual transfer speed may vary based on your operating system and software configuration.
59
Glossary
Album
A collection list of songs / photos.
Contextual
menu
A menu consisting of executable action / feature with respect to current
status.
Digital Rights
Management
(DRM)
A technology that provides a persistent level of protection to digital
content by encrypting it with a cryptographic key. Authorized recipients
(or end users) must acquire a license in order to unlock and consume the
content.
Flywheel
A SuperscrollTM concept using the metaphor and the physics of wheel, I.e.
energy input defines speed, deceleration.
Genres
A particular style or type of music.
MP3
An audio compression format known as MPEG-1 Audio Layer 3.
Photo
Image, photo and picture in JPEG file format.
Playlist
A list of digital media contents.
Playlist on
the go
A playlist that can be created on the player by adding favorite songs,
albums, artists and genres during music playback.
Rip
To copy digital media content from an audio CD. Content may be
converted to a different format during a ripping process.
Root menu
The main menu that sits on top of the user interface structure tree.
Sampler
Audio tracks preview mode that plays a short clips of different songs.
Skin
A user interface that provides an alternative appearance and customized
functionality.
60
Songs
An individual track or a discrete piece of audio content.
Superscroll
TM
A Philips trademark user interface navigator feature to enhance the speed
of browsing long list of content.
Synchronization The process of maintaining digital media files on a portable device based
on the rules specified by the users. This may require copying digital media
files from a computer to a device, updating information on the device or
deleting files from the device.
Thumbnail
A small version of the main image, used for indexing and browsing.
Title
The largest unit of digital media content. For CD, it may be the name of
the CD.
Vertical touch
strip
The control keys that are used to enable scrolling up/down a list.
WAV
A digital media file format for storing sound.
Windows Media An audio file in Windows Media Format. The audio content of the file is
Audio (WMA) encoded with one of the Windows Media Audio codecs.
61
PHILIPS reserves the right to make design and specification changes for product
improvement without prior notice.
62
Specifications are subject to change without notice.
Trademarks are the property of Ko ninklijke Philips Electronics N.V.
or their respective owners
2006 © Koninklijke Philips Electronics N.V. All rights reserved.
www.philips.com
wk6241
Printed in China