1
Add Smart Tasks to the Initial Diagnosis Dialog Workflow
Create smart tasks for actions that are performed often. There is no limit to the amount
of smart tasks you can add to Incident Management; conceivably, each will expand your
ability to work an incident.
This example will create a smart task for automatically searching the Altiris Knowledge
Base using the ticket’s description.
To create a smart task for searching the Altiris Knowledge Base web
site
1.
In Symantec Workflow, open the SD.IncidentManagement project. Please see
Editing the Core ITIL Processes (page 18) if this is the first time opening Incident
Managment from its package; there is an important, required step regarding
unpacking.
2.
Within the Main Incident Work model, double-click the “Diagnose and Work
Incident” Linked Model component.
3.
Double-click the “Initial Diagnosis” Dialog Workflow component.
4.
Select the Interaction Setup tab. The existing smart tasks will be listed as dialog
models.
5.
Click Add.
6.
From the Setup tab, set the Category as “Tools” and provide a name for the new
smart task. In this example, the name is “Search Altiris KB.”
7.
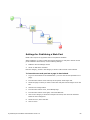
Open the Dialog Model. This is where the process itself is configured.
8.
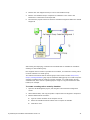
Add a Merge Text component to the new dialog model and double-click the
component to edit it.
9.
Open the Merge Data model. It is easiest to paste in the URL of the Altiris KB rather
than type it, therefore go to the Altiris KB site: http://kb.altiris.com. (Leave the
Merge Text component open.)
10. Do a simple search, for example, type “test” in the Search Terms field then click on
Search.
11. On the right, under Last Searches, right-click the “test” link and copy the URL to the
clipboard.
12. Back in Symantec Workflow, in the Advanced Text Creator window of the Merge
Text component, paste or type the URL of the site.
13. Where the URL has “test,” delete “test” and add the variable for incident name. This
is done by dragging and dropping the Incident.IncidentName variable from the Data
tab on the left into its respective position within the string.
14. Click OK and provide an output variable name. For this example, we will use
“AltirisKBURL.”
15. Click OK, and back in the Decision Model editor, add a Terminate and Transfer
Dialog Flow component.
16. Double-click the component, and in the URL field, select Process Variables, then
Add.
17. Select the output variable name that you created in the Merge Data component, in
this example, “AltirisKBURL.” Click OK.
Symantec® ServiceDesk Customization Guide 7.0
51