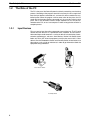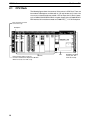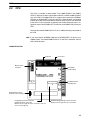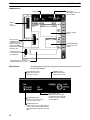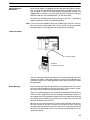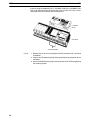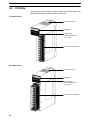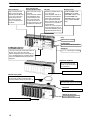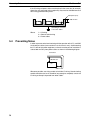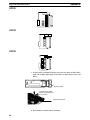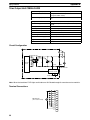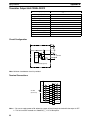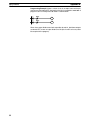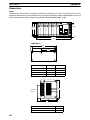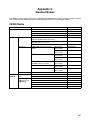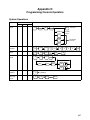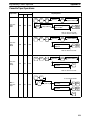
1
Cat. No. W111-E1-10
SYSMAC
Programmable Controllers
C200H
(CPU01-E/03-E/11-E)
INSTALLATION GUIDE
C200H Programmable Controllers
(CPU01-E/03-E/11-E)
Installation Guide
Revised January 2001
Terms and Conditions of Sale
1. Offer; Acceptance. These terms and conditions (these "Terms") are deemed
part of all quotes, agreements, purchase orders, acknowledgments, price lists,
catalogs, manuals, brochures and other documents, whether electronic or in
writing, relating to the sale of products or services (collectively, the "Products")
by Omron Electronics LLC and its subsidiary companies (“Omron”). Omron
objects to any terms or conditions proposed in Buyer’s purchase order or other
documents which are inconsistent with, or in addition to, these Terms.
2. Prices; Payment Terms. All prices stated are current, subject to change without notice by Omron. Omron reserves the right to increase or decrease prices
on any unshipped portions of outstanding orders. Payments for Products are
due net 30 days unless otherwise stated in the invoice.
3. Discounts. Cash discounts, if any, will apply only on the net amount of invoices
sent to Buyer after deducting transportation charges, taxes and duties, and will
be allowed only if (i) the invoice is paid according to Omron’s payment terms
and (ii) Buyer has no past due amounts.
4. Interest. Omron, at its option, may charge Buyer 1-1/2% interest per month or
the maximum legal rate, whichever is less, on any balance not paid within the
stated terms.
5. Orders. Omron will accept no order less than $200 net billing.
6. Governmental Approvals. Buyer shall be responsible for, and shall bear all
costs involved in, obtaining any government approvals required for the importation or sale of the Products.
7. Taxes. All taxes, duties and other governmental charges (other than general
real property and income taxes), including any interest or penalties thereon,
imposed directly or indirectly on Omron or required to be collected directly or
indirectly by Omron for the manufacture, production, sale, delivery, importation, consumption or use of the Products sold hereunder (including customs
duties and sales, excise, use, turnover and license taxes) shall be charged to
and remitted by Buyer to Omron.
8. Financial. If the financial position of Buyer at any time becomes unsatisfactory
to Omron, Omron reserves the right to stop shipments or require satisfactory
security or payment in advance. If Buyer fails to make payment or otherwise
comply with these Terms or any related agreement, Omron may (without liability and in addition to other remedies) cancel any unshipped portion of Products sold hereunder and stop any Products in transit until Buyer pays all
amounts, including amounts payable hereunder, whether or not then due,
which are owing to it by Buyer. Buyer shall in any event remain liable for all
unpaid accounts.
9. Cancellation; Etc. Orders are not subject to rescheduling or cancellation
unless Buyer indemnifies Omron against all related costs or expenses.
10. Force Majeure. Omron shall not be liable for any delay or failure in delivery
resulting from causes beyond its control, including earthquakes, fires, floods,
strikes or other labor disputes, shortage of labor or materials, accidents to
machinery, acts of sabotage, riots, delay in or lack of transportation or the
requirements of any government authority.
11. Shipping; Delivery. Unless otherwise expressly agreed in writing by Omron:
a. Shipments shall be by a carrier selected by Omron; Omron will not drop ship
except in “break down” situations.
b. Such carrier shall act as the agent of Buyer and delivery to such carrier shall
constitute delivery to Buyer;
c. All sales and shipments of Products shall be FOB shipping point (unless otherwise stated in writing by Omron), at which point title and risk of loss shall
pass from Omron to Buyer; provided that Omron shall retain a security interest in the Products until the full purchase price is paid;
d. Delivery and shipping dates are estimates only; and
e. Omron will package Products as it deems proper for protection against normal handling and extra charges apply to special conditions.
12. Claims. Any claim by Buyer against Omron for shortage or damage to the
Products occurring before delivery to the carrier must be presented in writing
to Omron within 30 days of receipt of shipment and include the original transportation bill signed by the carrier noting that the carrier received the Products
from Omron in the condition claimed.
13. Warranties. (a) Exclusive Warranty. Omron’s exclusive warranty is that the
Products will be free from defects in materials and workmanship for a period of
twelve months from the date of sale by Omron (or such other period expressed
in writing by Omron). Omron disclaims all other warranties, express or implied.
(b) Limitations. OMRON MAKES NO WARRANTY OR REPRESENTATION,
EXPRESS OR IMPLIED, ABOUT NON-INFRINGEMENT, MERCHANTABIL-
14.
15.
16.
17.
18.
ITY OR FITNESS FOR A PARTICULAR PURPOSE OF THE PRODUCTS.
BUYER ACKNOWLEDGES THAT IT ALONE HAS DETERMINED THAT THE
PRODUCTS WILL SUITABLY MEET THE REQUIREMENTS OF THEIR
INTENDED USE. Omron further disclaims all warranties and responsibility of
any type for claims or expenses based on infringement by the Products or otherwise of any intellectual property right. (c) Buyer Remedy. Omron’s sole obligation hereunder shall be, at Omron’s election, to (i) replace (in the form
originally shipped with Buyer responsible for labor charges for removal or
replacement thereof) the non-complying Product, (ii) repair the non-complying
Product, or (iii) repay or credit Buyer an amount equal to the purchase price of
the non-complying Product; provided that in no event shall Omron be responsible for warranty, repair, indemnity or any other claims or expenses regarding
the Products unless Omron’s analysis confirms that the Products were properly handled, stored, installed and maintained and not subject to contamination, abuse, misuse or inappropriate modification. Return of any Products by
Buyer must be approved in writing by Omron before shipment. Omron Companies shall not be liable for the suitability or unsuitability or the results from the
use of Products in combination with any electrical or electronic components,
circuits, system assemblies or any other materials or substances or environments. Any advice, recommendations or information given orally or in writing,
are not to be construed as an amendment or addition to the above warranty.
See http://oeweb.omron.com or contact your Omron representative for published information.
Limitation on Liability; Etc. OMRON COMPANIES SHALL NOT BE LIABLE
FOR SPECIAL, INDIRECT, INCIDENTAL, OR CONSEQUENTIAL DAMAGES,
LOSS OF PROFITS OR PRODUCTION OR COMMERCIAL LOSS IN ANY
WAY CONNECTED WITH THE PRODUCTS, WHETHER SUCH CLAIM IS
BASED IN CONTRACT, WARRANTY, NEGLIGENCE OR STRICT LIABILITY.
Further, in no event shall liability of Omron Companies exceed the individual
price of the Product on which liability is asserted.
Indemnities. Buyer shall indemnify and hold harmless Omron Companies and
their employees from and against all liabilities, losses, claims, costs and
expenses (including attorney's fees and expenses) related to any claim, investigation, litigation or proceeding (whether or not Omron is a party) which arises
or is alleged to arise from Buyer's acts or omissions under these Terms or in
any way with respect to the Products. Without limiting the foregoing, Buyer (at
its own expense) shall indemnify and hold harmless Omron and defend or settle any action brought against such Companies to the extent based on a claim
that any Product made to Buyer specifications infringed intellectual property
rights of another party.
Property; Confidentiality. Any intellectual property in the Products is the exclusive property of Omron Companies and Buyer shall not attempt to duplicate it
in any way without the written permission of Omron. Notwithstanding any
charges to Buyer for engineering or tooling, all engineering and tooling shall
remain the exclusive property of Omron. All information and materials supplied
by Omron to Buyer relating to the Products are confidential and proprietary,
and Buyer shall limit distribution thereof to its trusted employees and strictly
prevent disclosure to any third party.
Export Controls. Buyer shall comply with all applicable laws, regulations and
licenses regarding (i) export of products or information; (iii) sale of products to
“forbidden” or other proscribed persons; and (ii) disclosure to non-citizens of
regulated technology or information.
Miscellaneous. (a) Waiver. No failure or delay by Omron in exercising any right
and no course of dealing between Buyer and Omron shall operate as a waiver
of rights by Omron. (b) Assignment. Buyer may not assign its rights hereunder
without Omron's written consent. (c) Law. These Terms are governed by the
law of the jurisdiction of the home office of the Omron company from which
Buyer is purchasing the Products (without regard to conflict of law principles). (d) Amendment. These Terms constitute the entire agreement between
Buyer and Omron relating to the Products, and no provision may be changed
or waived unless in writing signed by the parties. (e) Severability. If any provision hereof is rendered ineffective or invalid, such provision shall not invalidate
any other provision. (f) Setoff. Buyer shall have no right to set off any amounts
against the amount owing in respect of this invoice. (g) Definitions. As used
herein, “including” means “including without limitation”; and “Omron Companies” (or similar words) mean Omron Corporation and any direct or indirect
subsidiary or affiliate thereof.
Certain Precautions on Specifications and Use
1. Suitability of Use. Omron Companies shall not be responsible for conformity
with any standards, codes or regulations which apply to the combination of the
Product in the Buyer’s application or use of the Product. At Buyer’s request,
Omron will provide applicable third party certification documents identifying
ratings and limitations of use which apply to the Product. This information by
itself is not sufficient for a complete determination of the suitability of the Product in combination with the end product, machine, system, or other application
or use. Buyer shall be solely responsible for determining appropriateness of
the particular Product with respect to Buyer’s application, product or system.
Buyer shall take application responsibility in all cases but the following is a
non-exhaustive list of applications for which particular attention must be given:
(i) Outdoor use, uses involving potential chemical contamination or electrical
interference, or conditions or uses not described in this document.
(ii) Use in consumer products or any use in significant quantities.
(iii) Energy control systems, combustion systems, railroad systems, aviation
systems, medical equipment, amusement machines, vehicles, safety equipment, and installations subject to separate industry or government regulations.
(iv) Systems, machines and equipment that could present a risk to life or property. Please know and observe all prohibitions of use applicable to this Product.
NEVER USE THE PRODUCT FOR AN APPLICATION INVOLVING SERIOUS
RISK TO LIFE OR PROPERTY OR IN LARGE QUANTITIES WITHOUT
ENSURING THAT THE SYSTEM AS A WHOLE HAS BEEN DESIGNED TO
2.
3.
4.
5.
ADDRESS THE RISKS, AND THAT THE OMRON’S PRODUCT IS PROPERLY RATED AND INSTALLED FOR THE INTENDED USE WITHIN THE
OVERALL EQUIPMENT OR SYSTEM.
Programmable Products. Omron Companies shall not be responsible for the
user’s programming of a programmable Product, or any consequence thereof.
Performance Data. Data presented in Omron Company websites, catalogs
and other materials is provided as a guide for the user in determining suitability and does not constitute a warranty. It may represent the result of Omron’s
test conditions, and the user must correlate it to actual application requirements. Actual performance is subject to the Omron’s Warranty and Limitations
of Liability.
Change in Specifications. Product specifications and accessories may be
changed at any time based on improvements and other reasons. It is our practice to change part numbers when published ratings or features are changed,
or when significant construction changes are made. However, some specifications of the Product may be changed without any notice. When in doubt, special part numbers may be assigned to fix or establish key specifications for
your application. Please consult with your Omron’s representative at any time
to confirm actual specifications of purchased Product.
Errors and Omissions. Information presented by Omron Companies has been
checked and is believed to be accurate; however, no responsibility is assumed
for clerical, typographical or proofreading errors or omissions.
Notice:
OMRON products are manufactured for use according to proper procedures by a qualified operator
and only for the purposes described in this manual.
The following conventions are used to indicate and classify precautions in this manual. Always heed
the information provided with them. Failure to heed precautions can result in injury to people or damage to property.
DANGER
Indicates an imminently hazardous situation which, if not avoided, will result in death or
serious injury.
! WARNING
Indicates a potentially hazardous situation which, if not avoided, could result in death or
serious injury.
! Caution
Indicates a potentially hazardous situation which, if not avoided, may result in minor or
moderate injury, or property damage.
!
OMRON Product References
All OMRON products are capitalized in this manual. The word “Unit” is also capitalized when it refers
to an OMRON product, regardless of whether or not it appears in the proper name of the product.
The abbreviation “Ch,” which appears in some displays and on some OMRON products, often means
“word” and is abbreviated “Wd” in documentation in this sense.
The abbreviation “PC” means Programmable Controller and is not used as an abbreviation for anything else.
Visual Aids
The following headings appear in the left column of the manual to help you locate different types of
information.
Note Indicates information of particular interest for efficient and convenient operation
of the product.
1, 2, 3...
1. Indicates lists of one sort or another, such as procedures, checklists, etc.
© OMRON, 1990
All rights reserved. No part of this publication may be reproduced, stored in a retrieval system, or transmitted, in any
form, or by any means, mechanical, electronic, photocopying, recording, or otherwise, without the prior written permission of OMRON.
No patent liability is assumed with respect to the use of the information contained herein. Moreover, because OMRON is
constantly striving to improve its high-quality products, the information contained in this manual is subject to change
without notice. Every precaution has been taken in the preparation of this manual. Nevertheless, OMRON assumes no
responsibility for errors or omissions. Neither is any liability assumed for damages resulting from the use of the information contained in this publication.
v
vi
TABLE OF CONTENTS
PRECAUTIONS . . . . . . . . . . . . . . . . . . . . . . . . . . . . . . . . .
1 Intended Audience . . . . . . . . . . . . . . . . . . . . . . . . . . . . . . . . . . . . . . . . . . . . . . . . . . . . . . . . . . .
2 General Precautions . . . . . . . . . . . . . . . . . . . . . . . . . . . . . . . . . . . . . . . . . . . . . . . . . . . . . . . . . .
3 Safety Precautions . . . . . . . . . . . . . . . . . . . . . . . . . . . . . . . . . . . . . . . . . . . . . . . . . . . . . . . . . . .
4 Operating Environment Precautions . . . . . . . . . . . . . . . . . . . . . . . . . . . . . . . . . . . . . . . . . . . . .
5 Application Precautions . . . . . . . . . . . . . . . . . . . . . . . . . . . . . . . . . . . . . . . . . . . . . . . . . . . . . .
SECTION 1
Introduction . . . . . . . . . . . . . . . . . . . . . . . . . . . . . . . . . . . .
1-1
1-2
1-3
What is a Control System? . . . . . . . . . . . . . . . . . . . . . . . . . . . . . . . . . . . . . . . . . . . . . . . . .
The Role of the PC . . . . . . . . . . . . . . . . . . . . . . . . . . . . . . . . . . . . . . . . . . . . . . . . . . . . . . .
How Does a PC Work? . . . . . . . . . . . . . . . . . . . . . . . . . . . . . . . . . . . . . . . . . . . . . . . . . . . .
SECTION 2
Description . . . . . . . . . . . . . . . . . . . . . . . . . . . . . . . . . . . . .
2-1
2-2
2-3
2-4
2-5
2-6
CPU Rack . . . . . . . . . . . . . . . . . . . . . . . . . . . . . . . . . . . . . . . . . . . . . . . . . . . . . . . . . . . . . .
CPU . . . . . . . . . . . . . . . . . . . . . . . . . . . . . . . . . . . . . . . . . . . . . . . . . . . . . . . . . . . . . . . . . .
Expansion I/O Rack . . . . . . . . . . . . . . . . . . . . . . . . . . . . . . . . . . . . . . . . . . . . . . . . . . . . . .
Power Supply . . . . . . . . . . . . . . . . . . . . . . . . . . . . . . . . . . . . . . . . . . . . . . . . . . . . . . . . . . .
I/O Units . . . . . . . . . . . . . . . . . . . . . . . . . . . . . . . . . . . . . . . . . . . . . . . . . . . . . . . . . . . . . . .
Memory Units . . . . . . . . . . . . . . . . . . . . . . . . . . . . . . . . . . . . . . . . . . . . . . . . . . . . . . . . . . .
SECTION 3
Assembly Instructions . . . . . . . . . . . . . . . . . . . . . . . . . . . .
3-1
3-2
3-3
Mounting the Units . . . . . . . . . . . . . . . . . . . . . . . . . . . . . . . . . . . . . . . . . . . . . . . . . . . . . . .
Memory Packs . . . . . . . . . . . . . . . . . . . . . . . . . . . . . . . . . . . . . . . . . . . . . . . . . . . . . . . . . .
System Configurations . . . . . . . . . . . . . . . . . . . . . . . . . . . . . . . . . . . . . . . . . . . . . . . . . . . .
SECTION 4
System Connections . . . . . . . . . . . . . . . . . . . . . . . . . . . . . .
4-1
4-2
4-3
4-4
IR Word Allocation . . . . . . . . . . . . . . . . . . . . . . . . . . . . . . . . . . . . . . . . . . . . . . . . . . . . . .
Remote I/O . . . . . . . . . . . . . . . . . . . . . . . . . . . . . . . . . . . . . . . . . . . . . . . . . . . . . . . . . . . . .
Maximum Current and Power Supplied . . . . . . . . . . . . . . . . . . . . . . . . . . . . . . . . . . . . . . .
I/O Connections . . . . . . . . . . . . . . . . . . . . . . . . . . . . . . . . . . . . . . . . . . . . . . . . . . . . . . . . .
SECTION 5
Installation Environment . . . . . . . . . . . . . . . . . . . . . . . . .
5-1
5-2
5-3
5-4
Installation Environment . . . . . . . . . . . . . . . . . . . . . . . . . . . . . . . . . . . . . . . . . . . . . . . . . .
Mounting Requirements . . . . . . . . . . . . . . . . . . . . . . . . . . . . . . . . . . . . . . . . . . . . . . . . . . .
Duct Work . . . . . . . . . . . . . . . . . . . . . . . . . . . . . . . . . . . . . . . . . . . . . . . . . . . . . . . . . . . . .
Preventing Noise . . . . . . . . . . . . . . . . . . . . . . . . . . . . . . . . . . . . . . . . . . . . . . . . . . . . . . . .
SECTION 6
Power Considerations . . . . . . . . . . . . . . . . . . . . . . . . . . . .
6-1
6-2
6-3
6-4
Grounding . . . . . . . . . . . . . . . . . . . . . . . . . . . . . . . . . . . . . . . . . . . . . . . . . . . . . . . . . . . . . .
Insulation . . . . . . . . . . . . . . . . . . . . . . . . . . . . . . . . . . . . . . . . . . . . . . . . . . . . . . . . . . . . . .
Emergency Stop . . . . . . . . . . . . . . . . . . . . . . . . . . . . . . . . . . . . . . . . . . . . . . . . . . . . . . . . .
Wiring . . . . . . . . . . . . . . . . . . . . . . . . . . . . . . . . . . . . . . . . . . . . . . . . . . . . . . . . . . . . . . . . .
SECTION 7
Safety Considerations . . . . . . . . . . . . . . . . . . . . . . . . . . . .
7-1
7-2
Interlock Circuits . . . . . . . . . . . . . . . . . . . . . . . . . . . . . . . . . . . . . . . . . . . . . . . . . . . . . . . .
Wiring . . . . . . . . . . . . . . . . . . . . . . . . . . . . . . . . . . . . . . . . . . . . . . . . . . . . . . . . . . . . . . . . .
vii
TABLE OF CONTENTS
Appendices
A
B
C
D
E
Inspection and Maintenance . . . . . . . . . . . . . . . . . . . . . . . . . . . . . . . . . . . . . . . . . . . . . . . . . .
Specifications . . . . . . . . . . . . . . . . . . . . . . . . . . . . . . . . . . . . . . . . . . . . . . . . . . . . . . . . . . . . . .
Standard Models . . . . . . . . . . . . . . . . . . . . . . . . . . . . . . . . . . . . . . . . . . . . . . . . . . . . . . . . . . .
Programming Console Operation . . . . . . . . . . . . . . . . . . . . . . . . . . . . . . . . . . . . . . . . . . . . . .
Programming Instructions . . . . . . . . . . . . . . . . . . . . . . . . . . . . . . . . . . . . . . . . . . . . . . . . . . . .
Glossary . . . . . . . . . . . . . . . . . . . . . . . . . . . . . . . . . . . . . . .
Index . . . . . . . . . . . . . . . . . . . . . . . . . . . . . . . . . . . . . . . . . .
Revision History . . . . . . . . . . . . . . . . . . . . . . . . . . . . . . . . .
viii
About this Manual:
This manual explains how to install a C-series C200H Programmable Controller
(CPU01-E/03-E/11-E).
Section 1 is an introduction to Programmable Controllers. General information about what a Programmable Controller can do and how a Programmable Controller works is provided.
Section 2 provides a description of all the components of the C200H. The names of all the individual parts
of each Unit are given.
Section 3 explains how to assemble the C200H. A detailed description of how to mount each Unit is provided.
Section 4 outlines the system connections involved in installing a C200H Programmable Controller System. All I/O, including Remote I/O, are included.
Section 5 contains the requirements for the installation environment of the C200H. Suggestions for preventing electrical noise are included.
Section 6 explains the power considerations involved in installing the C200H.
Section 7 lists safety considerations that should be kept in mind while installing the C200H.
Appendixes, a Glossary, and an Index are also provided.
! WARNING Failure to read and understand the information provided in this manual may result in
personal injury or death, damage to the product, or product failure. Please read each
section in its entirety and be sure you understand the information provided in the section
and related sections before attempting any of the procedures or operations given.
ix
PRECAUTIONS
This section provides general precautions for using the Programmable Controller (PC) and related devices.
The information contained in this section is important for the safe and reliable application of the Programmable Controller. You must read this section and understand the information contained before attempting to set up or operate a
PC system.
1 Intended Audience . . . . . . . . . . . . . . . . . . . . . . . . . . . . . . . . . . . . . . . . . . . . . . . . . . . . . . . . . . . .
2 General Precautions . . . . . . . . . . . . . . . . . . . . . . . . . . . . . . . . . . . . . . . . . . . . . . . . . . . . . . . . . . .
3 Safety Precautions . . . . . . . . . . . . . . . . . . . . . . . . . . . . . . . . . . . . . . . . . . . . . . . . . . . . . . . . . . . .
4 Operating Environment Precautions . . . . . . . . . . . . . . . . . . . . . . . . . . . . . . . . . . . . . . . . . . . . . .
5 Application Precautions . . . . . . . . . . . . . . . . . . . . . . . . . . . . . . . . . . . . . . . . . . . . . . . . . . . . . . . .
xi
3
Safety Precautions
1
Intended Audience
This manual is intended for the following personnel, who must also have knowledge of electrical systems (an electrical engineer or the equivalent).
• Personnel in charge of installing FA systems.
• Personnel in charge of designing FA systems.
• Personnel in charge of managing FA systems and facilities.
2
General Precautions
The user must operate the product according to the performance specifications
described in the operation manuals.
Before using the product under conditions which are not described in the manual
or applying the product to nuclear control systems, railroad systems, aviation
systems, vehicles, combustion systems, medical equipment, amusement machines, safety equipment, and other systems, machines, and equipment that
may have a serious influence on lives and property if used improperly, consult
your OMRON representative.
Make sure that the ratings and performance characteristics of the product are
sufficient for the systems, machines, and equipment, and be sure to provide the
systems, machines, and equipment with double safety mechanisms.
This manual provides information for programming and operating the Unit. Be
sure to read this manual before attempting to use the Unit and keep this manual
close at hand for reference during operation.
! WARNING It is extremely important that a PC and all PC Units be used for the specified
purpose and under the specified conditions, especially in applications that can
directly or indirectly affect human life. You must consult with your OMRON
representative before applying a PC System to the above-mentioned
applications.
3
Safety Precautions
! WARNING Do not attempt to take any Unit apart while the power is being supplied. Doing so
may result in electric shock.
! WARNING Do not touch any of the terminals or terminal blocks while the power is being
supplied. Doing so may result in electric shock.
! WARNING Do not attempt to disassemble, repair, or modify any Units. Any attempt to do so
may result in malfunction, fire, or electric shock.
! Caution
xii
Tighten the screws on the terminal block of the AC Power Supply Unit to the
torque specified in this manual. The loose screws may result in burning or malfunction.
5
Application Precautions
4
Operating Environment Precautions
! Caution
Do not operate the control system in the following places:
• Locations subject to direct sunlight.
• Locations subject to temperatures or humidity outside the range specified in
the specifications.
• Locations subject to condensation as the result of severe changes in temperature.
• Locations subject to corrosive or flammable gases.
• Locations subject to dust (especially iron dust) or salts.
• Locations subject to exposure to water, oil, or chemicals.
• Locations subject to shock or vibration.
! Caution
Take appropriate and sufficient countermeasures when installing systems in the
following locations:
• Locations subject to static electricity or other forms of noise.
• Locations subject to strong electromagnetic fields.
• Locations subject to possible exposure to radioactivity.
• Locations close to power supplies.
! Caution
5
The operating environment of the PC System can have a large effect on the longevity and reliability of the system. Improper operating environments can lead to
malfunction, failure, and other unforeseeable problems with the PC System. Be
sure that the operating environment is within the specified conditions at installation and remains within the specified conditions during the life of the system.
Application Precautions
Observe the following precautions when using the PC System.
! WARNING Always heed these precautions. Failure to abide by the following precautions
could lead to serious or possibly fatal injury.
• Always ground the system to 100 Ω or less when installing the Units. Not connecting to a ground of 100 Ω or less may result in electric shock.
• Always turn OFF the power supply to the PC before attempting any of the following. Not turning OFF the power supply may result in malfunction or electric
shock.
• Mounting or dismounting Power Supply Units, I/O Units, CPU Units,
Memory Cassettes, or any other Units.
• Assembling the Units.
• Setting DIP switches or rotary switches.
• Connecting or wiring the cables.
• Connecting or disconnecting the connectors.
! Caution
Failure to abide by the following precautions could lead to faulty operation of the
PC or the system, or could damage the PC or PC Units. Always heed these precautions.
• Fail-safe measures must be taken by the customer to ensure safety in the
event of incorrect, missing, or abnormal signals caused by broken signal lines,
momentary power interruptions, or other causes.
xiii
Application Precautions
5
• Interlock circuits, limit circuits, and similar safety measures in external circuits
(i.e., not in the Programmable Controller) must be provided by the customer.
• Always use the power supply voltage specified in the operation manuals. An
incorrect voltage may result in malfunction or burning.
• Take appropriate measures to ensure that the specified power with the rated
voltage and frequency is supplied. Be particularly careful in places where the
power supply is unstable. An incorrect power supply may result in malfunction.
• Install external breakers and take other safety measures against short-circuiting in external wiring. Insufficient safety measures against short-circuiting may
result in burning.
• Do not apply voltages to the Input Units in excess of the rated input voltage.
Excess voltages may result in burning.
• Do not apply voltages or connect loads to the Output Units in excess of the
maximum switching capacity. Excess voltage or loads may result in burning.
• Disconnect the functional ground terminal when performing withstand voltage
tests. Not disconnecting the functional ground terminal may result in burning.
• Install the Unit properly as specified in the operation manual. Improper installation of the Unit may result in malfunction.
• Be sure that all the mounting screws, terminal screws, and cable connector
screws are tightened to the torque specified in the relevant manuals. Incorrect
tightening torque may result in malfunction.
• Leave the label attached to the Unit when wiring. Removing the label may result in malfunction.
• Remove the label after the completion of wiring to ensure proper heat dissipation. Leaving the label attached may result in malfunction.
• Use crimp terminals for wiring. Do not connect bare stranded wires directly to
terminals. Connection of bare stranded wires may result in burning.
• Double-check all the wiring before turning ON the power supply. Incorrect wiring may result in burning.
• Mount the Unit only after checking the terminal block completely.
• Be sure that the terminal blocks, Memory Units, expansion cables, and other
items with locking devices are properly locked into place. Improper locking
may result in malfunction.
• Check the user program for proper execution before actually running it on the
Unit. Not checking the program may result in an unexpected operation.
• Confirm that no adverse effect will occur in the system before attempting any of
the following. Not doing so may result in an unexpected operation.
• Changing the operating mode of the PC.
• Force-setting/force-resetting any bit in memory.
• Changing the present value of any word or any set value in memory.
• Do not pull on the cables or bend the cables beyond their natural limit. Doing
either of these may break the cables.
• Do not place objects on top of the cables. Doing so may break the cables.
xiv
SECTION 1
Introduction
This section provides general information about Programmable Controllers (PCs) and how they fit into a Control System.
1-1
1-2
1-3
What is a Control System? . . . . . . . . . . . . . . . . . . . . . . . . . . . . . . . . . . . . . . . . . . . . . . . . . .
The Role of the PC . . . . . . . . . . . . . . . . . . . . . . . . . . . . . . . . . . . . . . . . . . . . . . . . . . . . . . . .
1-2-1 Input Devices . . . . . . . . . . . . . . . . . . . . . . . . . . . . . . . . . . . . . . . . . . . . . . . . . . . . .
1-2-2 Output Devices . . . . . . . . . . . . . . . . . . . . . . . . . . . . . . . . . . . . . . . . . . . . . . . . . . .
How Does a PC Work? . . . . . . . . . . . . . . . . . . . . . . . . . . . . . . . . . . . . . . . . . . . . . . . . . . . . .
1
Section
What is a Control System?
1-1
1-1
What is a Control System?
A Control System is the electronic equipment needed to control a particular
process. It may include everything from a process control computer, if one is
used, to the factory computer, down through the PCs (and there may be many of
them networked together) and then on down through the network to the control
components: the switches, stepping motors, solenoids, and sensors which
monitor and control the mechanical operations.
Process Control Computer
Factory Computer
PCs
PC
PC
PC
Control Components
A Control System can involve very large applications where many different models of PC are networked together or it could be an application as small as a single
PC controlling a single output device.
2
Section
What is a Control System?
1-1
A Position Control System
Position Control Unit
Input Unit
PC
Signal line for
Servomotor
driver control
Power
source
Hand-held Programming
Console
Control panel
Control switch
DC Servomotor
Driver
Power
source
DC Servomotor
DC Servomotor Driver
DC Servomotor
In the typical Control System example shown above, a PC controls the movement of the workpiece bed across two horizontal axes using Limit Switches and
Servomotors to monitor and control movement.
3
Section
The Role of the PC
1-2
1-2
The Role of the PC
The PC is the part of the Control System that directly controls the manufacturing
process. According to the program stored in its memory, the PC accepts data
from the input devices connected to it, and uses this data to monitor the controlled system. When the program calls for some action to take place, the PC
sends data to the output devices connected to it, to cause that action to take
place. The PC may be used to control a simple, repetitive task, or it may be connected to other PCs, or to a host computer in order to integrate the control of a
complex process.
1-2-1
Input Devices
PCs can receive input from either automated or manual devices. The PC could
receive data from the user via a pushbutton switch, keyboard, or similar device.
Automated input could come from a variety of devices: microswitches, timers,
encoders, photosensors, and so on. Some devices, like the Limit Switch shown
below, turn ON or OFF when the equipment actually makes contact with it. Other
devices, like the Photoelectric Switch and Proximity Switch shown below, use
other means, such as light or inductance, in order to get information about the
equipment being monitored.
Photoelectric Switch
Limit Switch
Proximity Switch
4
Section
The Role of the PC
1-2-2
1-2
Output Devices
A PC can output to a myriad of devices for use in automated control. Almost anything that you can think of could be controlled (perhaps indirectly) by a PC. Some
of the most common devices are motors, Solenoids, Servomotors, Stepping
Motors, valves, switches, indicator lights, buzzers, and alarms. Some of these
output devices; such as the motors, Solenoids, Servomotors, Stepping Motors,
and valves; affect the controlled system directly. Others; such as the indicator
lights, buzzers, and alarms; provide output to notify personnel.
Solenoid
Servomotor
Stepping Motor
5
Section
How Does a PC Work?
1-3
1-3
How Does a PC Work?
PCs operate by monitoring input signals and providing output signals. When
changes are detected in the signals, the PC reacts, through the user-programmed internal logic, to produce output signals. The PC continually cycles the
program in its memory to achieve this control.
Block Diagram of PC
Power Supply
Memory
Signals
from
switches,
sensors,
etc.
Input
CPU
Output
Signals to
Solenoids,
motors,
etc.
Programming
Device
A program for your applications must be designed, and stored in the PC. This
program is then executed as part of the cycle of internal operations of the PC.
Cycle
When a PC operates, that is, when it executes its program to control an external
system, a series of operations are performed inside the PC. These internal operations can be broadly classified into the following four categories:
1, 2, 3...
1. Common (or overseeing) processes, such as watchdog timer operation and
testing the program memory.
2. Data input and output.
3. Instruction execution.
4. Peripheral device servicing.
Cycle Time
The total time required for a PC to perform all these internal operations is called
the cycle time. The flowchart and diagram on the following page illustrate these
internal operations for a typical PC.
Timing is one of the most important factors in designing a Control System. For
accurate operations, it is necessary to have answers to such questions as these:
• How long does it take for the PC to execute all the instructions in its memory?
• How long does it take for the PC to produce a control output in response to a
given input signal?
The cycle time of the PC can be automatically calculated and monitored, but it is
necessary to have an understanding of the timing relationships within the PC for
effective System design and programming.
6
Section
How Does a PC Work?
1-3
PC Operation Flowchart
Power application
Clears data areas and
resets System counters
Initial
processing
on power
application
Checks I/O Units
Resets watchdog timer
Checks hardware and
program memory
No
Sets error flag and
lights indicator
Check OK?
Common
processes
Yes
Alarm
Error or alarm?
Resets watchdog timer
and program counter
IR data to Output Units
Error
Proceses remote I/O
Remote
processing
Executes program
Resets watchdog timer
Output
refreshing
No
End of program?
Yes
Services peripherals
Servicing
peripheral
devices
PC
cycle
time
No
End of program?
Yes
Resets watchdog timer
Input Unit data to IR area
Instruction
execution
Input
refreshing
7
SECTION 2
Description
This section provides information about the individual Units that make up a PC. The names of all the parts of a Unit are given,
followed by any details that apply to that Unit alone. For a description of how the Units fit together to become a PC, refer to
Section 3 Assembly Instructions. For information about the model numbers of any of the parts described in this section, refer to
Appendix C Standard Models.
2-1
2-2
2-3
2-4
2-5
2-6
CPU Rack . . . . . . . . . . . . . . . . . . . . . . . . . . . . . . . . . . . . . . . . . . . . . . . . . . . . . . . . . . . . . . .
CPU . . . . . . . . . . . . . . . . . . . . . . . . . . . . . . . . . . . . . . . . . . . . . . . . . . . . . . . . . . . . . . . . . . .
Expansion I/O Rack . . . . . . . . . . . . . . . . . . . . . . . . . . . . . . . . . . . . . . . . . . . . . . . . . . . . . . .
Power Supply . . . . . . . . . . . . . . . . . . . . . . . . . . . . . . . . . . . . . . . . . . . . . . . . . . . . . . . . . . . .
I/O Units . . . . . . . . . . . . . . . . . . . . . . . . . . . . . . . . . . . . . . . . . . . . . . . . . . . . . . . . . . . . . . . .
Memory Units . . . . . . . . . . . . . . . . . . . . . . . . . . . . . . . . . . . . . . . . . . . . . . . . . . . . . . . . . . .
9
Section
CPU Rack
2-1
2-1
CPU Rack
The following figure shows the names of all the parts of a CPU Rack. There are
four models of Backplanes available with 3, 5, 8 and 10 slots for I/O Units. You
can use any of these Backplanes to build a CPU or Expansion I/O Rack. However, the C200H-OC225/OD212/OD21A 16-point Output Unit and C200H-B7AO1
B7A Interface Unit must be mounted to a C200H-BCjj1-V1/V2 Backplane.
This connector not used:
Cover with a cap.
Backplane
I/O Units
I/O Connecting Cable connector
Connects CPU Rack to Expansion I/O Rack
When not used, cover with a cap.
10
CPU
Backplane mounting
screws (four, with
4-mm dia. heads)
Section
CPU
2-2
2-2
CPU
The CPU is available in three models. The C200H-CPU01-E and C200HCPU11-E both run on 100 to 120 or 200 to 240 VAC, and the C200H-CPU03-E
runs on 24 VDC. The C200H-CPU11-E is unique in that it connects the SYSMAC
LINK Unit or SYSMAC NET Link Unit to the CPU. These two Units are mounted
to either of the two slots located directly to the left of the the CPU and connected
to the CPU via a bus connector. A separate Unit, the Bus Connector Unit, is required to connect the SYSMAC NET Link Unit or the SYSMAC LINK Unit to the
CPU.
Also note that model C200H-CPU11-E has an additional battery connected to
the CPU.
Note If you are using the SYSMAC LINK Unit or SYSMAC NET Link Unit in your
C200H system, use model C200H-CPU11-E as the CPU. Otherwise, the link
Units cannot be used.
C200H-CPU01-E/03
Indicators
Memory Pack
connector
Power fuse
Detachable
terminal block
Peripheral device
mounting hole
Programming Console
connector cover storage slot
Programming Console connector
(Peripheral device connector)
Remove cover to gain access to connector; store cover in cover storage slot.
Handheld Programming Console connector
Remove cover to gain access to connector.
11
Section
CPU
2-2
C200H-CPU11-E
Indicators
Power fuse
MF51NR (5.2 dia. x 20
mm) 2A 250 V
Memory
Pack
connector
Battery compartment
Bus connector
Available only with the
C200H-CPU11-E.
Used to connect this
Unit to a SYSMAC
LINK Unit or SYSMAC
NET Link Unit.
Handheld Programming Console connector
Programming Console connector cover storage slot
Programming Console connector
(Peripheral device connector)
CPU Indicators
The following figure shows the indicators that are located on the front panel of
the three CPU models.
RUN indicator (green)
Lights when the PC is
operating normally.
ALARM (blinking red)
Blinks if an error occurs that
does not stop the CPU.
POWER (green)
Lights when power is
supplied to the CPU.
OUT INHIBIT (red)
Lights when the Load OFF
flag (SR bit 25215) turns ON,
at which time all the outputs
are turned OFF.
ERROR (solid red)
Lights if an error occurs that stops the
CPU, at which time the RUN indicator
turns OFF and the outputs are turned
OFF.
12
Section
CPU
Peripheral Device
Connectors
2-2
All three CPU models are equipped with two connectors for peripheral devices.
One is used for the Handheld Programming Console or the Data Access Console; the other is used for the CPU-Mounting Programming Console. The
C200H-CPU11-E, however, has a third connector that is used for connecting the
SYSMAC LINK Unit or the SYSMAC NET Link Unit to the CPU.
To connect the Handheld Programming Console to the CPU, a Connecting
Cable is required, as shown in the following diagram.
Note If you are using the SYSMAC LINK Unit or SYSMAC NET Link Unit in your system, you must use model C200H-CPU11-E as the CPU. The other two models
mentioned above are not equipped with the appropriate connectors.
Cable Connection
Connecting Cable
Handheld
Programming Console
The CPU-mounting Programming Console can be mounted directly to the CPU
and does not require a Connecting Cable. To mount the CPU-Mounting Programming Console (or any other peripheral device) directly to the CPU, follow
the steps below.
Direct Mounting
The CPU-mounting Programming Console, when mounted to the CPU, covers
the two I/O Units located directly to the left of the CPU. For this reason it is important to know which shapes can be mounted to these slots.
Notice, in the following diagram, that the two I/O Units mounted directly to the left
of the CPU are A-shape Units. The CPU-mounting Programming Console can
be mounted to the CPU provided A-shape I/O Units are mounted to these two
slots. Make sure the protective covers of the two I/O Units are in place to avoid
electrical interference with the CPU.
Because the surface of B-shape and E-shape I/O Units protrudes a few centimeters from surface of the CPU, B-shape and E-shape I/O Units cannot be
mounted to the two slots to the left of the CPU unless a Programming Console
Base Unit is first mounted to the CPU to increase the mounting height of the Programming Console.
13
Section
CPU
2-2
If you are using the C200H-CPU11-E, a SYSMAC LINK Unit or a SYSMAC LINK
Unit can be mounted to either of the two slots to the left of the CPU. They are then
connected to the CPU with the Bus Connector Unit.
Peripheral
device
CPU Rack
A-shape I/O Units
1, 2, 3...
14
1. Remove the cover from the peripheral device connector with a standard
screwdriver.
2. Connect the CPU-Mounting Programming Console to the peripheral device
connector.
3. Attach the CPU-Mounting Programming Console to the CPU by tightening
the mounting screws.
Section
Expansion I/O Rack
2-3
2-3
Expansion I/O Rack
The Backplane used to construct a CPU Rack is also used to construct an Expansion I/O Rack. An Expansion I/O Rack is identical to a CPU Rack, except the
CPU has been replaced with a Power Supply. The parts of an Expansion I/O
Rack are shown in the following diagram.
I/O Connecting Cable Connector
Connects Expansion I/O Rack to preceding Expansion I/O Rack or to CPU.
Backplane
I/O Connecting Cable Connector.
Connects Expansion I/O Rack
to next Expansion I/O Rack.
When not used, cover with a cap.
Power Supply
I/O Units
Backplane mounting screws
(four, with 4-mm dia. heads)
15
Section
Power Supply
2-4
2-4
Power Supply
The Power Supply used for Expansion I/O Racks is available in two models. One
runs on 100 to 120 or 200 to 240 VAC, and the other runs on 24 VDC.
AC Power Supply
POWER
indicator (green)
Lights when power is
supplied to Power Supply
Power fuse 2 A 250 V
(5.2-dia. x 20) MF51NR
AC Input
Voltage selector
terminals
Short: 100 to
120 VAC
Open: 200 to
240 VAC
LG
Terminals
for external
connections
GR
+
24 VDC
0.3 output
NC
NC
16
Section
Power Supply
2-4
DC Power Supply
POWER
indicator (green)
Lights when power is
supplied to Power Supply
Power fuse 5 A 125 V
(5.2-dia. x 20)
MF51NR
+
24 VDC
NC
Terminals
for external
connections
NC
LG
GR
+
(See note.)
NC
NC
NC
NC
Note The LG and GR terminals are connected internally.
17
I/O Units
2-5
Section
2-5
I/O Units
I/O Units come in three shapes: A-shape, B-shape, and E-shape. Refer to Appendix B Specifications for the dimensions of each Unit.
A-shape I/O Units
I/O Unit lock notch
Nameplate
I/O indicators
Indicate ON/OFF status of points
10-terminal terminal block
B-shape I/O Units
I/O Unit lock notch
Nameplate
I/O indicators
Indicate ON/OFF status of points
19-terminal terminal block
18
Section
Memory Units
2-6
E-shape I/O Units
I/O Unit lock notch
Nameplate
I/O indicators
Indicate ON/OFF
status of points
10-terminal terminal block
2-6
Memory Units
There are three types of Memory Units, having three different types of memory.
The three types of memory are EPROM, EEPROM, and RAM.
Memory
Model
Capacity
Maximum
program size
EPROM
C200H-MP831
8K words
6,974 words
EEPROM
C200H-ME431
C200H-ME831
4K words
8K words
2,878 words
6,974 words
RAM
C200H-MR431
4K words
2,878 words
C200H-MR831
8K words
6,974 words
C200H-MR432
4K words
2,878 words
C200H-MR832
8K words
6,974 words
Backup
Clock1
---
NO
Battery
NO
Capacitor
Contents for Memory Unit Registration
Fixed DM area
(DM 1000 to DM 1999)
I/O table (see note)
UM (ladder program area)
Note I/O tables are also saved in the Memory Unit at the time of creation. Therefore, if
the Memory Unit is set to write-protect, it will be impossible to create an I/O table.
19
Section
Memory Units
2-6
EPROM Unit
The data that you wish to store in an EPROM Unit must first be written to an
EPROM Chip, using the PROM Writer. Then the EPROM Chip must be mounted
to the inside of the EPROM Unit. Once this has been done, the data cannot be
changed. In addition, the data will be retained indefinitely when the power is
turned OFF.
EEPROM Unit
Data can be stored in the EEPROM Unit while the Unit is mounted to the PC. The
data is retained indefinitely when the power is turned OFF.
RAM Unit
Data can be randomly written to and read from the RAM Unit. However, the Unit
requires battery or capacitor back-up in order to retain the information when the
power is OFF. Units with battery back-up can retain their data for approximately
five years at room temperature (25°C). Units with capacitor back-up retain their
data for approximately 20 days at room temperature, but the length of time varies with temperature as shown below.
20
Capacitor
back-up time
(days)
10
7
1
25
50
80
Ambient temperature (°C)
Switches on Memory
Units
Two switches are provided on Memory Units, as shown below.
1
2
Write-enable switch
(SW1)
ON OFF
Initial mode selector
(SW2)
SW1 (the write enable switch) only has an effect if the Unit is a RAM Unit or EEPROM Unit. Peripheral devices can only write data to these Memory Units if
SW1 is ON. When you wish to write data to this Memory Unit, make sure SW1 is
set to the ON position. After you have finished writing the data to the Memory
Unit, turn SW1 to the OFF position so that the data will be protected from any
further changes. If you try to write data to the Memory Unit while SW1 is in the
OFF position, the message “DISABLED ROM” will appear on the Programming
Console.
SW2 Selects what operating mode the PC will be in when power is applied to the
System. If there is no peripheral device connected to the CPU, the PC will enter
RUN mode when power is applied. If a Programming Console is connected to
the CPU, the PC will enter the mode that the Programming Console is set to. If a
peripheral device other than the Programming Console is connected to the
CPU, the PC will enter the mode specified by SW2.
Battery Failure Flag
20
The C200H-CPU11-E, unlike the other two CPU models, has an additional battery connected to the CPU. A flag, assigned to the bits listed in the following
table, indicates where battery failure occurred (in the RAM Unit or in the CPU)
and in which Unit.
Section
Memory Units
Model
Bit
2-6
Function
C200H-CPU01-E/03
25308
Battery failure in RAM Unit
C200H-CPU11-E
25308
Battery failure in RAM Unit or
CPU
AR2404
Battery failure in CPU
In the following table, the ON/OFF status of the bits indicate where battery failure
took place in the C200H-CPU11-E. For example, when bit 25308 is ON the battery in the CPU failed.
25308
AR2404
Unit in which the battery failed
ON
ON
CPU
ON
OFF
RAM Unit
21
SECTION 3
Assembly Instructions
When we speak of a PC, we usually think of it as a single object. But actually even the simplest PCs are usually composed of
several different devices. In fact a single PC can be physically spread throughout a building, but we still call it one PC.
3-1
3-2
3-3
Mounting the Units . . . . . . . . . . . . . . . . . . . . . . . . . . . . . . . . . . . . . . . . . . . . . . . . . . . . . . . .
Memory Packs . . . . . . . . . . . . . . . . . . . . . . . . . . . . . . . . . . . . . . . . . . . . . . . . . . . . . . . . . . .
System Configurations . . . . . . . . . . . . . . . . . . . . . . . . . . . . . . . . . . . . . . . . . . . . . . . . . . . . .
23
Section
Mounting the Units
3-1
3-1
Mounting the Units
There is no single Unit that can be said to constitute a Rack PC. To build a Rack
PC, we start with a Backplane. The Backplane for the C200H is shown below.
C200H Backplane
The Backplane is a simple device having two functions. The first is to provide
physical support for the Units to be mounted to it. The second is to provide the
connectors and electrical pathways necessary for connecting the Units
mounted to it.
The core of the PC is the CPU. The CPU contains the program consisting of the
series of steps necessary for the control task. The CPU has a built-in power supply, and fits into the rightmost position of the Backplane.
The CPU of the C200H has no I/O points built in. So, in order to complete the PC
we need to mount one or more I/O Units to the Backplane. Mount the I/O Unit to
the Backplane by locking the top of the I/O Unit into the slot on the Backplane and
rotating the I/O Unit downwards as shown in the following diagram. Press down
on the yellow tab at the bottom of the slot, press the I/O Unit firmly into position,
and then release the yellow tab.
24
Mounting the Units
Section
3-1
The figure below shows one I/O Unit mounted directly to the left of the CPU.
I/O Units are where the control connections are made from the PC to all the various input devices and output devices. As you can see from the figure above,
there is still some space available on the left side of the Backplane. This space is
for any additional I/O Units that may be required.
The figure above shows a total of eight I/O Units mounted to the Backplane. I/O
Units come in three shapes; A-shape, B-shape, and E-shape (refer to Appendix
B Specifications for dimensions). Normally, only A-shape I/O Units can be
mounted to the two rightmost I/O Unit positions on the Backplane (the ones next
to the CPU). This is so that there will be enough room to mount peripheral devices such as a Programming Console to the CPU. However, if you use a Programming Console Base Unit to increase the mounting height of the Programming Console, you will be able to mount the Programming Console to the CPU
even if there are B-shape and/or E-shape I/O Units mounted to the two rightmost
slots.
The C200H-OC225/OD212/OD21A 16-point Output Unit and C200H-B7AO1
B7A Interface Unit can be mounted only to a C200H-BCjj1-V1/V2 Backplane.
If a Backplane other than these two models is used, the Units will not operate
properly.
Backplanes are available in different lengths (three, five, eight, ten slots), and
can hold a different number of I/O Units accordingly (refer to Appendix B Specifications for dimensions). Of course, not all I/O Units look exactly alike, but the
ones in the figure show their typical appearance. This configuration of Backplane, CPU, and I/O Units is called a CPU Rack. This term refers to the Backplane and all the Units mounted to it. However, if we want to include more than
eight I/O Units in our configuration we can add an additional Backplane.
25
Mounting the Units
Section
3-1
This Backplane has I/O Units mounted to it, but it has no CPU of its own. The
additional Backplane must also have an Expansion I/O Power Supply mounted
to its rightmost position. This configuration of additional Backplane, Expansion
I/O Power Supply, and I/O Units is called an Expansion I/O Rack.
The CPU Rack and Expansion I/O Rack shown above are connected by a Connecting Cable (the length of Cable between individual Racks can be up to 10 m,
but the total length of Cable between all Racks must be within 12 m).
Remember that this whole configuration is still referred to as one PC. It is possible to add up to two Expansion I/O Racks to one CPU Rack. When installing I/O
Connecting Cables, cover any unused connectors with the caps provided.
26
Section
Memory Packs
3-2
3-2
Memory Packs
The CPU has a removable Memory Pack that stores the user program. Memory
Packs are available with three types of memory; EPROM, EEPROM, and RAM
(refer to Section 2-6 Memory Packs). If this is your first C200H, then you must
have a RAM Pack in order to write and test the program you are going to use. If
this is not your first C200H and you have a complete, tested program already,
you can copy the program to an EPROM or EEPROM Pack for use on this
C200H. The EEPROM chip can be written to without removing the chip from the
Memory Pack by using an appropriate peripheral device (refer to Appendix C
Standard Models). The EPROM Chip may be programmed using a PROM Writer or a FIT Ladder Pack. Then the EPROM Chip must be mounted inside the
EPROM Pack.
Note Only PROM Writer Model C500-PRW06 may be used with the SYSMAC C200H.
After the data has been written to the EPROM Chip, mount it to the inside of the
EPROM Pack by following these steps.
How to Mount an
EPROM Chip to the
Memory Pack
1, 2, 3...
1. Remove the cover of the EPROM Pack as shown below.
2. Unlock the holding bracket and slide it upward to remove it as shown below
3. Pull the printed circuit board out of the EPROM Pack.
27
Section
Memory Packs
3-2
4. On the printed circuit board there is a socket for the EPROM Chip. On the
socket you will find a notch. Align the notch on the socket with the notch on
the EPROM Chip and mount the EPROM Chip to the socket as shown below.
Notch
5. Reassemble the EPROM Pack in the reverse order of disassembly. During
reassembly, ensure that the circuit board is inserted along the guides on the
top and bottom of the Pack housing and that the projections on the housing
fit into the holes in the holding bracket. Be sure to lock the holding bracket
into the right side of the housing. When reassembled, the Pack should appear as shown below.
Circuit board guide
Bracket
Hole
Holding bracket
Circuit board
Circuit board guide
28
Section
System Configurations
How to Mount the
Memory Pack to the CPU
1, 2, 3...
! Caution
3-3
Mount the Memory Pack to the CPU by following the steps below.
1. Turn OFF the power to the PC.
Do not attempt to mount the Memory Pack to the CPU while the power to the PC
is ON. Doing so may cause data to be lost, or may damage the CPU or Memory
Pack.
2. Set the selector switches on the Memory Pack to the desired positions (refer
to Section 2-6 Memory Packs).
3. Insert the Memory Pack into its compartment as shown below. As you do
this, you will feel a slight resistance as the connector on the Memory Pack
mates with the connector on the CPU. Continue pushing on the Memory
Pack until it is inserted completely into the CPU.
Guide
Guide
3-3
System Configurations
When building your C200H system there may be some restrictions depending
on the Unit you are using and the Rack you are mounting it to. The following figure shows an assembled CPU Rack, Expansion I/O Rack, and Remote I/O
Slave Rack. Use it as a quick reference when assembling your PC. For details
about the individual Units, refer to that Unit’s operation manual.
The items listed below should be kept in mind.
• The SYSMAC LINK Unit and the SYSMAC NET Link Unit are always mounted
to either of the two slots to the left of the C200H-CPU11-E CPU. When using
SYSMAC NET, a power supply adapter is mounted to the left of the Units.
• The C200H-OC225/OD212/OD21A 16-point Output Unit and C200H-B7AO1
B7A Interface Unit can be mounted only to a C200H-BCjj1-V1/V2 Backplane.
29
Section
System Configurations
Special I/O Units
Host Link Unit and
Remote I/O Master Unit
3-3
Memory Packs
I/O Units
•Up to ten Special I/O
•Up to two Units can be
•I/O Units available with 5, 8,
Units can be mounted.
•Mount Special I/O Units
to any slot on the CPU
Rack (except the two
slots to the left of the
CPU) or the Expansion
I/O Rack.
mounted.
•Host Link Units and Remote I/O Master Units
can be mounted to any
slot on the CPU Rack
(except the two slots to
the left of the CPU) or the
the Expansion I/O Rack.
12, or 16 points.
•Units available with 10- or
19-terminal terminal blocks.
•Units with 5 and 8 points
have 10-terminal terminal
blocks and Units with 10 and
12 points have 19-terminal
terminal blocks.
•There are some restrictions
on the mounting position of
19-terminal I/O Units (refer to
Appendix B Specifications).
•RAM, EPROM, or EEPROM Packs available.
•EEPROM requires an optional EEPROM Chip.
•EPROM requires a separately available EPROM
Chip.
CPU
Built-in power supply
I/O Unit Cover
For 10-terminal block I/O Units
SYSMAC NET LINK Unit
and SYSMAC LINK Unit
• Use up to two Units, mounted to either of
the two slots to the left of the CPU.
•When using either of these two Units the
use of peripheral devices is limited. Refer to
Section 4-3 Maximum Current and Power
Supplied.
Backplane
3-, 5-, 8-, 10-slot types available
Expansion I/O Racks
Up to two Expansion I/O
Racks can be connected to
one CPU Rack.
Expansion I/O Power Supply
I/O Connecting Cable
•Available in lengths from 30 cm to 1 m.
•Total length of I/O Connecting Cables
between all Racks must not exceed 12 m.
Remote I/O Slave Unit
Up to five Units can be connected.
Backplane
3-, 5-, or 8-slot types available
Remote I/O Slave Unit
Power supply built-in
Optical Fiber Cable or Wire Cable
30
SECTION 4
System Connections
In the preceding sections we have covered what all the parts of a PC are and how they should be assembled. This section
provides detailed information about the types of considerations involved in making all of the PC connections. Also included
in this section are considerations that should be kept in mind when using the C200H-CPU11-E as the CPU.
4-1
4-2
4-3
4-4
IR Word Allocation . . . . . . . . . . . . . . . . . . . . . . . . . . . . . . . . . . . . . . . . . . . . . . . . . . . . . . .
Remote I/O . . . . . . . . . . . . . . . . . . . . . . . . . . . . . . . . . . . . . . . . . . . . . . . . . . . . . . . . . . . . . .
Maximum Current and Power Supplied . . . . . . . . . . . . . . . . . . . . . . . . . . . . . . . . . . . . . . . .
I/O Connections . . . . . . . . . . . . . . . . . . . . . . . . . . . . . . . . . . . . . . . . . . . . . . . . . . . . . . . . . .
31
Section
IR Word Allocation
4-1
4-1
IR Word Allocation
Each slot of the Backplane is assigned a hardware word number. This word is
accessible for I/O use only in the given slot. However, standard I/O Units are
available in 5-, 8-, 12-, and 16-point models. If an I/O Unit other than a 16-point
model is mounted, the unused points of that word are accessible only as “work
bits” (refer to the C200H Operation Manual). The number of I/O bits available for
the entire system, therefore, varies according to the model of I/O Units used, as
well as the model of Backplanes used. The figure below shows the relationship
between the model of I/O Unit and work bits. The shaded bits can only be used
as work bits.
5-point Unit
00
01
02
03
04
05
06
07
08
09
10
11
12
13
14
15
32
8-point Unit
00
01
02
03
04
05
06
07
08
09
10
11
12
13
14
15
12-point Unit
16-point Unit
00
01
02
03
04
05
06
07
08
09
10
11
12
13
14
15
00
01
02
03
04
05
06
07
08
09
10
11
12
13
14
15
Section
IR Word Allocation
4-1
The CPU Rack begins with word 000 at the leftmost slot. The first Expansion I/O
Rack begins with word 010, and the second Expansion I/O Rack with word 020.
The first word of each Rack is fixed, regardless of the model of Backplane used.
As with the I/O bits unused by individual I/O Units, the bits of the I/O words unused by a Backplane can be used as work bits. The following figure shows the
relationship between the model of Backplane and I/O words. The shaded bits
can only be used as work bits.
C200H-BC031 Backplane
Word
000
001
002
003
004
005
006
007
008
009
00
00
00
00
00
00
00
00
00
00
15
15
15
15
15
15
15
15
15
15
bits
C200H-BC051-V1 Backplane
Word
000
001
002
003
004
005
006
007
008
009
00
00
00
00
00
00
00
00
00
00
15
15
15
15
15
15
15
15
15
15
bits
C200H-BC081-V1 Backplane
Word
000
001
002
003
004
005
006
007
008
009
00
00
00
00
00
00
00
00
00
00
15
15
15
15
15
15
15
15
15
15
bits
Note The C200H-OC225/OD212/OD21A 16-point Output Unit and C200H-B7AO1
1-V1/V2 Backplane.
B7A Interface Unit can be mounted only to a C200H-BC
For example, if a PC consists of three 8-slot Racks with 8-point I/O Units
mounted to all I/O Unit mounting positions, the number of I/O points for the entire
PC will be:
8 points x 8 slots x 3 Racks = 192 points
If a PC consists of three 8-slot Racks with the I/O Unit mounting positions equally
divided between 16-point Input Units and 12-point Output Units, the number of
I/O points for the entire PC will be:
Input points = 16 points x 4 slots x 3 Racks = 192 points
Output points = 12 points x 4 slots x 3 Racks = 144 points
Total I/O points = 192 + 144 = 336
33
Section
Remote I/O
4-2
The following figure shows the word allocation for a fully expanded C200H with
three 8-slot Backplanes.
4-2
word
000
word
001
word
002
word
003
word
004
word
005
word
006
word
007
CPU
word
010
word
011
word
012
word
013
word
014
word
015
word
016
word
017
Power
Supply
word
020
word
021
word
022
word
023
word
024
word
025
word
026
word
027
Power
Supply
Remote I/O
There are limits to how long the normal wiring between the PC and its Expansion
I/O Racks can be. A Remote I/O Unit can extend this distance greatly, so that the
PC and its Expansion I/O Racks can even be located in separate buildings.
There are two types of Remote I/O Systems, optical and wired.
By locating a Rack farther from the CPU Rack, a Remote I/O System eliminates
the time and mess in wiring (or changing wiring) to many devices that are separated from the CPU Rack. Although all I/O points must ultimately be wired individually, the question is one of distance: Do you want to wire dozens of terminals
all the way across a factory complex or do you want to run a single cable for most
of the distance and then wire individual terminals locally? A PC with an Expansion I/O System is called an Expanded PC.
I/O words 100 through 199 and DM words 1000 through 1999 are allocated to
Special I/O Units. There are limitations to the number and model of Special I/O
Units that can be mounted to a Remote I/O Slave Rack. Provided no other models of Special I/O Units are mounted to a Remote I/O Slave Rack, the maximum
number of Special I/O Units that can be mounted is shown below for each model.
Group
Units
Total number
A
High-speed Counter, Position Control
(NC111/NC112), ASCII, Analog I/O, ID Sensor,
Fuzzy Logic Unit
4 Units
B
High-density and Mixed I/O, Cam Positioner,
Temperature Control, PID Control, Heat/Cool
Temperature Control
8 Units
C
Temperature Sensor, Voice
6 Units
D
Position Control (NC221)
2 Units
When using a combination of A, B, C, and D Units on a Remote I/O Slave Rack,
the number of each model of Unit being used must satisfy the following two formulas.
3A + B + C + 6D 12
A+B+C+D 8
34
Section
Maximum Current and Power Supplied
4-3
In addition, when PC Link Units are used, a maximum of ten Special I/O Units
and PC Link Units total can be mounted to one Expanded PC. When a High-density I/O Unit is mounted to a Remote I/O Slave Rack, the RM001-PV1 or RM201
Remote I/O Master Unit must be used.
4-3
Maximum Current and Power Supplied
The power supplies, including those built in the CPUs, are limited in the total current they can supply to I/O units.
The table below shows the maximum currents supplied by each power supply.
There are three categories in the “Maximum current supplied”:
1, 2, 3...
1. The 5-V internal logic current powers I/O Cards and communications cards.
Refer to the deductions table to determine what trade-offs must be made
when the total I/O and peripherals exceed the CPUs internal logic current
capacity.
2. The 26-V relay current powers relay output cards and ID Sensor Units.
3. Finally, the external 24-VDC power supply on the CPU powers external input devices.
The total wattage of all three categories cannot exceed the wattage listed in the
last column, “Maximum power”.
You should not exceed any of the individual current ratings for the voltage
supplied by any single unit, nor should you exceed the total maximum power output.
Current Supplied
Name
CPU Rack
Model number
C200H-CPU01-E
Max. current supplied
5V
(internal logic
current)
26 V
(relay current)
1.6 A
0.6 A
C200H-CPU03-E
C200H-CPU11-E
1.4 A
Expansion
C200H-PS221
2.7 A
I/O Rack
C200H-PS211
Slave Rack
C200H-RT001-P
2.7 A
0.6 A
0.6 A
24 V
(No-voltage
contact current)
Maximum
power
0.8 A
23 W
---
18 W
0.8 A
22 W
0.8 A
28 W
---
23 W
0.8 A
28 W
C200H-RT002-P
---
23 W
C200H-RT201
0.8 A
28 W
C200H-RT202
---
23 W
Note The figures shown in the “maximum current supplied” and “maximum power
supplied” columns are computed with the power consumed by the Backplanes,
CPU, Memory Cassettes, Peripheral Devices, I/O Power Supply Units, and
Slave Units already calculated.
Design the system so that the following two conditions are satisfied.
Condition 1
(1) (Total current consumption of all Units in the 5-V system) ≤ (the figure in the
5-V column)
(2) (Total current consumption of all Units in the 26-V system) ≤ (the figure in the
26-V column)
(3) (Total current consumption of all Units in the 24-V system) ≤ (the figure in the
24-V column)
Condition 2
(1) x 5 V + (2) x 26 V + (3) x 24 ≤ (maximum power supplied)
35
Section
Maximum Current and Power Supplied
4-3
Deductions Table
CPU11-E 5-V
consumption (I/O card)
CPU01/03-E 5-V
consumption (I/O card)
≤ 1.4 A
≤ 1.6 A
None
> 1.4 A, but ≤ 1.7 A
> 1.6 A, but ≤ 1.9 A
PROM Writer and CPU-mounting Host Link Unit
> 1.7 A, but ≤ 1.9 A
> 1.9 A, but ≤ 2.1 A
PROM Writer, CPU-mounting Host Link Unit, Peripheral Interface
Unit
> 1.9 A, but ≤ 2.1 A
> 2.1 A, but ≤ 2.3 A
PROM Writer, CPU-mounting Host Link Unit, Peripheral Interface
Unit, and Printer Interface Unit
Current Drawn from 5-V
Supply
Peripheral device deductions
Unit
DC Input
Model number
C200H-ID211
Current
consumption
0.01 A each
C200H-ID212
No-Voltage Contact
C200H-ID001
Input
C200H-ID002
AC Input
C200H-IA121
C200H-IA122/IA122V
C200H-IA221
C200H-IA222/IA222V
AC/DC Input
C200H-IM211
C200H-IM212
Contact Output
C200H-OC221
C200H-OC222
C200H-OC223
C200H-OC224
Transistor Output
C200H-OC225
0.05 A
C200H-OD411
0.14 A
C200H-OD211
0.16 A
C200H-OD212
0.18 A
C200H-OD213
0.14 A
C200H-OD214
C200H-OD216
0.01 A each
C200H-OD217
C200H-OD21A
0.16 A
C200H-OA121-E
0.14 A
C200H-OA122-E
C200H-OA223
C200H-OA222V
0.18 A
0.18 A
0.20 A
C200H-OA224
0.27 A
Analog Timer Unit
C200H-TM001
0.06 A
B7A Interface Unit
C200H-B7AI1
0.10 A
Triac Output
C200H-B7AO1
Host Link
0.25 A
C200H-LK201-V1
0.15 A
C200H-LK202-V1
0.25 A
PC Link
C200H-LK401
0.35 A
Remote Master
C200H-RM001-PV1
0.20 A
C200H-RM201
0.25 A
C200HW-SLK13/SLK14/
SLK23/SLK24
0.8 A
SYSMAC LINK Unit
36
C200H-LK101-PV1
Section
Maximum Current and Power Supplied
Unit
Model number
4-3
Current
consumption
SYSMAC NET Link Unit
C200HS-SNT32
1.0 A
Feed Adapter
C200H-APS01/ASP02
0A
TTL Input
C200H-ID501
0.13 A
DC Input
C200H-ID215
TTL Output
C200H-OD501
Transistor Output
C200H-OD215
TTL I/O
C200H-MD501
DC Input/Transistor
C200H-MD115
Output
C200H-MD215
High-speed Counter
C200H-CT001-V1
0.22 A
0.18 A
0.30 A
C200H-CT002
Position Control
Analog Input
Analog
g Output
Temperature Control
U i
Units
C200H-NC111
0.15 A
C200H-NC112
0.15 A
C200H-NC211
0.50 A
C200H-AD001
0.55 A
C200H-AD002
0.45 A
C200H-DA001
C200H-DA002
C200H-TC001
C200H-TC002
C200H-TC003
0.65 A
0.6 A
0.33 A
C200H-TC101
C200H-TC102
C200H-TC103
Heat/Cool Temperature
C
Control
l Units
U i
C200H-TV001
C200H-TV002
C200H-TV003
0.33 A
C200H-TV101
C200H-TV102
C200H-TV103
PID Control Units
C200H-PID01
C200H-PID02
C200H-PID03
0.33 A
Temperature Sensor
C200H-TS001/TS002
0.45 A
Input
C200H-TS101/TS102
0.35 A
ASCII
C200H-ASC02
0.15 A
Voice Output
C200H-OV001
0.30 A
ID Sensor
C200H-IDS01-V1
0.25 A
C200H-IDS21
Fuzzy Logic Unit
C200H-FZ001
0.30 A
Cam Positioner
C200H-CP114
0.30 A
Current Drawn from 26-V
Supply
Unit
Model number
Contact Output
C200H-OC221/OC222/OC223/
OC224/OC225
Transistor Output
C200H-OD216/OD217
ID Sensor
C200H-IDS01-V1/IDS21
Current
consumption
0.075 A*
0.12 A
37
Section
Maximum Current and Power Supplied
4-3
Note *With all eight bits on simultaneously.
Current Drawn from 24-V
Supply
Unit
Model number
No-Voltage Contact
Input Units
Calculation Examples
C200H-ID001/ID002
Current
consumption
0.06 A
The total power consumption for each Rack can be obtained from the following
formulas:
CPU Rack =
Total power consumption for each Unit + 7 (8)
(VA)
0.6 x 0.55 (1)
7 = CPU power consumption, (8) = Power consumption of the CPU11-E
0.6 = 60% efficiency
0.55 (1) = Power rate (Number in parentheses: when CPU03-E is used.)
All other Racks =
Total power consumption for each Unit + 2
0.6 x 0.55 (1)
(VA)
2 = I/O Power Supply Unit (Remote I/O Slave Unit) power consumption
0.6 = 60% efficiency
0.55 (1) = Power rate (Number in parentheses: when PS211, RT002-P or RT202
is used.)
Example 1
Assume that four Contact Output Units, three No-Voltage Contact Input Units,
and one Host Link Unit are mounted to a Rack, along with CPU01-E. The following table shows how the total power consumption is calculated.
Voltage
Example 2
Current consumption
(1) 0.01 x 7 + 0.25 = 0.32 A (≤ 1.6 A)
(1) x 5 V = 1.6 W
26 V
(2) 0.075 x 4 = 0.30 A (≤ 0.6 A)
(2) x 26 V = 7.8 W
24 V
(3) 0.06 x 3 + 0.3 = 0.48 A (≤ 0.8 A)
(3) x 24 V = 11.52 W
Total
---
20.92 W (≤ 23 W)
Assume that six DC Input Units and two High-speed Counter Units are mounted
to a Rack, along with the PS221 Power Supply. The following table shows how
the total power consumption is calculated.
Voltage
Example 3
Current consumption
Power consumption
5V
(1) 0.01 x 6 + 0.3 x 2 = 0.66 A (≤ 2.7 A)
(1) x 5 V = 3.3 W
26 V
(2) 0
(2) 0
24 V
(3) Service power supply = 0.8 A (≤ 0.8A)
(3) x 24 V = 19.2 W
Total
---
22.5 W (≤ 28 W)
Assume that the following Units are mounted to a Rack to which a C200HCPU11-E is mounted. The following table shows how the total power consumption is calculated.
Voltage
Current consumption
Power consumption
5V
(1) 0.01 x 6 + 0.18 = 0.24 A (≤ 1.1 A)
(1) x 5 V = 1.2 W
26 V
(2) 0.075 x 4 = 0.30 A(≤0.6 A)
(2) x 26V = 7.8 W
24 V
(3) 0.06 x 2 + 0.3 = 0.42 A(≤0.8 A)
(3) x 24 V = 10.08 W
Total
---
19.08 W (≤ 20.5 W)
• Peripheral Interface Unit (IP006)
• SYSMAC LINK Units (SLK22):
• Contact Output Units (OC221):
• No-Voltage Contact Input Units (ID001):
38
Power consumption
5V
1
6
2
Section
Maximum Current and Power Supplied
• High-density and Mixed I/O Units (MD215):
• Current for MD215:
Example 4
1
0.3 A
Assume that the following Units are mounted to a rack to which is mounted the
C200H-CPU11-E. The following table shows how the total power consumption
is calculated.
Voltage
Current consumption
Power consumption
5V
(1) 0.01 x 5 + 0.3 x 1 = 0.35 A (≤ 0.7 A)
(1) x 5 V = 1.75 W
26 V
(2) 0
(2) 0
24 V
(3) Current=0.5 A(≤0.8 A)
(3) x 24 V = 12 W
Total
---
13.75 W (≤ 18.5 W)
• Peripheral Interface Unit (IP006)
• SYSMAC NET Link Units (SNT32):
• Central Power Supply Adapter (Current 0):
• DC Input Units (ID212):
• High-speed Counter Units (CT002):
• Current for ID212:
Calculation of Power
Consumption for Each
Rack (Examples)
4-3
1
1
5
1
0.5 A
The total power consumption for each Rack can be obtained from the following
formulas:
• CPU Rack: Total power consumption for each Unit + 7 (8)
(VA)
0.6 x 0.55 (1)
Where:
7 = Power consumption of the CPU,
(8) = Power consumption of the CPU11-E,
0.6 = 60% efficiency, and
0.55 (1) = Power rate (Number in parentheses: when CPU03-E is used.)
• Expansion I/O Power Supply/Remote I/O Slave Unit:
Total power consumption for each Unit + 2
0.6 x 0.55 (1)
(VA)
Where:
2 = Power consumption of the I/O Power Supply or
Remote I/O Slave Unit,
0.6 = 60% efficiency, and
0.55 (1) = Power rate (Number in parentheses: when
PS211, RT002-P or RT202 is used.)
39
Section
I/O Connections
4-4
4-4
I/O Connections
Connect the I/O Devices to the I/O Units using AWG 22 (cross-sectional area of
0.3 mm2) for 19-terminal terminal blocks and AWG 22 to 18 lead wire (cross-sectional area of 0.3 to 0.75 mm2) for 10 terminal terminal blocks. The terminals
have screws with 3.5-mm diameter heads and self-raising pressure plates. Connect the lead wires to the terminals as shown below. Tighten the screws with a
torque of 0.8 N S m.
If you wish to attach solderless type terminals to the ends of the lead wires, use
terminals having the dimensions shown below.
7 mm max.
Terminal Block
7 mm max.
The terminal block of an I/O Unit can be removed by loosening the mounting
screws. You do not have to remove the lead wires from the terminal block in order to remove it from an I/O Unit.
Locks for terminal block.
Unlock to remove the terminal
block from the I/O Unit. Make
sure the terminal block is
locked securely after wiring is
complete.
40
Section
I/O Connections
I/O Unit Cover
4-4
A C200H-COV11 Cover is provided as an I/O Unit cover for Units that use 10P
terminal block connectors. After the I/O wiring has been completed, slide the
cover up from the bottom, as shown in the illustration below.
Attach
Remove
DC Two-wire Sensor
Connection Precautions
I/O Unit cover
If a two-wire sensor is used with a 12-VDC or 24-VDC input device, make sure
that the following conditions are satisfied. Malfunctions will occur if these conditions are not satisfied.
• The relationship between the PC ON voltage and the sensor residual voltage is
as follows:
VON x VCC – VR
• The relationship between the PC ON current and the sensor control output
(load current) is as follows:
IOUT (min) x ION x IOUT (max)
ION = (VCC – VR – 1.5 (PC internal residual voltage))/RIN
Connect R bleeder resistance if ION is less than IOUT (min).
The constant for bleeder resistance is determined by the following equation.
R x (VCC – VR)/(IOUT (min) – ION)
Power W y (VCC – VR)2/R 4 (margin)
• The relationship between the PC OFF current and sensor leakage current is as
follows:
IOFF x Ileak
Refer to the information on input and output leakage current on page 56 for
details.
The value of IOFF depends on the Unit used. For Input Units that have an unspecified OFF current, however, the value of IOFF is always 1.8 mA.
DC Input Unit
Two-wire sensor
VR
R
RIN
VCC
Wiring Examples
VCC:
Power supply voltage
VR:
Sensor output residual voltage
VON:
PC ON voltage
IOUT:
Sensor control output (load current)
ION:
PC OFF current
Ileak:
Sensor leakage current
IOFF:
PC OFF current
R:
Bleeder resistance
RIN:
PC input impedance
The following are examples of how to connect I/O devices to I/O Units. During
wiring, work slowly and carefully. If an input device is connected to an Output
Unit, damage may result. Check all I/O devices to make sure they meet the specifications (refer to Appendix B Specifications).
41
Section
I/O Connections
4-4
DC Input Units
Contact output
IN
DC input
COM
When using the configuration shown below, the sensor and Input Unit should
receive their power from the same supply.
NPN current output
+
Current
regulator
IN
Output
7 mA
0V
Sensor
Power
Supply
DC input
COM
NPN open-collector output
+
Sensor
Power
Supply
DC input
IN
Output
7 mA
COM
0V
PNP current output
+
Sensor
Power
Supply
Output
AC/DC input
IN
7 mA
0V
COM
0V
The circuit below should be used for I/O devices having a voltage output.
Voltage output
+
COM
Output
0V
IN
DC input
Sensor
Power
Supply
The circuit below should NOT be used for I/O devices having a voltage output.
Voltage output
+
Output
0V
42
Sensor
Power
Supply
IN
COM
DC input
Section
I/O Connections
4-4
AC Input Units
Contact output
IN
AC input
COM
AC Switching
IN
Prox.
switch
main
circuit
! Caution
Output Units
AC input
COM
When using Reed switch as the input contacts for AC Input Units, be sure the
allowable current of the switch is at least 1 A. Using switches with lower capacities may cause the contacts to fuse due to surge current.
A fuse placed in the output circuit will protect the output element, circuit board,
etc., in the event of a short circuit in the output circuit. Although some transistor
Output Units and Triac Output Units have a built-in fuse, it is recommended that
you connect an external fuse to each Output Unit for extra safety and ease of
maintenance.
43
SECTION 5
Installation Environment
This section details the necessary environment and conditions for installation of the PC. For specific instructions on mounting
Units and wiring for I/O and power, refer to Section 2-4 Power Supply and Section 3-3 System Configurations.
5-1
5-2
5-3
5-4
Installation Environment . . . . . . . . . . . . . . . . . . . . . . . . . . . . . . . . . . . . . . . . . . . . . . . . . . .
Mounting Requirements . . . . . . . . . . . . . . . . . . . . . . . . . . . . . . . . . . . . . . . . . . . . . . . . . . . .
Duct Work . . . . . . . . . . . . . . . . . . . . . . . . . . . . . . . . . . . . . . . . . . . . . . . . . . . . . . . . . . . . . .
Preventing Noise . . . . . . . . . . . . . . . . . . . . . . . . . . . . . . . . . . . . . . . . . . . . . . . . . . . . . . . . .
45
Section
Installation Environment
5-1
5-1
Installation Environment
This section details the necessary environmental conditions for installing the
PC.
! Caution
Ambient Conditions
Static electricity can damage PC components. Your body can carry an electrostatic charge, especially when the humidity is low. Before touching the PC, be
sure to first touch a grounded metallic object, such as a metal water pipe, in order
to discharge any static build-up.
Do not install the PC in any of the following locations. Doing so will affect PC life
and may affect operating performance.
• Locations subject to ambient temperatures lower than 0°C or higher than
55°C.
• Locations subject to drastic temperature changes or condensation.
• Locations subject to ambient humidity lower than 10% or higher than 90%.
• Locations subject to corrosive or flammable gases.
• Locations subject to excessive dust (especially iron dust) or chloride.
• Locations that would subject the CPU to direct shock or vibration.
• Locations that would subject the PC to water, oil, or chemical reagents.
• Locations exposed to direct sunlight.
Cooling
There are two points to consider in order to ensure that the PC does not overheat. The first is the clearance between Racks, and the second is installation of a
cooling fan.
Clearance Between
Racks
The Racks need to have sufficient room between each other to allow for I/O wiring, and additional room to ensure that the I/O wiring does not hamper cooling.
However, the Racks must be mounted close enough to each other that the
length of the Connecting Cable between any two Racks does not exceed 10 m,
and the total length of the Connecting Cables between all Racks does not exceed 12 m. As a general rule, about 70 to120 mm should be left between any two
Racks.
Cooling Fan
A cooling fan is not always necessary, but may be needed in some installations.
Try to avoid mounting the PC in a warm area, or over a source of heat. A cooling
fan is needed if the ambient temperature may become higher than that specified
(refer to Appendix B Specifications). If the PC is mounted in an enclosure, a cooling fan may need to be installed, as shown below, to maintain the ambient temperature within specifications.
Fan
PC
Control Panel
46
Section
Mounting Requirements
5-2
5-2
Mounting Requirements
The PC consists of from one to three Racks. Each Rack must be mounted vertically, that is with the printing on the front panels oriented as it would normally be
read. The Racks should be mounted one above the other with the CPU Rack
uppermost as shown below.
CPU Rack
These connectors
are not used.
Cover them with
caps.
Expansion Rack
Expansion Rack
The C200H is approved by Underwriters Laboratories under the condition that,
“The device must be mounted vertically for ventilation purposes”.
DIN Rail Mounting
The PC may be mounted using DIN Rail if desired. This type of mounting is not
required, and the PC may be directly mounted to any sturdy support meeting the
environmental specifications (refer to Appendix B Specifications). If you want to
mount the PC on DIN Rail, you can order a DIN Rail from OMRON (refer to Appendix B Standard Models). DIN Rails come in the two heights shown below.
7.3-mm Height
16-mm Height
47
Section
Mounting Requirements
DIN Rail Mounting
Bracket
5-2
The DIN Rail Mounting Bracket shown below is necessary for mounting the PC
to the DIN Rail.
Procedure
1, 2, 3...
1. The following diagram is a view of the back of the Backplane. Attach one
Mounting Bracket to the left and right sides of the Backplane as shown below.
Backplane
DIN Rail Mounting
Bracket
There are two Backplane mounting
screws each on the
left and right sides of
the Backplane. Use
these screws to attach the DIN Rail
Mounting Brackets to
the Backplane.
2. Mount the Backplane to the DIN Rail so that the claws on the Mounting
Brackets fit into the upper portion of the DIN Rail as shown below.
This claw fits into the DIN Rail
DIN Rail
Backplane
DIN Rail Mounting Bracket
48
Section
Duct Work
5-3
3. Loosen the screws attaching the Mounting Brackets to the Backplane. Slide
the Backplane upward as shown below so that the Mounting Bracket and
Backplane clamp securely onto the DIN Rail. Tighten the screws.
DIN Rail Mounting Bracket
DIN Rail
Hold-down bracket
Projections
5-3
Slide this screw to the top of the
projection and then tighten it.
Duct Work
If power cables carrying more than 10 A 400 V, or 20 A 220 V must be run alongside the I/O wiring (that is, in parallel with it), at least 300 mm must be left between the power cables and the I/O wiring as shown below.
Low current cable
1
300 mm min.
Control cable
2
Power cable
300 mm min.
3
Grounding at resistance
of less than 100 W
Where:
1 = I/O wiring
2 = General control wiring
3 = Power cables
49
Section
Preventing Noise
5-4
If the I/O wiring and power cables must be placed in the same duct (for example,
where they are connected to the equipment), they must be shielded from each
other using grounded metal plates.
Metal plate (iron)
200 mm min.
1
2
3
Grounding at resistance
of less than 100 W
Where:
5-4
1 = I/O wiring
2 = General control wiring
3 = Power cables
Preventing Noise
In order to prevent noise from interfering with the operation of the PC, use AWG
14 twisted-pair cables (cross-sectional area of at least 2 mm2). Avoid mounting
the PC close to high-power equipment, and make sure the point of installation is
at least 200 mm away from power cables as shown in the following diagram.
Power lines
200 mm min.
PC
200 mm min.
Whenever possible, use wiring conduit to hold the I/O wiring. Standard wiring
conduit should be used, and it should be long enough to completely contain the
I/O wiring and keep it separated from other cables.
50
SECTION 6
Power Considerations
Use a commercially available 100 to 120 VAC, 200 to 240 VAC, or 24 VDC power source, according to the model of PC you
are using (refer to Appendix B Specifications). Expansion I/O Racks, if used, must also be connected to the power source. If
possible, use independent power sources for the PC, input devices, and output devices. All Racks of the PC may be connected
to one power source.
6-1
6-2
6-3
6-4
Grounding . . . . . . . . . . . . . . . . . . . . . . . . . . . . . . . . . . . . . . . . . . . . . . . . . . . . . . . . . . . . . . .
Insulation . . . . . . . . . . . . . . . . . . . . . . . . . . . . . . . . . . . . . . . . . . . . . . . . . . . . . . . . . . . . . . .
Emergency Stop . . . . . . . . . . . . . . . . . . . . . . . . . . . . . . . . . . . . . . . . . . . . . . . . . . . . . . . . . .
Wiring . . . . . . . . . . . . . . . . . . . . . . . . . . . . . . . . . . . . . . . . . . . . . . . . . . . . . . . . . . . . . . . . . .
51
Section
Emergency Stop
6-1
6-3
Grounding
The Line Ground (LG) terminal is a noise-filtered neutral terminal that does not
normally require grounding. If electrical noise is a problem, however, this terminal should be connected to the Ground (GR) terminal.
To avoid electrical shock, attach a grounded (earth ground) AWG 14 wire (crosssectional area of at least 2 mm2) to the GR terminal. The resistance to ground
must be less than 100 W. Do not use a wire longer than 20 m. Care must be taken, because ground resistance is affected by environmental conditions such as
soil composition, water content, time of year, and the length of time since the
wire was laid underground.
PC operation may be adversely affected if the ground wire is shared with other
equipment, or if the ground wire is attached to the metal structure of a building.
When using an Expansion I/O Rack, the Rack must also be grounded to the GR
terminal. The same ground can be used for all connections.
6-2
Insulation
If a separate ground is being supplied to different Racks, Insulating Plates must
be used to insulate the Racks from each other. Insulating Plates are supplied as
an accessory (refer to Appendix B Specifications).
6-3
Emergency Stop
An external relay should be used to form an emergency stop circuit that turns the
power to the PC OFF in the event of an emergency. An emergency stop routine
in the PC program is not sufficient to ensure safety. The circuit shown below is an
example of an emergency stop circuit.
MCB1
Power section
MCB2
CR1
Control section
Transformer or
noise filter
PC
Twisted
DC voltage
regulator
PC RUN
output
DC input/output
CR1
52
Surge
suppressor
+
-
Section
Wiring
Power Failure
6-4
A sequential circuit is built into the PC to handle power interruptions. This circuit
prevents malfunctions due to momentary power loss or voltage drops. A timing
diagram for the operation of this circuit is shown below.
The PC ignores all momentary power failures if the interruption lasts no longer
than 10 ms. If the interruption lasts between 10 and 25 ms, the interruption may
or may not be detected. If the supply voltage drops below 85% of the rated voltage for longer that 25 ms (less for the DC Power Supply), the PC will stop operating and the external outputs will be automatically turned OFF. Operation is resumed automatically when the voltage is restored to more than 85% of the rated
value.
6-4
Wiring
The following diagrams show the proper way to connect the power source to the
PC. The terminals marked “NC” are not connected internally.
C200H-CPU01-E/CPU11-E
Screw (3.5 mm head with
self-raising pressure plate)
Breaker
1:1 isolation
transformer
Voltage selector
Short: 100 to 120 VAC
Open: 200 to 240 VAC
Short-circuit these terminals with the shorting
bracket supplied as an
accessory to select 100
to 120 VAC supply voltage. For 200 to 240 VAC
leave them open.
C200H-PS221
Screw (3.5 mm head with
self-raising pressure plate)
Voltage selector
Short: 100 to 120 VAC
Open: 200 to 240 VAC
Short-circuit these terminals
with the shorting bracket
supplied as an accessory to
select 100 to 120 VAC supply voltage. For 200 to
240 VAC, leave them open.
AC Power Supply Wiring
Isolation transformer
• Noise between the PC
and ground can be significantly reduced by
connecting a 1-to-1 isolation transformer. Do
not ground the secondary coil of the transformer.
AC power source
• Supply 100 to
120 or 200 to 240
VAC
• Keep voltage
fluctuations within
the specified range
(refer to Appendix
B Specifications)
Power line
• Use AWG 14 twisted
pair cable (cross-sectional area of 2 mm2 min).
Use 1.25-mm2 cables or larger. The terminal blocks have screws with 3.5-mm
diameter heads and self-raising pressure plates. For connecting to the terminal
blocks, use round crimp terminals for 3.5-mm diameter heads. Directly connecting stranded wires to the terminal blocks may cause a short-circuit.
53
Section
Wiring
! Caution
6-4
Tighten the AC Power Supply terminals on the terminal blocks to the torque of
0.8 N S m. Insufficient tightening may cause short-circuiting, malfunction, or
burning.
C200H-CPU03-E
Screw (3.5 mm head with
self-raising pressure plate)
Breaker
• Supply 24 VDC
• Keep voltage
fluctuations within
the specified range
(refer to Appendix
B Specifications)
C200H-PS211
Screw (3.5 mm head with
self-raising pressure plate)
Voltage selector
Short: 100 to 120 VAC
Open: 200 to 240 VAC
Short-circuit these terminals
with the shorting bracket
supplied as an accessory to
select 100 to 120 VAC supply voltage. For 200 to 240
VAC, leave them open.
Power Supply Wiring
54
Power line
• Use AWG 14 twisted
pair cable (cross-sectional area of 2 mm2 min).
Use 1.25-mm2 cables or larger. The terminal blocks have screws with 3.5-mm
diameter heads and self-raising pressure plates. For connecting to the terminal
blocks, use round crimp terminals for 3.5-mm diameter heads. Directly connecting stranded wires to the terminal blocks may cause a short-circuit.
Tighten the terminals on the terminal blocks to the torque of 0.8 N S m.
SECTION 7
Safety Considerations
There are certain safety requirements to be considered when installing the PC. Some of these, such as the emergency stop
circuit (refer to Section 2-4 Power Supply), are part of the initial wiring. The considerations described below should be kept in
mind when operating the PC and when connecting I/O devices to the PC.
7-1
7-2
Interlock Circuits . . . . . . . . . . . . . . . . . . . . . . . . . . . . . . . . . . . . . . . . . . . . . . . . . . . . . . . . .
Wiring . . . . . . . . . . . . . . . . . . . . . . . . . . . . . . . . . . . . . . . . . . . . . . . . . . . . . . . . . . . . . . . . . .
55
Section
Wiring
7-1
7-2
Interlock Circuits
When the PC controls an operation such as the clockwise and counterclockwise
operation of a motor, provide an external interlock such as the one shown below
to prevent both the forward and reverse outputs from turning ON at the same
time.
Interlock circuit
00501
MC2
MC1 Motor clockwise
PC
00502
MC1
MC2 Motor counterclockwise
This circuit prevents outputs MC1 and MC2 from ever both being ON at the same
time. Even if the PC is programmed improperly or malfunctions, the motor is protected.
7-2
Wiring
Power Supply Output
The 24 VDC output of the CPU and Expansion I/O Power Supply may be used to
power other devices. The output current of these supplies is limited to 0.3 A. A
separate power supply must be provided if the devices being powered require a
higher current.
Input Leakage Current
When two-wire sensors, such as photoelectric sensors, proximity sensors, or
limit switches with LEDs, are connected to the PC as input devices, the input bit
may be turned ON erroneously by leakage current. In order to prevent this, connect a bleeder resistor across the input as shown below.
Input
power
supply
Bleeder
resistor
R
PC
Sensor
If the leakage current is less than 1.3 mA, there should be no problem. If the leakage current is greater than 1.3 mA, determine the value and rating for the
bleeder resistor using the following formulas.
I = leakage current in mA
7.2
kW max.
R = ––––––
2.4 x I – 3
2.3
W = ––– W min.
R
56
Section
Wiring
Output Leakage Current
7-2
If there is a possibility of leakage current causing a transistor or triac to malfunction, connect a bleeder resistor across the output as shown below.
OUT
L
R
Load power supply
PC
Bleeder resistor
COM
Determine the value and rating for the bleeder resistor using the following formula.
R
Eon
–––
I
Where
Eon = ON voltage of the load
I = leakage current in mA
R = bleeder resistance
Output Surge Current
When connecting a transistor or triac Output Unit to an output device having a
high surge current (such as an incandescent lamp), care must be taken to avoid
damage to the Output Unit. The transistor and triac Output Units are capable of
withstanding a surge current of ten times the rated current. If the surge current
for a particular device exceeds this amount, use the circuit shown below to protect the Output Unit.
L
OUT
+
R
COM
Another way of protecting the Output Unit lets the load draw a small current
(about one third the rated current) while the output is OFF, significantly reducing
the surge current. This circuit (shown below) not only reduces the surge current,
but also reduces the voltage across the load at the same time.
R
OUT
L
+
COM
Transistor Output
Residual Voltage
When connecting TTL circuits to transistor Output Units, it is necessary to connect a pull-up resistor and a CMOS IC between the two. This is because of the
residual voltage left on the transistor output after the output turns OFF.
57
Section
Wiring
Inductive Load Surge
Suppressor
7-2
When an inductive load is connected to an I/O Unit, it is necessary to connect a
surge suppressor or diode in parallel with the load as shown below. This is so
that the back EMF generated by the load will be absorbed.
OUT
L
Relay Output Unit
Triac Output Unit
Surge suppressor
COM
OUT
L
+
Relay Output Unit
Transistor Output Unit
Diode
COM
Electrical Noise
Be sure to take appropriate measures when any electrical device likely to produce noise is connected to the PC as a load. Devices generating noise of more
than 1,200 V (such as electromagnetic relays and valves) require noise suppression. For noise sources running off of AC power, connect a diode in parallel
with the coil of each device.
When mounting a CPU Rack and an Expansion I/O Rack together on a mounting
plate, be sure to provide a solid ground the mounting plate. The mounting plate
must be plated with a highly conductive surface in order to ensure noise immunity.
58
Appendix A
Inspection and Maintenance
Certain consumable items in a PC (such as fuses, Relays, or batteries) need occasional replacement. This Appendix explains how to replace each of these items. Refer to Appendix B for the specifications of individual consumable items. Always keep spare items on hand so that they can be used as immediate replacements when needed.
CPU and Power Supply Fuses
Turn counterclockwise
to remove, clockwise to
attach
Standard
screwdriver
To replace a fuse, follow the steps below:
1, 2, 3...
1. Turn OFF the power to the PC.
2. Remove the fuse holder by turning it approximately 50° counterclockwise
with a standard screwdriver.
3. Remove the fuse from the holder.
4. Insert a new fuse.
5. Reattach the fuse holder by turning it approximately 50° clockwise with a
standard screwdriver.
Output Unit Fuses
To replace a fuse, follow the steps below. Use only UL/CSA certified replacement fuses.
Fuse Specifications (5.2-dia. x 20)
Model
F indicator (fuse blowout
detection circuit)
Rating
C200H-OD411
Yes
5 A 125 V
C200H-OD211
No
C200H-OD212
No
C200H-OD213
Yes
C200H-OA121-E
Yes
C200H-OA122-E
Yes
C200H-OA222V
No
3 A 250 V
C200H-OA223
Yes
5 A 250 V
C200H-OA224
No
3.15 A 250 V
8 A 125 V
5 A 125 V
59
Appendix A
Inspection and Maintenance
1, 2, 3...
1. Turn OFF the power to the PC.
2. Detach the terminal block by unlocking the lock levers at the top and bottom
of the terminal block.
3. While pushing down the lock lever on the Backplane with a screwdriver as
shown below, remove the Output Unit.
4. Remove the screw from the top of the Unit (Phillips screwdriver).
5. Detach the case from the Unit (flat-blade screwdriver).
6. Pull out the printed circuit board.
7. Insert a new fuse. A spare fuse is provided inside the rear of the case when
the Unit is delivered.
8. Reassemble in reverse order of assembly.
Output Unit Relays
To replace a Relay, follow the steps below:
1, 2, 3...
1. Turn OFF the power to the PC.
2. Detach the terminal block by unlocking the lock levers at the top and bottom
of the terminal block.
60
Appendix A
Inspection and Maintenance
3. While pushing down the lock lever on the Backplane with a screwdriver as
shown below, remove the Output Unit.
4. Remove the screw from the top of the Unit (Phillips screwdriver).
5. Detach the case from the Unit (flat-blade screwdriver).
6. Pull out the printed circuit board. The Relays are placed on the PC boards of
individual Units as shown in the figures below.
OC221/OC224
0
1
2
3
4
5
6
7
61
Appendix A
Inspection and Maintenance
OC222
0
1
2
3
4
6
8
10
5
7
9
11
OC223
0
1
2
3
4
OC225
8
9
10
11
12
13
14
15
0
1
2
3
4
5
6
7
7. A Relay puller is provided inside the rear of the case when the Unit is delivered. Use the Relay puller to pull out the Relay as shown below. Insert a new
Relay.
Relay puller
Using the Relay puller,
pull the relay up and out
of the socket.
Printed circuit board
8. Reassemble in reverse order of assembly.
62
Appendix A
Inspection and Maintenance
Batteries
Some RAM Packs use a battery (refer to Appendix B for specifications). When
the battery is nearly discharged, the ALARM indicator blinks and the message
“BATT FAIL” appears on the Programming Console. When this occurs, replace
the battery within one week to avoid loss of data. The battery comes together
with its connector as a set. To replace the Battery Set, follow the steps below.
The entire replacement must be completed within five minutes to ensure that the
data will not be lost.
If you are using model C200H-CPU11-E as the CPU, the battery is installed in
the Unit upon delivery.
1, 2, 3...
1. Turn OFF the power to the PC. (If the power was not already ON, turn the
power ON for at least one minute before turning the power OFF.)
2. Remove the cover from the battery compartment of the RAM Pack.
3. Remove the old Battery Set.
4. Install the new Battery Set as shown shown in the following diagram.
Battery
connector
Battery Set
5. Replace the cover of the battery compartment.
6. Press CLR, FUN, MONTR, MONTR or just turn the power to the PC OFF
and then ON again to clear the error message on the Programming Console.
63
Appendix B
Specifications
The following series of figures and tables provides a complete set of specifications for each Unit of the C200H.
Note that I/O Units may take on one of three different shapes. Thus I/O Units are sometimes referred to as A-shape
I/O Units, B-shape, or E-shape I/O Units. Refer to the figures at the end of the I/O Unit specifications for the exact
dimensions of these three shapes of I/O Unit.
General Specifications
Item
C200H-CPU01-E, CPU11-E/PS221
C200H-CPU03/PS211
Supply Voltage
100 to 120/200 to 240 VAC selectable
50/60 Hz
24 VDC
Operating Voltage Range
85 to 132/170 to 264 VAC
20.4 to 26.4 VDC
Power Consumption
120 VA max. per Rack (Backplane)
40 W max. per Rack (Backplane)
Surge Current
Approx. 5 times the normal current
Output Capacity
CPU Rack: 3 A 5 VDC (1.6 A supplied to I/O Units)
Refer to Section 4-4 Special Considerations for C200H-CPU11
Expansion I/O Unit Rack: 3 A 5 VDC (2.7 A supplied to I/O Units)
Fuse
2 A 250 V 5.2 dia. x 20 (MF51NR)
+10%/
–20%
2 A 125 V 5.2 dia. x 20 (MF51NR)
24 VDC Output
0.3 A 24 VDC
Dielectric Strength
2,000 VAC 50/60 Hz for 1 minute between
See Caution.
AC terminals and housing 500 VAC 50/60
Hz for 1 minute between DC terminals and
housing leakage current: 10 mA max.
1,000 Vp-p, pulse width: 100 ns to 1 ms, rise time: 1 ns
Noise Immunity
None
Vibration
Mechanical durability: 10 to 35 Hz, 1 mm double amplitude (24.5 m/s2) in X, Y, and Z
directions, for 2 hours each (When mounted on DIN Rail, 16.7 Hz, 1 mm double
amplitude (4.9 m/s2) in X, Y, and Z directions, for 1 hour each)
Malfunction durability: 2 to 55 Hz, 19.6 m/s2, in X, Y, and Z directions, for 20 minutes
each (When mounted on DIN Rail, 2 to 55 Hz, 2.94 m/s2, in X, Y, and Z directions, for 20
minutes each)
Shock
98 m/s2 in X, Y, and Z directions, 3 times each
Ambient Temperature
Operating: 0° to 55°C (0° to 45°C for Programming Console) Storage: –20° to 65°C
Humidity
35 to 85% RH (without condensation)
Atmosphere
Must be free of the following:
• Corrosive gases
• Abrupt temperature changes
• Direct sunlight
• Dust, salt, or metal filings
• Water, oil, or chemicals
Grounding
Less than 100 W
Degree of Protection
Mounted in a panel
Weight
6 kg max.
! Caution
When conducting an insulation resistance or dielectric strength test, disconnect the power supply
terminals from the LG and GR terminals. Do not conduct a dielectric strength test on the C200HCPU03-E, PS211, RT002-P, or RT202 Units. The power supply input line and internal circuit of the
24 VDC Power Supply are not isolated from each other. If a dielectric strength test is conducted,
the Power Supply will be damaged.
65
Appendix B
Specifications
CPU Specifications
Main Control Element
MPU, CMOS, LS-TTL
Programming Method
Ladder diagram
Instruction Length
1 address/instruction, 1 to 4 words/instruction
Number of Instructions
C200H-CPU11
145 (12 basic instructions + 133 special instructions)
159 (12 basic instructions + 147 special instructions)
Execution Time
Basic instructions: 0.75 to 2.25 ms
Memory Capacity
6,974 words (with 8k-word memory)
I/O bits
480
(00000 through 02915)
I/O Units mounted
Special I/O Units
to Remote I/O Slave 1,600
Optical I/O Units
and I/O Terminals
512
IR bits
3,296
(03000 through 23515)
Racks 800 (05000
through 09915)
(20000 through
23115)
SR bits
312 (23600 through 25507)
TR bits
8 (TR 0 through 7)
HR bits
1,600 (HR 0000 through 9915)
AR bits
448 (AR 0000 through 2715
LR bits
1,024 (LR 0000 through 6315)
Timers/Counters
512 (TIM/CNT 000 through 511)
TIMHs: 0 through 99.99 s
DM words
Read/write: 1,000 (DM 0000 through 0999)
Read only: 1,000 (DM 1000 through 1999)
RUN Output
Memory Protection
Self-diagnostic Functions
Program Check
66
Special instructions: 34 to 724 ms
(10000 through
19915)
TIMs: 0 through 999.9 s
CNT: 0 through 9999 counts
DM area is in Memory Pack.
Contacts are closed while PC is in RUN mode and operating.
Max. switching capacity: 2A 250 VAC (resistive load)
0.5 A 250 VAC (inductive load, cos of phase angle = 0.4)
2 A 24 VDC
Status of HR bits, AR bits, preset value of counters (CNT), and contents of data memory
(DM) are retained during power failure. Length of memory protection depends on the
Memory Pack model being used (refer to Section 2-6 Memory Packs).
CPU failure (watchdog timer)
Battery failure
Cycle time error
Memory failure
I/O bus failure
Host Link error
Remote I/O error, etc.
Program check (executed on start of RUN operation):
END missing
Instruction errors
(Program can be checked by Programming Console or GPC at three levels.)
Appendix B
Specifications
AC Input Unit C200H-IA121
Rated Input Voltage
100 to 120 VAC 50/60 Hz
Operating Input Voltage
85 to 132 VAC 50/60 Hz
Input Impedance
9.7 kW (50 Hz), 8 kW (60 Hz)
Input Current
10 mA typical (at 100 VAC)
ON Voltage
60 VAC min.
OFF Voltage
20 VAC max.
ON Response Time
35 ms max. (at 100 VAC, 25°C)
OFF Response Time
55 ms max. (at 100 VAC, 25°C)
No. of Circuits
1 (8 points/common)
Internal Current Consumption
10 mA 5 VDC max.
Weight
250 g max.
Dimensions
A-shape
Circuit Configuration
IN
100 to
120 VAC
IN
0.33 mF 470 W
330 kW
910 W
COM
Internal
circuit
Input LED indicator
Terminal Connections
0
A0
1
2
100 to
120 VAC
3
4
5
6
7
COM
NC
A1
A2
A3
A4
A5
A6
A7
A8
A9
67
Appendix B
Specifications
AC Input Unit C200H-IA122/IA122V
Rated Input Voltage
100 to 120 VAC 50/60 Hz
Operating Input Voltage
85 to 132 VAC 50/60 Hz
Input Impedance
9.7 kW (50 Hz), 8 kW (60 Hz)
Input Current
10 mA typical (at 100 VAC)
ON Voltage
60 VAC min.
OFF Voltage
20 VAC max.
ON Response Time
35 ms max. (at 100 VAC, 25°C)
OFF Response Time
55 ms max. (at 100 VAC, 25°C)
No. of Circuits
1 (16 points/common)
Internal Current Consumption
10 mA 5 VDC max.
Weight
IA122: 300 g max.
IA122V: 400 g max.
Dimensions
B-shape
Circuit Configuration
IN
100 to
120 VAC
IN
0.33 mF 470 W
330 kW
910 W
COM
Input LED indicator
Terminal Connections
1
3
5
100 to
120 VAC
7
9
11
13
15
COM
68
B0
A0
A1
A2
A3
A4
A5
A6
A7
A8
0
B1
2
B2
4
B3
6
B4
8
B5 10
B6 12
B7 14
B8
NC
B9
NC
Internal
circuit
Appendix B
Specifications
AC Input Unit C200H-IA221
Rated Input Voltage
200 to 240 VAC 50/60 Hz
Operating Input Voltage
170 to 264 VAC 50/60 Hz
Input Impedance
21 kW (50 Hz), 18 kW (60 Hz)
Input Current
10 mA typical (at 200 VAC)
ON Voltage
120 VAC min.
OFF Voltage
40 VAC max.
ON Response Time
35 ms max. (at 200 VAC, 25°C)
OFF Response Time
55 ms max. (at 200 VAC, 25°C)
No. of Circuits
1 (8 points/common)
Internal Current Consumption
10 mA 5 VDC max.
Weight
250 g max.
Dimensions
A-shape
Circuit Configuration
IN
0.15 mF
820 W (IA221)
IN
200 to
240 VAC
680 kW
910 W
COM
Internal
circuit
Input LED indicator
Terminal Connections
0
A0
1
2
100 to
120 VAC
3
4
5
6
7
COM
NC
A1
A2
A3
A4
A5
A6
A7
A8
A9
69
Appendix B
Specifications
AC Input Unit C200H-IA222/IA222V
Rated Input Voltage
200 to 240 VAC 50/60 Hz
Operating Input Voltage
170 to 264 VAC 50/60 Hz
Input Impedance
21 kW (50 Hz), 18 kW (60 Hz)
Input Current
10 mA typical (at 200 VAC)
ON Voltage
120 VAC min.
OFF Voltage
40 VAC max.
ON Response Time
35 ms max. (at 200 VAC, 25°C)
OFF Response Time
55 ms max. (at 200 VAC, 25°C)
No. of Circuits
1 (16 points/common)
Internal Current Consumption
10 mA 5 VDC max.
Weight
IA222: 300 g max.
IA222V: 400 g max.
Dimensions
B-shape
Circuit Configuration
IN
0.15 mF 680 W (IA222)
IN
200 to
240 VAC
680 kW
910 W
COM
Input LED indicator
Terminal Connections
1
3
5
100 to
120 VAC
7
9
11
13
15
COM
70
B0
A0
A1
A2
A3
A4
A5
A6
A7
A8
0
B1
2
B2
4
B3
6
B4
8
B5 10
B6 12
B7 14
B8
NC
B9
NC
Internal
circuit
Appendix B
Specifications
No-Voltage Contact Input Unit C200H-ID001
Input Voltage
No-voltage contact/NPN output type (negative
common)
Input Impedance
3 kW
Input Current
7 mA typical
ON Voltage
(14.4 VDC min.)
OFF Voltage
(5.0 VDC max.)
ON Response Time
1.5 ms max. (no-voltage contact, at 25°C)
OFF Response Time
1.5 ms max. (no-voltage contact, at 25°C)
No. of Circuits
1 (8 points/common)
Internal Current Consumption
10 mA 5 VDC max.
Weight
200 g max.
Dimensions
A-shape
Circuit Configuration
Current
IN
IN
3 kW
0.01 mF
COM
Internal
circuit
1.8
kW
Input LED indicator
0.3 A
24 VDC
Power
supply
+ Internal 24 VDC
– power supply
CPU, Expansion I/O Power
Supply, Remote I/O Slave Unit
Note The power is supplied to the Input Units from the 24 VDC output of the Power Supply of the CPU, Expansion
I/O Unit, or Remote I/O Unit. Never connect 24 VDC output terminals to the input terminals or COM terminals.
Terminal Connections
0
1
2
3
Current
(NPN output)
4
5
6
7
COM
NC
A0
A1
A2
A3
A4
A5
A6
A7
A8
A9
71
Appendix B
Specifications
No-Voltage Contact Input Unit C200H-ID002
Input Voltage
No-voltage contact/NPN output type (positive
common)
Input Impedance
3 kW
Input Current
7 mA typical
ON Voltage
(14.4 VDC min.)
OFF Voltage
(5.0 VDC max.)
ON Response Time
1.5 ms max. (no-voltage contact, at 25°C)
OFF Response Time
1.5 ms max. (no-voltage contact, at 25°C)
No. of Circuits
1 (8 points/common)
Internal Current Consumption
10 mA 5 VDC max.
Weight
200 g max.
Dimensions
A-shape
Circuit Configuration
IN
IN
3 kW
0.01 mF
COM
1.8
kW
Internal
circuit
Current
Input LED indicator
0.3 A
24 VDC
Power
supply
+ Internal 24 VDC
– power supply
CPU, Expansion I/O Power
Supply, Remote I/O Slave Unit
Note The power is supplied to the Input Units from the 24 VDC output of the Power Supply of the CPU, Expansion
I/O Unit, or Remote I/O Unit. Never connect 24 VDC output terminals to the input terminals or COM terminals.
Terminal Connections
0
1
2
3
Current
(PNP output)
4
5
6
7
COM
NC
72
A0
A1
A2
A3
A4
A5
A6
A7
A8
A9
Appendix B
Specifications
DC Input Unit C200H-ID211
Rated Input Voltage
12 to 24 VDC
Operating Input Voltage
10.2 to 26.4 VDC
Input Impedance
2 kW
Input Current
10 mA (at 24 VDC)
ON Voltage
10.2 VDC min.
OFF Voltage
3.0 VDC max.
ON Response Time
1.5 ms max. (at 24 VDC, 25°C)
OFF Response Time
1.5 ms max. (at 24 VDC, 25°C)
No. of Circuits
1 (8 point/common)
Internal Current Consumption
10 mA 5 VDC max.
Weight
200 g max.
Dimensions
A-shape
Circuit Configuration
IN
IN
2 kW
0.01 mF
COM
Internal
circuit
1.8
kW
12 to 24 VDC
Input LED indicator
Terminal Connections
0
1
2
3
12 to 24 VDC
4
5
6
7
COM
NC
A0
A1
A2
A3
A4
A5
A6
A7
A8
A9
73
Appendix B
Specifications
DC Input Unit C200H-ID212
Rated Input Voltage
24 VDC
Operating Input Voltage
20.4 to 26.4 VDC
Input Impedance
3 kW
Input Current
7 mA (at 24 VDC)
ON Voltage
14.4 VDC min.
OFF Voltage
5.0 VDC max.
ON Response Time
1.5 ms max. (at 24 VDC, 25°C)
OFF Response Time
1.5 ms max. (at 24 VDC, 25°C)
No. of Circuits
1 (16 points/common)
Internal Current Consumption
10 mA 5 VDC max.
Weight
300 g max.
Dimensions
B-shape
Circuit Configuration
IN
IN
3 kW
0.01 mF
COM
Internal
circuit
1.8
kW
24 VDC
Input LED indicator
Terminal Connections
1
3
5
7
24 VDC
9
A0
A1
A2
A3
A4
B0
0
B1
2
B2
4
B3
6
B4
8
B5 10
11
A5
B6 12
13
A6
B7 14
15
A7
B8 NC
COM
A8
B9 NC
74
Appendix B
Specifications
AC/DC Input Unit C200H-IM211
Rated Input Voltage
12 to 24 VDC
Operating Input Voltage
10.2 to 26.4 VDC
Input Impedance
2 kW
Input Current
10 mA typical (at 24 VDC)
ON Voltage
10.2 VDC min.
OFF Voltage
3.0 VDC max.
ON Response Time
15 ms max. (at 24 VDC, 25°C)
OFF Response Time
15 ms max. (at 24 VDC, 25°C)
No. of Circuits
1 (8 points/common)
Internal Current Consumption
10 mA 5 VDC max.
Weight
200 g max.
Dimensions
A-shape
Circuit Configuration
IN
IN
2 kW
0.01 mF
COM
1.8
kW
Internal
circuit
12 to
24 VAC/DC
Input LED indicator
Terminal Connections
0
1
2
3
12 to
24 VAC/DC
4
5
6
7
COM
NC
A0
A1
A2
A3
A4
A5
A6
A7
A8
A9
75
Appendix B
Specifications
AC/DC Input Unit C200H-IM212
Rated Input Voltage
24 VDC
Operating Input Voltage
20.4 to 26.4 VDC
Input Impedance
3 kW
Input Current
7 mA typical (at 24 VDC)
ON Voltage
14.4 VDC min.
OFF Voltage
5.0 VDC max.
ON Response Time
1.5 ms max. (at 24 VDC, 25°C)
OFF Response Time
1.5 ms max. (at 24 VDC, 25°C)
No. of Circuits
1 (16 points/common)
Internal Current Consumption
10 mA 5 VDC max.
Weight
250 g max.
Dimensions
B-shape
Circuit Configuration
IN
IN
3 kW
0.01 mF
COM
1.8
kW
Internal
circuit
24 VAC/DC
Input LED indicator
Terminal Connections
1
3
5
24 VAC/DC
7
9
B0
A0
A1
A2
A3
A4
0
B1
2
B2
4
B3
6
B4
8
B5 10
11
A5
B6 12
13
A6
B7 14
15
A7
B8 NC
COM
A8
B9 NC
76
Appendix B
Specifications
Triac Output Unit C200H-OA222V
Max. Switching Capacity
0.3 A 250 VAC, 50/60 Hz (2 A/Unit)
Min. Switching Capacity
Leakage Current
10 mA (resistive load)/40 mA (inductive load)
10 VAC
3 mA (100 VAC) max./6 mA (200 VAC) max.
Residual Voltage
1.2 V max.
ON Response Time
1/2 of load frequency or less.
OFF Response Time
1/2 of load frequency or less.
No. of Circuits
1 (12 points/common)
Internal Current Consumption
200 mA 5 VDC max.
Fuse Rating
3 A 250 V (5.2-dia.x20)
Power for External Supply
N/A
Weight
400 g max.
Dimensions
B-shape
Circuit Configuration
OUT
L
Output indicator
OUT
L
Internal
circuit
Fuse
COM
250 VAC max.
Fuse: 3 A 250 V (5.2-dia.x20) MF51SH (JIS)
Note No blown fuse detector circuit is provided.
Terminal Connections
1
L
3
L
L
L
5
7
9
L
11
L
250 VAC max.
(0.3 A max., 2 A/Unit)
B0
A0
A1
A2
A3
A4
A5
NC
A6
NC
A7
COM
A8
0
B1
2
B2
4
B3
6
B4
8
B5
10
B6
NC
B7
NC
B8
NC
B9
NC
L
L
L
L
L
L
77
Appendix B
Specifications
Triac Output Unit C200H-OA121-E
Max. switching capacity
1 A 120 VAC, 50/60 Hz (4 A/Unit)
Min. switching capacity
10 mA (resistive load)/40 mA (inductive load)
10 VAC
Leakage Current
3 mA (100 VAC) max.
Residual Voltage
1.2 V max.
ON Response Time
1 ms max.
OFF Response Time
1/2 of load frequency or less.
No. of Circuits
1 (8 points/common)
Internal Current Consumption
140 mA 5 VDC max.
Fuse Rating
5 A 125 V (5.2-dia.x20)
Power for External Supply
N/A
Weight
250 g max.
Dimensions
A-shape
Circuit Configuration
OUT
Output LED
indicator
OUT
Internal
circuit
Fuse
L
L
COM
120 VAC max.
Fuse blowout
detection circuit
F LED
Fuse: 5 A 125 V (5.2-dia.x20) GGS (Nagasawa)
Note When the fuse blows F LED lights and bit 08 turns ON. Bits 08 through15 cannot be used as work bits.
Terminal Connections
L
L
L
L
120 VAC max
(1 A max. 4 A/Unit)
L
L
L
L
0
1
2
3
4
5
6
7
COM
NC
78
A0
A1
A2
A3
A4
A5
A6
A7
A8
A9
Appendix B
Specifications
Triac Output Unit C200H-OA122-E
Max. Switching Capacity
1.2 A 120 VAC, 50/60 Hz (4 A/Unit)
Max. Inrush Current
15 A (pulse width: 100 ms)
30 A (pulse width: 10 ms)
100 mA 10 VAC/50 mA 24 VAC/10 mA 100 VAC
min.
1.5 mA (120 VAC) max.
Min. Switching Capacity
Leakage Current
Residual Voltage
ON Response Time
1.5 VAC max. (50 to 1,200 mA)/ 5 VAC max. (10 to
50 mA)
1 ms max.
OFF Response Time
1/2 of load frequency+1 ms or less.
No. of Circuits
1 (8 points/common)
Internal Current Consumption
180 mA 5 VDC max.
Fuse Rating
5 A 125 V (5.2-dia.x20)
Power for External Supply
N/A
Weight
300 g max.
Dimensions
E-shape
Circuit Configuration
OUT
L
OUT
Output indicator
L
Internal
circuit
Fuse
COM
120 VAC max.
Fuse blowout
detection circuit
F indicator
Fuse: 5 A 125 V (5.2-dia.x20) GGS (Nagasawa)
Note When the fuse blows, the F indicator lights and bit 08 turns ON. Bits 08 through 15 cannot be used as work
bits.
Terminal Connections
120 VAC max.
(1.2 A max. 4 A/Unit)
L
0
A0
L
1
A1
L
2
A2
L
3
A3
L
4
A4
L
5
A5
L
6
A6
L
7
A7
COM
A8
NC
A9
79
Appendix B
Specifications
Triac Output Unit C200H-OA223
Max. Switching Capacity
1.2 A 250 VAC, 50/60 Hz (4 A/Unit)
Max. Inrush Current
15 A (pulse width: 100 ms)
30 A (pulse width: 10 ms)
100 mA 10 VAC/50 mA 24 VAC/10 mA 100 VAC
min.
1.5 mA (120 VAC) max./3 mA (240 VAC) max.
Min. Switching Capacity
Leakage Current
Residual Voltage
ON Response Time
1.5 VAC max. (50 to 1,200 mA)/ 5 VAC max. (10 to
50 mA)
1 ms max.
OFF Response Time
1/2 of load frequency+1 ms or less.
No. of Circuits
1 (8 points/common)
Internal Current Consumption
180 mA 5 VDC max.
Fuse Rating
5 A 250 V (5.2-dia.x20)
Power for External Supply
N/A
Weight
300 g max.
Dimensions
E-shape
Circuit Configuration
OUT
L
OUT
Output indicator
L
Internal
circuit
Fuse
COM
250 VAC max.
Fuse blowout
detection circuit
F indicator
Fuse: 5 A 250 V (5.2-dia.x20) HT (SOC)
Note When the fuse blows F LED lights and bit 08 turns ON. Bits 08 through15 cannot be used as work bits.
Terminal Connections
250 VAC max.
(1.2 A max. 4 A/Unit)
80
L
0
A0
L
1
A1
L
2
A2
L
3
A3
L
4
A4
L
5
A5
L
6
A6
L
7
A7
COM
A8
NC
A9
Appendix B
Specifications
Triac Output Unit C200H-OA224
Max. Switching Capacity
0.5 A 250 VAC, 50/60 Hz (2 A/Unit)
Max. Inrush Current
10 A (pulse width: 100ms)
20 A (pulse width: 10 ms)
100 mA 10 VAC/50 mA 24 VAC/10 mA 100 VAC
min.
1.5 mA (120 VAC) max./3 mA (240 VAC) max.
Min. Switching Capacity
Leakage Current
Residual Voltage
ON Response Time
1.5 VAC max. (50 to 500 mA)/5 VAC max. (10 to
50 mA)
1 ms max.
OFF Response Time
1/2 of load frequency + 1 ms or less.
No. of Circuits
1 (12 points/common)
Internal Current Consumption
270 mA 5 VDC max.
Fuse Rating
3.15 A 250 V (5.2-dia.x20)
Power for External Supply
N/A
Weight
300 g max.
Dimensions
B-shape
Circuit Configuration
OUT
L
OUT
Output indicator
L
Internal
circuit
Fuse
COM
250 VAC max.
Fuse: 3.15 A 250 V (5.2-dia.x20) MT4 (SOC)
Note 1. No blown fuse detector circuit is provided.
2. Check the fuse when there is no output.
Terminal Connections
1
L
3
L
L
L
5
7
9
L
11
L
250 VAC max.
(0.5 A max., 2 A/Unit)
B0
A0
A1
A2
A3
A4
A5
NC
A6
NC
A7
COM
A8
0
B1
2
B2
4
B3
6
B4
8
B5
10
B6
NC
B7
NC
B8
NC
B9
NC
L
L
L
L
L
L
81
Appendix B
Specifications
Contact Output Unit C200H-OC221
Max. switching capacity
2 A 250 VAC (cos of phase angle = 1), 2 A
250 VAC (cos of phase angle = 0.4), 2 A 24 VDC
8 A/Unit
Min. switching capacity
10 mA 5 VDC
Relay
G6B-1174P-FD-US (24 VDC) w/socket
Service Life of Relay
Electrical: 500,000 operations (resistive load)/
100,000 operations (inductive load)
Mechanical: 50,000,000 operations
ON Response Time
10 ms max.
OFF Response Time
10 ms max.
No. of Circuits
1 (8 points/common)
Internal Current Consumption
10 mA 5 VDC max. 75 mA 25 VDC (8 points ON
simultaneously.)
Weight
250 g max.
Dimensions
A-shape
Circuit Configuration
OUT
L
Output LED indicator
OUT
L
Internal
circuit
COM
250 VAC 24 VDC max.
Terminal Connections
0
L
A0
1
A1
L
2
A2
L
3
A3
L
4
A4
L
5
A5
L
6
A6
L
7
A7
L
COM
A8
NC
250 VAC 24 VDC max.
(inductive load: 2 A resistive load: 2 A) (8 A/Unit)
82
A9
Appendix B
Specifications
Contact Output Unit C200H-OC222
Max. switching capacity
2 A 250 VAC (cos of phase angle = 1), 2 A
250 VAC (cos of phase angle = 0.4), 2 A 24 VDC
8 A/Unit
Min. switching capacity
10 mA 5 VDC
Relay
G6B-1174P-FD-US (24 VDC) w/socket
Service Life of Relay
Electrical: 500,000 operations (resistive load)/
100,000 operations (inductive load)
Mechanical: 50,000,000 operations
ON Response Time
10 ms max.
OFF Response Time
10 ms max.
No. of Circuits
1 (12 points/common) 8 points max. can be ON
simultaneously.
Internal Current Consumption
10 mA 5 VDC max. 75 mA 25 VDC (8 points ON
simultaneously.)
Weight
300 g max.
Dimensions
B-shape
Circuit Configuration
OUT
L
Output LED indicator
OUT
L
Internal
circuit
COM
250 VAC
24 VDC max.
Terminal Connections
1
L
L
L
3
5
7
L
9
L
11
L
B0
A0
A1
A2
A3
A4
A5
NC
A6
NC
A7
COM
A8
0
L
B1
2
L
B2
4
L
B3
6
B4
8
B5 10
B6
NC
B7
NC
B8
NC
B9
NC
L
L
L
250 VAC 24 VDC max.
(inductive load: 2 A resistive load: 2 A) (8 A/Unit)
83
Appendix B
Specifications
Contact Output Unit C200H-OC223
Max. switching capacity
2 A 250 VAC (cos of phase angle = 1), 2 A
250 VAC (cos of phase angle = 0.4), 2 A 24 VDC
10 A/Unit
Min. switching capacity relay
10 mA 5 VDC
Service Life of Relay
Electrical: 500,000 operations (resistive load)/
100,000 operations (inductive load)
Mechanical: 50,000,000 operations
ON Response Time
10 ms max.
OFF Response Time
10 ms max.
No. of Circuits
5 independent contacts
Internal Current Consumption
10 mA 5 VDC max. 75 mA 25 VDC (8 points ON
simultaneously.)
Weight
250 g max.
Dimensions
A-shape
Circuit Configuration
Output LED indicator
OUT
L
Internal
circuit
OUT
250 VAC
24 VDC max.
Terminal Connections
L
0
c0
L
1
c1
2
L
250VAC 24 VDC max.
(inductive load: 2 A
resistive load: 2 A)
(8 A/Unit)
c2
L
3
c3
4
A1
A2
A3
A4
A5
A6
A7
A8
L
c4
84
A0
A9
Appendix B
Specifications
Contact Output Unit C200H-OC224
Max. switching capacity
2 A 250 VAC (cos of phase angle = 1), 2 A
250 VAC (cos of phase angle = 0.4), 2 A 24 VDC
16 A/Unit
Min. switching capacity relay
10 mA 5 VDC
Service Life of Relay
Electrical: 500,000 operations (resistive load)/
100,000 operations (inductive load)
Mechanical: 50,000,000 operations
ON Response Time
10 ms max.
OFF Response Time
10 ms max.
No. of Circuits
8 independent contacts
Internal Current Consumption
10 mA 5 VDC max. 75 mA 25 VDC (8 points ON
simultaneously.)
Weight
300 g max.
Dimensions
B-shape
Circuit Configuration
Output LED indicator
OUT
L
Internal
circuit
OUTc
250 VAC
24 VDC max.
Terminal Connections
c0
c1
B0
A0
A1
c2
A2
c3
250 VAC 24
VDC max. (inductive load: 2
A resistive
load: 2 A) (16
A/Unit)
A3
c4
A4
c5
A5
c6
A6
c7
A7
NC
A8
B1
B2
B3
B4
B5
B6
B7
0
1
2
3
4
5
6
7
L
L
L
L
L
L
L
L
B8 NC
B9 NC
85
Appendix B
Specifications
Contact Output Unit C200H-OC225
Max. switching capacity
2 A 250 VAC (cos of phase angle = 1), 2 A
250 VAC (cos of phase angle = 0.4), 2 A 24 VDC
8 A/Unit
Min. switching capacity
10 mA 5 VDC
Relay
G6B-1174P-FD-US (24 VDC) w/socket
Service Life of Relay
Electrical: 500,000 operations (resistive load)/
100,000 operations (inductive load)
Mechanical: 50,000,000 operations
ON Response Time
10 ms max.
OFF Response Time
10 ms max.
No. of Circuits
1 (16 points/common) 8 points max. can be ON
simultaneously.
Internal Current Consumption
50 mA 5 VDC max. 75 mA 25 VDC (8 points ON
simultaneously.)
Weight
400 g max.
Dimensions
B-shape
Circuit Configuration
OUT
L
Output LED indicator
OUT
L
Internal
circuit
COM
250 VAC
24 VDC max.
Terminal Connections
L
L
L
L
L
L
L
L
1
3
5
7
9
11
13
15
COM
A0
A1
A2
A3
A4
A5
A6
A7
A8
0
B0
B1 2
B2 4
B3 6
B4 8
B5 10
B6 12
B7 14
B8 NC
B9 NC
L
L
L
L
L
L
L
L
250 VAC 24 VDC max.
(inductive load: 2 A resistive load: 2 A) (8 A/Unit)
Note This Unit must be mounted to a C200H-BCjj1-V1/V2 Backplane.
86
Appendix B
Specifications
Transistor Output Unit C200H-OD211
Max. switching capacity
0.3 A 24 VDC +10%/–15% (2 A/Unit)
Min. switching capacity
None
Leakage Current
0.1 mA max.
Residual Voltage
1.4 V max.
ON Response Time
0.2 ms max.
OFF Response Time
0.3 ms max.
No. of Circuits
1 (12 points/common)
Internal Current Consumption
160 mA 5 VDC max.
Fuse Rating
5 A 125 V (5.2-dia.x20)
Power for External Supply
25 mA 24 VDC +10%/–15% max.
Weight
300 g max.
Dimensions
B-shape
Circuit Configuration
OUT
L
+V
Output LED indicator
OUT
L
Internal
circuit
24 VDC
Fuse
COM
Fuse: GGS (Nagasawa)
Note No blown fuse detector circuit is provided.
Terminal Connections
L
L
L
24 VDC
(0.3 A max., 2 A/Unit)
L
L
L
1
3
5
7
9
11
A0
A1
A2
A3
A4
A5
NC
A6
NC
A7
COM (0 V)
A8
B0
0
L
B1
2
L
B2
4
L
B3
6
B4
8
B5 10
L
L
L
B6
NC
B7
NC
B8
NC
+ 24 VDC
B9
Note Be sure to supply power to B9; otherwise current will leak through the load while the output is OFF.
87
Appendix B
Specifications
Transistor Output Unit C200H-OD212
Max. switching capacity
0.3 A 24 VDC +10%/–15% (4.8 A/Unit)
Min. switching capacity
None
Leakage Current
0.1 mA max.
Residual Voltage
1.4 V max.
ON Response Time
0.2 ms max.
OFF Response Time
0.3 ms max.
No. of Circuits
1 (16 points/common)
Internal Current Consumption
180 mA 5 VDC max.
Fuse Rating
8 A 125 V (5.2-dia.x20)
Power for External Supply
35 mA 24 VDC +10%/–15% max.
Weight
350 g max.
Dimensions
B-shape
Circuit Configuration
OUT
L
+V
Output LED indicator
OUT
L
Internal
circuit
24 VDC
Fuse
COM
Fuse: GGS (Nagasawa)
Note No blown fuse detector circuit is provided.
Terminal Connections
L
L
L
24 VDC
(0.3 A max )
L
1
3
5
7
9
A0
A1
A2
A3
A4
B0
0
L
B1
2
L
B2
4
L
B3
6
B4
8
L
L
B5 10 L
11
A5
L
B6 12 L
13
A6
L
B7 14 L
15
A7
L
B8 NC
A8
+ 24 VDC
COM (0 V)
B9
L
Note 1. Be sure to supply power to B9; otherwise current will leak through the load while the output is OFF.
2. This Unit must be mounted to a C200H-BCjj1-V1/V2 Backplane.
88
Appendix B
Specifications
Transistor Output Unit C200H-OD213
Max. switching capacity
2.1 A 24 VDC +10%/–15% (5.2 A/Unit) NPN output
Min. switching capacity
None
Leakage Current
0.1 mA max.
Residual Voltage
1.4 V max.
ON Response Time
0.2 ms max.
OFF Response Time
0.3 ms max.
No. of Circuits
1 (8 points/common)
Internal Current Consumption
140 mA 5 VDC max.
Fuse Rating
8 A 125 V (5.2-dia.x20)
Power for External Supply
30 mA 24 VDC +10%/–15% max.
Weight
250 g max.
Dimensions
A-shape
Circuit Configuration
OUT
L
+V
Output LED indicator
OUT
L
24 VDC
Internal
circuit
Fuse
COM
Fuse blowout
detection circuit
F LED
Note When the fuse blows F LED lights and bit 08 turns ON. Bits 08 through 15 cannot be used as work bits.
Terminal Connections
L
L
L
24 VDC
(2.1 A max., 5.2 A/Unit)
L
L
L
L
L
0
1
2
3
4
5
6
7
A0
A1
A2
A3
A4
A5
A6
A7
COM (0 V)
A8
24 VDC
A9
Note Be sure to supply power to A9; otherwise current will leak through the load while the output is OFF.
89
Appendix B
Specifications
Transistor Output Unit C200H-OD214 (Sourcing Type)
Max. switching capacity
24 VDC +10%/–15% 0.8 A (2.4 A/Unit) surge current
2 A (sourcing type) PNP output
Min. switching capacity
None
Leakage Current
1 mA max.
Residual Voltage
1.5 V max.
ON Response Time
1 ms max.
OFF Response Time
1 ms max.
No. of Circuits
1 (8 points/common)
Internal Current Consumption
140 mA 5 VDC max.
Fuse Rating
Short-circuit protection
Power for External Supply
150 mA 24 VDC +10%/–15% max.
Weight
250 g max.
Dimensions
A-shape
Overcurrent protection
Thermal protection
Circuit Configuration
OUT
L
Out put
LED indicator
+V
Source
Driver
Internal
circuit Reset
button
OUT
L
+
24 VDC
COM
Alarm
Output LED
Terminal Connections
0
L
1
L
2
L
L
24 VDC
(2.1 A max., 5.2 A/Unit)
L
L
L
L
3
4
5
6
7
A0
A1
A2
A3
A4
A5
A6
A7
COM (0 V)
A8
24 VDC
A9
Note Be sure to supply power to A9; otherwise current will leak through the load while the output is OFF.
90
Appendix B
Specifications
C200H-OD214 Short-Circuit Protection
The C200H-OD214 Output Unit is equipped with two types of short-circuit protection. One is overcurrent protection, and the other is thermal protection. The
short-circuit should be eliminated immediately in order to avoid damage to the
Unit.
Overcurrent Protection When the output current reaches 2 A, the alarm output
turns ON, and the alarm LED lights. Make sure the surge current of the load does
not exceed 2 A, or the alarm may be activated.
Thermal Protection When the junction temperature of the output transistor
reaches its upper limit, the output turns OFF, the alarm output turns ON, and the
alarm LED blinks. But the output transistor is provided with a heat sink. So in
some cases, when the output is short-circuited the thermal protection may not
activate because the extra heat is dissipated by the heat sink. However, the
alarm LED will still light and the alarm output will still turn ON.
How It Works When the short-circuit protection activates, the output displays
the characteristic shown below.
Output
Voltage
Overcurrent
limit alarm
output point
Output current
2 A (minimum value)
0
Each pair of outputs share one alarm LED and one alarm output bit as shown
below (bits 12 through 15 cannot be used as work bits)
Output No.
0
1
2
3
4
5 6
7
Alarm LED No.
0
2
4
6
Alarm Output Point No.
08
09
10
11
Both the alarm LED and alarm output bit for the short-circuited output turn ON
even if only one of the outputs is short-circuited. Both outputs should be disconnected until the short-circuit can be traced.
Clearing the Alarm When the short-circuit has been eliminated, reset the Unit
by pressing the reset button. The alarm LED will go out, the alarm output will turn
OFF, and the output will be reset.
Output LED
Alarm LED
Reset button (use a screwdriver
or other similar object to press it).
91
Appendix B
Specifications
Programming Example If there is a short-circuit in an output, we want the program to turn that output OFF. Assume that the Unit is mounted at word 000. A
program to turn OFF output bits 00 and 01 is shown below.
A
00008
00000
B
00008
00001
Since alarm output bit 08 covers both output bits 00 and 01, both these outputs
are forced OFF as soon as output bit 08 turns ON (bits A and B can be any other
bits required in the program).
92
Appendix B
Specifications
Transistor Output Unit C200H-OD216
Max. switching capacity
0.3 A 5 to 24 VDC
Min. switching capacity
10 mA 5 VDC
Leakage Current
0.1 mA max.
Residual Voltage
1.5 V max.
ON Response Time
1.5 ms max.
OFF Response Time
2 ms max.
No. of Circuits
1 (8 points/common) positive common (sourcing
type)
Internal Current Consumption
10 mA 5 VDC max. 75 mA 25 VDC (8 points ON
simultaneously.)
Fuse Rating
None
Power for External Supply
N/A
Weight
250 g max.
Dimensions
A-shape
Circuit Configuration
OUT
Output
LED indicator
OUT
Internal
Circuit
L
L
5 to 24 VDC
COM
Terminal Connections
L
L
L
L
5 to 24 VDC
L
L
L
L
0
1
2
3
4
5
6
7
A0
A1
A2
A3
A4
A5
A6
A7
COM A8
NC A9
93
Appendix B
Specifications
Transistor Output Unit C200H-OD217
Max. switching capacity
0.3 A 5 to 24 VDC
Min. switching capacity
10 mA 5 VDC
Leakage Current
0.1 mA max.
Residual Voltage
1.5 V max.
ON Response Time
1.5 ms max.
OFF Response Time
2 ms max.
No. of Circuits
1 (12 points/common) positive common (sourcing
type)
Internal Current Consumption
10 mA 5 VDC max. 75 mA 25 VDC (8 points ON
simultaneously.)
Fuse Rating
None
Power for External Supply
N/A
Weight
300 g max.
Dimensions
B-shape
Circuit Configuration
OUT
Output
LED indicator
L
OUT
L
Internal
circuit
5 to
24 VDC
COM
Terminal Connections
L
L
5 to 24 VDC
L
L
L
L
1
3
5
7
9
11
A0
A1
A2
A3
A4
A5
NC A6
NC A7
COM A8
B0
0
B1
2
B2
4
B3
6
B4
8
B5 10
B6 NC
B7 NC
B8 NC
B9 NC
94
L
L
L
L
L
L
Appendix B
Specifications
Transistor Output Unit C200H-OD411
Max. switching capacity
12 to 48 VDC 1 A (3 A/Unit)
Min. switching capacity
None
Leakage Current
0.1 mA max.
Residual Voltage
1.4 V max.
ON Response Time
0.2 ms max.
OFF Response Time
0.3 ms max.
No. of Circuits
1 (8 points/common)
Internal Current Consumption
140 mA 5 VDC max.
Fuse Rating
5 A 125 V (5.2-dia.x20)
Power for External Supply
30 mA 12 to 48 VDC max.
Weight
250 g max.
Dimensions
A-shape
Circuit Configuration
OUT
L
V
Output LED indicator
OUT
L
Internal
circuit
Fuse
COM
12 to
48 VDC
Fuse blowout
detection circuit
F LED
Note When the fuse blows F LED lights and bit 08 turns ON. Bits 08 through 15 cannot be used as work bits.
Terminal Connections
L
L
L
L
12 to 48 VDC
(1 A max., 3 A/Unit)
L
L
L
L
0
1
2
3
4
5
6
7
A0
A1
A2
A3
A4
A5
A6
A7
COM (0 V)
A8
12 to 48 VDC
A9
Note Be sure to supply power to A9; otherwise current will leak through the load while the output is OFF.
95
Appendix B
Specifications
Transistor Output Unit C200H-OD21A (Sourcing Type with Load Circuit
Protection)
Max. switching
capacity
24 VDC +10%/–15%, 1.0 A (4 A/Unit)
surge current 1.6 A (sourcing type)
PNP output
No. of Circuits
1 (16 points/common)
Min. switching
capacity
None
Internal Current
Consumption
160 mA, 5 VDC max.
Leakage Current
0.1 mA max.
Load Short-circuit
Protection
Detection current: 1.2 A min
(1.6 A typical)
Residual Voltage
ON Response Time
0.8 V max.
0.1 ms max.
Power for External Supply
35 mA 24 VDC +10%/–15% min.
Alarm Output (See note)
No. of outputs: 1 (2 kΩ
internal resistor)
Connectable Units: Only the
following DC Input Units and
alarm output LED indicators
can be connected:
C200H-ID001, ID211, ID212,
IM211 (DC), IM212 (DC),
ID215, ID501, MD115,
MD215, MD501
Weight
Dimensions
400 g max.
B-shape
OFF Response Time 0.3 ms max.
Internal Circuit
Output LED
indicator
Short-circuit
protection
circuit
Circuit Configuration
to
0V
2 kΩ
Note When short-circuit/overload protection is activated, all 16 outputs will be switched OFF and the ALARM
output becomes active (low level). The problem can be detected externally by connecting a DC Input Unit to
the ALARM output or by connecting an alarm output indicator. It’s not possible to connect both the Input Unit
and the indicator at the same time.
96
Appendix B
Specifications
Terminal Connections
+24 VDC
24 VDC
Note 1. When the ALARM output turns ON, remove the cause of the high current and then shut off the external
power supply for approx. 1 second. After confirming that the cause has been removed, turn ON the power supply again to reset the output. As shown in the diagram, it is recommended that a relay or switch that
turns ON or OFF only the external power supply be connected right before the B9 (+V). Check that this
relay or switch has a contact capacity higher than the external power supply current consumption
(35 mA + load current min.).
2. This Unit must be mounted to a C200H-BCjj1-V1/V2 Backplane.
97
Appendix B
Specifications
Analog Timer Unit
Item
Specifications
Oscillation Method
RC oscillation
Time Setting Range
Use the DIP switch to set any of the following four ranges, according to the chart shown on
the next page.
0.1 to 1 second (typical)
1 to 10 seconds (typical)
10 to 60 seconds (typical)
1 to 10 minutes (typical)
Timer Pause Function
The timing operation can be paused if so specified by the program. Therefore, the timers can
also be used as cumulative registers.
Number of Timer Points
4
Indicators
SET and TIME UP
External Variable
Resistor
External variable resistors can be used to set the time value when the IN/EXT selector is set
to OFF (EXT). Use 20 kW variable resistors.
Bit Allocation
The word is determined by the system configuration.
Bit
Function
00
T0 start output
01
T1 start output
02
T2 start output
03
T3 start output
04
T0 pause output
05
T1 pause output
0
Operates
06
T2 pause output
1
Stops
07
T3 pause output
08
T0 time-up input
09
T1 time-up input
10
T2 time-up input
11
T3 time-up input
“1” when time is running
“1” when time is up
12
13
Cannot be used
14
15
Programming and
Timing Chart
Timer start input
word n bits 08 through 11
Timer setting
(word n bits 00
through 03)
Time-up output
Time-up flag
Internal Current
Consumption
98
60 mA 5 VDC max.
Timer start
input
Time-up
output
Timer set value
Appendix B
Specifications
Internal variable
resistors
These variable resistors are used to
set the timers. The
settings of these resistors are effective
only when the corresponding IN/EXT
selector is ON. To
set or adjust the
time, use the
screwdriver
supplied with the
Unit. Turn the variable resistor clockwise to increase the
time value. The
numbers 0 through
3 correspond to T0
through T3, respectively.
TM001
Indicators
The SET indicators in the top row light when the corresponding timer is operating. The TIME UP indicators in the bottom row light when the corresponding
timer (T0 through T3) turns ON.
0
1
2
3
Time range setting
Min.
0
1
External variable resistor connectors
Max.
2
External variable resistors can also be used to set the
timers. The IN/EXT selector pin must be set to the
OFF position. Numbers 0 through 3 correspond to T0
through T3, respectively. Use 20-kW variable resistors
and AWG 22 to 28 lead wires. The connector has solderless terminals and must be wired as shown below.
3
IN/EXT selectors
When the internal variable resistor is used, set the corresponding pin to ON; when an external
variable resistor is used, set the
corresponding pin to OFF. Pin
numbers 4 through 1 correspond
to T0 through T3, respectively.
Timers
Pin No.
0.1 to 1 s
0.1 to 10 s
10 to 60 s
1 to 10 m
T0
8
0
1
0
1
7
0
0
1
1
6
0
1
0
1
5
0
0
1
1
4
0
1
0
1
3
0
0
1
1
2
0
1
0
1
1
0
0
1
1
T1
T2
T3
(0: OFF 1: ON)
99
Appendix B
Specifications
! Caution
Ensure that the external variable resistor connectors are open when using the internal variable
resistor.
External variable
resistor connector
External variable
resistor
B7A Interface Unit C200H-B7Aj1 (Basic I/O Unit Type)
The B7A Interface Unit used with the B7A Link Terminal allows the transmission and reception of 16-point I/O data
over two wires.
The following B7A Interface Unit and B7A Link Terminal models are available.
B7A Interface Unit
16-point input: C200H-B7AI1
B7A Link Terminals
B7A-T6j1 (Screw terminal models)
B7A-T6D2 (Modular models)
B7A-R6jj1 (Screw terminal models)
B7A-R6A52 (Modular models)
16-point output: C200H-B7AO1
Mount the B7A Interface Unit to the C200H-BCjj1-V1 or C200H-BCjj1-V2 Backplane.
Note If the B7A Interface Unit is connected to the C200H-CPU03-E or C200H-PS211, supply 24 VDC from an
independent power supply to the B7A Interface Unit or use a transformer to separate the power supply line
to the B7A Interface Unit from the power supply lines to the CPU and I/O Power Supply Unit.
I/O indicator
ERR indicator
Connection terminals
Connection terminals for the B7A Link Terminal:
Connect this terminal to the SIG terminal of the
B7A Link Terminal.
Connect this terminal to the negative power terminal of the B7A Link Terminal.
Supply 12 to 24 VDC.
12 to 24 VDC
I/O Indicator
Indicates the ON or OFF status of input from the B7A Link Terminal or the ON
and OFF status of output to the B7A Link Terminal.
ERR Indicator
Incorporated by the B7AI1 and lit when the B7AI1’s data transmission or reception is abnormal.
100
Appendix B
Specifications
Connection Terminals
SIG:
Connects to the SIG terminal of the B7A Link Terminal.
V–:
Connects to the negative power terminal of the B7A Link Terminal.
! Caution
If the terminals are not connected correctly, the internal circuitry of the B7A Link Terminal will be
damaged.
Note 1. The transmission cable must be a VCTF cable with a thickness of 0.75 mm2 minimum.
2. Do not wire power lines or high-tension lines along with the transmission cable in the same conduit.
Input Mode Selector
The B7AI1 incorporates an input mode selector on the back panel of the Unit,
with which the following modes can be set.
Input mode
15 points + 1 error
16 points
Function
Fifteen-point input from the B7A Link
Terminal is effective. Bit 15 is used as
transmission error bit.
Sixteen-point input from the B7A Link
Terminal is effective.
Switch setting
Bit no.
allocation
ll
i
Upper side
Lower side
00 to 14
15
Status of input indicator lamp 15
Input 00 to input 14
Transmission error bit
Not used
Input 00 to input 14
Input 15
Lit when input 15 is ON. Not lit when
input 15 is OFF.
Status of the ERR indicator
Lit when there is a transmission error and OFF during normal transmission
The ERR indicator is lit when an error occurs. If the error is corrected, the ERR indicator is OFF at the next transmission cycle.
When there is a transmission error, the B7A Link Terminal will hold the data just before the occurrence of the transmission error. If there is a transmission error because the B7A Link Terminal is turned off, however, data 0 is transmitted in the first transmission cycle when the B7A Link Terminal is turned on again.
Transmission errors between the C200H-B7A01 and B7A Link Terminal are detected by the B7A Link Terminal
only. Check the ERR indicator and error bit for any error.
Performance Specification
Item
I/O points
C200H-B7AI1
C200H-B7AO1
Transmission distance
16 points or 15 points and 1 error
16 output points
input
500 m max. if power is supplied to the Interface Unit and B7A Link Terminal
separately.
100 m max. if power is supplied to the Interface Unit and B7A Link Terminal
from a single power supply.
Transmission delay
Typ. 19.2 ms, 31 ms max.
Minimum input time (see note 2)
---
Internal current consumption
5 VDC, 100 mA max.
External power supply (see note 1)
12 to 24 VDC ±10%, 10 mA min.
Weight
200 g max.
16 ms
12 to 24 VDC ±10%, 30 mA min.
Note 1. The external power supply capacity does not include the capacity required by the B7A Link Terminal.
2. The minimum input time is the minimum time required to read input signals from the CPU. Be sure that
the ON/OFF width of signals sent to B7A Interface Unit output relays is at least 16 ms.
101
Appendix B
Specifications
Dimensions
Racks
The dimensions shown below are for both the CPU Rack and Expansion I/O Rack. The C dimension for the Programming Console will increase by 30mm when the Programming Console Adapter C200H-BP001 is used, and
will increase by 50 mm when the Programming Console Adapter C200H-BP002 is used.
M-4
screws
130 118
A
W
6.5
7.5
C200H-BC101
505
491
270.5
Model
A
W
C200H-BC031
246
260
C200H-BC051-V1
316
330
C200H-BC081-V1
421
435
C200H-BC101
491
505
135
Peripheral
device
D
C
CPU Unit
102
D
C200H-CPU01/02/03
118
C200H-CPU11
143
Appendix B
Specifications
Mounted Unit
C
CPU01/03
CPU11
Programming Console
148
173
Other peripheral devices
160
185
B-shape I/O Units
145
145
E-shape I/O Units
138
138
I/O Units
The dimensions shown below are for the three shapes of I/O Units mentioned throughout these specifications.
A-shape I/O Units
x
x
Backplane
130
x
x
101
35
118
B-shape I/O Units
130
x
x
x
x
x
x
Backplane
x
x
128
35
145
103
Appendix B
Specifications
E-shape I/O Units
Backplane
x
x
130
x
x
121
35
138
Backplane Insulation Plates
The dimensions shown below are for Backplane Insulation Plates.
PC mounting screws
Four screws with 4-mm diameter
heads are provided.
Insulation plate mounting screws
Four screws with 5-mm diameter
shafts are provided.
B
135
118 110
C
D
A
E
6
5 dia
12 dia
10
Specifications
104
Model
D
E
C
A
B
3 slots
C200H-ATT31
210
261
---
246
---
5 slots
C200H-ATT51
280
331
---
316
---
8 slots
C200H-ATT81
385
436
---
421
---
10 slots
C200H-ATTA1
455
506
227.5
491
270.5
Appendix B
Specifications
I/O Connecting Cables
The dimensions shown below are for I/O Connecting Cables.
L
Cable
Length (L)
C200H-CN311
30 cm
C200H-CN711
70 cm
C200H-CN221
2m
C200H-CN521
5m
C200H-CN131
10 m
105
Appendix C
Standard Models
The C200H is a Rack-type PC that can be configured many different ways. Here is a series of tables listing the
Units available for the C200H, along with a brief description of the Unit and its model number.
C200H Racks
Name
Backplane (same for all Racks)
CPU Rack
CPU
Specifications
Model number
10 slots
8 slots
5 slots
3 slots
100 to 120/200 to 240 VAC (Does not support SYSMAC
LINK and SYSMAC NET Link Systems.)
C200H-BC101-V2
C200H-BC081-V2
C200H-BC051-V2
C200H-BC031-V2
C200H-CPU01-E
100 to 120/200 to 240 VAC (Supports SYSMAC LINK and C200H-CPU11-E
SYSMAC NET Link Systems.)
Memory Unit
24 VDC
CMOS-RAM Unit; built-in backup
battery
UM: 7K words;
DM: 1K words
C200H-MR831
UM: 3K words;
DM: 1K words
C200H-MR432
UM: 7K words;
DM: 1K words
C200H-MR832
EPROM Unit
(EPROM ordered separately)
UM: 7K words;
DM: 1K words
C200H-MP831
EEPROM Unit
UM: 3K words;
DM: 1K words
C200H-ME431
EEPROM Unit
UM: 7K words;
DM: 1K words
C200H-ME831
CMOS-RAM Unit; capacitor backup
Expansion
I/O Racks
R k
EPROM
I/O Power Supply
y
U i
Unit
I/O Connecting
g
C bl (max.
Cable
(
totall
length: 12 m)
UM: 3K words;
DM: 1K words
C200H-CPU03-E
C200H-MR431
27128; 150 ns; write voltage: 12.5 V
100 to 120/200 to 240 VAC
24 VDC
30 cm
70 cm
2m
5m
10 m
ROM-ID-B
C200H-PS221
C200H-PS211
C200H-CN311
C200H-CN711
C200H-CN221
C200H-CN521
C200H-CN131
107
Appendix C
Standard Models
C200H I/O Units
Name
Input Units
AC Input Unit
DC Input Unit
AC/DC Input Unit
Output
U i
Units
Relay Output Unit
Triac Output Unit
Transistor Output
U i
Unit
Analog Timer Unit
Specifications
8 pts
100 to 120 VAC
C200H-IA121
16 pts
100 to 120 VAC
C200H-IA122/IA122V
8 pts
200 to 240 VAC
C200H-IA221
16 pts
200 to 240 VAC
C200H-IA222/IA222V
8 pts
No-voltage contact; NPN
C200H-ID001
8 pts
No-voltage contact; PNP
C200H-ID002
8 pts
12 to 24 VDC
C200H-ID211
16 pts
24 VDC
C200H-ID212
8 pts
12 to 24 VAC/DC
C200H-IM211
16 pts
24 VAC/DC
C200H-IM212
8 pts
12 pts
16 pts
2 A, 250 VAC/24 VDC (For resistive loads)
2 A, 250 VAC/24 VDC (For resistive loads)
2 A, 250 VAC/24 VAC (For resistive loads)
C200H-OC221
C200H-OC222
C200H-OC225
5 pts
2 A, 250 VAC/24 VDC (For resistive loads)
Independent commons
C200H-OC223
8 pts
2 A, 250 VAC/24 VDC (For resistive loads)
Independent commons
C200H-OC224
8 pts
1 A, 120 VAC
C200H-OA121-E
8 pts
1.2 A, 120 VAC
C200H-OA122-E
8 pts
1.2 A, 250 VAC
C200H-OA223
12 pts
0.3 A, 250 VAC
C200H-OA222V
12 pts
0.5 A, 250 VAC
C200H-OA224
8 pts
12 pts
16 pts
1 A, 12 to 48 VDC
0.3 A, 24 VDC
0.3 A, 24 VDC
C200H-OD411
C200H-OD211
C200H-OD212
8 pts
2.1 A, 24 VDC
C200H-OD213
8 pts
0.8 A, 24 VDC; sourcing type (PNP); with
load short protection
C200H-OD214
8 pts
5 to 24 VDC; sourcing type (PNP)
C200H-OD216
12 pts
5 to 24 VDC; sourcing type (PNP)
C200H-OD217
16 pts
1 A, 24 VDC; sourcing type (PNP); with load
short protection
C200H-OD21A
4 timer
pts
0.1 to 1 s, 1 to 10 s, 10 to 60 s, or 1 min to
10 min (switchable)
C200H-TM001
Connector with lead wire (2 m) for 1 external
resistor
C4K-CN223
Variable Resistor
Connector (Related
Product)
B7A Interface Units
(Basic I/O Units)
Model number
Connects to B7A Link Terminals.
15 or
16 input
pts
C200H-B7AI1
16 output pts
C200H-B7AO1
Note The C200H-OC225/OD212/OD21A 16-point Output Unit and the C200H-B7AO1 B7A Interface Unit must
be mounted to a C200H-BCjj1-V1/V2 Backplane.
108
Appendix C
Standard Models
C200H Special I/O Units
All of the following are classified as Special I/O Units except for the ASCII Unit, which is an Intelligent I/O Unit.
Name
High-density I/O
Units
DC Input
Units
Transistor
Output Units
DC Input/
Transistor
Output Units
Specifications
Model number
32 pts
5 VDC (TTL inputs); with high-speed input function C200H-ID501
32 pts
32 pts
24 VDC; with high-speed inputs
C200H-ID215
0.1 A, 24 VDC (usable as 128-point dynamic output C200H-OD215
unit)
32 pts
35 mA, 5 VDC (TTL outputs) (usable as 128-point C200H-OD501
dynamic output unit)
16 input/
12-VDC inputs; with high-speed input function
C200H-MD115
16 output pts 0.1 A , 12-VDC outputs (usable as 128-point dynamic input unit)
16 input/
24-VDC inputs; with high-speed input function
C200H-MD215
16 output pts 0.1 A , 24-VDC outputs (usable as 128-point dynamic input unit)
16 input/
5 VDC (TTL inputs); with high speed input function C200H-MD501
16 output pts 35 mA, 5 VDC Output (TTL outputs) (usable as
128-point dynamic input unit)
Analog I/O Analog Input 1 to 5/0 to 10 V; 4 inputs
Units
Unit
C200H-AD001
4 to 20 mA, 1 to 5/0 to 10/–10 to 10 V; 8 inputs
Analog
g Output 1 to 5/0 to 10 V; 2 outputs
U i
Unit
4 to 20 mA, –10 to 10 V; 4 outputs
Temperature Sensor Units
Thermocouple (K(CA) or J(IC)) (switchable); 4 inputs
Thermocouple (K(CA) or L(Fe-CuNi)) (switchable);
4 inputs
C200H-AD002
C200H-DA001
C200H-DA002
C200H-TS001
C200H-TS002
Platinum resistance thermometer (JPt) (switchable), DIN stan- C200H-TS101
dards; 4 inputs
Temperature Control Units
Heat/Cool Temperature
C
Control
lU
Units
i
PID Control Units
Platinum resistance thermometer (Pt) (switchable);
4 inputs
C200H-TS102
Thermocouple
l
C200H-TC001
C200H-TC002
C200H-TC003
C200H-TC101
C200H-TC102
C200H-TC103
C200H-TV001
C200H-TV002
C200H-TV003
C200H-TV101
C200H-TV102
C200H-TV103
C200H-PID01
C200H-PID02
C200H-PID03
Transistor output
Voltage output
Current output
Platinum re- Transistor output
i
sistance
Voltage output
thermometer
Current output
Thermocou- Transistor output
ple
l
Voltage output
Current output
Platinum re- Transistor output
sistance
i
Voltage output
thermometer
Current output
Transistor output
Voltage output
Current output
109
Appendix C
Standard Models
Name
Position Control Units
Cam Positioner Unit
High-speed Counter Units
1 axis
1 axis
Specifications
Model number
Pulse output; speeds: 1 to 99,990 pps
C200H-NC111
Directly connectable to servomotor driver; compat- C200H-NC112
ible with line driver; speeds:
1 to 250,000 pps
2 axis
1 to 250000. pps. 53 pts per axis
C200H-NC211
Detects angles of rotation by means of a resolver and provides ON C200H-CP114
and OFF outputs at specified angles. A maximum of 48 cam outputs
(16 external outputs and 32 internal outputs) maximum are available.
1 axis
Pulse input; counting speed: 50 kcps;
C200H-CT001-V1
5 VDC/12 VDC/24 VDC
1 axis
Pulse input; counting speed: 75 kcps;
RS-422 line driver
ASCII Unit
I/D Sensor Units
C200H-CT002
EEPROM
Local application, electromagnetic coupling
Remote application, microwave transmissions
Read/Write
Electromagnetic type
H d
Head
Microwave type
Data Carrier SRAM type for V600-H series.
(
(see
note))
EEPROM type for V600-H series.
60 messages max.; message length: 32, 48, or 64 s (switchable)
Connecting
RS-232C
Cable
Voice Unit
Fuzzy Logic Unit
C200H-ASC02
C200H-IDS01-V1
C200H-IDS21
V600-H series
V620-H series
V600-DjjRjj
V600-DjjPjj
C200H-OV001
C200H-CN224
Up to 8 inputs and 4 outputs. (I/O to and from specified data area C200H-FZ001
words)
Note For Read/Write Head and Data Carrier combinations, refer to the V600 FA ID System R/W Heads and EEPROM Data Carriers Operation Manual and Supplement or V600 FA ID System R/W Heads and SRAM
Data Carriers Operation Manual and Supplement.
C200H Link Units
Name
Host Link Unit
Specifications
Rack-mounting
CPU-mounting
PC Link Unit
C200H only
Model number
APF/PCF
C200H-LK101-PV1
RS-422
C200H-LK202-V1
RS-232C
C200H-LK201-V1
C1000H/C2000H
PCF
3G2A6-LK101-EV1
C500
APF/PCF
3G2A6-LK101-PEV1
C200H
RS-232C
3G2A6-LK201-EV1
C120
RS-422
3G2A6-LK202-EV1
RS-485
C200H-LK401
APF/PCF
Wired
APF/PCF
C200H-RM001-PV1
C200H-RM201
C200H-RT001-P
Remote I/O Master Unit
Multilevel
Up to two per PC; connectable to up to 5
Sl
Slaves
per PC totall
Remote I/O Slave Unit
100 to 120/200 to 240 VAC (switchable)
24 VDC
100 to 120/200 to 240 VAC (switchable)
24 VDC
110
C200H-RT002-P
Wired
C200H-RT201
C200H-RT202
Appendix C
Standard Models
Optional Products
Name
Specifications
Model number
I/O Unit Cover
Cover for 10-pin terminal block
C200H-COV11
Terminal Block Cover
Short protection for 10-pin terminal block
C200H-COV02
Short protection for 19-pin terminal block
C200H-COV03
Connector Cover
Protective cover for unused I/O Connecting Cable connectors
C500-COV01
Space Unit
Used for vacant slots
C200H-SP001
Battery Set
For C200H RAM Memory Unit only
C200H-BAT09
Relay
24 VDC
G6B-1174P-FD-US DC24
Backplane Insulation Plate
For 10-slot Backplane
C200H-ATTA1
For 8-slot Backplane
C200H-ATT81
For 5-slot Backplane
C200H-ATT51
For 3-slot Backplane
C200H-ATT31
For 5-slot Backplane
C200H-ATT53
For 8-slot Backplane
C200H-ATT83
For 3-slot Backplane
C200H-ATT33
Memory Unit Lock Fitting
To secure Memory Unit to CPU
C200H-ATT03
External Connector
Solder terminal; 40 pin with connector cover
C500-CE401
Solderless terminal; 40 pin with connector cover (crimp-type)
C500-CE402
Pressure welded terminal; 40 pin
C500-CE403
Solder terminal; 40 pin with connector cover (rightangle type)
C500-CE404
Solderless terminal; 40 pin with connector cover
(right-angle type)
C500-CE405
Solder terminal; 24 pin with connector cover
C500-CE241
Solderless terminal; 24 pin with connector cover (crimp-type)
C500-CE242
Pressure welded terminal; 24 pin
C500-CE243
I/O Bracket
Optical Units
Name
Optical I/O Unit
No-voltage Input Unit
8 pts.
AC/DC Input Unit
12 to 24 VAC/DC 8 pts.
AC Input Unit
100 to 120 VAC 8 pts.
Relay Output Unit
2A,, 250 VAC/24 VDC
( / l socket)
(w/relay
k ) 8 pts.
Triac Output Unit
1A, 100 to 120/200 to
240 VAC (w/built-in
surge killer) 8 pts.
Transistor Output Unit
Repeater Unit
Specifications
100 to 120 VAC
l
power supply
Model no.
APF/PCF
PCF
APF/PCF
3G5A2-ID001-PE
3G5A2-ID001-E
3G5A2-IM211-PE
PCF
3G5A2-IM211-E
APF/PCF
3G5A2-IA121-PE
PCF
3G5A2-IA121-E
APF/PCF
PCF
APF/PCF
3G5A2-OC221-PE
3G5A2-OC221-E
3G5A2-OA222-PE
PCF
3G5A2-OA222-E
0.3 A, 12 to 48 VDC
8 pts.
APF/PCF
3G5A2-OD411-PE
Connected between 32nd and 33rd Units
when connecting more than 33 Units in a
Remote Subsystem; power supply: 85 to
250 VAC.
APF/PCF
3G5A2-RPT01-PE
PCF
3G5A2-RPT01-E
100 to 120/200 to
240 VAC power
supply
111
Appendix C
Standard Models
Link Adapters
Name
Specifications
Link Adapter
Model no.
3 RS-422 connectors
3G2A9-AL001
3 optical connectors (APF/PCF)
3G2A9-AL002-PE
3 optical connectors (PCF)
3G2A9-AL002-E
1 connector for RS-232C; 2 for RS-422
3G2A9-AL003
1 connector each for APF/PCF, RS-422, and RS-232C
3G2A9-AL004-PE
1 connector each for PCF, RS-422, and RS-232C
3G2A9-AL004-E
1 connector each for APF/PCF and APF
3G2A9-AL005-PE
1 connector each for PCF and AGF
3G2A9-AL005-E
1 connector for APF/PCF; 2 for AGF
3G2A9-AL006-PE
1 connector for PCF; 2 for AGF
3G2A9-AL006-E
O/E converter; 1 connector for RS-485, 1 connector each for APF/PCF
B500-AL007-PE
Used for on-line removal of FIT or SYSMAC NET Link Units from the
SYSMAC NET Link System, SYSMAC NET Optical Link Adapter 3
connectors for APF/PCF.
B700-AL001
DIN Products
Name
Specifications
Model number
DIN Track Mounting Bracket
1 set (1 included)
C200H-DIN01
DIN Track
Length: 50 cm; height: 7.3 cm
PFP-50N
Length: 1 m; height: 7.3 cm
PFP-100N
Length: 1 m; height: 16 mm
PFP-100N2
Optical Fiber Cable
Plastic Optical Fiber Cable (APF) APF stands for “All-Plastic Fiber”. This cable
can be used to connect only Units having the suffix “-P” in their model number.
The maximum length is 20 m. The 3G5A2-PF002 cable comes without connectors and must be assembled by the user.
Product
Description
Model no.
Plastic Optical Fiber Cable
Cable only (optical connectors not provided)
Order in units of 5 m for cable less than 100 m, or in units of
200 m or 500 m.
3G5A2-PF002
Optical Connector A
2 pcs (brown),for plastic Optical fiber 10 m long max.
3G5A2-CO001
Optical Connector B
2 pcs (black) for plastic Optical fiber 8 to 20 m long
3G5A2-CO002
Plastic Optical Fiber Cable
1 m, w/optical connector A provided at both ends
3G5A2-PF101
112
Appendix C
Standard Models
Plastic-Clad Optical Fiber Cable (PCF) PCF stands for “Plastic-Clad Fiber”.
This cable can be used to connect any Units. The maximum length for Units having the suffix “-P” in their model number is 200 m. The maximum length for Units
without the suffix “-P” in their model number is 800 m.
Product
Optical Fiber Cable
(f indoors)
(for
i d
)
Description
0.1 m, w/connector
1 m, w/connector
2 m, w/connector
Ambient temperature: –10° to 70°C
3 m, w/connector
3G5A2-OF301
5 m, w/connector
3G5A2-OF501
10 m, w/connector
3G5A2-OF111
20 m, w/connector
3G5A2-OF211
30 m, w/connector
3G5A2-OF311
40 m, w/connector
3G5A2-OF411
50 m, w/connector
Optical Fiber Cable
(f outdoors)
(for
d
)
Model no.
3G5A2-OF011
3G5A2-OF101
3G5A2-OF201
1 to 500 m (Order in Units of 10 m)
501 to 800 m (Order in Units of 10 m)
3G5A2-OF511
Ambient temperature: –10° to 70°C
Ambient temperature: 0° to 55°C
(Must not be subjected to direct
sunlight)
3G5A2-OF002
Crystal Optical Fiber Cable (AGF) AGF stands for “All-Glass Fiber”. Crystal
optical fiber cable is not available from OMRON.
Cable Length
The connectors may be difficult to attach to the cables. Therefore, always leave
a little extra length when cutting the cable. The lengths given for pre-assembled
cables are as shown below.
Fiber length (m)
113
Appendix C
Standard Models
Peripheral Devices
Product
Programming Console
Description
Model no.
Vertical, w/backlight
3G2A5-PRO13-E
Horizontal, w/backlight
3G2A6-PRO15-E
Vertical type, w/backlight (Connecting cable required)
C200H-PRO27-E
Data Access Console
Connecting cable required
C200H-DAC01
Programming Console and
Data Access Console
Connecting Cables
For vertical type
Data Setting Console
Used for data input and process value display for the
C200H-TCjjj/C200H-TVjjj/C200H-PIDjj.
Data Setting
g Console Con- For C200H-DSC01
necting
ti C
Cables
bl
2m
C200H-CN222
4m
C200H-CN422
C200H-DSC01
2m
C200H-CN225
4m
C200H-CN425
Panel Mounting Bracket
For vertical Programming Console, Data Access Console
C200H-ATT01
Cassette Tape Recorder
Connecting Cable
1m
SCYP0R-PLG01
PROM Writer
For C-series PCs (12.5/21 V)
C500-PRW06
Floppy Disk Interface Unit
For C-series PCs
3G2C5-FDI03-E
Printer Interface Unit
For C-series PCs
3G2A5-PRT01-E
Memory Pack (for Printer
Interface)
For C200H/C1000H/C2000H
C2000-MP103-EV3
Printer Connecting Cable
For printer, 2 m
SCY-CN201
Peripheral Interface Unit
High-density I/O
12-/16-point I/O
Special I/O Unit
C200H-IP006
Connecting Cable
To connect GPC to Peripheral Interface Unit
2m
3G2A2-CN221
5m
C500-CN523
10 m
C500-CN131
20 m
C500-CN231
30 m
C500-CN331
40 m
C500-CN431
50 m
C500-CN531
Graphic Programming
Console
100 to 120 VAC, w/comment
3G2C5-GPC03-E
Memory Pack
For C200H/C1000H/C2000H
3G2C5-MP304-EV3
CRT Interface Unit
For connection between GPC and CRT
C500-GDI01
Programming Console
Mounting Base
To attach peripheral
devices to the CPU with
B-type or E-type I/O Units
mounted to the CPU Rack.
Space between the
Programming
Console Adapter and
CPU surface.
29 mm
C200H-BP001
49 mm
C200H-BP002
SYSMAC Support Software (SSS)
Product
SYSMAC Support Software
114
Description
3.5”, 2HD for IBM PC/AT compatible
Connection Cable
Model no.
C500-ZL3AT1-E
CQM1-CIF02
CV500-CIF01
Appendix C
Standard Models
SYSMAC LINK Unit/SYSMAC NET Link Unit
If you are using any of the Units listed in the table below, they must be mounted to
a CPU Rack that uses model C200H-CPU11-E as the CPU. Otherwise, these
Units will not operate properly.
Name
SYSMAC LINK Unit
Specifications
Wired via coaxial cable.
Must be mounted to leftmost 2 slots on Rack
with
ith C200H-CPU11-E
C200H CPU11 E
Wired via optical fiber cable.
Bus Connection Unit required
separately.
q
y May
y
b used
d with
ith APS Power
P
S
l U
it
be
Supply
Unit.
Model number
918 data
link words
C200HW-SLK23
2,966 data
link words
C200HW-SLK24
918 data
link words
C200HW-SLK13
2,966 data
link words
C200HW-SLK14
Terminator
One required for each node at ends of System
C1000H-TER01
Attachment Stirrup
Provided with SYSMAC LINK Unit
C200H-TL001
F Adapter
---
C1000H-CE001
F Adapter Cover
Communications
C bl
Cable
---
C1000H-COV01
Coaxial cables
Manufactured by Hitachi
Manufactured by Fujigura
For use with the C200H-SLK13/SLK14
ECXF5C-2V
5C-2V
C200H-APS03
Must be mounted to leftmost 2 slots on Rack with
C200H-CPU11-E
C200HS-SNT32
Power Supply
y
Ad
Adapter
Required
q
when supplying
y g power from Central
P
Power
Supply
S
l
Power Cable
Connects Power Supply
y Adapter and SYSLi k Unit
U i
MAC NET Link
Bus Connection Unit
Connects SYSMAC LINK Unit or SYSMAC
NET Link
Li k Unit
U i to CPU
C200H-APS01
C200H-APS02
C200H-CN111
C200H-CN211
C200H-CE001
C200H-CE002
Auxiliary Power Supply Unit
SYSMAC NET Link Unit
For 1 Unit
For 2 Units
For 1 Unit
For 2 Units
For 1 Unit
For 2 Units
115
Appendix D
Programming Console Operation
System Operations
Operation
Data All
Clear
Mode
Key Sequence
RUN
MON.
PROG.
NO
NO
YES
PLAY
CLR
REC
NOT
SET
MONTR
RESET
[Address]
All Clear
Partial
Clear
HR
Retained if
pressed
CNT
DM
I/O Table
Register
NO
I/O Table
Verify
YES
I/O Table
Read
YES
NO
YES
YES
YES
CLR
FUN
SHIFT
CLR
FUN
SHIFT
CLR
FUN
SHIFT
YES
[0-7]
CHG
*
9
7
D
1
3
WRITE
CH
YES
Rack no.
B
CH
[0-7]
Unit no.
VER
*
VER
CH
*
MONTR
SHIFT
SHIFT
Setting
Address
YES
Error
Message
Read
YES
YES
YES
YES
CLR
[Address]
CLR
FUN
YES
MONTR
MONTR
117
Appendix D
Programming Console Operation
Programming Operations
Operation
Mode
Key Sequence
RUN
MON.
PROG.
Setting
Address
YES
YES
YES
Program
Read
YES
YES
YES
Search
YES
YES
YES
CLR
[Address]
Address
currently
displayed
CLR
[Instruction]
SRCH
SRCH
CONT
[Address]
SHIFT
CLR
#
LR
HR
SHIFT
SRCH
SRCH
(AR)
HR
TIM
CNT
Instruction
Insert and
Instruction
Delete
Program
Check
NO
NO
NO
NO
YES
Locate
position in
program
then enter
YES
[Instruction]
INS
Instruction
currently
displayed
DEL
A
CLR
0
SRCH
SRCH
SRCH
To check up to END (01)
B
1
CLR
C
2
118
(0, 1, 2: check level)
To abort
Appendix D
Programming Console Operation
Monitoring and Data Change Operations
Operation
Monitor
Mode
Key Sequence
RUN
MON.
PROG.
YES
YES
YES
CLR
SHIFT
CONT
[Address]
#
SHIFT
CH
LR
*
HR
MONTR
SHIFT
HR
LD
CLR
OUT
SHIFT
CLR
(Monitor Clear)
TIM
CNT
DM
3 Word
Monitor
NO
Forced
Set/Reset
NO
NO
YES
Bit/Hex
monitor in progress
YES
YES
EXT
PLAY
MONTR
SET
REC
RESET
SHIFT
PLAY
SET
SHIFT
REC
RESET
NOT
PV
Change 1
NO
PV
Change 2
NO
YES
YES
YES
Change or Timer/Counter
currently displayed
CHG
[Data]
WRITE
YES
Change currently
displayed in binary
B
CHG
1
WRITE
A
0
119
Appendix D
Programming Console Operation
Operation
SV Increment/
Decrement, SV
Reset
RUN
Mode
MON. PROG.
NO
NO
YES
YES
YES
NO
Key Sequence
Timer/Counter
currently displayed
CHG
EXT
[New SW]
3-Word
Change
NO
YES
Cycle
YES
Time Read
YES
HEX-ASCII Display
Convert
YES
120
YES
YES
3 Word Monitor
in progress
[Data]
CHG
NO
CLR
YES
MONTR
Word currently
displayed
MONTR
TR
WRITE
WRITE
Appendix D
Programming Console Operation
Cassette Tape Operations
Operation
Mode
RUN
Key Sequence
MON. PROG.
A
Cassette
Tape
Write
NO
NO
YES
0
EXT
CLR
[Stop address]
WRITE
[File no.]
[Start address]
WRITE
Start recording with the
tape recorder.
REC
SHIFT
RESET
Wait for about 5 seconds.
(Cancel with the CLR key.)
A
EXT
CLR
Cassette
Tape
Read
NO
NO
0
YES
[File no.]
[Start address]
WRITE
Start tape recorder
playback.
REC
SHIFT
RESET
Wait for about 5 seconds.
A
EXT
CLR
Cassette
Tape
Verify
NO
NO
0
YES
[File no.]
[Start address]
WRITE
Start tape recorder
playback.
VER
Wait for about 5 seconds.
EXT
CLR
5 second tape leader
DM<–>
Cassette
Tape
B
1
NO
NO
YES
[File no.]
Start tape recorder
recording.
SHIFT
Start tape recorder
playback.
SHIFT
REC
RESET
PLAY
SET
VER
121
Appendix E
Programming Instructions
Basic Instructions
Name
Mnemonic
Symbol
AND
AND
Function
Operand Data Areas
Logically ANDs the status of the desig- B:
nated bit with the current execution condi- IR
SR
tion.
HR
AR
LR
TC
B
AND LOAD
AND LD
Logically ANDs the resultant execution None
conditions of the preceding logic blocks.
AND NOT
AND NOT
Logically ANDs the inverse of the desig- B:
nated bit with the current execution condi- IR
SR
tion.
HR
AR
LR
TC
B
COUNTER
CNT
CP
A decrementing counter. SV: 0 to 9999; N:
CP: count pulse; R: reset input. The TC bit TC
is entered as a constant.
CNT N
R
SV
LOAD
LD
SV:
IR
HR
AR
LR
DM
#
Defines the status of bit B as the execution B:
condition for subsequent operations in the IR
SR
instruction line.
HR
AR
LR
TC
TR
Defines the status of the inverse of bit B as B:
the execution condition for subsequent op- IR
SR
erations in the instruction line.
HR
AR
LR
TC
B
LOAD NOT
LD NOT
B
Data Areas
These footnote tables show the actual ranges of all data areas. Bit numbers are provided (except for DM and TC areas); remove the rightmost two digits for word numbers.
IR
00000 to 23515
SR
23600 to 25507
HR
HR 0000 to 9915
TR
TR 0 to 7
AR
AR 0000 to 2715
LR
LR 0000 to 6315
TC
TC 000 to 511
DM
Read/Wr: DM 0000 to DM 0999
Rd only: DM 1000 to DM 1999
#
0000 to 9999
or 0000 to FFFF
123
Appendix E
Programming Instructions
Name
Mnemonic
Symbol
Function
OR
OR
Operand Data Areas
Logically ORs the status of the designated B:
IR
bit with the current execution condition.
SR
HR
AR
LR
TC
B
OR LOAD
OR LD
Logically ORs the resultant execution con- None
ditions of the preceding logic blocks.
OR NOT
OR NOT
Logically ORs the inverse of the desig- B:
IR
nated bit with the execution condition.
SR
HR
AR
LR
TC
B
OUTPUT
OUT
Turns ON B for an ON execution condition; B:
turns OFF B for an OFF execution condi- IR
SR
tion.
HR
AR
LR
TR
B
OUTPUT NOT
OUT NOT
Turns OFF B for an ON execution condi- B:
tion; turns ON B for an OFF execution con- IR
SR
dition.
HR
AR
LR
B
TIMER
TIM
ON-delay (decrementing) timer operation. N:
Set value: 000.0 to 999.9 s. The same TC TC
bit cannot be assigned to more than one
timer/counter. The TC bit is entered as a
constant.
TIM N
SV
SV:
IR
HR
AR
LR
DM
#
Special Instructions
Name
Mnemonic
Symbol
Function
NO OPERATION
NOP(00)
Operand Data Areas
Nothing is executed and program opera- None
tion moves to the next instruction.
None
Data Areas
These footnote tables show the actual ranges of all data areas. Bit numbers are provided (except for DM and TC areas); remove the rightmost two digits for word numbers.
IR
00000 to 23515
124
SR
23600 to 25507
HR
HR 0000 to 9915
TR
TR 0 to 7
AR
AR 0000 to 2715
LR
LR 0000 to 6315
TC
TC 000 to 511
DM
Read/Wr: DM 0000 to DM 0999
Rd only: DM 1000 to DM 1999
#
0000 to 9999
or 0000 to FFFF
Appendix E
Programming Instructions
Name
Mnemonic
Symbol
END
END(01)
Function
Required at the end of each program. In- None
structions located after END(01) will not be
executed.
END(01)
INTERLOCK
IL(02)
INTERLOCK CLEAR
ILC(03)
If an interlock condition is OFF, all outputs None
and all timer PVs between the current
IL(02) and the next ILC(03) are turned OFF
or reset, respectively. Other instructions
are treated as NOP. Counter PVs are maintained. If the execution condition is ON, execution continues normally.
IL(02)
ILC(03)
JUMP
JMP(04)
JUMP END
JME(05)
JMP(04)
N
JME(05)
N
FAILURE ALARM
(@)FAL(06)
FAL(06)
SEVERE FAILURE
ALARM
FALS(07)
N
N:
00 to 99
(not applicable for
CjjP, CjjK, or
C120 PCs)
A fatal error is indicated by outputting N to N:
the FAL output area and the CPU is 01 to 99
stopped. The same FAL numbers are used
for both FAL(06) and FALS(07).
STEP DEFINE
STEP(08)
STEP START
SNXT(09)
When the execution condition for the
JMP(04) instruction is ON, all instructions
between JMP(04) and the corresponding
JME(05) are to be ignored or treated as
NOP(00). For direct jumps, the corresponding JMP(04) and JME(05) instructions have the same N value in the range
01 through 99. Direct jumps are usable
only once each per program (i.e., N is 01
through 99 can be used only once each)
and the instructions between the JUMP
and JUMP END instructions are ignored;
00 may be used as many times as necessary, instructions between JMP 00 and the
next JME 00 are treated as NOP, thus increasing cycle time, as compared with direct jumps.
Assigns a failure alarm code to the given N:
execution condition.When N can be given 00 to 99
a value between 01 and 99 to indicate that
a non-fatal error (i.e., one that will not stop
the CPU) has occurred. This is indicated
by the PC outputting N (the FAL number)
to the FAL output area. To reset the FAL
area, N can be defined as 00. This will
cause all previously recorded FAL numbers in the FAL area to be deleted. FAL
data sent after a 00 will be recorded in the
normal way. The same code numbers can
be used for both FAL(06) and FALS(07).
FALS(07) N
STEP(08)
Operand Data Areas
B
SNXT(09) B
When used with a control bit (B), defines
the start of a new step and resets the previous step. When used without B, it defines
the end of step execution.
B:
IR
HR
AR
LR
Used with a control bit (B) to indicate the
end of the step, reset the step, and start the
next step which has been defined with the
same control bit.
B:
IR
HR
AR
LR
Data Areas
These footnote tables show the actual ranges of all data areas. Bit numbers are provided (except for DM and TC areas); remove the rightmost two digits for word numbers.
IR
00000 to 23515
SR
23600 to 25507
HR
HR 0000 to 9915
TR
TR 0 to 7
AR
AR 0000 to 2715
LR
LR 0000 to 6315
TC
TC 000 to 511
DM
Read/Wr: DM 0000 to DM 0999
Rd only: DM 1000 to DM 1999
#
0000 to 9999
or 0000 to FFFF
125
Appendix E
Programming Instructions
Name
Mnemonic
SHIFT REGISTER
SFT(10)
Symbol
Function
Creates a bit shift register for data from the
starting word (St) through to the ending
word (E). I: input bit; P: shift pulse; R: reset
input. St must be less than or equal to E. St
and E must be in the same data area.
I
P
R
SFT(10)
St
E
15
00
15
KEEP(11)
REVERSIBLE
COUNTER
CNTR (12)
B
Increases or decreases the PV by one N:
whenever the increment input (II) or decre- TC
ment input (DI) signals, respectively, go
from OFF to ON. SV: 0 to 9999; R: reset
input. Each TC bit can be used for one timer/counter only. The TC bit is entered as a
constant.
II
DI
R
DIFFERENTIATE UP
DIFU(13)
DIFFERENTIATE
DOWN
DIFD(14)
IN
Defines a bit (B) as a latch, controlled by B:
IR
the set (S) and reset (R) inputs.
HR
AR
LR
S
R
St/E:
IR
HR
AR
LR
00
St
E
KEEP
KEEP(11)
Operand Data Areas
CNTR(12)
N
SV
DIFU(13) B
DIFU(13) turns ON the designated bit (B)
for one cycle on reception of the leading
(rising) edge of the input signal; DIFD(14)
turns ON the bit for one cycle on reception
of the trailing (falling) edge.
SV:
IR
SR
HR
AR
LR
DM
#
B:
IR
HR
AR
LR
DIFD(14) B
HIGH-SPEED TIMER
TIMH(15)
A high-speed, ON-delay (decrementing) N:
timer. SV: 00.02 to 99.99 s. Each TC bit can TC
be assigned to only one timer or counter.
The TC bit is entered as a constant.
TIMH(15) N
SV
WORD SHIFT
(@)WSFT(16)
The data in the words from the starting
word (St) through to the ending word (E),
is shifted left in word units, writing all zeros
into the starting word. St must be less than
or equal to E, and St and E must be in the
same data area.
WSFT(16)
St
E
SV:
IR
SR
HR
AR
LR
HR
#
St/E:
IR
HR
AR
LR
DM
Data Areas
These footnote tables show the actual ranges of all data areas. Bit numbers are provided (except for DM and TC areas); remove the rightmost two digits for word numbers.
IR
00000 to 23515
126
SR
23600 to 25507
HR
HR 0000 to 9915
TR
TR 0 to 7
AR
AR 0000 to 2715
LR
LR 0000 to 6315
TC
TC 000 to 511
DM
Read/Wr: DM 0000 to DM 0999
Rd only: DM 1000 to DM 1999
#
0000 to 9999
or 0000 to FFFF
Appendix E
Programming Instructions
Name
Mnemonic
Symbol
REVERSIBLE WORD
SHIFT
(@)RWS(17)
(CPU11)
Function
RWS(17)
C
St
E
CYCLE TIME
(@)SCAN(18)
(CPU11)
SCAN(18)
Mi
–––
–––
MULTI-WORD
COMPARE
(@)MCMP(19)
(CPU11)
MCMP(19)
S1
S2
D
COMPARE
(@)CMP(20)
CMP(20)
Cp1
Cp2
MOVE
(@)MOV(21)
Operand Data Areas
Creates and controls a reversible
non-synchronous word shift register between St and E. Exchanges the content of
a word containing zero with the content of
either the preceding or following word, depending on the shift direction. Bits 13, 14,
and 15 of control word C determine the
mode of operation of the register according to the following: The shift direction is
determined by bit 13 (OFF shifts the
non-zero data to higher addressed words;
ON to lower addressed words). Bit 14 is
the register enable bit (ON for shift enabled). Bit 15 is the reset bit (if bit 15 is ON,
the register will be set to zero between St
and E when the instruction is executed
with bit 14 also ON). St and E must be in
the same data area.
Sets the minimum cycle time, Mi, in tenths
of milliseconds. The possible setting
range is from 0 to 999.0 ms. If the actual
cycle time is less than the time set using
SCAN(18), the CPU will wait until the designated time has elapsed before starting
the next cycle.
C:
IR
SR
HR
AR
LR
TC
DM
#
St/E:
IR
SR
HR
AR
LR
TC
DM
Mi:
IR
SR
HR
AR
LR
TC
DM
#
–––:
Not used.
Compares the data within a block of 16
words of 4-digit hexadecimal data (S1 to
S1+15) with that in another block of 16
words (S2 to S2+15) on a word-by-word
basis. If the words are not in agreement,
the bit corresponding to unmatched words
turns ON in the result word, D. Bits corresponding to words that are equal are
turned OFF.
Compares the data in two 4-digit hexadecimal words (Cp1 and Cp2) and outputs result to the GR, EQ, or LE Flags.
S1/S2:
IR
SR
HR
AR
LR
TC
DM
D:
IR
SR
HR
AR
LR
TC
DM
Cp1/Cp2:
IR
SR
HR
AR
LR
TC
DM
#
Transfers data from source word, (S) to S:
IR
destination word (D).
SR
HR
AR
LR
TC
DM
#
MOV(21)
S
D
D:
IR
HR
AR
LR
DM
Data Areas
These footnote tables show the actual ranges of all data areas. Bit numbers are provided (except for DM and TC areas); remove the rightmost two digits for word numbers.
IR
00000 to 23515
SR
23600 to 25507
HR
HR 0000 to 9915
TR
TR 0 to 7
AR
AR 0000 to 2715
LR
LR 0000 to 6315
TC
TC 000 to 511
DM
Read/Wr: DM 0000 to DM 0999
Rd only: DM 1000 to DM 1999
#
0000 to 9999
or 0000 to FFFF
127
Appendix E
Programming Instructions
Name
Mnemonic
Symbol
Function
MOVE NOT
(@)MVN(22)
MVN(22)
S
D
BCD-TO-BINARY
(@)BIN(23)
BIN(23)
S
R
BINARY-TO-BCD
(@)BCD(24)
Operand Data Areas
Transfers the inverse of the data in the S:
IR
source word (S) to destination word (D).
SR
HR
AR
LR
TC
DM
#
D:
IR
HR
AR
LR
DM
Converts 4-digit, BCD data in source word S:
(S) into 16-bit binary data, and outputs IR
SR
converted data to result word (R).
HR
AR
LR
S
R
TC
(BCD)
(BIN)
DM
0
0
x16
x10
R:
IR
HR
AR
LR
DM
x101
x161
x102
x162
x103
x163
Converts binary data in source word (S) S:
into BCD, and outputs converted data to IR
SR
result word (R).
HR
AR
S
R
LR
(BIN)
(BCD)
DM
0
0
x16
BCD(24)
S
R
R:
IR
HR
AR
LR
DM
x10
ARITHMETIC SHIFT
LEFT
(@)ASL(25)
x101
x162
x102
x163
x103
Each bit within a single word of data (Wd) Wd:
is shifted one bit to the left, with zero written IR
HR
to bit 00 and bit 15 moving to CY.
AR
00
15
LR
CY
0
DM
Wd
ASL(25)
Wd
ARITHMETIC SHIFT
RIGHT
(@)ASR(26)
x161
Each bit within a single word of data (Wd) Wd:
is shifted one bit to the right, with zero writ- IR
HR
ten to bit 15 and bit 00 moving to CY.
AR
15
00
LR
0
Wd
CY
DM
ASR(26)
Wd
ROTATE LEFT
(@)ROL(27)
Each bit within a single word of data (Wd) Wd:
is moved one bit to the left, with bit 15 mov- IR
ing to carry (CY), and CY moving to bit 00. HR
AR
15
00
LR
DM
CY
Wd
ROL(27)
Wd
Data Areas
These footnote tables show the actual ranges of all data areas. Bit numbers are provided (except for DM and TC areas); remove the rightmost two digits for word numbers.
IR
00000 to 23515
128
SR
23600 to 25507
HR
HR 0000 to 9915
TR
TR 0 to 7
AR
AR 0000 to 2715
LR
LR 0000 to 6315
TC
TC 000 to 511
DM
Read/Wr: DM 0000 to DM 0999
Rd only: DM 1000 to DM 1999
#
0000 to 9999
or 0000 to FFFF
Appendix E
Programming Instructions
Name
Mnemonic
Symbol
Function
ROTATE RIGHT
(@)ROR(28)
Each bit within a single word of data (Wd)
is moved one bit to the right, with bit 00
moving to carry (CY), and CY moving to bit
15.
ROR(28)
Wd
15
CY
COMPLEMENT
(@)COM(29)
Adds two 4-digit BCD values (Au and Ad) Au/Ad: R:
IR
and content of CY, and outputs the result to IR
SR
HR
the specified result word (R).
HR
AR
AR
LR
Au + Ad +
CY
R CY
LR
DM
TC
DM
#
ADD(30)
Au
Ad
R
BCD SUBTRACT
(@)SUB(31)
Subtracts both the 4-digit BCD subtrahend
(Su) and content of CY, from the 4-digit
BCD minuend (Mi) and outputs the result
to the specified result word (R).
SUB(31)
Mi
Su
R
Mi – Su – CY
BCD MULTIPLY
(@)MUL(32)
R CY
Multiplies the 4-digit BCD multiplicand
(Md) and 4-digit BCD multiplier (Mr), and
outputs the result to the specified result
words (R and R + 1). R and R + 1 must be
in the same data area.
MUL(32)
Md
Mr
R
BCD DIVIDE
(@)DIV(33)
00
Wd
Wd:
IR
HR
AR
LR
DM
Inverts bit status of one word (Wd) of data, Wd:
IR
changing 0s to 1s, and vice versa.
HR
AR
Wd
Wd
LR
DM
COM(29)
Wd
BCD ADD
(@)ADD(30)
Operand Data Areas
Md x Mr
R+1
R
Divides the 4-digit BCD dividend (Dd) by
the 4-digit BCD divisor (Dr), and outputs
the result to the specified result words. R
receives the quotient; R + 1 receives the
remainder. R and R + 1 must be in the
same data area.
DIV(33)
Dd
Dr
R
Dd ÷ Dr
LOGICAL AND
(@)ANDW(34)
R+1
R
Logically ANDs two 16-bit input words (I1
and I2) and sets the bits in the result word
(R) if the corresponding bits in the input
words are both ON.
ANDW(34)
I1
I2
R
Mi/Su:
IR
SR
HR
AR
LR
TC
DM
#
R:
IR
HR
AR
LR
DM
Md/Mr:
IR
SR
HR
AR
LR
TC
DM
#
R:
IR
HR
AR
LR
DM
Dd/Dr:
IR
SR
HR
AR
LR
TC
DM
#
R:
IR
HR
AR
LR
DM
I1/I2:
IR
SR
HR
AR
LR
TC
DM
#
R:
IR
HR
AR
LR
DM
Data Areas
These footnote tables show the actual ranges of all data areas. Bit numbers are provided (except for DM and TC areas); remove the rightmost two digits for word numbers.
IR
00000 to 23515
SR
23600 to 25507
HR
HR 0000 to 9915
TR
TR 0 to 7
AR
AR 0000 to 2715
LR
LR 0000 to 6315
TC
TC 000 to 511
DM
Read/Wr: DM 0000 to DM 0999
Rd only: DM 1000 to DM 1999
#
0000 to 9999
or 0000 to FFFF
129
Appendix E
Programming Instructions
Name
Mnemonic
Symbol
LOGICAL OR
(@)ORW(35)
Function
ORW(35)
I1
I2
R
EXCLUSIVE OR
(@)XORW(36)
XORW(36)
I1
I2
R
EXCLUSIVE NOR
(@)XNRW(37)
XNRW(37)
I1
I2
R
INCREMENT
(@)INC(38)
Operand Data Areas
Logically ORs two 16-bit input words (I1
and I2) and sets the bits in the result word
(R) when one or both of the corresponding
bits in the input words is/are ON.
I1/I2:
IR
SR
HR
AR
LR
TC
DM
#
R:
IR
HR
AR
LR
DM
Exclusively ORs two 16-bit input words (I1
and I2) and sets the bits in the result word
(R) when the corresponding bits in input
words differ in status.
I1/I2:
IR
SR
HR
AR
LR
TC
DM
#
R:
IR
HR
AR
LR
DM
Exclusively NORs two 16-bit input words
(I1 and I2) and sets the bits in the result
word (R) when the corresponding bits in
both input words have the same status.
I1/I2:
IR
SR
HR
AR
LR
TC
DM
#
R:
IR
HR
AR
LR
DM
Increments the value of a 4-digit BCD word Wd:
(Wd) by one, without affecting carry (CY). IR
HR
AR
LR
DM
INC(38)
Wd
DECREMENT
(@)DEC(39)
Decrements the value of a 4-digit BCD Wd:
IR
word by 1, without affecting carry (CY).
HR
AR
LR
DM
DEC(39)
Wd
SET CARRY
(@)STC(40)
Sets the Carry Flag (i.e., turns CY ON).
None
STC(40)
CLEAR CARRY
(@)CLC(41)
Clears the Carry Flag (i.e, turns CY OFF). None
CLC(41)
Data Areas
These footnote tables show the actual ranges of all data areas. Bit numbers are provided (except for DM and TC areas); remove the rightmost two digits for word numbers.
IR
00000 to 23515
130
SR
23600 to 25507
HR
HR 0000 to 9915
TR
TR 0 to 7
AR
AR 0000 to 2715
LR
LR 0000 to 6315
TC
TC 000 to 511
DM
Read/Wr: DM 0000 to DM 0999
Rd only: DM 1000 to DM 1999
#
0000 to 9999
or 0000 to FFFF
Appendix E
Programming Instructions
Name
Mnemonic
Symbol
Function
DISPLAY MESSAGE
(@)MSG(46)
Operand Data Areas
Displays eight words of ASCII code, starting from FM, on the Programming Console
or GPC. All eight words must be in the
same data area.
MSG(46)
FM
FM
FM+ 7
A
B
C
D
D
FM:
IR
HR
AR
LR
TC
DM
#
P
ABCD........DP
LONG MESSAGE
(@)LMSG(47)
(CPU11)
LMSG(47)
S
D
–––
TERMINAL MODE
(@)TERM(48)
(CPU11)
TERM(48)
–––
–––
–––
SET SYSTEM
(@)SYS(49)
(CPU11)
SYS(49)
P
–––
–––
Outputs a 32-character message to either
a Programming Console, or a device connected via the RS-232C interface. The
output message must be in ASCII beginning at address S. The destination of the
message is designated in D: 000 specifies
that the message is to be output to the
GPC; 001 specifies the RS-232C interface, starting with the leftmost byte; and
002 specifies the RS-232C interface,
starting from the rightmost byte.
When the execution condition is ON, the
Programming Console operation mode is
changed to TERMINAL mode. There is no
program command available to change the
mode back to CONSOLE mode. Pressing
the CHNG key on the Programming Console manually toggles between the two
modes.
S:
IR
HR
AR
LR
TC
DM
Used to either control certain operating
parameters, or to execute the system
commands that can be executed from the
AR area.
The contents of the leftmost 8 bits (i.e., bits
08 to 15) of P determine which function
SYS(49) will have. If they contain A3, then
bit 00 specifies whether the battery will be
checked, and bit 07 specifies whether I/O
status will be maintained on start up. Bit 06
specifies whether the Force Status Hold
Bit is set.
To be effective SYS(49) must be programmed at address 00001 with LD AR
1001 at address 00000.
P:
#
D:
–––:
#000 Not
#001 used.
#002
None
–––:
Not used.
Data Areas
These footnote tables show the actual ranges of all data areas. Bit numbers are provided (except for DM and TC areas); remove the rightmost two digits for word numbers.
IR
00000 to 23515
SR
23600 to 25507
HR
HR 0000 to 9915
TR
TR 0 to 7
AR
AR 0000 to 2715
LR
LR 0000 to 6315
TC
TC 000 to 511
DM
Read/Wr: DM 0000 to DM 0999
Rd only: DM 1000 to DM 1999
#
0000 to 9999
or 0000 to FFFF
131
Appendix E
Programming Instructions
Name
Mnemonic
Symbol
Function
BINARY ADD
(@)ADB(50)
Operand Data Areas
Adds the 4-digit augend (Au), 4-digit ad- Au/Ad: R:
IR
dend (Ad), and content of CY and outputs IR
HR
the result to the specified result word (R). SR
HR
AR
AR
LR
Au
LR
DM
TC
+ Ad
DM
#
ADB(50)
Au
Ad
R
+
CY
R
CY
BINARY SUBTRACT
(@)SBB(51)
Subtracts the 4-digit hexadecimal subtrahend (Su) and content of carry, from the
4-digit hexadecimal minuend (Mi), and outputs the result to the specified result word
(R).
SBB(51)
Mi
Su
R
Mi
–
Su
–
CY
Mi/Su:
IR
SR
HR
AR
LR
TC
DM
#
R:
IR
HR
AR
LR
DM
Md/Mr:
IR
SR
HR
AR
LR
TC
DM
#
R:
IR
HR
AR
LR
DM
Dd/Dr:
IR
SR
HR
AR
LR
TC
DM
#
R:
IR
HR
AR
LR
R
CY
BINARY MULTIPLY
(@)MLB(52)
Multiplies the 4-digit hexadecimal multiplicand (Md) and 4-digit multiplier (Mr), and
outputs the 8-digit hexadecimal result to
the specified result words (R and R+1). R
and R+1 must be in the same data area.
MLB(52)
Md
Mr
R
Md
X
Quotient
Mr
R
Remainder R+1
BINARY DIVIDE
(@)DVB(53)
Divides the 4-digit hexadecimal dividend
(Dd) by the 4-digit divisor (Dr), and outputs
result to the designated result words ( R
and R + 1). R and R + 1 must be in the same
data area.
DVB(53)
Dd
Dr
R
÷
Quotient
Remainder
Dd
Dr
R
R+1
Data Areas
These footnote tables show the actual ranges of all data areas. Bit numbers are provided (except for DM and TC areas); remove the rightmost two digits for word numbers.
IR
00000 to 23515
132
SR
23600 to 25507
HR
HR 0000 to 9915
TR
TR 0 to 7
AR
AR 0000 to 2715
LR
LR 0000 to 6315
TC
TC 000 to 511
DM
Read/Wr: DM 0000 to DM 0999
Rd only: DM 1000 to DM 1999
#
0000 to 9999
or 0000 to FFFF
Appendix E
Programming Instructions
Name
Mnemonic
Symbol
DOUBLE BCD ADD
(@)ADDL(54)
Function
Adds two 8-digit values (2 words each) and
the content of CY, and outputs the result to
the specified result words. All words for
any one operand must be in the same data
area.
ADDL(54)
Au
Ad
R
Au
Au + 1
+
Ad + 1
R+1
Subtracts both the 8-digit BCD subtrahend
and the content of CY from an 8-digit BCD
minuend, and outputs the result to the specified result words. All words for any one
operand must be in the same data area.
–
Mi
Su + 1
R+1
R:
IR
HR
AR
LR
DM
R
Multiplies the 8-digit BCD multiplicand and
8-digit BCD multiplier, and outputs the result to the specified result words. All words
for any one operand must be in the same
data area.
R+3
Md/Mr:
IR
SR
HR
AR
LR
TC
DM
CY
CY
X
R:
IR
HR
AR
LR
DM
Su
–
MULL(56)
Md
Mr
R
Mi/Su:
IR
SR
HR
AR
LR
TC
DM
R
Mi + 1
DOUBLE BCD
MULTIPLY
(@)MULL(56)
R:
IR
HR
AR
LR
DM
CY
CY
SUBL(55)
Mi
Su
R
Au/Ad:
IR
SR
HR
AR
LR
TC
DM
Ad
+
DOUBLE BCD
SUBTRACT
(@)SUBL(55)
Operand Data Areas
Md + 1
Md
Mr + 1
Md
R+2
R+1
R
Data Areas
These footnote tables show the actual ranges of all data areas. Bit numbers are provided (except for DM and TC areas); remove the rightmost two digits for word numbers.
IR
00000 to 23515
SR
23600 to 25507
HR
HR 0000 to 9915
TR
TR 0 to 7
AR
AR 0000 to 2715
LR
LR 0000 to 6315
TC
TC 000 to 511
DM
Read/Wr: DM 0000 to DM 0999
Rd only: DM 1000 to DM 1999
#
0000 to 9999
or 0000 to FFFF
133
Appendix E
Programming Instructions
Name
Mnemonic
Symbol
DOUBLE BCD DIVIDE
(@)DIVL(57)
Function
Divides the 8-digit BCD dividend by an
8-digit BCD divisor, and outputs the result
to the specified result words. All words for
any one operand must be in the same data
area.
DIVL(57)
Dd
Dr
R
÷
Quotient
Remainder
DOUBLE
BCD-TO-DOUBLE
BINARY (@)BINL(58)
Dd
Dr + 1
Dr
R+1
R
R+3
S+1
S:
IR
SR
HR
AR
LR
TC
DM
R:
IR
HR
AR
LR
DM
S:
IR
SR
HR
AR
LR
DM
R:
IR
HR
AR
LR
DM
R+1
R
S
S+1
R+1
Compares the 8-digit hexadecimal values
in words S1+1 and S1 with the values in
S2+1 and S2, and indicates the result using
the Greater Than, Less Than, and Equal
Flags in the AR area. S1+1 and S2+1 are
regarded as the most significant data in
each pair of words.
CMPL(60)
S1
S2
R:
IR
HR
AR
LR
DM
R+2
Converts the binary value of the two
source words (S: starting word) into eight
digits of BCD data, and outputs the converted data to the two result words (R:
starting result word). Both words for any
one operand must be in the same data
area.
BCDL(59)
S
R
Dd/Dr:
IR
SR
HR
AR
LR
TC
DM
R
S
DOUBLE COMPARE
CMPL(60)
(CPU11)
Dd + 1
Converts the BCD value of the two source
words (S: starting word) into binary and
outputs the converted data to the two result
words (R: starting word). All words for any
one operand must be in the same data
area.
BINL(58)
S
R
DOUBLE
BINARY-TO-DOUBLE
BCD
(@)BCDL(59)
Operand Data Areas
S1,S2:
IR
SR
HR
AR
LR
TC
DM
Data Areas
These footnote tables show the actual ranges of all data areas. Bit numbers are provided (except for DM and TC areas); remove the rightmost two digits for word numbers.
IR
00000 to 23515
134
SR
23600 to 25507
HR
HR 0000 to 9915
TR
TR 0 to 7
AR
AR 0000 to 2715
LR
LR 0000 to 6315
TC
TC 000 to 511
DM
Read/Wr: DM 0000 to DM 0999
Rd only: DM 1000 to DM 1999
#
0000 to 9999
or 0000 to FFFF
Appendix E
Programming Instructions
Name
Mnemonic
Symbol
COLUMN-TO-WORD
(@)CTW(63)
(CPU11)
Function
Fetches data from the same numbered bit
(C) in 16 consecutive words (where S is the
address of the first source word), and
creates a 4-digit word by consecutively
placing the data in the bits of the destination word, D.
The bit from word S is placed into bit 00 of
D, the bit from word S+1 is placed into bit
01, etc.
CTW(63)
S
C
D
WORD-TO-COLUMN
(@)WTC(64)
(CPU11)
SECONDS-TO-HOURS
(@)STH(66)
(CPU11)
Bit C
D
S
0
0
00
S+1
1
1
01
S+15
0
0
15
Places bit data from the source word (S),
consecutively into the same numbered
bits of the 16 consecutive destination
words (where D is the address of the first
destination word).
Bit 00 from word S is placed into bit C of
word D, bit 01 from word S is placed into
bit C of word D+1, etc.
WTC(64)
S
D
C
HOURS-TO-SECONDS
(@)HTS(65)
(CPU11)
Operand Data Areas
S
Bit C
00
1
1
D
01
1
1
D+1
15
0
0
D+15
HTS(65)
S
R
–––
Converts a time given in hours/minutes/
seconds (S and S+1) to an equivalent time
in seconds only (R and R+1). S and S+1
must be BCD and within one data area. R
and R+1 must also be within one data
area.
STH(66)
S
R
–––
Converts a time given in seconds (S and
S+1) to an equivalent time in hours/minutes/seconds (R and R+1). S and S+1 must
be BCD between 0 and 35,999,999, and
within the same data area. R and R+1
must also be within one data area.
S:
IR
SR
HR
AR
LR
TC
DM
C:
IR
SR
HR
AR
LR
TC
DM
#
D:
IR
SR
HR
AR
LR
TC
DM
S:
IR
SR
HR
AR
LR
TC
DM
D:
IR
SR
HR
AR
LR
TC
DM
C:
IR
SR
HR
AR
LR
TC
DM
#
S:
IR
SR
HR
AR
LR
TC
DM
S:
IR
SR
HR
AR
LR
TC
DM
R:
IR
SR
HR
AR
LR
TC
DM
R:
IR
SR
HR
AR
LR
TC
DM
–––:
Not
used.
–––:
Not
used.
Data Areas
These footnote tables show the actual ranges of all data areas. Bit numbers are provided (except for DM and TC areas); remove the rightmost two digits for word numbers.
IR
00000 to 23515
SR
23600 to 25507
HR
HR 0000 to 9915
TR
TR 0 to 7
AR
AR 0000 to 2715
LR
LR 0000 to 6315
TC
TC 000 to 511
DM
Read/Wr: DM 0000 to DM 0999
Rd only: DM 1000 to DM 1999
#
0000 to 9999
or 0000 to FFFF
135
Appendix E
Programming Instructions
Name
Mnemonic
Symbol
BIT COUNTER
(@)BCNT(67)
Function
Operand Data Areas
Counts the number of ON bits in one or
more words (SB is the beginning source
word) and outputs the result to the specified result word (R). N gives the number of
words to be counted. All words in which bit
are to be counted must be in the same data
area.
BCNT(67)
N
SB
R
BLOCK COMPARE
(@)BCMP(68)
Compares a 1-word binary value (S) with
the 16 ranges given in the comparison
table (CB is the starting word of the comparison block). If the value falls within any
of the ranges, the corresponding bits in the
result word (R) will be set. The comparison
block must be within one data area.
BCMP(68)
S
CB
R
Lower limit Upper limit
CB
CB+1
1
CB+2 CB+3
0
1
CB+4 CB+5
S
CB+30 CB+31
Lower limit
≤S≤
N:
IR
SR
HR
AR
LR
TC
DM
S:
IR
SR
HR
AR
LR
TC
DM
#
R:
IR
HR
AR
LR
TC
DM
SB:
IR
SR
HR
AR
LR
TC
DM
R:
IR
HR
AR
LR
TC
DM
CB:
IR
SR
HR
LR
TC
DM
Result
0
Upper limit
1
Data Areas
These footnote tables show the actual ranges of all data areas. Bit numbers are provided (except for DM and TC areas); remove the rightmost two digits for word numbers.
IR
00000 to 23515
136
SR
23600 to 25507
HR
HR 0000 to 9915
TR
TR 0 to 7
AR
AR 0000 to 2715
LR
LR 0000 to 6315
TC
TC 000 to 511
DM
Read/Wr: DM 0000 to DM 0999
Rd only: DM 1000 to DM 1999
#
0000 to 9999
or 0000 to FFFF
Appendix E
Programming Instructions
Name
Mnemonic
Symbol
VALUE CALCULATE
(@)VCAL(69)
(CPU11)
Function
Operand Data Areas
Calculates the cosine, or sine of the given
degree value, or determines the y-coordinate of the given x value in a previously established line graph. For the sine and cosine conversions, S is entered in BCD as
an angle (in the range 0.0 to 90.0 degrees).
When calculating the y-coordinate in a
graph, S gives the address of the value of
the x-coordinate. The calculated data is
transferred to the destination word (D).
Sine and cosine results are given in BCD.
Line graph coordinate calculations (interpolation) can be in BCD or BIN.
The data in the control word (C) determines which operation is performed. If C is
entered as a constant with a value of 0000
or 0001, the sine or cosine, respectively, of
the source data value is calculated. If C is
entered as a word designation, it gives the
address of the first word of the data table
for the line graph. The value of the first two
digits gives m–1, where m is the number of
data points for which coordinates are given
on the line graph. Bits 14 and 15, respectively, specify the output and input data formats (0 indicates BCD, 1 indicates binary).
VCAL(69)
C
S
D
C:
IR
SR
HR
AR
LR
TC
DM
#
S:
IR
SR
HR
AR
LR
TC
DM
D:
IR
SR
HR
AR
LR
TC
DM
Y
Ym
Y4
Y3
Y1
Y2
Y0
X1
Input
data
format
15
Xm
X2 X3 X4
Output
data
format
X
m–1, where m is the
number of data points
whose coordinates are
specified in the table
14
08 07
00
000000
C
C+1
Xm (max. x-coordinate for this table)
C+2
Y0
C+3
X1
C+4
Y1
C+5
X2
C+6
Y2
C+(2m+1)
Xm
C+(2m+2)
Ym
Data Areas
These footnote tables show the actual ranges of all data areas. Bit numbers are provided (except for DM and TC areas); remove the rightmost two digits for word numbers.
IR
00000 to 23515
SR
23600 to 25507
HR
HR 0000 to 9915
TR
TR 0 to 7
AR
AR 0000 to 2715
LR
LR 0000 to 6315
TC
TC 000 to 511
DM
Read/Wr: DM 0000 to DM 0999
Rd only: DM 1000 to DM 1999
#
0000 to 9999
or 0000 to FFFF
137
Appendix E
Programming Instructions
Name
Mnemonic
Symbol
BLOCK TRANSFER
(@)XFER(70)
Function
Moves the content of several consecutive
source words (S gives the address of the
starting source word) to consecutive destination words (D is the starting destination
word). All source words must be in the
same data area, as must all destination
words. Transfers can be within one data
area or between two data areas, but the
source and destination words must not
overlap.
XFER(70)
N
S
D
BLOCK SET
(@)BSET(71)
Operand Data Areas
S
D
S+1
D+1
S+N–1
D+N–1
St
S
S:
IR
HR
AR
LR
TC
DM
St/E:
IR
HR
AR
LR
TC
DM
S:
IR
SR
HR
AR
LR
TC
DM
#
Sq:
IR
SR
HR
AR
LR
TC
DM
R:
IR
HR
AR
LR
DM
D:
IR
SR
HR
AR
LR
TC
DM
#
No. of
Words
Copies the content of one word or constant
(S) to several consecutive words (from the
starting word, St, through to the ending
word, E). St and E must be in the same
data area.
BSET(71)
S
St
E
N:
IR
SR
HR
AR
LR
TC
DM
#
E
SQUARE ROOT
(@)ROOT(72)
Computes the square root of an 8-digit
BCD value (Sq and Sq + 1) and outputs the
truncated 4-digit, integer result to the specified result word (R). Sq and Sq + 1 must
be in the same data area.
ROOT(72)
Sq
R
Sq+1
Sq
R
DATA EXCHANGE
(@)XCHG(73)
Exchanges the contents of two words (E1 E1/E2:
IR
and E2).
HR
AR
E1
E2
LR
TC
DM
XCHG(73)
E1
E2
Data Areas
These footnote tables show the actual ranges of all data areas. Bit numbers are provided (except for DM and TC areas); remove the rightmost two digits for word numbers.
IR
00000 to 23515
138
SR
23600 to 25507
HR
HR 0000 to 9915
TR
TR 0 to 7
AR
AR 0000 to 2715
LR
LR 0000 to 6315
TC
TC 000 to 511
DM
Read/Wr: DM 0000 to DM 0999
Rd only: DM 1000 to DM 1999
#
0000 to 9999
or 0000 to FFFF
Appendix E
Programming Instructions
Name
Mnemonic
Symbol
Function
ONE DIGIT SHIFT LEFT
(@)SLD(74)
Operand Data Areas
Shifts all data, between the starting word
(St) and ending word (E), one digit (four
bits) to the left, writing zero into the rightmost digit of the starting word. St and E
must be in the same data area.
SLD(74)
St
E
St
St/E:
IR
HR
AR
LR
DM
0
St + 1
E
ONE DIGIT SHIFT
RIGHT
(@)SRD(75)
Shifts all data, between starting word (St)
and ending word (E), one digit (four bits) to
the right, writing zero into the leftmost digit
of the ending word. St and E must be in the
same data area.
SRD(75)
E
St
St/E:
IR
HR
AR
LR
DM
E
E–1
0
4-TO-16 DECODER
(@)MLPX(76)
St
Converts up to four hexadecimal digits in
the source word (S), into decimal values
from 0 to 15, and turns ON the corresponding bit(s) in the result word(s) (R). There is
one result word for each converted digit.
Digits to be converted are designated by
Di. (The rightmost digit specifies the first
digit. The next digit to the left gives the
number of digits to be converted minus 1.
The two leftmost digits are not used.)
MLPX(76)
S
Di
R
S
S:
IR
SR
HR
AR
LR
TC
DM
Di:
IR
HR
AR
LR
TC
DM
#
R:
IR
HR
AR
LR
DM
S:
IR
SR
HR
AR
LR
TC
DM
R:
IR
HR
AR
LR
DM
Di:
IR
HR
AR
LR
TC
DM
#
0 to F
R
15
16-TO-4 ENCODER
(@)DMPX(77)
00
Determines the position of the leftmost ON
bit in the source word(s) (starting word: S)
and turns ON the corresponding bit(s) in
the specified digit of the result word (R).
One digit is used for each source word.
Digits to receive the converted values are
designated by Di. (The rightmost digit
specifies the first digit. The next digit to left
gives the number of words to be converted
minus 1. The two leftmost digits are not
used.)
DMPX(77)
S
R
Di
15
00
S
R
0 to F
Data Areas
These footnote tables show the actual ranges of all data areas. Bit numbers are provided (except for DM and TC areas); remove the rightmost two digits for word numbers.
IR
00000 to 23515
SR
23600 to 25507
HR
HR 0000 to 9915
TR
TR 0 to 7
AR
AR 0000 to 2715
LR
LR 0000 to 6315
TC
TC 000 to 511
DM
Read/Wr: DM 0000 to DM 0999
Rd only: DM 1000 to DM 1999
#
0000 to 9999
or 0000 to FFFF
139
Appendix E
Programming Instructions
Name
Mnemonic
Symbol
7-SEGMENT DECODER
(@)SDEC(78)
Function
Operand Data Areas
Converts hexadecimal values from the
source word (S) into 7-segment display
data. Results are placed in consecutive
half-words, starting at the first destination
word (D). Di gives digit and destination details. (The rightmost digit gives the first digit
to be converted. The next digit to the left
gives the number of digits to be converted
minus 1. If the next digit is 1, the first converted data is transferred to left half of the
first destination word. If it is 0, the transfer
is to the right half).
SDEC(78)
S
Di
D
S:
IR
SR
HR
AR
LR
TC
DM
Di:
IR
HR
AR
LR
TC
DM
#
Dd/Dr:
IR
SR
HR
AR
LR
TC
DM
R:
IR
HR
AR
LR
DM
S:
IR
SR
HR
AR
LR
TC
DM
#
DBs:
IR
HR
AR
LR
TC
DM
D:
IR
HR
AR
LR
DM
S
0 to F
D
FLOATING POINT
DIVIDE
(@)FDIV(79)
Divides one floating point value by another
and outputs a floating point result. The
rightmost seven digits of each set of two
words (eight digits) are used for mantissa,
and the leftmost digit is used for the exponent and its sign (Bits 12 to 14 give the exponent value, 0 to 7. If bit 15 is 0, the exponent is positive; if it’s 1, the exponent is
negative).
FDIV(79)
Dd
Dr
R
÷
SINGLE WORD
DISTRIBUTE
(@)DIST(80)
Dd + 1
Dd
Dr + 1
Dr
R+1
R
Moves one word of source data (S) to the
destination word whose address is given
by the destination base word (DBs) plus
offset (Of).
DIST(80)
S
DBs
Of
S
Base (DBs)
+
Offset (OF)
(S)
Of:
IR
HR
AR
LR
TC
DM
#
(DBs + Of)
Data Areas
These footnote tables show the actual ranges of all data areas. Bit numbers are provided (except for DM and TC areas); remove the rightmost two digits for word numbers.
IR
00000 to 23515
140
SR
23600 to 25507
HR
HR 0000 to 9915
TR
TR 0 to 7
AR
AR 0000 to 2715
LR
LR 0000 to 6315
TC
TC 000 to 511
DM
Read/Wr: DM 0000 to DM 0999
Rd only: DM 1000 to DM 1999
#
0000 to 9999
or 0000 to FFFF
Appendix E
Programming Instructions
Name
Mnemonic
Symbol
DATA COLLECT
(@)COLL(81)
Function
Operand Data Areas
Extracts data from the source word and
writes it to the destination word (D). The
source word is determined by adding the
offset (Of) to the address of the source
base word (SBs).
COLL(81)
SBs
Of
D
SBs:
IR
SR
HR
AR
LR
TC
DM
Of:
IR
HR
AR
LR
TC
DM
#
D:
IR
HR
AR
LR
TC
DM
S:
IR
SR
HR
AR
LR
DM
#
Bi:
IR
HR
AR
LR
TC
DM
#
D:
IR
HR
AR
LR
DM
S:
IR
SR
HR
AR
LR
TC
DM
#
Di:
IR
HR
AR
LR
TC
DM
#
D:
IR
SR
HR
AR
LR
TC
DM
Base (DBs)
+
Offset (OF)
(SBs+Of)
MOVE BIT
(@)MOVB(82)
(D)
Transfers the designated bit of the source
word or constant (S) to the designated bit
of the destination word (D). The rightmost
two digits of the bit designator (Bi) specify
the source bit. The two leftmost digits
specify the destination bit.
MOVB(82)
S
Bi
D
S
D
MOVE DIGIT
(@)MOVD(83)
Moves hexadecimal content of up to four
specified 4-bit source digit(s) from the
source word to the specified destination
digit(s) (S gives the source word address.
D specifies the destination word). Specific
digits within the source and destination
words are defined by the Digit Designator
(Di) digits. (The rightmost digit gives the
first source digit. The next digit to the left
gives the number of digits to be moved.
The next digit specifies the first digit in the
destination word.)
MOVD(83)
S
Di
D
15
00
S
D
Data Areas
These footnote tables show the actual ranges of all data areas. Bit numbers are provided (except for DM and TC areas); remove the rightmost two digits for word numbers.
IR
00000 to 23515
SR
23600 to 25507
HR
HR 0000 to 9915
TR
TR 0 to 7
AR
AR 0000 to 2715
LR
LR 0000 to 6315
TC
TC 000 to 511
DM
Read/Wr: DM 0000 to DM 0999
Rd only: DM 1000 to DM 1999
#
0000 to 9999
or 0000 to FFFF
141
Appendix E
Programming Instructions
Name
Mnemonic
Symbol
REVERSIBLE SHIFT
REGISTER
(@)SFTR(84)
Function
Operand Data Areas
Shifts bits in the specified word or series of
words either left or right. Starting (St) and
ending words (E) must be specified. Control word (C) contains shift direction, reset
input, and data input. (Bit 12: 0 = shift right,
1 = shift left. Bit 13 is the value shifted into
the source data, with the bit at the opposite
end being moved to CY. Bit 14: 1 = shift enabled, 0 = shift disabled. If bit 15 is ON
when SFTR(89) is executed with an ON
condition, the entire shift register and CY
will be set to zero.) St and E must be in the
same data area and St must be less than
or equal to E.
SFTR(84)
C
St
E
15
14
13
12 11
C
St/E/C:
IR
HR
AR
TC
LR
DM
00
Not used
15
00
15
00
E
St
IN
CY
15
00
15
E
IN
00
St
CY
TABLE COMPARE
(@)TCMP(85)
Compares a 4-digit hexadecimal value
(CD) with values in table consisting of 16
words (TB: is the first word of the comparison table). If the value of CD falls within
any of the comparison ranges, corresponding bits in result word (R) are set (1
for agreement, and 0 for disagreement).
The table must be entirely within the one
data area.
TCMP(85)
CD
TB
R
R
CD
Tb
0
Tb + 1
1
0
Tb + 13
Tb + 14
Tb + 15
1
0
1
CD:
IR
SR
HR
AR
LR
TC
DM
#
TB/R:
IR
HR
AR
LR
TC
DM
1: agreement
0: disagreement
Data Areas
These footnote tables show the actual ranges of all data areas. Bit numbers are provided (except for DM and TC areas); remove the rightmost two digits for word numbers.
IR
00000 to 23515
142
SR
23600 to 25507
HR
HR 0000 to 9915
TR
TR 0 to 7
AR
AR 0000 to 2715
LR
LR 0000 to 6315
TC
TC 000 to 511
DM
Read/Wr: DM 0000 to DM 0999
Rd only: DM 1000 to DM 1999
#
0000 to 9999
or 0000 to FFFF
Appendix E
Programming Instructions
Name
Mnemonic
Symbol
ASCII CONVERT
(@)ASC(86)
Function
Converts hexadecimal digits from the
source word (S) into 8-bit ASCII values,
starting at leftmost or rightmost half of the
starting destination word (D). The rightmost digit of Di designates the first source
digit. The next digit to the left gives the
number of digits to be converted. The next
digit specifies the whether the data is to be
transferred to the rightmost (0) or leftmost
(1) half of the first destination word. The
leftmost digit specifies parity:
0: none,
1: even, or
2: odd.
ASC(86)
S
Di
D
S
0 to F
D
8-bit
data
15
INTERRUPT CONTROL
(@)INT(89)
Operand Data Areas
08 07
S:
IR
SR
HR
AR
LR
TC
DM
CC
D:
IR
HR
LR
DM
N:
D:
00
Controls programmed (scheduled) inter- CC:
rupts and interrupts from Interrupt Input 000 to
Units. Each PC can have up to 4 IIUs. N de- 002
fines the source of the interrupt: 000 to 003
designate the no. of the IIU; 004 designates a scheduled interrupt. In IIUs, bits 00
to 07 identify the interrupting subroutine,
higher bits are not used. Bit 00 of Unit 0 corresponds to interrupt subroutine 00,
through to bit 07 of Unit 3 which corresponds to subroutine 31. CC is the control
code, the meaning of which depends on
the value of N, as follows:
INT(89)
CC
N
D
Di:
IR
HR
LR
TC
DM
#
N = 000 to 003
000 to IR
004
HR
AR
LR
TC
DM
#
N = 004
000
Masks and unmasks interrupt bits for the designated Unit (N) according
to the data in D. Bits corresponding to ON bits in
D are masked, those corresponding to OFF bits
are unmasked. Masked
bits are recorded and will
be executed when they
are unmasked (unless
previously cleared).
The interrupt time
interval is set according to the data
in D (00.01 to
99.99 s) The decimal point is not
entered. The interrupt is cancelled if D is
00.00.
001
Clears the masked interrupt bits of the designated
Unit (N) according to the
corresponding ON bits in
D. The subroutines corresponding to bits cleared
in this manner will not be
executed when the bit is
unmasked.
The time to the
first interrupt is set
according to the
data in D (00.01 to
99.99 s) The decimal point is not
entered. The interrupt is cancelled if D is
00.00.
002
Copies the mask status of Copies the time inthe designated IIU to D.
terval data to D.
Data Areas
These footnote tables show the actual ranges of all data areas. Bit numbers are provided (except for DM and TC areas); remove the rightmost two digits for word numbers.
IR
00000 to 23515
SR
23600 to 25507
HR
HR 0000 to 9915
TR
TR 0 to 7
AR
AR 0000 to 2715
LR
LR 0000 to 6315
TC
TC 000 to 511
DM
Read/Wr: DM 0000 to DM 0999
Rd only: DM 1000 to DM 1999
#
0000 to 9999
or 0000 to FFFF
143
Appendix E
Programming Instructions
Name
Mnemonic
Symbol
NETWORK SEND
(@)SEND(90)
(CPU11)
Function
Operand Data Areas
Transfers data from n source words (S is
the starting word) to the destination words
(D is the first address) in node N of the specified network (in a SYSMAC LINK or NET
Link System). The format of the control
words varies depending on the type of system. In both types of systems, the first control word (C) gives the number of words to
be transferred.
For NET Link Systems, in word C+1, bit 14
specifies the system (0 for system 1, and
1 for system 0), and the rightmost 7 bits define the network number. The left half of
word C+2 specifies the destination port
(00: NSB, 01/02: NSU), and the right half
specifies the destination node number. If
the destination node number is set to 0,
data is transmitted to all nodes.
For SYSMAC LINK Systems, the right half
of C+1 specifies the response monitoring
time (default 00: 2 s, FF: monitoring disabled), the next digit to the left gives the
maximum number of re-transmissions (0
to 15) that the PC will attempt if no response signal is received. Bit 13 specifies
whether a response is needed (0) or not
(1), and bit 14 specifies the system number
(0 for system 1, and 1 for system 0). The
right half of C+2 gives the destination node
number. If this is set to 0, the data will be
sent to all nodes.
SEND(90)
S
D
C
S:
IR
SR
HR
AR
LR
TC
DM
D/C:
IR
HR
AR
LR
TC
DM
NET Link
C
n: no. of words to be transmitted (0 to 1000)
C+1
0X00
C+2
0000
Network no. (0 to 127)
Destination node no.
(0 to 126)
Destination port no.
SYSMAC LINK
C
n: no. of words to be transmitted, 0 to 1000
C+1
0XX0
Re-transmissions
Response monitor time
(0.1 to 25.4 s)
C+2
0000
0000
Destination node no.
(0 to 62)
Source N
SUBROUTINE ENTER
(@)SBS(91)
SBS(91) N
Destination node N
S
D
S+1
D+1
S+n–1
D+n–1
Calls subroutine N. Moves program opera- N:
00 to 99
tion to the specified subroutine.
Data Areas
These footnote tables show the actual ranges of all data areas. Bit numbers are provided (except for DM and TC areas); remove the rightmost two digits for word numbers.
IR
00000 to 23515
144
SR
23600 to 25507
HR
HR 0000 to 9915
TR
TR 0 to 7
AR
AR 0000 to 2715
LR
LR 0000 to 6315
TC
TC 000 to 511
DM
Read/Wr: DM 0000 to DM 0999
Rd only: DM 1000 to DM 1999
#
0000 to 9999
or 0000 to FFFF
Appendix E
Programming Instructions
Name
Mnemonic
Symbol
SUBROUTINE START
SBN(92)
Function
Operand Data Areas
Marks the start of subroutine N.
SBN(92)
RETURN
RET(93)
N
Marks the end of a subroutine and returns None
control to the main program.
RET(93)
WATCHDOG TIMER
REFRESH
(@)WDT(94)
N:
00 to 99
WDT(94) T
Sets the maximum and minimum limits for T:
the watchdog timer (normally 0 to 130 ms). 0 to 63
New limits:
Maximum time = 130 + (100 x T)
Minimum time = 130 + (100 x (T–1))
IORF(97)
St
E
Refreshes all I/O words between the start St/E:
(St) and end (E) words. Only I/O words IR
may be designated. Normally these words
are refreshed only once per cycle, but refreshing words before use in an instruction
can increase execution speed. St must be
less than or equal to E.
I/O REFRESH
(@)IORF(97)
Data Areas
These footnote tables show the actual ranges of all data areas. Bit numbers are provided (except for DM and TC areas); remove the rightmost two digits for word numbers.
IR
00000 to 23515
SR
23600 to 25507
HR
HR 0000 to 9915
TR
TR 0 to 7
AR
AR 0000 to 2715
LR
LR 0000 to 6315
TC
TC 000 to 511
DM
Read/Wr: DM 0000 to DM 0999
Rd only: DM 1000 to DM 1999
#
0000 to 9999
or 0000 to FFFF
145
Appendix E
Programming Instructions
Name
Mnemonic
Symbol
NETWORK RECEIVE
(@)RECV(98)
(CPU11)
Function
Operand Data Areas
Transfers data from the source words (S is
the first word) from node N of the specified
network (in a SYSMAC LINK or NET Link
System) to the destination words starting
at D. The format of the control words varies depending on the type of system. In
both types of systems, the first control
word (C) gives the number of words to be
transferred.
For NET Link Systems, in the second word
(C+1), bit 14 specifies the system (0 for
system 1, and 1 for system 0), and the
rightmost 7 bits define the network number. The left half of word C+2 specifies the
source port (00: NSB, 01/02: NSU), and
the right half specifies the source node
number.
For SYSMAC LINK Systems, the right half
of C+1 specifies the response monitoring
time (default 00: 2 s, FF: monitoring disabled), the next digit to the left gives the
maximum number of re-transmissions (0
to 15) that the PC will attempt if no response signal is received. Bit 13 specifies
whether a response is needed (0) or not
(1), and bit 14 specifies the system number (0 for system 1, and 1 for system 0).
The right half of C+2 gives the source
node number.
RECV(98)
S
D
C
S:
IR
SR
HR
AR
LR
TC
DM
C/D:
IR
HR
AR
LR
TC
DM
NET Link
C
n: no. of words to be transmitted (0 to 1000)
C+1
0X00
C+2
Source port no.
(NSB: 00, NSU: 01/02)
0000
Network no. (0 to 127)
Source node no.
(0 to 126)
SYSMAC LINK
C
n: no. of words to be transmitted, 0 to 1000
C+1
0XX0
Re-transmissions
Response monitor time
(0.1 to 25.4 s)
C+2
0000
0000
Source node no.
(0 to 62)
Source node N
Destination node
S
D
S+1
D+1
S+n–1
D+n–1
Data Areas
These footnote tables show the actual ranges of all data areas. Bit numbers are provided (except for DM and TC areas); remove the rightmost two digits for word numbers.
IR
00000 to 23515
146
SR
23600 to 25507
HR
HR 0000 to 9915
TR
TR 0 to 7
AR
AR 0000 to 2715
LR
LR 0000 to 6315
TC
TC 000 to 511
DM
Read/Wr: DM 0000 to DM 0999
Rd only: DM 1000 to DM 1999
#
0000 to 9999
or 0000 to FFFF
Glossary
ASCII code
[A(merican) S(tandard) C(ode for) I(nformation) I(nterchange)] A standard
computer code used to facilitate the interchange of information among various types of data-processing equipment.
ASCII Unit
An Intelligent I/O Unit. The ASCII Unit has its own CPU and 16 kilobytes of
memory. This Unit enables communication between the PC and any other
device which uses ASCII code. The ASCII Unit can be programmed in BASIC.
Backplane
A base to which Units are mounted to form a Rack. Backplanes provide a
series of connectors for these Units along with wiring to connect them to the
CPU and Power Supply. Backplanes also provide connectors used to connect them to other Backplanes. In some Systems, different Backplanes are
used for different Racks; in other Systems, Racks differ only by the Units
mounted to them.
back-up
A copy of existing data which is valuable if data is accidentally erased.
baud rate
Transfer speed between two devices in a system measured in bits per
second. For example, an optical sensor might be configured to send its information to the FIT at 9600 baud. It is important for both of the devices to be
set to the same baud rate.
bit
The smallest piece of information that can be represented on a computer. A
bit has the value of either zero or one, corresponding to the electrical signals
ON and OFF. A bit is one binary digit.
central processing unit
A device that is capable of storing a program and data, and executing the set
of instructions contained in the program. In a PC System, the central processing unit executes the program, processes I/O signals, communicates
with external devices, etc.
communication cable
Cable used to transfer data between components of a control system and
conforming to the RS-232C or RS-422 standards.
Control System
All of the hardware and software components used to control other devices.
A Control System includes the PC System, the PC programs, and all I/O devices that are used to control or obtain feedback from the controlled system.
counter
A PC function that counts the number of occurrences of a certain event.
CPU
An acronym for central processing unit.
cycle time
The total time it takes the PC to perform internal operations, i.e., reset the
watchdog timer, read the program, receive input data, send output data, and
execute instructions. Cycle time is monitored by the watchdog timer within
the PC, and if it takes longer than a certain specified amount of time, an error
message may be generated, or the CPU may just stop. Cycle times will differ
depending on the configuration of the system.
data area
An area in the PC’s memory that is designed to hold a specific type of data,
e.g., the LR area is designed to hold common data in a PC Link System.
147
Glossary
data disk
Floppy disk used to store information such as programs or I/O tables. The
data disk should be used in drive B of the FIT.
data link
Allows for the connection of up to 32 PCs in a Net Link System where each is
contributing information to a common memory area. Data links may be established in the LR and/or DM memory areas.
debugging
The process of checking for errors in a program.
default condition
The original condition of a function or system. For example, the FIT’s default
condition is to start from its hard drive, but this default condition can be
changed so that it starts from a floppy disk drive.
distributed control
An automation concept in which control of each portion of an automated system is located near the devices actually being controlled, i.e., control is decentralized and “distributed” over the system. Distributed control is a concept
basic to PC Systems.
EEPROM
[E(lectrically) E(rasable) P(rogrammable) R(ead) O(nly) M(emory)] A type of
ROM in which stored data can be erased and reprogrammed. This is accomplished using a special control lead connected to the EEPROM chip and can
be done without having to remove the EEPROM chip from the device in
which it is mounted.
electrical noise
Electric ‘static’ that can disturb electronic communications. The ‘snow’ that
can appear on a TV screen is an example of the effects of electrical noise.
EPROM
[E(rasable) P(rogrammable) R(ead) O(nly) M(emory)] A type of ROM in
which stored data can be erased, by ultraviolet light or other means, and reprogrammed.
Expansion I/O Unit
An I/O Unit for a Package-type PC that provides more I/O points to the PC.
factory computer
A general-purpose computer, usually quite similar to a business computer,
that is used in automated factory control.
flag
A bit that is turned ON and OFF automatically by the system in order to provide status information.
High-speed Counter
A Special I/O Unit. A High Speed Counter Unit counts independently of the
PC’s cycle time. This allows counting of very short, fast signals.
host computer
A computer that is used to transfer data to or receive data from a PC in a
Host Link system. The host computer is used for data management and
overall system control. Host computers are generally small personal or business computers.
IBM PC/XT or AT,
or compatibles
A computer that has similar architecture to, and is logically compatible with
an IBM PC/XT computer; and that can run software designed for that computer.
instruction line
A succession of instructions which begins with a load instruction at the left
bus bar and ends at a right bus bar.
148
Glossary
interface
An interface is the conceptual boundary between systems or devices and
usually involves changes in the way the communicated data is represented.
Interface devices such as NSBs perform operations such as changing the
coding, format, or speed of data.
I/O devices
The devices which are connected to the terminals on I/O Units, Special I/O
Units, or Intelligent I/O Units. I/O devices may be part of the Control System if
they function to help control other devices, or they may be part of the controlled system if they interact directly with it.
I/O point
The place at which an input signal enters the PC System or an output signal
leaves the PC System. In physical terms, an I/O point corresponds to terminals or connector pins on a Unit; in terms of programming, an I/O point corresponds to an I/O bit in the IR area.
I/O table
Diagram written to the IR memory area listing the type of I/O units controlled
by a PC. It must be cleared before programming or when I/O units are
changed. Tables can be read, verified, or transferred to a EPROM.
I/O Unit
The most basic type of Unit mounted to a Backplane. I/O Units include Input
Units and Output Units, each of which is available in a range of specifications. I/O Units do not include Special I/O Units, Link Units, etc.
Limit Switch
A switch that detects when an object has reached the limit of its movement
by actually making contact with the object. Limit Switches are fitted to electric
elevators, traveling cranes, etc. to indicate when a certain part of the equipment has traveled to the specified limit.
Link Unit
Any of the Units used to connect a PC to a Link System. These are Remote
I/O Units, I/O Link Units, PC Link Units, Host Link Units, and Net Link Units.
operating mode
The Display Terminal Unit can operate in five different modes: Page Read,
Terminal, Dynamic Scan, Read/Write, and Self-Diagnosis.
page
One complete Display Terminal Unit screen. Two hundred screens can be
stored on one RAM card.
parallel interface
The parallel interface uses the RS-232 connector, but is not serial communication. When parallel mode is selected as the communication mode, up to 16
Display Terminal Units can be connected to a PC in parallel.
PC
An acronym for Programmable Controller.
PCB
An acronym for printed circuit board.
PC Link Unit
A Unit used to connect two or more PCs together so that they can exchange
data through their LR areas.
Photoelectric Switch
A switch that uses light to detect the presence of an object.
Power Supply
A Unit that mounts to a Backplane in a Rack PC. It provides power at the
voltage required by the other Units on the Rack.
printed circuit board
A board onto which electrical circuits are printed for mounting into a computer or electrical device.
149
Glossary
Programmable Controller
A small, computer-like device that can control peripheral equipment, such as
an electric door or quality control devices, based on programming and peripheral input devices. Any process that can be controlled using electrical
signals can be controlled by a PC. PCs can be used independently or networked together into a system to control more complex operations.
programming device
A peripheral device used to write programs and to input a program to a PC or
to alter or monitor a program already stored in the PC. There are dedicated
programming devices, such as Programming Consoles, and there are nondedicated programming devices, such as a host computer.
PROM
[P(rogrammable) R(ead) O(nly) M(emory)] A type of ROM into which the program or data may be written after manufacture, by a customer, but which is
fixed from that time on.
PROM Writer
A PROM Writer is a device used to write data to ROM, PROM, and EPROM
storage chips.
Proximity Switch
A switch that uses magnetic induction to measure the distance of a metallic
object from the front of the switch.
Rack PC
A PC that is composed of Units mounted to one or more Racks. This configuration is the most flexible, and most large PCs are Rack PCs. A Rack PC is
the opposite of a Package-type PC, which has all of the basic I/O, storage,
and control functions built into a single package.
RAM
[R(andom) A(ccess) M(emory)] RAM will not retain data when power is disconnected. Therefore data should not be stored in RAM.
register/registered
Storing text and graphics in the RAM/ROM card from a personal computer or
the ASCII Unit. Graphics that have been written to the RAM/ROM card are
referred to as registered messages.
Remote I/O Unit
A Unit that extends the distance an Expansion I/O Unit can be from the CPU.
ROM
[R(ead) O(nly) M(emory)] A type of digital storage that cannot be written to. A
ROM chip is manufactured with its program or data already stored in it, and it
can never be changed. However, the program or data can be read as many
times as desired.
switching capacity
The voltage/current that relay can switch ON and OFF.
stepping motor
An output device that rotates according to signals from the Control System.
The rotation is very precise and occurs in pre-defined “steps”.
switch
An input device that sends either an ON or OFF signal to the Control System.
A switch can be operated either by a person or by the movement of a piece
of equipment or material.
system configuration
The arrangement in which Units in a System are connected. This term refers
to the conceptual arrangement and wiring together of all the devices needed
to comprise the System. In OMRON terminology, system configuration is
used to describe the arrangement and connection of the Units comprising a
Control System that includes one or more PCs.
150
Glossary
Unit
In OMRON PC terminology, the word Unit is capitalized to indicate any product sold for a PC System. though most of the names of these products end
with the word Unit, not all do, e.g., a Remote Terminal is referred to in a collective sense as a Unit. Context generally makes any limitations of this word
clear.
watchdog timer
A special timer inside the CPU that monitors the PC’s cycle time. The watchdog timer sets a flag if the cycle time becomes longer than a certain specified
value. This is useful if the correct operation of your System depends on a
certain maximum cycle time.
word
In digital circuits, a group of bits. Usually a word consists of four, eight, or
sixteen bits. In C-series PCs, a word consists of sixteen bits. Words can be
used to store data, or they can be used for I/O.
work bits
Bits in the IR area that are not being used for input or output. These bits can
be used in the program in any way desired.
151
Index
A-B
Assembly
backplane, ,
connecting cable,
CPU,
Expansion I/O Unit,
I/O Units,
mounting the Units,
Backplane,
IR word allocation, ,
Backplane Insulating Plates,
Battery, Memory Packs, replacement,
C
C200H-CPU1 1
battery, replacement,
power consumption, calculation examples,
Cables,
control components,
Control System,
Cooling
clearance between Racks,
cooling fan,
CPU,
C200H-CPU01/03,
C200H-CPU1 1,
indicators,
Peripheral Device Connectors,
cable connection,
direct mounting,
wiring,
CPU Rack,
Current consumption
24-V supply,
26-V supply,
5-V supply,
calculation examples,
cycle,
cycle time,
D-E
Duct work
I/O wiring,
power cables,
electrostatic charge,
Emergency stop circuit,
Expansion I/O Rack,
F-H
factory computer,
Fuse
CPU and power supply, replacement,
Output, replacement,
Output Units,
Grounding
ground terminal,
line ground terminal,
wire,
humidity,
I-L
I/O Devices, connections,
I/O points, calculating the number of,
I/O Unit Cover,
I/O Units,
A-shape,
B-shape,
connections,
E-shape,
input devices,
installation, environment,
ambient conditions,
Insulating plates,
IR word allocation, work bits,
Limit Switch,
M
Memory Packs
assembly,
battery failure flag,
EEPROM chip,
EEPROM Pack,
EPROM chip
how to mount,
mounted to the printed circuit board,
EPROM Pack,
how to mount to CPU,
RAM Pack,
switches,
Mounting requirements,
DIN Rail mounting,
16-mm DIN Rail,
7.3-mm DIN Rail,
DIN Rail mounting bracket,
procedure,
153
Index
N-O
S
Noise
cables,
I/O wiring,
Sequential circuit (for power failure),
output devices,
servomotors,
Output Units, external fuse,
Solenoid,
Servomotor,
servomotor drivers,
Special I/O Units,
Remote I/O Slave Rack,
P
PC
block diagram,
flow chart,
operation,
role of,
Photoelectric Switch,
Power source,
wiring,
Power supply,
AC power supply,
DC power supply,
wiring,
precautions, general,
process control computer,
Programming Console, Hand–held,
static electricity, preventing,
stepping motor,
system configuration,
System Configurations,
Expansion I/O Racks,
Host Link Unit,
I/O Connecting cable,
Memory Packs,
Optical Fiber Cable,
Remote I/O Master Unit,
Remote I/O Slave Unit,
Special I/O Units,
Standard I/O Units,
SYSMAC Link Unit,
T
Terminal block,
terminal block, wiring,
Proximity Switch,
R
Relay, printed circuit board,
Relays, Output Unit, replacement,
Remote I/O,
PC Link Units,
Special I/O Units,
word allocation,
154
W
Wiring
AC Input Units,
DC Input Units,
examples,
I/O devices,
I/O Units,
terminal blocks,
word allocation, for expanded PC,
work bits,
Revision History
A manual revision code appears as a suffix to the catalog number on the front cover of the manual.
Cat. No. W111-E1-10
Revision code
The following table outlines the changes made to the manual during each revision. Page numbers refer to the
previous version.
Revision code
6
Date
July 1989
Revised content
Corrections to pages: 3, 6, 16 to 18, 21, 23, 26, 27, 31, 32, 33, 41, 51, 52, 53, 57,
58, and 60.
7
February 1990
Entire manual reorganized and reproduced.
8
October 1990
8A
May 1991
Revision of text and inclusion of new product information (C200H-CPU11-E, SYSMAC NET, SYSMAC LINK, C200H-OC225, and C200H-OD212)
Corrections to pages: 7, 10, 12, 13, 15, 16, 23, 27, 28, 34 to 39, 61, 63, 64, 82,
85, 94, 97 to 100, 103, 104.
Pages 33 to 38: Completely redone.
Page 102: Backplane model numbers revised.
Page 103: BC031-V1 and BC101-V1 added to note at bottom of page.
Page 104: Microwave ID Sensor and Analog I/O Units added.
Page 110: Terminal Resistor and Power Supply Adapter model numbers revised.
The manuals has also been reformatted, changing page numbers slightly.
8B
May 1992
8C
December 1993
Page 7: PC Operation Flowchart redone.
Page 27: The section reference in the second line corrected to Section 2-6
Memory Packs.
Page 28: “Optical Fiber Cable” in the lower left corner corrected to “Optical
Fiber Cable or Wire Cable”.
Pages 113 to 128: The following instructions are missing from Appendix E
Programming Instructions: LMSG(47), TERM(48), SYS(49), CMPL(60),
CTW(63), WTC(64), HTS(65), STH(66), VAL(69), SEND(90), and RECV(98).
(These instructions were originally added in revision 8, but inadvertently
omitted from revision 8A.)
Multipoint I/O changed to High-density I/O throughout the manual. Scan time
changed to cycle time throughout the manual.
Page 10: Model number corrections made in the first paragraph of CPU.
Page 28: Reference corrected for SYSMAC NET Link Unit and SYSMAC LINK
Unit.
Page 32: Table updated.
Page 33: Note added, 1.4 V corrected to 1.4 A in the top table.
Pages 34, 35: Models added and updated.
Page 37: Calculation of power consumption corrected.
Page 38: I/O Unit Cover description added.
Page 42: Ambient conditions added.
Page 79: “8 A/Unit” in Terminal Connections changed to “16 A/Unit”.
Page 82: Max. switching capacity changed.
Page 92: B7A Interface Unit specifications added.
Pages 97 to 105: Appendix C completely updated.
155
Revision History
Revision code
Date
Revised content
9
February 1999
References to C200H-OA221 removed throughout the manual.
Pages 10, 23, 27, 31, 34, 92: C200H-OD21A added.
Pages 10, 23, 27, 31, 82, 84: Backplane model information corrected.
Pages 13, 19, 23, 63, 98. 99: Added information on E-shape I/O Units.
Page 18: Number of terminals for B-shape I/O Units corrected.
Pages 34: Model numbers of SYSMAC LINK and SYSMAC NET Link Units
changed. C200H-OA224 added.
Pages 34, 66: C200H-IA222V added.
Pages 34, 76: C200H-OA222V added. C200H-OA222 removed.
Pages 34, 78: C200H-OA122-E added. C200H-OA224/OA223 added.
Pages 35: Analog I/O Units added/corrected.
Pages 39 to 40: Precautions for connecting DC two-wire sensors added.
Page 41: Caution added.
Page 57: Fuse specifications table added.
Pages 60, 61: Added step to procedures.
Page 63: Power consumption and dielectric strength corrected, and surge current added.
Pages 73 to 76: Specifications for C200H-ID218 and C200H-ID219 DC Input
Units added.
Page 77: Circuit configuration corrected for C200H-OA121-E.
Pages 84, 85: Circuit configurations changed for C200H-OD212 and
C200H-OD213.
Pages 95, 96: B7A Interface Unit information modified.
Page 99: Insulation plate mounting dimensions corrected.
Pages 100 to 111: Standard models list updated.
10
January 2001
Page xii: Minor change made to last caution.
Page xiii: Changes made to wording of information on grounding and mounting.
Pages 16, 17: Minor changes made to graphics.
Page 17: Information on LG and GR terminals added.
Page 19: “Pack” changed to “Unit” in several places. Information on Memory
Units added.
Page 37: Minor change to last sentence.
Pages 51, 52: Information on power supply wiring added.
Page 63: S.I. data replaced with metric equivalent.
156
W111-E1-10
Mouser Electronics
Authorized Distributor
Click to View Pricing, Inventory, Delivery & Lifecycle Information:
Omron:
C200H-OC222 C200H-ID001 C200H-ID002 C200H-OA122-E