1
SUPERSERVER 5012B-6/5012B-E Manual
static bags when not in use.
• For grounding purposes, make sure your computer chassis provides excellent conductivity between the power supply, the case, the mounting
fasteners and the motherboard.
Unpacking
The motherboard is shipped in antistatic packaging to avoid electrical static
discharge. When unpacking the board, make sure the person handling it is
static protected.
5-2
Motherboard Installation
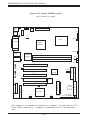
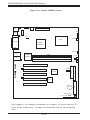
This section explains the first step of physically mounting the P4SBR
(5012B-6) or P4SBE (5012B-E) into the SC810 chassis. Following the steps
in the order given will eliminate the most common problems encountered in
such an installation. To remove the motherboard, follow the procedure in
reverse order.
1.
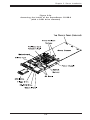
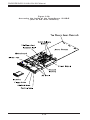
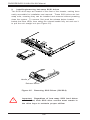
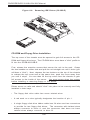
Accessing the inside of the 5012B-6/5012B-E (see Figure 2-5)
Two release buttons are located on the top cover of the chassis.
Depressing both of these buttons while pushing the cover away from
you until it stops. You can then lift the top cover from the chassis to
gain full access to the inside of the server. (If already installed in a
rack, you must first release the retention screws that secure the unit
to the rack. Then grasp the two handles on either side and pull the unit
straight out until the rails lock into place.)
2.
Check compatibility of motherboard ports and I/O shield:
The P4SBR/P4SBE requires a chassis big enough to support a 12" x
8.7" motherboard, such as Supermicro's SC810 1U rackmount. Make
sure that the I/O ports on the motherboard align properly with their
respective holes in the I/O shield at the back of the chassis.
3.
Mounting the motherboard onto the motherboard tray:
Carefully mount the motherboard to the motherboard tray by aligning
the board holes with the raised metal standoffs that are visible on the
bottom of the chassis. Insert screws into all the mounting holes on
your motherboard that line up with the standoffs and tighten until snug
(if you screw them in too tight, you might strip the threads). Metal
screws provide an electrical contact to the motherboard ground to
provide a continuous ground for the system.
5-2