1
SONY
0
Z
,iI
w
2-148-836-13 (1)
EGA
-o
m_
o..
o
f_
m
O
m
x
==
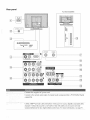
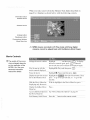
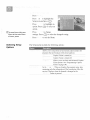
Flat Panel Color TV
Operating Instructions
IIIIIIIIIIIIIIllrlll
8836130
--
KDE-37XS955
KDE-42XS955
KDE-50XS955
©
2004 Sony Corporation
s-m25-rer
MEMORy 5TIEK _
WEGA
ENGINE
Digital
Amplifier
The model and serial mnnbers are located at the rear of the TV Record
these nmnbers in the spaces provided below Refer to them whenever
you call upon your Sony dealer regarding this product
Modet No.
Serial
No.
It', affel reading these operating instructions you have additional
questions related to the use of your Sony television, please call our
Customer Information Self-ices Center at 1-800-222-SONY (7669)
(US residems only) or 1-877-899-SONY (7669) (Canadian residems
only)
i i i iii¸
Toreduce
the
risk
offireorshock
hazard,
donot
expose
the
TV to rain or moisture
7
This equipment has been tested and %mid to
comply
with the limits for a Class B digital
device pursuant to Part 15 of the FCC Rules
These limits are designed to provide reasonable
protection against harmfld interference in a
residential installation. This equipment
generates, uses, and can radiate radio frequency
energy and. if not installed and used in
accordance wifll tt_e instructions, may cause
harmfifl interference wiflI radio
conlnl/lnlcations
However. tllere is no
guarantee that interference will not occur in a
particular installation If this equipment does
cause harmfid interference to radio or television
reception, which can be determined by turning
the equipment offand on, the user is encouraged
to ti T to correct the interference by one or more
of tlIe following lneasures:
Reorient or relocate the receiving
antennas
Increase the separation between the
equiplnent and receiver
Connect tt_e equipment into an outlet on a
circuit different fionl that to which the
receiver is connected
alert file user to file presence
of uninsulated "dangerous
voltage" witilin file
This symbol is intended to
product's enclosure tilat
ilia?' be of sufficient
lnagnitude to constitute a
risk of electric shock to
Consult the dealer or an experienced
radioiTV technician for help
persons
alel_ file user to the presence
of ilnpox_ant operating and
maintenance
(selwicing)
This symbol is
intended to
instmctions in the literatme
accolnpanying flie
appliance
ill
i
i
To prevent electric shock, do not use this
polarized AC phtg with an extension cord.
receptacle or other outlet unless the blades can
be fitily inselled to prevent blade exposure
This television receiver provides display of
television closed captioning in accordance with
g15.119 of tlIe FCC roles.
i
i
)
_
iiii
This reminder is provided to call the (ATV
system installer's attention to Al_icle 820-40 of
the National Elecnical (ode (NEC) that
provides guidelines for proper grounding and. in
particular, specifies that the cable ground shall
be connected to the grounding system of the
building, as close to flie point of cable enn T as
practical
Use of this television receiver for other than
private viewing of programs broadcast on UHF
or VHF or t_anslnitted by cable COlnpanies for
the use of flIe general public may require
authorization from the broadcaster/cable
conlpany
and, or program owner
You are cautioned flint any changes or
lnodifications not expressly approved in this
manual could void your authoriD, to operate
this equipment
i
Operate the TV only on 120 V A(
The plug is designed, for safety pml_oses,
to fi_into the wall outlet only one way. If
you are unable to insert the plug fidly into
the outlet, contact your dealer
If any liquid or solid object should fidl
inside the cabinet, unplug the TV
immediately and have it checked by
qualified service personnel before
operating it fiirther
If you will not be using the TV for several
days, discomiect the power by pulling the
plug itself Never pull on the cord
For details concerning safety precautions,
see "Impoltant Safeguards" on page 2
\_&en
used at an altitude
1,900m
or 6,248feet
800hPa),
this Plasnla
of greater
(air pressure
Display
than
To prevem internal heat buildup, do not
block the ventilation opemngs
Do not install the TV in a hot or lmlnid
place, or in a place subject to excessive
dust or lnechanical vibration
Avoid operating the TV at telnperamres
below 5°C (41°F).
If tiie TV is ttansported directly from a
cold to a waim location, or if the room
telnperature changes suddenly, the picture
may be blurred or show poor color due to
moisture condensation
In this case,
please wait a few hours to let the lnoisrure
evaporate before turning on the TV
To obtain the best picture, do not expose
the screen to direct illumination or direct
sm_light It is recommended to use spot
lighfing directed down fmln the ceiling or
to cover the windows tiiat face the screen
with opaque drapery It is desirable to
install the TV in a room where tiie floor
and walls are not of a reflective material
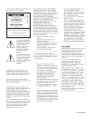
CAUTION
B_iglIt, stationary images such as TV station
logos, displayed on your TV can become
permanently imprinted onto the screen.
Theses types of imprints are tamwn as
"hnage Retenfion." Please take flIe following
steps to reduce tile risk of causing image
retention:
View a varie_, ofprograln somces or
prograimning material Changing the
program lnaterial viewed reduces tile
possibility that a single ilnage will becolne
imprinted on the TV screen
\_q_en using video games, computers, and
similar products with your TV, or viewing a
TV station whose logo always stays on the
screen, keep the "Brighmess" and "Picture"
fimctions at low settings. (See page 92 for
instructions on adjusting picture qualiD<)
This TV was designed primarily for viewing
TV broadcasts in wide screen mode (16:9
aspect ratio). Therefore. when viewing
conventional (4:3) aspect ratio TV progralns,
select %Vide Zoom" or "Full" in the Wide
Screen Mode, or "4:3 Default" in the Screen
nlenu (see pages 97-98)
IMAGE RETENTION IS NOT COVERED
BY YOUR WARRANTY
less _an
Panel
may
generate
a low buzzing
sound as a re_llt
of the difference
between
_e interior and
exterior air pressure
of the panels¸
This is
not considered
a defect and is not covered
under
by tile Limited
WarranW
(('ontinued)
Use the following
WALL-MOLLNT
BILa_C KET
SONY appliance(s)
only with the following
BRACKET.
Use with other WALL-MOL'NT
may
cause
SON'*" APPLIANCE
instabiliB,
MODEL
and result
in possible
ilkiury
NO
KDE-37XS955
Before using your TV, please read these instructions completely,
tllis manual for fitrure reference
KDE-42XS955
KDE-50XS955
SONY WALL-MOL _rNTBRACKET
and keep
Carefiflly observe and comply with all warnings, cautions and instructions
placed on the unit or described in the operating instructions or selwice
MODEL NO
nlanllal.
SU-PW3M
SON'*" FLOATING
STAND MODEL NO
To guard against mjm-y, the %llowing basic safety precautions
obser_'ed in the installation, use and se_'icing of the unit
SU-PF3L (for KDE-50XS955)
should be
SU-PF3M (for KDE-37i42XS955)
Sufficient expeltise is required for installing the specified product Be sure
to subcontract tl_e installation to Sony dealers or contractors and pay
adequate attention to safety, during the installation
ii
For installation of SONY WALL-MOL'NT BRACKET. or SONY
FLOATING STAND, be sure to read and follow the instructions supplied
with those optional products.
TruSurround,
SRS and tl_e (_)*
TruSurround
Licensed
BBE
technology
by BBE
symbol
symbol
is incorporated
Sound,
Inc. under
are trademarks
of BBE
ale trademarks
under
license
USP4638258,
Sound.
of SRS Labs.
from
SRS Labs.
4482866¸
Inc
Laboratories.
Inc
Inc
]
_
|
1"
A
L
under
Dolby
license
This unit is equipped with a polarized AC power cord plug (a plug having
one blade wider than the other), or with a three-wire grounding type plug
(a phtg having a third pin for grmmding). Follow the instructions below:
ii
'_BBE" and
Steady Sound, Digital Reality Creation, CineMotion. Memory Stick, and
Twin View ale registered uademarks of Sony C oiporation BN Smoother
is trademark of Sony Corporation
Manuf'actm'ed
This refit should be operated only fiOlll the type of
power source indicated on the serial/model plate
If you are not sure of the type of electrical power
supplied to yore home, consult your dealer or local
power company. For those sets designed to operate
from battery power, refer to the operating
instntctions.
from
If the plug still fails to fit, contact your
electrician to have a suitable outlet installed. Do not defeat the safety
purpose of the polarized plug by forcing it in
Dolby
and the double-D
i
symbol
Do not use a poor fitting outlet
aretradelnarksofDolbyLaboratories
H.-a ml
This TV mcolporates
High-DefinifionTM
Multnnedia
Interface (HDMI
' ) technology
HDMI, the HDMI logo and High-Definition Multimedia Interf'ace are
trademarks or registered trademarks of HDMI Licensing LLC
CableCARD "_ is a trademark of Cable Television Laboratories,
This plug will fit into the power outlet only
one way This is a safety feature. If you are
unable to insert the plug fidly into tlle
outlet, t_y reversing the plug
Insel_ the phtg fully into the outlet If it is loose, it
may cause arcing and result in fire
Contact your electrician
to have the outlet changed
Inc
This digital television is capable of receiving analog basic, digital basic and
digl*al prelnium cable television programming by direct colmection to a
cable system providing such progralmning.
A security card provided by your cable operator is required to view
encrypted digital progralmning
Certain advanced and interactive digital cable services such as
video-on-delnand,
a cable operator's enhanced prograln guide and
data-elflmnced television services lnay require the use of a set-top box For
more information call your local cable operator
For },our safety, unplug tim AC power cord when wiring cables
Do not touch
wet hand
the AC
If you phtghmplug
with
a wet
hand,
power
cord
the AC power
it may
cause
or the unit
cord
electric
with
a
from the unit
shock
!i
Clean the A( power plug regularly
Do not insmx anything in the ventilation holes If metal
or something flalmnable enters, it may result in fire or
electric shock.
If the plug is covered with &1st and it picks up
moisture, its insulation may deteriorate and result in
fire Unplug the AC power plug and clean it
regularly.
/
..... '
il
iii-[il
i
[i
¸ iii
ii[i
.
?
,!i
Unplug the A( power cord when cleaning this unit
If not, it may result in electric shock.
Clean the cabinet of the TV with a dr,,, sot} cloth To
remove dust fiOln the screen, wipe it gently with a
soft cloth Stubborn stains may he relnoved with a
cloth slightly dampened with a solution of mild soap and warm water
Never use strong solvents such as thinner or benzine for cleaning.
This phlg will only fit into a grounding-type power
outlet This is a safety feature If you are unable to
insert file plug into the outlet, contact your electrician
to have a suitable outlet installed Do not defeat the
safety, propose of the grounding plug.
ii
If the picture becomes dark after using the TV for a long period of time, it
mav_ be necessal¢,, to clean the inside of the TV Consult qualified service
personnel.
Do not overload wall outlets, extension cords or
convemence receptacles beyond their capacity, since
this can result in fire or electlic shock
Do not use attachments not recommended
manufacturer, as they may cause hazards
by the
Ahvays turn the unit off when it is not being used
When the unit is left unattended and mmsed for
long periods of time, lmphtg it from the wall outlet
as a precaution against the possibility of an internal
lnalfunction that could create a fire hazard
If a snapping or popping sound floln a TV unit is
continuous or fiequent while the TV is operating,
unphtg the TV and consult your dealer or service
technician. It is nomlal for some TV sets to nlake
occasional snapping or popping sounds, particularly
when being turned on or off
Do not place this mlit in a place where medical
equipment is in use
It may cause 1hal function of medical instruments.
If you damage the AC power cord. it may result in fire or electric shock
Do not pinch, bend, or twist the cord excessively The core lines may
be bared and cut. and cause short-circuit, resulting in fire or electric
shock
Do not convert or damage the AC power cord or display interface
cable
Do not put anything heavy on the A( power cord Do not pull the
AC power cord
Keep the AC power cord away from heat smlrces
Be sure to grasp the phtg when disconnecting the AC power cord
If the A( power cord is damaged, stop using it and ask your dealer or Sony
service center to exchange it
Do not dispose of batteries in fire
Do not short circuit, disassemble
i
i
Do not use power-line operated sets near
water
for example, near a baflmtb.
washbowh kitchen sink, or laundry tllb, in a
wet baselnent, or heal a swilnlning pool, ere
It may lesult in file or electric shock
Do not let this unit get wet Never spill liquid
of any kind on the unit If any liquid or solid
object does fall through, do not operate the
P¢_'_
unit. It ma? ....... it in electric shock o1 damage
_gQ
.-_
to the unit. Have it checked i...... diatelv bv
%_'_
qualified personnel
To prevent fire. keep inflalmnable objects o2 naked lights (eg.
candles) away from the unit
or overheat the batteries
)
Never push objects of any kind into the refit tluough
the cabinet slots as they may touch dangerous voltage
points or short out parts that could result in a fire or
electric shock Never spill liquid of any kind on the
unit
Do not place any objects on the unit
The apparatus shall not be exposed to dripping or
splashing and that no objects filled wifll liquids, such
as vases, shall be placed on the apparatus
_
_h'_l:2_l_
#
Do not place the unit on an unstable cart, stand, table or
shelf. The unit may fall. causing serious injmT to a child
or an adult and serious damage to the unit Use only a
cal_ or stand recommended by Sony for the specific
model of TV No part of the TV unit should overhang
any edge of the TV cart or stand: any overhanging edge
is a safety, hazard. An appliance and cart combination
should be moved with care Quick stops, excessive
force, and uneven sm'faces may cause the appliance and
cart combination to ovemlrn
(Continued)
fo preserve
local
o/lr envlrolllllent,
d1512 se tile used
batteries
according
it until you
unphtg
to yo/lr
laws or regulatlon_
If the surtace
of the TV cracks
do not touch
Be sine to follow the operating nlstntctions
supplied with your stand or wall-mount bracket
when installing the unit
Be sure to attach the brackets supplied with yore stand or
wall-mount bracket.
the AC
p wer cord¸
Othel_vlse
electric
Do not throw
rile
screen
rake
care
anvthln_
glass
AdJust
easily
break
the surface
hot.
even
the volmne
at mght
tmle
inav
resull
at the unll
may
not to catch
Do not touch
It remains
shock
yore
by file mlpact
and cause
feet on tile cables
It may
serious
damage
Do not install the TV m protruding locations
following locations, injul T may result.
mjul T
using
as heanng
of the TV
for some
tmle
after
so as not to trouble
Therefore
headphones,
damage
may
closing
the TV is turned
your
nmghbors.
the windows
Do not install this unit in restaurants where oil?' vapors occur Dust
absorbing oil may enter into the unit and damage the unit
off
Sound
or using
carries
vel T
headphones
adjust
the volmne
so as to avmd
excessive
levels.
result
Use of this set near the seashore may subject the set to excessive salt.
corrosion and internal damage and result in deterioration of the set's
performance
If the set will be subjected to these conditions, steps should
be taken to reduce the humidity and telnperamre of the area where the set
is located.
The slots and openings in the TV are provided for necessary retaliation. To
ensure reliable operation of the unit and to protect it fiom overheafing,
these slots and openings must never be blocked or covered
Carry the TV in the specified manner
(anwing
If you install the unit in the
Do not install the unit m a location where tlle unit protludes, such as
pillars
Do not install the unit in a location that may cause facial iNury
the unit
is suggested
When
Obselwe the following when installing tile TV using a
stand ol wall-mount bracket If the TV is not secmed
properly, it may fall and cause injury
the TV requires at least two people
If you carl%_the TV m a rammer oilier than that specified and without
the specified nmnber of persons, it may drop and a serious iIlimT may
result Be sme to follow the instructions given below
Can T tile TV with tile specified nmnber of
€'_
_
persons.
Can T tile TV holding the upper and botloln
fiames of the TV as illustrated. Do not cmry
by, file clear plastic front panel
Hold the TV securely when carlTing it.
As file glass surface of the TV has a special coating, be cmefid to
avoid touching tile glass surface as far as possible.
When transpol_ing, do not subject tile unit to shocks or vibration, or
excessive force
Unless proper ventilation is provided, the unit may
gather dust and get dir W For proper vemilation.
Obsm_e the following:
Do not install the unit turned backward or
sideways.
Do not install the unit turned over or upside
dov_-n
Never cover the slots and openings with a
cloth or other materials
Never block the slots and openings by
placing the unit on a bed. sofa. rug or oilier
similar surface
wall, be sure to use qualified contractors
When mount
installing
oi ........ requires
'rag the the
TV use
on the
Wall
installation
of a
removed from tile wall by a person oilier than
wall ......... t bracket If the TV is installed or
a qualified contractor, file unit may tall and
cause serious iNury if the refit is not installed
secmely.
_1
..........
_/_,_)_r_',_
_
_,_
It is reconnnended to watch the TV at a distance of 3-7 times that of the
screen, and in moderate brightness Watching tile TV for too long or in a
dark room will cause eye tatigue
Never place tile unit m a confined space, such as
a bookcase or built-in cabinet, unless proper
ventilation is provided
Do not place the unit nero or over a radiator or
heat register, or where it is exposed to direct
sunlight
_.,_\ll]
//2
b_
Leave
some
space
around
tilerefitOtherwise,
adequate
air-cilculation
may
beblocked
causing
overheating
and
cause
fire
or
damage
the
unit
When installing the unit on the wail
Unplug the AC power cord when moving the unit
Do not move the unit with the A( power cord plugged in It may damage
tile AC power cord and result in tire or electric shock
......30 cm (11 7Is inches)
i
i
iii i
ii
i
i
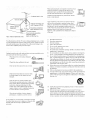
Take measures to prevent the unit tiOln toppling over and causing injury.
I
I
Ii
To prevent the mlit from toppling over, secure tile unit to the wall or pillar
I
10 cm
(4 inches)
,
I
I................
,_
I
....
!
..............
10cm
(4 inches)
10 cm
(4 inches)
If you install tile unit on an inclined smf:ace, the unit may
fall or drop and cause injury or damage.
much
space.
If you place
When installing the unit using a stand
the unit
fall and cause
on an unstable
surface,
the unit may
i*!imy or damage
30 cm (11 7/8 inches)
.............
10 cm
(4 inches)
10 cm
(4 inches)
Tile unit
causing
I
',
Do not hang
anything
may
fall from
damage
on the unit
tile stand
or serious
or wall-molmt
uni_
injury.
Allow this
much
space.
Do not allow
Never install the unit as follows:
Air circulation
Air circulation is blocked
is blocked.
power
cord,
power
cord
i
anything
to rest on or roll
and do not place
is subject
the/mit
to wear
over
where
the
ll_e
or abuse.
¸ i
A
¸
ih
_
iJii
iii-
If an outdoor amenna is installed, follow tbe precautions below. An
outdoor antenna system should not be located in tbe vicinity of overhead
power lines or other eleetlic light or power clrcmts, or where it can come
in contact witb such power lines or circuits
V_'-IEN INSTALLING AN OUTDOOR ANTENNA SYSTEM.
EXTREME CARE SHOULD BE TAKEN TO KEEP FROM
CONTACTING SUCH POWER LINES OR CIRCUITS AS CONTACT
_trlTH THEM IS ALMOST INVARIABLY FATAL
Be sme tbe antenna systenl is grmmded so as to provide sonle protection
against voltage surges and built-up static charges
Do not install
ram,
it may
exposed
nlay
this unit outdoors
result
to direct
damage
If the unit is exposed
in tire or electric
sunlight,
shock.
the lmit may
to
If the unit is
heat lip and it
tbe mlit.
Do not install this unit in a vehicle or hung fronl tile
ceiling.
Section 810 of the National Electrical (:ode (NEC) in USA and Section 54
of the Canadian Electrical (:ode in Canada provides reformation with
respect to proper grounding of the nlast and suppmling snucmre.
grounding of the lead-in wire to an antenna discharge refit, size of
grounding conductors, location of antenna discharge unit, connectmn to
grounding electrodes, and requiremems for the grounding electrode
Bunlping of the vehicle may cause the unit to fall down
and cause inj/u)_.
ii
Do not install this unit in a ship or vessel If the unit is
exposed to seawater, it may cause tire or damage the
/lnlt
(Continued)
i
ii ¸¸¸"
i
L
d
i
,
i
_tqlen replacemem parts are required, be sure the service
technician certifies in writing that he/she has used
replacelnent parts specified by the lnanufacturer that
have the same characteristics as the original parts
/
Unauthorized substitutions
shock or other hazards.
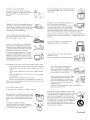
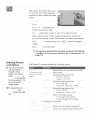
Antenea lead-in wire
ntenna discharge
unit
(NEC Section 810-20)
Grounding conductors
(NEC Section 810-21)
NEC: NationaI Electrical
. Ground clamps
Power service grounding
electrode system
(NEC Art 250 Part H)
Code
For added protection for this TV receiver dumlg a lighming storm, or when
it is left unattended and unused tbr long periods of fime, unplug it fionl the
wall outlet and disconnect the antenna. This will prevent damage to the
receiver due to lightning and power-line surges
Upon completion of any sel_'ice or repairs to the unit,
ask the service technician to perforln routine sate b,
checks (as specified by the manufacturer) to determine
that the unit is in safe operating condition, and to so
certi_. When the unit reaches the end of its usefid life.
improper disposal could result in a picture tube
ilnplosion. Ask a qualified sel_'ice teclmician to dispose
of the unit.
1)
2)
3)
4)
5)
6)
7)
....
When the power cord or plug is damaged
or flayed
has been
spilled
into
the unit
If the unit has been exposed to rain or water
by being dropped, or the cabinet has been
damaged
Ifthe unit has been subject to excessive shock
_
When the refit exhibits a distinct change in
performance, it indicates a need for service
Do not attempt
to service
the unit
yourself
personnel
since opening
voltage
sel_'ice
Install in accordance
with the
_l
Do not install near any heat sources such as radiators, heat registers,
stoves, or other apparatus (including amplifiers) that produce heat
9)
Do not defeat the safe b, pro'pose of the polarized or grounding-type
plug A polarized plug has two blades with one wider than the other
A grounding type plug has two blades and a third grounding prong.
The wide blade or the third prong are provided for your safety If the
provided plug does *lot fit into your outlet, consult an elecnician for
replacement of the obsolete outlet
10) Protect the power cord fiom being walked on or pinched particularly
at phtgs, convenience receptacles, and the point where they exit froln
the apparatus.
tt) Only use attachments/accessories
specified by file manufacturer
12) Use only with the call, stand, tripod, bracket, or table specified by the
manufacturer, or sold with the apparatus. When a cart is used, use
caution when moving the cal_ apparatus combination to avoid injuly"
fiom tip-over
_j
If the refit does not operate normally when
following file operating instructions. Adjust only
dlose controls flint are specified in the operating
instructions Improper adjusmlent of other
controls may result in damage and will often
require extensive work by a qualified technician
to restore the unit to normal operation
the cabinet may expose you to dangerous
hazalds.
Refer all servicing
to qualified
_ _[
Read these instructions.
Keep these instructions
Heed all warnings
Follow all instructions
Do *lot use this apparatus near water
Clean only with dry cloth
Do *lot block any ventilation openings
manufacturer's instructions
8)
Unplug the mitt from the wall outlet and refer servicing to qualified service
personnel under file following conditions:
If liquid
nlay result in fire. electric
or other
13) l Tn!flug this apparatus during lightning stomls or when unused for
long periods of tilne
t4) Re fer all sel_-lcing to qualified service personnel Servicing is
required when the apparaiats has been damaged in any way, such as
power-supply cord or phtg is damaged, liquid has been spilled or
objects have fallen into the apparatus, tile apparatus has been exposed
to rain or moisture, does not operate normally, or has been dropped
Welcome
...............................................................................................
Package
Features
Overview
Contents ..........................................................................
.........................................................................................
..............................................................................................
TV Controls
and Connectors
..............................................................
11
12
15
16
Front panel .....................................................................................
16
Side panel
17
......................................................................................
Rear panel ......................................................................................
Connecting
the Power
Preventing
Cord ...............................................................
the TV from Toppling
Bundling
Basic
11
the Connecting
Cables
18
20
Over ...........................................
21
....................................................
22
Connections:
Connecting
a Cable or Antenna
......................
Cable or Antenna ...........................................................................
23
24
Cable
Box and Cable
25
Cable
Box .......................................................................................
Connecting
Optional
Making
Video
.....................................................................
Equipment
Connections
.......................................................
............................................................
26
28
28
About Using S VIDEO ....................................................................
VCR and Cable ..............................................................................
29
30
VCR
32
and Cable
Box .......................................................................
Two VCRs for Tape Editing ............................................................
Satellite Receiver ...........................................................................
Satellite
Receiver
and VCR ............................................................
DVD
Player
with Component
DVD
Player
with S VIDEO
Digital
DVD
Satellite
Receiver
Video
and Audio
with
HDMI
Connectors
Connectors
Connector
............................
.........................
.............................
Player or Digital Satellite Receiver via AV Receiver with
CENTER
SPEAKER
IN Terminals ..........................................
Camcorder
Audio
Receiver
Sub Woofer
Device
.....................................................................................
...............................................................................
....................................................................................
with an Optical
(Digital
Audio)
Connector
..........................
Using the CONTROL
S Feature .....................................................
Using CableCARD
TM
. ...........................................................................
Activating
CableCARD
Removing
the CableCARD
Setting
Up the Channel
Using
Auto
TM
List
Service
TM
...................................................
..........................................................
...............................................................
Setup ...........................................................................
34
36
38
41
43
44
46
48
49
49
50
50
51
51
52
53
53
vi
(/
J
i
i
U
¸
Overview
..............................................................................................
55
Inserting
Batteries
...............................................................................
55
............................................................................
56
Button
Descriptions
Programming
Using
the Remote
Other
Equipment
Control
.....................................................
with Your Remote
Control
.........................
Box ...................................................................
58
60
Operating
a Cable
Operating
a Satellite
Operating
a VCR ............................................................................
61
Operating
a DVD
.....................................
61
Operating
a 5.1ch
DAV)
62
Operating
a DVD/VCR
Operating
an AV Receiver
Receiver
Player
.......................................................
or DVD
Changer
DVD AV System
Combo
(Sony
...........................
Unit ...............................................
.............................................................
60
60
62
62
Overview
..............................................................................................
63
Watching
TV. ........................................................................................
64
Using
the Program
Displaying
Using
Guide
...................................................................
the Program
Additional
Guide
Program
Guide
Options
......................................
Using
Wide
Screen
Using
Twin
View ..................................................................................
Displaying
Using
Twin
Mode
.......................................................
...................................................................
Pictures
................................................................
65
65
66
67
69
69
Activating
the Picture
.....................................................................
70
Changing
the Picture
Size ..............................................................
71
Favorite
Channels
....................................................................
72
Using
the Channel
Menu ................................................................
72
Using
the Favorite
Channels
73
Guide
...............................................
About Memory Stick ............................................................................
Features .........................................................................................
75
75
Memory
Stick Compatibility
............................................................
76
Memory
Stick Functionality
............................................................
76
File Compatibility
............................................................................
Trademark
Information
...................................................................
Inserting
and
Removing
a Memory
inserting
a Memory
inserting
the Memory
Removing
Using
a Memory
the Memory
Using
Stick ..........................................
Stick ................................................................
78
78
Stick DUO ....................................................
79
Stick .............................................................
80
Stick Index
the Memory
77
77
Stick
...........................................................
index
.......................................................
Viewing Photos ....................................................................................
Photo Controls ...............................................................................
82
83
83
Photo
Menu
Bar Options
Using
Zoom
and Pan .....................................................................
85
Using
Rotate
..................................................................................
85
Playing Movies ....................................................................................
Movie Controls ...............................................................................
86
86
Movie
Memory
Menu
Stick
Contents
Memory
Bar Options
Index
Slide Show
................................................................
81
Menu
Menu
................................................................
Bar Options
Options
Menu Options
Stick Menu
.............................................
Overview
88
89
.......................................................................
Using
Video
the Audio
Selecting
Using
Selecting
Selecting
Audio
Canadian
Viewing
Using
Menu
the Parental
Viewing
Options
Custom
Selecting
Programs
Options
Caption
the Applications
Selecting
Menu .........................................................
..................................................
Rating
Options
.............................
..........................................................
Custom
Rating
Options
..................
..........................................................
Menu .......................................................................
Setup
Programming
.............................................................
Programs
Models:
Blocked
....................................................................
Lock
Selecting
Blocked
...............................................................
Options
Lock
Parental
the Setup
Selecting
.................................................................
Menu .......................................................................
Channel
US Models:
........................................................................
Options
Applications
...............................................................
Vision
.......................................................
Menu ...........................................................
Options
89
90
90
90
91
................................................................
.................................................................
Options
Screen
Selecting
Using
Options
the Channel
Using
Menus
Menu
the Screen
Using
.............................................................
the Video Menu .........................................................................
Selecting
Using
Stick Precautions
Through
88
.................................................................
..............................................................................................
Navigating
87
..............................................................
Notes on Using Memory Stick Media ................................................
About DCF File Names ..................................................................
Memory
84
.....................................................
91
92
92
95
95
97
97
99
99
101
101
102
102
103
103
104
104
106
107
107
Overview ............................................................................................
Glossary .............................................................................................
Contacting Sony ................................................................................
Troubleshooting ................................................................................
Twin View .....................................................................................
Remote Control ............................................................................
CableCARD
...............................................................................
Channels ......................................................................................
Memory Stick ...............................................................................
Audio ............................................................................................
Video ............................................................................................
General ........................................................................................
Specifications ....................................................................................
Optional Accessories ........................................................................
Index ...................................................................................................
TM
109
110
111
111
111
112
112
113
114
115
116
117
118
120
121
Thank you for purchasing the Sony Flat Panel Color TV. This manual is to
be used with the following models:
KDE-37XS955
KDE-42XS955
KDE-50XS955
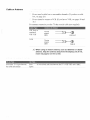
Package
Contents
The package contains the t\_llowing:
Flat panel color TV
Remote control (RM-Y1004) and two size AA batteries
AC power cord
AC plug holder
Cable band (1)
Cable band screw (1)
AC cord clamp
Cleaning cloth
Operating Instructions
Quick Setup Guide
Warranty Card
These items are all you need to set up and operate the TV in its basic
configuration.
Most components (VCRs, DVD players, etc.) come with the necessary
cables to connect them. If you want to set up a complex system, you may
need to buy extra cables, connectors, etc. Be sure to have these on hand
be*\_re you start to connect your system.
(Contimwd)
Features
Some of the features that you wilt enjoy with your new TV include:
Integrated HDTV: You can watch digital television pr%malns and
enjoy the improved audio/video quality offered by these pro_ams.
CableCARD
slot: Provides cable subscribers with access to digitally
encrypted cable channels
without the need for a set-top box
that
wilt enable you to receive not only standard definition but also high
definition television. The CableCARD
which is provided by your
cable TV company, is inserted into the TV's rear panel CableCARD
slot. After the service is activated with your cable TV company, the card
replaces the need for a separate set-top box. (Check with your cable TV
company about CabteCARD
service details, limitations, pricing, and
availability. For more in*\mnation about CableCARD
in this manual,
see pages 18 and 51.)
TM
TM,
TM
TM
TM
WEGA EngineTM: Delivers superb picture quality from a W video
source by minimizing the signal deterioration caused by digital-toanalog conversion and stabilizing the signal processing. The WEGA
engine features unique Sony technology, including:
• The first step in the digital processing system, Composite
Component Processor2 (CCP2), which enhances input signal to
noise ratio by chroma decoder digital processing;
• DRC (Digital Reali_" Creation _) MultiFunction 2 circuitlT:
Enables the digital mapping of any NTSC source (DVD, VHS, DBS,
Cable, etc.), to create a picture that is precise and finer in detail,
rivaling high definition resolution. Incoming HD signals (1080i) are
also bitmapped, utilizing Sow's proprietary algorithm to provide a
crisp and clear picture;
• IFP (Image Format Processor): The Digital Texture Enhancer
function of this chip provides the optimal contrast by utilizing a wide
dynamic range. This chip also reduces signal noise, by using an
ilnproved motion vector algorithm, while maintaining image
sharpness.
• New Panel Driver LSI: This drive provides a more realistic color
expression by improving the color space of the original signal and
color gradation.
S-master Full Digital Amplifier: Delivers superb clear dialog and
reproduces the original sound quality while minimizing any sound
fragmentation or jitter noise.
BN Smoother'=: Reduces the block noise caused by digital video
encoding and decoding process.
CineMotion®: Provides an optimized display by automatically
detecting film content and applying a reverse 3/2 pultdown process.
Moving pictures will appear clearer and more natural-looking.
WideScreen
Mode:Watch
conventional
4:3aspect
ratiobroadcasts
in
widescreen
(16:9)mode.
FavoriteChannels:
Allowsyoutopreview
andselect
from16ofyour
favorite
channels.
Steady
Sound®:
Equalizes
volumelevelssothereisconsistent
output
between
programs
andcommercials.
MemoryStick®Viewer:AllowsyoutoviewonyourTVscreen
digital
images
(JPEG)
andmovies
(MPEG1)
withbackground
music(MP3)
thatarestored
onMemoryStickmedia.
Component
VideoInputs:OffersthebestvideoqualityforDVD(480p
and480i),anddigitalset-top
box(1080i,720p,
480pand480i)
connections.
ParentalControl:V-Chiptechnology
allowsparents
toblock
unsuitable
programlning
fiomyounger
viewers.
HDMI(High-Definition
MultimediaInterface):
Provides
an
uncompressed,
all-digital
audio/video
interface
between
thisTVand
anyHDMI-equipped
audio/video
component,
suchasa set-top
box,
DVDplayer,
andA/Vreceiver.
HDMIsupports
enhanced,
orhighdefinition
video,plustwo-channel
digitalaudio.
i
d
L
i
¸
This chapter includes illustrated instructions for setting up your TM
TV Controls
and Connectors
Connecting
the Power
Basic Connections:
Connecting
Making
16-19
Cord
20-22
Connecting
Optional
a Cable
or Antenna
23-27
Equipment
Video Connections
28
About Using S VIDEO
VCR and Cable
29
30
VCR and Cable Box
32
Two VCRs for Tape Editing
Satellite Receiver
34
36
Satellite
38
Receiver
DVD Player
DVD Player
Digital
and VCR
with Component Video Connectors
with S VIDEO and Audio Connectors
Satellite
Receiver
with HDMI
41
43
Connector
DVD Player or Digital Satellite Receiver
CENTER SPEAKER
IN Terminals
via AV Receiver
44
with
46
Cameorder
48
Audio Receiver
49
Sub Woofer
Device
49
with an Optical
Using the CONTROL
Using
Setting
CableCARD
(Digital
S Feature
Connector
50
50
51
TM
Up the Channel
Audio)
List
53
Front panel
PICTURE OFF
TIMER
STANDBY
POWER
Outputs audio signal.
When
lit, indicates
For details,
When
that the Picture
Off feature
lit, indicates
one of the timers
is set, this LED will remain
off. For details,
is set. When
see page 107.
in standby
Eights
up in green when the TV set is turned
mode, the LED
lights up in red.
does not light up when the main power
display
in red continuously,
unit needs
selwicing
IR signals
on. The LED
is turned
this may indicate
(see "Contacting
page 111).
Receives
the timer
lit even if the TV set is turned
When
LED blinks
is activated.
see page 56.
from the remote
control.
off. If the
the
Sony" on
Side panel
Left side
PRO
Right side
POWER
STD/DUO
[]
IvoL M l
TV/VIDEO
[] ................
............
When
lit, indicates
(Do not remove
Memory
that the Memory
the Memory
Stick insertion
Removing
Connects
a Memory
picture
slot. For details,
Stick"
to the S VIDEO
other video equipment
quality
to the composite
camcorder
or other video
OUT jack
video
Provides
better
().
A'V output jacks
on your
main power
channels.
of the TV.
To scan quickly
through
press and hold down either
Press to adjust
Press repeatedly
connected
on your camcorder
equipment.
Press to mm on and offthe
channels,
see "Inserting and
that has S VIDEO.
Connects
is lit.)
on page 78.
than composite
Press to scan through
Stick is being read.
Stick when the indicator
the volume.
to cycle through
to the TV's video
the video
inputs.
equipment
or
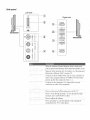
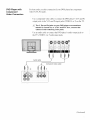
Rear panel
For KDE-50XS955
D
[]
:
i
Connects
the supplied
Connect
to the optical
AC power
cord.
audio input of a digital
audio component
that is PCM/Dolby
Digital
compatible.
ii
i
....
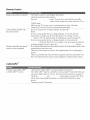
CableCARD
TM
provides
cable
subscribers
channels
without
the need for a set-top-box
standard
definition
but also high definition
with access
to secure,
digitally
encrypted
that will enable you to receive
television.
For more information,
cable
not only
see page 5 i.
HDMI(High-Definition
Multimedia
Interface)
provides
anuncompressed,
all-digital
audio
videointerface
between
thisTVandanyHDMI-equipped
audio_video
component,
such
asaset-top
box,DVDplayer,
andAiVreceiver.
HDMIsupports
enhanced,
orhighdefinition
video,
plustwo-channel
digitalaudio.
Connect
tothecomposite
A'Voutput
jacksonyourVCRorother
videocomponent.
Athird
composite
AiVinput
jack(VIDEO
2) is located on the left side panel of the TV. These
video connections
Connect
provide
better
to your DVD player's
audio (E.R) jacks. Component
the VHFiUHF
()
picture
or digital
qnality
video provides
or the composite
video
RF input that connects
to your cable signal.
RF input that connects
to your VHFiUHF
Connects
to the S VIDEO
S VIDEO.
VHFiUHF
Connect
the center output
Allows
Connects
better picture
()
()
connections.
video
quality
(Y, PB, PR) and
than the S VIDEO
better
antenna
temlinals
picture
of Dolby
or cable box.
quality
than either
Pro Logic*
system
composite
decoder
that has
video ()
"Dolby",
"Pro Logic",
or
amplifier.
(IN) and send (OUT)
audio or video
equipment
remote
control
signals
that has the CONTROL
You can
to other Sony
S flmction.
to the input jack of your woofer.
Connects to the left and right audio input jacks of your audio or video equipment.
use these outputs to listen to your TV's audio through your stereo system.
*
(),
connections.
as a center speaker.
the TV to receive
infrared-contro!led
component
OUT jack of your VCR or other video equipment
S VIDEO provides
( ) connections.
use the TV speakers
than the VHFiUHF
set-top box's
and the double-D
symbol
are trademarks
of Dolby
Laboratories.
You can
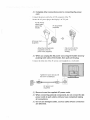
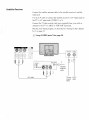
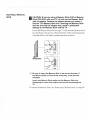
J_3 Complete other connections prior to connecting the power
cord.
Connect the power cord to the AC IN connector of the TV.
Secure the AC power plug to the display's AC IN jack.
AC IN (Power
supply input)
jack of the
display
\
_
AC plug holder
(supplied)
AC power cord
(supplied)
Attach the AC plug holder
(supplied) to the AC
power cord (supplied).
Clip on to the AC IN
jack until you hear
clicking.
S3 When you unplug the AC power cord, drag the holder down by
pushing both sides of the holder, then pull out the plug.
Connect the other end of the AC power cord (supplied) to a wall outlet.
Tighten the screw slowly until
the screw is stabilized.
AC power cord
(supplied)
Be sure to use the supplied
AC power cords.
j_j When connecting optional components, do not connect the AC
power cords to wall outlets until you have completed making
all connections.
j/_
Do not use damaged cables, such as cables whose connectors
are deformed.
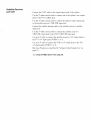
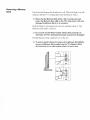
Preventing the TV
from Toppling Over
WARNING
Be sure to take measures to prevent stand from toppling over.
If you tail to do so, the TV may topple over and cause injury. Anchor the
TV to a wall, pillar, etc., to prevent it tiom toppling over.
Prepare a commercially available strong rope or chain and wall anchor
bracket beforehand.
After connections with antennas and other equipment are completed, be sure
to attach a sturdy strong rope or chain securely to each clamp screw, and
attach it to a wall or pillar.
i
I
Bundfing the
Connecting
Cables
You can bundle the connecting cables using the supplied cord clamp with a
cable band at the rear of the TM
Bundle the connecting cables.
Cable band
Attach the supplied cord clamp for the AC power cord.
Remove the cable cover.
One side of the cable cover is secured by screws.
Store the connecting cables.
Secure the cord clamp and replace the cable cover.
Thewayinwhichyouwill connect
yourTVvaries,
depending
onhowyour
home
receives
asignal(cable,
cablebox,antenna)
andwhether
ornotyou
plantoconnect
aVCR.
Cable or Antenna
24
No cable box or VCR
Cable Box and Cable
25
(;able box unscrambles only some channels
(usually
premium
channels)
No VCR
Cable Box
26
(;able box unscrambles all channels
No VCR
See the connections described on pages 30 and 32.
Cable or Antenna
i ¸
i
_i
Do not need a cable box to unscramble channels. (If you have a cable
box, see page 26.)
Do not intend to connect a VCR. (If you have a VCR, see pages 30 and
32.)
For antenna connection, use the 75-ohm coaxial cable (not supplied).
VHF Only or
combined
VHFiUHF
75-ohm
coaxial
cable
VHF/UHF
Cable
75-ohm
coaxial
cable
CABLE
/Z_j When using an indoor antenna, such as rabbit-ear or dipoleantenna, keep the antenna away from the display unit. If not,
noise may appear on the screen.
Switch
the TV's
input between
the cable and antenna
Press
inputs,
to switch back and forth between
the TV's VHF UHF
and CABLE
Cable Box and Cable
..................... iiii
ii
ii
cable box, See "Using
CableCARD
TM''on
Your cable company scrambles some channels, such as premium
channels (,a_ich requires you to use a cable box), but does not scramble
all channels.
page 51.
You do not have a VCR. (If you have a VCR, see pages 30 and 32.)
"_" Before
connecting
a
ii i
i
Use the remote control to change channels coming through the cable
box to the TV's VHF/UHF input jack. (You must first pro_am the
remote control for your specific cable box; see "Pro_amming the
Remote Control" on page 58.)
Use the remote control to change channels coming directly into the TV's
CABLE input. (The TV's tuner provides a better signal than the cable
box.)
Coaxial cable
cabl3
7 ohmcoaxiot
cable
]l
II
VHFItJ_F
i
With this connection,
channels
il ¸
il
iii
i
i-i
Use the cable box
Activate
into the TV's CABLE
features
control
to
for unscrambled
input jack.
i
Program
the remote
control.
See "Programming
channel
the Remote
3 or 4) and then
Control"
on page 58.
the cable box
the remote
control
operate
the cable box
Prevent
the accidental
to
switching
of TV channels
Press
When using the cable box, you need the TV to stay on the channel
set to (usually
specific
Switch
you can use all the dual picture
directly
Tune the TV to the channel the cable box is set to (usually
use the cable box to switch channels.
Set up the remote
operate
ii
coming
the TV's
input between
the cable box and cable
Press
channel
channel.
3 or 4). You can use the TV's Channel
For details,
see "Using
the Channel
to switch back and forth between
channels)
and CABLE
(unscrambled)
Menu"
the cable box is
Fix feature
to lock in a
on page 99.
the TV's VHFAJHF
(scrambled
inputs.
,_D Do not leave the display indication of the cable box turned on.
Cable Box
"_" Before
connecting
i
a
cable box, See "Using
CableCARD
TM''on
i
iii
ii
ii.
ii ¸ i.
i
Your cable company scrambles all channels, which requires you to use a
cable box.
You do not have a VCR. (If you have a VCR, see pages 30 and 32.)
page 51.
Use the remote control to change channels coming through the cable
box to the TV's VHF/UHF jack. (You must first program the remote
control for your specific cable box, see page 58.)
With this connection,
all channels
only one unscrambled
signal
features.
come into the TV through
your cable box and
is sent to the TV, so you cannot
use the dual picture
If some of your channels
the "(;able
Box and (;able"
i
! ii
are scrambled,
connection
but others are not, consider
using
on page 25 instead.
!
Connect the CATV cable to the cable box's input jack.
Use the 75-ohm coaxial cable (not supplied) to connect the cable box's
output jack to the TV's VHF/UHF jack.
Run the Auto Setup program, as described in "Setting Up the Channel
List" on page 53.
CATV
cable
--1
iN
75-ohm coaxial cable
i
VHF/UHF
OUT
Use the cable box
Set up the remote
operate
Activate
operate
Tune the TV to the channel the cable box is set to (usually
use the cable box to switch channels.
control
to
Program
the remote
control.
See "Programming
the Remote
channel
3 or 4) and then
Control"
on page 58.
the cable box
the remote
control
to
Press
:
the cable box
Prevent the accidental
of TV channels
switching
When using the cable box, you need the TV to stay on the channel the cable box is
set to (usually channel 3 or 4). You can use the TV's Channel Fix feature to lock in a
specific
_)
channel.
For details,
see "Using
the Channel
Menu"
on page 99.
Do not leave the display indication of the cable box turned on.
:
!¸ ;
L
¸"
....
Use the directions
equipment:
Making Video
Connections
in this section to connect
the following
About Using S VIDEO
VCR and Cable
29
30
VCR and Cable Box
32
Two VCas lbr Tape Editing
Satellite Receiver
34
36
Satellite Receiver and VCR
38
DVD Player with Component Video Connectors
41
DVD Player with S VIDEO and Audio Connectors
43
Digital Satellite Receiver with HDMI Connector
44
DVD Player or Digital Satellite Receiver via AV
Receiver with CENTER SPEAKER IN Terminals
46
Camcorder
48
Audio Receiver
49
Sub Woofer
49
Device with an Optica! (Digital Audio) Connector
50
Using the CONTROL S Feature
50
optional
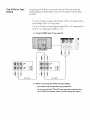
Your TV includes several types of video inputs. When connecting your TV,
use the inputs that are available on your components that provide the best
video pert\_rmance, as described below.
Best Video
Performance
Connector type
HDml
@
Y
@
HDMI
(High-Definition
@
P_
Multimedia Interface)
Component video
P
sv,oEo@
S VIDEO
v,oEo
4_)
Composite video
RF/Coaxial
About Using
S VIDEO
@
If the optional equipment you are connecting has an S VIDEO jack
(shown at left), you can use an S VIDEO cable for improved picture
quality (compared to an A/V cable). Because S VIDEO carries only
the video siNlal, you also need to connect audio cables for sound, as
shown below.
Audio cable
SVIDEO
cable
VCR and Cable
!
i
iiii
ii
ii
Your cable company does not require you to use a cable box.
With this connection,
i
i
you can use all the dual picture
!
features.
ii
Connect the CATV cable to the VCR's VHF/UHF input jack.
Use the 75-ohm coaxial cable (not supplied) to connect the VCR's
VHF/UHF output jack to the TV's CABLE input jack.
Use an A/V cable to connect the VCR's A/V output jacks to the TV's
A/V input jacks (VIDEO 1 or 3).
Run the Auto Program function, as described in "Setting Up the
Channel List" on page 53.
_
Using S VIDEO jacks? See page 29.
I
coaxial cable
75-ohm
Watch the VCR
Press
Watch cable channels
Press
Set up the remote
operate
Activate
operate
control
the remote
"Programming
control
repeatedly
to select
the VCR input (VIDEO
1 in the illustration).
repeatedly
to select
the cable input (CABLE
in the i!lustration).
If you have a non-Sony
the VCR
to
VCR, you must program
the Remote
Control"
the remote
control.
See
on page 58.
Press
the VCR
Control VCR fi.metions
remote control
Label video
identify
the TV
to
:
with the
inputs to easily
equipment
connected
See "Operating
a VCR"
See the instructions
on page 6 i.
for setting
up Video Labels
on page 105.
to
_
Do not leave the display indication of the VCR turned on.
VCR and Cable Box
";_" Before
connecting
.....................
iiii
ii
ii
Your cable company scralnbles some channels, such as premium
channels (,a_ich requires you to use a cable box), but does not scramble
all channels.
a
cable box, See "Using
CableCARD
TM''on
page 51.
i
i
H
¸
With this connection,
_
7
.i
i
you can use all the dual picture
_
>
%
_
features.
il
Use the remote control to change channels coming through the cable
box. You must first program the remote control for your specific cable
box; see "Pro mamlning the Remote Control" on page 58.
Use the remote control to change channels coming directly into the TV's
CABLE input jack. (The TV's tuner provides a better signal than the
cable box.)
Record channels coming through the cable box and channels coming
directly into the TV
A splitter, which is a small, inexpensive device that you can purchase at
your local electronics store.
Four coaxial cables.
Two A/V cable or two S VIDEO cable with audio cables.
i
ii
!
Connect the CATV cable to the single (input)jack
of the splitter.
Use a coaxial cable to connect one of the sptitter's two output jacks to
the TV's CABLE input jack.
Use a coaxial cable to connect the splitter's other output jack to the
cable box's input jack.
Use a coaxial cable to connect the cable box's output jack to the VCR's
RF input jack.
Use an A/V cable to connect the cable box's A/V output jacks to the
TV's A/V input jacks.
Use the 75-ohm coaxial cable (not supplied) to connect the VCR's RF
output jack to the TV's VHF/UHF input jack.
Use an A/V cable to connect the VCR's A/V output jacks to the TV's
A/V input jacks (VIDEO 1 or 3).
Run the Auto Setup prograln, as described in "Setting Up the Channel
List" on page 53.
Using S VIDEO jacks? See page 29.
I
75-ohm coaxial cable
Coaxia
cable
Coaxial
cable
A/V cable
CATV cable
Watch cable (unscrambled)
channels
Press
repeatedly
Watch cable box (scrambled)
Turn on the VCR and tune it to the channel
channels
or 4). Press
illustration).
Watch the VCR
Set up the remote
operate
Activate
operate
to
control
:
repeatedly
If you have a non-Sony
the cable box or VCR
the remote
repeatedly
"Programming
to
the cable input (CABLE
the cable box is set to (usually
to select the VCR input (VIDE()
Control"
the remote
1 in the illustration).
control.
See
on page 58.
For the cable box, press
the cable box or VCR
channel
1 in the
channels.
VCR, you must program
the Remote
in the illustration).
to select the VCR input (VIDEO
Use the cable box to change
Press
control
to select
......I_
. For the VCR, press
.
Control specific cable box and
VCR functions with the remote
See "Operating
a Cable Box"
on page 60 and "Operating
a VCR"
on page 61.
control
Label video
identify
the TV
inputs to easily
equipment
connected
See the instructions
for setting
up Video Labels
on page 105.
to
_3
Do not leave the display indication of the cable box and VCR
turned on.
3
Two VCRs for Tape
Editing
Connecting two VCRs lets you record fioln one VCR to the other. By
connecting them as shown below, you can view (monitor) what is being
recorded.
_i-&
¸¸5¸¸¸¸¸
ii_
i_i
Use an A/V cable to connect the playback VCR's A/V output jacks to
the recording VCR's A/V input jacks.
Use an A/V cable to connect the recording VCR's A/V output jacks to
the TV's A/V input jacks (VIDEO 1 or 3).
_D Using S VIDEO jacks? See page 29.
L NE
IN
.uo.o..o_o_
v.oEo
"
I ®®Joo,
.§
U_E
: _'_"_
OuT
out
AtV cable
,.
A/V cable
_
When
connecting
-
you
cannot
-
do not connect
your
VCRs
two VCRs
for tape
editing;
edit a tape with copy protection.
the TV's
at the same
AN
time
input
jack
to avoid
and output
looping
jack
the signal.
to
View (monitor)
recorded
what is being
Set up the remote
operate
Activate
operate
control
to
the remote
"Progralnmmg
control
repeatedly
If you have a non-Sony
the VCR(s)
to
to select
the VCR input (VIDEO
VCR, you must program
the Remote
Control"
the remote
on page 58.
Press.
the VCR(s)
Control VCR functions
remote control
Label video
identify
the TV
Press
with the
inputs to easily
equipment
connected
See "Operating
a VCR"
See the instructions
to
on page 6 i.
for setting
up Video Labels
on page 105.
1 in the illustration).
control.
See
Sate//ite
Receiver
i
iiii
ii
Connect the satellite antenna cable to the satellite receiver's satellite
input jack.
Use an A/V cable to connect the satellite receiver's A/V output jacks to
the l_V's A/V input jacks (VIDEO 1 or 3).
Connect the 75-ohm coaxial cable (not supplied) t_romyour cable or
antenna to the TV's CABLE or VHF/UHF input jack.
Run the Auto Setup program, as described in "Setting Up the Channel
List" on page 53.
S_ Using S VIDEO jacks? See page 29.
Satellite
antenna
cable
AN cable
75-ohm
coaxial
cable
CATV
cable
Watch the satellite
receiver
Press
(VIDEO
Set up the remote
control
to operate
the satellite
receiver
Control satellite
remote control
If you have a non-Sony
remote
Activate the remote
satellite receiver
control
receiver
to operate
functions
Label video inputs to easily identify
connected to the TV
the
with the
equipment
,_
repeatedly
to select
the satellite
receiver
input
1 in the illustration).
control.
satellite
Press
See "Operating
receiver,
See "Programming
you must program
the Remote
Control"
.
a Satellite
See the instructions
Receiver"
lbr setting
Do not leave the Electronic
indication
turned
on.
on page 60.
up Video Labels
Program
Guide
on page
the
on page 58.
105.
and display
Satellite Receiver
and VCR
i
iiii
ii
!i
Connect the CATV cable to the single (input)jack
of the splitter.
Use the 75-ohm coaxial cable to connect one of the splitter's t,a_ output
jacks to the TV's CABLE jack.
Use the 75-ohm coaxial cable to connect the splitter's other output jack
to the satellite receiver's VHF/UHF input jack.
Connect the satellite antenna cable to the satellite receiver's satellite
input jack.
Use the 75-ohm coaxial cable to connect the satellite receiver's
VHF/UHF output jack to the VCR's VHFA;HF input jack.
Use an A/V cable to connect the satellite receiver's A/V output jacks to
the TV's A/V input jacks (VIDEO 1 or 3).
Use an A/V cable to connect the VCR's A/V output jacks to the TV's
A/V input jacks (VIDEO 1 or 3).
Run Auto Program, as described in "Setting Up the Channel List" on
page 53.
j!_ Using S VIDEO jacks? See page 29.
(Contin_lcd)
Watch the satellite
receiver
Press
repeatedly
to select
The VCR may need to be turned
Watch the VCR
Press
repeatedly
(VIDEO
Set up the remote
operate
VCR
Activate
operate
VCR
the satellite
the remote
the satellite
control
to
receiver
control
receiver
control.
to
to select
1 in the illustration).
receiver
input.
the input to which the VCR is connected
1 in the illustration).
If you have a non-Sony
or
the VCR input (VIDEO
on and set to the satellite
VCR or satellite
See "Programming
For the satellite
receiver,
or
the Remote
receiver,
Control"
press
you must program
the remote
on page 58.
.
For the VCR, press
.
Control satellite receiver and
VCR functions with the remote
See "Operating
a Satellite
Receiver"
on page 60 and '_Operating
a VCR"
on page 61.
control
Label video
identify
the TV
inputs to easily
equipment
connected
See the instructions
for setting
up Video Labels
on page 105.
to
_D Do not leave the Electronic Program Guide and display
indication turned on.
DVD Player with
Component
Video Connectors
For best results, use this connection if your DVD player has component
video (Y, PB, Pa) jacks.
Use a component video cable to connect the DVD player's Y, PB and PR
output jacks to the Y, PB and PR input jacks (VIDEO 4 or 5) on the TV.
_/_ The Y, PB and PR jacks on your DVD player are sometimes
labeled Y, CB and CR, or Y, B-Y and R-Y. If so, connect the
cables to their matching color jacks.
Use an audio cable to connect
the TV's VIDEO
the DVD player's
audio output jacks to
4 or 5 audio input jacks.
Y
Audio cable
Component
video cable
(('ontinzted)
Watch the DVD player
Press
Set up the remote control
operate the DVD player
Activate
operate
the remote
control
Label video
identify
the TV
repeatedly
to select
the DVD input (VIDEO
If you have a non-Sony DVD player, you must program
"Programming
the Remote Control" on page 58.
to
Press
4 in the illustration).
the remote
control.
See
.
the DVD player
Control DVD functions
remote control
ii'
to
with the
inputs to easily
equipment
connected
See "Operating
a DVD Player
See the instructions
for setting
or DVD Changer"
up Video Labels
on page 6 i.
on page 105.
to
_
You cannot record the signal from any equipment connected
into the Y, PB, PR jacks.
_}
Do not leave a still image, such as the DVD menu, displayed on
the screen.
Use this connection if your DVD player does not have component video (Y,
PB, Pa) .jacks.
DVD Player with
S VIDEO and Audio
Connectors
i
?iiil
i
..........
Use an S VIDEO cable to connect the DVD player's S VIDEO jack to
the TV's S VIDEO input jack (VIDEO 1 or 3).
Use an audio cable to connect the DVD player's audio output jacks to
the TV's VIDEO 1 or 3 audio input jacks.
Watch the DVD player
Set up the remote
operate
Activate
operate
to
the remote
repeatedly
If you have a non-Sony
the DVD player
"Programming
control
to
to select
DVD player,
the Remote
Control"
the DVD input (VIDEO
you must program
1 in the illustration).
the remote
control.
See
on page 58.
Press.
the DVD player
Control DVD functions
remote control
Label video
identify
the TV
Press
control
with the
inputs to easily
equipment
connected
See "Operating
a DVD Player
See the instructions
for setting
or DVD Changer"
up Video Labels
on page 6 i.
on page 105.
to
Do not leave a still image,
the screen,
such as the DVD menu,
displayed
on
Digital Satellite
Receiver with HDMI
Connector
Use a HDMI cable to connect the Digital Satellite Receiver's HDMI
output connector to the TV's HDMI 1N connector (VIDEO 6).
_
HDMI
cables
transmit
audio
cables
are not necessary,)
cables
at your local
both audio
electronics
and video
signals.
You can purchase
(Separate
HDMI
store,
?i ?i ¸
HDMI cable
If the Digital Satellite Receiver does not have an HDMI connector, you can
connect the TV's HDMI IN connector to the Digital Satellite Receiver's
DVI-HDTV OUT connector using the HDMI cable (not supplied).
Use a HDMI to DVI-HDTV adapter or cable (not supplied) to connect
the Digital Satellite Receiver's DVI-HDTV OUT connector to the TV's
HDMI IN connector (VIDEO 6).
_
The DVI-HDTV VIDEO connector does not provide audio, so
audio cables must be connected to provide sound when an
HDMI to DVI-HDTV adapter is used.
Use an Audio cable to connect the Digital Satellite Receiver's AUDIO
OUT jacks to the TV's AUDIO IN jacks (VIDEO 6).
v
Watch the digital
satellite
receiver
Label video
,
Press
repeatedly
to select the digital
satellite
receiver
input (VIDEO
the illustration),
inputs to easily
identify equipment
to the TV
See the instructions
for setting
up Video Labels
on page 105.
connected
_
Do not leave the Electronic
indication
turned
on.
_
Do not connect
Program
to a PC to the
TV with
Guide
and
display
the DVl cable.
6 in
DVD Player or
Digital Satellite
Receiver via AV
Receiver with
CENTER SPEAKER
IN Terminals
Use this connection if you have a digital audio device that is PCM/Dolby
Digital compatible, such as an AV Receiver with a Dolby Pro Logic system
decoder.
i i
ii_
i ¸¸
_iil !i i
i¸¸
ii
i_ il
ii
i _i ii i
_
ii
iiiiii
i_
Using a SPEAKER cord, connect the TV's CENTER SPEAKER IN
terminals to the AV Receiver's CENTER SPEAKER OUT terminals.
Using a component video cable, connect the DVD player or Digital
Satellite Receiver's Y, PB and PR jacks to the Y, PB and PR jacks on the
TV. Use the HD/DVD IN 4 connections. Using an Audio cable, connect
the DVD player or Digital Satellite Receiver to the TV's AUDIO IN
jacks.
If your DVD player does not have component (Y, PB, PR) jacks,
you can connect the DVD player with A/V connectors, use the
connection described on page 43.
_3
If your Digital Satellite Receiver has a HDMI connector, for best
picture quality, use the connection described on page 44.
Using an optical
Satellite
OPTICAL
digital cable, connect
Receiver's
IN jack.
OPTICAL
the DVD player
or Digital
OUT jack to the AV Receiver's
Component
_
cable
SPEAKER cord
ideo cable
t
Optical digital cable
When using the TV's speakers as the center speaker
Using
in the AUDIO lnenu, select the video input for
which you want to use the TV's speakers as the center speaker, and set to
Camcorder
For easy connection ofa camcorder, the TV has front A/V input jacks. If you
prefer, you can connect the camcorder to the TV's rear A/V input jacks.
Use
an A/V cable
to connect
the camcorder's
A/V
output
jacks
to the TV's
A/V input jacks (VIDEO 2).
_(/_2JUsing
S VIDEO
jacks?
See page
29.
To A/V output
il ¸
il
iii
i
i-i
ii
Watch the cameorder
i
Press
:
repeatedly
to select
the camcorder
input (VIDEO
2 in the
illustration).
Label video
identify
the TV
inputs to easily
equipment
connected
See the instructions
1"o1"
setting
up Video Labels
on page 105.
to
,_-j
Do not leave
displayed
a still
image
on the screen.
of the camcorder
or digital
camera
Audio
Receiver
For improved sound quality, you may want to play the TV's audio through
your stereo system.
Use an audio cable to connect the TV's AUDIO OUT jacks to the audio
receiver's line input jacks.
x
i
i¸
Audio ca
To line input
Using the TV's Audio menu, set the
option to
. Then set the
option to
or
, depending on how you want to
control the volume. For details, see "Using the Audio Menu" on page
95.
Turn on the audio receiver, and then set the audio receiver's line input to
the jack into which you connected the TV.
Sub Wooer
Use a monaural audio cable to connect the TV's SUBWOOFER OUT jack to
the sub woofer's input jack.
@
l
Sub woofer input
Monaural audio
cable (not supplied)
Device
with an
Optical (Digital
Audio) Connector
You can use the TV's digital audio output jack (OPTICAL OUT) to connect
a digital audio device that is PCM/Dolby Digital compatible, such as an
audio amplifier.
Using an optical cable, connect the device's OPTICAL IN jack to the
TV's OPTICAL OUT jack.
Optical cable
Using the CONTROL
S Feature
CONTROL S allows you to control your system and other Sony equipment
with a single remote control. In addition, the CONTROL S feature allows
you to always point your remote control at your TV, instead of having to
point it at the other equipment, which might be hidden or out of direct line of
sight.
Use CONTROL S IN to send siNlals to the TV.
Use CONTROL S OUT to send siNlals to connected equipment.
IN
OUT
CableCARD
provides cable subscribers with access to digitally encrypted
cable channels
without the need tBr a set-top box
that will enable you to
receive not only standard definition but also high definition television. The
CableCARD
which is provided by your cable TV company, is inserted into
the TV's rear panel CableCARD
slot. After the service is activated with
your cable TV company, the card replaces the need t_r a separate set-top box.
TM
TM,
TM
If you are planning to use a separate cable box for digital cable TV services,
you may be able to receive pro_amming using this TV with the
CableCARD
instead
except in the following circumstances:
Your cable TV company does not provide CableCARD
service in your
viewing area.
TM
TM
You want to access your cable TV company's interactive or advanced
features (such as video-on-demand or, in some cases, pay-per-view). At
this time, these services require a bidirectional link, which are only
available through the use of a separate set-top box. CabteCARD
is
currently a unidirectional device only, and cannot provide these
advanced services.
TM
Check with your cable TV company for CableCARD
service details,
limitations, pricing, and availability, all of which are determined by your
cable TV company
not Sony.
TM
Activating
CableCARD
Service
Before you can use CabteCARD
service, you need to insert the
CableCARD
(supplied by your cable TV company) and activate the
service, as described below:
TM
TM
TM
Turn offthe TV.
Insert the CableCARD
TM
into the TV's CableCARD
TM
slot.
KDE-37XS955
KDE-42XS955
(Comimwd)
KDE-50XS955
CAUTION: Inserting the CableCARD
damage to the card and the TV.
";_"You can also access
information
CableCARD
Applications
page
about your
TM
in the
Menu
108).
(see
TM
incorrectly may result in permanent
Gently push the card into the slot until it locks into place.
Turn on the TV. After 1-2 minutes, the CableCARD
TM
setup screen is
displayed. This screen includes information your cable TV company
will request before they can activate your service.
Follow the displayed instructions: Phone your cable TV company. A
representative wilt guide you through the activation process.
After your CableCARD
TM
is activated, your cable TV company will
download the service information, including the channel list, to the
CableCARD
TM.
After the CableCARD
has acquired channels from your cable TV
TM
company, the TV tunes to the lowest available channel.
Removing the
CableCARD "_
In the event you want to cancel your service, contact your cable TV
company.
SJ
Once
the CableCARD
decrypt
digital
CableCARD
TM.
cable
TM
is removed,
your TV will no longer
TV programming
services
that
require
Turn off the TV.
Push the eject button on the TV's CableCARD
Pull the CableCARD
TM
TM
slot to release the card.
straight out of the slot to relnove it.
To install a different CableCARD
follow the instructions in "Activating
CableCARD
Service" on page 51.
TM,
TM
Afteryoufinishconnecting
yourTV,youneedtorunInitialSetup,
which
automatically
sets
upavailable
analog
anddigitalchannels.
TheInitialSetup
screen
appears
whenyouturnonyourTVforthefirsttimeafterhooking
it
up.If youdonotwanttosetupthechannels
atthistime,youcandoit later
byselecting
theAutoProgram
optionin theChannel
menu(seepage99).
,_
The Auto Program feature does not apply
use a cable box for all channel
selection.
for installations
that
Using Auto Setup
Press
: to turn on the TV.
The Initial Setup screen appears.
Press
or
to select the on-screen displaylanguage.
Thenpress
@.
The message "Start auto program now?" appears.
Press
or
to select"Yes",
thenpress
@.
Auto Pro_am automatically creates a list of receivable channels. When
finished, the lowest nmnbered channel is displayed.
Use the Auto Program feature as described on page 99.
Use the Digital Channels feature as described on page 99.
_3
Auto
Program
A progress
created.
may take
up to 50 minutes
bar is displayed
while
or more
the channel
list
to complete.
is being
This chapter describes how to set up, program, and use the remote control.
Inserting
Batteries
55
Button Descriptions
Programming
Using Other
56
the Remote
Equipment
Control
58
with Your Remote
Control
60
Insert two size AA batteries (supplied) by matching the : and
on the
batteries to the dia_am inside the remote control's battery compartment.
_j
Remove
the batteries
leakage
whenever
not be used
_
Handle
or placing
humidity
_)
video
Control"
damage
control
it in direct
from
that the
possible
remote
battery
control
will
period.
with
care.
sunlight,
Avoid
dropping
near a heater
it, getting
or where
is high.
The supplied
most
for an extended
the remote
it wet,
to avoid
you anticipate
remote
equipment
on page
58).
control
can be programmed
(see "Programming
to operate
the Remote
the
Press to turn on and off the equipment
into the remote
....
Remote
control.
Control"
you have programmed
For details, see _'Programming
the
on page 58.
Press to turn on and offthe video equipment.
Press to turn on and off the satellite receix_er or
cable box.
Press to mute the sound.
the sound.
......
Press repeatedly
modes:
,
.....
Press again or press
to cycle through
,
to restore
the available
video picture
. The video picture
also accessed
in the Video menu. For details,
Video Menu"
on page 92.
modes can be
see _'Using the
Pre_r_peatediy
io_tepihl-ough
th_Wideg_reenMode
settings:
,,
Mode settings
details,
O
::,
can be also accessed
see pages
. The Wide Screen
in the Screen menu. For
67 and 68.
Use with
and
buttons to select digital
example, 2.1). For more details, see "Watching
channels
TV" on
(for
page 64.
.......... Pre_sio m;piaytheprog_;m;ui_el .......................
When:
:
: is switched
Press to display
on
the top menu of your DVD..VCR.
Press to dispiay the Fa'_oriteChannels iisil For detaiis see
page 72.
:
Press to have the remote
want. For details,
control
operate
see "Programming
the equipment
the Remote
you
Control"
on
page 58.
When
.....
......
is switched
operate
the video equipment
remote
control.
Your Remote
For details,
Control"
on
, these buttons
you have programmed
see "Using
into the
Other Equipment
with
on page 60.
Rewind
_iay..................................................................................
Pa;tfo);:;_d............................................................
Pause
siop.......................................................................
Record
:
Press repeatedly
to cycle through
....
"Selecting
........
Setup
the power
:
Options"
on page
see
105.
Press repeatediy to cycie ihrough the sound modesi
. For more details,
Options"
:
saving modes:
. For more details,
on page 95.
Press to adjust the volume.
see "Selecting
Audio
Press
toreset
thesettings
tothefactory
defaults.
See
pages
92
and95.Alsoused
toclear
Label
Channels.
Press
tommonandoffTwinView.
Fordetaiis,
see
page
691
Press
toturnonandofftheTV.
.......
repe;tediytocyclethrough vkleoq ipme i;
connected
to the TV's video
Press once to display
the current
label. If set, the current
seconds.
:
:
Press
channel
to select a channel:
seconds.
Press
For details,
channel
number,
number
will display
the channel
to change
Press to display
press
inputs.
channels
the menu. Press
and channel
changes
for 10
after 2
immediately.
again to exit l];oln the menu.
see page 91.
(_).
Press to select the function
programmed
of your video equipment
on the TV's remote
which
is
control.
z
When
"_
is switched
Press to display
"Using
the Memory
the Memory
Stick menu.
Stick Viewer"
Press to select the function
programmed
on
of your video equipment
on the TV's remote
the sources
VHF
inputs.
When
is switched
Press to display
the program
see
which
is
control.
Press to switch between
UHF and CABLE
For more details,
on page 75.
connected
to the TV's
on
guide of your satellite
program
provider.
(_)
Press to select the sound effect modes:
,
The sound effect modes
in the Audio menu.
Options"
For more details,
,
can be also accessed
see "Selecting
Audio
on page 95.
When
is switched
Press to switch between
Press to scan through
channels,
on
the TV and the satellite
channels.
receiver.
To scan quickly
press and hold down either
through
CH.
Press to jump back and forth between m'o channels. The TV
alternates between the current channel and the last channel
that was selected.
Press repeatediy
tO cycle ihrough
(MTS)
Stereo,
options:
and Mono.
menu.
The MTS setting
For more details,
page 95.
Auto
ihe Multi-channel
SAP (Second
Audio
can be also accessed
see "Selecting
Audio
TV Sound
Program),
in the Audio
Options"
on
5
The remote control is preset to operate Sony brand video equipment.
DVDiVCR
601 (Sony
Dream
SAT/Cable
801 (Sony
Satellite
System)
Receiver)
If you have video equipment other than Sony brand that you want to control
with the TV's remote control, use the following procedures to program the
remote control.
,_? The equipment
must have infrared (IR) remote
order to be used with this remote control,
capability
in
From the "Manufacturer's Codes" listed on page 59, select the three-digit
code nmnber for the manufacturer's code of your equipment. If more than
one code nmnber is listed, try entering them one by one until you come to the
correct code for your equipment. Use the code nmnber to complete the
following procedure.
Press the
and
buttons
1,2
simultaneously, or press the
and
buttons simultaneously. DVD/VCR and SAT/CABLE buttons flash.
Press the function button you want to program.
To program a cable box or a satellite receiver
Press
To program video equipment
Press
Enter the three-digit manui_acturer's code nmnber using the
buttons.
Press
To check if the code nmnber works, aim the TV's remote control at the
equipment and press
and/or
:
that
corresponds with that equipment. If it responds, the pro mamming is
completed. If not, try using the other codes listed for that manuIZacturer.
_j
If you enter a new code number, the code number you
previously entered at that setting is erased.
_3 In some rare cases, you may not be able to operate your
equipment with the Sony remote control. In this case, use the
equipment's own remote control unit.
i
¸
i
i
!i
Son?'
Broksonic
319. 3t7
([anon
309. 308
335. 323,324
C ]tizen
3`3")................
325, 326
751
Craig
755
Curtis
Hitachi
758
Daewoo
JVC
756
Magnaxox
757
.............................................
_314336
DEN
Dimensia
304
Mitsubishi
......................
Panasonic
761
753
Phiiips .........
757
Pioneer
752
Ftmai
755
General
General
Electric
RCA, PROSCAN
Samstmg
Mathes
Einerson
............................
........................................
758
...........
Electric
Go Video
754
G01dstar
Zenith
760
Hitachi
hlstant
.....
765
Panasonic
766
Sony
Signature
341. 312, 309
(M. \X,aard)
go"
314. 336, 338,337
329, 304. 309
Technics
309. 308
322. 339. 340
Toshiba
312. 311
....................
309. 308
304.
330. 314
336. 337
Hamlin
LXi (SEARS5
332365336
................
Jenold"G.
336, 332, 337
Magnavox
....
.........................
Marantz
308. 309,3i0
314. 336
Marta
332
Memorex
30913`37
Broksonic
776
Minolta
305,304
Sony
772
Olympic
Sony (DAV)
601. 602603
604
..............................................................
764
...............................
301
327
302
230
Regal
222.223
I.
.....
....
204. 205206
207. 208.218
222
Oak
227. 228
Panasonic
219. 220,221
Pioneer
325. 326
325. 338.321
Scientific
209.210,
211
216.217
Tocoln
...........................................................................
Zenith
212.213
...............................................
`309`308 ............................
:
PanasolliC
327
3 t7
`36813691
`36636"7
Son?'
DishYetwork
Pentax
`3652`36_
................
..................
Echostar
810
Philco
308. 309
General
802
Philips
308. 309, 310
Hitachi
805
Pioneer
Quasar
.......................
308
5682 ...........
`369 `36g...................
Hughes ........
Mitsubishi
804 ......
g69 ...........................
RCA
304. 305
308.
Panasonic
803 .........
PROSCAN
309. 311
312.
RCAPROSCAN
802, 808
Reaiisiic
3691313,
3361310.
329329
303
335
3v4
338
801
............................
810 ........................................................
Eiectric
Toshiba
...................
..................................................
8662 N07 ........................................
...........
*
If an Aiwa
VCR
Sansui
314
even
Aiwa 'I ...........................................
`338 344 ........
sams_mg
322, 313. 321
for Aiwa,
Audio
Sanyo
330, 335
Sony instead.
3 i4 337
q...................................
Atlanta
(M. Ward)
D_:namic
229
214. 215
..........................................
323. 324
224
225:226
...........
201 202 203,
337
.............................................................
Optimus
Orion
Sony
Admiral
.....
347
332
775
Sony
............................
`3i4;
774
770. 771
314. 330, 336, 337
Zelliii_ ......................................
33i
LG
JVC
Sony
331. 332
Yamaha
309, 305
`33g `33-7 .....
327. 328, 335.
305. 338
Kenwood
Mitsubishi'
MGA
...........................
Muhitech
........
Teac
338
Samsung
777
..................
338
332
3i4;
335,338
..................................................................
SymPhonic
3i4 336 `3372
767
Panasonic
....
Tashiro
Tat;n; .......
345. 346
Zenith .............................................
768 ..................................
Toshiba ..................
773 ...................................
338, 327
`33"7........................ SV2000
338
..........................................................................
Sylvania
308. 309 338 310
320[ 3i6
306, 304
Repiay
321
327, 328
2000
.................................
`332............................................... a_ards
JC Penney
Sony
Sharp
304, 338. 309
3i9
......................
312. 313
30233}
317, 318, 341
...................
330. `335 ..........
Fisher
Toshiba
Scott
though
enter
not work
does
you
enter
the
code
the
for
code
To operate other connected equipment with your TV, first turn to page 59 and
program the necessary code. For operating video equipment, press
repeatedly until you see the video input on the screen for your
connected equipment. Remote control operation tips are provided below.
Operating
Box
a Cable
Activate
the remote
operate
the cable box
control
to
Turn on/off
Select a channel
Change
channels
Back to previous
channel
Opera ting a Sa te//ite
Receiver
Activate
operate
Turn
the remote
the satellite
control
to
receiver
on,.............
0_"
...........................................................................
Select a channel
Change
,
channels
Back to previous
channel
Display
cham_el number
Display
SAT Guide
Display
SAT Menu
Move highlight
Select item
: :
:
(cursor)
@
Operating
a VCR
Activate
operate
the remote
control
to
the VCR
Turn on/off
Change
channeis
....
..................................................................................................................
Record
and
simultaneously
Play
s op.......................................................................................
..............................................................
Fast forward
Rewind
the tape
Pause
(press
Search the picture
forward
or
backward
or
(release
again to resume
:
during
normal
playback)
playback
to resume
normal
playback)
z
Operating a DVD
Player or DVD
Changer
Activate
operate
the remote
control
to
the DVD
Turn on,off
If you have a DVD changer,
to skip disk
Play
Stop
Pause
(press again to resume
Step through different
tracks of the disc
Step through
of the disc
Select a track
different
to step forward
chapters
directly
Display
the menu
Display
the top menu
Operate
ihe DvD
to step forward
or
or
normal
playback)
to step backward
to step backward
,
(setup)
menu ................................
.........................................................................................
Operating a 5. lch
DVD AV System
(Sony DAV)
Activate
the remote
control
to
operate the DVD
Turn on/off
:
Select other equipment
connected
to the DAV
Operating
DVD/VCR
Unit
Display
the menu (setup)
Chanae
Volume
:
,
a
Combo
Activate
the remote
operate
the DVDVCR
control
to
Turn on,off
If you have a DVDVCR
combo
component,
Select the DVD
Select the VCR
Pause
Search the picture
backward
forward
Move highlight (cursor)
and select (DVD)
Record
(VCR)
an AV
Turn
on,off
or
during playback
@
..........
Adjust tracking (VCR)
Operating
Receiver
or
and :
:
simuiiane0usiy
(during tape playbac k)
This chapter
describes
how to use the features
of your TV.
Watching TV
64
Using the Program Guide
65
Using Wide Screen Mode
67
Using Twin View
69
Using Favorite Channels
72
";_° For a complete
list of all
the functions of the
remote
56.
control,
see page
Activate
the remote
operate
control
to
Press
.
the TV
........................................................................................................
Turn on offthe
Tune directly
TV
to a channel
? ...................................................................................................................................
Press
.
To tune to analog
channels,
press
and then
(or wait 3 seconds).
For digital
again,
subchannels,
and then
For example,
O,,
_
Adjust
the _olume
, O'
to select subchannel
and then press
press
2.1, press
channels
using
the program
details.
See page
65 for
guide.
.
Press
(press again or
to
unmute).
Alternate
back and _brth between
two channels
Press
:
The TV alternates
between
and the last channel
Display
number
the cun'ent channel
(and other information)
Press
number,
current
the current
once to display the channel
time, wide mode, and channel
S_vitch the TV's input io the vcRI
Press
DVD player,
the video equipment
equipment
Change
parental
again to turn
repeatediy
connected
to cycle through
to the TV's
video inputs.
video
customize
channel
tuned.
label (if set). Press
Display of£
or other connected
and audio options,
the TV's setup,
controls,
set
Press
see 'q£sing
to display
the Menus"
the Menu.
For details,
on page 91.
and more
Switch the TV's input between
sources connected
to the TV's
Press
connected
VHFiUHF
inputs.
and (?ABLE
inputs
,
.
You can also select
Press
Mute the volume
press
.
to alternate between sources
to the TV's VHFiUHF
and CABLE
Displaying the
Program Guide
The program guide lets you review program
analog and digital channels.
_j
information
and select both
The Program Guide cannot be displayed when the TV is tuned
to one of the video inputs or if the Channel Fix option is set to
anything other than Off (see page 99).
Press
on the remote control. The pro mam _ide appears, with the
currently selected program showing in the background.
Program title and
description, program
duration, time remaining,
rating information, closedcaption availability, format,
resolution (if digital),
aspect ratio
Channel number,
call letters
Selectable channel list
,_
Program
information
broadcasters.
channel
Scroll through
number,
without
the channel
Select the currently
in the guide
As a result,
list
displayed
channel
and exit the guide
Display
additional
options
is provided
it may sometimes
a program
Press
Press
Press
title
or
channels)
changing
Press
only
the
or description.
.
@.
. See "Using
Guide Options"
Exit the Guide (without
by the
include
Additional
on page 66.
.
Program
Using Additional
Program Guide
Options
Press while in the program guide's channel list to display the following
options, which allow you to customize the settings of the pro_am on the
currently tuned channel.
....
....
(when
Each
program
has a main video
when the channel
available)
streams. This option
video streams.
Each
program
available)
streams.
audio
is first tuned)
This option
streams
stream (the video that you see
and may have alternate
allows you to switch among
has a main audio
when the channel
(when
is first tuned),
stream (the audio that you hear
and may have alternate
allows you to switch among
(e.g., lbr different
video
these altemate
languages).
audio
these altemate
"_° You can also access
Wide screen mode lets you watch 4:3 normal broadcasts in several wide
screen modes (16:9 aspect ratio).
Press
repeatedly to toggle through the following screen mode
settings.
the
screen mode settings in
the Screen menu. For
details,
see page
Changing
97.
the Wide Screen Mode for 4:3 Source
(Standard
definition
source)
original source
enlarges the center portion of
WIDE
_'
the picture. The left and right edges of the
picture are stretched to till the 16:9 screen.
Wide Zoom
displays the 4:3 picture in its
original size. Side bars are shown to till the
16:9 screen.
WIDE
Normal
i!!
stretches the 4:3 picture horizontally,
to fill the 16:9 screen.
WIDE
Full
WIDE
i
enlarges the 4:3 picture
proportionately to fill the 16:9 screen.
.... is useful for watching Letterbox
movies.
Zoom
_j_j When
revert
current
you change
channels
to the 4:3 Default
Wide
set 4:3 Default
Mode
or inputs,
setting
setting
the Wide
in the Screen
as channels
to Off. For details,
Mode
Menu.
and inputs
settings
To retain the
are changed,
see page 98.
(('onfimwd)
Changing
the Wide Screen Mode for 16:9 Source
(High definition
source)
original source
Upconverted
4:3
Native 16:9
.....
enlarges the center portion of the picture. The left and right edges
of the picture are stretched to fill the 16:9 screen.
Wide Zoom
Normal
(This mode is not available.)
displays the picture at its original size.
Full
enlarges
Zoom
the picture
proportionately,
both vertically
and horizontally.
Twin View lets you see two pictures from two sources
from an antenna,
VCR, DVD, etc.
on the screen at the same time. You hear the sound from
only one of the sources at a time, but you can choose which source's sound is
selected. You can also change the relative size of each of the pictures.
Displaying
Pictures
Twin
Tune the TV to a working channel.
Press Cll.
A second picture appears.
Press _
Factors
Affecting
or @.
Twin View
If you use a cable box to view all cha:mels, the same chain:el appears inboth windows of Twin View
because the cable box unscrambles only one chamlet at a thne.
If you use a cable box, you can view the cable box output in one Twin View window and view a
different source _such as a VCR or DVD player) in the second window by using the
button. For details, see "Colmecting Optional Equipment" on page 28.
Digital sources, as well as any sources connected to the VIDEO 4. 5.6 inputs, display m the left
window, but not in the right window.
If you are viewing a 4:3 source and a 16:9 enhanced source (such as a DVD) side by side in Twin
View. the 4:3 source appears larger.
Twin View does not display chmmels that are blocked by parental settings (see page 102).
z
Activating
Picture
the
You can use the and
using Twin View.
buttons to activate the left and right pictures while
To activate the picture in the right
window
Press
.
Press
.
To activate the picture in the left
window
Tune to a channel
To rune to analog
channels,
For digital subchannels,
again, andthen
press
press
.
-
For example, to select subchannel
+ +('_+
+,
and then press
Adjust
the volume
and then
, (_,
press
21.13,
press
Press
...............................................................................................
Mute the sound
................................................
Press
(press
i ..........
.............................................
again or
to
unmute).
Switch the TV's input between
sources connected
to the TV's
VHF_UHF
sources
and CABLE
Press
.
inputs
connected
to the TV's AV
the picture
size
inputs
Change
Press
or . (For details,
Picture
Size"
on page 710
see "Changing
the
Changing the
Picture Size
Enlarge
The zoom feature lets you vary the relative size of the left and right pictures.
the active picture
Make the active picture
Press
.
Press
.
smaller
When you adjust the picture sizes, the TV memorizes the
change. The next time you use the Twin View function, the
memorized sizes appear.
The Favorite Channels feature lets you select pr%mams from a list of up to
16 tZavoritechannels that you specify. You can create a list using the Favorite
Channels option in the Channel Menu, or by using the Add to Favorites
feature in the Favorite Channels guide.
Using the Channel
Menu
Press
Press
to display the Menu.
or
Press @
"_° For details
on using
the Channel
see page
Menu,
to highlight the Channel icon and press @.
to select
.
Use the - and
buttons to enter the channel number that you want
to assign to the Favorite Channel number.
99.
2<0Digital channels do not display in the preview window.
Press Q
to select that channel as a Favorite Channel.
_/To enter digital channel numbers in step 4, use the 0-9, (_),
press 0-9 again, and ENT buttons.
To add more channels to your favorites list, repeat step 4.
To clear a Favorite Channel, press
or to highlight the channel you
want to clear. Press @
Press
and then press
to exit the Menu.
Using the Favorite
Channels Guide
Press
. The Favorite Channels list appears.
Favorite
Channels
Press
or
to highlight the channel you want to watch.
To add the current channel to the list of Favorite Channels, highlight
and press @.
Press (_)
to select the channel you want to watch.
To change your Favorite Channels list, highlight
press @.
......
and
i:
i
)>
)!_
i ¸¸ );
Memory Stick (sold separately) is a compact, portable, and versatile
Integrated Circuit recording medium with a data capacity that makes it
perfect t\_r portable applications, such as digital photography. Memory Stick
is specially designed for sharing digital data among Memory Stick
compatible products such as digital cameras and digital video cameras.
Because it is removable, Melnory Stick can also be used for external data
storage.
The Memory Stick Viewer on your TV allows you to view files that are
stored on Memory Stick media. You can view:
Digital photos (JPEG files)
Movies (MPEG1 files)
You can also play slide show background music using MP3 files (or m3u
playlists) stored on your Memory Stick.
For more information about handling Memory Stick media, see "Notes on
Using Memory Stick Media" on page 90.
Features
With the Melnory Stick Viewer, you can:
View TV screen digital images (JPEG) and (MPEG 1) with background
music (MP3) in a thumbnail index or Slide Show
Set customized Slide Show options, including transitions and
background audio
Pan, zoom, and rotate photos
Mark photos and set quantities of prints to be output when the Memory
Stick is inserted into your photo printer (not supplied)
Lock (protect) or delete files on the Memory Stick
Memory Stick
Compatibility
This television is compatible with the following Sony brand Memory Stick
media types:
Memory Stick Media
Memory Stick DUO and PRO DUO Media (without the Memory Stick
adaptor)
ii
CAUTION: If you are using a Memory Stick DUO or Memory
Stick PRO DUO with your TV, do not use the Memory Stick
with its adaptor. Remove the adaptor before you insert it
into the TV's Memory Stick slot. Inserting the Memory Stick
into the slot with the adaptor may result in permanent
damage to the Memory Stick and the TV.
Memory Stick Media with Memory Select Function
Memory Stick PRO Media
Memory Stick PRO media features vary by and are dependent upon the
design of host hardware devices. Memory Stick PRO in this television has
been tested to support up to 1 GB media capacity and does not support highspeed transfer, MagicGate copyright protection technology, or access control
security features.
Memory Stick
Functionality
Sony cannot guarantee or assure the Memory Stick functionality on this
television in the following cases:
You are using non-Sony brand Memory Stick media.
You are using video or audio clips that have been processed on a
computer.
You are using files that were obtained fiom the Internet or from a
printed film processing center.
The Memory Stick has been formatted on a personal computer.
Sony recommends that you back up all data stored on Memory Stick media
to avoid potential data loss. In the above two cases, in order to avoid
potential data corruption that may occur, be sure to back up data prior to use
with the TV's Memory Stick Viewer. Sony cannot accept responsibility in
the event that data recorded to Memory Stick media is lost or damaged. For
certain non-Sony brand Memory Stick media, you can view images, but you
cannot rotate, delete or protect/unprotect images on the television. An error
message will occur if you attempt any of these operations. This is a result of
the unique file directory structure on these particular flash memory media
and is not a malfunction of the television.
File Compatibility
The Memory Stick Viewer is compatible with JPEG images taken with SoW
digital still cameras and MPEG 1"movies taken with SoW digital cameras
and camcorders. In order to be viewable in the Memory Stick Viewer, the
files must have the t\_llowing file name extensions:
JPEG
.jpg
.jpeg
MPEG 1
.mpg
.mpeg
Trademark
Information
Memory Stick, Memory Stick PRO, Memory Stick PRO DUO, and
MagicGate are trademarks of Sony Corporation.
2
* Some variations
of MPEG1
movies
may not play back correctly.
Inserting
Stick
a Memory
If you are using a Memory Stick DUO or Memory
B CAUTION:
Stick PRO DUO with your TV, do not use the Memory Stick
with its adaptor. Remove the adaptor before you insert it
into the TV's Memory Stick slot. Inserting the Memory Stick
into the slot with the adaptor may result in permanent
damage to the Memory Stick and the TV.
Locate the Memory Stick slot (see page 17) and insert the Memory Stick
into the Melnory Stick slot as illustrated below. When inserted properly,
it should slide in with little resistance and click into place.
Y_
Be sure
to insert
the Memory
the Memory
Stick
is forced
Stick
in the correct
in the wrong
direction.
If
way, it may become
damaged.
Insert
only Memory
Attempting
TV.
to insert
Stick
media
other objects
into the Memory
Stick
slot.
into the slot may damage
To remove the Memory Stick, see "Removing
the
a Memory Stick" on page 80.
Inserting the
Memory Stick DUO
Memory Stick DUO is a new, compact version of the standard-sized
Memory Stick recording medium.
_
CAUTION: The Memory Stick slot on your TV has been
designed to accommodate standard and compact versions of
Memory Stick. It is not necessary to use an adaptor for Memory
Stick DUO and Memory Stick PRO DUO. If you use an adaptor,
it may damage the adaptor and Memory Stick slot.
_7_ CAUTION: Inserting the Memory Stick DUO incorrectly may
result in permanent damage to the Memory Stick DUO and the
LCD projection TV.
Insert the Memory Stick DUO as shown below.
To remove the Memory Stick DUO, see "Removing a Memory Stick" on
page 80.
Removing
Stick
a Memory
Check that the Memory
indicates
Stick indicator
that the TV is reading
is off. (When
data from the Memory
the light is on, this
Stick.)
Removing the Memory Stick while a file is being accessed
(when the Memory Stick LED on the TV's side panel is lit) may
damage the Memory Stick or its contents.
Push the Memory Stick gently into the slot, and then release
Memory Stick media is ejected.
it. The
JL_ Do not pull out the Memory Stick without first pushing it in;
otherwise, the TV's locking mechanism may become damaged.
Pull the Memory
Stick completely
out of the slot.
_D To protect small children from injury from Memory Stick Media,
remove all Memory Stick media from the TV's Memory Stick
slot and store it in a safe location when it is not in use.
;
x
3¸¸¸¸
x
Turn on the TV and insert a Memory Stick that contains the photo or movie
files you ,a_antto vie,a_ For details, see page 78.
S_J If the Memory Stick
the remote control.
Index
does
not appear,
press
F1 button
on
The Memory Stick Index appears, which displays thumbnail images of the
tiles stored on the Memory Stick.
Information about the
highlighted photo or movie
Highlighted thumbnail
Thumbnails of photos and
movies
Memory Stick Menu bar
H
Indicates
file.
the thumbnail
is a movie (MPEG
i) file instead
of a photo
Indicates the thumbnail
is locked. Locked files cannot be changed
deleted. For details, see "Photo Menu Bar Options" on page 84.
_
Indicates
that the photo
is marked
to be printed.
_
Indicates
that the photo
has an associated
voice memo.
(JPEG)
or
Using the Memory
Stick Index
The t\_tlowing describes how to use the Memory Stick Index.
Move the highlight
a photo,
(_),
or movie
thumbnail
Display
to
.
(H)
the
Press
highlighted
photo,
voice menlo, or movie
file full screen
Display
Press
voice memo
the next page
@.
For details,
83 and "Playing
see "Viewing
Movies"
Press
to select
of thumbnails
Press
to display
or next page of
Press
to select
thumbnails
To go to the previous
Stick
Menu bar to access
additional options
Press
Press
the next page of thumbnails.
_.
Press
to select
or
page,
press
.
.
T.
toselect
.
or
on page
V.
To go to the next page, press
Use the Memory
Photos"
on page 86.
to select
,
the option
,or
you want to
change.
For details
on these options,
Menu Bar Options"
Move the highlight
Press
or
from the Memory
Press
to remm
Stick Menu bar back
to the thumbnails
thumbnails,
thumbnails.
Exit Memory
Viewer
Stick
Press the
to select
or
button
see "Memory
Stick Index
on page 88.
V.
to the currently
to display
on the remote
displayed
the next page of
control.
When you select a photo from the Memory Stick Index (described on
page 81), it displays as shown below, with the following controls.
Information about
selected photo
Selected photo
Previous/next
buttons
Photo Menu bar
Y_j JPEGs captured using a digital video camera may appear to
display motion in full screen. This is a result of the way digital
video cameras record still images, and is not a result of a
malfunction with the TV.
Photo
";_" When
hidden,
Controls
the Menu
is
press
or
go to the previous
to
or
Display the next or previous
file on the Memory Stick
Highlight the
(Previous Next) button.
Then press
to go to the previous file, or
to go to
the next file.
Hide the Photo
With the highlight
displaying
Menu bar,
in the Photo Menu bar, press
.
only the photo
next photo.
Display the hidden
Menu bar
Photo
Press
.
Play the JPEG voice memo
(_
files only)
Highlight I_ (Play) and then press (_.
To pause
the voice memo, highlight || (Pause) and then press
Display
Highlight
GD.
the Memory
Stick
Index again
Access additional options
the Photo Menu bar
Exit Memory
Stick Viewer
in
in the Photo Menu bar and press
@.
For details
on the Memory
See "Photo
Menu
Press the
button
Stick Index,
Bar Options"
see page 82.
on page 84.
on the remote
control.
Photo Menu
The Photo Menu bar lets you access additional photo viewing options.
Bar Options
Press or
toselect,
,or
.
Press to select the desired option.
Displays
thumbnail
the Memory
Stick Index, with the highlight
of the currently
displayed
the Memol 7 Stick Index"
....
Displays
the Slide Show Menu. For details,
Options"
on page 88.
clockwise
see "Using
Allows
you to magnify
Allows
are indicated
by the Lock
@=e icon.
feature
i
you to indicate
(Digital
Order
Format).
photo
and pan across
the photo.
and Pan" on page 85.
the JPEG
file from any
the number
photo
it cannot
of prints to make
when the Memory
into a compatible
For
on page 85.
printer
Stick is
(not
supplied).
is also known
DPOF
Show Menu
Zoom
you to the protect
inserted
!
Rotate"
see "Using
of the specific
ii
see "Slide
changes. When a JPEG file is protected,
be rotated or deleted. Select
or
Allows
"_*Thel
see "Using
or counterclockwise.
details,
For details,
protected
on the
For details,
on page 81.
increments
";_° JPEG files that are
photo.
Print
as
Deletes
the JPEG
cannot
delete
file from the Memory
Stick.You
a JPEG file that has been protected
(or if the Memory
Stick is locked).
Using Zoom
and Pan
In the Photo Menu bar, highlight
Highlight Zoom/Pan and press (_).
Specify the zoom center point by using
the center.
;then
press
@
to set
The Zoom and Pan controls are displayed.
Zoom in (increase
or out (decrease
Pan (move
right,
magnification)
magnification)
the photo
left,
up, doxxl_)
controls
Stick Viewer
and press
For help on using
(You can use
Highlight
Exit the Zoom/Pan
Exit Memory
Highlight
,
to zoom in or
press
only when the photo
and press
@.
To stop using Pan, press
(_.
Highlight
@.
Press
the
and press
button
to zoom out.
Q.
is magnified
Then press
on the remote
using
.)
to pan around
the photo.
control.
Using Rotate
In the Photo Menu bar, highlight
Highlight
";_° You cannot
rotate
a
photo that has been
protected.
on page
See
87.
.
....
To rotate cloc_vise, highlight
To rotate countercloc_vise,
highlight
and press @.
....
and press
C).
The photo is rotated 90 degrees each time you press @.
J
When you select a movie from the Memory Stick Index (described on
page 81), it displays as shown below, with the following controls.
Information about
selected movie
Selected movie
Enlarge button
Play/pause button
Previous/next buttons
Movie Menu bar
J_j MPEG movies recorded in VX Fine mode with Sony digital
cameras cannot be played back with the Memory Stick Viewer.
Movie
Contro/s
"_° The quality
of the movie
Enlarge
the movie window
Highlight
when enlarged depends
on the resolution
of the
MPEG1 file. See your
camera's instruction
manual
for details.
, and then press
the movie controls again, press
movie ends, the movie controls
@.
Play the movie with the
movie controls displayed
Highlight
I_ (Play)
Pause the movie
Highlight
I|
Display the previous or next
file on the Memory Stick
Highlight the
(Previous/Next)
press
to go to the previous file, or
next file.
Hide the Movie
With the highlight
displaying
Menu bar,
and then press
(Pause)
To display
(_.
When the
are displayed again.
@.
and then press
@.
button. Then
to go to the
in the Movie Menu bar, press
only the movie
Display the hidden
Menu bar
Access additional
the Movie Menu
Exit Memory
Movie
options
bar
Stick Viewer
Press
in
.
See "Movie
Menu
Press
button
the
Bar Options"
on the remote
on page 87.
control.
.
Movie Menu
Bar Options
Highlight
Press
in the Movie
or
to select
Menu bar.
,
or
Select the desired option.
"_°MPEG1
protected
files that are
are indicated
by the Lock
_
icon.
Displays
the Memory
of the currently
Stick Index, with the highlight
displayed
Displays
the Slide Show Menu.
Options"
on page 88.
Allows
For details,
you to the protect
changes. When an MPEG
cannot be deleted. Select
.....
on the thumbnail
movie.
see "Slide
the MPEG1
Show Menu
file from any
1 file is protected,
or
it
Deletes the MPEG1 file from the Memory
Stick.You cannot delete an MPEG1 file that has
been protected
(or if the Memory
Stick is locked).
2
T
Slide Show Menu
The Slide Show Menu includes the following options:
Options
Starts the Slide Show.
"_° The Slide Show
Menu is
the same whether
select it from the
Memory
you
Allows
Show.
you to select background
81), Photo
(page
83), or Movie
(page
86) Menus.
the Slide
No additional background
audio is played during
the Slide Show. Audio that is associated with the
Stick index
(page
audio to play during
JPEG
.......
or MPEGI
files will play,
Plays all MP3 files on the Memory
Sticl_. The
MP3 file and any MP3 file playlists
are not
played.
Plays the MP3 file stored in the TV's internal
lIlenlofy.
Displays a list of all available MP3 files.
Displays
";_° When
you select
take a moment
• it may
to
lblders on the Memory
display the list of al
MP3 files.
"_° Some
to display
Allows
you to specify
than others• which may
make it seem longer
than the interval
selected for
you
Detemlines
";_° You can also display
information
remote
file
using the
button on the
control.
Stick, select
Allows you to select an effect to be used when advancing
file in the Slide Show
JPEG files may
take longer
a list of all MP3 files and MP3 file
playlists found at the top level (root) of the Memory
Stick. To show additional MP3 files stored in other
displayed
when to advance
to the next slide.
Slide advances
after about 3 seconds.
Slide advances
after about 6 seconds.
Slide advances
after about
Slide advances
only after you press
whether
full screen.
file information
Select
Slide Show
12 seconds.
or
.
is shown when the file is
or
.
continuously
Slide Show plays
to the next
loops.
once through
all files and ends.
Contents
Menu
The Contents
Menu includes
the following
options:
Options
Allows you to select different folders to view in the Memory
Stick Viewer.
Selects all folders within the directories
defined by the DCF rules used by Sony
digital cameras (see page 90). JPEG and
MPEG1 files in those directories are
recognized even if they do not conform to
the DCF file naming rules.
Allows you to access individual fblders on
the Memory Stick.
Allows you to change the order in which the Memory Stick
files are displayed.
"_° The Rotate
function
does not change
file's modification
....
Displays files in chronological order by
modification date.
the
date.
Displays files in reverse chronological
order by modification date.
....
:
Displays files in alphabetical order by
filename.
Allows you to selectively display specific file types within the
selected lblder.
Displays all readable files.
i
i
....
Displays only photo (JPEG) files.
Displays only movie (MPEG1) files.
Displays all files that are marked for
printing. For details, see "Photo Menu Bar
Options" on page 84.
Memory
Stick Menu
The Memory Stick Menu displays all files marked with the Print Mark
feature, regardless of the currently selected tblder.
2
About DCF File
Names
Most Sony brand digital still and video cameras automatically record still
photo and movie files using DCF compliant directory and file names.
Ifyou selected the
option, as described on
page 89, you might want to have your digital camera's instruction manual
handy in order to check how files and directories are organized for your
specific model of digital camera.
DCF stands for "Design Rules for Camera File Systems," which are
specifications established by the Japan Electronic Industry Development
Association (JEIDA).
Memory Stick
Precautions
When using Memory Stick media, t\_llow these precautions:
To avoid perlnanent damage to still image data, do not turn offthe TV or
relnove Memory Stick media from the insertion slot while data is being
read (as indicated by the Memory Stick indicator light being on).
Avoid touching the terminal of Memory Stick media or bringing it into
contact with a metal object.
Do not drop, bend, or submit Memory Stick media to external shock.
Do not disassemble or modify Memory Stick media.
Avoid getting liquid on Melnory Stick media.
Apply labels only within the desimlated label area.
Area
To avoid perlnanent damage to still image data, do not use or store
Memory Stick media in a location subject to:
High temperature (such as near a heater or inside a hot car)
High humidity
Direct sunlight
Corrosive substances
MaNletic fields
Excessive dust
Static electricity or electric noise
Electric surges
Store and carry Memory Stick media in its original case to ensure
protection of stored data.
Save a backup of stored data.
When using the Memory Stick DUO, insert it without using the
Memory Stick DUO adaptor. For details, see page 79.
The Menu gives you access to the following
features:
The Video Menu allows you to make adjustments to your 92
picture settings• It also allows you to customize the Picture
Mode based on the type of program you are viewing, select
Advanced Video options, and more.
";_°Press
to enter
and exit Menus.
The Audio Menu Offers enhanced audio options such as
listening to second audio programming (SAP) or
customizing the Effect of the sound on your TV.
95
The Screen Menu allows you to make Screen Mode
adjustments and make changes to the screen's vertical
center and size.
97
The Channel Menu allows you to set up a Favorite
Channels list, run the Auto Program function, label
channels, and more.
99
The Parental Lock Menu lets you control the viewing of
programs based on their ratings.
101
The Setup Menu provides options for setting up your
system, including selecting closed caption modes, labeling
video inputs, selecting the language and color of the onscreen Menus, and more.
104
The Applications Menu lets you display the Memory Stick 107
•
TM
Viewer, set on offTlmers, access CableCARD
and
diagnostics infomlation, and more.
";_" Menus
include
help text
that appears at the top
of each Menu.
Display the Menu
Press
Move through the Menus
Press
Select an option to change
Press (_).
Select (conlinn) changed setting
Exit the Menu
Press @
Press
.
.
or press
.
.
ii >i
i
ii¸¸
Press
Press
,
.
or
to highlight the
Video icon and press (_).
Press
to highlight an
option. Press @
option.
Press
Press @
setting.
to change settings.
to select the changed
Press
<
to exit the Menu.
i¸
<
Press
Selecting
Options
:
ii< <
;i
i
The Video menu includes the following options:
from one
control.
Select for enhanced
(
,
) for each
input (including
the TV antenna
input).
"_° You can alter the Video
settings
(;
,
"_° To prevent
retention,
the
long time.
Adjust
to increase
picture
contrast
Adjust
to brighten
or darken the picture.
Adjust
to increase
or decrease
co!or intensity.
Adjust
to increase
or decrease
the green tones.
Adjust
to sharpen
or soften the picture.
White intensi O,
a@;llSt117C_2t
image
do not use
mode for a
and sharpness.
Recommended
settings.
etc.)
for each Mode.
contrast
settings.
.....................................................................................................
Select for professional
monitor like appearance
viewing
,
picture
Select for standard picture
for home entertainment.
Cztstomized
"_° You can alter the Mode
options
iliii,
i
on the remote control when in the Video menu.
picture
menu
!i
to another, use
button on the
remote
video
i
Video
";_°To change
Mode
to select an
picture
contrast
and deepen
the color, or decrease
and soRen the color.
Select to give the white
colors a blue tint.
Select to give the white
colors a neutral
...............................................................................................................................................................
....
Select to give the white
colors a red tint.
tint.
Select to reduce
effective
......
"_"
isnot
available when
watching 480p or 720p
sources.
the noise
on the signal
and
level of connected
fi'om the VHFiUHF
equipment.
..........................................................................................
Select for a natural, soft picture.
Select to turn offthe
Select to optimize
the lipsync
when playing
Select to turn offthe
.....
"_'i
! i
i
and
Seiect
i
watching
720p sources
View.
io choose
Creates
are not available
when
among the options
or Twin
when
sources
bel0W.
with 4x density,
(i.e., DVD player,
satellite
Recommended
for moving
Recommended
text.
for still images
Provides
isset
or using
described
picture
receiver).
is set to
to ,
Stick.
games.
.
a high-resolution
for high quality
480p or
Also not available
It is also
jack. Select fi'om
an optimized
automatically
Memory
detecting
pictures.
display
and
by
film
content and applying a reverse 3-2
pulldown process. Moving pictures
will appear
clearer
and more
natural-looking.
"_"
available
isnot
when
........
is set to
is set to
or using Twin View.
allolvs
you to cusiomize
Press
(_.
"_" For best results,
the Reality
adjust
the levei of detail
(Reality) and smoothness
(Clarity) for up to three
input sources. For example, you can create one
Custom setting to optimize your cable input's
picture, and create another to optimize your DVD
player's picture. You can switch among the three
Custom settings in the menu.
to highlight
:
,
, or .....
and then press
The DRC palette appears.
Custom 1
Press @ to exit
by pressing
until you are
satisfied with the level
of detail.
Then
the Clarity
adjust
until you have a
smooth
Clarity_
(1) "
by pressing
image.
Press
to adjust the position of the
marker (O). As you move the • higher along
the Reality axis, the picture becomes more
detailed. As you move the • to the right,
along the Clarity axis, the picture becomes
smoother.
To save the setting,
To return the Custom
settings, press
press
options
.
@.
to the default
factory
(Contilmed)
";_°
available
when
isnot
watching
480p,
720p,
and 1080i sources,
using Memory
Twin View.
Select to reduce the block noise caused by digital
video encoding and decoding process. It is
or
fco_timled)
especially effective for watching
TV pictures. Select fronl
,
a DVD or digital
and
Stick or
...................Sdect to emphasize the red and blue Coi01"sl
Seiect
or
Select to enhance
texture of the picture.
and.
Select from
ii ¸¸¸41
i
iii
Press
Press
.
or
to highlight the
Audio icon and press (_).
Press
to highlight an
option. Press @
option.
Press
Press @
Press
Press
to select an
to change settings.
to select the changed setting.
to exit the Menu.
on the remote control when in the Audio menu.
The Audio menu includes the following options:
Selec ting A udio
Options
Select to enhance
";_°
and
available when
or
is selected in
C_stomized
Suitable
'_cmre
Flat setting.
rzewmg
are not
treble
for spoken
dialogue.
Adjust [o decrease
or increase
higher-pitched
Adjust to decrease
or increase
lower-pitched
sounds.
Adjust to decrease
or increase
woofer
level.
Adjust
to emphasize
set to
when
balance.
the volume.
Select to tuna off
is not
available
sounds.
sound
left or right speaker
Select to stabilize
";_°
and bass.
is
Select for surround
or
sound
(for stereo programs
only).
Adds
Enyqr stereo,
a surround-like
effect to mono
Select for normal
stereo
Select for stereo
reception
program
broadcast
Select to automatically
mono programs
audio
SAP signal
programs.
reception.
when viewing
a
in stereo.
bilingl_al at_d
programs
or mono
switch
when a signal
is present,
the TV to second
is received.
the TV remains
If no
in Stereo
lrlode.
Select for mono
during
reception.
weak stereo
T
Use to reduce
noise
broadcasts,
(('onthmed)
Select the video
speakers
....
input (TV, Video
This option
can be set when the
to
. Select
the center speaker)
This option
Easy
control
of
i-6) you want to use the TV's
as the center speaker.
option
, if the sound
sounds unnatural.
fi'om the TV's speaker
The default setting is
can be set only when the
....
option
is set
(as
is set to
.
vohtme
The TV's speakers
ac[iltstme_ts
output
are turned
l_om your audio
controlled
by the TV's remote
The TV's speakers
output
o1I\ but the audio
system
are turned
can still be
control.
offand
the audio
of the TV is fixed. Use your audio
receiver's
remote
control
(and other audio settings)
to adjust the volume
through
your audio
system.
Select to tuna on the TV speakers.
Select to turn offthe
TV's
sound
receiver
TV speakers
only through
and speakers.
and listen to the
your external
audio
Press
Press
.
or
to move to the
Screen icon and press @.
Press
or to move to an
option. Press @
option.
Press
Press @
Press
Selecting
to change settings.
to select the changed setting.
to exit
the menu.
Screen
The Screen menu includes the following options:
Options
";_" To change
Wide
to select an
from
Mode
one
option to
another, use
the remote control.
on
......
Select a _Tde
Mode
to ztsefor
4:3 soztrces,
to fill screen
Select to display
4:3 picture
when the original
definition
IS
recommended
Select to enlarge
distortion.
for 4:3
Select to enlarge
the original
horizontally
image
retention.
souice
is 4.._ (Standard
When
the original
and
adjust
to fill the screen
definition
you can
and size of the
Select to enlarge
picture.
For details,
distorting
see
page 98.
....
Allows
"_° The
feature
the picture
is useful
TV is connected
game
This function
being
source).
select
this mode
to display
size.
the original
the aspect
you to move the position
the window.
when the original
definition
is 16:9 (High
in original
position
picture
source
source),
16:9 picture
the vertical
size
source).
to prevent
modes,
in original
source is 4:3 (Standard
picture
";_" For
with minimum
picture
without
ratio.
of the picture
allows for horizontal
left and right in
adjustment
of
displayed.
if the
to
equipment.
(('ontinzted)
.....
Select
Select to enlarge
the defalt/t
Screen Mode
";_°
ztsefor
functions
only when
receives
screem
to
keeping
the 4:3 picture
the original
to fill the 16:9
image as much
as
possible.
4:3 soz,1"ces
.......
Select to return the 413 picture
io [is odainai
size.
the TV
Select to enlarge
480i or 480p
the 4:3 picture
horizontally
only, to fill the 16:9 screen.
signals.
";_° If
Select to enlarge the 4:3 picture horizontally
and vertically
to an equal aspect ratio that fills
is setto
anything
but,
the
the 16:9 screen.
lnovies.
setting
changes only for the
current channel. When
you change
Select to continue
for watching
Letterbox
using the cun'ent
Screen Mode setting
channels
Wide
when the channel
or input
is changed.
(or inputs),
is automatically
replaced
Useful
.....
Displays
with the
Allows
setting. To
retain the current
setting
channels
.....
as
are
set
to
.
Allows
you to move the position
the window.
Available
the viewable
of the picture
only in Wide Zoom
Press
or
and press @
+i0 and 10 (Zoom mode),
area of the
up and down in
and Zoom
modes.
to choose a correction between
and +10 and
i0 (Wide Zoom
mode).
Allows
you to adjust
only in Wide Zoom
the vertical
and Zoom
Press
or
and press
+10 and 10.
"_°
size picture.
picture.
and inputs
changed,
a standard
you to adjust
fu nction
Moves
@
size of the picture.
Available
modes.
to choose
the picture
a correction
position
between
to reduce
image
finishes automatically
after 30 minutes.
retention. This does not prevent image retention
completely
if the same picture is displayed for
If image
retention
an extended
present,
repeat
function
again.
is still
the
";_° To cancel
return to normal
Displays
retention.
and
viewing, press any
button on the remote
control.
";_° Once
occurs,
image
retention
it may become
less conspicuous
over
time but it will never
completely
disappear.
(See page
1 for more
information
on Image
Retention.)
period
a white
of time.
screen
to reduce
image
Press
Press
.
or
to highlight the
Channel icon and press @.
Press
to highlight an
option. Press @
option.
Press
Press @
Press
Selecting
Options
Channel
to select an
to change settings.
to select the changed setting.
to exit the Menu.
The Channel menu includes the following options:
Lets you set up a list of your favorite channels.
"Using Favorite Channels" on page 72.
:
Turns off
Us@d
u,he_ you
.....................................................
"Fix" your TV's
channel
setting
to 2-6
ha_,e a cable box
oi" a satellite
(VHF.UHF
input) or (72-(76 ((:able input) and
use the cable box or the satellite receiver to
receiYer co_mected
change
channels.
equipment
....
accessed only with the
buttons.
see
....
Use this setting
";_"Channels that you set
to be hidden can be
For details,
if you have connected
Automatically
sets up the channel
receivable channels.
:
list on the TV for all
Select to add digital
Allows
the
you to show or hide channels
buttons.
Press
or
the channel
select it.
Press
or
the
to the A/V input jacks.
to scroll tln'ough
channels.
that appear
the channels
when you use
until you find
you want to show or hide. Then press
to determine
if the channel
@
to
will be shown or
hidden.
To show or hide more channels,
repeat steps 1 and 2.
Press
to return
exit the Menus.
menu,
to the Channel
or press
to
(Continued)
Allows you to assign
channel numbers.
Press
labels (such as station
to scroll through
the channel
press @
to select the channel
assim_ a label.
Press
............ to highlight
Press
to scroll through
etc.).
Repeat
Then press
@
Then
(_).
to select the highlighted
to the Channel
to
that you want to
and press
labels to more channels,
Press
to return
exit the Menus.
numbers.
number
the label characters
to add up to 5 characters
To assign
call letters)
(A-Z, 0-9,
character.
to the label.
repeat
menu,
steps 1-3.
or press
to
The Parental Lock menu allows you
to set up the TV to block programs
according to their content and rating
levels.
ii ¸¸¸41
il
il
Press
i
ii
/
?
i
.
Press
or
to highlight the
Parent icon and press @.
Use
on the remote control to enter a four-digit password.
If this is the first time you are creating this password, confirm the
password by entering it again. The Parental Lock menu options appear.
Press
setting.
to change settings. Press @
Press
_3
Selecting Parental
Lock Options
to exit the Menu.
You need your password
Lock
Menu.
page
117.
If you
Tm'n rating_
you should
. or
at_d select
ombff
selection.
a ratit_g
password"
on
are blocked
ratings permitted
are:
US: TV-Y, TV-G, G
Canada:
C, G, TV-Y
To
Maximum
ratings permitted
US: TV-PG,
select
Canada:
";_" For descriptions
of
• and
ratings,
into the Parental
lock is off. No programs
Maximum
system
set more specific
ratings
access
see "Lost
from viewing.
to help simplify
the rating
password,
Parental
rating
system,
select
for any future
lose your
The Parental Lock menu includes the following options:
"_" if you are not familiar
with the Parental
Guideline
to select the changed
Maximum
C8-,
are:
PG
PG, 8 ans ÷, TV-PG
ratings permitted
are:
US: TV-14, PG-13
Canada: 14-, la ans + , TV-14
see page
102
Select to set ratings manually.
US: See page
Canada:
For changing
102 for details.
See page 103 Ibr details.
your password.
Select to use USA ratings
Select to use Canadian
(see page 102).
ratings
(see page
103).
US Models:
For US models, the Custom Rating menu includes
Canadian models, see page 103.
Selecting Custom
Rating Options
"_° The Content-Based
Ratings
....
are linked to
the following
options.
For
Al! children and General Audience.
the level of the AgeBased
Rating.
example,
:
For
a program
of
Noone
(Violence)
rating may
contain moderate
violence,
while
violence.
"_°To ensure
Age-Based
Blockprograms
b)
their rati,_g.
co_te_t or both
capability,
set
TV
public
news,
service
religious
weather.
programs
Viewing Blocked
Programs
and
only.
Violence.
Dialogue.
Sexual situations.
Violence.
Blockprograms
movies
announcements,
suggested.
cautioned.
Strong Language.
political
sports,
Audience
age 7 and older.
Ratings
Suggestive
types
emergency
programs,
Guidance
Strongly
Fantasy
may be
broadcasts,
to children
Audience.
Mature
blocked: programs
broadcast from another
country,
is suggested
.........................................................................
General
Content-Based
be aware
of programs
guidance
13.
allowed.
Directed
Parents
Ratings.
that the following
under
Ratings
Parental
";_" If you block unrated
programs,
17 or under
Aii ci;;idl'en.
.................
maximum
the Age-Based
for children
and
.......
a
(Violence) rating may
contain more intense
blocking
Guidance
Restricted
viewing, parental
for children under 17.
with an Age-Based
Rating
Parental
or
that are
broadcast
a rat#Tg
without
Allows
programs
without
a rating.
Blocks
without
and movies
all programs
that are broadcast
and movies
that are broadcast
a rating.
You can view blocked programs by entering the password. Press
when
tuned to a blocked pro m'am, then enter the password. ]his temporarily
switches offParental Lock. To reactivate the Parental Lock settings, turn off
the T_ When the TV is turned on again, your Parental Lock settings are
reactivated.
Canadian
Models:
Selecting Custom
Rating Options
For Canadian models, the Custom Rating menu includes the tbltowing
options. For US models, see page 102.
All children.
Children 8 years and older.
General programming.
Parental
Guidance.
Viewers
14 and older.
Adult programming.
General
programming.
Not recommended tbr young children.
Not recommended
for ages under
13.
Not recommended
for ages under
16.
Programming
See "US Models"
Viewing Blocked
Programs
on page
restricted
to adults.
102 for details.
You can view blocked programs by entering the pass,a_rd. Press
when
tuned to a blocked prQmam, then enter the password. This temporarily
switches offParental Lock. To reactivate the Parental Lock settings, turn off
the TM When the TV is turned on again, your Parental Lock settings are
reactivated.
ii
i
ji
Press
Press
i
i
.
or
to highlight the
Setup icon and press @.
Press
to highlight an
option. Press @
option.
";_°To move from within one
Menu to the main Menu
of icons,
Selecting
Options
press
Setup
.
Press
to select an
to change
settings. Press @
Press
to select the changed setting.
to exit the Menu.
The Setup menu includes the following options:
Allows you to select from several closed caption modes
programs that are broadcast with closed caption).
Caption
Allows
Vision
Vision"
.......
Seito
remaining
service).
Vision
is turned
See "Programming
Displays
button
Caption
Caption
on page 106.
7 When on dispiays ihe
and other
on.
you to set basic and advanced
options.
(for
information
when the channel
is pressed.
program
name
(if the broadcaster
is changed
time
offers this
or the
Allows
you to identify
such as a VCR,
player connected
to the VIDEO
for the VIDEO
to change
appears
A.V equipment
you connected
DVD, etc. For example,
inputs,
4 jack,
to the TV,
if you have a DVD
you can select the labe!
4 input. Then when you press
the Video Label
you assigned
to that input
on screen.
the video input (VIDEO
1-6) to
which you want to assign
the input.
Press
a label. Then press
to select
Press
one of the displayed
press
or
to highlight
or
to highlight
(_)
to select
(_)
labels. Then
the label.
i
You can select
"_'The
for inputs
equipment
connected.
label
l_com the following
labels for each input:
is useful
to which
no
is
_
......
If you
select
when
you
Select to display
choice.
......
Skip,
press
all on-screen
you to select a specific
Allows
TV.
you to illuminate
this
input
button.
color for the on-screen
of
menus.
the Sony logo on the front panel of the
Illuminates
turned on.
the Sony logo while
Illuminates
the Sony logo when you switch the
power
......
TV skips
Menus in your language
Enables
....
your
the TVNIDEO
the power is
to on or of£
Select to view picture
without
Select to view picture
with reduced
consumption.
It also enhances
the black level.
Select to turn off the picture.
the benefit
power
of
Programming
Caption Vision
If you selected the
option under
can change the following settings:
Allows
(see page 104), you
you to select basic analog
(EIA-6081
Displays
version
closed
caption
options.
sound
a printed
of the dialog
effects of a program.
(Should
or
be set to
for most programs.)
Displays
using
network
available).
Allows
you to select
options.
advanced
you to select digital
EIA-608)
closed
For closed
digital
Select l}om the available
Allows
Allows
station
or
additional
screen
captioning,
(EIA-708)
presented
(if
set to
closed
caption
options.
closed
(digital
you to make
caption
infomlation
either half or the whole
captioning
to
(digital
EIA-708).
settings
for digital
(EIA-708)
options.
The closed caption
broadcasted.
letters are shown as they are
The closed
letters.
caption
letters are shown
in small
The closed
letters.
caption
letters are shown
in large
Allows
you to customize
the following
semngs:
ii
4
i
Press
.ii
.
Press
or to highlight the
Applications icon and press
GD.
Press
to highlight an
option• Press @
option•
Press
setting.
Press
to select an
......... to change settings• Press (_
to select the changed
to exit the Menu•
The Applications Menu includes the following options:
Selecting
Applications
Options
Displays
the Memow
Select to set the clock,
Stick Viewer.
For details,
see page 75.
set the Sleep timer, and to program
TV to turn on and off at two scheduled
viewing
Set the time in minutes
, or
TV to remain
your
times.
(
,
) that you want the
on before
shutting
of]."
automatically.
You can use the Timers to program the
TV to turn on and off and tune to a
and
Press
programming
2, press
@
to
Timer
instead
Press
1 or
of
press
channel
viewing
times.
are not available
or
timer, press
"_° To go directly
specific
or
to highlight
at two scheduled
to be set until you set the
or
. To set the
.
to highlight
one of the following
options,
then
@.
Select to set the Timer by day, time,
duration,
and channel.
Select to turn offthe
previous
settings
Timer.
(-'*our
are saved.)
(Contimwd)
If you selected
day(s),
"_° To return
to the Timer
@
or
Menu after programming
setting.
one of the Timers,
Press
press
(_
when the highlight
is in the channel number
in step 2, press
hour, minute,
to confirm
Press
to the Timer
after setting
,
the
press
@
when the highlight
is in the minute field.
each setting
and
to set the
number.
Press
and move to the next
to go back to the previous
will light, indicating
setting.
the timer
has been set.
Select to set the current time (day,
hour, minute, and AM PM).
Press
Menu
and channel
to exit the Menu. An LED on the front panel
field.
"_° To return
duration,
and
to set the current
and AM PM). Press @
or
move to the next setting. Press
time (day, hour, minute,
to confirm each setting and
to go back to the previous
setting.
Press
Displays
to exit the Menu.
diagnostics
useful in providing
inlbnnation
intbnnation
about the TV. This can be
to an authorized
technician
or
repair person.
This list of selectable
CableCARD
on your cable service
provider.
options
wi!l valT, depending
This chapter
includes
Glossary
the following
topics:
i 10
Contacting Sony
i 11
Troubleshooting
111
Specifications
i 18
Optional Accessories
Index
120
121
Asignaling
method
thatuses
continuous
changes
intheamplitude
orfrequency
ofan
electronic
transmission
toconvey
information.
Refers to the ratio between the width
(widescreen)
aspect ratio, as opposed
4:3 aspect ratio
and height of the screen.
to a 4:3 aspect ratio.
This TV has a 16:9
16:9 aspect ratio
The PCMCIA shaped card provided by your cable TV company which deserambles
the digitally encwpted cable channels. You should check with your local cable TV
company about CableCARD
service.
TM
Component video
and one brighmess
accuracy
is sent through three cables: two color shade (ehrominance)
signals
(luminance)
signal. Component
video achieves greater color
than composite
separate
video or S VIDEO
by splitting
chrominanee
into two
portions.
Composite video is sent through a single cable. Composite video combines the color
shade (ehrominance) and brightness (luminance) inlbnnation into one video signal.
A new technology
for transmitting
clearer resolntion
and improved
Provides
an uncompressed,
all-digital
HDMI-equipped
AiV receiver.
digital
HDMI
!
supports
broadcast
sound quality
audio/video
audio video component,
television
signals.
DTV
over analog television.
interface
between
this TV and any
such as a set-top box, DVD player, and
enhanced,
or high-definition
video, plus two-channel
audio.
A unit of the Federal
i ii i
and receiving
provides
Communications
establishes
television standards
standard used in this TV.
Commission,
in the United
Washington,
States, such as NTSC
DC, that
Color, the
Radio Frequency. That part of the frequency spectrum that is used to transmit TV and
radio signals.
S VIDEO
requires
a single cable, which
carries
the brightness
(chrominance)
signals of the picture
separately.
S VIDEO
than composite
video, which
the signals
together.
carries
(lnminance)
provides
better
and color
resolution
VHF (Very High Frequency)
is the part of the frequency spectrum from 30 to 300
megahertz. UHF (Ultra High Frequency)
is the part of the fi'equency spectrum from
300 to 3,000 megahertz.
Provides 480 lines of resolution. Displays images using interlaced scanning, which
first transmits all the odd lines on the TV screen and then the even lines.
Provides
480 lines of resolution.
transmits
each line fi'om top to bottom.
Displays
images
using progressive
scanning,
which
Provides 720 lines of resolution. Displays images using progressive scanning, which
transmits each line from top to bottom.
Provides 1080 lines of resolution.
Displays images using interlaced scanning, which
first transmits all the odd lines on the TV screen and then the even lines, i080i is one
of the formats
used by HDTV
(High Definition
TV).
It; after reading these operating instructions, you have additional questions
related to the use of your Sony television, please call our Customer
Int\_rmation Services Center at 1-800-222-SONY (7669) (US residents only)
or (416) 499-SONY (7669) (Canadian residents only).
Before calling Sony customer support, please write down the model and
serial numbers of your TM You'll find this int\_rmation on the front cover of
this manual.
Twin View
I cannot
get Twin View to work
If you are using a cable box to unscramble
all channels (as shown on page 26), you
cannot use the Twin View feature. This is because the cable box can unscramble
only one channel
(usually
at a time. But if you need the cable box to unscramble
premium)
you connect
channels,
you can use Twin View tbr unscrambled
the TV's A.V jacks
pressing
the
Digital
sources,
display
Be sure the Twin View window
airing.
anything
display
but TV channels
program
thi'ough
by
4, VIDEO
5,
connected
is not set to
thai has a signal
to it. Try cycling
? button.
the
:.
button
( heck
(See the Setup Menu on
105.)
the
in both windows
to the VIDEO
the
the video _nputs by pressing
option
window
but not in the right windows.
be tuned to a video input with nothing
that the
page
Twin View dispiays
connected
is set to a video input or charred
the video inputs by pressing
Try cycling
source that is connected
in the second
in Twin View.
in the left window,
or it is just static
Twin View cannot
while
as well as any sources
There is no Twin View window,
through
from a different
(such as a VCR or DVD player)
button
6 inputs,
You might
if
both a cable and cable box, as shown on page 25.
You can use Twin View to view a signal
VIDEO
only some
channels
w_ndows
in either window.
might be set to the same channel
Try Changing channels
to
Remote
Remote
Control
control
does not operate
The batteries could be weak. Replace
Check the orientation
of the batteries.
Press the
button.
You may have inadvertently
button,
(?ABLE
Make
the batteries.
which
changes
the remote
with
If you are Using the TV to change
button.
If you are using another
inadvertently
option
switched
securely
device to change
to "fix" the channel
:
button
to change
non-Sony
control
does not operate
video equipment
CableCARD
channels,
if you replaced
equipment
channels
to the wall outlet.
based
channels,
be sure you have not
Use the
be sure to press the
if you are using your cable box
be sure to press the ):
the gatter_es
to ihe remote
:
you used (see page 99).
channels,
for that device. For example,
........................
3 or 4 setting.
on the hookup
device to change
lights.
first press the
your TV from the channel
If you are using another
Remote
the
to SAT or
mode.
sure the TV's power cord is connected
Locate the TV at least 3-4 feet away from fluorescent
Cannot change channels
the remote control
pressed
control
button.
recently,
ti{e code nun_bers
fol" the video
may need to be reset.
There may be more than one code for the equipment
that you are attempting
operate.
There is a possibility
that some non-Sony
cannot
Sony TV remote.You
may need to use the equipment's
equipment
be operated
original
remote
to
by your
control.
TM
Problems using CableCARD
or CableCARD TM services
TM
Check that the CableCARD TM is inserted properly (see page 5 i).
The CableCARD TM must be activated by your local cable TV provider
can receive
Check
digital
cable TV services.
the
can be useful in providing
and ....
information
person.)
Contact
your cable TV provider.
See the activation
instructions
menu options
to an authorized
before
you
on page 5 i.
(see page 108). (This
technician
or repair
Channe_
Cannot
receive
(UHF)
when using an antenna
upper
channels
Press
to select the VHF.UHF
Use
presently
_ i; _x_dioone _hannei
presently
Cannot
rece)_e
any channels
when using cable
Cannot
receive
Some
digital
TV
cable channels
in the TV's
memory
in the TV's
:
memory
Menu to add reeeiva]_ie channels
to select the (?ABLE input (see page 57).
:
in the Channel Menu to add receivable
(see page 99).
Certain
TV companies
have limitations
cable
Check
with your cable TV company
Some
optional
TV company
digital
will need a separate
channels.
The digital
cable broadcast
is broadcasting
cable
Use the Digital
set-top
channel
Channels
digital
formats
may be set to :
feature
to search
cable
are scrambled
or encrypted.
set-top box to view those channels.
signals
box provided
of digital
that are
for more infomlation.
if the channels
or a separate
TV channels
on the broadcast
with your cable TV company
You will need a CableCARD
that are not
(see page 99).
in TV memory
Check
that are not
(see page 99).
not presently
channels.
channels
(see page 99).
Fix settings
in ihe channel
Press
...... Use
are
Menu to add receivable
(see page 99).
ihe ChanneiM_n_to _it_trec_i;;a_i_channeisthat _renot
your Channel
presently
Or select
displayed
memory
Use
channels
not being
in the TV's
...................
_i_e
Check
input (see page 57).
in the Channel
may not be supported.
in unsupported
broadcast
by your cable TV company
in the Channel
for new digital
If your cable
formats,
you
to view those
Menu (see page 99).
channels
(see page 99).
Memory
Image
Stick
does not display
Cannot
Make sure the image file is a JPEG
see all files
sure the Memory
Stick is inserted
Check
the
setting
Check
the
option
....
currently
if
selected
The maximum
folder if
of files the Memory
all JPEG,
MPEG1,
If you are using a Memory
the position
JPEG
image
..........
displays
motion
in
Rotation
not saved .........after
The Memory
Memory
Stick is ejected
image again.
Memory
Stick Viewer
is closed
(see page 89).
Stick with the Memory
using a di_iiai_ vkleo
Stick might
camera
l_e iocke&
camera
records
a photo.
There might be insufficient
deleting
_;nno_;howiorhkl_ifii_
in fidl screen
is selected
Stick Viewer
can display
is 2,000 files
and MP3 files.
[iniock
The file might not have information
digital
information
(see page 89), or in the
Select fimetion,
may appear
screen. This is a result of the way digital video
not a result of a malfunction
with the TV.
or
in
is selected
try changing
of the AiB select switch.
,IPEGs eapiured
or flicker
file.
(see page 78).
(see page 89) and ensure that files are either
:
number
total, including
properly
(see page 89).
setting
DCF directories
undesirable
IM1 screen
(.jpg_ .jpeg) file o1"an MPEG 1 (.mpg, .mpeg)
Make
ihe Memory
(EXIF
option
motion
in fuil
still images,
and is
Siick and iry rotating
data) that is usually
space on the Memory
....
to dispiay
record
In this case, it is not possible
one or more files and rotating
Set the
cameras
generated
ihe
when a
to save the rotation.
Stick to save the rotated
file. Try
the image again.
to or
(see page 88).
or
Slide Show
Cannot..........
set print quantity
The Memory
St_ck m_ght be iockedl
Uniock
ihe
MelIlOfy
Silck
alia
ify
rotailng
ihe
image again.
Cannot
see Menu
Cannot
hear audio while using
Memory
....
Press
to display
Check
Stick
or
To hear JPEG voice memo
option
and set the
Check
that the
_o_ ;ii M_ fii_; onMemo_
The Memory
Stick are included
all JPEG,
when the
option
selected
the Menu again.
the TV's volume
is
:
option
option
Stick Viewer
MPEGI,
to
....
.
is not to set to
can display
(see page 88).
a maxinmm
of 2,000
files total, including
and MP3 files.
Make sure that the file is named
with the file extension
(.mp3).
(page 88)
!;nnot;ee MP3ii;t iopi;y ........
yo;r Memo gti; oniy
music
Slide Show (see page 88).
MP3 fiie does not piay back
The Memory
correctly
128 kbps (kilobits
MP3 files on the Memory
are not listed
Stick
Stick Viewer
Only MP3 files that are named
list.
MP3 files are played
order
are stored.
back correctly
does not piay
........
variai_ons
only MP3 files with a fixed data rate of
with the file extension
in alphabetical
If you want to change
alphabetically
movie
supports
bepGyedX;ga kgroundm;;i du in)
per second).
Music files are piay_ng _n Wrong
MPEGi
(page 96) settings.
in Nll screen view, select the :
order,
according
the playlist
(.mp3)
are displayed
to the lblder in which
order, rename
in the
they
your files
in the order in which you want them to play.
of'MPEGi
movies
may notbe
compai_bie
,v_th the Memo_
St_ck
Viewer.
MPEG
movies
played
back with the Memory
recorded
in VX Fine mode with Sony digital
Stick Viewer.
cameras
cannot
be
MPEG1
quality
ispoor
when
enlarged
(page
86)
Errormessage
isdisplayed
Thequality
ofthemovie
when
enlarged
depends
ontheresolution
oftheMPEG1
file.See
yourcamera's
instruction
manual
fordetails.
NoMemory
Stick
There
isnoMemory
Stickintheslot.
.............
Memory
Si[ck ...................................
Theiockmechanism
oniheMemo_
Stick engaged
.....
Locked
...........
Menlory
giick
Error
Wh;
Menlo_
different
Stick
Memory
............................................................................
Fomlat Error
The Memow
i}le
siot
nllgilt
that is not compatible
The fiie _s not a ;;aiid MPEGi
progressive
JPEG
The thumbnail
.............
be
dalrxaged;
gi_ck may have been formatted
or other device
Error
.................................................................................................
icon is displayed
in
iF
a .....
Stick.
(which
using
with cameras.
or JPgG
format;
or_i _s a
is not supported).
is not DCF-compatible.
_he fii; i; ; JPgG or;n MPgdi but theihumbn;iii;
unreadable.
The file is unreadable.
Audio
Good picture,
no sound
Press
Make
so that the word
sure the
option
Make sure the
when using a cable box
Sound
seems weak or
................
press
: :
set to
during weak
raise ihe voiume
audio speakers
and adjust
. In the Audio
already
extemal
is set to
from the screen
in the Audio
....
or
on
Menu
,
(see page 95).
the TV's ;olume.
it m_ght ge getter
(see page 95), set the
switch
to
0pi_0n is set to
the sound to your audio system)
to
setting
(which may reduce
order to output
option
:
to
background
set to
. If
noise
stereo broadcasts).
Ifihe
the sound
(see page 56).
Menu (see page 96).
..........The TV;s audio m_}ht be setto
insufficient
Cannot
option
disappears
is set to
option
is se:Lto
use your audio receiver
(see page 96). Or, to use the TV remote
control,
to adjust
set the
.
To turn on the TV speakers,
set the
option
to
(see page 96).
.....
Video
No picture
(screen
not lit), no
sound
If your TV does not turn on, and a red light keeps
service.
Make
Call your local Sony Service
sure the power cord is plugged
Press the :
button
Press the
Dark, poor or no picture
(screen
lit), good sound
No color..Dark
.............
Color
Adjust
channel;
the
picture ......
in.
to cycle through
it could be station
option
Adjust the
Check the antenna'cable
appear on
the screen
in the Video Menu (see page 92)•
Adjust
the
Check
the antenna..cable
Press
Dotted
lines or stripes
Doubie
images
Striped
noise during
playback
recording
option
channel;
in the Video Menu
oz"gi_osts
it could be station
to change
...... Using a highly
directional
of a VCR
outdoor
......... Perform
Keep your V(R
recovery.
function
This is caused
by feature
turning
on the TV.
malfunction
"Black
box" on screen
You have selected
at the top and
to
(see page 98)
of the Plasma
on DVD or
sources
display
a text option
in the Setup
loss of detail, especially
fast-motion
during
or dark scenes
If you were trying
Panel,
and does not indicate
programs
Menu and no text is available.
To turn offthis
to select
are filmed
feature,
set the
closed captioning,
select
in aspect
a
with bars at the top and bottom
check the documentation
common
that came
with theatrical
releases)•
(See
instead
ratios that are greater
show these programs
TV's screen
used by certain
digital
than 16:9,
of the screen• For more
with your DVD (or contact
broadcasts
to display less detail than usual,
your
dots, pixelations)
to appear
on your screen•
to show very fine detail, and is normal
programs.
Adjust
optimize
the picture
while viewing
artifacts
(small blocks
This is due to your TV's
and ability
the reality.clarity
and DVDs may cause your
or cause
in the
these sources.
lbr certain
:
digitally
option
of
-'/our TV will
provider).
The compression
a
Display
is especmlly
program
programs
your VCR and the TV to avoid
such as _.._5:1. (This
details,
other digital
between
of the TV.
Some wide-screen
of the screen
or a cable may solve the problem.
away from the TV.
(see page 98).
page 104 to reset Setup selections•)
option
such as cars, neon signs, or hair-dryers.
your VCR in front of the TV or at the side of the TV.
image retention
Use the
when
(see page 92).
trouble•
antenna
Leave a space of 30 cm (i 1 7/8 inches)
noise.
Avoid installing
Ceriain
mode
the input mode (see page 57).
..............
Video head inierferencel
Image left on Screen
Bars appear
Picture
connections.
Move the TV away from noise sources
bottom
(see page 92)•
io seiect ihe desired
Try another
flickers
video sources•
(see page 56)•
Only snow and nolse
The screen
the connected
trouble•
option in the Video Menu
connections.
Press the
is not con'ect.
your TV may need
on the right side of the TV.
button
Try another
flashing,
Center.
or
large screen
recorded
(see page 93) to
General
How to reset TV to factory
Turn on the TV. While holding
settings
press the
button
then back on again.)
How to restore Video settings
to
Press the
factolT settings
How to restore
Audio
Setiings io
Press the
connected
Menu
Release
LED on front panel is lit
If a Menu
button.
on the remote
control
while in the Video Menu (see page
button
on the remote
control
while
in the Audio Menu (see page
_no_ set
option
appears
in gray, this indicates
password
temporarily
unblock
channels.
The LED (see page
16) blinks
picture
If the LED blinks
is displayed.
service.
cable box does not work
channels
that the TV is in a state in which
isee page
i6ii; enierihefoiiowin}m;;ter p;_,:ordi
ord screen
The master
clears your previous
If you are connecting
password;
it cannot
when the TV is mined
When lit, indicates
is set, this LED will remain
digital
p_g_i65i
is not available.
In the pass;
needs
Cannot record
to VCR
the
button
g_ _re _he
.....
Lost password
Digital
control,
to
the Menu option
TIMER
on the remote
95).
_annotcy_i_ihro_ghthe o_her
Cann0{operaie
button
92).
factol T settings
video equipment
the TV
down the
on the right side of the TV. (The TV will turn itself off,
continuously,
on, then shuts off when the
this may indicate
that the timer is set (page
lit even when the TV is turned
a VCR and digital
bi-directional
splitter
your digital
cable box. Contact
your cable TV company
Only analog
channels
to your VCR.
the TV
107). When
the timer
o112
cable box using a splitter,
page 32, you must use a special
can be recorded
be used to
as described
that is designed
for details.
on
to work with
Panel
System
Display
resolution
Antenna
Telex
ision
System
Channel
Cox
erage
Power
Requirements
Inputs
Outputs
HDMI
IN
Plasma
Display
panel
KDE-37XS955
1024
pixels
(horizontal)
×1024
pixels
(vertical)
KDE-42XS955
1024
pixels
(horizontal)
x1024
pixels
(vertical)
KDE-50XS955
1365
pixels
(horizontal)
x768
pixels
(vertical)
75ohm
external
terminal
forVHP,
UHP
NTSC
American
TVStandard
ATSC
(8VSB
terrestrial)
ATSC
compliant
8VSB
QAM
oncable
ITU-T
J.83
Annex
Bcompliant
64256
QAM
Terrestrial
(analog)
2-69
Cable
TV(analog)
1-125,
Terrestrial
(digital)
2-69
Cable
TV(digital)
1-135
120\_
60Hz
Video
1080i.
720p,
480p,
Audio
Two channel linear PCM 32.44.1
16, 20 and 24 bits
480i
and 48 kHz,
Video (IN)
3 total (1 on left side panel)
1 Vp-p, 75 ohms unbalanced, sync negative
S Video (IN)
3 total (1 on left side panel)
Y: 1 Vp-p, 75 ohms m_balance& sync negative
C: 0.286 Vp-p (Burst signal), 75 ohms
Audio (IN)
5 total (1 on left side panel)
500 mVrms (100% modulation)
hnpedance: 47 kilohm
Component Video Input
2 (Y, PB, Pa)
Y: 1.0 Vp-p, 75 ohms unbalanced,
PB: 0.7 Vp-p, 75 ohms
PR: 0.7 Vp-p, 75 ohms
CONTROL S (IN)
1
Mini jack
CONTROL S (OUT)
1
Minijack
Digital Audio Optical Output
(PCM, Dolby Digital)
1
Optical rectangular (1)
\:ariable'Fixed
1
More than 408 lnVrlns at the maximum xolume
setting (\=ariable)
More than 408 mVrms (Fixed)
Impedance (output): 2 kilohms
Sub woofer (OUT)
1
Phono .jack
(ableCARD
P(- MCIA T_pe 1II
TM
Audio (OUT)
slot
Screen Size (measured diagonally)
KDE-37XS955
37 inches
KDE-42XS955
42 inches
KDE-50XS955
50 inches
Speaker Output
25 \V x 2 + 50 W _oofer
CENTER SPEAKER IN
Max. 180 W (6 £t), 1 kHz, Sensitix ity 30 Vp-p
Dimensions (\V x H x D)
KDE-37XS955
1048 x 679 x 360 mln
(41
x 26 3'4 x 14
KDE-42XS955
1139 x 752 x 360 nzm
(44
x 29 5'8 x 14
in)
KDE-50XS955
1336 x 870 x 360 mm
(52
x 34 3'8 x 14 14in)
in)
sync negatixe:
Mass
Power
Consumption
KDE-37XS955
51.0 kg (112
lb 7 oz)
KDE-42XS955
56.5 kg (124
lb 9 oz)
KDE-50XS955
68.0 kg (149
lb 14
In Use
KDE-37XS955
: 350 W
KDE-42XS955:385
W
KDE-50XS955:450
_V
In Standby
0.5 \V
Cal_ie(ARD
Supplied
Accessories
Standi_;,
Remote Control (1)
AA (R6) Batteries
(2)
A( power cord
AC plug holder
Cable band (1)
Cable
band
A( cord
Cleaning
oz)
KDE-37XS955:26
W
KDE-42XS955:26
KDE-50XS955:29
W
W
RM-Y
1004
(1)
(1)
scre_
(1)
clamp (1)
Cloth (1)
Operating
InstxTactions (1)
Quick Setup Guide (1)
Warranty
Design
and
Card
(1)
specifications
are
subject
to change
without
notice.
HDM[ cable
Component
video cable
S video cable
A/V cable
Audio
cable
Optical
cable
Control
S cable: RK-G69
Floating
Stand:
Wall-Mount
SU-PF3L
SU-PF3M
Bracket:
(for KDE-50XS955)
(for KDE-37/42XS955)
SU-PW3M
4:3 Default settings 98
Alternate Audio 66
Alternate Video 66
ANT button 57
Applications menu 91, 107
Audio Menu 91,95
Audio Out 96
AUDIO OUT jack, described 19
audio receiver, connecting 49
Auto Pro_am (channel setup) 53
Auto SAP, MTS setting 95
balance, adjusting 95
bass, adjusting 95
bilingual audio 95
blocking programs. See ratings.
BN Smoother 94
brightness, adjusting 92
cable
described 19
with VCR, connecting 30
cable box
Twin View issues 69
using with remote control 60
with, VCR connecting 32
CableCARD
TM
Channel Menu 91, 99
channels
creating labels 100
setting up 53
troubleshooting 113
CineMotion 12, 93
Clear Voice 95
clearing, Favorite Channels 72
Clock/Timers 107
closed caption modes 91, 104
Color Conector 94
color, adjusting 92
CONTROL S 50
CONTROL S IN/OUT jack,
described 19
Cool, Color Temp. 92
Custom 95
Diaguostics 108
Digital CC 106
Digital Channels 99
Digital Reality Creation 12
Direct Mode 93
DISPLAY button 57
Display unit
connecting 20
controls 16
DRC Function 93
DRC Mode 93
DRC Palette 93
inserting card 51
slot, described 18
troubleshooting 112
using 51
Caption Vision 104
CATV. See cable
DRC. See Digital Reali O,
Crea#on.
DTE 94
Center Speaker In 96
CENTER SPEAKER IN jack,
described 19
DVD player
using with remote control 61
with A/V connectors,
connecting 43
DVD/VCR Operating button 56
DVD/VCR, SAT/CABLE Power
buttons 56
changing picture size, in Twin
View 71
CHANNEL buttons 17, 57
DVD 5.1Channel using with
remote control 62
Dynamic 95
ENT button 57
error messages, Memory Stick
115
F1 button 57
F2 button 57
Favorite Channels
clearing 72
in Channel menu 99
using 72, 73
FAVORITES button 56
Fixed audio setting 96
Full mode, setting 97, 98
FUNCTION buttons 56
Game Mode 93
Game Picture 97
GUIDE button 56
HD/DVD IN jack (1080i/720p/
480p/480i), described 19
HDMI 1N jack, described 19
High-Definition Multimedia
Interface (HDMI) 13, 110
hue, adjusting 92
Illuminated 105
hnage Retention 1,98
Info Banner 104
interlaced 110
JUMP button 57
(Contimted)
Label
channels 100
videos 105
Language, setting 105
Memory Stick
DUO 79
features 75
Index 81
indicator 17
inserting 78
panning photos 85
photo options 84
playing movies 86
precautions 90
removing 80
rotating photos 85
slide show options 88
slot 17
troubleshooting 114
viewing photos 83
zooming photos 85
MENU button 57, 91
Menu Color 105
Menus
Apptications 91,107
Audio 91,95
Channel 91,99
Parental Lock 91,101
Screen 91, 97
Setup 91,104
Video 91,92
Model, 2 93
Mono, MTS setting 95
movies
viewing thumbnails 81
MTS 95
MTS/SAP button 57
MUTING button 56
Neutral, Color Temp. 92
Noise Reduction 93
Normal mode, setting 97, 98
oft\ turning off the TV 17
on, turning on the TV 17
Overscan 98
parental control, described 13
Paremal Lock Menu 91,101
Passxvord 101
Phase 96
photos
viewing thmnbnails 81
PICTURE button 56
picture contrast, adjusting 92
Picture in Picture. See irwin
_?ew'.
PICTURE OFF LED 16
POWER button 17, 57
POWER LED 16
Power Saving 105
POWER SAVING button 56
Pro (Video) mode 92
problems, troubleshooting
117
111
ratings, setting 101 103
ratings, vie,x-ing blocked
pro_ams 102, 103
remote control
Inserting Batteries 55
pro m'amming 58-59
troubleshooting 112
RESET button 57
resetting
Audio options 95
S VIDEO jack, described 17, 19
satellite receiver, using with
remote control 60
Screen menu 97
Screen Saver 98
setting up channels 53
Setup menu 91, 104
sharpness, adjusting 92
Show/Hide channels 99
Simulated, Effect 95
sizing, picture in Twin View 71
SOUND MODE button 56
speakers
turning on/off 96
using external speakers 96
specifications 118
Standard mode 92
STANDBY LED 16
Steady Sound
described 13
setting 95
Stereo, MTS setting 95
SUBWOOFER OUT jack,
described 19
sunound sound 95
TIMER LED 16, 117
treble, adjusting 95
troubleshooting 111-117
TruSurround, Effect 95
turning op2off the TV 17
TV/VIDEO button 17, 57
Twin View
troubleshooting 111
using 69-71
Variable audio setting 96
VCR
using with remote control 61
with cable box, connecting 32
with cable, connecting 30
with satellite receiver,
connecting 38
Vertical Center, adjusting 98
Vertical Size 98
VHF/UHF jack, described 19
Video Menu 91,92
Video modes, selecting 92
VIDEO/AUDIO (VAR/FIX/R/
L) jacks, described 19
Vivid mode 92
VOL buttons 17, 56
Warm, Color Tempe. 92
WIDE button 56
Wide Mode 97
Wide Screen Mode 67
Wide Screen, described 13
Wide Zoom mode, setting 97, 98
Woofer Level 95
zoomfeature,
withTwinView
71
Zoom mode, setting 97, 98
http://www, sony.net/
2148836130
Printed
Printed in Japan
on 100% recycled
paper.