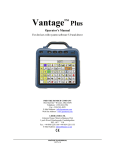
1
Pathfinder Operator's Manual Setting Up and Using Pathfinder's Basic Tools PRENTKE ROMICH COMPANY Corporate Headquarters: 1022 Heyl Rd. • Wooster, Ohio 44691 Telephone: (330) 262-1984 Fax: (330) 263-4829 E-Mail Address: [email protected] Web Site Address: www.prentrom.com Worldwide Headquarters Prentke Romich International, Ltd. Whitegates • Swinstead • Grantham • Lincs.• NG33 4PA • UK. Fax: 44 1476 550872 E-Mail Address: [email protected] The cover photograph of multiple generations of stars in the Tarantula Nebula was taken by the Hubble Space Telescope. The picture was downloaded from the Space Telescope Science Institute/Association of Universities for Research in Astronomy, Inc. web site on the internet. Table of Contents GETTING ACQUAINTED WITH THE PATHFINDER What's on the Front of the Pathfinder? ............................................................................................ 11 What's on the Top of the Pathfinder? .............................................................................................. 17 What's on the Back of the Pathfinder? ............................................................................................ 19 What's on the Right and Left Sides of the Pathfinder? .............................................................. 21 About the Batteries ................................................................................................................................ 23 About the Backlight Shut-Off ............................................................................................................25 About Minspeak ...................................................................................................................................... 27 Icon Prediction Shows You Where Messages are Stored ......................................................... 29 Examples of Icon Associations ..........................................................................................................31 About Selecting Your Own Icons to Represent Messages ....................................................... 33 About Activities ...................................................................................................................................... 35 Locating Keys on the Keyboard ........................................................................................................37 About the Toolbox ................................................................................................................................. 39 Using Menus in the Toolbox ..............................................................................................................41 Change the Speaker and Earphone Volume .................................................................................. 43 SETTING UP A USER AREA AND A SELECTION TECHNIQUE The USER AREA Menu ...........................................................................................................................47 Select a User Area .................................................................................................................................. 49 About Overlays ....................................................................................................................................... 51 Rename a User Area ..............................................................................................................................52 Copy a User Area ................................................................................................................................... 53 Erase a User Area ................................................................................................................................... 54 About Computer Access Mode ..........................................................................................................55 The Selection Techniques....................................................................................................................57 Using the SELECTION TECHNIQUE Menu ......................................................................................... 59 Keyboard ................................................................................................................................................... 61 Infrared Headpointer .............................................................................................................................63 More About Your IR Headpointer ...................................................................................................65 1-Switch ..................................................................................................................................................... 67 2-Switch ..................................................................................................................................................... 69 Joystick ...................................................................................................................................................... 71 Quarter Row/Column Scan .................................................................................................................73 TABLE OF CONTENTS Pathfinder Manual: Basics v Some Options in the SELECTION TECHNIQUE MENU .................................................................... 75 IR Headpointing Options: Averaging .................................................................................................................................................. 77 Horizontal and Vertical Adjustment ................................................................................................ 79 Pointer Color ............................................................................................................................................ 81 Battery Information................................................................................................................................ 82 Connecting the HeadMouse® to the Pathfinder .......................................................................... 83 Connecting the Madentec Tracker 2000® to the Pathfinder ......................................... 84 Some Scanning Options 1-Switch—Scan Mode 1 ......................................................................................................................85 1-Switch—Scan Mode 2 ......................................................................................................................86 2-Switch—Scan Mode 1 ......................................................................................................................87 2-Switch—Scan Mode 2 ......................................................................................................................88 Scan Direction ......................................................................................................................................... 89 Scanning Speed ....................................................................................................................................... 90 Acceptance Time .................................................................................................................................... 91 Release Time ............................................................................................................................................ 92 Activation Delay ..................................................................................................................................... 93 Auto Repeat Rate .................................................................................................................................... 94 Predictive Selection ...............................................................................................................................95 Modify Predictive Keys........................................................................................................................97 Scan Start Position: Center or Top Left ........................................................................................ 99 About Linear Scan Cut-Off .............................................................................................................. 100 WORD PREDICTION About Minspeak and Word Prediction......................................................................................... 103 The Benefits of Minspeak and Word Prediction Together ................................................... 105 Turn Word Prediction On and Off................................................................................................. 107 Spell and Select Words...................................................................................................................... 109 Set Up Word Prediction in the WORD PREDICTION Menu ...................................................... 111 Predict in Minspeak ............................................................................................................................ 112 Recency/Frequency ............................................................................................................................. 113 About Predictor Keys ......................................................................................................................... 115 The Word Prediction Dictionary .................................................................................................... 117 Add a Word to the Word Prediction Dictionary ....................................................................... 118 Delete a Word from the Word Prediction Dictionary ............................................................. 118 Review Words in the Word Prediction Dictionary .................................................................. 119 About the Computer "Backspace" Command ............................................................................ 121 The Word Prediction Display Area ............................................................................................... 122 STORING MESSAGES Store Digitized (Recorded) or Synthesized (Text-to-Speech) Messages ......................... 125 About Core Vocabulary and Activity Row Vocabulary......................................................... 127 TABLE OF CONTENTS Pathfinder Manual: Basics vi About SPELL/MINSPEAK, GO TO SPELL, GO TO MINSPEAK and GO TO COMPUTER Tools . 128 Plan Before You Begin to Store ..................................................................................................... 129 Store a Recorded Message ............................................................................................................... 131 Erase a Recorded Message ............................................................................................................... 132 Store a Synthesized Message........................................................................................................... 133 Edit a Synthesized Message ............................................................................................................. 134 Erase a Synthesized Message .......................................................................................................... 135 Some Helpful Storing Hints ............................................................................................................. 136 Storing and Retrieving Using the 64 and 32 Location Overlays ......................................... 137 About Themes....................................................................................................................................... 139 About Using INSERT TOOL to Store Theme Tools on your Overlay ................................... 140 Assign PICK 1 (or 2) ICON THEME to a Key or Store it under an Icon Sequence .............. 141 Assign SET 1 (or 2) ICON THEME to a Key or Store it under an Icon Sequence ............... 143 About EXIT THEME............................................................................................................................... 145 About Single Meaning Icons ........................................................................................................... 147 About Creating an Activity .............................................................................................................. 151 Create a New Activity—An Example........................................................................................... 153 Dynamic Activities.............................................................................................................................. 157 Erase a Dynamic Activity ................................................................................................................. 159 Review All Dynamic Activities ...................................................................................................... 159 Modify an Activity .............................................................................................................................. 160 Linking Activities/Creating Sub-Categories............................................................................... 161 Copy Activities from one User Area to Another ...................................................................... 163 Using the REVIEW VOCABULARY Menu ........................................................................................ 165 PERSONALIZE YOUR OVERLAY About Personalizing Your Overlay ............................................................................................... 171 The ASSIGN KEY Menu ....................................................................................................................... 173 About Copying Tools from the Toolbox to your overlay ...................................................... 175 Assign a Tool to a Key in Minspeak Mode ................................................................................ 176 Assign a Minspeak Icon to a Key .................................................................................................. 177 Assign a Tool to Spell Mode ........................................................................................................... 178 Assign a Tool to Computer Mode.................................................................................................. 179 Erase a Tool from a Key ................................................................................................................... 181 Copying a Tool and Storing it Under and Icon Sequence ..................................................... 182 About Macros ....................................................................................................................................... 183 Assign a Macro to a Key................................................................................................................... 184 Store a Macro Under an Icon Sequence ...................................................................................... 185 Erase a Macro ....................................................................................................................................... 185 Swap Keys ............................................................................................................................................. 186 Hide/Show Keys .................................................................................................................................. 187 Auditory Prompts and the AUDITORY PROMPTS Menu ............................................................ 189 Prompt Type: Key or Content ........................................................................................................ 190 TABLE OF CONTENTS Pathfinder Manual: Basics vii Key Prompts and Category Prompts ............................................................................................. 191 Mid-Sequence Prompts ..................................................................................................................... 193 Some Options in the FEEDBACK Menu ......................................................................................... 195 Spell One Word.................................................................................................................................... 197 Auto Spell .............................................................................................................................................. 198 Icon Tutor............................................................................................................................................... 199 System Colors ....................................................................................................................................... 200 The MAINTENANCE MENU.................................................................................................................. 203 Reset Individual Menu Options to their Default Settings ...................................................... 205 APPENDICES Appendix A: All Tools List and Explanations of Tools....................................................... 209 Appendix B: Data Logging: Using the LAM .......................................................................... 224 Appendix C: How to Use the Review to Output Option in Various Pathfinder Menus .................................................................................................... 232 Appendix D: Pre-Stored Songs in the Pathfinder ................................................................... 236 To Copy a Pre-Stored Song onto your Overlay............................................ 237 Appendix E: How to Program and Store your own Songs on your Overlay ................ 239 English Vowel Phonemes .................................................................................... 253 English Consonant Phonemes............................................................................. 254 Pitch Notes and Pitch Values.............................................................................. 255 Pitch Value Code .................................................................................................... 257 Time Values of Notes............................................................................................ 259 Appendix F: Helpful DECtalk Speech Tips ............................................................................ 261 Words with Alternate Pronunciations .............................................................. 263 Abbreviations Recognized by DECtalk Speech ........................................... 265 Produce a Long "A" in a Sentence.................................................................... 268 Creating Pauses ....................................................................................................... 269 How DECtalk Speech Handles Numbers ....................................................... 269 Appendix G: Dependent Icons ...................................................................................................... 271 Appendix H: External Speaker and Microphone Specifications....................................... 275 Appendix I: Creating Macros that Contain Menu Options................................................ 276 Appendix J: Computer Commands for IBM and Macintosh Keyboards and Keypads...................................................................................................................... 279 Appendix K: Save Your Setup Settings ..................................................................................... 283 Appendix L: Troubleshooting ...................................................................................................... 285 INDEX .................................................................................................................................................... 293 TABLE OF CONTENTS Pathfinder Manual: Basics viii Getting Acquainted with the Pathfinder GETTING ACQUAINTED Pathfinder Manual: Basics 9 U S E R AR E AS M IC R O P H O N E O N /O F F I/O 1 H E AD P O IN T E R IR W IN D O W 2 3 4 TO O L B O X DIS P LA Y S CRE E N O F F 5 6 S YS T E M IN F O R M AT IO N SPELL ABC M IN S P E AK USER KEY C O MP U TE R B AT T E R Y S T AT U S LED s 1 Sp e ak Dis p lay S p e ak Se n ten ce Sp eak W o rd Sp el l M in sp e a k 2 A ct iv i ty Assig n K ey Au ditory Promp t Fe ed b a ck 3 4 ESC Tab A £ = B 0 ~ - C h oos e A ctiv i ty IR S e tu p 1 2 ! C D @ Main t 3 # No te b ook 4 $ Sp eak e r Vol Up S pe a k er Vo l Do w n O u tp u t Re vie w Voc ab 5 % E F G H 6 ^ I R es et De fa ult To o lbo x O n/O f f In s e r t Too l S e l e ct Tec h Sp eech M e nu Tr an s fe r Me m o ry 7 & J 8 9 Hid e/ S ho w Not eb oo k H om e E d it M o de Us er Ar ea W o rd P r edic ti o n P ag e Up E nd Ed it M en u ( ) ' K L M N O 1 2 LED s P ag e D o wn 3 D el e te Last S e l ec tio n 4 P 5 / + Q W E R T Y U I O P " \ | B lo ck M a rker Del e te I co n 5 6 * - A S D F G H J K L ; : { [ } ] D ele te W o rd 6 7 < > C alcu lat or Z X C V B N M , . ? S to re C o re D ele te Cha r 7 Caps L o ck Sh ift E rase C ore E d it Co r e 8 Sp ee c h O n/ O ff CT RL AL T Sp ace S pac e S pa ce Retu rn OK C a ncel S H IF T / C AP S LOC K C le a r Di sp lay 8 K E Y B O ARD AND T O O L B O X Front of the Pathfinder: Turned Off Message Display turned ON Icon Names Date and Time Battery Status (turn ON in FEEDBACK menu) GETTING ACQUAINTED Pathfinder Manual: Basics 10 What's on the Front of the Pathfinder? Display Screen The display screen is where you will see text. You can choose large, medium, or small sized text. The size of the text you select dictates how many lines of text will fit on the screen. You can press on the display to make menu selections or you can use the keyboard. Directly below the display screen is the status bar. This is where you can see icon names and check for directions or instructions about what you are doing. If you are using a Notebook, the status bar will display the icon of a small notebook. The blank area below the display area is where you will see your Activity Row or Word Prediction choices when those options are On. Buttons On the Front Left Side: ,2 I/O: Press this button to turn the Pathfinder On or Off. Tools: Press this to open and close the Toolbox. GETTING ACQUAINTED Pathfinder Manual: Basics 11 System Status: Press this to see the Pathfinder's current settings. There is also a TOOLBOX option on this screen that allows you to access all the Toolbox menus from the display screen without removing the keyguard and overlay and going to the Toolbox. User Defined Key: This key defaults to CHOOSE ACTIVITY. If you do not want CHOOSE ACTIVITY, you can program it with whatever command you want. The command will be set in all three modes— Minspeak, Spell and Computer. 7 Battery Indicator When the LED in the battery box comes on, : charge the battery. When you plug in the charger, the LED in the lightning volt will flash. A rapid flash indicates fast-charging; a slow flash indicates that the battery is charged but it will continue to tricklecharge as long as the charger is plugged in. GETTING ACQUAINTED Pathfinder Manual: Basics 12 On the Front Right Side User Areas: The areas are numbered 1-6 and each number has an LED (Light Emitting Diode) next to it. The area you are currently using will be lit. ABC: When this LED is lit, you are in Spell mode and can spell messages. Minspeak Symbol: When this LED is lit, you are in Minspeak mode and can retrieve stored messages. Computer Icon: When this LED is lit, you are in Computer mode and can use the pre-set computer keys for computer emulation. Shift/Caps Lock: Press Caps Lock on your overlay and this LED will light. Press SHIFT and this LED will flash for one activation. Microphone The recording microphone is in the upper right corner of the Pathfinder case. Speak into the microphone when you record a message. Headpointing IR Window: Infrared signals are received from your headpointer through this window. GETTING ACQUAINTED Pathfinder Manual: Basics 13 Unity Default Overlay GETTING ACQUAINTED Pathfinder Manual: Basics 14 The Keyboard: Keyboard and LEDs: The Pathfinder comes with 128 keys, each with an LED (Light Emitting Diode) that will light when the key is activated. Keyguard: The keyguard fits over the keyboard and outlines the keys on the keyboard. It is made of durable plastic. Remove the keyguard by sliding it up from the bottom of the case and lifting up. Overlay Protector: This is a clear sheet of vinyl that fits under the keyguard and on top of the overlay. It helps protect the overlay from spills, crumbs, drooling, etc. Overlay: The Pathfinder is shipped with a Unity overlay in place. This overlay has icons but no printed words on it. It will work with the Unity 1-Hit or the Unity Sequenced-Hit vocabularies. The overlay package also includes a Unity I-Hit overlay, Unity 32-1 and 2 hit overlays and a computer mouse access overlay that you place on top of your Unity overlay. Toolbox: Remove the keyguard, overlay protector and overlay to see the Toolbox. The Toolbox contains "tools" that you can use to increase the Pathfinder's usefulness. The names of the tools are printed on the keys. The Toolbox has 128 keys and can be accessed the same way as the keyboard. ÂThere may be times when you would like to go to a menu without having to remove the keyguard and overlay and opening the Toolbox. You can do this by using the SYSTEM STATUS key on the top left front of the Pathfinder. . On the display screen, Activate the SYSTEM STATUS key, activate the TOOLBOX key. Select the menu you want. You can also activate the STATUS key twice to go directly to the Toolbox. GETTING ACQUAINTED Pathfinder Manual: Basics 15 Earphone External Speaker Serial Port Memory Door Multi Switch Speaker Grille IR Transmitting Window GETTING ACQUAINTED Pathfinder Manual: Basics 16 Switch A Switch B What's On the Top of the Pathfinder? The back of the Pathfinder contains the connectors for things you can plug into the Pathfinder. Earphone jack: Plug an earphone in here. See Appendix H for earphone specifications. External Speaker: Plug an external speaker in here. See Appendix H for speaker specifications. Memory Card Door: Underneath this door is the PCMCIA card that contains the system software for your Pathfinder. Unless you have received a new system software card from PRC and need to install it, this door should remain securely in place at all times. Serial Port: If you want to make a memory transfer, plug in a computer or plug in a serial printer, use the computer serial port. ÂIf you are going to use a multi-switch (e.g., a joystick) plug it into the MultiSwitch connector. Switch 1 and Switch 2: Plug a switch into one of these ports. Speaker Grille: The internal speaker for the Pathfinder is under this grille. This area should not be covered up if you want optimum speaker volume and speech. IR Transmitting Window: Infrared signals are sent out to other devices and appliances through this area on the Pathfinder. GETTING ACQUAINTED Pathfinder Manual: Basics 17 Mounting Plate Stand Handle Stand When you are using the stand, you can change its position/angle. Carefully remove the sides of the stand from the positional holes they are currently in. Replace them in another set of holes (there are 3 holes on each side). Warning! It is possible to pinch your fingers while re-positioning the stand. Remove the sides of the stand from their positional holes with care. GETTING ACQUAINTED Pathfinder Manual: Basics 18 What's on the Back of the Pathfinder? Turn the Pathfinder face down. You will see: Wheelchair/Table Stand Mounting Plate: This plate slips into the PRC wheelchair mount or the PRC table stand to hold the Pathfinder upright. Handle: The Pathfinder has a molded handle on the back. Built-In Table Stand: The Pathfinder has its own table stand. Pull it out from the case. It can be set at one of three different angles by repositioning the stand in the different positioning holes. Carry Strap Holders: Connect the hooks on your carry strap through these holders. Unscrew the hook, slip it around the holder and screw the hook back together again. See the label on the strap bag. GETTING ACQUAINTED Pathfinder Manual: Basics 19 Left side of Pathfinder Expansion port (for future use) Battery charger port Battery Door Right Side of Pathfinder Learning IR Window GETTING ACQUAINTED Pathfinder Manual: Basics 20 What's on the Left and Right Sides of the Pathfinder? On the left side of the Pathfinder: Expansion Port: This port is for future development and does not work at this time. Battery Door: The battery pack is under this door. If you need to replace your battery pack, you will remove this door, pull the old battery out, slide the new battery in and replace the battery door. Battery Charger Port: Plug the battery charger that came with your Pathfinder into this port. ÄSee warning below. WARNING! Use only the battery charger that came with your Pathfinder. Other chargers may damage the batteries or the Pathfinder. On the Right Side of the Pathfinder IR Learning Window: When you teach remote control signals to the Pathfinder you will point the infrared area of your remote control at this area on the Pathfinder. The easiest way is simply to lay the remote control on a table next to the Pathfinder with the remote control IR area pointing to the IR learning window on the Pathfinder. Just press the remote keys to send the correct signals to the Pathfinder. See the Power Tools manual for complete learning infrared instructions. GETTING ACQUAINTED Pathfinder Manual: Basics 21 Battery Status Area Battery Status Area on the Display Screen GETTING ACQUAINTED Pathfinder Manual: Basics 22 About the Pathfinder Batteries Always use the battery charger that came with the Pathfinder. Any other charger may damage your batteries. If you turn Battery Status On in the FEEDBACK menu, you will see a percentage of the full battery charge displayed in the battery status area (which is the far right area) in the status bar at the bottom of your display screen. For example, you might see, "78%" which means your batteries are 78% full. The battery status area turns blue and displays the word, Charger, when the charger is plugged in and the batteries are charging. When the batteries are fully charged, the battery status area turns green and displays the word, Full. When the batteries get low, the Pathfinder sounds a Low Battery Warning. This is a two-toned running beep. The battery status area on the display turns red and displays the amount of charge remaining in the batteries, for example, 14%. The Low Battery LED on the front of the case also turns on. ÂWhen the Low Battery warning sounds, you can no longer do any storing. The Low Battery warning starts when battery capacity drops below 15%. The warning beeps are repeated at every 2% drop in battery capacity. When the battery capacity drops to 4%, the warning is repeated every 20 seconds. When the batteries are dead, the Pathfinder powers down completely and you cannot use it. ÂWhen you hear the Low Battery warning, plug in the battery charger. When the Pathfinder is in use during charging, it will take 8-10 hours to fully charge a dead battery. When the Pathfinder is not in use during charging, it will take 4-5 hours to fully charge a dead battery. A fully charged battery should last for 8-10 hours of normal use. GETTING ACQUAINTED Pathfinder Manual: Basics 23 GETTING ACQUAINTED Pathfinder Manual: Basics 24 About the Backlight Shut-Off Summary: The Backlight Shut-Off can be set for either 5 or 10 minutes. If 5 (or 10) minutes pass with no key activations, the Pathfinder will turn the display backlight off to conserve battery energy. Activate a key or switch to wake it back up. The Backlight Shut-Off option is in the MAINTENANCE MENU in the Toolbox. The Pathfinder automatically shuts down the backlight on your display if you don't make any key activations for 5 minutes. This helps to conserve the batteries. Just activate a key or switch to turn the display on again. After 30 minutes of no key activations the pathfinder will go to sleep. To wake it up, press any key or switch. When the Pathfinder powers down, it automatically saves any storing or programming you have done. If you would prefer a longer wait before the backlight powers down, you can set the Backlight Shut-Off for 10 minutes. Open the MAINTENANCE MENU in the Toolbox and change the Backlight Shut-Off option to 10 minutes. (See pages 39-41 for information about using the Toolbox.) You can also choose to turn Backlight Shut-Off to Off. This means the Pathfinder will never power down by itself. ÂIf You Use an Infrared Headpointer: an infrared headpointer will always be able to wake up the system as long as the Pathfinder has not been turned off using the I/O button on the front of the case. ÂTo turn the Pathfinder completely Off, press the I/O button on the left front of the case. If you turn the Pathfinder off with this button, you must turn it back on by pressing this button again. GETTING ACQUAINTED Pathfinder Manual: Basics 25 8 I W ANT .K^ TO HAV E B F UN Minspeak Icon Sequences GETTING ACQUAINTED Pathfinder Manual: Basics 26 About Minspeak The Pathfinder uses a patented vocabulary-coding method called Minspeak to help you communicate. Minspeak is a means of coding vocabulary to a small set of icons that are rich in meaning. Minspeak's use of icons taps into a person's natural tendency to associate multiple meanings to pictures. By coding a large vocabulary of words, phrases and whole messages using this small set of icons, Minspeak offers many advantages: ♦ it is logical in how it represents a person's language; ♦ it is easy to learn because it fits into a person's natural ability to associate many meanings to one picture; ♦ it promotes language development by providing a rich vocabulary of words that you can combine into sentences; ♦ because the small set of icons remains the same on a single overlay, you can, with practice, learn to recall your vocabulary automatically; ♦ it promotes further language development by offering many opportunities for language-learning experiences. These advantages lead to the ultimate benefit of using Minspeak: it allows for and promotes independent, effective communication. GETTING ACQUAINTED Pathfinder Manual: Basics 27 IC O N P R E D IC T IO N Ic o n s th a t b e g in m e s s a g e s a re lit. S e le c t a n ic o n . A c tivate a n ic o n tha t is lit. P a thf in d e r s p e aks the m e s s ag e . Icon Prediction Lights only those Icons where Messages are Stored GETTING ACQUAINTED Pathfinder Manual: Basics 28 Icon Prediction Shows Where You Have Messages Stored Summary: When Icon Prediction is ON, the icons where messages are stored are lit, other icons are not lit. Choose a Low or High intensity for the lights. If you have activated any keys on the keyboard, you have probably noticed that some LEDs on the keyboard remain lit while other LEDs go out. This is called "Icon Prediction". The icons with lighted LEDs tell you that they are possible selections for messages that are part of the vocabulary that was pre-stored in the Pathfinder software. The default for Icon Prediction is On. When you turn Icon Prediction On (in the FEEDBACK menu) you can select a Low, Medium or High intensity for the LEDs. If you select Low, the LEDs will not be overly bright. If you select High, the LEDs will be very bright. If you press a key that is lit, the name of that icon will appear in the status bar area of the display. Other keys on the keyboard will either go out or remain lit. If you select another lit key, its icon will appear in the status bar area and the device will speak the message that is stored under the sequence you just activated. Once a message is spoken, the keyboard returns to lighting all the icons. When you press a key again, some keys will remain lit and some will go out. If you are using scanning you will want to adjust the Scan LED Intensity so that it is easy for you to see the key you are scanning or pointing to. Icon Prediction is a good tool to use to help you learn your vocabulary. GETTING ACQUAINTED Pathfinder Manual: Basics 29 Icon Association s "* a p p le is la nd Vocabulary w ord = anyw here P o s s ib le a s s o c ia tio n s f o r th e ic o n b e lo w : W E A TH E R S H E L TE R 6 UM B RE LLA R A IN HOOK UND E R WH E TH E R Icon Associations GETTING ACQUAINTED Pathfinder Manual: Basics 30 An Example of Icon Associations Minspeak uses icon combinations to represent a vocabulary. For example, suppose you want to store the word, "Where." Minspeak allows you to choose several icons to represent the word. If you choose a two-icon sequence, you will find that you can speak the word with only two key activations. This results in a 60% savings in key activations over spelling out the word. Minspeak also makes it easy for the user to remember which locations he/she must activate to speak a message. Here is where the power of the icons becomes apparent. When storing a message you pick icons that will remind you of its contents. With the word "anywhere", you might choose the sequence, " plus *. In this case the icons were chosen " represents the letter "A" and * represents an island (or because 'someplace'). You will notice that in the future when you want to speak the word "anywhere" you can simply activate the icons that you selected while storing the message. Not only will this require fewer activations, but with practice it will become automatic to recall. If the association of "where" with the map of an island is not understood to start with, there is a good teaching activity built into this kind of Minspeak sequence to help a person understand and to create a rewarding language experience. It is important to realize that the Minspeak icons are rich in meaning. The meanings associated with the icons can be the meanings you learn from your vocabulary program and they can also have very individual meanings. For instance, the icon, 6might be used in different sequences to mean 'umbrella', 'weather', 'under', 'rain', 'whether', or any number of other things that the icon makes you think of. GETTING ACQUAINTED Pathfinder Manual: Basics 31 IC O N S S H O U L D B E e a s y to le a rn e a s y to re m e m b e r ea s y to te a c h "B "^ "M = F O OD = EAT = HUNG R Y Choosing Your Own Icons GETTING ACQUAINTED Pathfinder Manual: Basics 32 About Selecting Your Own Minspeak Icons to Represent a Message Summary: When choosing your own icons for messages consider the following things: the "rules" for your vocabulary program; all the associations an icon may have; the category your message may belong in; how easy the association between icon and word will be to learn, to remember and to teach; what icons might be combined to represent a wide range of messages. There is a Pathfinder Unity overlay in place on your device. We suggest you use this overlay for practice. A big consideration in choosing icon sequences is that they are logical, easy to learn and easy to remember. If you are using a vocabulary program you will want your own sequences to work the same way as the sequences work in your program. To achieve this you will need to understand the "rules" of your vocabulary program. Spend a little time thinking about multiple associations for icons. This will help you to understand how various icons can be combined to represent a word. Also spend some time thinking about what kind of a 'category' your message might fit into. Organizing a vocabulary into categories is something human beings do naturally so having a vocabulary program that is stored in the same way can help you learn and remember your sequences more easily. ÂFor more information about this, see your Unity manual. Also see the STORING MESSAGES chapter in this manual beginning on page 125. If you are not using a vocabulary program, you will want to achieve the same goals, i.e., logical sequences that are easy to learn and remember. To achieve this you will want to devise a good system for storing vocabulary. Picking icons is part of this system. GETTING ACQUAINTED Pathfinder Manual: Basics 33 The Activity Row Showing a List of Activities (the Activities on your Pathfinder may be different) GETTING ACQUAINTED Pathfinder Manual: Basics 34 About Activities When Activities are turned On (in the ACTIVITIES menu), you will see a row of keys/icons at the bottom of your display screen. This is the Activity Row. Activities can be used in a number of ways. You can create activities that allow you to access words that are centered around a particular theme, such as "School," "Work," "Party," etc. Or, as some of the Pathfinder Unity overlays do, you can have an activity row that contains the picture producing nouns from your overlay, or all the action words, or whatever you wish. Activities can be accessed two ways: Dynamic: these activities are brought up by activating an icon or an icon sequence on your overlay. There are pre-stored dynamic activities in the Unity vocabulary, but their icons are not shown in the Activity Row. List of Activities: you can create activities that appear in a row (or rows) on your display screen when Activities are turned On. You can then choose an Activity from the row. ÂThe User Defined Key (on the left front of the Pathfinder case) defaults to CHOOSE ACTIVITY. If you do not assign something else to this key, you may use it to select activities from the Activity row. ÂYou can also assign the CHOOSE ACTIVITY tool to a key or store it under an icon sequence, if you would like to. See pages 173-182 to learn about this. ÂThe Unity overlay also has CHOOSE ACTIVITY assigned to key M1. GETTING ACQUAINTED Pathfinder Manual: Basics 35 K ey L o catio n C o d es C A R B C O D L E F U G M N I H J S L K M N O P 1 2 O 3 4 W 5 6 7 S 8 Location G- 4 Colum n G A B C D E F G Row 4 H I J K L 1 2 3 4 5 6 7 8 Location Co lum n O O -2 Row 2 Key Coordinates GETTING ACQUAINTED Pathfinder Manual: Basics 36 M N O P Use Key Coordinates to Locate Keys on an Overlay There are 16 columns of keys going across a 128-location overlay. There are 8 rows going down the overlay. These numbers are also true in the Toolbox. The columns are labeled from "A" (far left column) to "P" (far right column. The rows are numbered from "1" (the top row) to "8" (bottom row). Using these guides as coordinates, you can find any key on the overlay. For example, key A1 is the top key in the far left column. Key P8 is the bottom key in the far right column. Key H4 is near the middle of the keyboard. Key coordinates are used frequently in this manual to help you locate keys easily. GETTING ACQUAINTED Pathfinder Manual: Basics 37 9 Word Prediction & ( ) ' K L M N Select Tech 3 4 5 6 # $ % ^ Assign Key Auditory Prompt Feedback IR Setup Maint £ 0 1 2 = ~ - ! @ B C Choose Activity E 8 Review Vocab Activity D 7 Output 2 A User Area Notebook Spell Minspeak Tab Transfer Memory Toolbox On/Off Speak Word 4 Speech Menu Reset Default Speak Sentence ESC Hide/ Show Notebook Speaker Vol Down Speak Display 3 Insert Tool Speaker Vol Up 1 F G H I J Page Up Home Edit Mode End Edit Menu O 1 2 Page Down 3 Delete Last Selection 4 P 5 / + Q W E R T Y U I O P " \ | Block Marker Delete Icon 5 6 * - A S D F G H J K L ; : { [ } ] Delete Word 6 7 < > Calculator Z X C V B N M , . ? Return Store Core Delete Char 7 Caps Lock Shift Space Space Space Erase Core Edit Core OK 8 Speech On/Off CTRL ALT The Pathfinder Toolbox GETTING ACQUAINTED Pathfinder Manual: Basics 38 Cancel Clear Display 8 About the Toolbox Summary: Remove the keyguard and overlay to see the Toolbox. To turn the Toolbox On, press the TOOLS key in the Status Area of the Pathfinder. Remove the keyguard and overlay from the Pathfinder. What you see is the Toolbox. The Toolbox has 128 keys. Some of these keys contain tools that you can use to make the Pathfinder more useful to you. Some of the keys contain the letters and numbers that you use when you want to spell something. Some tools allow you to do specific things-like turn the speech on or off or erase the display. Other tools are multipurpose-like the menu tools which give you a number of options to choose from. Notice that some keys are black with white letters, some are gray with white letters and some are gray with black letters. MENUS are gray with white letters. Most of the Pathfinder menus are in the second row of keys. The WORD PREDICTION and EDIT menus are in different rows. The gray keys with black letters are the keys you use to store, erase and edit messages. All the rest of the keys are black with white letters and they are either Pathfinder tools or keyboard keys for the Pathfinder. The Toolbox must be turned On before any of the keys will work. To turn the Toolbox On, press the TOOLS key on the front of the Pathfinder When the Toolbox is On, the small red light on the TOOLS key is lit. This goes out when the Toolbox is turned Off. The tools in the Toolbox are tools that you generally use most often. There are lots more tools available for use, but there aren't enough keys in the Toolbox for each individual tool. For a list of all the Pathfinder tools, see Appendix A. Tools can be copied from the Toolbox to your overlay and stored under icon sequences or assigned to keys so that you can use them without having to go to the Toolbox. Pages 173-182 discuss these possibilities. GETTING ACQUAINTED Pathfinder Manual: Basics 39 Notebook Output Review Vocab Select Tech Speech Menu 3 4 5 6 7 8 9 Word Prediction # $ % ^ & ( ) ' K L M N Spell Minspeak 2 Activity Assign Key Auditory Prompt Feedback IR Setup Maint £ 0 1 2 = ~ - ! @ Tab A B C D Choose Activity E User Area Toolbox On/Off Speak Word 4 Transfer Memory Reset Default Speak Sentence ESC Hide/ Show Notebook Speaker Vol Down Speak Display 3 Insert Tool Speaker Vol Up 1 F G H I J Page Up Home Edit Mode End Edit Menu O 1 2 Page Down 3 Delete Last Selection 4 P 5 / + Q W E R T Y U I O P " \ | Block Marker Delete Icon 5 6 * - A S D F G H J K L ; : { [ } ] Delete Word 6 7 < > Calculator Z X C V B N M , . ? Return Store Core Delete Char 7 Caps Lock Shift Space Space Space Erase Core Edit Core OK 8 Speech On/Off CTRL ALT Cancel Menus in the Toolbox are Light Gray GETTING ACQUAINTED Pathfinder Manual: Basics 40 Clear Display 8 Using Menus in the Toolbox Remove the keyguard and overlay from the Pathfinder. Press the TOOLS button on the front of the case. When the light on the TOOLS button is lit, the Toolbox is On. Using the menus in the Toolbox is easy. The menus are arranged alphabetically. Menu keys are light gray. The name of each menu is printed in white on the gray key. Press the FEEDBACK menu. Let's look for a moment at the menu. The name of the menu and any instructions for using it are at the top of the menu. There are nine keys on the menu and each key is numbered. For example, the Speaker Volume key has the number "1" in the upper left corner of the key. OK and Cancel are number "8" and number "9". On any menu, OK and Cancel are #8 and #9. (You can also put OK and Cancel on your overlay if you want.) To select an option you can press or scan to the number of the key you want in the Pathfinder's Toolbox, or you can press on or scan to the key area on the display itself. If you want to change the Activation Feedback from "Beep" to "light", you can activate the number "6" in the toolbox or you can activate the "Activation Feedback" key on the Pathfinder display. Since there are more than 6 options to the FEEDBACK MENU, there is a More Items key in the menu (key #7). Activate "7" or press the More Items area on the display to see more options. Any Yes or No responses you may have when using a menu can always be answered by activating the numbers 8 or 9 on your overlay (the same as OK and Cancel). Exit a menu by activating OK. (the #8 key in the Toolbox). The Pathfinder will save your changes and exit the menu. GETTING ACQUAINTED Pathfinder Manual: Basics 41 To exit a menu without saving any changes, activate "Cancel". Do this before you activate the "OK" key. Once the "OK" key is activated any changes are saved. Using the Arrow Keys to Navigate in Some Menus Some menus will have screens with categories of icons on them, or Activity keys. When you see screens like these, you can use the arrow keys on your overlay to navigate through the smaller squares. When you activate an arrow a square is highlighted. Activate it again and the next square in the direction of the arrow is highlighted. To select a square, press the key directly or activate the OK key on your overlay. You can also use the up and down arrow keys to navigate through the options within menus. For example, if you are setting the date and you go past the number you want, activate the down arrow once then activate the option you want until you see the correct date in the box. You Can Access Most Menus Without Removing the Keyguard and Overlay There may be times when you would like to go to a menu without having to remove the keyguard and overlay and opening the Toolbox. You can do this by using the SYSTEM STATUS key on the top left front of the Pathfinder. Activate the SYSTEM STATUS key, . Activate the TOOLBOX key on the display screen. Select the Toolbox menu you want. (Not all Toolbox tools are represented in the Status Screen Toolbox.) GETTING ACQUAINTED Pathfinder Manual: Basics 42 Change Speaker and Earphone Volume You can raise or lower the speaker volume in the Toolbox. Remove the keyguard and overlay. Turn the Toolbox On by activating the TOOLS key on the front of the Pathfinder case. You can also activate the SYSTEM STATUS key and then select TOOLBOX. Activate SPEAKER VOL. UP to raise the speaker volume. Activate SPEAKER VOL. DOWN to lower the volume. Press the display screen, or activate one of the SPEAK tools in the Toolbox to hear the volume changes. ÂThe FEEDBACK MENU in the Toolbox also contains the Volume Up and Volume Down functions for the Speaker and for an external Earphone. ÂSee Appendix H for speaker and earphone specifications. GETTING ACQUAINTED Pathfinder Manual: Basics 43 44 Set Up a User Area and Selection Technique USER AREAS AND SELECTION TECHNIQUES Pathfinder Manual: Basics 45 User Area Menu USER AREAS AND SELECTION TECHNIQUES Pathfinder Manual: Basics 46 User Area Menu The USER AREA Menu allows you to select an area to use and then set it up with a keyboard and overlay. There are six areas available for use in the Pathfinder. This means that six different people can use the Pathfinder and each person can have a separate area. If only one person is going to use the Pathfinder, then that user can set up different areas for different requirements. In the USER AREA menu you can: Switch between User Areas Rename an Area Copy an Area Erase an Area Select an overlay and vocabulary Select a Computer for computer emulation (IBM or Mac) Copy an Activity from one User Area to another ÂSee page 163 for information about the Copy Activity option. ÂImportant Note: Vocabulary, Activities, Notebooks and the Selection Technique are specific to each User Area and cannot be accessed from other areas. ÂImportant Note: Imported Icons, the Speech Dictionary, the Word Prediction Dictionary and any Infrared (IR) Commands can be accessed from all User Areas. ÂThe Copy All Activities and Copy Selected Activities options are discussed on pages 163. The next few pages discuss the USER AREA menu options. USER AREAS AND SELECTION TECHNIQUES Pathfinder Manual: Basics 47 Select a User Area USER AREAS AND SELECTION TECHNIQUES Pathfinder Manual: Basics 48 Select a User Area There are 6 possible user areas in the Pathfinder. Each user area can be set up differently. If different people are using the Pathfinder, each person can have his or her own area complete with its own settings, overlays, notebooks and keyboards. If just one person is using the Pathfinder, he or she might like to set it up so that one user area can be accessed with a switch. Another area might be set up for use with the keyboard. Different overlays might be used in different areas. One area might be set up for school or work and another for when the user is at home. A clinician may choose to set up a single user area in order to teach vocabulary. The default set-up is: User Area 1 contains Unity 1-Hit vocabulary; Area 2 contains Unity Sequenced-Hit Vocabulary; Area 3 contains Unity 32 Single Hit; Area 4 contains Unity 32 Sequenced; the other areas are blank. Both the Unity 1 and Unity Sequenced-Hit overlays use the 128-location overlay. To Select a User Area 1. Remove the keyguard and overlay. Turn the toolbox On. 2. Open the USER AREA menu. 3. Activate the Switch User Areas option. 4. Select the area you want to use. 5. Activate OK to exit the menu, or select another option. Choose a selection technique for your area from the SELECTION TECHNIQUE menu. ÂThe selection technique you choose will be active with any overlays in your user area. If you set up a new user area, the selection technique settings for another area do not transfer to the new area. You must select the technique and the settings you want for the new area. USER AREAS AND SELECTION TECHNIQUES Pathfinder Manual: Basics 49 Unity Overlay USER AREAS AND SELECTION TECHNIQUES Pathfinder Manual: Basics 50 About Overlays There are two Unity-for-Pathfinder overlays with pre-stored vocabulary for 128-locations: Unity One-Hit in User Area 1 and Unity SequencedHit in User Area 2. The default is User Area 2 with Unity Sequenced-Hit vocabulary. Areas 3 and 4 contain Unity 32 overlays. There are also blank overlays for 32, 64 and 128 locations If you are going to use a 64 or 32 location overlay, place the appropriate keyguard on the blank overlay. This will define the key locations for you. When you are using a 128-location overlay you cannot access any messages you may have stored using the 64 or 32 location overlays. To get to your 64 or 32 location vocabulary you must switch to the correct overlay (and User Area if you stored in a different area). 64 and 32location overlays do not have pre-stored vocabulary. To Load an Overlay: 1. Remove the keyguard and current overlay. Turn the Toolbox On. 2. Open the USER AREA menu. 3. Switch to the User Area you want (option #1). 4. Activate the Overlay Menu option. 5. Select the overlay you want from the menu. Activate YES. 6. Activate OK twice. 7. From the packet of overlays that you received, select the overlay you want. Place the overlay you have selected on the keyboard. Place the keyguard that goes with the overlay on top of the overlay. ÂAbout the Zorro Pattern: When you change from one overlay to another in the same User Area, you are asked to enter the Zorro pattern in order to clear out the User Area first. To perform the Zorro pattern activate the following keys in the order they are given: A1, P1,A8, P8, A8, P1, A1. The pattern traces a "Z" across the keyboard. USER AREAS AND SELECTION TECHNIQUES Pathfinder Manual: Basics 51 ÂIf you want to save the vocabulary in the area before you replace it, perform a Memory Transfer and put the vocabulary on a computer disk. See your MTI manual for information about memory transfers. ÂAll overlays can be accessed by direct selection (keyboard or headpointer) or by using a switch. Rename a User Area The original names of the different areas are User Area 1, User Area 2, User Area 3, etc. You can rename the areas you are using. If you are one of a number of people using the Pathfinder you might want to name your area after yourself. Or, if you are the only person using the Pathfinder, you may have set up different User Areas for different parts of your life. You may have an area for computer use and an area for school or work, for example. You can give each area a separate name to help you remember which area is used for what. Once you assign a name to an area, that area will be referred to by its name until you change the name or erase the area. To Rename a User Area: 1. Remove the keyguard and overlay and open the Toolbox. 2. Open the USER AREA menu. 3. Activate the Rename User Area option. 4. Select the area you want to rename. 5. Type in the new name. Activate OK. 6. Activate OK to exit the menu. ÂNote: Up to 19 letters/spaces can be used for the name. USER AREAS AND SELECTION TECHNIQUES Pathfinder Manual: Basics 52 Copy a User Area You can copy a User Area and use it in another area. For example, if you are moving from a simple vocabulary to a more complex one, you might want to copy your original User Area into a new area. Then you can add vocabulary to the new area as your vocabulary increases. You will still have your original vocabulary to use until you have mastered the new vocabulary. To Copy an Area: 1. Remove the keyguard and overlay. Turn the Toolbox On. 2. Open the USER AREA menu. 3. Activate the Copy a User Area option. 4. Select the area you want to copy. 5. Select the area where you want the copy to go. 6. Activate YES if you are sure you want to copy, NO if you change your mind. 7. Activate OK to exit the menu. ÄNote: If the area that you are copying to already has an overlay loaded into it, you will lose the vocabulary that was in the area you are copying to by performing the Zorro pattern (see page 51). If you want to save the vocabulary in the second area, perform a memory transfer and save that area onto a computer disk before you copy another area into it. See the MTI Manual for complete instructions. USER AREAS AND SELECTION TECHNIQUES Pathfinder Manual: Basics 53 Erase a User Area There may come a time when you will want to erase a whole User Area. Perhaps the area is no longer relevant. You have graduated from that course, or changed jobs, or added so significantly to your vocabulary that the old area is useless. The Erase a User Area option allows you to get rid of outdated areas and begin a new area if you want to. To Erase a User Area: 1. Remove the keyguard and overlay. Turn the Toolbox On. 2. Open the USER AREA menu. 3. Activate the Erase User Area option. 4. Select the option to erase. 5. Answer YES if you want to erase; NO if you change your mind. 6. Activate OK to exit the menu. USER AREAS AND SELECTION TECHNIQUES Pathfinder Manual: Basics 54 About the Computer Access Menu ÂSee pages 75-124 in the Power Tools manual for complete Computer Access information. The Pathfinder has a Computer mode that is already set up for computer work. To go to the Computer Mode you must put the GO TO COMPUTER tool on your overlay or under an icon sequence. (See pages 175-182 for information about moving and storing tools.) If you are using the Sequenced-Hit Unity overlay, GO TO COMPUTER is already stored under the icon sequence: TOOLS+COMPUTER. (The TOOLS icon has the picture of a Toolbox on it). When you are in Computer mode, the LED next to the Computer icon on the front of the case will light. To access a computer from the Pathfinder, you must have a keyboard emulator and you must select the kind of computer you are using (IBM or Mac). You must also have the Computer Access overlay on your Pathfinder keyboard. Just place it over your regular overlay. To Select a Computer from the USER AREA Menu: 1. Open the USER AREA menu and activate the Computer Access Menu (option #6) 2. If you are using an IBM computer, set the Host Computer option to IBM and click OK. 3. Macintosh computers are a little trickier. If you are using a Mac with monitor manufactured before March of 1993, set the Host Computer option to Older Mac. If you are using a Mac with a monitor manufactured after March 1993, set the Host Computer option to Newer Mac. 4. If you discover that your mouse cursor is not doing what you want it to do (e.g., instead of opening the File menu it is opening the Edit menu), return to the Computer Access Menu and change your current MAC setting to the other one. That is, if you originally chose Newer Mac, and your mouse did not work correctly, change the setting to Older Mac or vice-versa. ÂWhen you are in Computer mode, you cannot retrieve sequences to speak messages. USER AREAS AND SELECTION TECHNIQUES Pathfinder Manual: Basics 55 Pathfinder Selection Techniques Keyboard Infrared Headpointer Single Switch (1-Switch) Dual Switch (2-Switch) Joystick Selection Techniques USER AREAS AND SELECTION TECHNIQUES Pathfinder Manual: Basics 56 The Selection Techniques Selection Technique refers to the method you use to control the Pathfinder. Direct Selection Techniques Keyboard: The keyboard consists of 128 keys on the front of the Pathfinder. Press on the keys to activate them. The keyboard always remains active, no matter which selection technique you choose. This means someone can use the keyboard no matter what other selection technique may have been selected. Headpointer: Pathfinder supports infrared headpointing. Select Headpointer from the SELECTION TECHNIQUE menu. Point the headpointer at a key. When the activation delay has passed, the key is activated. You can also plug a switch into either switch port (A or B) and use the switch to activate the key you have pointed to. Scanning Techniques: 1-Switch: Use a single switch to scan to any key on the keyboard. Plug the switch into one of the switch ports on the top of the Pathfinder. You can scan by row/column or column/row. Quarter Row/Column Scanning: This is a single switch scanning technique. The Pathfinder keyboard is divided into four quarters. You scan a particular quarter for a key you want. Dual or 2-Switch: Use a dual switch or two single switches to scan left, right, up and down to any key on the keyboard. Plug a dual switch or two singles into the switch ports on the top of the Pathfinder. Joystick: Use a joystick to scan up, down, left, right and diagonally. Plug a joystick into the Multi-Switch on the top of the Pathfinder. USER AREAS AND SELECTION TECHNIQUES Pathfinder Manual: Basics 57 Selection Technique Options for the technique The SELECTION TECHNIQUE Menu USER AREAS AND SELECTION TECHNIQUES Pathfinder Manual: Basics 58 Using the SELECTION TECHNIQUE Menu Summary: Remove the keyguard and overlay. Turn the Toolbox On. Press the SELECTION TECHNIQUE key. Press the first option in the menu (#1) to step through the Pathfinder selection techniques. Each technique has its own optional settings. ÂBefore you choose a selection technique: Make sure you have selected the User Area and overlay you want to set up for a particular selection technique. If you are going to use a switch, headpointer or joystick, plug it into the correct jack on the top of the Pathfinder before you turn the Pathfinder on. ÂThe selection technique you choose to use with your overlay can also be used in the Toolbox. If you are scanning, you can scan in the Toolbox. ÂRemember, the keyboard is always active and can be used, too. Choose a Selection Technique Remove the keyguard and overlay. Press the TOOLS button on the front of the Pathfinder case. The light on the TOOLS key will light when the Toolbox is on. 1. Press the SELECTION TECHNIQUE key in the Toolbox. 2. Press the "Selection Technique" option on the display screen or the #1 key on the Pathfinder to step through the different selection techniques. When you see the selection technique you want to use, stop pressing the key. 3. Select the set-up options you want to use. 4. When you have finished setting up the selection technique, press OK to save your changes and exit the menu. If you make a mistake or decide not to save changes, press "Cancel" to exit the menu. USER AREAS AND SELECTION TECHNIQUES Pathfinder Manual: Basics 59 Keyboard Only USER AREAS AND SELECTION TECHNIQUES Pathfinder Manual: Basics 60 Keyboard Only Summary: If you select "Keyboard" for your selection technique you must be able to press the keys with your finger or some kind of "point and press" device. You may also press on the display screen to select appropriate options if that is easier for you. The keyboard is always available to use. The keyboard and the headpointer are the quickest selection techniques. You make direct selections on the keyboard by pressing on the keys you want with your finger (or with the eraser end of a pencil or a "point and press" device). You can use the keyboard with any overlay. The keyboard is the default selection technique for the Pathfinder. This means that when you receive your Pathfinder you can use it right away. Just turn it on and then press the keys on the keyboard. The options for the keyboard selection technique are explained in the options section of this chapter on pages 61 and 75. USER AREAS AND SELECTION TECHNIQUES Pathfinder Manual: Basics 61 IR Window Headpointing Sensor Mounted on the Headset with the Body Pack USER AREAS AND SELECTION TECHNIQUES Pathfinder Manual: Basics 62 Infrared Headpointing ÂAlways use the battery charger that came with your headpointer. Any other charger may damage your headpointing batteries. Do not use the Pathfinder charger to charge the headpointer body pack. The Pathfinder infrared headpointing system consists of the infrared window on the top right front of the Pathfinder case, an infrared sensor (headpointer), a body pack and the battery charger for the body pack. The body pack contains the batteries that make the sensor work. (If the batteries run low, charge them by plugging the battery charger into the body pack.) If you have been using an optical headpointer, you will find that the infrared headpointer works differently. You do not point the sensor at the keys on the keyboard to activate them. Instead, you position the sensor so that it points at the infrared window on the front of the Pathfinder case. (You can still look at the keyboard and move your head to find the keys you want, as usual.) The sensor must be able to "see" the IR window in order for the system to work correctly. You can mount the sensor wherever it is most convenient for you. If you intend to mount the sensor on the PRC headset, headband or your own eyeglasses, Âplease read the Vanguard/Pathfinder Headpointer Mounting Instructions that came with your headpointer. ÂIf you want to use a switch to activate selected keys, plug it into either switch port A or B on the top of the Pathfinder. Select Manual for the Selection Type option under Headpointing in the SELECTION TECHNIQUE menu. The IR headpointing options in the SELECTION TECHNIQUE menu are discussed on pages 63-65, and 77-84. USER AREAS AND SELECTION TECHNIQUES Pathfinder Manual: Basics 63 6HQVRU&RUG3RVLWLRQV 7KHVPDOOZKLWHJURRYHLQWKHVHQVRU FDVH PXVWDOZD\VEHRQWRS RIWKHVHQVRU IDFLQJWKHFHLOLQJUHJDUGOHVVRIZKHUH WKHFRUGLV Position the Sensor Cord at 90-degree Angles USER AREAS AND SELECTION TECHNIQUES Pathfinder Manual: Basics 64 More About Your IR Headpointer When the Body Pack Powers Down The Body Pack will power down ("go to sleep") for two different reasons: • • If there is no sensor movement for 1 minute; If the sensor cannot see the Pathfinder for approximately 3 seconds. "Wake up" the Body Pack by tilting your head up and down or by activating your switch. About the Sensor Cord If the sensor cord is in the user's way, you can rotate it at 90-degree angles around the sensor case. That is, you can move the cord from straight down to straight out to the left or right or straight up. See the graphic on the facing page. Instructions for rotating the cord are in the Headpointer Mounting Instructions that you received with the headpointer. 7Warning! Do not pull on, or put undue stress on the sensor cord as you rotate it. The White Notch on the Sensor Case Pick up the sensor and look at the round case. You can see a white notch on the sensor case. (This notch is not the cut-out area where the cord rests. It is a separate indentation on the main part of the sensor case.) No matter where you position the sensor cord, this white notch must always be on top, facing upward (or toward the ceiling) when you mount the sensor. If the white notch is not on the top of the sensor case, the sensor and headpointing system will not work. ÂThe sensor cord must be plugged into the larger jack on the top of the Body Pack before it will work. USER AREAS AND SELECTION TECHNIQUES Pathfinder Manual: Basics 65 1-Switch USER AREAS AND SELECTION TECHNIQUES Pathfinder Manual: Basics 66 1-Switch Summary: Plug a single switch or a dual switch (use only the SELECT side of a dual switch) into the Switch A or Switch B port on the top of the Pathfinder. The default scan is 'automatic'. The default scanning rate is '1 second'. You can scan with a single switch, by using the SELECT side of a dual switch, or by using the display screen as a switch. You can use 1-switch scanning with the 128, 64 and 32-location overlays. Plug the switch into the Switch A or Switch B port on the top of the Pathfinder. Remove the keyguard and overlay from the Pathfinder and activate the TOOLS button on the front of the case. Activate the SELECTION TECHNIQUE menu. Press the "Selection Technique" key until you see "1-switch". The menu will then display the 1-switch scanning options. Pages 75, 89-100 describe these options. Select the options you want. Activate OK to exit the menu when you are finished. ÄNote: You will use your selection technique with any overlays in your area, (that is, whether you are using a 128, 64 or 32-location overlay). USER AREAS AND SELECTION TECHNIQUES Pathfinder Manual: Basics 67 2-Switch USER AREAS AND SELECTION TECHNIQUES Pathfinder Manual: Basics 68 2-Switch Summary: Use two single switches or a dual switch to scan up, down, left and right, or to do 2-switch row/column scanning. Plug the switch or switches into the Switch A and Switch B ports on the top of the Pathfinder. After each activation, the scan returns to the center of the keyboard. With 2-switch scanning you can use either two single switches or one dual switch. If you are using two single switches, plug one switch into the Switch A port on the top of the Pathfinder. Plug the other switch into the Switch B port. If you are using a Dual Switch, plug it into the Switch A port. Remove the keyguard and overlay. Press the TOOLS key on the front of the Pathfinder case to turn the Toolbox on. Activate the SELECTION TECHNIQUE menu. Activate the "Selection Technique" option until you see "2-Switch". Once you select 2-switch, you will see the 2-switch options. These options are described on pages 87-88 and 89-100. When you have finished with the SELECTION TECHNIQUE menu, activate the OK key to exit the menu. ÄNote: You will use your selection technique with any overlays in your area, (that is, whether you are using a 128, 64 or 32- location overlay). USER AREAS AND SELECTION TECHNIQUES Pathfinder Manual: Basics 69 Joystick USER AREAS AND SELECTION TECHNIQUES Pathfinder Manual: Basics 70 Joystick Summary: A joystick allows you to scan up, down, left, right and diagonally. Plug the joystick into the Multi-Switch port on the top of the Pathfinder. You can push a joystick in any direction to scan up, down, left, right and diagonally. You can also use an Arm Slot control instead of a joystick to do the same things. An Arm Slot control allows joystick-type scanning for people who do not have enough fine motor skills to use a joystick. Remove the keyguard and overlay. Press the TOOLS key on the front of the Pathfinder case to turn the Toolbox on. Activate the SELECTION TECHNIQUE menu until you see Joystick. Once you select Joystick, you will see the Joystick options. These options are described on pages 71, 75, 90-100. When you have finished with the SELECTION TECHNIQUE menu, activate the OK key to exit the menu. Move the joystick to scan to the location you want. The Pathfinder will automatically select the location you have chosen after the acceptance time has passed or you can activate a separate switch to select the location (see Note below). ÄImportant Note: If you choose "Manual" selection type from the menu, you must plug a separate switch into the Switch B connector on the top of the Pathfinder. Use the SELECT side of a dual switch or use a single switch). When you scan to the location you want, activate the separate switch to select your location. ÂWhen you are scanning in the Activity Row, all joystick activations move to the right. You cannot go left. USER AREAS AND SELECTION TECHNIQUES Pathfinder Manual: Basics 71 Quarter Row/Column Scan OFF/ON USER AREAS AND SELECTION TECHNIQUES Pathfinder Manual: Basics 72 Quarter Row/Column Scan – Off/On Quarter row/column scanning is a selection technique that can be used with 1-switch or 2-switch scanning. Turn this option On, in order to use it. With Quarter Row/Column scanning the Pathfinder keyboard is divided into four quarters. Activate the switch to choose the quarter that contains the key you want. Once the quarter has been selected, the Pathfinder sans the quarter according to the other settings you have made, i.e., 1-Switch Row/Column Scan or 2-Switch (scan mode 2). Quarter row/column scanning is somewhat faster than single row/column scanning but it does require more switch activations. ÂQuarter Row/Column Scan does not work in 2-Switch Scan Mode 1 or in Linear Scan Directions. USER AREAS AND SELECTION TECHNIQUES Pathfinder Manual: Basics 73 Some Scanning Options USER AREAS AND SELECTION TECHNIQUES Pathfinder Manual: Basics 74 Other Options in the SELECTION TECHNIQUE Menu Below and on the next few pages you will find explanations of the options in the SELECTION TECHNIQUE menu. Scan Type: Auto, Hold: Auto means the Pathfinder automatically scans the keyboard. Hold means you must press and hold your switch to scan. Step is an option if a Linear Scan Direction is chosen. Activate your switch each time you want to move to a new location. Selection Type (2-Switch, Joystick, Headpointing): Auto/Manual: Auto means the Pathfinder will automatically select a location after the acceptance time has passed. Manual means that you must activate your switch to select a location. Scan Auto Restart: On/Off: When this is Off, you must activate your switch to start a new scan. When this is On, the Pathfinder automatically starts a new scan after a message has been selected. If you are visually impaired, we suggest you set this to Off. This way the scan will always start at the same place (upper left corner of the keyboard). Number of Rescans: 0-10: This allows you to select the number of times you want the Pathfinder to automatically re-scan the keyboard. You can select a number from 0-10. The default is 3 times. On-Screen Scanning: Last/First/Off: Last scans core then display; First scans display then core; Off does not scan display. Use Screen as Switch: this allows you to tap on the screen as you would a switch. Activate Key When: (Keyboard) this allows you to tell the device to activate a key when you touch the key or when you release the key. The default is "Touched." ÂYou can turn the Scanning Beep On or Off in the FEEDBACK MENU. USER AREAS AND SELECTION TECHNIQUES Pathfinder Manual: Basics 75 H E A D P O IN T ING A verag in g Ð 5 Ï T h e HIG HE R th e A v e ra g in g n u m b e r th e f a rth e r yo u m u s t m o ve in to th e n e xt k e y b e f o re it is a c tivate d .  T he d e f a u lt is " 2 " USER AREAS AND SELECTION TECHNIQUES Pathfinder Manual: Basics 76 Headpointing: Averaging Summary: Cut down on accidental key activations by selecting a number from 1-5. 2 is the default. Averaging is a way of helping you cut down on accidental key activations caused by involuntary head movements. The number you select tells the pathfinder how far you must move out of one key location before a second key is activated. This generally means that when you cross the centerline between one key and the next key, the LED on the first key will go out and the LED on the second key will light. If you select an averaging number higher than "1" you are telling the headpointer signal to "lag behind" any head movements you make. The higher the number you choose, the further into the key's area you must move before the LED on the second key will light. Averaging numbers between 2 and 5 are recommended. The default is 2. USER AREAS AND SELECTION TECHNIQUES Pathfinder Manual: Basics 77 7URXEOH UHDFKLQJ WKH ULJKW RU OHIW HGJHV" ,QFUHDVH WKH +RUL]RQWDO QXPEHU 7URXEOH UHDFKLQJ WKH WRS RU ERWWRP HGJHV" ,QFUHDVH WKH 9HUWLFDO QXPEHU I f yo u m o ve d o f f th e s c re e n to o e a s ily d e c re a s e th e V e rtic a l n u m b e r. I f yo u m o ve d o f f th e s c re e n to o e a s ily d e c re a s e th e H o rizo n ta l n u m b e r. T o re a c h c o rn e rs , in c re a s e H o rizo n ta l a n d V e rtic a l F o r la rg e h e a d m o ve m e n ts d e c re a s e H o rizo n ta l a n d V e rtic a l. F o r s m a ll h e a d m o ve m e n ts in c re a s e H o rizo n ta l a n d V e rtic a l. Horizontal Adjustment; Vertical Adjustment USER AREAS AND SELECTION TECHNIQUES Pathfinder Manual: Basics 78 IR Headpointing: Horizontal Adjustment and Vertical Adjustment Summary: If you have trouble selecting keys on the edges of the keyboard, or positioning the pointer in the corners of the keyboard, use the adjustments in this option. Once your headpointer is connected and you are positioned properly, move your head and try to place the cursor in each corner of the screen—top right, top left, bottom right and bottom left. Move your head from left to right across the screen and from the top to the bottom of the screen. Did all the keys on the keyboard become highlighted? If you had trouble reaching the right or left edges, increase the Horizontal adjustment number. If you had trouble reaching the top or bottom edges, increase the Vertical adjustment number. If just the slightest head movement to the left or right moved you off the edges of the screen, decrease the Horizontal number. If the slightest head movement up or down moved you off the top or bottom edges, decrease the Vertical adjustment number. If you had trouble positioning the cursor in the corners of the screen, increase both the Horizontal and Vertical numbers. If you make large head movements you may lose the cursor easily. Try decreasing the Horizontal and/or the Vertical numbers. If you make small head movements, try increasing the Horizontal and Vertical numbers. Headpointing adjustments that you set when you are fresh and alert may not work as well for you later in the day when you become tired. If this happens, you can make new vertical and horizontal adjustments. You can also save the settings under an icon sequence on your overlay so that different settings are always available to you. See page 283. USER AREAS AND SELECTION TECHNIQUES Pathfinder Manual: Basics 79 Select a Headpointer Color USER AREAS AND SELECTION TECHNIQUES Pathfinder Manual: Basics 80 IR Headpointing: Color Pointer Summary: You can change the color of the headpointer if you do not like the default color. When you use Headpointing you will see a pointer in the shape of a hand on your display. The default color for the hand is gray. If this is hard for you to see, or if you would just like a different color, select the Pointer color option in the menu. Activate the option to see the different colors. When you see the color you want to use, activate the OK key. USER AREAS AND SELECTION TECHNIQUES Pathfinder Manual: Basics 81 IR Headpointing: Battery Information When the headpointing battery is low, a red LED on top of the Body Pack lights to warn you to plug in the headpointing battery charger. ÂWhen you first receive your sensor and Body Pack, charge the batteries overnight. Plug the small end of the charger that came with the headpointer into the battery charger connector on the side of the Body Pack. Plug the other end of the charger into a working A/C wall outlet. When the charger is plugged in, the red LED on the Body Pack lights until you unplug the charger. The next morning, unplug the charger from the Body Pack. Use the headpointer until the red LED on the Body Pack comes on, indicating that the batteries are low. This should take 3-4 days, depending on how much you use the unit. When the light comes on, recharge the unit. If it took 4 days before the red light came on, recharge the batteries once every 3 days. If the low battery light came on after 3 days, re-charge the battery once every 2 days. This recharging schedule means you should be charging the batteries before the red light comes on. ÂOnce a month, allow the batteries to go completely dead. This means you should use the unit until it no longer works. When the batteries are dead, plug in the charger and charge the batteries overnight (8-10 hours). If you use the headpointer while the battery charger is plugged in, the batteries will not charge. Plan not to use the unit while it is charging. If you follow these guidelines the batteries should last for at least 2 years. Replacing the Batteries If the batteries quit working completely and will not re-charge, you will have to replace them. You cannot use alkaline or NiCad batteries in the Body Pack. If you think you need to replace your batteries, call the PRC Service Department for specific battery information. USER AREAS AND SELECTION TECHNIQUES Pathfinder Manual: Basics 82 Connecting the HeadMouse to the Pathfinder ÂBefore you begin make sure the Pathfinder and the HeadMouse are turned Off. 1. Find the cable that came with your HeadMouse. Plug the male end of the cable into Port A on the back of the HeadMouse Interface Unit (large box with a series of connectors on the back). Plug the 2. 3. 4. 5. (picture of female end of the cable into the Multi port joystick) on the Pathfinder. Use the enclosed Dual-Lock to attach the Optical Sensor (smaller box with black circle on it) in between the two headpointing windows on the Pathfinder. Plug the Optical Sensor power cord into the appropriate connector on the front of the Interface Box. Place the thin reflective dot on your forehead, the bridge of your glasses or any other moveable location on your body where the Optical Sensor can see it. Turn the HeadMouse On (on the back of the Interface Unit), then turn the Pathfinder On. ÂDo not turn the Pathfinder on until you have turned the HeadMouse on first. Select the Tools key (top right corner of the case). Choose the Selection Technique Menu. Choose Headpointing. Adjust the Acceptance Time so it is appropriate for the person using the HeadMouse. 10. Adjust the mouse speed by using the Horizontal Adjust and Vertical Adjust options. 11. Activate OK to exit the menu when you are finished adjusting the HeadMouse. 6. 7. 8. 9. USER AREAS AND SELECTION TECHNIQUES Pathfinder Manual: Basics 83 Connecting Madentec’s Tracker 2000 to PRC’s Pathfinder ÂUse these instructions in conjunction with the instructions in the Tracker 2000 manual. ÂPosition the Tracker 2000 Tracker unit on the Pathfinder. The round ball at the front of Tracker 2000 contains a sensor. This sensor must be positioned so that it points toward the user. 1. Plug the large connector directly into the back of the Tracker 2000 unit. 2. Plug the PS/2-to-serial-mouse-adapter-cable (yellow band) into one of the small round connectors of the PS/2 mouse cable (orange band) 3. Plug the 9-pin serial connector into the Multi port (picture of joystick) on the top of the Pathfinder. 4. Plug the AC power adapter into the back of the Tracker 2000 unit. Plug the other end into a working wall socket or power bar. Turn on Headpointing in the Selection Technique Menu: 1. Select the Status key twice (left of the display) 2. Choose Selection Technique Menu (Select Tech) 3. Choose Selection Technique option #1 until it says Headpointing. 4. Select OK to exit the menu Place the reflective dot on your forehead, the bridge of your glasses or any other moveable location on your body. • If you see a green light, Tracker 2000 has detected the dot and is in the best position. • If you see a red light, you need to center yourself or position yourself closer to the Tracker. USER AREAS AND SELECTION TECHNIQUES Pathfinder Manual: Basics 84 1-Switch-Scan Mode 1 Summary: This is a single switch scan mode that requires 3 switch hits to make a selection when set to Row/Column scanning. The default scan is Automatic and the scanning rate is 1 second. You can also choose to use the display screen as a single switch. To Scan in 1-Switch Scan Mode 1 Activate your switch to start the scan. If you are using Row/Column scan, the top row on the keyboard lights, then the second row, then the third, etc. Each time a row lights, you hear a beep. When the row you want is lit, activate your switch or tap the display screen to select that row. The scan then moves from left to right across the columns in the row. When the key you want lights up, activate your switch or tap the screen to select that key. If a message is stored in the location you have selected, and the speech is turned on, the Pathfinder will speak the message, then return to scanning down the rows. If you do not make any activations after starting a scan, the Pathfinder automatically scans the keyboard 3 times and then stops scanning. To begin another scan, activate your switch or tap the display. ÂYou can select the amount of rescans you want in the "Number of Rescans" option. USER AREAS AND SELECTION TECHNIQUES Pathfinder Manual: Basics 85 1-Switch-Scan Mode 2 Summary Scan Mode 2 involves 4 switch activations instead of 3. Scan Mode 2 is another single switch technique. This technique involves 4 switch activations instead of 3 as in Scan Mode 1. To Scan Activate your switch. The top row on the keyboard lights. The scan automatically continues down the rows. When it reaches the row you want, activate and release your switch. The scan stops at the row you have chosen. Press the switch again and the scan proceeds automatically across the row. When the scan reaches the key you want, activate your switch to select the location. ÂIf you prefer Column/Row scan, columns will be chosen first, then the row. USER AREAS AND SELECTION TECHNIQUES Pathfinder Manual: Basics 86 2-Switch-Scan Mode 1 Summary: Activate and hold switch A to start scanning the middle row. Activate switch A again to reverse scan. Activate Switch B to scan columns. Activate switch B again to reverse the scan. Tap the switch to select a location. Scan Mode 1 is the default scan mode for 2 switches. To Scan 2 Single Switches (Auto): "Auto" is the default. Each switch alternates the direction of the scan between up/down and left/right. The first activation of switch A starts a scan of the middle row. Press switch A again and the scan reverses. The first activation of switch B starts the scan across the columns. Activate switch B again and the scan reverses. Activate and hold the switch to start a scan. Tap a switch with a short hit to select a location that is lit. Dual Switch: The principle is exactly the same as above. The SELECT side of your switch scans left/right and the ON/OFF side scans up/down. You can choose Auto or Hold with 2-switch scanning. Column/Row is not available with 2-switch Scan Mode 1. ÂIn the Activity Row both switches will only move from left to right. You cannot move from right to left. USER AREAS AND SELECTION TECHNIQUES Pathfinder Manual: Basics 87 2-Switch-Scan Mode 2 Summary: This is a 2-switch row/column technique. Switch 1 starts the scan. Switch 2 selects row or column. Switch 1 scans row or column. Switch 2 selects location. You can use 2-Switch Scan Mode 2 with 128, 64 and 32 locations. Press switch A to start the scan. The lights in the top row or the first column light. Hold down switch A to move the scan to the next row or column. You can also press and release the switch each time you want to move the scan to a new row or column. When you reach the row or column you want, press switch B. Then press and hold switch B to scan across or down. You can also press and release the switch until you reach the location you want. When you have reached the location you want, press switch B again. With this technique, switch 1 always moves you somewhere and switch 2 always chooses your locations. Stepping or pressing and holding the switch are the only scanning options with this technique. USER AREAS AND SELECTION TECHNIQUES Pathfinder Manual: Basics 88 Scan Direction Row/Column: This scan starts by lighting the top row (across the keyboard) of keys. It moves down to the second row, then the third row, etc. When the row that contains the key you want is highlighted, activate your switch. The scan then highlights the separate columns in the row you selected. The scan moves from left to right across the columns. When the key you want is highlighted, activate your switch. Column/Row: This scan begins by scanning the columns first instead of the rows. The scan moves from left to right across the columns. When the scan reaches the column that contains the key you want, activate your switch. The scan then highlights each key in that row. When the key you want is highlighted, activate your switch. ÂRow/Column and Column/Row are options for most of the scanning selection techniques. Linear Scan: This allows you to step through keys on your overlay moving from left to right across the rows or from top to bottom down each column. If you select Step you must activate your switch each time you want to move to a new location. If you select Auto, the keys are scanned automatically. Activate your switch to start a new scan. USER AREAS AND SELECTION TECHNIQUES Pathfinder Manual: Basics 89 Scanning Speed Summary: Scanning speed is the amount of time it takes the Pathfinder to move from one key to the next in a scan. ÂScanning Speed is used with all scanning techniques. Scanning speed refers to the time it takes the Pathfinder to move from one key in a scan to the next key. As each key is scanned, it's light comes on and the Pathfinder beeps. The default scanning speed is 1 second. This means that the Pathfinder will move to a new key every second. You may want to use a slower speed to start with, perhaps 4 seconds between beeps. This means it will take 4 seconds from the time one key lights and the Pathfinder beeps to the time the next key lights and the pathfinder beeps. If you are used to scanning you may want to try a very fast scanning speed, such as .1 seconds To Change the Scanning Speed 1. Remove the keyguard and overlay and turn the Toolbox On by pressing the TOOLS key on the front of the Pathfinder case. 2. Activate the SELECTION TECHNIQUE menu. 3. Activate the "Scanning Speed" option until you see the speed you want to use. 4. Activate OK to set the speed and to exit the menu. USER AREAS AND SELECTION TECHNIQUES Pathfinder Manual: Basics 90 Acceptance Time Summary: Scanning or Direct Selection: how long you must maintain contact with a switch or key before the Pathfinder accepts a location and makes a key activation. Headpointing: how long you must dwell at the lighted key. ÂAcceptance Time is used with all selection techniques. Acceptance time is the amount of time it takes for the Pathfinder to accept a location and activate the key. If you are scanning or pressing keys, the acceptance time is the amount of time you must maintain contact with your switch or the key before the key is accepted and activated. The default acceptance time is .01 second for scanning. If you are using a headpointer, acceptance time is the amount of time it takes between when the LED for the key you pointed to lights up and when the Pathfinder beeps that the location has been activated. The default Acceptance Time is .01 of a second for scanning and 1.0 seconds for headpointing. If one-tenth of a second (.01) seems too fast or one second (1.0) seems too slow for you, you can change the time in the SELECTION TECHNIQUE menu in the Toolbox. To Change the Acceptance Time: 1. Remove the keyguard and overlay and turn the Toolbox On by pressing the TOOLS key on the front of the Pathfinder case. 2. Activate the SELECTION TECHNIQUE menu. 3. Activate the "Acceptance Time" option until you see the time you want to use. 4. Activate OK to set the acceptance time and close the menu. ÂIf you select a high acceptance time, for example, 5 seconds, you must maintain contact with the key or switch until the key activates. This means you must hold down the key or switch for 5 seconds. ÂIf you selected Scan Type = Hold the Acceptance Time starts when you release your switch. USER AREAS AND SELECTION TECHNIQUES Pathfinder Manual: Basics 91 Release Time Summary: Release Time is the amount of time it takes for you to release a key or switch and be able to activate another key or start a new scan. ÂRelease Time is used with all selection techniques except Headpointing. Release Time is how long you tell the Pathfinder to wait after you have released a key or switch, before it allows you to make another activation with the same key or switch. Release time allows you to create a "time window" after you release a key or switch. During this "window" the Pathfinder will not recognize repeated key or switch activations. For example, if you set your release time for 1 second, you must wait 1 second after you release your switch or key before you can continue to scan or activate a new switch. This means that if you release your switch and then accidentally activate it again before the release time has passed, the Pathfinder will not make any activations. When the release time has passed you can activate the same key or the same switch again. ÂIf a user is accidentally making double activations, increasing the Release Time should help. USER AREAS AND SELECTION TECHNIQUES Pathfinder Manual: Basics 92 Activation Delay Summary: When this is On, you can scan to a key, select it and then change your mind and begin to scan again before the key is activated. Activation Delay is automatically set to your scanning speed. Activation Delay gives you a few seconds to change your mind when you are scanning and have selected a key. When Activation Delay is turned On, you can scan to a key, select it, and then if you change your mind, you can activate your switch again to keep the key from being activated. When this option is On, the amount of the delay is always the same as your scanning speed. If your scanning speed is set to one second (1.0), then once you select a key you have one second in which to "de-select" the key by activating your switch again. The default for Activation Delay is Off. Any key you select is activated with no delay. USER AREAS AND SELECTION TECHNIQUES Pathfinder Manual: Basics 93 Auto Repeat Rate Summary: Select a key, hold it down and it will repeat at the rate you have set. ÂAuto Repeat works with all selection techniques. Auto Repeat Rate lets you choose how fast a key will repeat itself if you hold it down. If you are using a switch you just hold the switch down. If you are using a headpointer, you must continue to point at the key to get it to repeat automatically. If you are using a 2-switch or joystick and selected Selection type: Manual, hold your extra switch down when you reach the key you want to repeat. You can choose to have a key repeat once every .10 seconds to once every 2 seconds. You can also turn this option Off. ÂAuto Repeat does not work if you are using 2-switch with Scan Mode 1. USER AREAS AND SELECTION TECHNIQUES Pathfinder Manual: Basics 94 Predictive Selection Summary: When Predictive Selection and Icon Prediction are both turned On, only those keys where messages are stored are active. ÂPredictive Selection works with Icon Prediction. Both options must be turned On for Predictive Selection to work correctly. When Icon Prediction (in the FEEDBACK menu) is On along with Predictive Selection (in the SELECTION TECHNIQUE menu), the Pathfinder lights only those icons where messages are stored. These lighted icons are the only keys on the keyboard that will produce a response. This means that if you are scanning, the Pathfinder scans only the lighted keys. If you are using direct selection (keyboard or headpointer) you will only be able to activate lighted keys. If the light belonging to a key is not lit, it will not work. ÂIf you are using an optical headpointer, any options for LED intensity will not work, including this one. ÂNote: Icon Prediction will work whether or not Predictive Selection is On. See page 29 for an explanation of Icon Prediction. You can create your own predicted keys. These are like miniapplications. With your own predicted keys you can "mask out" any locations that are empty or that contain tools that you don't want the Pathfinder to scan. This greatly reduces the amount of time it takes to scan the complete keyboard. See the next page for details. USER AREAS AND SELECTION TECHNIQUES Pathfinder Manual: Basics 95 Modify Predicted Keys USER AREAS AND SELECTION TECHNIQUES Pathfinder Manual: Basics 96 Modify Predicted Keys Summary: Keys with dim lights are inactive. Keys with bright lights are active. Icon Prediction must be On. Set Icon Prediction (in the FEEDBACK menu) to Low to better see the LEDs. ÂModified predictive keys work with all scanning techniques. ÂIf you are using an optical headpointer, Predictive Selection LED intensity (low, medium or high) in the FEEDBACK menu will not work. When you choose the Modify Predicted Keys option, you can tell the Pathfinder exactly which keys you want it to scan and when. 1. Before 1st icon hit These are keys that you want to be lit before you ever activate an icon. Consider them as "general" keys. For example, when you are in Minspeak, the time before you activate a key that begins a message and the time after you finish speaking the message are the times when you are most likely to decide to go to Spell mode, or to open a notebook or menu. Because of this, you will probably want most of the tools and menu keys to be active. 2. After 1st icon hit These keys should be more specific because now you are committed to speaking and won't need so many options on your keyboard. For example, once you have selected the first icon in a sequence, you won't want all the tools and menus to be active while you are looking for your second icon. You can now make all the tools inactive, except those that are necessary for you while you are in Minspeak, such as DELETE ICON or CLEAR DISPLAY. USER AREAS AND SELECTION TECHNIQUES Pathfinder Manual: Basics 97 Spell Mode You can make inactive all the tools in Spell mode that you seldom use, like DELETE ICON and any spelling characters that you know you aren't going to use. Spell One Word Make active any keys you use when you are in Spell One Word mode. 3. Computer Mode At this time, we cannot think of any reason why you would want to inactivate any computer mode keys. If you find a use for this option, let us know. To make a key inactive, select it once. It's LED dims to indicate that it is inactive. Select it again to make it active. Its LED will get bright. Press #1, Select All, to set all the keys to bright. Press #4, Select None, to set all the tools to dim. USER AREAS AND SELECTION TECHNIQUES Pathfinder Manual: Basics 98 Scan Start Position ÂThis option is available only with 2-Switch and Joystick scanning. Scan Start Position tells the Pathfinder where to start each scan. Center indicates that each new scan will start from the middle of your keyboard. Top Left indicates that each new scan will start from the top left corner of the keyboard. Scan Start Position is used only with 2-Switch or Joystick scanning because these are the only scanning techniques where you can move up, down, left, right or diagonally from the center of the keyboard. If you select Center with 2-Switch scanning, the scan will begin in the center of the keyboard. If you activate your "down" switch, the scan will continue down from the center. If you activate your "right" switch, the scan will continue to the right of the center. With a Joystick, the scan will continue in whichever direction you activate your switch. USER AREAS AND SELECTION TECHNIQUES Pathfinder Manual: Basics 99 About Linear Scan Cutoff ÂLinear Scan Cutoff can be used with all scanning techniques. This option allows a scan to change from row/column to key-to-key scanning. When you select Linear Scan Cutoff, you are telling the Pathfinder that you want it to perform your regular scanning technique until there are only a certain number of selections left. At that point, you want the Pathfinder to stop scanning rows and columns or quarters and to directly scan only the keys that are left. To Use This Option Effectively: 1. Set Icon Prediction to Low (this will not work if you are using an optical headpointer). 2. Turn Predictive Selection to On. 3. Use the Modify Predicted Keys option to eliminate all the keys that you don't want to have scanned at any time. 4. Activate Linear Scan Cutoff. 5. Enter the cutoff number you want to use. The cutoff number should be equal to or less than the number of predicted locations that are left on your overlay when you want to switch from regular scanning to key-to-key scanning. For example, if you select "5" as your cutoff number, the Pathfinder will use your regular scanning technique to scan the keys on your overlay until there are only five predicted choices left. At that point, it will stop the regular scan and begin to scan those five keys with no regard to columns, rows or quarters. USER AREAS AND SELECTION TECHNIQUES Pathfinder Manual: Basics 100 Using Word Prediction WORD PREDICTION Pathfinder Manual: Basics 101 Ä 8VH0LQVSHDN IRU\RXUFRUHYRFDEXODU\ DOO WKH ZRUGV WKDW \RX XVH IUHTXHQWO\ DQG FDQ DFFHVV HDVLO\ ZLWK LFRQ VHTXHQFHV Ä 8VH:RUG3UHGLFWLRQ IRUORQJHUZRUGVWKDW\RXGRQ WXVHRIWHQ EXWZDQWWRKDYHDYDLODEOH :RUGSUHGLFWLRQVDYHV\RXWKHWLPH DQGHQHUJ\RIVSHOOLQJWKHVHZRUGVRXW How to Blend Minspeak and Word Prediction WORD PREDICTION Pathfinder Manual: Basics 102 About Minspeak and Word Prediction Minspeak Benefits People who use PRC communication aids with Minspeak are known to be spontaneous, independent communicators. Using a single Minspeak overlay where icons are preset and basically unchanging, Minspeak users become automatic at recalling their stored vocabulary. When they are familiar with their vocabulary they no longer have to think about their communication device. Instead they can concentrate on actual communication—forming grammatical sentences, speaking to friends and colleagues, delivering speeches. A Minspeak user can learn to automatically recall and combine icon sequences to produce a very large vocabulary indeed. Word Prediction Benefits Word Prediction systems help improve a person's ability to communicate by cutting down on the amount of time spent in spelling out words. Dynamic Word Prediction Systems A Dynamic Word Prediction system predicts words based on how often (frequency) or how recently (recency) you have used the word. This means that the system is always changing and updating the words that it predicts. This makes it very difficult for you to automatically select words; you have to look at the screen to see where the word you want is slotted. With words that are less than six letters in length, using a dynamic system is often slower than actually spelling out the word. With words longer than six letters, significant time can be saved by finding the predicted word in the window. WORD PREDICTION Pathfinder Manual: Basics 103 "W e w en t to th e m u seu m to see th e Im p ressio n ist exh ib it." C o r e v o c a b u la r y s to r e d in M in s p e a k we we nt to th e m us e um to s e e S p e c ia l v o c a b u la ry to s e le c t fro m Wo rd P re d ic tio n I m p re s s io n is t e xh ib it   U s e M in s p e a k f o r c o re w o rd s . U s e W o rd P re d ic tio n (S p e ll) f o r w o rd s th a t a re n 't p a rt o f yo u r e ve ryd a y v o c a b u la ry . The Benefits of Minspeak and Word Prediction Together WORD PREDICTION Pathfinder Manual: Basics 104 The Benefits of Minspeak and Word Prediction Together Minspeak vocabulary represents your core vocabulary—verbs, adjectives, nouns, interjections, phrases, etc. These are words that make up most sentences and turn sentences into conversation. But lots of sentences also contain words that are not exactly "core" words. They are more like "fringe" vocabulary; words that help to make the sentences interesting or to clarify something. These fringe words often are not stored in your Minspeak vocabulary because they are words that you only use occasionally. To use them, you must spell them out which takes time, cuts down on your ability to communicate rapidly and is labor-intensive. This is where Word Prediction helps. Suppose you want to say, "We went to the museum to see the Impressionist exhibition." You can certainly recall "We went to the" and "to see the" using Minspeak. You might have "museum" stored in your device, too, in which case you can also recall it using Minspeak. But you probably don't have "Impressionist" or "exhibition" stored. With Word Prediction turned On, you can recall the parts of the message that are in your Minspeak vocabulary, then begin to spell "Imp" or "exh" and select the word you want from the list of words on the screen. Word Prediction allows you to more quickly select words that are not part of your core vocabulary so that you don’t have to take the time to spell them out. Your best bet for spontaneous, interactive communication is to become so familiar with your Minspeak vocabulary that recalling it is automatic. When situations arise where you need specialized vocabulary that you don't want to store in your system, use Word Prediction to select the words rather than taking the time to spell them. In many situations, a combination of Minspeak and Word Prediction will keep you talking! WORD PREDICTION Pathfinder Manual: Basics 105 Word Prediction Keys Turn Word Prediction On WORD PREDICTION Pathfinder Manual: Basics 106 Turn Word Prediction On or Off The default for Word Prediction is Off. To use it you must turn it On in the WORD PREDICTION menu. ÂIn order to see predicted words, you must be in SPELL mode. When Word Prediction is On, the Word Prediction keys are visible in the bottom two rows on the Pathfinder display screen. To Turn Word Prediction On or Off Remove the keyguard and overlay. Press the TOOLS key on the front of the Pathfinder case. 2. Open the WORD PREDICTION menu. 3. Activate the first option in the menu until it says On 4. Activate OK. 5. Make sure you are in SPELL and begin to spell a word from the Toolbox overlay. You can copy the tool, Word Prediction On/Off, to your communication overlay so that you do not have to go to the Toolbox to turn Word Prediction On or Off. See pages 175-182 for information about copying tools to your overlay. WORD PREDICTION Pathfinder Manual: Basics 107 Begin to spell a word. If the correct ending for the word you want is not listed, select the one that is most like the word you want. Now select the word that has the correct endings. You are ready to begin a new word. WORD PREDICTION Pathfinder Manual: Basics 108 Spell and Select Words Turn Word Prediction On in the Toolbox (WORD PREDICTION menu). Make sure you are in SPELL mode. Begin to spell a word. Notice that words begin to appear in the two rows of keys at the bottom of the Pathfinder display. These are the words that the Pathfinder is predicting from the letters you have spelled. To select a word, press the word on the display that you want. The word is placed in the text area of the display and either the predicted words disappear, or you will see a list of words that are derived from the word you selected. You can select one of these words, or you can continue to spell and watch more words become visible in the Word Prediction area. If you can't physically press on the display to select a word you can create predictor keys on the keyboard that correspond to the placement of the words in the Word Prediction area on the display. See p 113 for information on setting up predictor keys. The words that are being predicted are from the Word Prediction dictionary. You may see a lot of unfamiliar words. Most of the Word Prediction dictionary words will be words that you do not use as often as you use your Minspeak vocabulary. Word Prediction words are meant to enhance your Minspeak vocabulary, not replace it. ÂImportant Note: If you are a scanner and want to scan the Word Prediction words on the screen, turn the On-Screen Scanning option On in the SELECTION TECHNIQUE menu. WORD PREDICTION Pathfinder Manual: Basics 109 WORD PREDICTION Menu WORD PREDICTION Pathfinder Manual: Basics 110 Set Up Word Prediction in the WORD PREDICTION Menu Before you begin to use Word Prediction, you will want to set some options in the WORD PREDICTION menu so the Pathfinder knows what you want it to do. Remove the keyguard and overlay. Press the TOOLS key on the front of the Pathfinder case to open the Toolbox. Open the WORD PREDICTION menu. The next few pages explain the options in the WORD PREDICTION menu. WORD PREDICTION Pathfinder Manual: Basics 111 Predict in Minspeak When this is On and you retrieve a Minspeak word that is also in the Word Prediction Dictionary, the word prediction system will show you all the derivations of the Minspeak word. For example, if you retrieved the Minspeak word, "Cool" (which is stored under KITCHEN THUMBS DOWN ADJ, the Word Prediction system would display words like, "cooled, cooling, coolest," etc. ÂNote: You cannot use Activities if you turn Predict in Minspeak On. WORD PREDICTION Pathfinder Manual: Basics 112 Recency/Frequency The Word Prediction system will keep track of and predict all the words that apply that you have used most recently. It also keeps track of the words you use most frequently. You can decide how many most recently used or frequently used words you would like to have predicted. If you select to see 6 most recently used words, all the Word Prediction keys will display the most recently used words that begin with the letters you have spelled. If you want to see 3 recently used words, three of the Word Prediction keys will display recently used words and the rest of the keys will display the three most frequently used words that begin with the letters you have spelled. WORD PREDICTION Pathfinder Manual: Basics 113 F G H 1 2 3 4 5 6 1 = TE M P E R 2 = TE S T 3 = TE S TIM O NY 4 = TA B L E 5 = TA K E 6 = TA K E N = Predictor Key WORD PREDICTION Pathfinder Manual: Basics 114 About Predictor Keys You can select predicted words by pressing the word you want on the display screen, or, if you have trouble pressing on the screen, you can set up "predictor" keys on the Pathfinder that correspond to the Word Prediction keys on the display. This way you can press, or scan to, the appropriate key on the keyboard to select the word you want. Predictor keys are only active when you are spelling a word. If you are in Minspeak mode, the predictor keys will act as icons and you can select them as part of a sequence. In Spell mode, if no words are currently in the Word Prediction list, the regular spelling assignment for each key is active. Set your own Predictor Keys: 1. Turn the Toolbox On, open the WORD PREDICTION menu. 2. Activate Set Predictor Keys. The keys will say, Unassigned, or, if they are already set up, they will show the location where each is assigned. 3. Activate option #1. 4. Choose the key on your overlay that you want to use to pick the first word from the list of predicted words. 5. Choose option #2. 6. Choose the key on your overlay that you want to use to pick the second word from the list of predicted words. 7. Continue in this manner until you have assigned all the predictor keys. 8. When you have finished, activate OK. 9. Exit the menu. WORD PREDICTION Pathfinder Manual: Basics 115 Turn Predictor Keys Off and On When Word Prediction is On, the Predictor Keys are On. When there is a word being predicted, even if you are in Minspeak mode, you will not be able to use the predictor key associated with the predicted word for anything other than selecting the word. If you want quick access to the predictor keys' regular key assignments, you will want to be able to turn Word Prediction Off easily. We suggest that you store the tool, <WORD PREDICTION MENU>, #1 on your overlay. Either assign it to a key or store it in an icon sequence. This way you can turn the predictor keys Off when you need to and quickly turn them on again when you are back to typical spelling. See pages 175-182 to learn how to store tools on your overlay. Flash Predictor Keys If you turn this On, the LEDs for the keys that you are using to select words from the Word Prediction display area will flash when there is a word predicted that you can select. When this is Off, the LEDs for the predictor keys will light, but they will not flash when there is a word to be selected. WORD PREDICTION Pathfinder Manual: Basics 116 Word Prediction Dictionary The Word Prediction Dictionary allows you to add, delete, edit and review words in the Word Prediction system. This dictionary is separate from your Speech Dictionary. The Word Prediction Dictionary contains the words that you want to have available for Word Prediction. It does not contain your Minspeak vocabulary. If you want to review your speech dictionary, you must go to the SPEECH menu. The Word Prediction Dictionary can be accessed from all User Areas. WORD PREDICTION Pathfinder Manual: Basics 117 Add a Word to, or Delete a Word from, the Word Prediction Dictionary To Add a Word: Activate Add a Word and type in the root word of the word you want to add. (A root word has no endings to it, such as "es", "ing", etc.) For example, enter the word "abominate". The display asks you to enter a word with similar word endings. This means you should enter another word that is used the same way in sentences and with the same kind of endings as the word you want to add has. For this example, type in "terminate". The Pathfinder shows you a box containing the word you want to add with all its endings. If most of the endings are correct for the way you want to use the word, activate YES. The new word is entered into the Word Prediction Dictionary. If the endings aren't right for your word, activate NO, type in a new similar word and try again. To Delete a Word Activate Delete a Word. Type in the root word you want to delete. Activate OK. Answer YES if you want to delete the word. The root word and its derivations will be deleted. Answer NO if you change your mind. Nothing will be deleted. WORD PREDICTION Pathfinder Manual: Basics 118 Review Words in the Word Prediction Dictionary You can review all the words in the Word Prediction Dictionary or you can see only those words that begin with specific letters. You can also delete or change word derivations. Review Method You can review by the STEP or AUTO method. STEP means that you must activate your switch or touch a key or the display to move from one screen of words to the next. means that the Pathfinder will automatically change screens for you after a pre-set amount of "looking" time has passed. AUTO Review to Display If you select this option, the words in the dictionary are shown on the Pathfinder display screen. If you want to review words that begin with specific letters, type in the letters. The more letters you type in, the more specific the entries will be that the Pathfinder shows you. If you want to look at the whole dictionary, activate OK without typing anything. ÂHelpful Hint: Editing a Word and its Derivations: You can edit a word by selecting the word on the display or by choosing the corresponding number from your keyboard. Then you can choose to change the endings for the word or to delete the word and its endings from the dictionary. If you want to keep the word but not have any endings associated with it, activate Change Endings, then activate OK without typing in anything. Activate YES when asked. WORD PREDICTION Pathfinder Manual: Basics 119 Review to Display and Speaker This works the same way as Review to Display, except that the Pathfinder will also speak the entries on the screen. Review to Output This allows you to review the dictionary on a computer screen or print it out on a printer. You must be connected to a computer or printer and you must set the correct options in the OUTPUT menu for this option to work. ÂSee Appendix C for complete information. WORD PREDICTION Pathfinder Manual: Basics 120 About the Computer 'Backspace' Command You will only use this option if you are using a computer emulation program that has a command for "backspace" that is different from the Pathfinder's command. The Pathfinder command is: Åbackspace. If the "backspace" command for your computer is different from the one that the Pathfinder uses, you must activate this option and type in the keyboard emulation command that your program uses. Activate OK when you have finished entering the command. When Word Prediction is On and Serial Output is set to "Immediate" in the OUTPUT menu, any characters you type are sent to the Pathfinder display and to the computer monitor. When you select a word from the Word Prediction list, the characters that you spelled are deleted from the Pathfinder display and are replaced by the word you have selected. The characters you spelled must also be deleted from the computer monitor. The Pathfinder sends the "backspace" command for each character that is to be erased from your computer, so it is important that it knows the correct command. For example, suppose you spell the word, "berry". In the Word Prediction list you see the word "berries" and you select it. The Pathfinder deletes the "y" in "berry" and adds "ies". On your screen you now see "berries." ÂThe computer "backspace" command must be used to delete one character at a time. The Pathfinder "Delete Character" and "Delete Word" keys will not work correctly. WORD PREDICTION Pathfinder Manual: Basics 121 Predicted Word Display This option allows you to select a color for the Word Prediction keys and a color for the text on them that will help you to see them better. You can also choose the size of the text and whether the words are capitalized or not. ÂIf you choose "Large" text, the Pathfinder will use the large text for all words that fit easily on the key. If a word will not fit on the key in large text, the Pathfinder will make the text smaller and it may change from capital letters to lower case letters in order to make the word fit the key. Background Color: This changes the color of the Word Prediction keys. Step through the color options and select the color you want. Text Color Step through color options for the text. When you are finished, activate OK. WORD PREDICTION Pathfinder Manual: Basics 122 Storing Messages STORING MESSAGES Pathfinder Manual: Basics 123 Synthesized and Recorded Speech STORING MESSAGES Pathfinder Manual: Basics 124 Store Digitized (Recorded) or Synthesized (Text-to-Speech) Messages Summary: Recorded = messages someone has stored by speaking into the Pathfinder's microphone. Synthesized = messages that are typed into the Pathfinder which the Pathfinder then translates into its own speech. The Pathfinder allows you to store messages in two different kinds of speech-digitized or synthesized. Digitized speech is speech that someone else has recorded into the Pathfinder, just like recording something into a tape recorder. Synthesized speech is speech that the Pathfinder produces from words that are typed into it. Each time you store a message you can select which kind of speech you want to use. You will probably store most messages in synthesized speech. This is the best way to become familiar with Minspeak and to increase language abilities. But, it is fun to use recorded speech for things like clapping, laughter, singing and various animal or human sounds that don't sound natural when they are reproduced in synthesized speech. The Pathfinder has enough digitized memory to record approximately 15 minutes of digitized speech. ÂWhen you record messages, make sure the person doing the recording is a good representative of the person who uses the Pathfinder. If the Pathfinder user is an 8 year old girl, have an 8 year old girl do the recording. If the user is a middle-aged man, ask a middle-aged man to record the messages. We recommend that you do not use family members or close friends to do the recording. Remember, the Pathfinder is the voice of the person who uses it. You do not want to confuse it with someone else's voice. STORING MESSAGES Pathfinder Manual: Basics 125 Activity Row (The Activities in your Pathfinder will be different) STORING MESSAGES Pathfinder Manual: Basics 126 About Core Vocabulary and Activity Vocabulary Summary: Core Vocabulary is vocabulary that you use everyday. Activity vocabulary can be vocabulary that you use in special circumstances. The Unity overlays have two kinds of vocabularies stored in them, Core vocabulary and Activity vocabulary. Core vocabulary is made up of words that you use everyday. Besides frequently used nouns and verbs, it also contains words like, "it", "and", "about", "the": all the words that help make complete sentences. Core vocabulary is stored under icon sequences on your overlay. It usually takes one to three activations to retrieve a word or a message. The Activity Row can contain vocabulary that you use in special circumstances. For example, vocabulary that you use mostly at your job or in a class at school, or when ordering in a restaurant could be stored under different activities in the Activity Row. The Activity Row shows up on the bottom of your display screen when you have turned Activities On in the ACTIVITY menu. The Unity overlays use the Activity Row dynamically. Dynamic icons are not visible in an Activity row. When you make an activity dynamic you can activate a key on your overlay and then activate an Activity Row key, speak a word or message and return to your overlay to continue speaking. You might have nouns or picture producing words stored in your Activity Row for this kind of use. For example, activate the APPLE icon on your overlay. You will see icons on your display that you can choose from to produce a message. See pages 157-159 to learn about Dynamic Activities. STORING MESSAGES Pathfinder Manual: Basics 127 About the SPELL/MINSPEAK, GO TO SPELL, GO TO MINSPEAK and GO TO COMPUTER Tools Summary: MINSPEAK allows you to retrieve messages by activating icons. SPELL allows you to type messages into the Pathfinder. When you are selecting icons to store messages or to speak the messages you have stored, you are in MINSPEAK mode. When you are putting text on the display, either by typing or scanning, you are in SPELL mode. When you are connected to and using a computer you are in COMPUTER mode. The SPELL/MINSPEAK tool in the Toolbox and on your overlay allows you to toggle between Spell mode and Minspeak mode. To use a computer, you must store or assign the tool on your overlay. (On the full Unity vocabulary, GO TO COMPUTER is already stored under the icon sequence: TOOLS+COMPUTER+COMPUTER.) You can also store or assign the tools, GO TO SPELL and GO TO MINSPEAK. (See pages 173-182 to learn about using INSERT TOOL and storing or assigning tools on your overlay.) On the right front of the Pathfinder case there are LEDs next to the icons for SPELL, MINSPEAK and COMPUTER. When you are in one of these three modes, the icon next to the active mode will light. For example, if you are trying to spell, but every time you activate a key an icon appears on the display, check the front of the case. If the LED next to the Minspeak icon is lit, you will know that you are in Minspeak and not Spell mode. Activate the GO TO SPELL key until the light next to the ABC icon is lit. ÂWhen Auto Spell is On (in the FEEDBACK menu), the Pathfinder automatically switches you from Minspeak to Spelling. You don't have to activate the GO TO SPELL key. See page 198 for more information about Auto Spell. STORING MESSAGES Pathfinder Manual: Basics 128 Before You Begin to Store, PLAN What You Want to Say ÂIf you want to store Activity Row Vocabulary, see pages 151-163. You can store words, phrases and sentences in the Pathfinder's memory. You can store messages under an icon sequence of up to 8 icons, or you can store them under a single key on your overlay. Before you begin to store, plan out the messages and the icon sequences you want to use. Do you want to store Core vocabulary or Activity vocabulary? Planning helps you to store the message faster, and, if you are recording, keeps you from holding the RECORD option down while you think about what you want to say. The longer you hold the RECORD option down, the more memory space you waste. If you are using one of the Unity overlays, you might want to do a review of the overlay's vocabulary first to make sure that the message you are thinking of storing isn't already stored there. You can also use your Unity Vocabulary Sort to review the Unity vocabulary. (See page 165 for information about the REVIEW VOCABULARY menu.) When you record a message, direct your voice toward the microphone on the top right corner on the front of the Pathfinder. ÂScanners can record digitized messages by holding their switch down on the Record Message button. STORING MESSAGES Pathfinder Manual: Basics 129 Store a Recorded Message STORING MESSAGES Pathfinder Manual: Basics 130 Store a Recorded Message To Record and Store a Message 1. Decide what you want to say (or do) and the icon sequence you want to use. 2. Remove the keyguard and overlay. Open the Toolbox by pressing the TOOLS key on the front of the Pathfinder case. 3. Activate the STORE CORE key. 4. Activate the icon sequence you decided to use. Activate the OK key. 5. Activate the Type of Message key until you see Recorded. ÂIf you want to include written text that will be displayed while your message is spoken, activate Spell Text for Message and type in the text you want to have displayed. Activate OK when you have finished. 6. Press and hold the Record Message option. While you are holding the Record Message option, speak your message into the microphone at the top right corner of the Pathfinder case. Release the Record Message option as soon as you have finished recording. 7. Press Listen to Message to hear your recording. 8. If the message is fine, select OK. 9. If the message is too loud or too soft, press Record Message again. Activate the Microphone Volume button. If the message was too loud select a lower number. If the message was too soft, select a higher number. 10. Select Record Message and re-record your message. 11. Activate Listen to Message to see if you like the new recording. 12. If the recording is still too loud or too soft, repeat steps 9-11. 13. When the recording is the way you want it, activate OK. ÂOnce you have the Microphone Volume adjusted to your liking, you should not have to re-adjust it for recording any new messages. ÂIf you are scanning, select Record Message and hold your switch down until the message is recorded, then release the switch STORING MESSAGES Pathfinder Manual: Basics 131 Erase Recorded Messages Eventually you will want to erase some recorded messages. The Pathfinder's memory may become full or some messages may just become out of date. To Erase a Message: 1. Remove the keyguard and overlay and press the TOOLS button to turn the Toolbox On. 2. Activate the ERASE CORE key in the Toolbox. 3. Select the icon sequence you want to erase. 4. Answer YES if you want to erase. Answer NO if you change your mind. ÂYou cannot edit a recorded message. If you want to change a recorded message, erase it first and then re-record it. STORING MESSAGES Pathfinder Manual: Basics 132 Store a Synthesized Message To Store a Synthesized Message 1. Remove the keyguard and overlay. Press the TOOLS key to open the Toolbox. 2. Activate the STORE CORE key (M8). 3. Activate the icon sequence you want to use. 4. Activate OK. ÂRead the Instruction Area of the menu for directions. 5. Activate the Type of Message key until you see "Synthesized". 6. Activate the Spell Text for Message key. 7. Type in the message you want to store. ÂActivate any Speak tool to hear the message at any time. ÂUse the arrow keys and the Delete keys on the Toolbox overlay to edit your message. 8. When you have finished, activate the OK key. 9. If you see some more editing you want to do, activate the Spell Text for Message key again and then edit the message. Activate OK. 10. Activate OK again to exit the menu. ÂNote: When storing, SPEAK DISPLAY speaks only the entered text. All other SPEAK tools speak the entered text and the menu prompts. STORING MESSAGES Pathfinder Manual: Basics 133 Edit a Synthesized Message To Edit a Message 1. Remove the keyguard and overlay. Activate the TOOLS key on the front of the Pathfinder case to open the Toolbox. 2. Activate the STORE CORE key on the Toolbox overlay. 3. Activate the icon sequence of the message you want to edit. 4. Activate Spell Text for Message. Edit the message. ÂActivate any Speak tool to listen to the message. 5. When you have finished, activate OK. 6. Activate OK to exit the menu. STORING MESSAGES Pathfinder Manual: Basics 134 Erase a Synthesized Message To Erase a Message 1. Remove the keyguard and overlay. Press the TOOLS key on the front of the Pathfinder case to open the Toolbox. 2. Activate the ERASE CORE key on the Toolbox overlay. 3. Activate the icon sequence you want to erase. 4. Activate YES if you want to erase or NO if you change your mind. STORING MESSAGES Pathfinder Manual: Basics 135 Some Helpful Hints When you store individual words, always store them with a space after the word. Always add one or two spaces after any punctuation. To create a pause in a message, enclose an underscore ( _ ) in right and left square brackets, i.e., [_] (do not leave spaces) where you want the Pathfinder to pause before continuing. You can specify the length of the pause by adding a number in angle brackets. For example, [_<1000>] equals a 1 second pause; [_<2000>] equals a 2 second pause, etc. ÂSee Appendix F for more DECtalk speech hints. STORING MESSAGES Pathfinder Manual: Basics 136 Storing and Retrieving Messages Using the 64 and 32-Location Keyboards Storing and retrieving messages with a 64 or 32-location keyboard is exactly the same as with the 128 keyboard. However, you must make sure you have selected to use the 64 or 32 location keyboard in your user area. If you are using a 64-location keyboard, you can only retrieve messages stored under this keyboard. The same is true for the 32-location keyboard. If you are using a 128-location keyboard you cannot retrieve messages stored under a 64 or 32-location keyboard. The 64 and 32 location keyboards have blank overlays. This means that you must set up an overlay before you can store messages. See pages 173-182 to learn how to assign keys and tools to an overlay. STORING MESSAGES Pathfinder Manual: Basics 137 1 ICON THEME h= Colors hH = green h" = red h = yellow 2 ICON THEME ""= Fruits ""% = kiwi ""- = peach ""E = pear 1 and 2 Icon Themes STORING MESSAGES Pathfinder Manual: Basics 138 About Themes Summary: "Theme" tells the Pathfinder to automatically "hold down" the same first icon or first two icons for any sequences you enter into the theme. With Minspeak you can organize vocabulary by category, topic or situation. This helps you remember where messages are stored. You are also building strong language skills because you are learning to categorize, store and recall vocabulary. For example, the icon h could represent the category, "colors". h and Hmight represent the color "green." The graphic on the facing page shows you a "Colors" category. To add new words to this category, you would store them using the h icon for your first icon. This helps you remember that each message is an interjection word. The second icon you use can help you remember the specific word or phrase. The Pathfinder gives you Theme tools to choose from: PICK 1 (or PICK 2) ICON THEME or SET 1 (or SET 2) ICON THEME and EXIT THEME. If you store PICK 1 ICON THEME under a sequence, all you have to do is activate that sequence, then activate the theme icon you want the Pathfinder to hold down. Once you have selected the theme icon, you do not have to select it again as long as you remain in that theme. If you store SET 1 ICON THEME under a sequence, you select the theme icon you want to use during the storing process. Every time you activate the sequence you stored SET 1 ICON THEME under, the Pathfinder will automatically hold down the icon you selected for your theme. You do not have to select it. allows you to exit a theme for a single out-of-theme message or to exit your theme altogether. Activate EXIT THEME once for a single out-of-theme message. Activate EXIT THEME twice to completely exit your theme. EXIT THEME STORING MESSAGES Pathfinder Manual: Basics 139 When you Store Tools on your Overlay, use INSERT TOOL In order to use Themes you must assign the different "Theme" tools to keys on your overlay or store them under icon sequences on your overlay. The THEME tools, SET or PICK 1 ICON THEME, SET or PICK 2 ICON THEME and EXIT THEME can be found in the All Tools List. When you 'move' a tool from the Toolbox or the All Tools List to your overlay you are really copying the tool and storing it on your overlay. There are two places for tools in the Pathfinder: the Toolbox contains the most frequently used tools; the All Tools List contains the name of every tool available for use in the Pathfinder. Tools actually tell the Pathfinder to do something. If you go to the Toolbox and activate SPEAK DISPLAY, the Pathfinder will speak whatever is on the display. Before you move a tool from the Toolbox or the All Tools List to your overlay, you must tell the Pathfinder that you don't want it to do what the tool says right now, you just want to move the tool. To tell the Pathfinder that you want to move a tool to your overlay, you must activate INSERT TOOL and then activate the tool you want to move. You do this during the storing process. You can only use INSERT TOOL when you are assigning a tool to a key or storing it in an icon sequence. Once a tool is stored on your overlay it will perform its assignment just like it does in the Toolbox. STORING MESSAGES Pathfinder Manual: Basics 140 Assign PICK 1 ICON THEME to a Key or Store it under an Icon Sequence When you assign PICK 1 ICON THEME to a key or store it under an icon sequence, you are telling the Pathfinder to put you in a 1 Icon Theme and that you will pick the theme icon. Assign PICK 1 ICON THEME to a Key on your Overlay: 1. Remove keyguard and overlay. Turn Toolbox On. 2. Activate ASSIGN KEY MENU in the Toolbox. 3. Activate the key where you want to make the assignment. 4. Activate the Minspeak Assignment option. 5. Select TOOL in the Assign Key As option. 6. Activate Enter Assignment. 7. Activate the Insert Tool key on your storing screen. 8. Activate the first letter of the name of the tool you want, or activate More Items until you see PICK 1 ICON THEME, then activate it. 9. Activate OK until you exit the menu. Now when you activate this key in Minspeak Mode, the Pathfinder will ask you to pick an icon for your theme. You will then be in your 1 Icon theme. Store PICK 1 ICON THEME under an Icon Sequence 1. Remove the keyguard and overlay. Turn the Toolbox On. 2. Activate STORE in the Toolbox. 3. Select the icon sequence you want to store PICK 1 ICON THEME under. 4. Select Synthesized in the Type of Message option. 5. Activate Spell Text for Message. 6. Activate INSERT TOOL. 7. Activate the first letter of the name of the tool you want, or activate More Items until you see PICK 1 ICON THEME, then activate it. 8. Activate OK until you exit the menu. STORING MESSAGES Pathfinder Manual: Basics 141 Now when you activate this sequence, the Pathfinder will ask you to pick an icon for your theme. You will then be in a 1 Icon Theme. A 1 Icon Theme Example: Using the "Interjections" example from the previous page, you activate the key or icon sequence where you stored PICK 1 ICON THEME. Next you activate the "INTERJ" key. The Pathfinder will hold down this key. Now all you have to do is activate the individual interjection icons (PHONE, HAMMER, etc.). About PICK 2 ICON THEME Some vocabulary categories are represented by the same first two icons. For example, SENTENCE + EYE might be the icons for the vocabulary category, "Sentences About Me". When you have PICK 2 ICON THEME on your overlay you can activate it, then active SENTENCE and EYE for the Theme icons. The Pathfinder will hold these icons down while you select only the last icon in the sequence to produce a message. Use the same procedure as with PICK 1 ICON THEME for storing or assigning PICK 2 ICON THEME. Pathfinder Feedback when you are using a Theme: When you are in a Theme, the status bar on the bottom of the display will show the Theme icon name followed by a colon and a right angle bracket, e.g., INTERJ:> Whenever you see an icon name followed by a colon and a right angle bracket in the status bar you will know you are in a theme. When you select the next icon, its name will appear on the status bar in place of the right angle bracket. The colon will remain after the name of the Theme icon. For example, INTERJ: HAMMER. STORING MESSAGES Pathfinder Manual: Basics 142 SET 1 and SET 2 ICON THEME The SET 1 or SET 2 ICON THEME tools allow you to store the Theme icon(s) at the same time you store the Theme tool. This means that when you activate the key or sequence you stored the Theme tool under, the Pathfinder will automatically hold down the icon (s) you stored with the tool. You don't have to select icons from your overlay as you do with PICK 1 or 2 ICON THEME. For example, let's say you have a music synthesizer stored in your Pathfinder. It would be ideal if, every time you wanted to play with the synthesizer, you could just activate an icon sequence that would get you into your "Music synthesizer" theme. This sequence would tell the Pathfinder to hold the Theme icons down. Then you could activate single icons to compose a song. To be able to do this, you store or assign SET 1 (or 2) ICON THEME along with the Theme icons. You might choose the MUSIC and COMPUTER icons for your theme icons. To Assign SET 1 or 2 ICON THEME to a Key (2 Icon Theme Example) 1. Remove the keyguard and overlay. Turn the toolbox On. 2. Open the ASSIGN KEY menu. 3. Activate the key where you want to make the assignment. 4. Activate the Minspeak Assignment option. 5. Select TOOL in the Assign Key As option. 6. Activate Enter Assignment. 7. Activate Insert Tool. 8. Activate the first letter of the name of the tool you want, or activate More Items until you see SET 1(OR 2) ICON THEME, then activate it. STORING MESSAGES Pathfinder Manual: Basics 143 9. Activate the icons you want to for your Theme, e.g., MUSIC and COMPUTER 10. Activate OK until you exit the menu. Now when you activate this key in Minspeak mode, the Pathfinder will automatically hold down MUSIC COMPUTER for you. To Store SET 1 or 2 ICON THEME under an Icon Sequence (2 Icon Theme Example): 1. Remove the keyguard and overlay. Turn the Toolbox On. 2. Activate STORE. 3. Select the sequence you want to store the tool under (SET 1 (or SET 2) ICON THEME). In this example you could use. TOOLS+MUSICAL NOTE. 4. Select Synthesized in the Type of Message option. 5. Activate Spell Text for Message. 6. Activate Insert Tool. 7. Activate the first letter of the name of the tool you want, or activate More Items until you see PICK 1 ICON THEME, then activate it. 8. Activate the icon(s) you want to use for the theme (e.g., MUSIC COMPUTER). 9. Activate OK until you exit the menu. 10. Now when you activate TOOLS+MUSIC, the Pathfinder will automatically hold down the MUSIC+COMPUTER icons. STORING MESSAGES Pathfinder Manual: Basics 144 About EXIT THEME Summary: Activate EXIT THEME once to exit a theme temporarily. Activate it twice to permanently exit a theme. ÂIf you plan to use themes, you will have to assign the EXIT THEME tool (from the All Tools List) to a key or store it under an icon sequence on your overlay. See Notes: below. Activate EXIT THEME once to temporarily exit your current theme for a one-sequence activation. When the message is completed, the Pathfinder automatically returns you to your theme. If you want to leave a theme completely, activate EXIT THEME twice. If you assign EXIT THEME to a key: You can use it no matter what theme you are in. If you store EXIT THEME under an icon sequence: Store it using the same icons as your theme icons, that is, store it within your theme. For Temporary Exits from the Theme: If you know that, in general, you are going to leave your theme only to make a single sequence activation now and then, store EXIT THEME once under your theme. For example, Let's say your theme is MUSIC COMPUTER and you enter it by activating TOOLS+MUSICAL NOTE. 1. Activate TOOLS MUSICAL NOTE. 2. Check the status bar at the bottom of the screen. If it shows MUSIC COMPUTER you are in your theme. 3. Go to the Toolbox and activate STORE. STORING MESSAGES Pathfinder Manual: Basics 145 4. Activate the icon you want to use to represent EXIT THEME (perhaps the LEFT ARROW icon). 5. Activate OK. 6. Activate Spell Text for Message, activate Insert Tool. Activate More Items until you see EXIT THEME, or type the letter "e" and then activate More Items until you see EXIT THEME. Select it. 7. Activate OK until you exit the menu. Now when you are in your theme and you want to leave it to speak one outside message, just activate the Left Arrow icon on your overlay. To Permanently Exit a Theme: When you want to permanently exit your theme, you must have EXIT THEME stored twice in a single sequence. For example: 1. Activate TOOLS MUSICAL NOTE. 2. Check the status bar at the bottom of the screen. If it shows MUSIC COMPUTER you are in your theme. 3 Go to the Toolbox and activate STORE. 4 Activate the icon you want to use to represent permanently exiting the theme (perhaps the NO icon). 5. Activate OK. 6. Activate Spell Text for Message, activate Insert Tool. 7. Activate More Items until you see EXIT THEME, or type the letter "e" and then activate More Items until you see EXIT THEME. Select it. 8. Select Insert Tool and EXIT THEME again. 9. Activate OK until you exit the menu. STORING MESSAGES Pathfinder Manual: Basics 146 About Single Meaning Icons You may want words or phrases like, "Yes", "No", or "I need help!" stored under single icons. With these words or phrases, you can respond to a question while speaking on the phone, answer questions if you are unable to indicate the answer by gesturing or get help quickly in any situation. However, if messages like these are stored under single icons, and you are in a 1 or 2 ICON THEME, you can only access the non-theme messages by activating EXIT THEME and then activating the icon the message is stored under. If you make "Yes", "No", or "I need help!" a Single Meaning icon, you can access the message when you are in a theme by simply activating the icon. You don't have to exit your theme. For example, if you are playing your music synthesizer (under the 2 ICON THEME: MUSIC COMPUTER), you can answer a question just by selecting the YES or NO key on the overlay. You don't need to exit the theme. This can be very valuable in an emergency when a quick response is needed. A Single Meaning icon will not work if the icon you have chosen to be the Single Meaning icon is already stored under a sequence which could be used in a 1 or 2 icon theme. For example, let's say you stored a musical note for your synthesizer under MUSIC COMPUTER MEDICAL. Let's also say that under the single icon, MEDICAL, you stored, "I need help!" You make, "I need help!" a Single Meaning icon (in the ASSIGN KEY menu) because it's a good phrase to have available at any time. Now, imagine you are playing your synthesizer under the 2-icon theme: MUSIC COMPUTER. If you activate the MEDICAL icon, you will get the musical note instead of "I need help!" even though you made MEDICAL a Single Meaning icon. When you are in a theme and you activate a single icon, the Pathfinder will first look to see if that icon is used in your theme. STORING MESSAGES Pathfinder Manual: Basics 147 Activate ASSIGN KEY menu in the Toolbox. Select Minspeak Assignment Select ICON and Single Meaning Activate OK when finished. Store a message under the icon. Single Meaning Icons STORING MESSAGES Pathfinder Manual: Basics 148 Since MUSIC COMPUTER MEDICAL is a legitimate theme sequence, Pathfinder will select that sequence rather than "I need help!" A Single Meaning icon will work only if it is not connected in any other sequences to the theme you are using. If you want an icon to be a Single Meaning icon no matter what theme you are in, you should consider selecting an isolated key on your overlay, such as we have done with the YES and NO keys. To Create a Single Meaning Icon: 1. Remove the keyguard and overlay. Turn the Toolbox On. 2. Activate the ASSIGN KEY menu. 3. Select the Minspeak Assignment option. 4. Select ICON in the Assign Key As option. 5. Select Single Meaning in the Icon Type option. 6. Activate OK until you exit the menu. You can now store the message you want under that icon. Use the regular storing process. ÂNote: Text stored as "Single Meaning" in Minspeak Mode is also available in THEMES. For example, YES and NO in Unity are available in a Theme. STORING MESSAGES Pathfinder Manual: Basics 149 Create an Activity in the ACTIVITY Menu STORING MESSAGES Pathfinder Manual: Basics 150 About Creating an Activity Regardless of how an activity is going to be accessed (through the Activity row list or from an icon), the first step is to create the activity. To create an activity or to modify an already existing activity, open the ACTIVITY menu in the Toolbox. Use the Create New Activity option or the Modify Item within Activity option. Perhaps you would like to create a "Baking Cookies" activity. The vocabulary for this activity can consist of words that are not part of your core vocabulary. You might need words like, "bowl", "flour", "teaspoon", "stir", "bake", etc. Each key that you define for this activity can contain one of these words. When you open this activity, you can use your core vocabulary to say, "I want" and then you can activate the "flour" key in the "Baking Cookies" activity. Or you might use your core vocabulary to say, "I need" and then activate "teaspoon" from the "Baking Cookies" activity. By using these guidelines for creating activities, you can accomplish a number of goals. You will continue to use and learn your core vocabulary. You will not waste communication time by duplicating your core vocabulary in an activity. You will be able to easily access words that you don't use every day but which are necessary for specific activities. You will be able to participate in any communication that takes place during the activity. Pathfinder icons are listed in categories and are already included in the device. You can select icons for activities from these categories. The Pathfinder takes you to the icon category page when you are creating or modifying activities. You can also import other icons, photos, etc. into the device. See the MTI Manual for more information about importing graphics. STORING MESSAGES Pathfinder Manual: Basics 151 Activate Create Activity from Screen 1 Spell name for Activity Choose an icon: spell the first few letters of an icon name or use arrows to move through categories Add items to the activity beginning with the blank square When finished, you will see this in your Activity Row STORING MESSAGES Pathfinder Manual: Basics 152 Create a New Activity: An Example Baking Cookies 1. Go to the Toolbox and open the ACTIVITY menu. 2. Spell the name of your new activity. For example you might spell, "Cookies". Activate OK when you have finished spelling. 3. Choose an icon to represent the new activity from one of the Icon Categories. ÂYou can use the Spell Icon To Find key to spell the first few letters of an icon name. Activate OK. The Pathfinder will bring up all the icons that might have the name you are looking for. Use the arrow keys on your overlay to navigate the icons or categories. When the icon you want is highlighted, activate OK. You might want to open the AROUND THE HOME category and then open the KITCHEN sub-category. You could then select the Cookies icon, or you could just spell "coo" and select the COOKIE icon. ÂThis icon will not appear on the "Modify Item Within Activity" screen as you continue to create the items within the activity. It will appear in the Activity Row on your display when you have finished creating the activity and exited the menu. 4. Now you can create the items in your "Baking Cookies" activity. The first (blank) key in the activity is highlighted with a red box around it. This will be your first activity item. 5. Select the Choose Icon option and select an icon for the key. ÂIf the name of the icon you select represents what you want to say, you will not have to type in a message. The Pathfinder will speak the label on the icon. 6. Options: If you do not like the label for an icon, you can select the Change Label option. For example, you might want to use the "oven" icon, but you would like the Pathfinder to speak, "bake". You can change the label to "bake". If you want the Pathfinder to speak, "Bake at 350 degrees", you will also want to select the Spell Text for Message option, and type in the message. STORING MESSAGES Pathfinder Manual: Basics 153 More ACTIVITY Menu Options STORING MESSAGES Pathfinder Manual: Basics 154 If you want a blank label, select the Change Label option and activate a space instead of typing in a word for the label. If you want to record a message to go with the icon, activate More Items twice and select Recorded in the Type of Message box. Hold down Record Message and speak your message. If you also want to include text, activate More Items once and then activate the #1 option: Spell Text for Message. If you need an additional row in your activity, select More Items and then select the #1 option: Add New Row. When you add a row, the Pathfinder automatically creates a More Items key for that row. This allows you to move between the rows when communicating. While creating an activity with more than one row, use the Previous Row and Next Row options to move between rows. If you want to delete a row in your activity, make sure the row you want to delete is showing on the display. Activate the Delete Current Row option. If you want to rearrange the order of the keys in your activity, make sure the key you want to move is highlighted. Select More Items, then select the Change Position Move Left or Change Position Move Right option. ÂYou can use the arrow keys on your overlay to step through the activities, one-by-one. Activate the OK key on your overlay to select a highlighted activity. 7. When you have finished with all the options that you want to use for this key, activate OK. 8. Activate the next key in the activity that you want to define and repeat these steps. Delete an activity by selecting the activity and then activating the Delete Activity option. ÂYou can erase the contents of any key in the activity by selecting the Clear Key Contents option. Then you can just start over with the key. STORING MESSAGES Pathfinder Manual: Basics 155 The Dynamic Activities Sub-Menu STORING MESSAGES Pathfinder Manual: Basics 156 Dynamic Activities A Dynamic Activity is an already created activity that you choose an icon or an icon sequence to represent. Once you make an activity dynamic, you can be in any other activity, activate the icon you selected for your dynamic activity, speak a message from it and return automatically to the original activity. Let's make the "Cookies" Activity dynamic. You make an activity dynamic by selecting the Dynamic Activities option in the ACTIVITY menu and then by selecting an icon to represent the activity. To Make an Activity Dynamic: 1. Go to the Toolbox and open the ACTIVITY menu. 2. Activate the Dynamic Activities option. 3. Make sure that the Dynamic Activities option is set to On. 4. Make sure the Activity Persistence option is set to Temporary. This means that the activity will stay dynamic for one activation only, then take you back to where you were. If you want to remain in the new activity and not return to your original one, set this option to Permanent. ÂRegular activities cannot be set to Permanent or Temporary unless they are made Dynamic first. Only Dynamic Activities can be Permanent or Temporary. 5. Activate the Add Dynamic Activity option. 6. Select a sequence (a one-icon sequence is quickest) that will remind you of the activity. For example, for the "Cookies" activity you might select the KITCHEN icon which is the pan with a thermometer in it. Activate OK when you are finished. ÂYou will not mask any vocabulary when you select a sequence for an activity. STORING MESSAGES Pathfinder Manual: Basics 157 7. Now activate the activity you want to make dynamic (e.g., "Cookies"). You may have to activate More Items before you see the activity you want. 8. Activate OK. Activate OK to exit the menu. 9. Open any activity. Then activate the KITCHEN icon in your core vocabulary area. 10. The "Cookies" activity opens on your display. Activate an icon in the activity. 11. The word is spoken and you return to your original activity. ÂSince a Dynamic Activity is intended to be selected from an icon or an icon sequence, you may not want to see a Dynamic Activity listed in the Activity list. Use the Hide Activity option in the ACTIVITY menu to keep a Dynamic Activity from being visible in the Activity list. STORING MESSAGES Pathfinder Manual: Basics 158 Erase a Dynamic Activity; Review All Dynamic Activities To Erase a Dynamic Activity: 1. Go to the Toolbox and open the ACTIVITY menu. Select the Dynamic Activities option. 2. Activate the Delete Dynamic Activity option. 3. Activate the icon sequence for the Dynamic Activity you want to delete. 4. Select YES if you are ready to delete the activity. 5. Activate OK to exit the menu. Activate OK again to completely exit. To Review Your Dynamic Activities 1. Go to the toolbox and open the ACTIVITY menu. Select the Dynamic Activities menu. 2. Activate the Review Dynamic Activity option. Select Step or Auto as the method you want to use to review the 3. Activities. ÂIf you want to Review to Output, see Appendix C for information about connecting to a printer or computer. 4 The Pathfinder shows you the sequences and the names of all the Dynamic Activities. If you are using Step, activate More Items if you have more than one page of Dynamic Activities. 5. Activate OK when you are finished and exit the ACTIVITY menu. STORING MESSAGES Pathfinder Manual: Basics 159 Modify an Activity Once you have created an activity, you might like to change it in some way later. Use the Modify Item Within Activity option in the ACTIVITY menu to change an existing activity. To Modify an Activity: 1. Go to the Toolbox and open the ACTIVITY menu. 2. Select the activity you want to modify. If necessary, activate More Items in the ACTIVITY menu until you see Next Activities or Previous Activities. Select the option you want. 3. You can change the icon or label of the main activity key. You can change its position in the Activity Row. You can hide it (or show it if you have already hidden it). You can also delete the entire activity. 4. If you want to change one of the items within the activity, select the Modify Item within Activity option. You can spell a new message for the key; change its icon and/or its label; clear the key's contents and start over; add a new row of keys to the activity or delete a whole row; change the position of the key in the row. You can use Previous Row and Next Row to navigate through more than one row in the activity. STORING MESSAGES Pathfinder Manual: Basics 160 Linking Activities/Creating Sub-Categories Let's say you have created three separate activities: FRUIT names, MEAT names and DESSERT names. When you activate your FRUIT activity you see the names of fruits. You might like to link these similar activities as sub-categories under a dynamic activity called FOODS. You can choose the APPLE icon to represent the dynamic FOODS activity. This way, you can activate APPLE on your overlay and see the MEAT, FRUIT and DESSERT activities in your activity row. To Link Activities and Create Sub-Categories 1. Create each activity that you will eventually want to link into subcategories (e.g., MEATS, FRUITS, DESSERTS). Follow the steps for Creating an Activity on page 151-153. 2. Now, create a new activity and call it FOOD. 3. For the first location in the FOOD activity (this will be highlighted on your display), activate Spell Text for Message. 4. Activate INSERT TOOL. 5. Activate the letter, "S". Activate More Items until you see SET ACTIVITY. Activate SET ACTIVITY. 6. Choose the activity you want to set, for example, MEATS. 7. Activate OK 8. Use Change Icon and add an icon to this sub-category key. 9. Use Change Label and name the subcategory key (MEATS) 10. Highlight the next location in the activity row and repeat steps x-x for each of the sub-categories you want to add to your FOODS activity. 11. When you have, finished activate OK 12. Now, activate More Items until you see Hide/Show Activity. Set this to Hide. 13. Activate More Items until you see Dynamic Activities. 14. Activate Dynamic Activities. 15. Activate Add Dynamic Activity. 16. Select the icon on your overlay that you want to represent your FOOD activity, for example, select APPLE. STORING MESSAGES Pathfinder Manual: Basics 161 17. Activate OK. 18. On your display, select the FOOD activity from list of activities. 19. Make sure Dynamic Activities is set to On. 20. Activate OK twice. Close the Toolbox. Go to Minspeak mode. Select the APPLE icon on your overlay. You should see the MEATS, DESSERTS and FRUITS activities in your Activity Row. STORING MESSAGES Pathfinder Manual: Basics 162 Copy Activities from One User Area to Another Eventually you may create rows of different activities in a User Area. If you set up a new User Area, you might like to have all the activities in your other User Area available in the new one. Instead of creating the activities all over again for the new area, the Pathfinder allows you to copy activities from one area to another. ÂA Note about Duplicate Activities: If you are copying activities to an area that already has some activities in it, the Pathfinder will check for duplicate activities before copying. This means the Pathfinder will check to see if there are duplicate activity names. If you have an activity in one area that has the same name as an activity that you are copying, the Pathfinder will think they are the same activity whether they are or not. If you choose Copy All Activities, the Pathfinder will replace any duplicates that it finds with the activities you are copying. If you choose Copy Selected Activities, you can tell the Pathfinder to replace a duplicated activity or to keep the old activity and add the new one with same name. To Copy Activities: 1. In the Toolbox, open the USER AREA menu. 2. Activate More Items. 3. If you want to copy only certain activities from one area to another, choose Copy Selected Activities. If you want to copy all the activities in one area to another area, choose Copy All Activities. 4. Select the area you want to copy the activities to. 5.ÂTo Copy all Activities in one area to another area: Activate YES to copy or NO if you change your mind.. All the activities will be copied to the new area you selected. There will be no duplicates. STORING MESSAGES Pathfinder Manual: Basics 163 ÂTo Copy Selected Activities: If you are touching the display screen to select items: Activate an activity. It turns gray to signify that it has been selected. If you change your mind, activate the same activity again. It is no longer selected. If you are using the arrow keys on the keyboard: Activate an arrow key. The activity in the upper left corner is highlighted in a red box. To select this activity, activate the OK key on your overlay. The activity turns gray to signify that it has been selected. If you change your mind, activate the OK key again to deselect the activity. Activate the arrow key you want to highlight another activity. Activate OK on the overlay. Select all the activities you want to copy. If you have more than one row of activities, the activities you have selected to copy in one row will remain selected while you move on to another row. Activate the OK key on the display screen when you are ready for the Pathfinder to copy the activities you have selected. If there are duplicates, the Pathfinder will ask you if you want to copy the activity. Activate YES or NO. If you activate YES, there will be two activities with that name in your new area. 6. Switch to the new User Area to check that the activities transferred. STORING MESSAGES Pathfinder Manual: Basics 164 Review Vocabulary Summary: You can review vocabulary stored under a specific icon, or you can see all the messages in the Pathfinder. You can review the vocabulary in your Pathfinder. You can find out if there are messages you are no longer using and you can erase them. You can refresh your memory about what messages are already stored. If you want, you can print out the whole Pathfinder vocabulary. To Review the Pathfinder Vocabulary Remove the keyguard and overlay. Press the TOOLS button on the front of the Pathfinder case to open the Toolbox. Activate the REVIEW VOCABULARY menu. All Sequences or By First Icon You can review all the sequences in the Pathfinder, or you can select a beginning icon and review all the sequences that begin with that icon. Step or Auto Review the vocabulary by activating a switch or key every time you want to move to a new sequence (step), or let the Pathfinder do it for you (auto). Review to Display The vocabulary is shown on the Pathfinder's display screen. ÂYou can edit a sequence or delete a sequence by selecting on the display screen the sequence that you want, or by selecting the corresponding number on your keyboard. Then select to edit the message or to delete it. STORING MESSAGES Pathfinder Manual: Basics 165 REVIEW VOCABULARY STORING MESSAGES Pathfinder Manual: Basics 166 Menu Review to Display and Speaker You can see the vocabulary on the display and hear the Pathfinder speak it at the same time. Review to Output (See Appendix C for specific information) You can send the vocabulary to a printer or computer. You must be connected with the correct cable and the options in the OUTPUT menu must be set before the information will appear on a printer or computer. Data Logging On/Off (see Appendix B) for specific information) When this option is On, any text (whether from Minspeak or from another program) that the Pathfinder user brings up on the screen is logged by date, time and a copy of the actual text. The data in this log can then be analyzed by clinicians. This is called Language Activity Monitoring (LAM). To analyze language data, the Pathfinder must be connected to another computer with a serial cable. To upload the information, the computer must be running a terminal program. (If you do not have a terminal program such as "HyperTerminal" for Windows or "Comet" for Macintosh, you can find these programs on the Internet. All terminal programs work differently. After downloading, use your help screens to get started.) You must also set the appropriate settings in the Pathfinder's OUTPUT menu. When you are connected and ready, activate Send Data Log to Computer. (See below). Send Data Log to Computer: sends any data that has accumulated in the log to a computer for editing and analysis. Clear Data Log: tells the Pathfinder to delete all information in the data log. STORING MESSAGES Pathfinder Manual: Basics 167 168 Personalize Your Overlay PERSONALIZE YOUR OVERLAY Pathfinder Manual: Basics 169 M en u s to H elp Yo u P erso n a liz e Yo u r O verlay ASSIGN KEY M ENU AUDITORY PROM PT M ENU F EEDBACK M ENU M AINTENANCE M ENU Personalize your Overlay using Options from these Menus PERSONALIZE YOUR OVERLAY Pathfinder Manual: Basics 170 About Personalizing Your Overlay In order to communicate rapidly and effectively, you will want to personalize, or customize, the overlay that you use the most. Whether you are using one of the Unity overlays or creating your own overlay from a blank one, you will want the tools, icons, spelling characters and computer commands that are most helpful to you on it. There are many things you can do to personalize your overlay. If there are icons on your overlay that have no meaning for you, you can change them or rename them to something familiar. You can delete tools or spelling characters that you never use and add tools and spelling characters from the Toolbox that are more useful for you. You can swap key positions or disable keys so that they won't work. You can also assign keys, tools, spelling characters and instructions for their use to specific keys or under icon sequences. To personalize your overlay you can use INSERT TOOL and the All Tools List. You will also use the ASSIGN KEY menu to perform many of the options mentioned above. ÂIf you want to personalize an area that is already set up, simply select it from the USER AREA menu. ÂIf you want to set up a totally new area, select an unused area from the USER AREA menu. (If you do not have an unused area, you may have to erase an already used area.) Select one of the pre-defined overlays or select a blank overlay from the Overlay Menu option. Finally, Name the Area.(See pages 47-55 for more complete USER AREA menu information.) PERSONALIZE YOUR OVERLAY Pathfinder Manual: Basics 171 Activate ASSIGN KEY menu Then activate a key to view or modify Once you have selected a key to view or modify, you see this menu PERSONALIZE YOUR OVERLAY Pathfinder Manual: Basics 172 The ASSIGN KEY Menu You will use the ASSIGN KEY menu when you want to assign tools or icons to a key in Minspeak or Spell, when you want to assign spelling characters to a key in Minspeak or Spell or when you want to assign a computer command to a key. This menu also lets you swap keys, copy keys and hide keys. Most keys have a Minspeak assignment and a Spell assignment. The Minspeak assignment is usually an icon and the spell assignment is usually an alphabet letter or a number or punctuation character. Some keys also have a Computer assignment. PERSONALIZE YOUR OVERLAY Pathfinder Manual: Basics 173 Activate Enter Assignment Activate Insert Tool Spell the first letter of the tool you want. Pathfinder will take you to the page of tools that begins with the letter you typed; or you can just activate More Items until you see the tool you want. When you find it, activate the tool you want to insert. PERSONALIZE YOUR OVERLAY Pathfinder Manual: Basics 174 About Copying Tools from the Toolbox or All Tools List to Your Overlay If you use a certain tool frequently, you may want to store it on your communication overlay. When you store a tool under an icon sequence or assign it to a key on your overlay, it is always available to you. You don't have to open the Toolbox to get to it. You can store tools under icon sequences, you can assign tool to keys on your overlay, and you can even combine tools and instructions together and store them in sequences or assign them to keys. There are many tools available in the Pathfinder; so many, in fact, that they will not all fit in the Toolbox. The All Tools List is a list of all the tools that are available for use. You must activate INSERT TOOL before you activate the tool you want to assign or store. The INSERT TOOL key allows you to copy tools from the All Tools List and assign them to keys or store them in sequences. INSERT TOOL only works when you are in storing mode or when you are in the ASSIGN KEY menu. When you activate INSERT TOOL, you are telling the Pathfinder that the next key you activate is going to be a tool that you want the Pathfinder to copy for you. You must activate INSERT TOOL before each tool that you want to copy. PERSONALIZE YOUR OVERLAY Pathfinder Manual: Basics 175 Assign a Tool to a Key in Minspeak Mode To assign tools to keys you must use the ASSIGN KEY menu and INSERT TOOL. To Assign a Tool to a Key in Minspeak Mode: 1. Remove the keyguard and overlay. Press the TOOLS key on the front of the Pathfinder case to open the Toolbox. 2. Activate the ASSIGN KEY menu. 3. Select the key where you want to assign the tool. 4. You see the current key assignments, as well as some other options. Activate the Minspeak Assignment option. ÂIf you want the tool to be available in all modes activate More Items and turn option #2 On. Then return to the previous screen and select option #1,2 or 3.) 6. Activate the Assign key as option to read, Tool. 7. Activate Enter Assignment. 8. Activate the INSERT TOOL key on the Pathfinder. 9. From the list, select the tool you want to add to the key. Activate More Items to see more tools or begin to spell the name of the tool. 10. If you want to define more keys, select Choose Next Key to Define. 11. When finished, activate OK until you have exited the menu. 5. ÄNote: When You Assign a Tool to a Key in Minspeak: The tool will always be available for use if you leave the TOOL option visible in the Assign Key As box when you exit the menu. If you leave the ICON option visible, the icon is available, not the tool. If you do not want the icon to be available at all, select ICON in the Assign Key As option. Select Rename Icon. Activate DELETE WORD. Activate OK. Exit the menu. PERSONALIZE YOUR OVERLAY Pathfinder Manual: Basics 176 Assign a Minspeak Icon to a Key You can also assign an icon to a key. If you are using a pre-defined overlay, all the icons on it are named (e.g., SUN, VOLT, DICE). If you are using a blank overlay all keys are named by their location code (e.g., E5, A1, N3). To Assign a Minspeak Icon to a Key in Minspeak Mode: 1. Remove the keyguard and overlay. Press the TOOLS key on the front of the Pathfinder case to open the Toolbox. 2. Activate the ASSIGN KEY menu. 3. Select the key where you want to assign the icon. 4. You see the current key assignments, as well as some other options. Activate the Minspeak Assignment option. ÂIf you want the tool to be available in all modes activate More Items and turn option #1 On. Then return to the previous screen and select option #1,2 or 3.) 6. Activate the Assign key as option to read, Icon. 7. You see the icon name or key location on the screen. Select Normal as the Icon Type. (See p.145 for information about Single Meaning icons and Appendix G for information about Dependent icons.) 8. If you do not like the icon name, select Rename Icon and give the 5. icon a new name. ÂIf you are setting up an overlay for the first time, you will probably want to name all the icons instead of using the pre-assigned location names 9. If you want to define more keys, select Choose Next Key to Define. 10. When you are finished, activate OK until you have exited the menu. Using Rename Icon When you activate this option you are asked to spell a new name for the icon. You can spell in the name of the original icon or you can spell in the name of a different icon. For example, if the original icon name is SUN, you might want to rename it to HAPPY. ÂYour Unity manual tells you the original names of all the icons. There is an 8 character limit for icon names. PERSONALIZE YOUR OVERLAY Pathfinder Manual: Basics 177 Assign a Tool to Spell Mode To Assign a Tool to a Key in Spell Mode: 1. Remove the keyguard and overlay. Press the TOOLS key on the front of the Pathfinder case to open the Toolbox. 2. Activate the ASSIGN KEY menu. 3. Select the key where you want to assign the tool. 4. You see the current key assignments, as well as some other options. 5. Activate the Spell Assignment option. ÂIf you want the tool to be available in all modes activate More Items and turn option #1 On. Then return to the previous screen and select Spell Assignment, option #2. 6. Delete the current assignment if there is one. 7. Activate the INSERT TOOL key on the Pathfinder. 8. From the list, select the tool you want to add to the key. Activate More Items to see more tools. 9. If you want to define more keys, select Choose Next Key to Define. 10. When you have finished assigning keys, activate OK until you have exited the menu. ÄNotes: When you are choosing a tool from the all Tools List, you can type the first letter of the tool you want and the Pathfinder will display the first screen that contains tool names that begin with the letter you typed. This makes for quicker navigation. You can access the ASSIGN KEY menu without removing the keyguard by activating the STATUS key on the left front of the Pathfinder case. Use the display to navigate. PERSONALIZE YOUR OVERLAY Pathfinder Manual: Basics 178 Assign a Tool to Computer Mode To Assign a Tool to a Key in Computer Mode 1. Remove the keyguard and overlay. Press the TOOLS key on the front of the Pathfinder case to open the Toolbox. 2. Activate the ASSIGN KEY menu. 3. Select the key where you want to assign the tool. 4. You see the current key assignments, as well as some other options. Activate the Computer Assignment option. ÂIf you want the tool to be available in all modes activate More Items and turn option #2 On. Then return to the previous screen and select option #3.) 6. Delete the current assignment if there is one. 7. Activate the INSERT TOOL key on the Pathfinder. 8. From the list, select the tool you want to add to the key. Activate More Items to see more tools. 9. If you want to define more keys, select Choose Next Key to Define. 10. When you have finished assigning keys, activate OK until you have exited the menu. 5. PERSONALIZE YOUR OVERLAY Pathfinder Manual: Basics 179 Activate Enter Assignment Activate DELETE CHARACTER or CLEAR DISPLAY on the Pathfinder to erase the tool. PERSONALIZE YOUR OVERLAY Pathfinder Manual: Basics 180 Erase a Tool from a Key To Erase a Tool from a Key: 1. Turn the Toolbox On and activate ASSIGN KEY menu. 2. Activate the key whose tool you want to erase. 3. Activate TOOL in the Assign Key As option. 4. Activate Enter Assignment. 5. Activate DELETE WORD or CLEAR DISPLAY on the Pathfinder to erase the tool. 6. Activate OK, or activate INSERT TOOL and assign a new tool, then activate OK. 7. Exit the menu. Using Clear Key Contents You can also erase a key by using the Clear Key Contents option. When you activate this option, it erases everything from the key and the key is blank. You can then assign new tools or spelling characters to the key. Erase a Spelling Assignment from a Key 1. Turn the Toolbox On and activate the ASSIGN KEY menu. 2. Activate the key whose assignments you want to change. 3. Activate Spell Assignment. 4. Activate DELETE WORD to erase the assignment. 5. Activate OK, or type in a new assignment if you wish, then activate OK. 6. Exit the menu. PERSONALIZE YOUR OVERLAY Pathfinder Manual: Basics 181 Copying a Tool and Storing it Under an Icon Sequence Let's say you would like to copy the BEEP ON/OFF tool and store it under an icon sequence on your overlay. To Copy a Tool and Store it Under an Icon Sequence: 1. Remove the keyguard and overlay. Press the TOOLS button on the front of the Pathfinder case to turn the Toolbox On. 2. Activate STORE CORE in the Toolbox. 3. Select the icon sequence you want to store the tool under and activate OK. 4. Select Synthesized in the Type of Message option. 5. Select the Spell Text for Message option. 6. Activate the INSERT TOOL key in the Toolbox. 7. You see the first screen of the All Tools List. Activate More Items until you see BEEP ON/OFF. Select it. 8. Activate OK. 9. Finish storing and exit the menu. 10. Make sure you are in Minspeak. 11. Activate the sequence you stored the tool under. 12. Activate a key. If the beep was On before, it should now be silent. If it was Off before, it should now be On. To Erase the Sequence: 1. Turn the Toolbox On. 2. Activate ERASE CORE 3. Activate the icon sequence you stored the tool under. 4. Activate OK. 5. Activate YES to erase the sequence or NO if you change your mind. PERSONALIZE YOUR OVERLAY Pathfinder Manual: Basics 182 About Macros Summary: Assign instructions that combine tools and text to a key or an icon sequence. When you store tools and text together, you are making a macro. A macro is just a set of instructions that tell the Pathfinder to do something. Macros are often used as shortcuts for tasks that would normally require a lot of key activations. When you copy and store a tool on your overlay you are creating a basic macro. You can also create and store macros that tell the Pathfinder to do a lot more than to just activate a tool. You can create macros that change your speaking voice in the middle of a sentence and return it to normal. You can create macros that involve changes in menu settings so that you don't have to go to the Toolbox to change settings. You can assign macros to keys on your overlay or you can store them under icon sequences. PERSONALIZE YOUR OVERLAY Pathfinder Manual: Basics 183 Assign a Macro to a Key As an example, let's store the tool, BEEP ON/OFF, and add the words "Beep! Beep!" for the Pathfinder to speak. To Assign Tools and Text to a Key: 1. Turn the Toolbox On and activate the ASSIGN KEY menu. 2. Select the key on your overlay where you want to store the macro. 3. Select Minspeak Assignment. 4. Select TOOL in the Assign Key As option. 5. Select Enter Assignment. 6. Activate INSERT TOOL. 7. Activate More Items until you see BEEP ON/OFF. Activate it. 8. Type Beep! Beep! 9. Activate OK. 10. Activate OK. 11. Go to your Minspeak overlay. Make sure your speech is On. Activate the key where you stored your macro. The Pathfinder should speak, "Beep! Beep!" and turn the activation beep Off (if it was already on. If the beep was Off to begin with, this should turn it On.) PERSONALIZE YOUR OVERLAY Pathfinder Manual: Basics 184 Store a Macro Under an Icon Sequence We will use the BEEP ON/OFF example from the previous page. To Store a Macro Under an Icon Sequence: 1. Turn the Toolbox On and activate STORE CORE. 2. Select the icon sequence you want to use to store the macro. 3. Activate OK. 4. Activate Spell Text for Message. 5. Activate INSERT TOOL. 6. Activate More Items until you see BEEP ON/OFF. Activate it. 7. Type in Beep! Beep! 8. Activate OK. 9. Activate OK. 10. Go to your Minspeak overlay and activate the sequence you just stored the macro under. The Pathfinder should speak, "Beep! Beep!" and turn the feedback beeps Off. Activate the sequence again to turn them back On. You can erase macros that you assigned to a key or a sequence the same way you erase tools from keys or sequences. Some Common Macros To switch between already-set-up user areas: INSERT TOOL <USER AREA MENU>, select menu option #1, select the area you want to switch to, INSERT TOOL<OK>: To Store the Notebook Menu so you can select from a list of menus INSERT TOOL<NOTEBOOK MENU>, select menu option #3 (Select OK to exit the menu. You do not need to add OK to the macro.) If you create messages in sentences and with punctuation, you can use the following macro to place a period at the end of a sentence, speak the sentence (if Speech is turned On) and set SHIFT for the beginning letter of a new sentence. INSERT TOOL<DELETE CHARACTER> (space) INSERT TOOL<CTRL>INSERT TOOL<SPEAK SENTENCE>INSERT TOOL<SHIFT> PERSONALIZE YOUR OVERLAY Pathfinder Manual: Basics 185 Swap Key After using your Unity overlay for awhile, you may find that you would like to swap some keys so that they would be in a better position for you to use. You can do this in the ASSIGN KEY menu. To Swap Keys on your Overlay: 1. Turn on the Toolbox and activate the ASSIGN KEY menu. 2. Activate one of the keys you want to swap. 3. Activate the Swap Key option. 4. Activate the key you want to swap with. 5. Activate OK. 6. The keys are swapped. ÂIf you decide you don't want to swap the keys you have selected, activate Cancel and the keys will retain their original assignments. ÂWhen you swap keys everything assigned to that key, including messages, is moved with the key. PERSONALIZE YOUR OVERLAY Pathfinder Manual: Basics 186 Hide/Show Key If you are just learning about your Unity overlay, you may want to use only a few keys on it to begin with. You can hide all the keys that you don't need. When you hide a key, its LED goes out. If you activate the key, nothing will appear on the display. In order to use the key, you must select Show in the Hide/Show Key option. If you choose to hide a key it will no longer work when you activate its location. PERSONALIZE YOUR OVERLAY Pathfinder Manual: Basics 187 The AUDITORY PROMPT Menu PERSONALIZE YOUR OVERLAY Pathfinder Manual: Basics 188 Auditory Prompts and the AUDITORY PROMPT Menu Auditory prompts are prompts that you assign to individual keys, to a row or column of keys, or to a quadrant of keys. The Pathfinder will speak the prompts when Auditory Prompts is turned On. Spoken prompts help you to learn the location of different keys on the keyboard and what particular sequences contain. You can hear prompts through the speaker in the Pathfinder or you can plug an earphone into the earphone connector on the top of the case. You can have Key Prompts, Category Prompts and Mid-Sequence Prompts. Key Prompts might be icon names, an alphabet letter, a color, etc. Category Prompts, used for scanning only, should help to identify what kind of messages a specific row, column or quadrant contains, such as "school" or "family". Or, they might simply identify a specific row, column, etc ("Row 1, Column 1"). Mid-Sequence Prompts allow you to change the name of a key in the middle of a sequence so that it relates to that particular sequence only, then reverts back to another (or original) name when the key is used in other sequences. Prompt Type: Key or Content tells you what you will hear when you activate the last key in a sequence, either the key name or the stored message. ÂIt is a good idea to use a different voice for the auditory prompt voice. Change voices in the SPEECH menu. PERSONALIZE YOUR OVERLAY Pathfinder Manual: Basics 189 Prompt Type: Key or Content Prompt Type: Key or Content tells you what you will hear when you activate the last key in a sequence, either the key name or the stored message. If you set this option to Key, the Pathfinder will speak the pre-assigned location code or icon name of each key. You can change pre-assigned names in the AUDITORY PROMPT menu. If you set this option to Content, when you activate the last key in a sequence the Pathfinder will speak the contents of the message stored under that sequence. ÂOnce a prompt is spoken, activate the key again to tell the Pathfinder to select it. ÄHelpful Hint: In Unity, some pre-stored sequences contain macros. If you are using Content prompts and you activate one of these sequences, the Pathfinder will say, "Macro". To store your own prompt, use the instructions for Mid-Sequence Prompts on page 193. PERSONALIZE YOUR OVERLAY Pathfinder Manual: Basics 190 Key Prompts and Category Prompts ÂAll prompts must be stored using synthesized speech. Key prompts are prompts that you assign to individual keys. You can assign a prompt to Minspeak, Spell or Computer. You may not use this option much as Minspeak and Unity icons already have specific names that are used in pre-stored sequences. One area where a prompt might be helpful, though, is macros. If you activate a key where you have stored a macro (or a tool) the Pathfinder will say, "Macro". You might want to assign a prompt to that key that describes the macro, e.g., "Hide Clock" or "Beep On". To Assign a Key Prompt: 1. Remove the keyguard and overlay. Turn the toolbox On. 2. Activate the AUDITORY PROMPTS menu. 3. Activate the Key Prompt option. 4. On your overlay, activate the key you want to assign the prompt to. 5. Select whether you want the prompt to be spoken when you are in Minspeak, Spell or Computer modes. (You can assign the prompt to all three modes by assigning the same thing to each mode, individually.) Activate OK when you have selected the mode you want. 6. Enter the prompt and activate OK. Continue to complete prompts for each mode. When you have finished, exit the menu. 7. The next time you activate this key, if you are in the mode you selected and if Prompt Type is set to Key, the Pathfinder will speak the prompt you assigned to the key. Category Prompts are only used if you are scanning. These should be prompts that help you locate where you are on the keyboard, e.g., "Quadrant 1, Row 1 Column 1" or "Row 3 Column E". In some cases, you may have a number of similar messages stored in one row or column PERSONALIZE YOUR OVERLAY Pathfinder Manual: Basics 191 or quadrant. In that case you might want the prompt to say something like, "Row 1, school". You can assign category prompts to rows, columns and quadrants. To Assign a Category Prompt: 1. Remove the keyguard and overlay. Turn the Toolbox On. 2. Activate the AUDITORY PROMPTS menu. 3. Activate the Category Prompt option. 4. Select the option you want. 5. Select a key in the appropriate quadrant or row. 6. Select whether you want the prompt to be spoken when you are in Minspeak, Spell or Computer modes. (You can assign the prompt to all three modes by assigning the same thing to each mode, individually.) Activate OK when you have selected the mode you want. 7. Enter the prompt and activate OK. Continue to complete prompts for each mode. When you have finished, exit the menu. 8. The next time you scan the row, column or quadrant, the Pathfinder will speak the prompt you assigned. To Delete a Prompt: 1. Open the AUDITORY PROMPT menu. 2. Activate the kind of prompt you want to delete. 3. Activate the key where the prompt is stored. 4. Activate the option that has the prompt you want to delete. 5. Use the Delete Character key on your overlay to delete the prompt. 6. Activate OK until you exit the menu. PERSONALIZE YOUR OVERLAY Pathfinder Manual: Basics 192 Mid-Sequence Prompts The default name for the SCALES icon is "Scales". If you do not change the name and have Prompt Type set to Key, the Pathfinder will say "Scales" when you activate this key. However, SCALES is also used to signify different categories of words on your Unity overlay. For example, to name different kinds of meat ("Meats" category), you activate the APPLE icon (Food), then the SCALES icon (meat), then a different icon for each type of meat you want to name—if you activate the DOG icon, the Pathfinder will say, "Hot dog". In this case, even when the SCALES icon means "Meat", the auditory prompt will still be "Scales". The Pathfinder allows you to change the prompt of an icon in a sequence so that it signifies what the icon means in that particular sequence. When the icon is used in a different sequence, the Pathfinder will speak the icon's default name. This is called a Mid-Sequence Prompt. You can give any icon in a sequence a Sequence Prompt, except for the first icon. Generally, though, if you are using Unity, you will do this with the second icon in a three icon sequence. To Assign a Mid-Sequence Prompt: 1. Remove the keyguard and overlay. Turn the toolbox On. 2. Activate the AUDITORY PROMPTS menu. 3. Activate the Sequence Prompt option. 4. Activate the Add/Edit Dynamic Prompt option. 5. Select the key in the sequence where you want to assign the sequence prompt. Activate OK (for example, SCALES). 6. Activate the key(s) leading up to the sequence prompt key. Activate OK (for example, APPLE). 7. Type in the prompt (for example, MEATS) and activate OK. Exit the menu. You can also edit, delete and review any sequence prompts that you have assigned. PERSONALIZE YOUR OVERLAY Pathfinder Manual: Basics 193 Feedback Menu PERSONALIZE YOUR OVERLAY Pathfinder Manual: Basics 194 Some Options in the FEEDBACK Menu Speaker Volume: Change the speaker volume to a louder or softer level. The choices are from 0-20. 10 is the default volume. Earphone Volume: If you have an earphone plugged into the Pathfinder you can change its volume. The choices are from 1-20. The default is 10. Scan Beep: The options are On or Off. When this is off, you do not hear a beep as you scan. Brightness: Choose a number from 1-10 to change the brightness of the display screen. Contrast: Choose a number from 1-10 to change the contrast on your display. Activation Feedback: This option lets you choose the kind of feedback you want to hear/see when you activate keys. You can choose to see a light, hear a beep, have both a light and a beep, or not have any feedback at all Text Size: Select the size of text you want to see on the display, small, medium or large. ÂSee the WORD PREDICTION menu to change the font size of the Word Prediction List. Icon Prediction: This allows you to turn Icon Prediction On or Off. See page 29 for an explanation of Icon Prediction. Display Clock: You can choose to display the time, the date, both date and time or to turn the clock display off. (Set up the clock in the MAINTENANCE menu.) Display Battery Status: This will display battery information in the status bar at the bottom of the display. PERSONALIZE YOUR OVERLAY Pathfinder Manual: Basics 195 Scan LED Intensity: You can change the brightness or dimness of the LEDs you are scanning by choosing a number from 0-7. Show Status Bar: When this is On, you see a bar at the bottom of your display screen. If you selected to display your clock, it will show up here. Speak When Spelling: When this is On and Speech is On, you can select to have the Pathfinder speak the letters, the words or the letters and words you type when you are in Spell. If you select Words you must spell the word and add a space or punctuation mark or quotation mark before the Pathfinder will speak the word. Resize Text Area: When Word Prediction and the Activity Row are turned On, the display screen is a different size than when they are turned Off. Perhaps you don't use Word Prediction when you are spelling but you always use the Activity Row when you are in Minspeak. You will notice a difference in screen sizes when you move between Minspeak and Spell modes. This option allows you to tell the Pathfinder what to do with the screen size. If you select No, the screen size will remain constant whether Word Prediction and/or the Activity Row are turned On or Off. If you select Yes, the Pathfinder will resize the screen, always maintaining the largest text area possible. ÂIf you select Yes, you will have to be able to re-orient yourself to the new screen size. PERSONALIZE YOUR OVERLAY Pathfinder Manual: Basics 196 Spell One Word When this option is On, you can go from Spell mode to Minspeak automatically. If you are in Spell and you decide you want to go to your communication overlay, you can type a word, activate the SPACE key on your spelling overlay and the Pathfinder will automatically switch you to Minspeak. The default for Spell One Word is Off. PERSONALIZE YOUR OVERLAY Pathfinder Manual: Basics 197 Auto Spell Summary: Auto Spell ON allows you to transfer automatically from Minspeak to Spelling. The default is Off. When you turn Auto-Spell mode On, and activate an empty sequence, the Pathfinder automatically switches you from Minspeak to Spell mode. It also displays the spelling characters that the icons you activated represent. For example, Auto-Spell is On and you are in Minspeak. Let's say you have a message stored under a sequence that begins with HOUSE, but no message is stored under a sequence that begins with HOUSE APPLE. Let's also say that what you really want to do is spell the word, "Halloween". Activate the HOUSE icon. The display status bar shows HOUSE>. Now activate the APPLE icon. Normally, the Pathfinder would display, HOUSE APPLE [EMPTY]. However, since Auto-Spell is On, the Pathfinder switches you to Spell mode and displays "ha" on the screen. You can now spell "Halloween". When you are finished spelling, activate the GO TO MINSPEAK to return to Minspeak. ÂIf Spell-One-Word is also On, you can activate a space after typing your word and the Pathfinder will automatically switch you back to Minspeak mode. You do not have to activate the GO TO MINSPEAK. ÂAuto-Spell Tips Turn Icon Prediction On when you are using Auto Spell. When you activate an icon that is not lit, you know the Pathfinder will switch you to Spell mode. Auto-Spell will not work with Predictive Selection. You must use the GO TO SPELL key to go to Spell mode. ÂAuto-Spell is very effective when you choose icon sequences wisely. For example, don't store a message under EAR EXIT if you want to use auto-spell to spell words that begin with "ex". PERSONALIZE YOUR OVERLAY Pathfinder Manual: Basics 198 Icon Tutor Summary: The Icon Tutor helps you learn the sequences where you have stored specific words. To use the Icon tutor, you must turn it On in the FEEDBACK menu. The default is Off. Select the number 1, 2, or 3 to tell the Pathfinder how many times to flash the light that will indicate where a word is stored. Icon Tutor tells you where you have stored individual words. An Icon Tutor Example: Perhaps you want to say, "Please," and you can't remember if it is in your Unity vocabulary or not. First, make sure you are in Spell. (If you are in Minspeak, press GO TO SPELL until you are in Spell.) Spell "Please" on your keyboard. Activate a space key after you have spelled the word. If "please" is stored in your vocabulary, as soon as you activate the space key, the icon or icon sequence that "please" is stored under will be displayed on the screen and the lights for those icons will flash. When Icon tutor is On, you can find out if any word is in your vocabulary and where it is stored by simply spelling the word and activating a space. If the word is in your vocabulary, the Pathfinder beeps, displays the icon name or sequence on the display and flashes the lights for the icons where the word is stored. ÂIcon Tutor can only find individual words, not words in a message. ÂWhen you store individual words, add a space at the end of the word. PERSONALIZE YOUR OVERLAY Pathfinder Manual: Basics 199 System Colors This option allows you to change the colors that are visible on parts of your display screen. Changing System Colors: In the first option, select the system component you want to change the color for. Use the second option to select the background color you want for that component. The third option allows you to select the color you want the text to be. You can see the selections you make in the display box on the right side of the menu. When you have finished, select OK. Option 1: Change Color For Menu Title: This is the bar across the top of the display where the menu name and instructions are shown. Menu Parameter: Parameters are the different options that are listed in particular menu. Notebook Status: If you have a notebook open, the bar at the bottom of the display will tell you information about it. Workspace Status: When there is no notebook open, you see the Workspace Status bar at the bottom of the display. Message Box: These are square "notice" boxes that you will see periodically when the Pathfinder has information to give to you or needs a response form you. Option 2: Background Color Step through the color options and select the color you want. You can see an example of your selection in the display box on the right side of the menu (where Option #4 would usually be). PERSONALIZE YOUR OVERLAY Pathfinder Manual: Basics 200 Option 3: Text Color Step through color options for the text. The Pathfinder will not allow you to select the same color for both background and text. It will automatically change the text color to a default that is visible. You can see an example of your selection in the display box on the right side of the menu (where Option #4 would usually be). Option 4: Set Default Colors This returns all the options to their default, or original, colors. PERSONALIZE YOUR OVERLAY Pathfinder Manual: Basics 201 MAINTENANCE Menu Screens PERSONALIZE YOUR OVERLAY Pathfinder Manual: Basics 202 The MAINTENANCE Menu The MAINTENANCE menu contains options that you will not use frequently, but which are still important. Use this menu to lock the Pathfinder, set the Backlight to On or Off, erase the Pathfinder's vocabulary and set the system clock. (You can find out the status of the batteries, your software version and other system information by activating the SYSTEM key on the left front of the Pathfinder.) System Lock: When this is On, the use of the I/O and TOOLBOX keys on the front of the Pathfinder case are severely limited. For instance, if the system is locked and you activate the TOOLBOX key, you will see a message on the display that tells you the system is locked. You can press and hold the TOOLBOX key for 5 seconds to activate the Toolbox. This allows you to use some of the tools in the Toolbox, but not all of them. To unlock the system: open the MAINTENANCE Menu and change the System Lock option to Off. Backlight Shut-Off: Set this for 5 or 10 minutes, or Off. When the time you have selected passes and no key activations are made, the Pathfinder will automatically power down into "sleep" mode. This conserves your batteries. To wake up the Pathfinder, activate a key or switch. If you are Headpointing and cannot touch the display or activate a switch to turn the Pathfinder back on, select Off. This means the Pathfinder will never power down until you activate the I/O button on the front of the case. If the Pathfinder stays On all day, remember to charge your batteries regularly. Erase All Vocabulary: When you select this option, the system erases all its vocabulary and resets itself to the original defaults. ÂImportant Note: When you select the Erase All Vocabulary option, the Speech and Word Prediction dictionaries return to their default entries; any customization is lost. You will lose any icons you have imported and all IR commands will be erased. PERSONALIZE YOUR OVERLAY Pathfinder Manual: Basics 203 Set Time/Date: Use this option to set the current time and date for the system clock. Time/Date Format: Use this option to set the format for the clock readout. You can select either a 12 hour or 24 hour format and a Month/Day/Year or Day/Month/Year format. Delete Imported Icon: This allows you to delete any imported icons that you no longer want. Hardware Tests: If you have called the PRC Service Department because something isn't working right with the Pathfinder, a service technician may ask you to open this sub-menu. The technician will walk you through it. Enter Shipping Mode: if you need to ship the Pathfinder to a different destination, always put the device in shipping mode before mailing it. ÂActivate Shipping mode. Wait ten seconds. After 10 seconds, shipping mode will be in effect and no keys will work. Calibrate Touch Screen: Use this option if you are pressing keys on the keyboard but not seeing the correct response on the display. Use a stylus or pencil point and follow the directions that you see on the display. When you have calibrated the screen correctly, you will see a screen that tells you to tap the display and wait 30 seconds while the Pathfinder saves the calibrations. If you do not see this screen, repeat the initial calibration. Error Reporting: When this is On, the Pathfinder reports any system errors that occur. You will see a box on the display that asks you write down what happened and report it to PRC. You are given some options for continuing. When this is Off, the Pathfinder does not report any system errors. License Message: This option is for PRC's Technical Service Department's use only. PERSONALIZE YOUR OVERLAY Pathfinder Manual: Basics 204 Reset Menu Options to their Default Settings The RESET DEFAULT tool in the Toolbox allows you to reset defaults (original settings) in menus, option by option. is most helpful when writing macros. Tools that toggle between two or more settings are difficult to include in macros without using RESET DEFAULTS. RESET DEFAULTS For example, if you want to return any options you have changed in the SPEECH menu to their original settings, you would open the SPEECH menu, activate the RESET DEFAULT key in the Toolbox and then in the SPEECH menu activate the option you want to reset. Repeat these steps for each option you want to reset, in any menu. To Reset Defaults in Menus: 1. 2. 3. 4. Open the menu that contains the options you want to reset. Activate the RESET DEFAULT tool in the Toolbox. Activate the option you want to reset in the menu that is open. Repeat steps #2 and #3 for each option that you want to return to its original settings. Macro Examples: For Loud Speech: <FEEDBACK MENU><RESET DEFAULTS>111118 For Quiet Speech: <FEEDBACK MENU><RESET DEFAULTS>1<DOWN>11118 PERSONALIZE YOUR OVERLAY Pathfinder Manual: Basics 205 206 Appendices APPENDICES Pathfinder Manual: Basics 207 208 Appendix A: All Tools List Summary: When you activate INSERT TOOL during the storing procedure, the Pathfinder shows you the screens that contain all the tools that you can assign to a key or store under an icon sequence. The tools are listed alphabetically. Explanations of the tools follow the list. Activate Key Activity Menu Alt Assign Core Key Menu Auditory Prompt Menu Auditory Prompts Off Auditory Prompts On Auditory Prompts On/Off Backlight Intensity Down Backlight Intensity Up Beep Off Beep On Beep On/Off Block Marker Calculator Call Cancel Caps Lock Caps Off Caps On Choose Activity Clear Display Close Notebook Close Toolbox Copy Block Ctrl Cut Block Date Display Delete Character Delete Icon Delete Last Selection Delete Word Disable Headpointer Down Ear Volume Down Ear Volume Up Edit Core Edit Menu Edit Mode End Erase Core Exit Theme Feedback Menu GoTo Computer Mode GoTo Minspeak GoTo Spell Hide/Show Notebook Home IBM Marker Icon Insert Tool IR Setup Menu IR Command Left MAC Marker Maintenance Menu Minsert More Items Mouse Move Mouse Set Notebook Menu OK Open Notebook Open Toolbox Output Menu APPENDIX A: ALL TOOLS LIST Pathfinder Manual: Basics 209 Page Down Page Up Paste Block Pick 1 Icon Theme Pick 2 Icon Theme Plural Power Off Reset Default Review Vocabulary Menu Right Save Changes Save Notebook Search/Replace Selection Technique Menu Serial Marker Serial Off Serial On Serial On/Off Set 1 icon theme Set 2 icon theme Set Permanent Activity Set Temporary Activity Settings Menu Settings 1 Settings 2 Settings 3 Shift Sing Speak All Speak Date Speak Display Speak Last Selection Speak Next Sentence Speak Next Word Speak Notebook Speak Sentence Speak Time Speak Word Speaker Volume Down Speaker Volume Up Speech Marker Speech Menu Speech Off Speech On Speech On/Off Spell/Minspeak Store Core System Function Menu Text Marker Text/Speech Marker Themes Menu Transfer Memory Menu Up User Area Menu Voice Wait Any Key or Switch Word Prediction Menu CTRL Any Speak Function CTRL Block Mark CTRL Edit Mode CTRL Serial Marker CTRL Serial On CTRL Serial Off CTRL Speech Off CTRL Speech On APPENDIX A: ALL TOOLS LIST Pathfinder Manual: Basics 210 Explanations of the Tools in the All Tools List ACTIVATE KEY Use this tool to tell the Pathfinder that you want to activate a particular key as part of your macro. ACTIVITY MENU Allows you to assign this menu to a key or sequence on your overlay. ALT (not available at this time; for future use) When used in conjunction with another tool, and possibly with CONTROL, this tool modifies the next character or function. ALT SPACE During storing, insert this tool if you want the Pathfinder to speak the alternative pronunciation of the word. ASSIGN CORE KEY Allows you to assign a tool or tools and text to a core vocabulary key on your communication overlay. You can also swap keys, hide/show keys, assign tools and/or text to Spell, Computer or Minspeak modes with this tool. AUDITORY PROMPT MENU Assign the AUDITORY PROMPTS MENU to a key or icon sequence. AUDITORY PROMPTS OFF AUDITORY PROMPTS ON AUDITORY PROMPTS ON/OFF Turns auditory prompts Off or On or toggles between the two actions. BACKLIGHT INTENSITY DOWN BACKLIGHT INTENSITY UP Turns the display backlighting up or down. APPENDIX A: ALL TOOLS LIST Pathfinder Manual: Basics 211 BEEP OFF BEEP ON BEEP ON/OFF Turns the feedback beep on or off or toggles between the two actions. BLOCK MARKER Allows you to highlight a block of text. CALCULATOR Allows you to store the calculator to a key or sequence. CALL When activated, this tool emits a series of tones that will alert people that you need something immediately. CANCEL Allows you to cancel an action. You would most likely use this when you are navigating through menus. CAPS LOCK Allows you to type using all capital letters. Activate it again to return to lowercase letters. When CAPS LOCK is On, the LED lights next to the picture of the padlock on the upper right front part of the Pathfinder case. CAPS OFF Activate to switch to lower case letters. CAPS ON Activate to type with all capital letters. CHOOSE ACTIVITY Allows you to select an activity from the Activity Row. CLEAR DISPLAY Removes all text and prompts from the display and text buffer. CLOSE NOTEBOOK Allows you to close an open Notebook from your overlay. APPENDIX A: ALL TOOLS LIST Pathfinder Manual: Basics 212 CLOSE TOOLBOX Allows you to close the Toolbox with a macro. CONTROL (CTRL) Activating this key can change what the next key that you activate does. The behavior of some keys will be altered, or the next character typed will generate a "control character" which can be sent to a computer, for example. See the CTRL commands at the end of this list. COPY Allows you to copy text in one application and paste it into another application. For example, if you have created some text in the regular Workspace that you decide is something that you would like to save in a Notebook, you can highlight the text using BLOCK MARK and copy it to a Notebook. CUT Allows you to cut text from a document and paste it somewhere else. DELETE CHAR DELETE CHARACTER removes the character to the left of the cursor. DELETE ICON This tool deletes the last icon that you selected. You can select a new icon or re-select the deleted one if you want. DELETE LAST SELECT DELETE LAST SELECTION removes any text that you brought up on the display when you activated your last (previous) selection. If the previous selection was a tool, DELETE LAST SELECTION does nothing. DELETE WORD This tool removes the word or group of letters to the left of the cursor up to the next space or punctuation mark. If the character to the left of the cursor is a space, DELETE WORD removes the space. DISABLE HEADPOINTER Activate this tool to disable your headpointer. When the headpointer is APPENDIX A: ALL TOOLS LIST Pathfinder Manual: Basics 213 disabled you will see a box on the Pathfinder screen. When you are ready to re-enable the headpointer, click OK in the box. When the headpointer is disabled you will only be able to activate OK in the box. The headpointer will not activate any other keys. DOWN Moves the cursor down one line, one screen, to the end of the workspace, depending on the EDIT MODE setting. EAR VOLUME DOWN EAR VOLUME UP Turns the earphone volume up or down. EDIT CORE Allows you to edit core vocabulary sequences. EDIT MENU Allows you to cut, copy edit and replace text from your overlay. EDIT MODE Allows you to move through text by sentence, word, or character. END Moves the cursor to the end of the current line. ERASE CORE Erases sequences stored in your core vocabulary. EXIT THEME Allows you to exit a theme from your overlay. Activate once to exit for one sequence; activate twice to permanently exit theme. FEEDBACK MENU Allows you to change the feedback the Pathfinder gives you. GO TO COMPUTER MODE Allows you to go from the mode you are currently using to Computer mode. APPENDIX A: ALL TOOLS LIST Pathfinder Manual: Basics 214 GO TO MINSPEAK Use this tool to move from the mode you are currently using to Minspeak mode. GO TO SPELL This takes you from the mode you are currently using to Spell mode. HIDE/SHOW NOTEBOOK This allows you to hide the Notebook you are working in and to retrieve it later. HOME Moves the cursor to the beginning of the current line. IBM MARKER Use this tool in conjunction with the MAC MARKER tool. Perhaps you use an IBM at work and a Mac at home. Often a Mac and an IBM have a key that does the same thing but it is called something different on each computer (e.g. Mac <DELETE> command or IBM <BACKSPACE> command). When you store computer emulation commands, you can store INSERT TOOL, IBM MARKER, and the specific IBM key command; then add INSERT TOOL, MAC MARKER and the specific Mac key command. Store both these commands under the same icon sequence. When you activate this sequence, the Pathfinder will select the correct command for the computer you are using, (Select the computer you are going to use for computer access in the Computer Access Menu of the USER AREA MENU.) ICON Places a selected icon into the icon buffer. INSERT TOOL Allows you to store tools or text and tools under icon sequences or assign them to keys. Activate this tool before each tool that you want to store. Then activate the tool you want to store. IR SETUP MENU Allows you to store infrared commands for remote controls. APPENDIX A: ALL TOOLS LIST Pathfinder Manual: Basics 215 IR COMMAND Use this tool when you are storing remote control commands. LEFT Moves the cursor to the left one character, word or sentence, depending on the setting of EDIT MODE. MAC MARKER See IBM MARKER. MAINTENANCE MENU This menu allows you to load software, erase the Pathfinder, lock the system, set the time and date, set backlight shut-off , etc. MINSERT Allows you to put blanks in a message that you can fill when you speak the message. MORE ITEMS This allows you to access more items in a menu or activity. MOUSE MOVE This allows you to store mouse movements from a list of movements which are relative to your current mouse position, e.g., large movement, very large movement, small movement, etc. The mouse moves in increments. MOUSE SET This allows you to store mouse movements from a list of specific movements, e.g., upper left corner, bottom right corner, middle top, etc. The mouse moves to a specific location. NOTEBOOK MENU Allows you to place this menu on your overlay. OK This is used in creating macros that navigate the menus. This tells the Pathfinder to save what you have done and return to the previous page. The OK key also acts as a "repeat" key in Minspeak mode. After you APPENDIX A: ALL TOOLS LIST Pathfinder Manual: Basics 216 have retrieved an icon sequence, you can activate OK to repeat the sequence. OPEN NOTEBOOK Allows you to open a specific Notebook from your overlay. OPEN TOOLBOX Allows you to open the Toolbox from your overlay. OUTPUT MENU This menu allows you to set up the Pathfinder so that it will work with a computer or printer, remote control or memory transfer. PASTE Allows you to paste cut or copied text into a new place. PAGE DOWN Moves the text on the display down a page. PAGE UP Moves the text on the display up a page. PICK 1 ICON THEME Switches you to a 1 icon theme and allows you to select the theme icon. PICK 2 ICON THEME Switches you to a 2 icon theme and allows you to select the first two icons. PLURAL When activated, the word to the left of the cursor is made plural. POWER OFF When this tool is activated the Pathfinder 'goes to sleep.' Activate a key or switch to wake it back up. RESET DEFAULT This resets all the Pathfinder defaults. APPENDIX A: ALL TOOLS LIST Pathfinder Manual: Basics 217 REVIEW VOCABULARY MENU Allows you to review all the vocabulary in the Pathfinder. You can print it out or see it on the display. RIGHT Moves the cursor right one character, word or sentence depending on the setting of EDIT MODE. SAVE CHANGES Normally, when you turn the Pathfinder off, you see "Saving changes…" on the screen. This tool allows you to save changes without turning the Pathfinder off. You might want to store this tool if you are doing a lot of programming and want to periodically save your work. SAVE NOTEBOOK Allows you to save the current Notebook from your overlay. SEARCH AND REPLACE Allows you to search for a word and replace it. SELECTION TECHNIQUE MENU Choose a selection technique and the options for it that you want from this menu. SERIAL MARKER Any text that follows a SERIAL MARKER is sent out the serial port but not displayed or spoken. SERIAL OFF Turns the serial output Off. SERIAL ON Sets the serial output to its last active setting, either Immediate or Delayed. Text is automatically sent out the serial port when this is turned On. SERIAL ON/OFF Toggles between Serial On and Serial Off. APPENDIX A: ALL TOOLS LIST Pathfinder Manual: Basics 218 SET 1 ICON THEME Switches you to a 1 icon theme you stored previously. SET 2 ICON THEME Switches you to a 2 icon theme you stored previously. SET ACTIVITY Allows you to go to a specific activity. Use the arrow keys and OK key on your overlay to navigate through your activities if you don't want to use the display screen. SETTINGS MENU Allows you to save settings and change between settings without navigating each of the menus. Use this with SETTINGS 1, 2 and 3 below. SETTINGS 1 SETTINGS 2 SETTINGS 3 Allows you to store and then access 3 different groups of settings. SHIFT When this is set, the next character you activate will be an UPPERCASE letter. The second character you activate will be in lowercase. When you activate SHIFT, the "Shift" LED flashes on the upper right front of the Pathfinder case. SING This tool shows you a list of all the songs in your Pathfinder and allows you to pick a song. SPEAK ALL When this tool is activated, the Pathfinder speaks all of the text in the text area of the display and in the buffer. (When you type, letters and words will move off the screen in order to make room for new letters and words. Words that are no longer on the screen have moved to the workspace. You can use the arrow keys to bring them back onto the display screen.) Clearing the display (CLEAR DISPLAY tool) or turning the device Off clears the buffer. This tool works whether speech is On of Off. APPENDIX A: ALL TOOLS LIST Pathfinder Manual: Basics 219 SPEAK DATE When you store this tool and then activate it, the Pathfinder will speak the current date. SPEAK DISPLAY When this tool is activated, the Pathfinder speaks everything that is visible in the text display area. This tool works whether speech is On or Off. SPEAK LAST SELECTION When you activate this tool, the Pathfinder speaks the last stored message you activated or the last spelling characters you put on the display. This is helpful if you have to repeat yourself so that someone listening can understand you better, or to get someone's attention. This tool works whether speech is On or Off. SPEAK NEXT SENTENCE For use with Notebooks. If you want to speak a Notebook sentence by sentence, use this tool. Activate it each time you are ready to move to the next sentence. SPEAK NEXT WORD For use with Notebooks. If you want to speak a Notebook word by word, use this tool. Activate it each time you are ready to go on to the next word. SPEAK NOTEBOOK Tells the Pathfinder to speak the Notebook you stored with the tool. SPEAK SENTENCE When you activate this key, the Pathfinder speaks the message that contains the cursor. This is helpful if you want to hear how something you are working on sounds before you store it. It is also useful if you are going to give a speech or presentation. People seem to understand DECtalk Access32 speech better when they hear it one sentence at a time until they are used to listening to it. This tool works whether speech is On or Off. APPENDIX A: ALL TOOLS LIST Pathfinder Manual: Basics 220 SPEAK TIME When you store this tool and then activate it, the Pathfinder will speak the current time. SPEAK WORD When this tool is activated, the Pathfinder speaks the last word you typed on your spelling overlay, or the last word you brought up in Minspeak mode. If you are typing in Spell mode, you can turn speech OFF (so you don't have to listen to the Pathfinder speak each letter) and type the word. Then you can activate this key and the word you typed will be spoken. See also the FEEDBACK menu, Speak When Spelling. SPEAKER VOLUME DOWN SPEAKER VOLUME UP Turns the speaking volume up or down. SPEECH MARKER This marks the beginning of text in a sequence that is to be spoken but not displayed. SPEECH MENU This allows you to insert the SPEECH MENU in a macro. SPEECH OFF SPEECH ON SPEECH ON/OFF When this tool is On, all the sequences you select or letters you type are automatically spoken. When this tool is Off, nothing is spoken unless you activate one of the SPEAK tools. SPEECH ON/OFF toggles between the two actions. (If Speak When Spelling is On in the FEEDBACK menu, the Pathfinder will speak regardless of where this tool is set.) SPELL/MINSPEAK Toggles between Spell mode and Minspeak mode. START SCAN Add this to a macro to force the Pathfinder to start scanning each time, regardless of how long a switch is held down. APPENDIX A: ALL TOOLS LIST Pathfinder Manual: Basics 221 STORE CORE Allows you to store core vocabulary messages under icon sequences. SYSTEM FUNCTION MENU This single menu gives you access to all other menus. With this menu, you do not have to go to the Toolbox to access menus, nor do you have to store each individual menu in an icon sequence or on your overlay. TEXT MARKER This marks the beginning of text in a sequence that is to be displayed but not spoken. TEXT AND SPEECH MARKER This marks the end of the text in a sequence where a SPEECH MARKER and/or TEXT MARKER has been used. Any text after the TEXT AND SPEECH MARKER will be both displayed and spoken. THEMES MENU Allows you to have this menu on your overlay. TRANSFER MEMORY MENU This allows you to save the Pathfinder's memory to a computer disk, transfer memory from one Pathfinder to another and import graphics, and Save/Load Notebooks to and from a computer. (See the MTI Manual for more information.) UP Moves the cursor up one line, paragraph, to the end of the workspace, depending on how EDIT MODE is set. USER AREA MENU Allow you to select user areas and overlays. VOICE Allows you to use different voices in a message, without having to store the whole SPEECH menu in a macro. This gives you only the voice options from the menu. APPENDIX A: ALL TOOLS LIST Pathfinder Manual: Basics 222 WAIT ANY KEY OR SWITCH Causes a pause in a macro until a key is activated. WORD PREDICTION MENU This menu allows you to turn Word Prediction On and Off, add words to the word prediction dictionary, delete words, etc. CTRL EDIT MODE Clears the current edit mode. CTRL BLOCK MARK Clears the current block marker. CTRL SERIAL MARKER This tells the Pathfinder to send data out the serial port only if the Serial option is turned On. CTRL SERIAL ON Turns the serial output back on in whatever the last serial mode was, for the remainder of the macro in which it is found. CTRL SERIAL OFF Turns the serial output back off in whatever the last active serial mode was, for the remainder of the macro in which this is found. CTRL SPEAK ANY FUNCTION Performs any regular speech function (SPEAK ALL, SPEAK DISPLAY, etc.) only if speech is turned on. SPEAK NOTEBOOK, CRTL SPEECH ON Turns speech on for the remainder of the macro in which it is found. CTRL SPEECH OFF Turns the speech off for the remainder of the macro in which this is found. CTRL START-SCAN This only starts scanning if Scan Auto Restart is set to ON (in the SELECTION TECHNIQUE MENU) APPENDIX A: ALL TOOLS LIST Pathfinder Manual: Basics 223 Appendix B: About Data Logging and Language Activity Monitoring Using the LAM A significant milepost in the field of augmentative and alternative communication (AAC) is the development of the notion of language activity monitoring. LAM is the intentional monitoring of the language activity of people who rely on AAC systems. LAM has implications in three primary areas of AAC: clinical intervention, outcomes measurement, and research. (Romich and Hill, 1999) LAM is being implemented in high performance AAC systems. (For older AAC systems, an external LAM device, available from PRC, can be connected to the serial port.) The LAM records each language event (one or more letters or words) and adds a time stamp (24-hour format with a resolution of one second). This data provides a record of what was said and when it was said. Time information allows determination of the language representation method(s) being used and the communication rate being achieved. The LAM data can be uploaded periodically to a computer for editing and analysis. The use of a standardized reporting protocol provides for universal compatibility with the computer-based tools. (Hill and Romich, 1999) The practice of any discipline can be either an art or a science. Science requires data. LAM data is changing AAC from an art to a science. References Romich, B. and Hill, K., "A Language Activity Monitor for AAC and Writing Systems: Clinical Intervention, Outcomes Measurement, and Research", Proceedings of RESNA '99, pp. 19-21, 1999. Hill, K., and Romich, B., "A Proposed Standard for AAC and Writing System Data Logging for Clinical Intervention, Outcomes Measurement, and Research", Proceedings of RESNA '99, pp. 22-24, 1999. APPENDIX B: USING THE LAM Pathfinder Manual: Basics 224 Instructions for Using the LAM For the instruction on the following pages you will need: an IBM PC or clone running Windows 95 or 98 with the LAM Terminal program; a Pathfinder with LAM software installed, and a null modem cable to connect the communication device to the computer. ÂThe LAM Terminal Program is on a floppy disk in an envelope at the back of the LAM Procedural Manual. These LAM instructions will teach you to: • Setup the LAM terminal program on your Windows Desktop • Setup the Pathfinder for the upload • Perform a LAM upload so that you can do it easily at any time. ÄBefore You Begin: In order to accumulate language data to be analyzed, you must turn Data Logging On in the REVIEW VOCABULARY MENU prior to the time you want to analyze the data. The LAM software will begin to record all language activity data from the time it is turned On. You will upload this data to a computer running the LAM Terminal program at a later date. To check if there is any data to be transferred and analyzed, activate the STATUS key on the left front of the Pathfinder. Check the Data in Log line. If it says Data Logging = xx bytes, there is information you can upload. If it says Data Logging = OFF 0 bytes there is no information to be uploaded. You must turn Data Logging On (in the REVIEW VOCABULARY MENU) and wait to perform an upload until the Pathfinder has been used enough to accumulate language data. APPENDIX B: USING THE LAM Pathfinder Manual: Basics 225 Set Up Instructions On both the Computer and the Pathfinder 1. Connect your computer and the Pathfinder with a null modem serial cable. You can use the MTI cable that came with your Pathfinder. 2. Plug one end of the cable into COM 1 on your computer. 3. Plug the other end of the cable into the serial port on the Pathfinder. The serial port is on the top of the case and has a picture of a computer above it. If your computer has more than one port, and COM 1 is being used for something else, plug the cable into another port. On the Computer ÂThere is a floppy disk in an envelope at the back of the LAM Procedural Manual. 1. Remove the disk from the envelope and put it in the floppy drive on your computer. 2. On your computer, go to the drive where you put the floppy disk and open the disk. 3. Click on and drag the Lamterm.exe icon to your desktop. 4. Double click on the Lamterm.exe icon on your desktop. 5. You see the Lamterm screen. The Status box indicates the baud rate and the computer COM port that are currently selected. Initially these are set to the factory defaults, using COM port 1 and a 9600 baud rate. If you want to change COM ports or baud rates: Click on the Options menu. Click on Port Settings. APPENDIX B: USING THE LAM Pathfinder Manual: Basics 226 Click in the box labeled Use Defaults. This removes the check mark in the box. Click on the Port and/or the Baud rate you want to use. (Make sure the LAM box is connected to the port you have selected.) Click on OK. On the Pathfinder 1. 2. Open the Toolbox. Open the OUTPUT menu. Set Baud Rate to 9600. The OUTPUT menu baud rate and the Lamterm baud rate must be the same. Set Serial to On. Set Auto Line Feed to On. Activate OK to exit. To Confirm that Everything is Properly Set Up between your Computer and the Pathfinder: On the Pathfinder, open the REVIEW VOCABULARY MENU in the Toolbox. Activate Send Data Log to Computer. Look at the Number of Bytes Received line in the Lamterm Status box on your computer. You will see the data transferring in byte numbers. When the data has stopped transferring: You see a Save As screen on your computer. You see a suggested format for saving the data YYMMDD_n_ls_name APPENDIX B: USING THE LAM Pathfinder Manual: Basics 227 • YYMMDD = the year, month and date; • n = the number of the language sample for this person on this date • ls = the Language Sample context (2 characters) (for example, pd=picture description; in=interview; co=conversation; etc.) • name = the first four letters of the person's last name. In the Save In box at the top of the screen, select where you want to save the upload. ÂThe upload will be saved as a Text file (.txt). You will have to resave the file as a Microsoft Word file or a WordPad file. To Save the Upload file in MSW or WordPad: 1. Open Microsoft Word or WordPad. 2. Open the file you recently uploaded. 3. Save the upload again as a MSW or Word Pad file. Delete the original .txt file. APPENDIX B: USING THE LAM Pathfinder Manual: Basics 228 Using the LAM Upload Follow these instructions each time you want to perform an upload. 1. 2. 3. Connect the Pathfinder to a computer using a null modem cable (the '95 MTI cable will work). Double-click on the Lamterm.exe icon on your computer desktop. On the Pathfinder, open the REVIEW VOCABULARY MENU in the Toolbox. Activate Send Data Log to Computer. When the data has all been transferred, save it on your computer using the Lamterm Save As screen that appears on your computer screen 1. Name the file. 2. Select where you want the file to be saved. 3. Select Save. When the file is saved: 1. Open your word processing application (MSW or WordPad). 2. Open the upload file you just saved. 3. Save it as a file in MSW or WordPad. 4. Delete the original .txt file ÂOn the Pathfinder 1. Open the REVIEW VOCABULARY MENU in the Toolbox. 2. Activate Clear Data Log. 3. Activate OK to exit the menu. ÂIf you want to accumulate more date for a later upload, make sure Data Logging is On in the REVIEW VOCABULARY MENU. APPENDIX B: USING THE LAM Pathfinder Manual: Basics 229 About the LAM Data When you look at the raw LAM data that you saved in your computer file or folder, the first thing you will see is the Time Stamp. This is the first item in the first line. The time is presented in a 24-hour format. Then you see the SOURCE of the language event. The following SOURCE codes are currently valid: ACT (Activity Row); SEM (Semantic compaction = Minspeak); SPE (spelling); WPR (word prediction); DWP (Derivative from Word Prediction). This code is in capital letters. The character string that follows the Source code is the language event that occurred at that time. Any characters spaced more than 0.2 seconds apart are considered to be separate language events. Below is an example of how the raw LAM data looks: 20:37:00 SEM "I need " 20:37:05"*[VOLUME UP]*" 20:37:06"*[VOLUME UP]*" 20:37:07"*[VOLUME UP]*" 20:37:14 SEM "something " 20:37:16 SEM "to drink " 20:37:19 SPE "i" 20:37:20 SPE "m" 20:37:24 SPE "m" 20:37:28 WPR "ediately " From this example you can see that whole words and phrases were accessed, in this case using the semantic compaction language representation method. The "*[VOLUME UP]*" event indicates that the system user is capable of identifying the need to perform that function APPENDIX B: USING THE LAM Pathfinder Manual: Basics 230 and can implement it. The word "immediately" was selected using spelling and word prediction. The utterance contains six words. Including the volume adjustment, the time from the first event to the last event was 28 seconds. LAM data can be analyzed in several different ways. Using a word processor, you can paste the LAM data into a new document and save it in its raw form. Some word processors, such as Word for Windows, allow you to create a macro that can be used for some editing, such as removal of the Time Stamp. However, simply viewing the raw data can provide information about the vocabulary that is being selected and how the AAC system is being used. For example, if a particular word was introduced or practiced at a previous therapy session, a search for that word in the data can indicate how many times the word was used in later conversations. Other performance monitoring tools soon to be available from Prentke Romich Company include an editor, language analysis program(s) and implementation programs. See the Procedure Manual for the LAM for more information. APPENDIX B: USING THE LAM Pathfinder Manual: Basics 231 Appendix C: How to Use the Review to Output Option in Various Pathfinder Menus You can review the Pathfinder vocabulary, the Word Prediction Dictionary or the Speech Dictionary by looking at the review on a computer or printing it out on a printer. To Review to an IBM or clone Computer: 1. 2. 1. 2. 3. 4. 5. 6. 7. Connect your computer and the Pathfinder with a null modem serial cable. You can use the 95 MTI cable that came with your Pathfinder. Plug one end of the cable into COM 1 on your computer. If you computer has more than one COM port and COM 1 is being used for something else, plug the cable into another port. Plug the other end of the cable into the serial port with the computer icon on the top of the Pathfinder. Select the computer Start menu. Select Programs. Select Accessories. Select HyperTerminal. In the HyperTerminal window, select Hyperterm.exe. In the New Connection dialogue box: Type, "Review" as the name. Select an icon. Press OK. In the Phone Number dialogue box: At Connect Using, select COM 1. (If you connected your cable to a different COM port select the correct port.) Press OK. In the COM 1 Properties dialogue box: Either select the Defaults option, or set the following: Data Bits = 8 Parity = None APPENDIX C: USING THE REVIEW TO OUTPUT MENU OPTION Pathfinder Manual: Basics 232 Stop Bits = 1 At Bits per Second, select 9600 if this is not already set there. At Flow Control, select None. 8. The "Review" window should now be open. 11. Open the Transfer menu in the menu bar. Select Capture Text. Type in the drive and the file or folder where you want the text to go. Click on Start. On the Pathfinder 1. Open the Toolbox on the Pathfinder. 2. Open the OUTPUT menu. Set Output Method to RS232. Set Output to On. Set Auto Line Feed to On. Set Output Mode to Immediate. Set Baud Rate = 9600. (The HyperTerminal and Pathfinder baud rates must be the same.) Activate OK to exit. 3. From the menu you are using in the Pathfinder, activate Review to Output. When the review has been transferred to your computer you can Copy it into a word processing program, Save it in a file or folder and then use the computer Print function to print the review. On a Macintosh Computer 1. Connect your computer and the Pathfinder with the MTI Mac cable that came with your Pathfinder. Plug one end of the cable into either the Printer port or the Modem port of your computer, depending on what your Terminal program calls for. (Some Terminal programs allow you to connect to either port, some only allow you to connect to the modem port.) 2. Open the Terminal program on your computer. APPENDIX C: USING THE REVIEW TO OUTPUT MENU OPTION Pathfinder Manual: Basics 233 3. Select the port that you are connected to. 4. Set the baud rate to match the Pathfinder's baud rate. (The Pathfinder baud rate is in the OUTPUT menu.) On the Pathfinder 1. Open the OUTPUT menu. Set Output Method to RS232. Set Output to On. Set Baud Rate = 9600. (You can select a higher baud rate, but the terminal program and Pathfinder baud rates must be the same.) Set Auto Line Feed to On. Activate OK to exit. 3. From the menu you are using in the Pathfinder, activate Review to Output.. When the review has been transferred to your computer you can Copy it into a word processing program, Save it in a file or folder and then use the computer Print function to print the review. To Print Directly to a Serial Printer 1. Attach the printer cable to the serial port with the picture of a computer on the top of the Pathfinder. 2. Set the printer baud rate to match the baud rate in the Pathfinder's OUTPUT menu. 3. The printer should be set for 8 Data Bits, 2 Stop Bits and Parity should be set to None. 4. Open the OUTPUT menu in the Pathfinder Toolbox. Set Output Method to RS232. Set Output to On. Set Baud Rate = 9600. (You can select a higher baud rate, but the printer and Pathfinder baud rates must be the same.) Set Output Mode to Immediate. APPENDIX C: USING THE REVIEW TO OUTPUT MENU OPTION Pathfinder Manual: Basics 234 5. 6. Make sure the printer is on-line and ready to print. From the menu you are using in the Pathfinder, activate Review to Output. To Print to a Parallel Printer If you want to print to a parallel printer, you will need a parallel-to-serial adapter. You can usually get these adapters from the place you got your printer. 1. 2. 3. 4. 5. 6. Plug the printer cable into the adapter and plug the adapter into the serial port on the top of the Pathfinder. Set the baud rate on the printer to match the Pathfinder's baud rate. The printer should be set for 8 Data Bits, 2 Stop Bits and Parity should be set to None. In the Pathfinder OUTPUT Menu Set Output Method to RS232. Set Output to On. Set Baud Rate = 9600. (You can select a higher baud rate, but the printe and Pathfinder baud rates must be the same.) Set Output Mode to Immediate. Make sure the printer is on-line and ready to print. From the menu you are using in the Pathfinder that contains the Review to Output option, activate Printer. APPENDIX C: USING THE REVIEW TO OUTPUT MENU OPTION Pathfinder Manual: Basics 235 Appendix D: The Pre-Stored Songs in the Pathfinder The following songs are pre-stored in the Pathfinder for your use. Amazing Grace Joy to the World O Come Little Children Silent Night Away in a Manger My Country 'Tis of Thee Old MacDonald Mary Had A Little Lamb Humpty Dumpty Twinkle Twinkle Little Star London Bridge I'm a Little Teapot Hickory Dickory Dock Jack and Jill Jingle Bells For He's a Jolly good Fellow Michael, Row the Boat Ashore Ring Around the Mulberry Bush Polly Put the Kettle On Waltzing Matilda Alouette Auld Lang Syne My Bonnie Lies Over the Ocean The Farmer in the Dell APPENDIX D: PRE-STORED SONGS Pathfinder Manual: Basics 236 Appendix D: To Copy a Pre-Stored Song to Your Overlay The songs on the previous page are already stored in the Pathfinder. In order to sing them, you have to move them from the Toolbox to your Minspeak overlay or into an Activity. To Move a Song to Your Overlay: 1. Go to the Toolbox. 2. Activate STORE CORE. 3. Select the icon sequence you want to use. 4. Select "Spell text for message." 4. Activate INSERT TOOL. 5. Activate SING. 6. Select the song you want to copy. 7. Activate OK twice. The next few pages explain how to program songs that you want the Pathfinder to sing. APPENDIX D: PRE-STORED SONGS Pathfinder Manual: Basics 237 238 Appendix E: How to Program and Store Your Own Songs in the Pathfinder ÂRemember: You can always record songs rather than programming them Programming a song in DECtalk speech is different from programming regular text because you must tell the Pathfinder to sing the song, not speak it. To do this you must type each letter of text phonetically and add time and pitch values, which correspond, to musical notes. At the end of this appendix you will find a list of PITCH and TIME values, a chart of musical notes and a list of vowel and consonant phonemes to use. Programming songs is not difficult but it is time consuming, so plan accordingly. `Highly Recommended Write down the programming of your song before you begin to program it into the Pathfinder. This means writing down the words to the song in phonemes and adding the time and pitch values exactly the way you want to program them. This will save you a great deal of time when you are ready to enter the song into the device. Helpful Hint You will be doing quite a bit of cross-referencing with the lists at the end of this appendix. We encourage you to use the sheet music for any song you want to program. This way you can match the notes on the sheet music with the notes in the pitch and time tables. You don't have to be able to read music. APPENDIX E: STORING YOUR OWN SONGS Pathfinder Manual: Basics 239 When programming a song you must change the letters in your song to phonemes (the written form of sounds). Find the sound in the Vowel and Consonant Phoneme List for each letter in your song and write down the phoneme. Once you have entered the correct phoneme for a letter, you must tell the Pathfinder how long (time) to hold which note (pitch). The TIME and PITCH values are always enclosed in angle brackets < > immediately following the phoneme they represent. The TIME value always comes before the PITCH value inside the brackets. The two values are always separated by a comma, i.e., <300,24>. You always start to program a song by activating the left square bracket [. This tells the Pathfinder that you are programming a song. Program all songs in STORE mode for DECtalk speech. Break the Song into Phrases or Lines Most songs, unless they are very, very short (one line) must be broken down into separate phrases or single lines to be stored. After each phrase (or line) you must activate the right square bracket, ] and then the CTRL key and the "k" key on your keyboard. You will see the right bracket and two small characters beside it on your display. The right square bracket ] usually tells the Pathfinder that it has come to the end of the song. When it is combined with the CTRLk activation, it tells the Pathfinder to keep on singing the song until it comes to a right square bracket that is not followed by a CTRL k character. The ] without a CTRL k following it signifies the end of the song. APPENDIX E: STORING YOUR OWN SONGS Pathfinder Manual: Basics 240 ÂBefore you Begin to Store: Write down the song you want to store exactly the way you will enter it into the Pathfinder. 1. 2. 3. 4. 5. 6. 7. Start with the left square bracket [ . Use the phoneme lists to change each letter of the song into the correct phoneme. Use the TIME and PITCH tables to match the note values in your song. Write down the TIME and PITCH values after each phoneme. Enclose the TIME and PITCH values in angle brackets < > and separate the two values with a comma. Break the song into phrases or lines by adding a right square bracket ] at the end of the line or phrase. Use a reminder of some kind to tell you to activate the CTRL and "k" keys when you are actually programming. Start the next phrase or line with the left square bracket [ . Continue until you have completed the song. About TIME Values The TIME value refers to the amount of time in milliseconds that a note is to be held. 1,000 milliseconds = 1 second; 500 milliseconds = ½ second. You can use the above numbers as a reference point. You choose the amount of time you want a note to be held according to the tempo of the song. For example, a quarter note is held half as long as a half note, so you would adjust the time value for a phoneme accordingly. Use the Note Time Value Chart at the end of the appendix. After you have entered a phoneme, type the left angle bracket < and then enter the TIME value (how long you want that phoneme to be held). APPENDIX E: STORING YOUR OWN SONGS Pathfinder Manual: Basics 241 About PITCH Values PITCH values correspond to notes as you see them on sheetPXVLFRUhear them on a piano. The PITCH value of notes for the Pathfinder range from 1 to 37. 1 corresponds to C2 (or the second C below middle C on a piano). 25 corresponds to the note C4 (middle C on a piano). 37 corresponds to C5 (the first C above middle C on a piano). The two tables, PITCH NOTES AND VALUES and PITCH VALUE CODE, at the end of the appendix will help you to figure out PITCH values. Enter the PITCH value that corresponds to the note you want after you have entered the TIME value and a comma. Then type a right angle bracket > . Do not put a space before or after the comma. APPENDIX E: STORING YOUR OWN SONGS Pathfinder Manual: Basics 242 An Example of Programming a Song Mary Had a Little Lamb #1 Mar Change the words of the song into phonemes. Use the Vowel and Consonant Phoneme Tables to find the correct phonemes. y ha d a li t tle la mb MER IY HXAE D AX LIH T TUHL LEYAE M li t tle la mb li t tle la mb LIH T TUHL LEYAE M LIH T TUHL LEYAE M mar y ha d a li t tle la mb MER IY HXAE D AX LIH T TUHL LEYAE M I t s flee ce wa s whi te a s snow IH T S FLIY S WAX Z WAY T AE Z SNOW. If you are new to using phonemes, it will take a little practice to become familiar with the different sounds. Sometimes a beginning consonant will blend into a vowel, but other times it may have to stand alone. APPENDIX E: STORING YOUR OWN SONGS Pathfinder Manual: Basics 243 Most ending consonants will stand alone but will be held for a very short time. Use the phoneme tables at the end of the appendix. Practice by spelling words into the Pathfinder using the phonemes you think might work. Then listen to them. Soon you will develop an idea about which phonemes are going to correspond to which sounds. #2 Find the correct PITCH value in the PITCH Values charts. Below is the regular notation for Mary had a Little Lamb. B A G A A B B D 4 4 Ma - ry B A had a G A lit - tle la mb lit-tle lamb lit- tle B lamb A A B G 4 4 Ma - ry had a lit-tle lam b its fleece was white as snow &?How You Can Make the Song Sound Better: Most songs that have notes above "37" (see the PITCH Value Code Chart) are scored too high for any Pathfinder voice to sing well. These higher songs will sound much better if you give the notes their value in an octave lower. For example, the first note in Mary Had a Little Lamb is B above middle C. This B has a PITCH value of 36. To assign the correct value in an octave lower, go to the PITCH Value Chart and find APPENDIX E: STORING YOUR OWN SONGS Pathfinder Manual: Basics 244 the first B below middle C. Notice that its value is 24. Assign 24 to your B. Also, some songs sung in a male Pathfinder voice may sound better if you program them in an octave lower than they are written. Below, the PITCH values for Mary had a Little Lamb are shown an octave lower than written in the music. #3 Find the correct TIME value for each note and write it down. 1. Using the secondhand on a watch, time the amount of time it takes you to sing your song. 2. On the sheet music, look at the tempo of the song. In our example it is 4/4 time. 3. The top "4" means that there are four beats to a measure. There are four measures in our song. The vertical lines between groups of notes define a measure. 4. The bottom "4" means that each ¼ note gets one beat. 5. Suppose it takes 10 seconds to sing Mary had a Little Lamb. APPENDIX E: STORING YOUR OWN SONGS Pathfinder Manual: Basics 245 To find out how many seconds each measure gets, divide 4 into 10. In this case each measure gets 2.5 seconds. 6. To find out how many milliseconds each ¼ note (one beat) gets, divide 4 into 2.5. In this case each ¼ note gets 625 milliseconds per beat. (You can round these numbers up or down so that they are easier to work with; e.g., 600.) 7. An 1/8 note is held for one-half the time of a ¼ quarter note, or 312 milliseconds (624 divided by 2). A 1/16 note is held for one-half as long as an 1/8 note, or 156 milliseconds (312 divided by 2). 8. A ½ note is held twice as long as a ¼ note, or 1250 milliseconds (625 times 2). 9. A whole note (4/4) is held twice as long as a ½ note, or 2500 milliseconds (1250 times 2). This gives you a rough formula for figuring out the TIME values. 10. In our example, "Mary" (two 1/8 notes in the music) makes up one beat and a beat is one ¼ note. But "Mary" is broken down into three phonemes: m er iy (the "a" and "r" in Mary is one vowel sound). The "m" "ea" "r" and "iy" phonemes are equivalent to one 1/8 note. According to our calculations above, an 1/8 note gets 312 milliseconds. APPENDIX E: STORING YOUR OWN SONGS Pathfinder Manual: Basics 246 Shortcut for Finding a TIME Value If you are not concerned with achieving the exact tempo of a song, there is a quicker way to figure out the TIME values. Hum a song. Look at a watch or have someone count to calculate the rough timing of the song. Decide how many seconds you want a whole note to be held. Then divide the ½, ¼, and 1/8 notes accordingly. For example: If you give a whole note the time of 2 seconds (or 2000 milliseconds), then a ½ note gets the value of 1000 milliseconds; a ¼ note gets the value of 500 milliseconds; an 1/8 note gets the value of 250 milliseconds. By practicing giving whole notes different time values and listening to the results on the Pathfinder, you can approximate the tempo of a song fairly accurately. #4 Assign TIME and PITCH values to the phonemes. Now let's figure out how many milliseconds from among the 312 (or 625 for a ¼ note) to give to each phoneme. Vowels are always held for a longer amount of time than consonants. Consonants that stand alone at the beginning and end of words are usually held for short amounts of time. Now that we know this we can begin to put the phonemes, TIME value and PITCH value together. The "m" and "er" of "Mary" can probably be sung together—"MER". Together, these two phonemes make up an 1/8 note. We discovered that APPENDIX E: STORING YOUR OWN SONGS Pathfinder Manual: Basics 247 in this song an 1/8 note uses 312 milliseconds, so let's assign a TIME value of 300 to "MER". (300 is easier to work with than 312 and there is no noticeable difference between the length of 300 and 312.) When you compare the notes on your sheet music with thenotes on the PITCH Charts, you see that the first note (MER) has a PITCH value of 24. So "MER" will be sung with a TIME value of 300 and a PITCH value of 24. The "IY" phoneme is held for about the same amount of time as "MER" when you sing it so let's give it a TIME value of 300, too. When we look at the PITCH charts, we see that its PITCH value is 22. The first word of our song will look like this when you enter it into the Pathfinder: [MER<300,24>IY<300,22> The second word, "HAD" uses an 1/8 note and contains the phonemes "HXAE D". The "D" is an ending consonant and stands alone. We don't want it to sound too pronounced when the word is sung, so it should get a lesser TIME value than "HXAE". Now we have: [MER<300,24>IY<300,22>HXAE<220,20>D<80,20> APPENDIX E: STORING YOUR OWN SONGS Pathfinder Manual: Basics 248 Let's give "HXAE" a TIME value of 220. Its PITCH value is 20. And let's give "D" a TIME value of 80. Its PITCH value is 20. (220 plus 80 equals 300, or an 1/8 note.) "A" (phonemes "AX") is easy. It's a one-phoneme 1/8 note. It gets a TIME value of 300 and the assigned PITCH of 22. "LITTLE" must be broken up into "LIH T TUHL". Because we want to hear the "T" pronounced in "little" we should give it its own TIME value. "LIH" and "T" make up the first 1/8 note, so let's give LIH the TIME value of 250 along with its PITCH value of 24. Since an 1/8 note has 300 milliseconds and we have used 250 for "LIH", that leaves us with a TIME value of 50 for "T" (300 minus 250 equals 50). Its PITCH value is 24. "TUHL" uses an 1/8 note so it gets a TIME value of 300 and its PITCH value of 24. Now we have [MER<300,24>IY<300,22>HXAE<220,20>D<80,20>AX<300,22> LIH<250,24>T<50,24>TUHL<300,24>" LAMB" ("LEYAE M") uses a ¼ note or about 600 milliseconds. It has an ending consonant, "M" (the "b" is silent) which must stand alone so we can hear it. Let's give "LEYAE" a TIME value of 500. Its PITCH is 24. ("LEYAE" sounds better when sung than "LAE".) "M" then gets a TIME value of 100. Its PITCH value is 24. When "LAMB" is repeated in the second line of the song, it uses an 1/8 note (300 milliseconds) so give "LEYAE" the TIME value of 200 and "M" the TIME value of 100. The pitch is 24. Now we have [MER<300,24>IY<300,22>HXAE<220,20>D<80,20>AX< 300,22>LIH<250,24>T<50,24>TUHL<300,24>LEYAE< 500,24>M<100,24> APPENDIX E: STORING YOUR OWN SONGS Pathfinder Manual: Basics 249 MARY HAD A LITTLE LAMB The song is written down exactly as it is to be entered into the Pathfinder [MER<300,24>IY<300,22>HXAE<220,20>D<80,20>AX<300,22> LIH<250,24>T<50,24>TUHL<300,24>LEYAE<500,24>M<100,24> [LIH<250,22>T<50,22>TUHL<300,22>LEYAE<500,22>M<100,22> [LIH<250,24>T<50,24>TUHL<300,27>LEYAE<500,27>M<100,27> [MER<300,24>IY<300,22>HXAE<220,20>D<80,20>AX<300,22> LIH<250,24>T<50,24>TUHL<300,24>LEYAE<500,24>M<100,24 IH<170,24>T<50,24>S<80,24>FLIY<200,22>S<100,22>WAX<200,2>Z<100,22> WAY<220,24>T<80,24>AE<200,22>Z<100,22>SNOW<600,20>] Helpful Hint: The Pathfinder will power down if no activations are made after a preset number of minutes pass. Press any key or switch to continue. We also highly recommend that you have the song written down on a piece of paper exactly as you are going to program it before you begin to enter it. This will save you a lot of time. ÂNote: Use of the ] and CTRLk in very long songs: If you are programming a really long song, you may need to use the ] and CTRLk to tell the Pathfinder to continue singing. For most songs, this will not be needed. Select the ] key on your keyboard and then select the CTRL key and the "k" key. (You will see a symbol for CTRLk ( ) on your display, not the letters.) When you end a phrase or line of a song with a ] (right square bracket) and the CTRLk characters, you must start the next phrase or line with a [ (left square bracket). APPENDIX E: STORING YOUR OWN SONGS Pathfinder Manual: Basics 250 If you do not do this, the Pathfinder will not know it is supposed to continue singing the song. At the end of the entire song you must enter a ] (right square bracket). Storing the Programmed Song If you do not have all the extra song programming characters on your Minspeak overlay (including TEXT and SPEECH MARKERS if you plan to use them), store the song from the Toolbox. Storing Using TEXT and SPEECH MARKERS When you store a song under an icon sequence, each time you activate the sequence to sing the song, the display will show the song just as you programmed it. Using TEXT and SPEECH MARKERS tells the Pathfinder to display only the title of the song. See below. 1. Activate STORE. 2. Select the icon sequence you want to use. 3. Activate INSERT TOOL. 4. Activate TEXT MARKER. 5. Type the title of the song. 6. Activate INSERT TOOL. 7. Activate SPEECH MARKER. 8. Activate the left square bracket [. 9. Type in the song exactly as you wrote it out for programming. You can listen to your song at any time by activating SPEAK ALL. You can use the arrow keys and DELETE keys to edit the song and correct any mistakes. 1. Activate INSERT TOOL. 12. Activate TEXT AND SPEECH MARKER. 13 Select OK. 14. Select OK again. If you do not want to use TEXT and SPEECH MARKERS, skip steps #3-7 and #10-11. APPENDIX E: STORING YOUR OWN SONGS Pathfinder Manual: Basics 251 The following pages contain some musical charts which you may find helpful when programming songs into the Pathfinder. 252 English Vowel Phonemes Phoneme Symbol Example Phoneme Symbol Example Vowels aa ae ah ao aw ax ay eh ey Bo b ba t bu t bou ght bou t a bout bi te be t ba ke ih ix iy ow oy rr uh uw yu bi t kiss es bea t boa t boy bir d bo ok lu te cu te R-Colored Diphthongs ar er ir or ur b ar b ear b eer b or e p oor Allophones dx lx q rx tx rid er wi ll we e at or ation Lat in Silence _ (underscore) Chart copied with permission from Digital Equipment Corporation APPENDIX E: STORING SONGS Pathfinder Manual: Basics 253 English Consonant Phonemes Phoneme Symbol Example Consonants b ch d dh el en f g hx jh k l m n nx p r s sh t th v w yx z zh b et ch in d ebt th is bottle button f in g uess h ead g in K en l et m et n et sing p et r ed s it sh in t est th in v est w est y et z oo az ure Chart copied with permission from Digital Equipment Corporation APPENDIX E: STORING SONGS Pathfinder Manual: Basics 254 Pitch Notes and Pitch Values PITCH NOTES AND PITCH VALUES BASS CLEF C 1 D 2 G 8 # # # C# G# 9 D# 3 A 10 E 4 A# 11 5 B 12 F F# 6 7 C3 13 C# 14 # D 15 D# 16 E 17 F 18 G 20 F# 19 G# 21 TREBLE CLEF # G G# A 20 21 22 # # A 32 2 # B 24 C4 25 APPENDIX E: STORING SONGS Pathfinder Manual: Basics 255 C# 26 D 27 PITCH NOTES AND VALUES (cont'd) G 20 # # # G# 21 A 22 A# 32 B 24 #F D# 28 E 29 F B C5 C# 36 C# 26 30 G 31 32 D 27 # # # # C4 25 G# A A# 33 34 35 D# E F F# 37 554.5 587.6 62 2.4 659.6 697.8 740.2 # D # # G G# A A# B C6 C# 284.4 831.0 880.0 932.4 988.0 104.6 1109.0 APPENDIX E: STORING SONGS Pathfinder Manual: Basics 256 PITCH Value Code PITCH NOTE PITCH VALUE OCTAVE RANGE C4 B A# A G# G F# F E D# D C# C3 25 24 23 22 21 20 19 18 17 16 15 14 13 C4 = Middle C B A# A G# G F# F E D# D C# C2 12 11 10 9 8 7 6 5 4 3 2 1 APPENDIX E: STORING SONGS Pathfinder Manual: Basics 257 ONE OCTAVE BELOW MIDDLE C TWO OCTAVES BELOW MIDDLE C PITCH Value Code (cont'd) PITCH NOTE PITCH VALUE C4 C# D D# E F F# G G# A A# B C5 25 26 27 28 29 30 31 32 33 34 35 36 37 C# D D# E F F# G G# A A# B C6 555.4* 587.6 622.4 659.6 697.8 740.2 784.4 831.0 880.0 932.4 988.0 1046.8 OCTAVE RANGE C4 = Middle C ONE OCTAVE ABOVE MIDDLE C TWO OCTAVES ABOVE MIDDLE C * For two octaves above middle C, you must enter PITCH values in Herz. This range is quite high for DECtalk speech voices. If you don't like the way a song sounds in this range, try entering the same notes with PITCH values that correspond to one octave lower. APPENDIX E: STORING SONGS Pathfinder Manual: Basics 258 TIME Values of Notes NOTE TIME VALUE CHART 1/16 note 1/8 note 1/4 note dotted 1/2 note 1/4 note triplet ( = ½ note l pair of 1/8 notes (each note above gets part of the time value 1/8 rest whole note 3 3 1/8 note triplet ( = 1/4 note) 1/2 note 1/4 rest half rest APPENDIX E: STORING SONGS Pathfinder Manual: Basics 259 pair of 1/16 notes :KROH 260 Appendix F: Helpful DECtalk Speech Tips Alternate Pronunciations of Words Sometimes a word has two different pronunciations. For instance, the word "record" can be pronounced RECord or reCORD. On the next page there is a list of words with alternate pronunciations which the Pathfinder knows. You can use CTRL<space> to tell the Pathfinder which pronunciation to use. For example, if you type "record" it is usually pronounced "RECord." If you want the alternate pronunciation for the word, insert the CTRL<space> tool just prior to typing in the word, record. Speech must be On. If you frequently use the alternate pronunciation of a word that is not on the word list, you can store it into the Speech Dictionary, using CTRL<space>. Once it is in the Dictionary, the Pathfinder will always use the alternate pronunciation. If there comes a time when you do not want to use the alternate pronunciation, use CTRL<space> and then spell the word in your message. We recommend that you do not store into the Speech Dictionary any alternate pronunciations of words that are on the list that follows, unless you always want the Pathfinder to use the alternate pronunciation. The next few pages contain a list of words that have alternate pronunciations which DECtalk speech already knows. There is also a list of all the abbreviations that you can use which DECtalk speech knows how to pronounce. The last part of this appendix explains how the Pathfinder and the DECtalk speech board handles numbers. APPENDIX F: DECtalk SPEECH HINTS Pathfinder Manual: Basics 261 262 Words with Alternate Pronunciations abstract abuse addict advocate affix ally alternate animate annex appropriate arithmetic articulate associate attribute august bass baton close combat combine compact complex compound compress concert conduct confederate confine conflict conglomerate console construct contest contract contrast converse convert convict coordinate decrease defect delegate deliberate desert desolate diffuse digest discharge discount dove duplicate elaborate estimate excerpt excuse expatriate exploit export extract ferment frequent geminate graduate impact implant import imprint incense incline increase insert insult interchange intimate invalid just APPENDIX F: DECtalk SPEECH HINTS Pathfinder Manual: Basics 263 lead live minute miscount misprint misuse moderate object overrun perfect permit pervert polish postulate predicate predominate present proceed produce progress project protest read reading rebel recall recap recess record recount refill refresh refund refuse reject relapse relay remake rerun research resume retake rewrite segment separate sow subject sublet subordinate survey suspect syndicate tear torment transform transplant transport upset use wind wound Chart copied with permission of Digital Equipment Corporation APPENDIX F: DECtalk SPEECH HINTS Pathfinder Manual: Basics 264 Abbreviations Recognized by DECtalk Speech Abbreviation Word all-in-one Apr. Assoc. Aug. Av. Ave. bldg. Blvd. CH. cm. cms. Co. COD cont. Corp. Ctr. CTRL cu. dec Dec. Dist. deg. Dept. doz. Dr. Dr. e.g. ESC esp. All in one April Associates August Avenue Avenue Building Boulevard Chapter centimeters centimeters Company "see-oh-dee" continued corporation center control cubic DEC (as in Digital) December District degrees Department dozen Doctor (when followed by a name, i.e., Doctor West) Drive (when preceded by a name, i.e, West Drive) "ee""gee" (not 'for example') escape especially APPENDIX F: DECtalk SPEECH HINTS Pathfinder Manual: Basics 265 Abbreviation Word est. etc. ext. Feb. Flt. FOB fn. Fr. Fri. Ft. Gen. gm. Gov. hrs. i.e. Inc. Intl. Jan. Jr. Jul. Jun. kg. kgs. km. lb. lbs. Ltd. Mar. mg. mgs. misc. ml. Mon. Mr. Mrs. established ("eee ess tee") et cetera extension February flight freight on board Footnote Father Friday Fort (not 'Foot') General grams Governor hours "eye ee" (not 'that is') Incorporated international January Junior July June kilograms kilograms kilometers pounds pounds Limited March milligrams milligrams miscellaneous milliliters Monday mister missus APPENDIX F: DECtalk SPEECH HINTS Pathfinder Manual: Basics 266 Abbreviation Word msde. msec. msecs. mss. Mt. Nov. Oct. oz. ozs. Pl. pp. ppd. Pres. Rd. recd. Rep. Rev. rsts Rte. Sen. Sep. Sept. sq. Sr. St. St. Sun. Thu. Thurs. Tue. Tues. Univ. USA merchandise milliseconds milliseconds manuscripts Mount November October ounces ounces Place pages post paid President Road received Representative Reverend "ris-tis" route Senator September September square Senior Saint (when followed by a name) Street (when preceded by a name) Sunday Thursday Thursday Tuesday Tuesday University "you-ess-aye" APPENDIX F: DECtalk SPEECH HINTS Pathfinder Manual: Basics 267 Abbreviation Word Vol. vs. yds. Volume versus yards Exceptions* nt.wt. op.cit. p.p.d. pat.pend. net weight op cit post paid patent pending. Wednesday • These abbreviations will not work at this time (12/90) List copied with permission of Digital Equipment Corporation Producing a Long "A" in the Middle of a Sentence Usually an "A" by itself in the middle of a sentence is pronounced as "uh," but there may be times when you want it to be pronounced as a long "A" ("ayee"). To achieve this, type in the capital letter "A" and then add a punctuation mark immediately following it: A, A? A! (A A; This will change the inflection of the sentence somewhat, but it will produce a long "A". To Create a Pause within a Word or between Words Enclose and underscore, _ , and a number designating the length of the pause within square brackets. For example, [_<1000>] tells the Pathfinder to pause for 1 second; [_<2000>] creates a 2 second pause. Changing the number changes the amount of seconds the Pathfinder pauses. APPENDIX F: DECtalk SPEECH HINTS Pathfinder Manual: Basics 268 Creating a Pause after a Period or a Comma Generally, the Pathfinder pauses for ½ second after a period, before beginning the next sentence. It will pause for 1/6 of a second after a comma. If you want to create a longer pause after a period or a comma, add the following indicator to your message: [:pp4500] This adds a 4.5 second pause to the regular period pause. You can type in the number you want to use. [:cp4800] This creates a 4.8 second pause after the regular comma pause. You can type in the number you want to use. If you want to return the pauses to their default settings, enter these indicators: For a period default: [:pp0] For a comma default: [:cp0] How DECtalk Speech Handles Numbers 1998 is a year. 1,998 is a big number. 1998 (no comma) is spoken as "nineteen-ninety-eight." 1,998 (with a comma) is spoken as "onethousand-nine-hundred-and-ninety-eight." Any four-digit number is spoken as a year unless you add a comma after the first digit. Commas are not necessary if a number contains more than four digits (e.g., 10,375). Numbers containing up to 9 digits are pronounced correctly. APPENDIX F: DECtalk SPEECH HINTS Pathfinder Manual: Basics 269 Examples of Entering Math Problems: When you enter math problems, they must be spaced correctly for DECtalk speech and the Pathfinder to pronounce them correctly. For example: 5 - 3 = 2 Enter this problem in the following manner: 5 (space) -3(no space between "-" and "3" but add a space after "3") =(space) 2. The problem looks like this when it is entered: 5_-3_=_2 ("_" indicates a space) Examples of Spacing for Other Math Problems: 2*8_=_16; 1*2_=_2 ("*" indicates "times" but the Pathfinder speaks "asterisk".) 2_+8_=_10 1 ½ must be entered as 1&_1/2 (1/2 can be entered by activating "1" "slash" "2".) At this time DECtalk speech and the Pathfinder cannot speak division problems correctly. Examples of Entering Dates: DECtalk speech does not recognize dates if you enter them the way they are normally written, e.g., 6-8-1990 or 11/20/95 Enter dates in the following manner for them to be spoken correctly: 6-Aug-1990 or 20-Nov-1995 These dates are spoken as "August 6, 1990" and "November 20, 1995". Example of Entering a Phone Number: Phone numbers must be entered by placing spaces and commas as shown below: 3_3_0,_2_6_2,_1_9_8_4 or 2_6_2,_1_9_3_3 APPENDIX F: DECtalk SPEECH HINTS Pathfinder Manual: Basics 270 Appendix G: About Dependent Icons ÂIf you are using one of the Unity overlays, dependent icons are already programmed into the vocabulary. If you are creating your own overlay from scratch, you will want to create dependent icons to make programming the overlay and the retrieval of words from the overlay easier. Let's say you have an icon that represents NOUN and an icon that represents NOUN PL (plural nouns). Let's also say that you have stored your most commonly used nouns under icon sequences that end with the icon: NOUN. For example, HOUSE+NOUN = home. If you want the word "homes" on your overlay, traditionally you would have to store it under another sequence that ended with the icon: NOUN PL. For example, HOUSE+NOUN PL = homes. This means you would have to store under icon sequences, all the nouns you want for your vocabulary. Then you would have to store all those same nouns again as plurals! With Pathfinder you can make NOUN PL a dependent icon. This means that an icon sequence ending with NOUN PL will be dependent on an identical sequence which ends in NOUN. For example, if you store NOUN PL as a dependent icon and then activate the sequence, HOUSE+NOUN PL, the Pathfinder will look to see what is stored under HOUSE+NOUN. It will see "home" and automatically add an "s" to it. You would see "homes" on your display. Dependent icons save you hours of storing. You can do the same thing with verbs by making icons such as VERB+ed and VERB+ing dependent on sequences that contain the icon: VERB. You store all of the regular verbs you want to use and the Pathfinder will put the correct ending on them. The next page explains how to create dependent icons. APPENDIX G: DEPENDENT ICONS Pathfinder Manual: Basics 271 Creating Dependent Icons Âthis example assumes that you have added a space after any words that you have stored in your vocabulary. In this example we are going to assign the icons NOUN and NOUN PL to separate keys. We are also going to make NOUN PL dependent on the NOUN icon. Then we will type in instructions for the Pathfinder to follow whenever the NOUN PL key is activated. These instructions will tell the Pathfinder to find the word stored under a sequence that ends in NOUN, to delete the space after the word that is stored there and to add an "s" and a space to the word. Assign NOUN to a Key: 1. Go to the Toolbox and open the ASSIGN KEY MENU. 2. Select the key you want to assign NOUN to. 3. Activate the Minspeak Assignment option (#1). 4. Make sure the Assign Key As: box is set to ICON. 5. Activate Rename Icon. 6. Type in the name: NOUN. 7. Activate OK twice. Assign NOUN PL to a Key: 8. Activate the Select Next Key to Define option (#6). 9. Select the key you want to assign NOUN PL to. 10. Activate the Minspeak Assignment option (#1). 11. Make sure the Assign Key As: box is set to ICON. 12. Activate Rename Icon. 13. Type in the name: NOUN PL. Make NOUN PL Dependent on NOUN and Type in Directions: 14. Activate OK. 15. Activate the Icon Type option (#5) twice. 16. You see a box that asks if you want to make the icon NOUN PL a dependent icon. Answer YES. APPENDIX G: DEPENDENT ICONS Pathfinder Manual: Basics 272 17. Select the icon you want NOUN PL to depend on. In this case select the key where you stored NOUN. 18. Now you must tell the Pathfinder what you want it to do when it sees NOUN PL. 1. Activate INSERT TOOL. 2. Type "d" and select <DELETE CHARACTER> or activate More Items until you see <DELETE CHARACTER> and then select it. Type the letter "s" and add a space. 19. Activate OK until you exit the ASSIGN KEY menu. NOUN PL is now a dependent icon. It will add an "s" to any word stored under a sequence that that ends with the NOUN icon. Some Notes and Exceptions for Dependent Icons You can create dependent icons for many different circumstances. You could have a dependent icon that automatically adds "the" before any noun (e.g., the HOME) or one that adds "es" to nouns (e.g., HOUSES). However, some irregular nouns and verbs will have to be programmed separately. For example, suppose you have the noun WOMAN stored under the sequence WOMAN NOUN. Since you have made NOUN PL a dependent icon, if you activate WOMAN and NOUN PL, the Pathfinder will display "Womans" instead of Women. You would have a hard time writing a macro to make a dependent icon work with all irregular nouns or verbs because they do not follow a standard format. Because of this, you will have to store irregular nouns and verbs under separate sequences. For example, using the regular storage process, you can store the noun "women" under WOMAN+NOUN PL. In this case NOUN PL is not used as a dependent icon. It is simply part of an icon sequence for the word, "women". APPENDIX G: DEPENDENT ICONS Pathfinder Manual: Basics 273 To Return a Dependent Icon to a Normal Icon If, for some reason, you decide that you no longer want an icon to be dependent, you can return it to a normal icon. 1. Go to the Toolbox and open the ASSIGN KEY menu. 2. Select the key which you want to return to normal. 3. Activate the Minspeak Assignment option (#1) 4. Make sure the Assign Key As option is set to ICON. 5. Activate the Icon Type option (#5) until you see NORMAL. 6. Activate OK twice to exit the menu. Your dependent icon is no longer dependent, and will now act as a regular icon. APPENDIX G: DEPENDENT ICONS Pathfinder Manual: Basics 274 Appendix H: External Speaker and Earphone You can connect an external speaker and earphone to the Pathfinder. (External earphones should be used if you are also using Auditory Prompts.) Their connectors must fit into the following jack sizes on the Pathfinder's top panel: External Speaker Jack—3.5 millimeter mono; use an 8 ohm speaker Earphone Jack—2.5 millimeter; mono Warning! Do not plug an earphone into the EXTERNAL SPEAKER jack. This could cause damage to your hearing. APPENDIX H: EXTERNAL SPEAKER AND EARPHONE Pathfinder Manual: Basics 275 Appendix I: Creating Macros That Contain Menu Options Many menus have options that are not listed in the All Tools List as insertable tools. For example, you cannot insert the tool "1-Switch" into a macro. But you can create a macro that includes part of the SELECTION TECHNIQUE MENU that allows you to change your selection technique to 1-Switch Scanning. Let's say that you normally use the keyboard for your selection technique, but when you get tired you like to change to 1-switch scanning. You might like to create a macro that allows you to change from keyboard to 1-switch scanning. You can store this macro on your overlay and activate it whenever you want to switch selection techniques. In order to create a macro that includes part of a menu you have to do some homework first. • You need to know and write down (or remember) the keys that you have to activate in the menu. • For our 'Keyboard to Scanning' example, you should set up the Keyboard and 1-Switch selection techniques before you begin to create the macro so that all the options are set the way you want them when you use a switch. Homework: Let's find out what key activations you have to make in the SELECTION TECHNIQUE MENU to change from Keyboard to 1-Switch Scanning. 1. 2. 1. 2. Go to the Toolbox and open the SELECTION TECHNIQUE MENU. The current selection technique should be "Keyboard." Activate option #1. Activate OK. APPENDIX I: CREATING MACROS THAT CONTAIN MENUS Pathfinder Manual: Basics 276 To Return to the Keyboard 1. Activate TOOLBOX. 2. Activate SELECTION TECHNIQUE MENU 3. Activate Option #1 four times. 4. Activate OK. To Create the "Keyboard to Scanning" Macro: 1. In the Toolbox, activate STORE CORE. 2. Select the icon sequence you want to store the macro under, for example, you might use the pointing finger (REMEMBER) and the medical icon (MEDICAL). 3. Activate OK. 4. Activate "Spell Text for Message" (we will add a message to be spoken at the end of the macro.) 5. Activate INSERT TOOL. Activate "S" on the keyboard. 6. Activate the SELECTION TECHNIQUE menu 7. Type #1. 8. Activate INSERT TOOL 9. Activate OK. 12. Now type a message if you want one, perhaps: "Please plug in my switch." 13. Activate OK when you have completed your message. Activate OK again. 14. Close the toolbox. Go to Minspeak mode. 15. Activate the icon sequence you chose (REMEMBER MEDICAL). 16. The Pathfinder should speak, "Please plug in my switch." Activate your switch once. If you are using Row/Column scanning, the top row of the display screen should be highlighted in red, ready for you to scan. ÂIf you want to return to using the keyboard (that is, if you want toggle between two selection techniques) you must create and store a second macro that takes you back to the first technique. APPENDIX I: CREATING MACROS THAT CONTAIN MENUS Pathfinder Manual: Basics 277 ÂBesides storing these macros under icon sequences, you can store them in Activity keys or assign them to Core keys. Other Macros That Might Be Used: You could modify other selection technique settings for different times of day without going to the Toolbox. 3 Remember, you can also do this by saving your settings and storing them on your overlay, see pages 283.) You could turn scan beeps on and off using menu selection #3 from the FEEDBACK menu. APPENDIX I: CREATING MACROS THAT CONTAIN MENUS Pathfinder Manual: Basics 278 Appendix J: Computer Commands for IBM Keyboard and Keypad Keys ÂCreate the <esc> command that you see below by activating CTRL [ (Control left bracket) in your Toolbox. This sequence (CTRL[) is shown as <esc> in all commands below. On your Pathfinder display you will see a small left arrow (Å). Keyboard Keys <esc>backspace. <esc>capslock. <esc>delete. <esc>down. <esc>end. <esc>enter. <esc>esc. <esc>f1. <esc>f2. <esc>f3. <esc>f4. <esc>f5. <esc>f6. <esc>f7. <esc>f8. <esc>f9. <esc>f10. <esc>f11. <esc>f12. <esc>home. <esc>insert. <esc>left. <esc>pagedown. <esc>pageup. <esc>pause. <esc>print. <esc>right. <esc>scroll. <esc>tab. <esc>up. <esc>,hold,alt. <esc>,hold,control. <esc>,hold,shift. Specify a right or left key by placing an "l" or "r" in front of the key name. For example, to hold the left shift key: <esc>,hold,lshift. APPENDIX J: COMPUTER KEYBOARD COMMANDS Pathfinder Manual: Basics 279 Keypad Keys <esc>kp0. <esc>kp1. <esc>kp2. <esc>kp3. <esc>kp4. <esc>kp5. <esc>kp7. <esc>kp8. <esc>kp9. <esc>kpslash. <esc>kpstar. <esc>kpup. <esc>numlock. <esc>sysreq. <esc>kpdel. <esc>kpdown. <esc>kpend. <esc>kpenter. <esc>kphome. <esc>kpins. <esc>kpleft. <esc>kpminus. <esc>kppgdn. <esc>kpplus. <esc>kpright. APPENDIX J: COMPUTER KEYBOARD COMMANDS Pathfinder Manual: Basics 280 Computer Commands (cont'd) For Apple/Macintosh Computer Keyboard and Keypad ÂCreate the <esc> command that you see below by activating CTRL[ (Control left bracket) in your Toolbox. This sequence (CTRL[) is shown as <esc> in all commands below. On your Pathfinder display you will see a small left arrow (Å). Keyboard Keys <esc>backspace. <esc>capslock. <esc>delete. <esc>end. <esc>esc. <esc>f1. <esc>f10. <esc>f11. <esc>f12. <esc>f13. <esc>f14. <esc>f15. <esc>f2. <esc>f3. <esc>f4. <esc>f5. <esc>f6. <esc>f7. <esc>f8. <esc>f9. <esc>help. <esc>home. <esc>insert. <esc>left. <esc>pagedown. <esc>pageup. <esc>pause. <esc>print. <esc>return. <esc>right. <esc>scroll. <esc>tab. <esc>up. <esc>,hold,command. <esc>,hold,control. <esc>,hold,option. <esc>,hold,shift. <esc>hold,alt. Specify a right or left key by placing an "l" or "r" in front of the key name. For example, to hold the left shift key: <esc>,hold,lshift. APPENDIX J: COMPUTER KEYBOARD COMMANDS Pathfinder Manual: Basics 281 Keypad Keys <esc>kp0. <esc>kp1. <esc>kp2. <esc>kp3. <esc>kp4. <esc>kp5. <esc>kp6. <esc>kp7. <esc>kp8. <esc>kp9. <esc>clear. <esc>kpdel. <esc>kpdown. <esc>kpend. <esc>kpenter. <esc>kpequal. <esc>kphome. <esc>kpins. <esc>kpleft. <esc>kpminus. <esc>kppd. <esc>kppgdn. <esc>kppgup. <esc>kpplus. <esc>kpright. <esc>kpslash. <esc>kpstar. <esc>kpup. <esc>numlock. <esc>reset. APPENDIX J: COMPUTER KEYBOARD COMMANDS Pathfinder Manual: Basics 282 Appendix K: Save Your Setup Settings 6XPPDU\ 7KHLQVHUWDEOHWRRO6(77,1*6 0(18DOORZV\RXWRVDYHIURP GLIIHUHQWJURXSVRIVHWWLQJV You may want to set up more than one selection technique and its options so that you can use different techniques during different times of the day. To do this, you need to assign the SETTINGS MENU key to your overlay or to store it under an icon sequence. The Pathfinder will save anything you have set in the SELECTION TECHNIQUE menu, AUDITORY PROMPT menu, FEEDBACK menu, SPEECH menu and OUTPUT menu. To store the SAVE SETTINGS MENU under an icon sequence: 1. Activate STORE CORE. 2. Select the sequence you want to use. 3. Select Synthesized and Spell Text for Message. 4. Activate INSERT TOOL. 5. Activate "s" and More Items until you see SETTINGS MENU. Activate it. 6. Activate OK. To Save your settings into the Menu 1. Make sure you are currently using the first set of settings you want to save. 2. Go to Minspeak and activate the sequence you saved the SETTINGS MENU under. 3. Save your current settings to #1 by activating Save #1 Settings. 4. Now set up your second technique and save those settings to Save #2 Settings. 5. Activate OK to until you exit the menu. When you are using one group of settings and want to change to another, activate the SETTINGS MENU and then activate the "Use #2 Settings option, or whichever option you have saved settings to. APPENDIX K: COPY YOUR SETUP SETTINGS Pathfinder Manual: Basics 283 Once you have saved the settings you want in the SETTINGS MENU, you can store the tools, SETTINGS 1, SETTINGS 2 and SETTINGS 3 under icon sequences on your overlay. Then you can delete the SETTINGS menu if you want. To go to different settings, you just activate the sequence you stored the settings under. ÂYou can assign all these tools to keys on your overlay if you have any keys available. Store the SETTINGS 1, SETTINGS 2 and SETTINGS 3 tools: Repeat the Menu storing steps on the previous page to store the SETTINGS 1, SETTINGS 2 and SETTINGS 3 tools under sequences. Replace SETTINGS MENU in step #5 with SETTINGS 1,2 or 3. To Change Your Settings 1. Activate the sequence where you stored the SETTINGS 1 tool. 2. You see a box that says: "Are you sure you want to replace your current settings with Settings #1?" Answer YES to store the settings. Now when you are tired of using your headpointer and want to start using a switch or the keyboard, you can activate the sequence where you stored your switch or keyboard settings and the Pathfinder will automatically switch you to the new settings. You can delete the SETTINGS MENU if you are not going to set new settings any time soon. APPENDIX K: COPY YOUR SETUP SETTINGS Pathfinder Manual: Basics 284 Appendix L: Troubleshooting :DUQLQJ '2127RSHQWKH3DWKILQGHUFDVH ,I\RXHQFRXQWHUDSUREOHPZLWK\RXUXQLW FDOOWKH35&6HUYLFH'HSDUWPHQWDW ,I\RXDUHRXWVLGHWKH86FDOO\RXUORFDOGLVWULEXWRU 'RQRWDWWHPSWWRRSHQWKHFDVH ÂBattery Charger Warning: Warning! Use only the battery charger that came with your Pathfinder. Other chargers may damage the batteries or the Pathfinder. This also applies to your headpointer battery charger. The Battery Status display window on the Pathfinder screen will tell you the battery status at any given time. You must turn the display window ON in the FEEDBACK menu, in order to see the status of the batteries. 3Remember! You cannot STORE when the batteries are low. APPENDIX L: TROUBLESHOOTING 285 ÂIf the battery charger is plugged in and the battery LED is solid red: This indicates that the battery pack is not communicating with the Pathfinder. Allow one hour of charging. If the battery charger LED continues to remain red after the hour of charging, call the PRC Service Department. ÂIf the batteries in your Pathfinder or Headpointer need to be replaced, dispose of the old batteries properly. Follow the regulations of your community, state or country for the disposal of batteries. ÂImportant Note! When you turn on the Pathfinder On you must wait a few minutes for the software to open up. The computer screen will remain dark while the software loads. Do not press the On/Off button again. Doing so will lock up your device. If you have locked up the Pathfinder: Try pressing and holding the I/O and TOOLS keys at the same time. If the above suggestions does not help: Press all four keys on the top left side of the Pathfinder case at the same time. This re-boots the Pathfinder. All unsaved work will be lost. ÂThe Pathfinder does not seem to be speaking: Go to the toolbox and make sure the speech is On. Go to the FEEDBACK MENU in the Toolbox and set the "Volume" option to it highest setting. Check to see if Speak when Spelling is On or Off. If it is On, check to see if it is set to Words or Letters. If it is set to Words, the Pathfinder will not speak until a whole word is spelled. APPENDIX L: TROUBLESHOOTING 286 ÂIf you are having trouble storing or retrieving messages: You may need to exit a theme before you can use the Pathfinder the way you want to. Check the status bar at the bottom of the Pathfinder's display area. If you are in a theme, the theme icon(s) will be displayed followed by a colon. ÂIf you are using a T-TAM and some characters are not appearing on your computer screen: If you send chunks of text over 60 characters in length through the TTAM, it will probably drop some of those characters. Turn Character Pacing on in the OUTPUT menu or send smaller chunks of text. ÂYou get double-hits from keys or a 'bouncing' effect when you activate keys, or when you move across the keyboard to activate a key: The Acceptance and/or Release times are too short. Increase these times. Open the SELECTION TECHNIQUE menu and activate your selection technique option. If the Pathfinder keys are bouncing as you move across the keyboard to your target key, increase the Acceptance Time and then try activating the keys. If you still experience bounce, increase the Acceptance Time a little more. If you are getting double-activations, increase the Release Time and practice with the keys. If double-activations continue, increase the Release Time a little more. APPENDIX L: TROUBLESHOOTING 287 ÂYour scanning speed is too slow Go to the SELECTION TECHNIQUE menu, select your technique, then set the Scanning Speed option to a faster number. To keep from scanning keys that you don't want to scan, read the pages on Predictive Selection, Modify Predicted Keys and Linear Scan ÂAbout accessing masked messages If you transfer vocabulary that contains masked messages from a DeltaTalker or Liberator into the Pathfinder, use the OK key on the Pathfinder to access the masked messages. ÂYou did something and an Error Box (below) appeared on your display. If you see this error box on your display, PRC would greatly appreciate it if you would take a few minutes to write down the error code at the bottom of the box (i.e., File; Line; Expr;) and to try to re-construct what you were doing just before this message appeared. Please phone the APPENDIX L: TROUBLESHOOTING 288 PRC Service Department and give one of the service representatives the information, or mail the information to PRC. The information can be very helpful to our software engineers as they work to debug the software. If you need to see the screen you were working on before the box appeared, press and hold the USER key on the front of the Pathfinder. The error box will disappear and you can see the display. When you release the USER key the error box will reappear. We recommend that you do not choose to turn the error message off (the second option in the box). The information it contains can be very helpful if you have to call service or send the Pathfinder in to PRC. ÂAbout High-Efficiency Fluorescent Lights and the Use of Infrared: There is a compatibility problem between many infrared controls and high-efficiency fluorescent lights. ' If you are using the Pathfinder in a room that has high-efficiency fluorescent lighting, the infrared, including headpointing, computer access, remote control commands, etc., will not work. Turn the lights off and the IR will work fine. ÂA Note About Shipping Mode When you put the Pathfinder in shipping mode (from the MAINTENANCE menu), wait 10 seconds after activating the option, for the shipping mode to take effect. Once the device is in shipping mode, you cannot activate keys. APPENDIX L: TROUBLESHOOTING 289 ÂCleaning the Pathfinder Regular Cleaning Clean the case with a soft, damp cloth. Clean the display screen with the same kind of product you use to clean glass. Use a soft cloth to wipe off the glass cleaner. Disinfecting To disinfect the equipment, mix ¼ cup vinegar with 1 cup water. Wipe all equipment with a cloth dampened in this mixture. Allow the equipment to air dry. APPENDIX L: TROUBLESHOOTING 290 Index INDEX Pathfinder Manual: Basics 291 292 Index 1-switch 67 85-100 2-switch 69, 85-100 32-location overlay 51, 137 64-location overlay 51, 137 1-switch scan mode 1 85 1-switch scan mode 2 86 2-switch scan mode 1 87 2-switch scan mode 2 88 Abbreviations, speech list 265 Acceptance time 91 Activation beep 195 Activation delay 93 Activation feedback 195 Activities about 35, 151 create 151-153 copy 163 delete 155 delete dynamic 159 dynamic 35, 157-159 dynamic menu 157 linking 161 menu 151-153 modify 160 review dynamic 159 set dynamic 157 Activity row 35 Add tools 140, 173-182 to keys 140, 176, 178-179 to sequences 140, 182 Add words to: speech dictionary, see Power Tools word prediction dictionary 118 All Tools List 209-224 Alternate pronunciations 263, see also Power Tools Appendices 209-283 Area about 47 blank area 49 copy an 53 erase an 54 overlay menu 51 rename an 52 select 49 switch areas 49 user area menu 49 Arrow keys see Power Tools Assign different icon to a key 175 Assign icon 177 Assign key 173-180 Assign key menu 173 Assign tool to a key 176-179 to a sequence 182 tools and text to a key 176-179, 184 tools and text to a sequence 183185 Assign-macros 184-185 Audio feedback 195 Auditory prompt menu 189 Auditory prompts 189-193 about 189 category 191 delete 192 mid-sequence 193 on/off 189 storing 189-193 Auto-line feed see Power Tools Auto repeat rate 94 Auto spell 198 Average pitch see Power Tools Averaging headpointer 77 Backlight shut-off 25, 203 Batteries about 23 INDEX Pathfinder Manual: Basics 293 display status 10, 23, 195 disposal 285 Battery charger headpointing 82 Pathfinder 23, 195, 285 Battery charger connector 21 Battery door 21 Battery indicator icon 12 Battery status area 23, 195 Baud rate see Power Tool Beep Activation 195 Scan 195 Blank notebook see Power Tools Blank overlays 51 Block marker see Power Tools Calibrate display screen 203 Calculator see Power Tools Caps/Lock 13 Category prompts 189, 191 Change a message 131, 134 Change voices in a message see Power Tools Character, delete 180-181, 192, 213 Character pacing see Power Tools Character/Word see Power Tools Charge (battery) 23, 81 Charger (battery) 23, 81 Charger light (LED) 12, 23, 81 Choose activity 12, 35 Cleaning the Pathfinder 290 Clear display 180-181, 212, 219 Clock display 195, 204 set date 204 set time 204 set time/date format 204 Close notebook see Power Tools Colors Notebook status bar see Power Tools IR Headpointer pointer 81 set default 201 system 200 word prediction 122 Column/row scan 57, 87-89 Computer 13, 47, 55, 77,128, see also Power Tools 'backspace' command (word prediction) 121 overlay 55 icon, front of case 13 Computer commands see Power Tools Computer emulation see Power Tools Connect to other devices see Power Tools Consonants 254 Contrast, display 195 Control (CTRL) commands see Power Tools Coordinates, key 37 Copy activity 47, 163 Copy calculator answer see Power Tools Copy text see Power Tools Copy user area 53 Core vocabulary 105, 127, 129, 151 Create activity 151-153 CTRL see Power Tools CTRL serial marker see Power Tools Cut text see Power Tools Data logging, 167, 224-231 DECtalk speech 259-268, see also Power Tools DECtalk voice see Power Tools Defaults Reset 205 system colors 198, 200-201 Delete character 180-181, 192, 213 Delete last selection 213 INDEX Pathfinder Manual: Basics 294 Delete notebook see Power Tools Delete word 213 Delete words from dictionary Speech dictionary see Power Tools Word prediction dictionary 118 Dependent icon 271-274 Dictionary speech see Power Tools word prediction 117-119 Digitized speech erase 132 store 131 Direct selection Keyboard 61 Headpointer 63-65 Disinfecting Pathfinder 290 Display battery status 195 Display brightness/contrast 195 calibration 204 clear 180-181, 212, 219 regular 11 text size, 195 word prediction 107-111 Display clock 195 Display contrast 195 Display date 195 Disposal, batteries 285 Dual (2) switch scanning 69, 87-88 Dynamic activity 157-159 Earphone, external 17, 275 Earphone jack 17, 275 Earphone volume 43, 195 Edit core 135 Edit menu see Power Tools Edit mode see Power Tools Edit text see PowerTools Editing tools see Power Tools Emulation, computer see Power Tools English consonant phonemes 254 English vowel phonemes 253 Erase all vocabulary 203 areas 54 auditory prompts 192 key assignment 181-182 macros 185 messages 132, 135 notebooks see Power Tools recorded speech 132 tools 181 user area 54 words from dictionary speech see Power tools word prediction 118 workspace see Power Tools Error reporting 204 Exit theme 145 External earphone 17, 275 External speaker 17, 275 Feedback beep 195 Feedback menu 195 Flash predictor keys 115 Formatted notebook see Power Tools Frequency/recency 113 Front of Pathfinder 11-13 Go to computer 55, 128, 214 Go to Minspeak 128, 198, 212 Go to spell 128, 198, 215 Graphics, importing (see MTI Manual) Handle, Pathfinder's 18-19 Hardware tests 204 Headpointer 13, 63-65, 77-84 Headpointing 13, 57, 63-65, 77-84 averaging 77 batteries 82 horizontal/vertical adjustment 79 mounting 63, see also Mounting Instructions INDEX Pathfinder Manual: Basics 295 pointer color 81 predictive selection 95, 97, 198 reset options to default 205 sensor cord position 63-65 Hide/show activity 161 Hide/show key 187 Hide/show notebook see Power Tools Highlight text see Power Tools IBM memory transfer see MTI Manual IBM computer commands 279 I/O button 11, 25 Icon About 27-29, 33 assign different 177 delete 213 dependent 271-273 examples 26-33 import see MTI Manual intensity 29 label 151-157 masking 288 Minspeak 27-33 Normal (ordinary) 274 one-shot 147 ordinary (normal) 274 pick 1 icon 139, 140-141 pick 2 Icon 139, 140-141 prediction 29, 95-97, 195 rename 176-177, 272-274 selecting 26-33 sequences 26-33 set 1 icon 139, 143 set 2 icon 137, 143 single meaning 147-149 tutor 199 Infrared see Power Tools Insert tool 140, 173-182, 215 IR see Power Tools IrDA see Power Tools IR window location 17, 21 IRR see Power Tools Joystick 17, 57, 71, 75, 89-100 Key assignments 173-182 Key coordinates 37 Key locations 37 Key prompts 189-191 Keyboard 15, 57, 61 Keyguard 15 LAM instructions 165, 224-230 Language acquisition monitor (LAM) 165, 224-230 Lights (LEDs) activation 195 battery 12 computer 13 intensity 196 shift/caps lock 13 spell/Minspeak 15 system status 12 tools 11 user area 13 user programmable key 12 Linear scan cut-off 100 Linking activities 161 List notebooks see Power Tools Load graphics see MTI Manual Load memory see MTI Manual Locations, key 37 Lock notebook see Power Tools Lock system 203 Long "A" (create in sentence) 268 Macintosh computer commands 281282 Macintosh memory transfer see MTI Manual Macros 183-185, 276-278 INDEX Pathfinder Manual: Basics 296 Maintenance menu 203 Main voice see Power Tools Masking messages 288 Memory card door 17 Memory review 165 Memory transfer interface see MTI Manual Menu choices 39-42 Menu prompts 189-193 Menu scanning (on-screen) 43, 75, 109 Menu voice see Power Tools Menus activity 151-163 assign key 173 auditory prompt 189 computer access (in User Area menu) 55 edit 214, see also Power tools feedback 195-196 IR setup see Power Tools maintenance 203-204 notebook see Power Tools output see Power Tools review vocabulary 165, 232-234 scanning (on-screen) 75, 109 selection technique 59 speech see Power Tools transfer memory see MTI Manual user area 47 word prediction 111 Merge/Load Module See MTI Manual Microphone 13 Minserts see Power Tools Minspeak about 27-33 icon, front of case 13 and Word Prediction 103-105, 112 Mispronounced words 263-264 Modify activity 160 Modify predicted keys 97 Mounting headpointer see Headpointer Mounting Instructions Mounting plate 19 MTI See MTI Manual Music 236-259 Notebook menu see Power Tools Notebook, see Power Tools Number of rescans 75 Numbers (DECtalk speech) dates 269-270 math problems 270 phone numbers 270 One-shot icon 147 On/Off character pacing see Power Tools, see MTI Manual Pathfinder 11, 25 prompts 189 speech 221 toolbox 12 word prediction 107 on-screen scanning 75, 109 Open/close notebook see Power Tools Ordinary icon 274 Overlay 128-location 51 64-location 51 32-location 51 keyguards 15 computer 55, see also Power Tools default 51 protector 15 toolbox 15 Unity 14, 51 Output menu see Power Tools Output method see Power Tools Output mode see Power tools Pathfinder 11-25, 290 INDEX Pathfinder Manual: Basics 297 Paste text see Power Tools Pause, create in speech 136, 268 Phonemes, consonants 254 Phonemes, vowel 253 Pick 1 icon 139, 141 Pick 2 icon 139, 141 Pictures, importing see MTI Manual Pitch, average see Power Tools Pitch notes 255 Pitch range see Power Tools Pitch value code 255-256 Pitch values 257 Pointer color 81 Predictive selection 95 Predictor keys (Word Prediction) 115 Pre-stored songs 236, 237 Print notebook see Power Tools Prompts, auditory 190-193 Prompts, menu 189 Prompt voice see Power Tools Pronunciation, alternate 263-264 Pronunciation, speech dictionary see Power Tools Quarter row/column scan 51, 73 Recency/frequency in Word Prediction 113 Record message 129, 131 erase 132 store 131 Regular icon 271 Regular workspace see Power Tools Release time 95 Rename icon 176-177, 272 Rename notebook see Power Tools Rename user area 52 Reset defaults in menus 203 Resize text area 195 Retrieve Minserts see Power Tools Return see Power Tools Review dynamic activities 159 speech dictionary see Power Tools to display 165 to display and speaker 165 to output 165, 232 word prediction dictionary 117-119 vocabulary menu 165 Row/column scan 57, 87-89 Save notebook see Power Tools Save setup settings 283 Scan 1-switch 67, 85-86 2-switch 69, 87-88 32-64-128 location 51, 137 acceptance time 91 activation delay 93 auto scan restart 75 beep 195 centering 99 column/row 57, 87-89 direction 89 joystick 57, 71, 75, 99 LED intensity 195 linear scan cutoff 100 menu scanning (on-screen) 75, 109 mode 1-1-switch 85 1-2-switch 86 2-1-switch 87 2-2-switch 88 on-screen 75, 109 quarter/row column 57, 73 rate 67, 85, 90 release time 92 row/column 57, 87-89 selection type 75 speed 90 start position 99 type 75 menus 75, 109 Screen as switch 75 INDEX Pathfinder Manual: Basics 298 Screen calibration 203 Search and replace see Power Tools Select user area 49 Select words in word prediction 109 Selection technique menu 59 Selection. techniques 1-switch 57, 67, 85-86 2-switch 69, 87-88 headpointer 13, 57, 63-65,77-84 joystick 17, 57, 71, 75, 99 keyboard 57, 61 quarter row/column 51, 73 row/column 57, 87-89 Sensor cord, headpointing 63-65 Sequences, icon 27-31 Serial marker see Power Tools Serial mouse see Power Tools Serial off see Power Tools Serial on see Power Tools Serial output see Power Tools Serial printer, connect to see Power Tools Serial port jack 17 Set 1 Icon 139, 143 Set 2 Icon 139, 143 Set Activity 161, 219 Set time/date on clock 203 Settings menu 283 Setup settings, save…283 Setup word prediction 111 Shift 13 Shipping mode 203, 289 Show status bar 195 Shut-off, backlight 25, 203 Shut-off with I/O 11 Side panel on Pathfinder 21 Singing 236-259 pitch notes and values 255 pitch value code 257 store song pre-stored songs 236-237 your own song 239-259 time value of notes 259 Single meaning icon 147 Single switch scanning see 1-switch scanning Software version 12, 15 Songs, pre-stored 236 Songs, store 237-259 Speak display 131, 218 see also Power Tools Speak notebook 218, see also Power Tools Speak when spelling 195, 286 Speak word 194, 221, see also Power Tools Speaker, external 275 Speaker grille 17 Speaker volume down 43, 195 Speaker volume up 43, 195 Speaking tools see Power Tools Speech see Power Tools Speech dictionary see Power Tools Speech marker 221, see also Power Tools Speech menu see Power Tools Speech on/off 221 Speech rate, notebook see Power Tools Speech tips (DECtalk) 261-269 Spell mode 13 Spell one word 98, 197 Spell words regular vocabulary 128, 133 speech dictionary see Power Tools word prediction dictionary 118-119 Spell/Minspeak key 128 221 Spoken prompts 189-193 Status bar, notebook see Power Tools Status bar, show 195 Store Activity 151-163 auditory prompts 189-193 INDEX Pathfinder Manual: Basics 299 computer commands see Power Tools core vocabulary 129, 133, 151 digitized speech 129 IR commands see Power Tools macros 183-185, 276 minserts see Power Tools notebook see Power Tools songs 237, 239-259 synthesized speech 133 themes 133-145 X-10 commands see Power Tools Storing tips 136 Strap 19 Stuffed Minserts see Power Tools Swap key 186 Switch connectors 17 Switch notebooks see Power Tools Switch user area 48-49 Switches 1-switch 59, 67, 85-86 2-switch 69, 87-88 joystick 17, 59, 71, 75, 99 screen 75 Synthesized speech edit 134 erase 135 store 133 System colors 203 System information key on front of case 12, 15 maintenance menu 203 status bar 11, 195 System lock 203 System status 12 key on front of case 12, 15 maintenance menu 203 status bar 11, 195 Table stand 19 Text delete 135 edit 135 storing 129, 133 Text and speech marker 220, see also Power Tools Text marker see Power Tools Text sizes 195 Themes 139-145 about 139 exit 145 pick 1 icon 137, 141 pick 2 icon 137, 141 set 1 icon 137, 143 set 2 icon 137, 143 store 137-145 Time/Date, set 203 Time values of notes 259 Tips, storing 136 Toolbox 11, 15, 39, 41, 175 Tools key on front of case 11, 15 Tools, list of 39-42, 209-223 Transfer memory See MTI Manual Transfer memory menu see MTI Manual Transfer notebook see MTI Manual Troubleshooting IR see Power Tools Pathfinder 285 Tutor, icon 199 Unity see also Unity Tour Guide and Vocabulary Sort User area 47-54 copy 53 erase 54 icon on front of Pathfinder 12 rename 52 select 49 switch 49 User area menu 47 User programmable key 12 Using the calculator see Power Tools Using insert tool 140, 175-185, 215 INDEX Pathfinder Manual: Basics 300 Version number, software 12, 15 View battery status 23, 195 Vocabulary, Unity See Unity Pathfinder Manual Voice see Power Tools Volume, earphone 43, 195 Volume, speaker 43, 195 Vowel phonemes 253 Wait any key See Power Tools Word Prediction 103-122 and Minspeak 103-105 dictionary 117 add words 118 delete words 118 review words 119 display 111 flash predictor keys 115 frequency list 113 on/off 107 predict in Minspeak 112 predictor keys 115 recency and frequency 113 reset defaults 205 select words 109 serial delete (computer backspace) 121 set up 111 spell 109 turning on word prediction 107 word prediction menu 111 Workspace see Power Tools X-10 INDEX Pathfinder Manual: Basics 301 see Power Tools 302