1
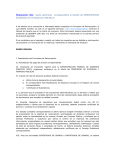
Instructions for using the Inscripta Utility (Windows XP-2000 ONLY)
Problem: Printed image looks stretched or skewed when the ribbon has 1/3 or less remaining. The
printer sounds like it is stuttering.
Solution: Adjust the take-up tension using the Inscripta Utility.
Instructions:
1. Unzip the DriverandUtilty.zip file. It contains two files, the printer driver update and the utility.
2. First, You must install the driver update. Click on the InscriptaDriverUpdate.exe file. Driver files will be
unzipped to c:\InscriptaDriverXP2000. Installation Instructions will then be displayed on screen. Choose
the installation method that fits your situation. After the installation, reboot your computer. See Appendix
A to verify driver installation if you have communications problems.
3. To open the utility click on the SetRibbonTension.exe file. (Make sure the Inscripta is on and connected
to the PC) You MUST unzip the Driver and Utility.zip file first. You can not run the SetRibbonTension.exe
file from the zip. You know you are running it from the zip file if you see the following option to the left in
the explorer window.
4. If you are unable to communicate with the
printer, (a) remove all other printers installed
on your system that communicate through an
LPT port (parallel port) (b) make sure the
driver has been updated (step 2) and (c) make
sure you are not running the utility from the zip
file.
5. Adjust the take-up tension. If it is currently
at 0 change it to 10. If it is at 10 change it to
15-20.
Please note that setting this number too
high may cause the ribbon to break.
Appendix A
Verify Driver Installation
Step 1.
Open the Registry Editor by going to Start – Run. Type “Regedt32” in the box provided. Click OK.
Browse to the following path.
HKEY_LOCAL_MACHINE\SYSTEM\CurrentControlSet\Control\Print\Environments\Windows NT
x86\Drivers\Version-2\Optical Disc Printer
Check for the “Monitor” key which is highlighted below. If it is present your driver was updated properly.
If it is not there you must update your driver again.
Step 2.
Verify the Langmon.dll file exists in the following folder:
C:\WINDOWS\SYSTEM32\spool\drivers\w32x86\2
If the file is not there you must update your driver again.