1
MTP 1500RL 15HD A SEQ • Setup Guide
This guide provides basic instructions for an experienced installer to set up and operate the Extron MTP 1500RL
15HD A SEQ twisted pair receiver.
For full details, see the MTP 1500RL 15HD A SEQ User Guide, available online at www.extron.com.
RED
BLUE
DELAY
INPUT
PEAKING
LEVEL
GREEN
ADJUST
BUFFERED OUTPUT
POWER
12V
1.0A MAX
RGB
MIN/MAX
OUTPUT
MONO
L
MTP
MTP 1500RL Series
H+
V+
CSYNC
SOG
VIDEO
END
SPARE
SELECT
AUDIO
R
MTP
ON
MTP 1500RL 15HD A SEQ
Installation and Setup
Step 1 — Mounting
Turn off or disconnect all equipment power sources. Mount the MTP 1500RL 15HD A SEQ receiver as required.
Step 2 — Connect Input
Connect the RJ-45 cable from an MTP transmitter to the Input port on the MTP 1500RL 15HD A SEQ receiver.
Terminate the cable as shown below right, using the same standard (A or B) at both ends.
Pin
T568A Wire
Color
T568B Wire
Color
1
White-green
White-orange
2
Green
Orange
3
White-orange
White-green
4
Blue
Blue
5
White-blue
White-blue
6
Orange
Green
7
White-brown
White-brown
8
Brown
Brown
RJ-45 Connector
Pins:
12345678
Insert Twisted
Pair Wires
NOTE:
The transmitter and receiver are designed for and perform best with Extron Enhanced Skew-Free AV cable terminated in accordance
with the TIA/EIA T568A standard. CAT 5 cables are acceptable but less preferable. Using preterminated and tested cables is also
recommend, Cables terminated on site should be tested before use to ensure that they comply with Category 5 specifications.
Step 3 — Connect Outputs
Attach the applicable output cables (video, audio, and buffered output).
A. High resolution video output — Connect a display device to the 15-pin HD connector (RGB).
B. Audio connector — Connect an audio device to the 5-pole captive screw connector for mono audio output
Do not tin the wires!
Sleeve(s)
Mono output 2
NO GROUND.
Unbalanced Output
Mono output 1+
Mono output 1Sleeve(s)
Mono output 2+
Mono output 2-
MONO AUDIO
1
2
NO GROUND.
MONO AUDIO
1
2
Mono output 1
Balanced Output
CAUTION
For unbalanced audio, connect the sleeve(s) to the ground contact.
DO NOT connect the sleeves to the negative (-) contacts.
C. Buffered output — Connect up to 5 daisy-chained MTP receivers to this RJ-45 connector.
MTP 1500RL 15HD A SEQ • Setup Guide (Continued)
Output
Format
H+
V+
CSYNC
SOG
VIDEO
END
SPARE
Step 4 — Receiver DIP Switches
C Sync SOG Video
•
H sync (H+) and V sync (V+) switches — Set these switches up (On) for positive
sync or down (Off) for negative sync.
•
Composite Sync, SOG, and Video switches — Set these switches as shown in the
table on the right to output the indicated format.
•
End Unit switch — Set this switch up if either of the following is true:
RGBHV
RGBS
RGsB
Component*
S-video*
Composite*
•
The receiver being configured is the only receiver connected to the transmitter.
* Input video format must match.
•
The receiver being configured is the last receiver in a daisy-chained system.
ON
Step 5 — Power
a
POWER
12V
xA MAX
Smooth
Wire the 2-pole captive screw connectors for the included external 12 VDC power supplies (see
image a on the right). Plug them into all units.
Ridges
A
Rear
Panel
A
3/16"
(5 mm)
Max.
Grounding guidelines
Extron MTP 1500RL 15HD A SEQ products can be adversely affected by electrostatic discharge (ESD)
if they are not grounded correctly.
SECTION A–A
Ridges
Power Supply
Output Cord
Earth
Ground
To prevent malfunctions or product damage, an experienced installer can correctly ground an Extron
MTP 1500RL 15HD A SEQ product in either of two ways:
•
Ground the power input port — Insert one end of the grounding wire to the negative or ground pin on the
power input connector (see image a on the right). Tie the other end of the wire to an earth ground.
•
Ground the chassis — Use a connector hex nut (see image b on the right). Tie the other end of the wire
to an earth ground.
Tie
Wrap
b
If you have any questions about how to ground a product in a specific application, contact an Extron technical
support specialist.
Step 6 — Peaking and Level
Adjust image sharpness with the Peaking control. Increased peaking compensates for mid- and high-frequency detail
loss. The LED lights red when minimum (zero) and maximum peaking is reached.
LEVEL
Adjust image brightness using the Level control. View the image and adjust either control for the best image quality.
RGB
Step 7 — Skew Compensation
Pair skew can be measured with test equipment or by viewing a crosshatch test pattern. The SEQ receivers have
built-in skew compensation capabilities. Adjust the equalization as follows:
A. Set the skew delay to zero for red, green, and blue by pressing and holding the Select button in for 3 seconds,
using a Tweeker or small screwdriver. When the Red, Green, and Blue LEDs all go out, release the Select button.
PEAKING
MIN/MAX
RED
SELECT
GREEN
BLUE
DELAY
ADJUST
B. Use UTP cable test equipment or examine the displayed image to determine which video signal — red, green, or blue
— is shifted furthest to the right.
C. Adjust the furthest left video signal by using a Tweeker or screwdriver to press and release the Select button until the LED for the leftshifted color lights.
D. Slowly rotate the Adjust control clockwise until the shifted color is properly aligned.
E. Repeat steps C and D to align the third color if needed.
Extron
MTP 1500RL 15HD A SEQ
H+
V+
CSYNC
SOG
VIDEO
END
SPARE
Flat Panel
Display
Audio
RGBHV
ON
O
IO
AUD
R
PUT MON
L
OUT
Extron
MTP 1500RL 15HD A SEQ
PUT
PC
ED
OUT
FER
BUF
T
INPU
MTP
A SEQ
RL
1500 R
MTP POWE
15HD
MTP
12V MAX
0.5A
Flat Panel
Display
500' (152 m) UTP Cable
(CAT 5/5e/6)
H+
V+
CSYNC
SOG
VIDEO
END
SPARE
RGBHV
Audio
Audio
ON
O
PUT MON
L
OUT
PUT
ED
IO
AUD
R
RGBHV
OUT
FER
BUF
T
INPU
MTP
A SEQ
RL
1500 R
MTP POWE
15HD
MTP
12V MAX
0.5A
Extron
MTP T 15HD A
1,000' (305 m) UTP Cable
(CAT 5/5e/6)
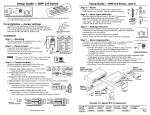
Figure 1. Example of a typical MTP 1500RL 15HD A SEQ application
Extron USA Headquarters +1.800.633.9876 (USA/Canada Only)
Extron USA - West: +1.714.491.1500 FAX: +1.714.491.1517
Extron USA - East: +1.919.850.1000 FAX: +1.919.850.1001
© 2013 Extron Electronics — All rights reserved. All trademarks mentioned are the property of their respective owners.
www.extron.com
68-1554-50
Rev. B
01 13