1
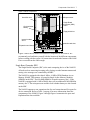
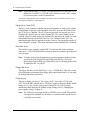
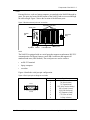
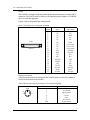
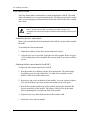
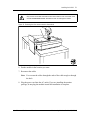
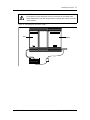
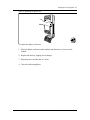
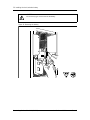
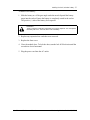
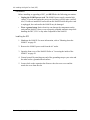
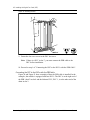
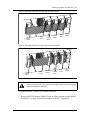
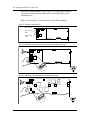
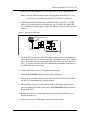
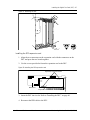
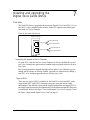
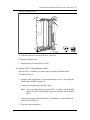
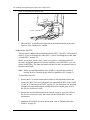
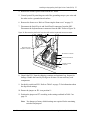
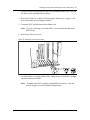
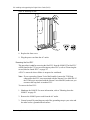
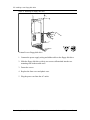
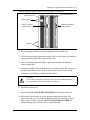
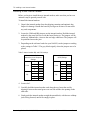
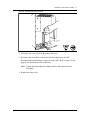
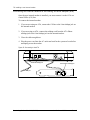
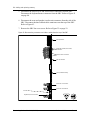
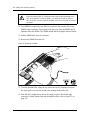
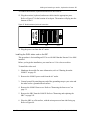
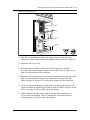
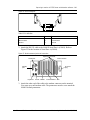
58 Installing and upgrading the Digital Voice Cards (DVC)s
12. Locate expansion slot 2. Refer to Table 3 on page 54 for more information
about the different card slots. Remove the slot cover screw and the metal slot
cover.
13. Gently push the large ribbon cables leading to the SBC flat against the
backplane. This will allow for easier installation of the DVC.
14. Carefully hold the DVC along the top. Insert the card by aligning it between
the metal groove on one side and the slot opening on the other side.
15. Push the DVC straight back and down until it fits snugly in place. Ensure the
edge connector is firmly inserted into the socket.
16. Reconnect the Serial Port A and Serial Port B connectors to the SBC.
Reconnect the keyboard/mouse connector to the SBC. Refer to Figure 34 for
the location of the connectors.
Note: Ensure the keyboard/mouse ribbon cable is still connected to the
backplane.
17. Fasten the slot cover screw in the DVC slot cover.
18. Replace the front cover.
19. Plug the power cord into the AC outlet.
Removing the second, third or fourth DVC
This procedure is for removing the second, third or fourth DVC from the NAM II.
These DVCs will be located in slots 5, 6, and 7 respectively. If you are removing
the first DVC from slot 2, refer to "Removing the first DVC" on page 60.
A DVC is removed when a failure is suspected or confirmed.
Note: If your system has Norstar Voice Mail installed, ensure the TCM loop
connected to the DVC is not associated with the Norstar Voice Mail DN. If
the TCM loop is associated with the Norstar Voice Mail DN, make sure you
reconnect the loop back to another DVC.
To remove a DVC:
1. Shutdown the NAM II. For more information, refer to "Shutting down the
NAM II" on page 29.
2. Remove the NAM II power cord from the AC outlet.
Norstar Applications Module II (NAM II)
Installation and Maintenance Manual


![MX2 sync [final].vp](http://vs1.manualzilla.com/store/data/005975841_1-4533d2555e3004ab9339335fb150c7a8-150x150.png)