1
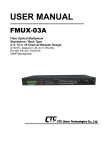
 FMUX80/160/800/1600
Fiber Optical Multiplexer
Standalone / Rack Type
8/16 Channel E1/T1 plus 100M/1G Ethernet
SNMP Manageable
LEGAL The information in this publication has been carefully checked and is believed to be entirely accurate at the time of publication. CTC Union Technologies assumes no responsibility, however, for possible errors or omissions, or for any consequences resulting from the use of the information contained herein. CTC Union Technologies reserves the right to make changes in its products or product specifications with the intent to improve function or design at any time and without notice and is not required to update this documentation to reflect such changes. CTC Union Technologies makes no warranty, representation, or guarantee regarding the suitability of its products for any particular purpose, nor does CTC Union assume any liability arising out of the application or use of any product and specifically disclaims any and all liability, including without limitation any consequential or incidental damages. CTC Union products are not designed, intended, or authorized for use in systems or applications intended to support or sustain life, or for any other application in which the failure of the product could create a situation where personal injury or death may occur. Should the Buyer purchase or use a CTC Union product for any such unintended or unauthorized application, the Buyer shall indemnify and hold CTC Union Technologies and its officers, employees, subsidiaries, affiliates, and distributors harmless against all claims, costs, damages, expenses, and reasonable attorney fees arising out of, either directly or indirectly, any claim of personal injury or death that may be associated with such unintended or unauthorized use, even if such claim alleges that CTC Union Technologies was negligent regarding the design or manufacture of said product. TRADEMARKS Microsoft is a registered trademark of Microsoft Corp. HyperTerminal™ is a registered trademark of Hilgraeve Inc. WARNING: This equipment has been tested and found to comply with the limits for a Class A digital device, pursuant to Part 15 of the FCC Rules. These limits are designed to provide reasonable protection against harmful interference when the equipment is operated in a commercial environment. This equipment generates, uses, and can radiate radio frequency energy and if not installed and used in accordance with the instruction manual may cause harmful interference in which case the user will be required to correct the interference at his own expense. NOTICE: (1) The changes or modifications not expressively approved by the party responsible for compliance could void the user's authority to operate the equipment. (2) Shielded interface cables and AC power cord, if any, must be used in order to comply with the emission limits. CISPR PUB.22 Class A COMPLIANCE: This device complies with EMC directive of the European Community and meets or exceeds the following technical standard. EN 55022 ‐ Limits and Methods of Measurement of Radio Interference Characteristics of Information Technology Equipment. This device complies with CISPR Class A. WARNING: This is a Class A product. In a domestic environment this product may cause radio interference in which case the user may be required to take adequate measures. CE NOTICE Marking by the symbol CE indicates compliance of this equipment to the EMC directive of the European Community. Such marking is indicative that this equipment meets or exceeds the following technical standards: EN 55022:2006+A1:2007, Class A, EN55024:2010, and EN60950‐1:2006 CTC Union Technologies Co., Ltd.
Far Eastern Vienna Technology Center (Neihu Technology Park)
8F, No. 60, Zhouzi St.
Neihu, Taipei, 114
Taiwan
Phone: +886-2-2659-1021
FAX: +886-2-2799-1355
FMUX160/80/1600/800 Fiber multiplexer with 8/16 channels E1/ T1 and 100M/1G Ethernet Trunk. Installation and Operation Manual Version 1.0 April 10, 2014 (Release) This document supports the following models: FMUX80B 8‐Ch. Unbalanced E1, BNC with 4‐port Ethernet Switch and 100M Ethernet wire speed trunk FMUX80R 8‐Ch. Balanced E1/T1, RJ‐45 with 4‐port Ethernet Switch and 100M Ethernet wire speed trunk FMUX160B 16‐Ch. Unbalanced E1, BNC with 4‐port Ethernet Switch and 100M Ethernet wire speed trunk FMUX160R 16‐Ch. Balanced E1/T1, RJ‐45 with 4‐port Ethernet Switch and 100M Ethernet wire speed trunk FMUX800B 8‐Ch. Unbalanced E1, BNC with 4‐port Gigabit Ethernet Switch and 850M Ethernet trunk FMUX800R 8‐Ch. Balanced E1/T1, RJ‐45 with 4‐port Gigabit Ethernet Switch and 850M Ethernet trunk FMUX1600B 16‐Ch. Unbalanced E1, BNC with 4‐port Gigabit Ethernet Switch and 850M Ethernet trunk FMUX1600R 16‐Ch. Balanced E1/T1, RJ‐45 with 4‐port Gigabit Ethernet Switch and 850M Ethernet trunk This document is the current official release manual. Please check CTC Union's website for any updated manual or contact us by E‐mail at [email protected]. Please address any comments for improving this manual or to point out omissions or errors to [email protected]. Thank you. ©2013~2014 CTC Union Technologies Co., Ltd. All Rights Reserved The contents of this document are subject to change without any prior notice. Table of Contents
CHAPTER 1. INTRODUCTION .................................................................................................................................... 7 1.1 GENERAL ......................................................................................................................................................................7 1.2 FUNCTIONAL DESCRIPTION ...............................................................................................................................................7 1.3 TECHNICAL SPECIFICATIONS ............................................................................................................................................10 1.4 E1 SIGNAL STRUCTURE ..................................................................................................................................................13 1.5 T1(DS1) SIGNAL STRUCTURE .........................................................................................................................................13 1.6 APPLICATIONS / CAPABILITIES .........................................................................................................................................14 CHAPTER 2. INSTALLATION .................................................................................................................................... 15 2.1 GENERAL ....................................................................................................................................................................15 2.2 SITE PREPARATION .......................................................................................................................................................15 2.3 MECHANICAL ASSEMBLY ................................................................................................................................................15 2.4 ELECTRICAL INSTALLATION..............................................................................................................................................16 2.4.1 Power connection.............................................................................................................................................16 2.4.2 Rear and Front panel connectors .....................................................................................................................17 2.5 REMOVAL/REPLACEMENT PROCEDURES ...........................................................................................................................18 2.5.1 SFP Removal / Replacement (Hot Swappable) .................................................................................................18 2.5.2 Top cover Removal / Replacement for internal access.....................................................................................19 2.5.3 SNMP Feature Removal / Replacement ...........................................................................................................20 CHAPTER 3. CONSOLE OPERATION......................................................................................................................... 21 3.1 INTRODUCTION ............................................................................................................................................................21 3.2 TERMINAL MODE OPERATION ........................................................................................................................................21 3.3 CONNECTING TO THE FIBER MULTIPLEXER .........................................................................................................................22 3.4 CONFIGURING IN CONSOLE MODE ...................................................................................................................................23 3.4.1 Login.................................................................................................................................................................23 3.4.2 Main Menu.......................................................................................................................................................23 3.4.3 Device Configuration Menu..............................................................................................................................24 3.4.4 Password Configuration Menu.........................................................................................................................25 3.4.5 Alarm Configuration Menu...............................................................................................................................26 3.4.6 Order Wire........................................................................................................................................................26 3.4.7 Store Parameters..............................................................................................................................................27 3.4.8 Aggregate Configuration..................................................................................................................................28 3.4.9 Optical Loop Back.............................................................................................................................................29 3.4.10 E1/T1 Mode Configuration (RJ45 models only) ..............................................................................................30 3.4.11 E1 (T1) Configuration .....................................................................................................................................30 3.4.12 LAN Port Configuration ..................................................................................................................................32 CHAPTER 4. WEB BASED OPERATION ..................................................................................................................... 35 4.1 GENERAL ....................................................................................................................................................................35 4.2 TCP/IP CONFIGURATION ...............................................................................................................................................35 4.3 BROWSER LOGIN ..........................................................................................................................................................35 4.3.1 Panel Display ....................................................................................................................................................36 4.3.2 Configuration ...................................................................................................................................................37 4.3.3 TCP/IP Configuration........................................................................................................................................38 4.3.4 Date and Time Configuration ...........................................................................................................................38 4.3.5 SNMP Manager Configuration .........................................................................................................................39 4.3.6 SYSLOG Configuration ......................................................................................................................................40 4.3.7 LOG Information...............................................................................................................................................41 4.4 PROVISIONING VIA WEB ................................................................................................................................................42 4.4.1 Device Configuration ........................................................................................................................................42 4.4.2 Optical Configuration .......................................................................................................................................43 4.4.3 E1/T1 Configuration .........................................................................................................................................44 4.4.4 LAN Configuration ............................................................................................................................................45 4.4.5 Order Wire Configuration.................................................................................................................................46 4.4.6 SFP Information................................................................................................................................................47 4.5 REMOTE MANAGEMENT ................................................................................................................................................48 i Table of Contents
CHAPTER 5. SNMP OPERATION ..............................................................................................................................48 5.1 GENERAL ................................................................................................................................................................... 48 5.2 SNMP OPERATIONS .................................................................................................................................................... 49 5.3 THE MANAGEMENT INFORMATION BASE ......................................................................................................................... 50 5.4 MIB STRUCTURE ......................................................................................................................................................... 50 5.5 SNMP COMMUNITIES ................................................................................................................................................. 50 5.6 SNMP UPGRADE VIA TFTP .......................................................................................................................................... 51 5.7 SNMP TRAP MESSAGES ............................................................................................................................................... 52 ii Chapter 1. Introduction
Chapter 1. Introduction
1.1 General
Thank you for choosing FMUX80/160 / FMUX800/1600. If you would like to skip right to the installation and configuration of the Multiplexer, proceed to Chapters 3 and 4. The Fiber Multiplexer is a 1U (1.75") high standalone or 19" rack mountable E1/T1/LAN multiplexer over fiber link, built upon a cost effective fixed design. The Fiber Multiplexer provides an economic optical connection solution in high‐density E1 and/or T1 installations such as between branch offices or for 2G/3G mobile backhaul, where multiple high speed synchronous data communications are required with high‐speed Ethernet backhaul. By utilizing a fixed design, costs are reduced and reliability improved. The standard unit is a chassis with local control and ordered with single or dual power. One model supports RJ‐45 connectors for E1/T1, wired per USOC RJ48C, while another model boasts BNC connectors for unbalanced 75 E1 over coaxial cables. The FMUX160 utilizes fixed optical transceivers and connector options including ST™, SC or FC. The FMUX1600 uses SFP cages that support any industry standard 1.25Gbps SFP module. The range of transmission for optical connection is from 2Km (for multi‐mode) up to 120Km (single mode). Optional SNMP Card (for local and remote management purposes) may be ordered and installed in the chassis. 1.2 Functional Description
The Fiber Multiplexer basic chassis is available in five power supply configurations. Depending on the model, power may be derived from single AC 100~240VAC, single DC +18~60VDC, dual AC 100~240VAC, dual DC +18~60VDC, or AC plus DC power sources. The Fiber Multiplexer provides all E1/T1 and LAN connections on the rear panel. The front panel provides the LED indicators, order wire, clear channel RS‐232, aggregate optical and console connectors. Model Breakdown: FMUX80B 8‐Ch. Unbalanced E1, BNC with 4‐port Ethernet Switch and 100M Ethernet wire speed trunk FMUX80R 8‐Ch. Balanced E1/T1, RJ‐45 with 4‐port Ethernet Switch and 100M Ethernet wire speed trunk FMUX160B 16‐Ch. Unbalanced E1, BNC with 4‐port Ethernet Switch and 100M Ethernet wire speed trunk FMUX160R 16‐Ch. Balanced E1/T1, RJ‐45 with 4‐port Ethernet Switch and 100M Ethernet wire speed trunk FMUX800B 8‐Ch. Unbalanced E1, BNC with 4‐port Gigabit Ethernet Switch and 850M Ethernet trunk FMUX800R 8‐Ch. Balanced E1/T1, RJ‐45 with 4‐port Gigabit Ethernet Switch and 850M Ethernet trunk FMUX1600B 16‐Ch. Unbalanced E1, BNC with 4‐port Gigabit Ethernet Switch and 850M Ethernet trunk FMUX1600R 16‐Ch. Balanced E1/T1, RJ‐45 with 4‐port Gigabit Ethernet Switch and 850M Ethernet trunk The 16‐CHANNEL "B" Model has 16 pairs of BNC (75 Ohm unbalanced) connectors for E1 Line interface connections supporting sixteen separate E1 channels at a transmission rate of 2.048Mb/s (transparent unframed E1) each. The 16‐CHANNEL "R" Model provide 16 RJ‐45 (120/100 Ohm balanced, software selectable) connectors for E1/T1(DS1) Line interface connections supporting sixteen separate E1/T1(DS1) channels at a transmission rate of 2.048/1.544Mb/s (transparent unframed E1/T1) each. E1 and T1 configuration cannot be mixed; all ports must be either E1 or T1. The 8‐CHANNEL models have the same features, but with only 8 tributary channels. The built‐in Ethernet Switch provides four RJ‐45 connectors for 10/100M wire speed Ethernet (FMUX80/160) or 10/100/1000M Ethernet (FMUX800/1600 up to 850M trunk speed). The switch function provides auto/forced per port settings, Port based VLAN and Ethernet flow control enable/disable. LEDs on the front panel will show power, alarm and channel statuses for all ports. 7 Chapter 1. Introduction
The Fiber Multiplexer E1 and T1 Interface Ports fully meet all E1 and T1 specifications including ITU‐T G.703, G.704, G.706, G.732, G.733, G.823 and G.824. The Ethernet switch meets all Ethernet specifications for IEEE802.3 and IEEE802.3u. Each E1/T1‐CHANNEL Port features diagnostic capabilities for performing local loop back or remote loop back. The loop back function is controlled by the terminal mode (RS‐232 console) or when the SNMP option board is installed via Telnet, Web or SNMP set commands. The unit operates from an internal free running oscillator. The Fiber Multiplexer is completely transparent to clocking and data transmission. This makes configuration of the MUX extremely easy. When the Fiber Multiplexer is ordered with an optional SNMP Module, the module card is installed inside the chassis. Configuration is accomplished via local control on the asynchronous RS‐232 port with a standard VT‐100 terminal, via Ethernet and Telnet, or via any standard SNMP network management software over Ethernet. The Fiber
Multiplexer will then also have an embedded web server to provide local or remote management using any www browser. If the SNMP Card option is not installed, local management is still possible via the unit's internal menu system accessible from the asynchronous RS‐232 port with a standard VT‐100 terminal. The Fiber Multiplexer also includes the ability to do in‐band remote configuration. Once the fiber optic link has been established, the remote unit may be configured or status checked from the local unit using any of the available management options. 8 Chapter 1. Introduction
The following photo, with graphics, shows the major components which make up the Fiber Multiplexer (with the SNMP option installed). This photo shows a unit with16 E1/T1 RJ‐45 interfaces. Figure 1‐1 : Fiber Multiplexer Major Components AC DC
SNMP
SFP 9 Chapter 1. Introduction
1.3 Technical Specifications
E1 Link Framing
Bit Rate
Line Code
Line Impedance
Receiver sensitivity
"Pulse" Amplitude
"Zero" Amplitude
Transmit Frequency Tracking
Internal Timing
Jitter Performance
Complies With
Interface Connectors
Test Loops
Unframed (transparent)
2.048 Mb/s
AMI
HDB3
Unbalanced 75 ohms (BNC)
Balanced 120 ohms (RJ-45)
+3 to -12dB (short haul)
Nominal 2.37V+/-10% for 75 ohms
Nominal 3.00V+/-10% for 120 ohms
+/-0.3V
+/-50 ppm
According to ITU-T G.823
ITU-T G.703, G.704, G.706 and G.732
RJ-45
BNC
LLB (Local Loop Back)
RLB (Remote Loop Back)
RRLB (Request Remote Loop Back)
T1 Link Framing
Bit Rate
Line Code
Line Impedance
Receiver sensitivity
"Pulse" Amplitude
"Zero" Amplitude
Transmit Frequency Tracking
Internal Timing
Jitter Performance
Complies With
Interface Connectors
Test Loops
Unframed (transparent)
1.544 Mb/s
AMI
B8ZS
Balanced 100 ohms (RJ-45)
+3 to -12dB (short haul)
Nominal 3.00V+/-10% for 100 ohms
+/-0.3V
+/-50 ppm
According to ITU-T G.824
ITU-T G.703, G.704, G.706 and G.733
RJ-45
LLB (Local Loop Back)
RLB (Remote Loop Back)
RRLB (Request Remote Loop Back)
Ethernet Switch Interface Type (FMUX80/160)
Interface Type (FMUX800/1600)
Interface Connector
WAN Data Rate
Complies with
Configuration modes
MTU
10Base-T, 100Base-TX (auto-negotiation)
10Base-T, 100Base-TX, 1000Base-T (auto-negotiation)
RJ-45
100M (FE Models) or 850M (GbE Models)
IEEE802.3 10Base-T
IEEE802.3u 100Base-TX
IEEE802.3ab 1000Base-T
IEEE802.3x Ethernet flow control
Auto, forced, Port Based VLAN, Ethernet flow control
1552 bytes (FMUX80/160)
10240 bytes (FMUX800/1600)
10 Chapter 1. Introduction
Local Setup and Configuration Console
Terminal Parameters
Pin Assignment (DB9F)
RS-232 async DCE
Speed: 38,400
Bits: 8 bits
Parity: None
Stop: 1 bit
Flow Control: None
2 - RD Receive Data (output towards DTE)
3 - TD Transmit Data (input from DTE)
5 - SG Signal Ground
Alarm Output Relays Alarm Output
One of Normally Open/Closed contact for alarms, both
audio and visual.
Contact ratings: 1A at 30 VDC resistive
or 0.5A at 125 VAC resistive
LED Indicators PWR1
PWR2
OP1
OP2
Channels
ALM
RDI
SYS
SNMP
Phone
E1
LNK (LAN)
100M (LAN)
Green
Green
Green
Power Module 1 active
Power Module 2 active
Off = off
On = optical link is good
blinking = working port
Green
Off = off or disabled
On = optical link is good
Blinking = working port
Dual Color One LED for each channel (1-8) or (1-16)
Green = E1/T1 Signal Present
Off = Out of Service
Amber = E1/T1 Loss of Signal
Amber (blinking) = channel in loopback mode
Red
Indicates an alarm has occurred, includes E1 or T1 BPV, signal
loss, LAN link down, or fiber sync slip.
Red
Remote Defect Indicator, indicates an alarm has occurred in
the remote multiplexer, includes E1, T1, LAN and fiber signal
loss.
Green
Indicates the system is normal
Green
If SNMP option is installed, indicates the agent is active by
blinking once per second.
Green
Indicates the order wire is in use.
Green
For an E1/T1 multiplexer, On if configured as E1-RJ45 (120
ohm), OFF for T1-RJ-45 (100 ohm), Blinking for E1-BNC (75
ohm)
Green
4 LEDs, one for each LAN port
On = LAN link established
Flashing = link with traffic
Off = no LAN link or port disabled
Dual Color 4 LEDs, one for each LAN port
Amber On = The LAN speed is 1000M (FMUX1600, 800 only)
Green On = The LAN speed is 100M
Off = If link is present, the LAN speed is 10M
11 Chapter 1. Introduction
Optical Specifications (FMUX80/160 fixed optical type) Standard Types
Type
M-M
S-M
S-M
S-M
S-M
S-M
Distance (Km)
2
15
30
50
120
20(A)*
Wavelength
Tx:1310
1310
1310
1310
1310
1550
(nm)
Rx:1550
BER**
<10-11
<10-11
<10-11
<10-11
<10-11
<10-11
Sensitivity
-31dBm -32dBm -35dBm -36dBm -35dBm -32dBm
Output Power -20dBm -20dBm -15dBm
-8dBm
0dBm
-18dBm
Power Margin
11dB
12dB
20dB
28dB
35dB
14dB
Return Loss
-12dBm -12dBm -12dBm -12dBm -12dBm -14dBm
ST
v
v
v
v
v
Conn.
SC
v
v
v
v
v
v
Types
FC
v
v
v
v
v
M‐M: multi‐mode S‐M: single‐mode [All optical transceivers are rated Class A.] * WDM types must match (A) with (B) in pairs ** Bit Error Rate WDM Types*
S-M
S-M
20(B)*
40(A)*
S-M
40(B)*
Tx:1550
Rx:1310
Tx:1310
Rx:1550
Tx:1550
Rx:1310
<10-11
<10-11
<10-11
-32dBm
-15dBm
17dB
-14dBm
-32dBm
-10dBm
22dB
-14dBm
-32dBm
-7dBm
25dB
-14dBm
v
v
v
All fiber transceivers in the fiber multiplexer incorporate an automatic laser shutdown feature (ALS) designed to protect personnel that may come into contact with a disconnected fiber connection. This feature may also be disabled for testing purposes via console terminal mode or SNMP (when SNMP option is installed). Physical Height:
Width:
Depth:
Weight:
43 mm (1.75")
438 mm (17.25")
200 mm (7.875")
2.4 kg (5.3 lb.) Net
Power supply Voltage (AC source)
Voltage (DC source)
Frequency
Power consumption
100 ~ 240 VAC
18 ~ 60 VDC
47 to 63 Hz for AC power
<30 Watts
Environment Temperature
Humidity
o
o
0-60 C / 32-140 F
0 to 90% non-condensing
Miscellaneous MTBF
Emission compliance
Safety compliance
65,000 hours
meets FCC part 15 Sub B (class A)
EN55022:1994/A1:1995/A2:1997,
EN61000-3-2:1995, EN61000-3-3:1995,
and EN50082-1:1997
EN60950-1
12 Chapter 1. Introduction
1.4 E1 Signal Structure
E1 link line rate The E1 line operates at a nominal rate of 2.048Mb/s. E1 link line coding The basic E1 line signal is coded using either the Alternate Mark Inversion (AMI) or HDB3 rule. In the AMI format, "ones" are alternately transmitted as positive and negative pulses, whereas "zeros" are transmitted as a zero voltage level. AMI is not used in most 2.048Mb/s transmissions because synchronization loss occurs during long strings of data zeros. In the HDB3 format, a string of four consecutive zeros is replaced with a substitute string of pulses containing an intentional bipolar violation. The HDB3 code substitutions provide high pulse density so that the receiving equipment is able to maintain synchronization with the received signal. The 8/16-CHANNEL E1 supports two E1 line codes: AMI coding. HDB3 coding. The 8/16-CHANNEL E1 supports only transparent unframed format. ie., The E1 will pass through with its original framing structure completely intact. 1.5 T1(DS1) Signal Structure
T1 link line rate The T1 line operates at a nominal rate of 1.544Mb/s. T1 link line coding The basic T1 line signal is coded using either the Alternate Mark Inversion (AMI) or B8ZS rule. In the AMI format, "ones" are alternately transmitted as positive and negative pulses, whereas "zeros" are transmitted as a zero voltage level. AMI is not used in most 1.544Mb/s transmissions because synchronization loss occurs during long strings of data zeros. In the B8ZS format, a string of eight consecutive zeros is replaced with a substitute string of pulses containing an intentional bipolar violation. The B8ZS code substitutions provide high pulse density so that the receiving equipment is able to maintain synchronization with the received signal. The 8/16-CHANNEL T1 supports two T1 line codes: AMI coding. B8ZS coding. The 8/16-CHANNEL T1 supports only transparent unframed format. ie., The T1 will pass through with its original framing structure completely intact. 13 Chapter 1. Introduction
1.6 Applications / Capabilities
In the following example, the Fiber Multiplexer utilizes an optical fiber connection between a pair of units to provide 8 or 16 channels of E1, T1, and 1 to 4 ports of Trunk Ethernet between the units. The timing scheme for typical E1 or T1 equipment is to transparently pass timing from a timing source unit on one side, to a timing slaved unit on the other. Each of the up to 16 available channels of the Fiber Multiplexer is independent of any other channel for framing or timing. Figure 1‐2 : Typical Point‐to‐Point Application of Fiber Multiplexer 14 Chapter 2. Installation
Chapter 2. Installation
2.1 General
This chapter explains in detail the requirements and procedures for the installation of the Fiber Multiplexer
Standalone/Rack Mount Fiber Optical Multiplexer. 2.2 Site Preparation
Install the Fiber Multiplexer within reach of an easily accessible grounded AC outlet. The outlet should be capable of furnishing 100 to 240 VAC (18 to 60 VDC for DC supply). Allow at least 10cm (4 inch) clearance at the rear and front of the Fiber Multiplexer for signal lines and interface cables. 2.3 Mechanical Assembly
The Fiber Multiplexer is designed for rack mount installation and only requires 1U space (1 3/4") in a standard EIA 19 inch rack. It is highly recommended that the unit be placed in a rack. The Fiber Multiplexer is delivered completely assembled, with the exception of the rack mount adapter brackets. No provision is made for bolting the Fiber Multiplexer to a tabletop. Figure 2‐1 : Rack mount Installation of the Fiber Multiplexer 15 Chapter 2. Installation
2.4 Electrical Installation
2.4.1 Power connection For a model with AC power supply, AC power (100~240VAC) is supplied to the Fiber Multiplexer through a standard IEC C14 3‐prong receptacle, located on the rear of the chassis. For a model with DC power supply, DC –48V (18~60VDC) is connected to the terminal block, observing the proper polarity. In the AC/DC model, both IEC receptacle and DC terminal block are provided for dual power operation. The Fiber Multiplexer should always be grounded through the protective earth lead of the power cable in AC installations, or via the frame ground connection for DC installations. IEC C13 line plug Left: Live line
Right: Neutral line
Middle: Ground
+V
DC IN
FG -V
Right: -V (-48V)
Left: +V (0V)
Middle: Frame Ground
18~60VDC
Figure 2‐2 : Supply connections, AC/DC model shown 16 Chapter 2. Installation
2.4.2 Rear and Front panel connectors All Channels are fixed on the rear of the Fiber Multiplexer. As a manufacturer of fiber multiplexers for almost 15 years, our experience has shown that in less than 1% of cases will an operator ever use the expansion feature of a modular multiplexer which is all E1 or T1. This additional cost for modular design is born by the operator, increasing operating costs. In this age where costs must be controlled, purchasers should be opting for a low cost fixed design when available. Maintenance personnel must take on a new mind set to not specify high priced and useless features when developing compliance documents. Modular designed multiplexers, of this capacity, are neither required or are they financially viable. Modular designs are reserved for multi‐service multiplexers supporting TDM, Data and Voice. Mains Switches E1 unbalanced BNC Fast Ethernet Switch Rear Panel (example FMUX160B) Rear Panel (example FMUX1600R) AC Mains IEC C14 DC Mains Terminal Block 16 x E1/T1 balanced RJ‐45
Gigabit Ethernet Switch Figure 2‐3 : Rear Panel Connections The front panel of the Fiber Multiplexer, holds the optical interfaces, the status and alarm LEDs, the call button, order wire jack, clear RS‐232 channel and the local management console port. The optical interfaces may be of the Fixed type or pluggable SFP type. The two optical interfaces provide 1+1 fiber protection. The front panel also provides the connections to the RS‐232 Console Interface (terminal mode) and to the management network for SNMP control (when the SNMP option is installed). Optical and Channel Order Wire Alarm Contacts
Optical Status Interfaces Indicators SNMP Ethernet RS‐232 Console Order Wire Management Clear Channel Call Button Management Port Port Figure 2‐4 : Front Panel Controls and Indicators 17 Chapter 2. Installation
2.5 Removal/Replacement Procedures
2.5.1 SFP Removal / Replacement (Hot Swappable) The Gigabit Ethernet Fiber Multiplexer accepts any SFP unit that complies with the MSA standard. Follow all ESD precautions when handling the SFP modules. Fiber optic components and cables are very sensitive to dirt, dust and mishandling, especially in high‐speed networks. Dirty or mistreated fiber may cause errors and an unwanted degradation of signal quality. Remove the dust caps on SFP and patch cable connectors only when ready to plug in optical cables. When choosing SFP optical modules, the SFP must be able to support the required data rate. For the FMUX800 and FMUX1600, SFP with a data rating of 1.25Gbps is required. Make sure the SFP modules chosen are suitable for the required data rate. (FMUX80 and FMUX160 use fixed transceivers.) Installation CTC Union supplied SFP modules are of the Bale Clasp type. The bale clasp SFP module has a bale clasp that secures the module into the SFP cage. Figure 2‐5 : Optical Interface Removal / Replacement (while in service) • Removing a Bale Clasp SFP Module Step 1 Open the bale clasp on the SFP module. Press the clasp downward with your index finger. Step 2 Grasp the SFP module between your thumb and index finger and carefully remove it from the SFP cage. • Inserting a Bale Clasp SFP Module into an SFP cage Step 1 Close the bale clasp upward before inserting the SFP module. Step 2 Line up the SFP module with the port, and slide it into the cage until it seats. SFP Cages 1+1 Optical Figure 2‐6 : SFP cages located on front panel 18 Chapter 2. Installation
2.5.2 Top cover Removal / Replacement for internal access Normally, there is no need to remove the cover of the unit. All interfaces are fixed and no user serviceable components are inside. However, to change any AC or DC power module, add the SNMP feature, internal access is required and the cover must be removed. ***CAUTION*** This procedure should only be performed by qualified service personnel. In addition, all power connections must be removed before even attempting to open the case. 1. If the unit is installed in a rack, it must be removed along with all power connections. 2. The rack mounting brackets, if installed, need not be removed. 3. The top cover is held in place by eight screws. 4. Once all eight screws are removed, the top panel just lifts off. The internals are now exposed. Follow the procedure in reverse to re‐install the top panel. Install the screws but at first do not tighten. Make sure all eight screws are started and not cross threaded, then tighten them in a crisscross pattern. The screws are only 3mm, so do not over tighten or they may become stripped or broken. Re‐install the rack mount ears if they were removed. Figure 2‐7 : Top cover removal (while out of service) 19 Chapter 2. Installation
2.5.3 SNMP Feature Removal / Replacement ***CAUTION*** This procedure should only be performed by qualified service personnel. In addition, all power connections must be removed before attempting to open the case. 1. If the unit is installed in a rack, it must be removed. 2. Follow the procedure in 2.5.2 to remove the top cover. 3. The connector for the SNMP daughter card is located on the left side of the device, when looking from the front. The SNMP kit will include three stand‐offs, the SNMP card and three screws. Insert the three stand‐offs and tighten carefully as they are brass and only 3.5mm. Carefully align the pins of the SNMP card, seat the card, ensuring no pins are bent. The three holes in the PCB should line up with the three stand‐offs on the mainboard. 4. Install the three pan‐head screws supplied. Tighten firmly, but do not over tighten. Refer to the photo below. 5. Re‐install the top cover. Figure 2‐8 : SNMP module card Removal / Replacement 20 Chapter 3. Operation
Chapter 3. Console Operation
3.1 Introduction
This chapter will go into the details of the specific configuration and operation of the Fiber Multiplexer. The section will outline the operation when using a VT‐100 terminal connected to the RS‐232 Console port. 3.2 Terminal Mode Operation
A notebook computer has become an invaluable tool of the Systems Engineer. Connection between the computer and the Fiber Multiplexer is very straight forward. The only hardware required is a DB9M to DB9F extension cable. The Fiber Multiplexer's RS‐232 console port acts as a DCE to the PC's DTE communications port. There are a number of common programs which can be used as terminal emulators for Microsoft ® Windows™ based computers. Windows XP® computers already have a terminal emulation program called HyperTerminal™. However, in operating systems after Windows XP®, such a Windows Vista®, Windows 7®, and Windows 8®, there is no such terminal emulation program. In these cases, we highly recommend the free emulation program "TeraTerm Pro". This program can be found freely on the Internet by doing a simple search. For the remainder of this chapter, "TeraTerm Pro" will be used as our terminal emulator under Windows™. [TeraTerm Example] Start the application. The 'New connection' pop‐up window will appear. Select the 'Serial' radio button. From the 'Port' pull‐down menu, select the communication port. In the example below, the COM port is a USB serial adapter. After selection of the communications port, click the 'OK' button. The next step is to configure the serial port communication parameters. To do this, select the 'Setup' pull‐down menu and from that menu, select 'Serial port...'. 21 Chapter 3. Operation
Modify the serial port parameters so that we can establish working communication with the Fiber Multiplexer. The communication parameters must be set as follows: Baud rate: 38400 Data: 8 bit Parity: none Stop: 1 bit Flow control: none Now, click the 'OK' button and the application will be ready to establish communication with the Fiber Multiplexer. Figure 3‐1 TeraTerm Pro port settings for Fiber Multiplexer 3.3 Connecting to the Fiber Multiplexer
The console port on the Fiber Multiplexer is an RS‐232D interface (DCE) that utilizes a DB9(F) connector. Use the configuration cable that is supplied with the Fiber Multiplexer or prepare a three wire, DB9(M) to DB9(F), 1:1 cable with the following pin out: DB9(M)
5
2
3
signal
GND
RD
TD
22 DB9(F)
5
2
3
Chapter 3. Operation
3.4 Configuring in Console Mode
3.4.1 Login The Fiber Multiplexer local management port (labeled "Console" on the front panel) is a console terminal port designed to facilitate setup of all parameters through the use of a standard text based terminal or any terminal emulation program running on a Personal Computer. Make the appropriate connections, start the terminal application, apply power to the Fiber Multiplexer, then press ENTER on the PC keyboard. The terminal display should look like the following, depending on the model type. ****************************************
***
***
*** FMUX160
***
****************************************
[Local ] Ver:[1.100-1.001-0.000-1.000] [Alarm]
User Name : admin
Password :
The default password is 'admin'. 3.4.2 Main Menu After successfully logging in, the main menu will be displayed. From this menu, all configurations can be performed. Operation of the interface is very straight forward. The menu system requires no complex CLI commands, just simply enter the menu by keying the item. Upper and lower case letters work in any case. [Local ] Ver:[1.000-1.003-0.000-1.000] [Alarm]
< 1 > Optical Port 01 ~ 02
< 2 > LAN
Port 01 ~ 04
< 3 > E1
Port 01 ~ 08
< 4 > E1
Port 09 ~ 16
< O > Order Wire Configuration
< A > Alarm
Configuration
< D > Device
Configuration
< S > Store Parameters
< U > Firmware Upgrade with Xmodem
< P > Password Setup
< R > Go to Remote
[ ESC ] Logout
23 Chapter 3. Operation
The following explains the functions of each menu item. These will all be detailed later: < 1 > Optical Port 01 ~ 02 The sub‐menu provides settings for ALS, protection mode, loop back, display bit error count. < 2 > LAN Port 01 ~ 04 Leads to the sub‐menu to configure the 4‐port Ethernet switch. < 3 > E1 Port 01 ~ 08 Leads to the sub‐menu to configure E1/T1 ports 1~8. < 4 > E1 Port 09 ~ 16 Leads to the sub‐menu to configure E1/T1 ports 9~16. < O > Order Wire Configuration This sub‐menu shows the order wire status. < A > Alarm Configuration The alarm status and configuration is done on this sub‐menu < D > Device Configuration Information (uptime, power status) and configuration (reset, factory default) are here. < S > Store Parameters Before leaving the main menu, store the settings in non‐volatile ram. < U > Firmware Upgrade with Xmodem In the event of any future upgrade, the firmware can be loaded here. < P > Password Setup Sets up the console login password through this sub‐menu < R > Go to Remote When fiber links to a remote unit, this option is available. Remote management is done via the EOC (Embedded Operations Channel) within the fiber transmission between a pair of Fiber Multiplexers. 3.4.3 Device Configuration Menu The menu screen is broken into two parts, the informational part and the configuration part. [Local ]
Ver:[1.100-1.003-0.000-1.000]
[Alarm]
<< Device Information and Configuration >>
< Information >
Uptime
[
10 : 12 : 04 ] S/N [ C49102332600000000001 ]
Power 1 [ AC Power
] [Fixed ] [UP ]
Power 2 [ DC Power
] [Fixed ] [Down]
< Configuration >
<1> Device Active [Enable ]
<2> Device Reset
<3> Factory Default
<4> Clear system Uptime
<5> SNMP Information
<6> SNMP [Enable ]
[ ESC ] Go to previous menu. Please select an item.
Information shown includes the Uptime of the device, power types (AC or DC) and power status. <1> Device Active Indicates if the device is enabled or disabled. When disabled, no traffic will flow through the device. A confirmation will be required to disable the device. <2> Device Reset When performing a device reset the CPU will reboot, FPGA code is reloaded and the saved configuration is restored. During the reset, no traffic will flow through the device. A confirmation will be required prior to resetting. <3> Factory Default When performing a factory default, all configuration settings will be reverted to the factory default settings. Doing a factory default on an in service device could lead to traffic disruption. Therefore, a confirmation will be required before the factory default is performed. Device Reset and Factory Default actions could result in disruption of traffic, a further confirmation will be required by the user. -----------------------------------------------------------------------------< Confirmation >
WARNING!! Resetting device will momentarily block all traffic.
Are you sure?
<Y> Yes
<Esc> Exit
<4> Clear system Uptime Uptime is a measure of the time the device has been working. The counter can be zeroed using this function. 24 Chapter 3. Operation
<5> SNMP Information If an SNMP module is installed, the TCP/IP settings may be viewed here. Once the IP address is known, a management PC or Laptop can adjust its TCP/IP settings so it can connect with the Fiber Multiplexer's SNMP agent. The default IP address of SNMP agent is 192.168.1.1. [Local ] Ver:[1.100-1.003-0.000-1.000] [Alarm] [RDI]
<< SNMP Information >>
< IP Information >
IP
[192.168. 1. 1]
Subnet Mask [255.255.255. 0]
Gateway
[192.168. 1.254]
[ ESC ] Go to previous menu. Please select an item.
<6> SNMP [Enable ] Toggles the SNMP agent in this unit between enabled (active) or disabled state. When two Fiber Multiplexer units form a link, only one SNMP agent is required to manage and operate the local and remote pair. If both units have SNMP agents installed, disable the SNMP for the unit that will be designated as the 'Remote' unit. This will avoid the "who is master" issue when one local SNMP agent tries to overwrite another agent's remote settings. Note: Only one unit in the working pair requires SNMP agent for management and only one should be enabled. 3.4.4 Password Configuration Menu The Fiber Multiplexer has a factory default password, 'admin'. In order to modify the password, choose the password configuration menu item from the main menu. First, key in the old password "admin", then key in the new password twice. If the password is not entered the same twice, it will be rejected. The password should only consist of alpha‐numeric characters, i.e., a~z, 0~9. The password is case sensitive and its length is limited to 16 characters. [Local ] Ver:[1.100-1.001-0.000-1.000] [Alarm]
Old
Password :
New
Password :
Confirm Password :
[ ESC ] Go to previous menu.
25 Chapter 3. Operation
3.4.5 Alarm Configuration Menu The menu screen is broken into two parts, the informational part and the configuration part. The alarm information displays either normal or alarm for the overall "Alarm Status", for the "Relay" state, for the audible "buzzer" status and for RDI (remote defect indicator) status. [Local ] Ver:[1.100-1.001-0.000-1.000] [Alarm]
<< Alarm Information and Configuration >>
< Information >
Alarm Status
[Alarm ]
Alarm Relay Status [Normal]
Alarm Buzzer Status [Normal]
RDI
[Normal]
< Configuration >
<1> Alarm Relay [Disable]
<2> Alarm Buzzer [Disable]
Alarm Triggers: <3> Optical[ ] <4> LAN[ ] <5> RDI[ ] <6> Power[ ]
[ ESC ] Go to previous menu. Please select an item.
<1> Alarm Relay When disabled, the alarm relay will remain with pins 1&2 closed and pins 2&3 open. When the configuration is enabled, the relay state will reflect the "Alarm Status" shown under the Information heading as follows. If "Alarm Status" is 'Normal', then pins 1&2 are closed and pins 2&3 are open. If "Alarm Status" is 'Alarm', then pins 1&2 are open and pins 2&3 are closed. <2> Alarm Buzzer When disabled, the alarm buzzer will remain off, no matter the actual alarm status. When the configuration is enabled, the buzzer will reflect the "Alarm Status" shown under the Information heading as follows. If "Alarm Status" is 'Normal', then the buzzer will be off. If "Alarm Status" is 'Alarm', then the buzzer will sound. <3> Optical , <4> LAN , <5> Power These three alarm triggers may be toggled on or off by the user, allowing them to either report or not report their alarm condition. By default, they are not enabled. Enable them if alarms should be indicated for these. By default, all E1/T1 loss of signal condition will trigger an alarm. 3.4.6 Order Wire The order wire is an optional accessory which is available in either a 2‐wire or a 4‐wire version. The option must be installed in both the local and remote multiplexers and is typically done in the factory. We made the order wire an option, because nowadays everyone has a mobile phone (or two), so it is easy for two engineers to contact each other without requiring the order wire feature in the multiplexers. The menu for the order wire only has 'informational' messages regarding the presence of any ring and the type of order wire module installed in the multiplexer. There are 3 (three) possible types show: ‐‐ : no order wire module was found 2W : a two wire module is installed 4W : a four wire module is installed [Local ] Ver:[1.100-1.001-0.000-1.000] [Alarm]
<< Phone Information and Configuration >>
< Information >
Phone Ring [ None ]
Type
[ 2W ]
[ ESC ] Go to previous menu. Please select an item.
26 Chapter 3. Operation
3.4.7 Store Parameters Any changes made to running configuration are made immediately, but they are not saved unless the "Store Parameters" function is performed. From the Main Menu, press "s" and then confirm the save parameter function. [Local ] Ver:[1.100-1.001-0.000-1.000] [Alarm]
< 1 > Optical Port
01 ~ 02
< 2 > LAN
Port
01 ~ 04
< 3 > E1
Channel 01 ~ 08
< 4 > E1
Channel 09 ~ 16
< O > Order Wire Configuration
< A > Alarm
Configuration
< D > Device
Configuration
< S > Store Parameters
< U > Firmware Upgrade with Xmodem
< P > Password Setup
< R > Go to Remote
----------------------------------------------------------------------------- <Y> Yes
<Esc> Exit
Failure to save parameters will result in all changes being lost if the multiplexer is power cycled. 27 Chapter 3. Operation
3.4.8 Aggregate Configuration When we use the term aggregate, we are referring to the optical section of the multiplexer. All of the tributary channels (E1/T1, LAN, Order Wire, RS‐232) are multiplexed or "aggregated" into the optical fiber transmission. The received optical transmission, which contains all of the multiplexed signals, is de‐multiplexed back into the appropriate tributary channels. To enter the configuration menus for the aggregate, select the "Optical Port" menu item from the main menu page. [Local ] Ver:[1.100-1.003-0.000-1.000]
[RDI]
< 1 > Optical Port
01 ~ 02
< 2 > LAN
Port
01 ~ 04
< 3 > E1
Channel 01 ~ 08
< 4 > E1
Channel 09 ~ 16
< O > Order Wire Configuration
< A > Alarm
Configuration
< D > Device
Configuration
< S > Store Parameters
< U > Firmware Upgrade with Xmodem
< P > Password Setup
< R > Go to Remote
[ ESC ] Logout
The menu screen is broken into two parts, the informational part and the configuration part. The two optical ports work to provide redundancy in the event of any hardware failure or fiber cable breakage or disconnection. Type : Will be listed as either "1 * 9" which is a fixed transceiver, or as " SFP "a small form pluggable transceiver. Link : This indicates the state of the optical link, either UP or DOWN. DDM : Digital Diagnostic Monitor is an optional feature of SFP modules. An SFP which supports DDM offers additional diagnostic information such as Tx Power, Rx Power and internal temperature. The fiber multiplexer is able to read and monitor this information if available. Working Path Status : When 1+1 optical protection is utilized, one of the optical paths is active or "working" while the other path is standing by. The status here shows which optical interface is providing the working or active path. bit Error Counter : The multiplexer maintains a constantly running bit error rate channel as one of the multiplexed streams. If the optical path has transmission errors, this stream will show an increasing bit error count. The counter register can be cleared and then monitored over an extended time, looking for any optical transmission errors. [Local ] Ver:[1.100-1.003-0.000-1.000] [Alarm] [RDI]
<< Optical Port Information and Configuration >>
< Information >
[
Optical 1
]
[
Optical 2
]
Type
[ S F P ]
Type
[ S F P ]
Link
[ UP
]
Link
[ UP
]
DDM
[ DDM
]
DDM
[ None ]
Tx Fault [ Normal]
Tx Fault [ Normal]
Present [ Exist ]
Present [ Exist ]
Working Path Status [ OP1 ]
bit Error Counter [
0]
< Configuration >
< 1 > Protection Mode
[Auto, Non-Revert]
< 2 > ALS
[Disable]
< 3 > Loopback Test
[Disable]
< 4 > Insert one BERT Err
< 5 > Clear bit Err Counter
< 6 > Optical 1 SFP-DD Information
< 7 > Optical 2 SFP-DD Information
[ ESC ] Go to previous menu. Please select an item.
< 1 > Protection Mode : Choose the mode of optical protection, non‐revert, revert or manual (non‐revert default). < 2 > ALS : Enable or Disable the Auto Laser Shutdown safety feature here (disabled by default). < 3 > Loopback Test : Take care when doing fiber loopback test as ALL the aggregate channel will be looped, including the Ethernet. If an Ethernet port is connected to an active network, the multiplexer will create a broadcast storm. Please exercise care when performing optical loopback. (See next page for loopback details.) 28 Chapter 3. Operation
< 4 > Insert one BERT Err : This will insert a single error into the BERT channel and will increment counter by 1. < 5 > Clear Fiber bit Err Counter : Use this menu item to clear the bit counter to zero. < 6 > Optical 1 SDP‐DD Information : If available, display the SFP DDOM information for SFP slot 1. < 7 > Optical 2 SDP‐DD Information : If available, display the SFP DDOM information for SFP slot 2. [Local ] Ver:[1.100-1.001-0.000-1.000] [Alarm] [RDI]
<< Optical D/D Function Status >>
Vendor Name
:[CTC UNION
]
Vendor Part Number :[SFS-7020-WA-DDI
]
Optical Type
:[ Single ]
Tx Wave Length
:[ 1310 nm ]
RX Wave Length
:[ 1550 nm ]
Link Length
:[ 0020 Km ]
Tx Power
:[ -05 dBm ]
Rx Power
:[ -04 dBm ]
Rx Sensitivity
:[ -23 dBm ]
Temperature
:[ 44 C
]
[ ESC ] Go to previous menu. Please select an item.
3.4.9 Optical Loop Back CAUTION: Performing optical loopback on an in‐service system will cause a service disruption on ALL the E1 (T1) channels as well as create a possible broadcast storm condition on the four Ethernet LAN ports. The graphics below indicate the location where the three loop back types are placed. * LLB (Optical local loop back) near end (NE) far end (FE) * RLB (Optical Remote loop back) far end (FE) near end (NE) * RRLB (Request optical remote loop back) near end (NE) far end (FE) 29 Chapter 3. Operation
3.4.10 E1/T1 Mode Configuration (RJ45 models only) The multiplexer uses a software programmable LIU (line interface unit) that can be configure for E1 or T1 mode. For the BNC model multiplexers, the mode is fixed for E1, 75 ohm as the transmission media is coaxial cable and therefore will always be E1, 75 ohm. However, for the RJ‐45 models, the multiplexer can have all ports configured for E1 75 ohms, E1 120 ohms or T1 (DS1) 100 ohms. The setting is made by choosing the 'S' item and then selecting the desired mode. (Remember to 'save' the settings under the Device menu.) [Local ] Ver:[1.100-1.001-0.000-1.000] [Alarm]
< 1 > E1
Channel 01 Link [UP ]
< 2 > E1
Channel 02 Link [UP ]
< 3 > E1
Channel 03 Link [UP ]
< 4 > E1
Channel 04 Link [Down]
< 5 > E1
Channel 05 Link [Down]
< 6 > E1
Channel 06 Link [Down]
< 7 > E1
Channel 07 Link [Down]
< 8 > E1
Channel 08 Link [Down]
< A > All
Channel Configuration
[ S ] Set to E1/T1 mode [E1 120 ohm]
[ ESC ] Go to previous menu.
----------------------------------------------------------------------------- <0> E1 75 ohm
<1> E1 120 ohm <2> T1 100 ohm <Esc> Exit
3.4.11 E1 (T1) Configuration The menu screen is broken into two parts, the informational part and the configuration part. Information The current E1/T1 mode for the device is displayed (E1, RJ45, 120 ohm in the below example) along with a running count of UAS (unavailable seconds) count. The status of RX Loss of Signal will be "Normal" when E1 (T1) signal is present. If no signal is present, the RX Loss of Signal will be indicated. LoS indicates that the signal from the connected E1 (T1) device is not being received. It could be a very simple issue with cable not connected or possibly wrong twisted pair wiring. When a connected E1 (T1) device no longer receives E1 (T1) signal from the multiplexer, it should issue AIS (alarm indication signal) on the E1 (T1) path back to the multiplexer. The alarm AIS Detected means we are able to receive E1 (T1) from the connected device, but for some reason that device is not receiving our signal. Again, this is probably a cabling issue. Line Code Violation, LCV for short, or Bi‐Polar Violation, BPV for short, are indications of an electrical problem at Layer 1. LCV or BPV will either be caused by noise or interference on the E1 (T1) cabling or it could indicate a hardware failure of the LIU (line Interface Unit i.e., the E1/T1 transceiver chip). TX Driver Failure is an indication of hardware failure of the LIU (line Interface Unit i.e., the E1/T1 transceiver chip). [Local ] Ver:[1.000-1.000-0.000-0.000] [Alarm]
<< E1
Port 01 Information and Configuration >>
< Information >
Mode: E1 [RJ45 ] 120 ohm
Performance [
0]
Rx Loss Signal Detect [Normal
]
AIS Detect
[Normal
]
Line Code Violation
[Normal
]
TX
Driver
Failure
[Normal
]
< Configuration >
< 1 > Service
[Enable ]
< 2 > Line Code
[HDB3/B8ZS]
< 3 > Auto AIS
[Disable]
<
4
>
Clear
Performance
Counter
< 5 > Loopback Test [Disable]
[ ESC ] Go to previous menu. Please select an item.
30 Chapter 3. Operation
Configuration <1> Service : This configuration setting is used to place the E1/T1 port IN or OUT of service. For unused channels, place them OUT of service to avoid alarm condition. <2> Line Code : This setting configures the port for HDB3 (E1) / B8ZS (T1) or AMI (E1/T1) line coding. In most modern PDH networks, HDB3/B8ZS is the desired setting. <3> Auto AIS : When enabled, a loss of received signal condition will transmit AIS on this port's Tx line. <4> Clear Performance Counter : The E1 performance is monitored and the counter incremented is case of errors. The counter can be reset with this menu selection. <5> Loopback Test : Selecting this item will pop up the loop back setting options ----------------------------------------------------------------------------- <0> Disable <1> LLB <2> RLB <3> RRLB <Esc> Exit
The following graphics explain the loopback locations for each of the three available loopback settings. * LLB (E1/T1 local loop back) E1/T1 E1/T1 near end (NE) far end (FE) * RLB (E1/T1 remote loop back) E1/T1 E1/T1 near end (NE) far end (FE) * RRLB (request E1/T1 remote loop back) E1/T1 E1/T1 near end (NE) far end (FE) 31 Chapter 3. Operation
3.4.12 LAN Port Configuration The LAN tributaries are provided by Fast Ethernet switch (in FMUX80/160) or Gigabit Ethernet switch (in FMUX800/1600). Each of the 4 (four) individual LAN ports are able to set IN or OUT of service as well as to configure manual (forced mode) speed and duplex settings. The default and recommended settings are for Auto‐negotiation (per IEEE802.3u). [Local ] Ver:[1.100-1.000-0.000-0.050] [Alarm]
< 1 > LAN
Port 01 Link [Down]
< 2 > LAN
Port 02 Link [Down]
< 3 > LAN
Port 03 Link [Down]
< 4 > LAN
Port 04 Link [Down]
< V > VLAN
[Disable]
< F > Flow Control [Disable]
[ ESC ] Go to previous menu.
[Local ] Ver:[1.100-1.000-0.000-0.050] [Alarm] [RDI]
<< LAN
Port 01 Information and Configuration >>
< Information >
Link Status
[ UP
]
Speed
[ 100M ]
Duplex Status [ Full ]
< Configuration >
< 1 > Service
[Enable ]
< 2 > Negotiation [ Auto ]
[ ESC ] Go to previous menu. Please select an item.
Two option settings are available for the L2 switch. The first is Ethernet flow control which is defined in the Ethernet standard IEEE802.3x. By default, flow control is disabled in the switch. To enable, select the menu item "F" and enable it from the pop up. Flow control is enabled or disabled for all ports of the switch. ----------------------------------------------------------------------------- <0> Disable
<1> Enable
<Esc> Exit
32 Chapter 3. Operation
The second L2 switch option is the Port Based VLAN configuration. The Virtual LANs are created by assigning the LAN channels to one of 4 (four) VLAN groups, A, B, C, or D. When each channel is assigned a different group the 4 (four) LAN channels will have their traffic isolated from the other channels so that traffic on local FMUX channel 1 will only appear on the remote FMUX channel 1. Channel 2 will only appear on the remote channel 2, and so on. The Port Based VLAN setting is selected by using the "V" menu item. The below screen is an example of isolating each channels traffic using the Port Based VLAN. [Local ] Ver:[1.100-1.000-0.000-0.050] [Alarm] [RDI]
<< Port VLAN Information and Configuration >>
< 0 > Port VLAN [Disable]
Group A Group B Group C Group D
< 1 > Port 01
[*]
[ ]
[ ]
[ ]
< 2 > Port 02
[ ]
[*]
[ ]
[ ]
< 3 > Port 03
[ ]
[ ]
[*]
[ ]
< 4 > Port 04
[ ]
[ ]
[ ]
[*]
[ ESC ] Go to previous menu. Please select an item.
The settings need to be duplicated on both multiplexers. Do not forget to save the settings under the "Device" menu. This completes the console based setting part of configuration for the fiber multiplexers. If an optional SNMP module has been installed in at least one of the multiplexer pair, then both SNMP and an easy to use Web based manager are available to the engineer for local and remote configuration and monitoring. The TCP/IP configuration and use of the Web based management are covered in the next chapter. 33 Chapter 3. Operation
This page was left blank intentionally 34 Chapter 4. Web Based Operation (SNMP option required)
Chapter 4. Web Based Operation
4.1 General
In this chapter we shall explain the Web management features when the Fiber Multiplexer has the optional SNMP management module installed. The Fiber Multiplexer pair work as one system. Only one unit in the pair requires an SNMP module. In fact, if both units contain SNMP options, one of them must specifically disable the SNMP agent (see Chapter 3 section 3.4.3). In the working pair, one agent manages both units, seeing them as a local unit and a fiber linked remote unit. All management is performed from a single point. 4.2 TCP/IP Configuration
The SNMP option has a default IP address of 192.168.1.1. The SNMP's IP address can be checked via the console port, but the IP address can only be changed through the Web interface. Log into the console and follow the menu <D> Device => <5> SNMP Information. [Local ] Ver:[1.100-1.003-0.000-1.000] [Alarm] [RDI]
<< SNMP Information >>
< IP Information >
IP
[192.168. 1. 1]
Subnet Mask [255.255.255. 0]
Gateway
[192.168. 1.254]
[ ESC ] Go to previous menu. Please select an item.
Configure the management PC or laptop to access the Multiplexer's IP address. 4.3 Browser Login
Start by opening a web browser application such as Chrome, Firefox or Internet Explorer. Enter the address of the Fiber Multiplexer in the format http://xxx.xxx.xxx.xxx where xxx.xxx.xxx.xxx is the IP address of the SNMP card. A login username and password may or may not be required to enter the configuration. The default username and password are both 'admin'. In the example, we have connected to the Fiber Multiplexer with web browser. SNMP Default IP : 192.168.1.1 Default netmask : 255.255.255.0 Default Gateway : 192.168.1.254 Default TFTP Server : 192.168.1.100 Default username : admin Default password : admin 35 Chapter 4. Web Based Operation (SNMP option required)
4.3.1 Panel Display The initial display, after successful login, is the 'panel' page. This page provides graphical representation of local and remote units with all indicators shown in real‐time. Optical : When the optical port has signal, a green color will be indicated. E1/T1 : Each of 8 or 16 channels is displayed a green for signal active, orange for LOS, and no color if disabled. LAN : The Ethernet ports will display both link state and speed. Green link means Ethernet link is good. Flashing green indicates there is traffic. Off means no link. The speed LED will display Green is the LAN speed is 100M or Orange color if the speed is 1000M. Status : If power modules are receiving mains power, the indicator will be lit Green. The OP1/OP2 indicators have two functions. If flashing Green, this Optical path is both linked and is the working path. A solid lit Green means this optical path is linked, but it is standing by. If the LED isn't lit, there is no optical link. SYS : After the main unit has booted, this LED will light Green. SNMP : If the SNMP option is installed and the agent has booted, this LED will blink Green. E1 : This LED indicated the configuration for the ports. Blinking Green for E1 RJ45/120 Ohm, solid Green for E1 BNC/75 Ohm or OFF if configured as RJ45/T1 100 Ohms. ALM : This Red alarm LED will be lit if any alarm condition exists, including power, optical link, or E1 link errors. RDI : This Red 'Remote Defect Indicator' will blink Red if alarm condition exists in the remote unit. Power connectors are shown for the 5 available combinations of power (AC, DC, 2AC, 2DC or AC+DC). A Red outline indicates lack of mains power for that supply input. The tributary connectors (E1/T1), whether RJ‐45 or BNC will indicate signal status; Green means signal present, Orange indicates Loss of Signal (LOS) and no color means the port has been provisioned as 'disabled'. 36 Chapter 4. Web Based Operation (SNMP option required)
4.3.2 Configuration Click the SNMP icon on the left menu. The window is broken into the following 4 functional sections. 1. System Information Change the IP address and other information by changing the fields here. After the changes are input, click the "Set Parameters' button function key. 2. System Function Keys These buttons provide functions for setting parameters, rebooting, defaulting, refreshing and upgrading the SNMP. 3. Data and Time Information plus Time Function Keys Use this section to setup the time keeping for the Fiber Multiplexer. The time may be manually set, can synchronize to PC clock or can be configured to synchronize to NTP (network time protocol). 37 Chapter 4. Web Based Operation (SNMP option required)
4.3.3 TCP/IP Configuration Change the TCP/IP parameters from the 'SNMP' menu. Key in the new IP values, click the "Set Parameters" button. To activate the new IP address, the SNMP agent must be rebooted, so click "Reboot". Connect to the web interface with the new IP address. 4.3.4 Date and Time Configuration Time can be manually configured, set to PC time or configured for network time. To configuration network time, key in the IP address for a geographically close time server host. Set the timezone offset for your geographic location. Enable the 'Auto Adjust Time' function. Click the "Set Parameters" button. Click the "Sync. with NTP" button. To manually configure date and time, key it into the "Date and Time:" fields, then click the "Set Parameters" button. The "Get PC Time" button will take the current time of the PC running the browser and place that time into the "Date and Time:" fields. It will not set the time. Click the "Set Current Time" button to set the time. The "Sync. with PC" button will take the current time of the PC running the browser and set the time. 38 Chapter 4. Web Based Operation (SNMP option required)
4.3.5 SNMP Manager Configuration Configure up to 8 specific network managers for SNMP access. By using the key word 'default', any manager is allowed access, assuming of course that the community string is correct. Traps may be sent to trap receivers. Specific IP addresses must be entered (up to 8) and the defined community string. Refer to Chapter 5 if unclear how SNMP works. 39 Chapter 4. Web Based Operation (SNMP option required)
4.3.6 SYSLOG Configuration The Fiber Multiplexer supports sending all log information to a standard Syslog server. Configure the IP address of syslog server (Syslog Receiver IP) and adjust any facility and severity as required. In most cases the defaults are fine. 40 Chapter 4. Web Based Operation (SNMP option required)
4.3.7 LOG Information The Fiber Multiplexer's SNMP keeps a running log with the latest 255 entries, which may be viewed via the web page. Entries highlighted in Red are alarm conditions. The log displays in a first in, first out fashion. 41 Chapter 4. Web Based Operation (SNMP option required)
4.4 Provisioning via Web
When an active fiber link is established, both local and remote Fiber Multiplexers can be provisioned via simple web interface. 4.4.1 Device Configuration From the 'Device' tab, the status of SNMP, Power and alarms can be easily viewed. There are 5 items that can be configured here. 1. Device Active ‐ If disabled, all traffic through this device is stopped, all LEDs will be extinguished, the Power LED will blink intermittently every 3 seconds. 2. E1/T1 Mode ‐ Unless this is a BNC unit (E1 Only), the transmissions may be configured for either E1 or T1. If an RJ‐45 model is configured for E1 75 Ohm, adapter cables may be used to convert the RJ‐45 connectors to a pair of Female BNC connectors. 3. Alarm Relay ‐ When enabled, this relay can be wired in either a normally open or normally closed circuit and respond to alarm conditions. 4. Alarm Buzzer ‐ When enabled, an audible alarm is heard as long as an alarm condition exists. 5. Alarm Triggers ‐ When checked, the 'Power', 'Optical', 'LAN', and 'RDI' alarms will also generate SNMP traps by the network agent. 42 Chapter 4. Web Based Operation (SNMP option required)
4.4.2 Optical Configuration From the 'Optical' tab, the status of fiber ports, current working path and Bit Error count can be easily viewed. There are 3 items that can be configured here. 1. Protection Mode ‐ The default is 1+1 protection, non‐reverting. Non‐reverting means that even if a faulty path is re‐
established, the Fiber Multiplexer will continue with its current path i.e., not revert. The reverting mode will return the path to the preferred path after the broken path as been repaired. i.e., revert back. The other two options can be used to manually force the path to optical 1 or optical 2 path. 2. ALS ‐ Automatic Laser Shutdown (ALS) is a technique used to automatically shut down the output power of the transmitter in case of fiber break according to ITU‐T G.664. This is a safety feature that prevents laser light from leaking out of a broken fiber, provided ALS is provisioned on both ends of the fiber pair. ALS is disabled by default. 3. Loopback Test ‐ Be very careful when selecting optical loopback. All traffic, including Ethernet will be looped and could cause unintended effects. Please review the loop back types in section 3.4.9. Notes on BERT The Fiber Multiplexer includes a channel which constantly runs a bit error rate pattern. A counter will count any errors that are received on this channel. An incrementing counter is an indication of poor fiber transmission and should be troubleshot. Two buttons are available along with the counter. The 'Clear Bit Error' button should be self evident; it clears the accumulated Bit Error Counter to zero. The "Insert Bit Error" button is a test that should insert exactly one error when pressed. This assures we are really working on a functional pair of Fiber Multiplexers. 43 Chapter 4. Web Based Operation (SNMP option required)
4.4.3 E1/T1 Configuration From the 'E1' tabs, the status of each tributary port's signal status, Alarm Indication Signal and performance (ES or Error Seconds), can be easily viewed. There are 4 items that can be configured here for each port. Service ‐ The port's service can either be enabled or disabled. When disabled, no transmission occurs and no alarms are generated from that port. The front panel LED for that channel will be OFF. Line Code ‐ This will configure the line coding performed by the LIU (line interface unit) to HDB3/B8ZS or AMI. Auto AIS ‐ When enabled, a LOS of receive signal will cause an AIS to be transmitted. This lets the remote side know their transmit signal is broken. Loopback ‐ The E1 supports local, remote and request remote loopback. Refer to 3.4.11 for details of loopback operation. Performance Monitor Note The only performance monitor parameter available in the Fiber Multiplexer is ES or errored seconds. When a receive signal is lost (LOS) the ES counter will increment. The counters are separate for each channel and can be individually cleared by using the "Clear PM" check boxes followed by clicking "Set Parameters". The "Clear All PM Counter" button will clear all the channel counters. 44 Chapter 4. Web Based Operation (SNMP option required)
4.4.4 LAN Configuration From the 'LAN' tab, the status of each LAN port's link status, speed and Duplex, can be easily viewed. There are 3 items which can be configured for the internal Ethernet switch. Each of the LAN ports also supports 'auto' or 'forced mode' configuration. Be very careful to avoid "Duplex Mismatch" when using forced mode. Do not connect forced mode port to an auto device. Port VLAN ‐ This switch supports port based VLAN which can be used to isolate traffic between the different ports. The 4 ports are assigned to any of 4 groups. If each port is assigned a different group, then traffic is effectively isolated between the ports. Port based VLAN takes place within the switch and does not rely on or require VLAN tags. Flow Control ‐ IEEE802.3x defines the Ethernet flow control method. Flow control is enabled or disabled for all ports in the switch. Jumbo Frame ‐ IEEE defines any Ethernet frame larger than 1518 (1522 with tag or 1526 with double tag) as being a jumbo frame. Jumbo frames are non‐standard and not standardized by IEEE. Although there is a lot of marketing hype, currently jumbo frames are only being deployed in data centers for server‐server communication and in some special backbone networks. When enabled in this switch, the Fast Ethernet switch supports up to 9.6k byte frames while the gigabit Ethernet switch supports up to 10.24k byte frames. 45 Chapter 4. Web Based Operation (SNMP option required)
4.4.5 Order Wire Configuration As of this writing, only a 4‐wire order wire option is supported. A normal telephone handset may be connected directly to the Fiber Multiplexer, 2‐wire for mouth piece and 2‐wire for speaker. Order wire is becoming less and less common with the advent of mobile personal communications (cell phones). 46 Chapter 4. Web Based Operation (SNMP option required)
4.4.6 SFP Information The gigabit Ethernet Fiber Multiplexers use pluggable SFP modules for fiber aggregate. These SFP contain a ROM which is factory burned and contains parameters which identify the module. Optional DDOM (digital diagnostic optical monitoring) features are available in some SFP. These provide real time monitoring of internal temperature and transmit and receive power. 47 Chapter 4. Web Based Operation (SNMP option required)
4.5 Remote Management
When an active fiber link is established, the remote Fiber Multiplexer can be provisioned via the same simple web interface. Refer to the configuration steps in 4.4.1 through 4.4.6 to configure the remote Fiber Multiplexer. Chapter 5. SNMP Operation
5.1 General
The Simple Network Management Protocol (SNMP) is one of many protocols in the Internet Protocol (IP) suite. SNMP is the protocol recommended specifically for the exchange of management information between hosts residing on IP networks. Network management allows you to monitor and control network devices remotely using conventional computer network technology. The SNMP management functions of the Fiber Multiplexer are provided by an internal SNMP agent, which utilizes out‐of‐band communication over standard 10Base‐T or 100Base‐TX Ethernet. The SNMP agent is compliant with the SNMPv1/v2C standards. SNMP communications use the User Datagram Protocol (UDP). UDP is a connectionless transport protocol, part of the TCP/IP suite. The SNMP application uses an asynchronous command/response polling protocol and operates at the OSI Layer 7 (Layer 7 is the Application Layer. Other IP 48 Chapter 5. SNMP Operation
applications that operate at this layer are FTP, Telnet, HTTP, SMTP, etc.). All management traffic is initiated by the SNMP‐based network management station. Only the addressed managed entity (agent) answers the polling of the management station (except for trap messages). 5.2 SNMP Operations
The SNMP protocol includes four types of operations: getRequest
getNextRequest getBulkRequest setRequest trap Command for retrieving specific value of an "instance"
from the managed node. The managed node responds with a getResponse message. Command for retrieving sequentially specific management information from the managed node. The managed node responds with a getResponse message. Command for retrieving a block of management information from the managed node. The managed node responds with a getResponse message. getBulkRequest was introduced in SNMPv2c. Command for manipulating the value of an "instance" within the managed node. The managed node responds with a getResponse message. Management message carrying unsolicited information on extraordinary events (that is, events which occurred not in response to a management operation) reported by the managed node. 49 Chapter 5. SNMP Operation
5.3 The Management Information Base
The management information base (MIB) includes a collection of managed objects. Managed objects are defined as parameters that can be managed, such as specific information on device configuring or on performance statistics values. The MIB includes the definitions of relevant managed objects (MIB variables) for the specific node. Various MIB's can be defined for various management purposes, types of equipment, etc. The management data itself is a collection of integer, string and MIB address variables that contain all the information necessary to manage the node. A leaf object's definition includes the range of instances (values) and the "access" rights: Read‐only Instances of an object can be read, but cannot be set. Read‐write Instances of an object can be read or set. Write‐only Instances of an object can be set, but cannot be read. Not accessible Instances of an object cannot be read, nor set. 5.4 MIB Structure
The MIB has an inverted tree‐like structure (root over leaves), with each definition of a managed instance forming one leaf, located at the end of a branch of that tree. Each "leaf" in the MIB is reached by a unique path, therefore by numbering the branching points, starting with the top, each leaf can be uniquely defined by a sequence of numbers. The formal description of the managed objects and the MIB structure is provided in a special standardized format, called Abstract Syntax Notation 1, or ASN.1 (pronounced A‐S‐N dot one). Since the general collection of MIB's can also be organized in a similar structure, under the supervision of the Internet Activities Board (IAB), any parameter included in a MIB that is recognized by the IAB is uniquely defined. To provide the flexibility necessary in a global structure, MIB's are classified in various classes (branches), one of them being the experimental branch, another being the management (mgmt) branch, and yet another the group of private (enterprise‐specific) branch. Under the private enterprise‐specific branch of MIB's, each enterprise (manufacturer) can be assigned a number, which is its enterprise number. The assigned number designates the top of an enterprise‐specific sub‐tree of non‐standard MIB's. Enterprise‐specific MIB's are published and distributed by their creators, who are responsible for their contents. The MIB supported by the Fiber Multiplexer SNMP Agent follows RFC 1158 (MIB‐II standard). 5.5 SNMP Communities
To enable the delimitation of management domains, SNMP uses "communities". Each community is identified by a name, which is an alphanumeric string of up to 255 characters defined by the user. Any SNMP entity (this term includes both managed nodes and management stations) is assigned by its user a community name. In parallel, the user defines for each SNMP entity a list of the communities which are authorized to communicate with it, and the access rights associated with each community (this is the SNMP community name table of the entity). In general, SNMP agents support two types of access rights: the SNMP agent accepts and processes only SNMP getRequest Read‐only and getNextRequest commands from management stations which have a read‐only community name. Read‐write the SNMP agent accepts and processes all the SNMP commands received from a management station with a read‐write community name. SNMP agents are usually configured to send traps to management stations having read‐write communities. 50 Chapter 5. SNMP Operation
5.6 SNMP Upgrade via TFTP
To upgrade the SNMP firmware, configure a TFTP server on your network. Configuring a TFTP server is beyond the scope of this document. However, in the upgrade package there should be a free, open source, portable (no installation required), TFTP daemon for Windows. Place the upgrade binary file in the same folder as the TFTP server and set the IP address and image filenames in the SNMP agent. Refer to 4.3.3 for configuring the SNMP card for TCP/IP. Firmware is broken into two images, the 'kernel' and the 'filesystem'. The kernel (kernel.gz) is the Linux OS and is rarely, if ever, updated. The 'filesystem' (romfs.gz) contains most of the operation programming supporting the SNMP and web provisioning for the Fiber Multiplexer. This may require updating when new features are added or if bugs are found and need fixing. For any TCP/IP changes to be remembered in the agent, please click the "Save Parameters" button and then click "Reboot". TFTP Server IP ‐ The IP address of the server running a TFTP daemon. There must be a reliable TCP/IP connection between the TFTP Server and the Fiber Multiplexer's SNMP agent. Kernel Filename ‐ This is the filename of the kernel image which must be on the TFTP server. File‐System Filename ‐ This is the filename of the filesystem which must be on the TFTP server. "Flash Kernel" button ‐ Click this once to start kernel update. "Flash File System" button ‐ Click this once to start filesystem update. Warning!! DO NOT INTERRUPT POWER DURING UPDATE OPERATION OR THE FLASH MEMORY MAY BECOME CORRUPT. 51 Chapter 5. SNMP Operation
5.7 SNMP Trap Messages
powerOn powerOff utpLinkUp utpLinkDown opticalLinkUp opticalLinkDown alarmModeChange login logout loginError e1t1SignalNormal e1t1SignalLoss rdiOff rdiOn alarmOff alarmOn remoteDevFound remoteDevDisconn DESCRIPTION "Power on." DESCRIPTION "Power failed or empty." DESCRIPTION "UTP port link up." DESCRIPTION "UTP port link down." DESCRIPTION "Optical port link up." DESCRIPTION "Optical port link down." DESCRIPTION "Alarm mode changed." DESCRIPTION "Somebody login." DESCRIPTION "Somebody logout." DESCRIPTION "Somebody login error." DESCRIPTION "E1/T1 channel signal normal." DESCRIPTION "E1/T1 channel signal loss." DESCRIPTION "RDI alarm off." DESCRIPTION "RDI alarm on." DESCRIPTION "System alarm off." DESCRIPTION "System alarm on." DESCRIPTION "Remote device found." DESCRIPTION "Remote device disconnected." 52 { alarmTrap 10 } { alarmTrap 15 } { alarmTrap 30 } { alarmTrap 35 } { alarmTrap 40 } { alarmTrap 45 } { alarmTrap 50 } { alarmTrap 60 } { alarmTrap 61 } { alarmTrap 65 } { alarmTrap 70 } { alarmTrap 75 } { alarmTrap 80 } { alarmTrap 85 } { alarmTrap 90 } { alarmTrap 95 } { alarmTrap 100 } { alarmTrap 105 } Technical Inquiry Form
MODEL No.: FMUX80/160/800/1600
Please fill in the configuration settings with '9' marks into the following table. Send it to us by fax or email,
and we will reply to you immediately.
Firmware Version: _____________________ FPGA Version: ____________________ Installed Options (if any) Order Wire SNMP Card Optical ALS: Auto Disable Op 1: Work Off Op 2: Standby Disable Type: 2KM‐M 15KM‐S 30KM‐S 50KM‐S 120KM‐S Connector: ST SC FC LC (SFP) Loopback: Off LLB RLB RRLB PORT 1~4 E1 BNC 75 E1 RJ45 120 T1(DS1) 100 Service Service Service Service ON OFF ON OFF ON OFF ON OFF Line Code Line Code Line Code Line Code AMI HDB3/B8Z3 AMI HDB3/B8Z3 AMI HDB3/B8Z3 AMI HDB3/B8Z3 Loop Back: Off LLB RLB RRLB PORT 5~8 E1 BNC 75 E1 RJ45 120 T1(DS1) 100 Service Service Service Service ON OFF ON OFF ON OFF ON OFF Line Code Line Code Line Code Line Code AMI HDB3/B8Z3 AMI HDB3/B8Z3 AMI HDB3/B8Z3 AMI HDB3/B8Z3 Loop Back: Off LLB RLB RRLB PORT 9~12 E1 BNC 75 E1 RJ45 120 T1(DS1) 100 Service Service Service Service ON OFF ON OFF ON OFF ON OFF Line Code Line Code Line Code Line Code AMI HDB3/B8Z3 AMI HDB3/B8Z3 AMI HDB3/B8Z3 AMI HDB3/B8Z3 Loop Back: Off LLB RLB RRLB PORT 13~16 E1 BNC 75 E1 RJ45 120 T1(DS1) 100 Service Service Service Service ON OFF ON OFF ON OFF ON OFF Line Code Line Code Line Code Line Code AMI HDB3/B8Z3 AMI HDB3/B8Z3 AMI HDB3/B8Z3 AMI HDB3/B8Z3 Loop Back: Off LLB RLB RRLB LAN CH1~4 Channel 1 Channel 2 Channel 3 Channel 4 Service Service Service Service ON OFF ON OFF ON OFF ON OFF Auto Auto Auto Auto 10 100 1000 10 100 1000 10 100 1000 10 100 1000 Full Half Full Half Full Half Full Half VLAN Channel 1 Channel 2 Channel 3 Channel 4 Group Group Group Group A B C D A B C D A B C D A B C D