1
03/10 Rev. 5.04-01
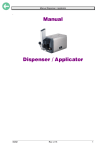
TECHNICAL MANUAL
Rewinder 2000
Attachment, Setup, Service
General Notes................................................ 2
Intended Purpose ....................................... 2
Properties ................................................... 2
System requirements ..................................... 3
Printer type ................................................. 3
Preparation for peripheral devices ............. 3
Attaching the rewinder ................................... 4
General information about setting up the
printer............................................................. 5
Direction of rotation .................................... 5
Dancer arm deflection ................................ 5
Rotation speed with 64-xx / AP 5.4 ............ 6
Setting up TTX 350 / TTK .............................. 7
Activating the rewinder / Selecting the
Rotation Direction....................................... 7
Setting the sensor current .......................... 8
Adjusting the sensor................................... 9
Setting up 64-xx / AP 5.4 / AP 7.t ................ 11
Activating the rewinder ............................. 11
Selecting the direction of rotation ............. 11
Setting the sensor current ........................ 12
Adjusting the sensor................................. 13
Status reports............................................... 14
Inserting material ......................................... 15
Starting .........................................................17
Starting TTX 350 / TTK .............................17
Starting 64-xx / AP 5.4 / AP 7.t .................17
Servicing the Rewinder.................................19
General notes ...........................................19
Function check..........................................19
64-xx: Setting the output stage .................19
TTX 350 / TTK: Setting the output stage ..20
Rewinder core...........................................21
Buffer disc .................................................22
Toothed belt ..............................................23
Belt tensioner ............................................23
Cable harness / light barrier......................24
Light barrier wedge ...................................25
Tension spring ..........................................25
Bouncer arm .............................................25
Guide roller ...............................................25
(AP 5.4) Run-in roller for narrow labels ........26
Technical Specifications ...............................27
Troubleshooting............................................28
Appendix.......................................................29
Pin assignment light barrier board ............29
Pin assignment D-Sub plug ......................29
Index.............................................................30
2
03/10 Rev. 5.04-01
TECHNICAL MANUAL
Rewinder 2000
Attachment, Setup, Service
General Notes
Intended Purpose
The rewinder option is a peripheral device for label printers of the types
TTK, TTX 350, 64-xx, AP 5.4 and AP 7.t. The device is designed for
winding up label material after it has been printed using one of the printer
types named above.
Properties
As opposed to the stand-alone rewinding devices Junior Rewinder and
Jumbo Rewinder, the rewinder option (subsequently referred to as the
rewinder) is permanently attached to the printer. The printer provides power
for the rewinder motor via a socket on the front, which is also used for
receiving signals relating to the lateral deflection of the bouncer arm.
Rotational speed
While the material is being wound up, the rotational speed is controlled via
the lateral deflection of the bouncer arm. The greater the lateral deflection,
the lower the rotational speed. If the label material sags – the bouncer arm
is in this case only slightly deflected – the rewinder increases the rotational
speed in order to make up the "delay". This ensures that the label material
is rolled up evenly tautly. Without lateral deflection - e.g. when the material
is finished – the rewinding process stops after about four seconds.
Direction of rotation The label material can be alternately rolled up with the labels facing
outwards or inwards by reversing the direction of rotation.
3
03/10 Rev. 5.04-01
TECHNICAL MANUAL
Rewinder 2000
Attachment, Setup, Service
System requirements
Printer type
The rewinder can be operated with the following printer types:
•
•
•
•
•
TTX 350
TTK
64-xx
AP 5.4
AP 7.t
Preparation for peripheral devices
For using the printers with a rewinder, they must be especially equipped
(see Tab. 1). This so called peripherals preparation consists mainly of an
additional output stage board for the motor of the peripheral device and of
someadditional connection cables.
Printer
Peripherals Preparation
64-xx
Optional
TTX 350
Optional
TTK
Standard
AP 5.4
Standard with printer version „Peripheral“
AP 7.t
Standard
Tab. 1
Peripheral test
Only the TTK is always equipped with the peripheral preparation. For the other
printer types this is an option.
Do the following, if you are not sure, wether the printer is equipped with
peripheral preparation:
•
TTK / TTX 350:
£ Set parameter SYSP > PEPH to KNIF.
If the printer displays the status message ST68 after the ENTER key is
pressed, the peripheral board is not installed. If ST68 does not appear or if
a different status message is displayed, then the printer has been set up for
peripheral devices.
•
64-xx / AP 5.4 / AP 7.t:
£ Make a service status printout: Call parameter PRINT INFO > Service Status.
64-xx and AP 5.4 printers are equipped with peripheral preparation if the
topic “Peripheraldriver” can be found below the header “Peripheraldriver”
on the printout.
Printer Peripherals preparatioPrinter Peripherals preparation
4
03/10 Rev. 5.04-01
TECHNICAL MANUAL
Rewinder 2000
Attaching the rewinder
Attachment, Setup, Service
1
¯ Before beginning service work, switch
2
off the printer and pull out the mains
power supply plug!
¯ Under no circumstances should you use
4
the dancer arm as a carrying handle! A
bent dancer arm will cause the device to
malfunction!
5
The rewinder (1) is attached to the front of the
printer (2) with two screws. The support leg (3)
absorbs some of the strain exerted by the
material roll.
3
¯ Other options which may be installed or
the cover must be removed before
assembling the rewinder.
Tool
– Allan key 3mm
Assembly / Disassembling
6
1. Place the printer on a level surface.
Ensure that there is enough room in
front of the printer for the support leg (3)
of the rewinder.
2. Attach the rewinder housing (4) to the
printer recess (5) using the two screws
supplied.
3. Loosen the supporting leg fastening
screw (6). Push down the support leg
until it stands on the surface. Push up
the rewinder a little and at the same time
tighten the fastening screw.
¯ The weight of the material roll should
rest on the support leg.
4. Plug in the connector plug (7).
¯ Under no circumstances should the plug
be attached or removed
when the device is switched
on, as otherwise the device
electronics could be damaged.
7
5
03/10 Rev. 5.04-01
TECHNICAL MANUAL
Rewinder 2000
Attachment, Setup, Service
General information about setting up the printer
After mounting the rewinder you must set up the printer for operation with
the new peripheral device. This is done by selecting the appropriate
parameter in the parameter menu of the printer.
Direction of rotation
The rewinder can be operated in two rotation directions, which are
designated in a different way in the parameter menues of the printers.
Printer
Designation of the rotation direction
TTK/TTX 350
“DIRL”
“DIRR”
64-xx/AP 5.4/AP 7.t
“Printing outside”
“Printing inside”
Tab. 2
The designations of the rotation direction are different in the parameter menus of
TTK/TTX 350 and 64-xx/AP 5.4/AP 7.t.
•
TTK / TTX 350:
The direction of rotation is requested after selecting the rewinder option in
the parameter menu.
•
64-xx / AP 5.4 / AP 7.t:
The rotation direction is set by a separate parameter.
¯ Default setting: “Printing outside”.
Dancer arm deflection
In the mode "DIRR"/"Printing inside", material does not wrap itself around
the bouncer arm as much as is the case with "DIRL"/"Printing outside"
(Tab. 2). Particularly with larger roll diameters, the dancer arm would often
shoot from one extreme position to the other. The material would then be
wound up in a jolting manner.
For this reason, the software is adjusted when "Direction of rotation right"
"Printing inside" is selected – it then only uses approximately 50% of the
maximum dancer arm deflection for controlling the motor.
6
03/10 Rev. 5.04-01
TECHNICAL MANUAL
Rewinder 2000
Attachment, Setup, Service
Rotation speed with 64-xx / AP 5.4
With printers of the types 64-xx / AP 5.4 / AP 7.t, the rewinder rotation
speed depends on the print speed. A low print speed leads to a slower
rewinder rotation as a high print speed. An exception to this rule is the
rotation speed directly after starting the wind-up process.
P For details to this, refer to the section Starting on page 17.
7
03/10 Rev. 5.04-01
TECHNICAL MANUAL
Rewinder 2000
Attachment, Setup, Service
Setting up TTX 350 / TTK
Setup the printer for rewinder-use by performing the three subsequently
described steps:
1. Activating the rewinder / Selecting the Rotation Direction on page 7.
2. Setting the sensor current on page 8.
3. Adjusting the sensor on page 9.
How to perform the steps is explained in the following.
P A complete description of the parameters can be found in the chapter "Info
Printouts and Parameters" in the User Manual of the printer.
Activating the rewinder / Selecting the Rotation
Direction
¯ CAUTION! - Selecting a non-existent option can cause the device to
malfunction!
Action
Direction of
rotation
Display
1. Connect the printer
and switch it on
OFF
2. Press the CUT+FEED
button
INFO
3. Repeatedly press the
CUT button until
SYSP
4. Press the ENTER
button
EMUL
5. Repeatedly press the
CUT button until
PEPH
6. Press the ENTER
button
NONE
7. Repeatedly press the
CUT button until
RWND
Note
If a peripheral device has previously not been
set.
8a. Press the ENTER
button
DIRL
Step 8a for direction of rotation left.
8b. Press the CUT button
DIRR
Step 8b for direction of rotation right.
9. Press the ENTER
button
The printer restarts.
The rewinder is now activated. Other previously activated options are
automatically deactivated (see parameter PEPH).
8
03/10 Rev. 5.04-01
TECHNICAL MANUAL
Rewinder 2000
Attachment, Setup, Service
Setting the sensor current
Befor using the rewinder for the first time, the sensor current must be set by
a potentiometer at the rewinder (see Fig. 1).
Rewinder (section)
Turn counter-clockwise =>
Sensor current decreases
Displayed value increases
Z0139E.cdr
Pot. (P101)
Turn clockwise =>
Sensor current increases
Displayed value decreases
Fig. 1 The pot. can be accessed through a slot in the back cover of the rewinder.
Action
Display
1. Select parameter OTHR > SCHK.
SCHK
2. Press the ENTER button
Pxxx
3. Repeatedly press the CUT button
until
Wxxx
Note
Other information may be
displayed depending on the
printer type; xxx = variable value.
4. Set the rewinder pot. (Fig. 1) so
W20
that a value between 20 and 30 is
displayed.
Bouncer arm in zero position
(Fig. 2); 24 = set value.
5. Move the bouncer arm to the final W141
position (towards the support leg).
Check the displayed value*.
141 = set value (example) in the
final position; Value difference =
117 (o.k.)
*) The value with the bouncer arm in its final position must be at least 100 higher than the
value in zero position, which was set in step 4. Most important ist the difference between the
two values in the two end positions: the difference must equal/be higher than 100, ideally
110. Repeat step 4 and set a higher value in the zero position, if the difference is too little.
9
03/10 Rev. 5.04-01
TECHNICAL MANUAL
Rewinder 2000
Attachment, Setup, Service
Adjusting the sensor
The bouncer arm controls the winding speed of the rewinder by means of a
sensor. Bevor applying the rewinder for the first time, the bouncer arm has
to be brought in both end positions to adjust the sensor.
Fig. 2 Left side: bouncer arm in zero position; right side: bouncer arm in final position.
Action
Display
Note
1. Select parameter SYSP > PEPH.
PEPH
2. Press the ENTER button
RWND
3. Repeatedly press the CUT button
until
RADJ
4. Press the ENTER button
RNUL
Initially setting of the sensor with
the bouncer arm in the zero
position. (See fig. above left)
5. Press the ENTER button
xxx
xxx = actual sensor value; the
displayed value is altered by
moving the bouncer arm.
6. Move the bouncer arm appr.
5 mm out of the zero position.
Press the ENTER button.
REND
7. Press the ENTER button
xxx
8. Move the bouncer arm up to the
stop plate in the direction of the
support leg, and then back again
by approx. 5 mm. Press the
ENTER button.
RWND
If the rewinder has already been
set.
xxx = actual sensor value; the
displayed value is altered by
moving the bouncer arm.
9. Repeatedly press the CUT+FEED OFF
button until
¯ Set the value approx. 5 mm before reaching the final or zero position,
respectively!
10
03/10 Rev. 5.04-01
TECHNICAL MANUAL
Rewinder 2000
Attachment, Setup, Service
¯ CAUTION! - If programming is interrupted by pressing the CUT+FEED
button, the printer uses preset values which may cause the device to
malfunction!
P A complete description of the parameters can be found in the chapter "Info
Printouts and Parameters" in the User Manual of the printer being used.
11
03/10 Rev. 5.04-01
TECHNICAL MANUAL
Rewinder 2000
Attachment, Setup, Service
Setting up 64-xx / AP 5.4 / AP 7.t
Setup the printer for rewinder-use by performing the following steps:
1. Activating the rewinder on page 11.
2. Selecting the direction of rotation on page 11.
3. Setting the sensor current on page 12.
4. Adjusting the sensor on page 13.
How to perform the steps is explained in the following.
P A complete description of the parameters can be found in the chapter "Info
Printouts and Parameters" in the User Manual 64-xx.
Activating the rewinder
¯ CAUTION! - Selecting a non-existent option can cause the device to
malfunction!
£ Set SYSTEM PARAMETERS > Periph. device to “Rewinder”.
The rewinder is now activated. Other previously activated options are
automatically deactivated.
Selecting the direction of rotation
Action
Display
1. Press the Prog button
PRINT INFO
2. Press the Cut button
PRINT PARAMETERS
3. Press the Online
button
Print speed
4. Repeatedly press the
Cut button until
Rewind direction
Note
5a. Press the Online
button
Rewind direction
Printing inside
Step 5a for printing
facing inwards
5b. Press the Cut button
Rewind direction
Printing outside
Step 5b for printing
facing outwards
6. Press the Online
button
Rewind direction
7. Repeatedly press the
Prog button until
OFFLINE 0 JOBS
12
03/10 Rev. 5.04-01
TECHNICAL MANUAL
Rewinder 2000
Attachment, Setup, Service
Setting the sensor current
Befor using the rewinder for the first time, the sensor current must be set by
a potentiometer at the rewinder (see Fig. 3).
Rewinder (section)
Turn counter-clockwise =>
Sensor current decreases
Displayed value increases
Z0139E.cdr
Pot. (P101)
Turn clockwise =>
Sensor current increases
Displayed value decreases
Fig. 3 The pot. can be accessed through a slot in the back cover of the rewinder.
Action
Display
Note
1. Select parameter SERVICE
FUNCTION > Sensor test.
Sensor test
Sens: 0.01 xxx
xxx is the value
supplied by the
sensor
2. Press the Feed button
repeatedly until
Sensor test
Sens: 4.01 xxx
4.01 = sensor
peripheral devices
3. Set the rewinder pot.
(Fig. 1) so that a value
between 20 and 30 is
displayed.
Sensor test
Sens: 4.01
27
Bouncer arm in zero
position (Fig. 2); 27 =
set value.
4. Move the bouncer arm to the Sensor test
final position (towards the
Sens: 4.01 130
support leg). Check the
displayed value*.
130 = set value
(example) in the final
position; Value
difference = 103
(o.k.)
*) The value with the bouncer arm in its final position must be at least 80 higher than the value
in zero position, which was set in step 3. Most important ist the difference between the two
values in the two end positions: the difference must equal/be higher than 80, ideally 100.
Repeat step 3 and set a higher value in the zero position, if the difference is too little.
13
03/10 Rev. 5.04-01
TECHNICAL MANUAL
Rewinder 2000
Attachment, Setup, Service
Adjusting the sensor
The bouncer arm controls the winding speed of the rewinder by means of a
sensor. Bevor applying the rewinder for the first time, the bouncer arm has
to be brought in both end positions to adjust the sensor.
Fig. 4 Left side: bouncer arm in zero position; right side: bouncer arm in final position.
Action
Display
Note
1. Select parameter SERVICE
FUNCTION > rewinder adjust
rewinder adjust
If 0 jobs are stored in
memory.
2. Press the Online button
rewinder adjust
Resting pos. xx
xx = actual value
supplied by the
sensor; moving the
bouncer arm alters
the value
3. Move the bouncer arm appr. rewinder adjust
5 mm out of its resting (zero) End pos. xx
position. Press the Cut
button.
Mind the notes
following this table!
8. Move the bouncer arm up to rewinder adjust
the stop plate i the direction
of the support leg, and then
back again by approx. 5 mm.
Press the Enter button.
Mind the notes
following this table!
9. Repeatedly press the Prog
button until
OFFLINE 0 JOBS
¯ Set the value approx. 5 mm before reaching the final or zero position,
respectively!
¯ Press the Cut button in the resting position but the Online button in the end
position!
¯ CAUTION! - If programming is interrupted by pressing the Esc-button, the
printer uses preset values which may cause the device to malfunction!
14
03/10 Rev. 5.04-01
TECHNICAL MANUAL
Rewinder 2000
Attachment, Setup, Service
Status reports
The following status reports may be displayed when operating the rewinder:
TTX 350
TTK
64-xx / AP 5.4 / AP 7.t
Example, comment
ST13
ST13
5004 Rewinder mat.ris
Rewinder fault. Occurs with the bouncer
arm left in it´s resting position during
operation for longer than 4 s (or 6 s for
64-xx / AP 5.4 / AP 7.t respectively). May
be caused by material tear off or if no
material is loaded.
ST68
Tab. 3
No peripheral device preparation
Status messages caused by printer operation with a rewinder.
P For more detailed information, see the chapter "Status Reports" in the User
Manual of the printer in question.
15
03/10 Rev. 5.04-01
TECHNICAL MANUAL
Rewinder 2000
Attachment, Setup, Service
Inserting material
Direction of rotation The material – depending on the set direction of rotation – is wound around
the core in a clockwise or anti-clockwise direction (see Fig. 5).
1
Fig. 5 Left side: direction of rotation = left (labels outside); right side: direction of rotation =
right (labels inside)
Proceed as follows:
1. Remove the guide disk (1). To do so,
open the clamping lever (2). Remove
the clamping bar (3).
2
2. Feed the end of the material web around
dancer arm and winding core and fix it
with the clamping bar. To do so, push
the clamping bar over the material (4).
¯ If a cardboard core is used: Push the
clamping bar underneath the cardboard
core.
3
1
P Continued overleaf.
4
16
03/10 Rev. 5.04-01
TECHNICAL MANUAL
Rewinder 2000
3. Remount the guide disk.
¯ The recesses at the inner diameter of
Attachment, Setup, Service
5
the guide disk (arrows) must be
positioned over the clamping bar
legs (5).
4. Push the guide disk up to the material
edge (6). Close the clamping lever.
¯ The guide disk may not wedge in the
material.
5. Adjust the material guides (7) on the
bouncer arm by pushing them sideways
until they correspond to the width of the
material.
¯ The material should run evenly, and
there should be a small gap between it
and the material guides.
6
7
17
03/10 Rev. 5.04-01
TECHNICAL MANUAL
Rewinder 2000
Attachment, Setup, Service
Starting
After securing the material end, proceed as follows to start printer and
rewinder:
The printer is set to off-line mode.
Starting TTX 350 / TTK
1. Press the CUT button.
The rewinder starts rewinding, until the bouncer arm reaches the final
position. At that point, the rewinder stops.
2. Switch the printer on-line.
If a printjob has already been loaded, both printing and rewinding start
nearly simultaneously.
Cut button
Material end
Start or stop the rewinder by pressing the CUT button. This works in on-line
mode as well as in off-line mode.
¯ With no material to rewind, the rewinder stops after approx. 4 s and shows
the status report:
ST13
£ Press the ON/OFF button to acknowledge the status report.
Starting 64-xx / AP 5.4 / AP 7.t
1. Press the Cut button
The rewinder starts rewinding, until the bouncer arm reaches the final
position. At that point, the rewinder stops.
¯ It is essential to let the bouncer arm initially reach its final position after
starting. Only then, the bouncer arm takes control over the rotation speed
(explanation below).
2. Switch the printer on-line.
If a printjob has already been loaded, both printing and rewinding start
nearly simultaneously.
Cut button
Material end
Start or stop the rewinder by pressing the Cut button. This works in on-line
mode as well as in off-line mode.
¯ With no material to rewind, the rewinder stops after approx. 6 s and shows
the status report:
Status
5004
Rewinder mat. tear
£ Press the Online button to acknowledge the status report.
Ë
18
03/10 Rev. 5.04-01
Rotation speed
TECHNICAL MANUAL
Rewinder 2000
Attachment, Setup, Service
Pressing the Cut button after securing the material end lets the rewinder
start winding at a comparably slow, constant speed. This startup speed is
independent of the formerly set printspeed and is maintained until the
bouncer arm reaches its final position for the first time after starting. After
having reached the final position, you recognize an alternating motor sound
as well as a changing rotation speed, indicating that the bouncer arm is
from then on controlling the rotation speed.
19
03/10 Rev. 5.04-01
TECHNICAL MANUAL
Rewinder 2000
Attachment, Setup, Service
Servicing the Rewinder
General notes
¯ Before beginning service work, switch off the printer and pull out the mains
plug.
£ Detach the rewinder from the printer before taking the following steps.
Function check
Preconditions:
•
•
The rewinder is attached and connected.
The appropriate printer parameters for rewinder use are set.
£ Slowly move the bouncer arm from the resting position to the end position
(see Fig. 4) and observe the motor while it is running.
The motor should slow down steadily and may only stop if the bouncer arm
reaches the end position.
If the motor stops before the bouncer arm reaches the end position (several
cm), there are most probably dark spots and/or inclusions contained in the
Light barrier wedge, which influence the control mechanism negatively. In
this case, the wedge should be replaced.
If the motor doesn´t stop as soon as the bouncer arm reaches the end
position, please check the setting of the sensor current and the setting of
the output stage board (next paragraph).
64-xx: Setting the output stage
Output stage boards of the older type must be set to a short-circuit current
of 25 mA (see Fig. 6). The older board generation can be recognized by the
two potentiometers mounted on it.
The newer board generation (without potentiometers) doesn´t require any
setting. The current is set fix to 30 mA on those boards.
P For details on setting the output stage boards refer to the service manual,
topic section "Service Boards", paragraph "Output stage board".
Ë
20
03/10 Rev. 5.04-01
TECHNICAL MANUAL
Rewinder 2000
Attachment, Setup, Service
Fig. 6 Setting of the shortcut current on boards of the older type (recognizable by the two
potentiometers).
TTX 350 / TTK: Setting the output stage
The peripherals board used in TTX 350 and TTK must be set to a shortcircuit current of 30 mA (see Fig. 7).
P For details on setting the peripherals board refer to the service manual,
topic section "Service Boards", paragraph "Peripherals board".
Fig. 7 Setting the short-circuit current on the peripherals board.
21
03/10 Rev. 5.04-01
TECHNICAL MANUAL
Rewinder 2000
Attachment, Setup, Service
Rewinder core
The rewinder core is available in diameters of
1.5", 3" and 4". The rewinder core can be
replaced with another diameter. To do this,
proceed as follows:
1
Disassembling/assembly
1. Pull off the retaining ring (1).
2. Pull off the rewinder core (2).
¯ Assembly: the flat section (3) and the
pins (4) must go into the corresponding
recesses of the disc.
4
3
4
2
22
03/10 Rev. 5.04-01
TECHNICAL MANUAL
Rewinder 2000
Buffer disc
Attachment, Setup, Service
1
The buffer disc (1) guides the label material
while it is being wound up. A ratchet wheel is
fitted to the back of the buffer disc, over which
the drive belt runs.
Tools
– Screwdriver, medium
– Phillips screwdriver, medium
– Allan key 3mm
Disassembling
1. Unscrew the three Phillips fastening
screws (2) on the cover plate (3).
Carefully remove the cover plate.
¯ The cover plate is also held in position
by double-sided tape (4).
4
4
4
2. Loosen the two fastening screws (5) of
the belt tensioner.
3. Remove the retaining ring (6).
5
5
4. Remove the buffer disc.
P Assembly, see overleaf
6
23
03/10 Rev. 5.04-01
TECHNICAL MANUAL
Rewinder 2000
Attachment, Setup, Service
Assembly
1. Lay the belt around the motor sprocket
(1) and belt tensioner (2).
2. Slowly tighten the buffer disc just like
tightening a chain. Hold the belt in
position with a screwdriver.
3. Attach the retaining ring of the buffer
disc.
1
2
4. Stretch the belt by pressing the
tensioning screw (3) in the long slot
against the belt. Tighten both screws
(3,4).
5. Thread the cover plate over the
connector cable and screw it tight.
Toothed belt
P Changing the toothed belt as described
in the section Buffer disc.
4
3
Belt tensioner
Tool
– Allan key 3mm
Disassembling/assembly
1. Remove the Rewinder core, Buffer disc
and cover plate.
5
P More detailed information can be found
in the corresponding sections.
¯ The flange bushing (5) can now be
removed.
2. Unscrew the fastening screws (3,4) of
the belt tensioner. Remove the eccentric
axle (6).
3. Assembly as described in the section
"Buffer disc".
6
24
03/10 Rev. 5.04-01
TECHNICAL MANUAL
Rewinder 2000
Attachment, Setup, Service
Cable harness / light barrier
The light barrier (transparency), in conjunction
with the light barrier wedge, controls the
position of the bouncer arm. More or less light
is allowed to pass through the light barrier
wedge depending on the position of the
bouncer arm. The light barrier transforms the
amount of light which is received into electrical
information.
1
The light barrier (1) is placed on a small
board, together with a potentiometer and a
connector.
3
P See also paragraphs Pin assignment
light barrier board and Pin assignment
D-Sub plug.
4
Tools
– Allan key 3mm
– Phillips screwdriver, small
Disassembling/assembly
1. Remove the Rewinder core, Buffer disc
and cover plate.
5
6
P More detailed information can be found
in the corresponding sections.
2. Remove the adhesive tape strips (3);
unscrew the screw (4) securing the
cable.
5
3. Unscrew the two fastening screws (5) of
the base plate (6). Remove the base
plate.
4. Plug the cable (7) off the board (1).
5. Unscrew the fastening screw (8) of the
light barrier bracket. Take out the board
(1).
6. Thread the cable through the recess (9)
in the rewinder housing.
8
1
9
7
25
03/10 Rev. 5.04-01
TECHNICAL MANUAL
Rewinder 2000
Attachment, Setup, Service
Light barrier wedge
3
Tool
1
– Screwdriver, small
Disassembling/assembly
1. Disassembling the light barrier.
P More detailed information can be found
in the section Cable harness / light
barrier.
2. Remove the retaining ring and light
barrier wedge (1).
Tension spring
6
5
The tension spring (2) returns the bouncer
arm to the zero position.
2
Disassembling/assembly
1. Disassembling the light barrier and Light
barrier wedge.
P More detailed information can be found
in the corresponding sections.
4
2. Remove the spacer spring (3).
3. Detach the tension spring (2) at the
bottom (4).
4. Pull the spring holder (5) off the axle (6).
7
Bouncer arm
Disassembling/assembly
1. Disassembling all parts up to the section
"Tension spring", step 4.
2. Remove the retaining ring (7) and
bouncer arm.
Guide roller
Tool
– Screwdriver, small
Disassembling/assembly
9
£ Remove the retaining ring (8) and guide
roller (9).
8
26
03/10 Rev. 5.04-01
TECHNICAL MANUAL
Rewinder 2000
(AP 5.4) Run-in roller for
narrow labels
Attachment, Setup, Service
1
To improve the guiding accuracy of AP 5.4
printers processing very narrow label material,
it is recommended to install an additional runin roller (1) (article number A100422).
At older rewinders, an additional hole
according to fig. (2) must be drilled before
installing the run-in roller.
Tools:
2/2.5 mm allen keys
2
Assembling:
£ Screw the axle of the run-in roller to the
Countersunk 90°
hole as illustrated (1).
Adjusting:
1. Measure the centre of the label material
and mark it (3).
R4.4
0
R2.10
3. Shift the roller on the axle until the
centre groove on the roller (5) is in front
of the mark (3) on the material.
4. Re-tighten the set screw (4).
30.50
2. Loosen the set screw (4).
23.50
Material path:
¯ Insert the material so that it runs over
the roller (6).
3
4
5
6
27
03/10 Rev. 5.04-01
TECHNICAL MANUAL
Rewinder 2000
Attachment, Setup, Service
Technical Specifications
Motor
Stepper motor
Position sampling
Infrared light barrier
Rot. direction
Free selectable – Rewind direction with label facing outside or inside.
Rewind speed
Max. 203 mm/s (8"/s)
Spezification
Max. outer-Ø
230 mm
material roll
Core Inner-Ø
38/76/102 mm (1,5/3/4")
Min. material width
= Minimal print width
Max. material width
= Width of the rewinding mandrel
(102/127/152 mm resp. 4/5/6")
Max. roll weight
5 kg
Noise level
< 70dB(A)
28
03/10 Rev. 5.04-01
TECHNICAL MANUAL
Rewinder 2000
Attachment, Setup, Service
Troubleshooting
General
¯ The status reports should be printed and evaluated to check the
mechanical and electronic functional capability if no obvious defects are
evident.
P Information about the status reports can be found in the chapter "Info
Printouts and Parameters".
¯ Gray background: Those are the most common causes in cases of a notstirring-at-all rewinder.
Feature
Possible cause
Solution
Material slips on the
core
Clamping lever forgotten
Attach clamping lever
Material not secured to the core
Secure the material
Paper core too large
Replace paper core or install a
larger rewinder core
Bouncer arm bent
Adjust bouncer arm
Material guide set incorrectly
Adjust material guide
Material runs to the
inside or outside
Rewinder not screwed to the printer Attach the rewinder properly
Rewinder does not
run
Printer is not supplied with
peripherals preparation
retrofit p. p.
64-xx / AP 5.4: Wrong PIC version
on the output stage board
Check the PIC version. If necessary,
exchange the PIC or the whole
output stage board.
Connector cable not attached
Plug in the stepper motor
Stepper motor defect
Replace the stepper motor
Peripheral device board defect
Check board and replace if
necessary
Photoelectric switch wedge not
installed correctly
Check and adjust if necessary
Toothed belt defect
Check and replace toothed belt if
necessary
Belt tensioner loose
Check and tension if necessary
Direction of rotation
incorrect
Direction of rotation incorrectly set
Check and alter if necessary
Printer tilts forward
Support leg not set properly
Check and alter if necessary
Roll weight too heavy
Check and use smaller roll if
necessary
Printer is standing on an uneven
surface
Place the printer on an even surface
Bouncer arm does
not deflect
Spring is not functioning
Check; attach or replace spring as
required
Guide roller is
jammed
Guide roller is dirty
Check and clean if necessary
29
03/10 Rev. 5.04-01
TECHNICAL MANUAL
Rewinder 2000
Attachment, Setup, Service
P Notes about printer troubleshooting can be found in the Service Manual of
the printer in question, chapter "Troubleshooting".
Appendix
Pin assignment light barrier board
Connection
light sensor board
(3 pin)
3
2
2
11
1
1
A
B
K
4
3
C
E
3
(Light barrier)
cable harness
(inside of the rewinder)
Light barrier board
Z0138E.cdr
Rewinder
D-sub 15
plug
Fig. 8 Pin assignment between the light barrier board and rewinder cable harness
Pin assignment D-Sub plug
GND 4
Motor A\ 7
Motor A 8
11 Anode (LS Stepper board 1)
14 Motor B\
15 Motor B
Fig. 9 Pin assignment D-Sub plug at the rewinder cable harness
Z0140_a.cdr
(LS Stepper Board 3) Collector 3
30
03/10 Rev. 5.04-01
TECHNICAL MANUAL
Rewinder 2000
Attachment, Setup, Service
Index
A
P
Application................................................... 2
Assembly, rewinder..................................... 4
B
Pin assignment light barrier board ............ 29
properties.................................................... 2
R
Belt tensioner ............................................ 23
Bouncer arm.............................................. 25
return spring ........................................... 25
Buffer disc ................................................. 22
Rewinder core........................................... 21
Rotation speed 64-xx .................................. 6
Run-in roller for narrow labels (AP 5.4) .... 26
S
C
Sensor adjustment
– 64-xx ................................................... 13
– TTK ....................................................... 9
– TTX 350 ................................................ 9
Setup
– 64-xx ................................................... 11
– TTK ....................................................... 7
– TTX 350 ................................................ 7
Starting ..................................................... 17
Status report ............................................. 28
Status reports ........................................... 14
System requirements .................................. 3
Cable harness ........................................... 24
D
Direction of rotation ..................................... 5
G
Guide roller................................................ 25
L
Light barrier ............................................... 24
Light barrier wedge ................................... 25
M
Material, inserting...................................... 15
Mounting, rewinder...................................... 4
O
Output stage setting
– 64-xx.................................................... 19
– TTK...................................................... 20
– TTX 350............................................... 20
T
Tension spring .......................................... 25
Toothed belt.............................................. 23
Troubleshooting ........................................ 28