1
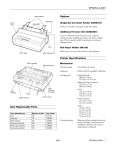
9-pin Dot Matrix Printer
User’s Guide
This manual explains how to set up your printer and provides
basic product information.
For detailed information, see the on-screen Reference Guide
(which is installed when you install the printer software). It
describes all the printer’s functions, optional products, printer
software, troubleshooting, and detailed technical specifications.
English
®
Contents
Chapter 1 - Setting Up the Printer
Unpacking the Printer . . . . . . . . . . . . . . . . . . . . . . . . . . . . . . . . . . . . . . . . . . . . . . 3
Choosing a Place for the Printer . . . . . . . . . . . . . . . . . . . . . . . . . . . . . . . . . . . . . . 3
Installing the Ribbon Cartridge . . . . . . . . . . . . . . . . . . . . . . . . . . . . . . . . . . . . . . . 4
Connecting the Power Cord . . . . . . . . . . . . . . . . . . . . . . . . . . . . . . . . . . . . . . . . . 6
Connecting the Printer to Your Computer . . . . . . . . . . . . . . . . . . . . . . . . . . . . . . 6
Installing the Printer Software . . . . . . . . . . . . . . . . . . . . . . . . . . . . . . . . . . . . . . . . 7
Installing and Viewing the Online Reference Guide . . . . . . . . . . . . . . . . . . . . . . . 7
Installing and Using the Remote Configuration Manager . . . . . . . . . . . . . . . . . . . 8
Chapter 2 - Loading Paper
Using the Two-Tractor System . . . . . . . . . . . . . . . . . . . . . . . . . . . . . . . . . . . . . . . 9
Supported Paper Types and Sizes . . . . . . . . . . . . . . . . . . . . . . . . . . . . . . . . . 9
Loading Paper On the Front Tractor . . . . . . . . . . . . . . . . . . . . . . . . . . . . . . . . . . . 9
Loading Paper On the Rear Tractor. . . . . . . . . . . . . . . . . . . . . . . . . . . . . . . . . . . 12
Switching Between Front and Rear Tractors . . . . . . . . . . . . . . . . . . . . . . . . . . . . 14
Changing Paper . . . . . . . . . . . . . . . . . . . . . . . . . . . . . . . . . . . . . . . . . . . . . . . . . . 15
Chapter 3 - Using the Control Panel
Buttons and Lights . . . . . . . . . . . . . . . . . . . . . . . . . . . . . . . . . . . . . . . . . . . . . . . 17
Selecting a Font and Pitch . . . . . . . . . . . . . . . . . . . . . . . . . . . . . . . . . . . . . . . . . . 18
Changing the Printer’s Default Settings . . . . . . . . . . . . . . . . . . . . . . . . . . . . . . . . 18
Using SelecType Mode . . . . . . . . . . . . . . . . . . . . . . . . . . . . . . . . . . . . . . . . 18
Default-setting Mode . . . . . . . . . . . . . . . . . . . . . . . . . . . . . . . . . . . . . . . . . 20
Locking the Control Panel Buttons . . . . . . . . . . . . . . . . . . . . . . . . . . . . . . . . . . . 21
Chapter 4 - Troubleshooting
Using the Error Indicators . . . . . . . . . . . . . . . . . . . . . . . . . . . . . . . . . . . . . . . . . . 23
Clearing Paper Jams. . . . . . . . . . . . . . . . . . . . . . . . . . . . . . . . . . . . . . . . . . . . . . . 24
Where To Get Help . . . . . . . . . . . . . . . . . . . . . . . . . . . . . . . . . . . . . . . . . . . . . . 24
2 Contents
Chapter 5 - Product Information
Printer Specifications . . . . . . . . . . . . . . . . . . . . . . . . . . . . . . . . . . . . . . . . . . . . .
Electrical . . . . . . . . . . . . . . . . . . . . . . . . . . . . . . . . . . . . . . . . . . . . . . . . . .
Environmental . . . . . . . . . . . . . . . . . . . . . . . . . . . . . . . . . . . . . . . . . . . . . .
Options . . . . . . . . . . . . . . . . . . . . . . . . . . . . . . . . . . . . . . . . . . . . . . . . . . .
ENERGY STAR Compliance . . . . . . . . . . . . . . . . . . . . . . . . . . . . . . . . . . . . . . .
Safety Instructions . . . . . . . . . . . . . . . . . . . . . . . . . . . . . . . . . . . . . . . . . . . . . . .
Hot Parts Caution Symbol. . . . . . . . . . . . . . . . . . . . . . . . . . . . . . . . . . . . .
Important Safety Instructions. . . . . . . . . . . . . . . . . . . . . . . . . . . . . . . . . . .
FCC Compliance Statement for United States Users . . . . . . . . . . . . . . . . . . . . .
WARNING. . . . . . . . . . . . . . . . . . . . . . . . . . . . . . . . . . . . . . . . . . . . . . . .
For Canadian users. . . . . . . . . . . . . . . . . . . . . . . . . . . . . . . . . . . . . . . . . . .
Declaration of Conformity . . . . . . . . . . . . . . . . . . . . . . . . . . . . . . . . . . . . . . . . .
EPSON AMERICA, INC., LIMITED WARRANTY . . . . . . . . . . . . . . . . . . . .
SUPPLEMENT TO THE LIMITED WARRANTY. . . . . . . . . . . . . . . . . . . . .
25
25
25
25
25
26
26
26
26
26
26
27
27
28
Chapter 1
Choosing a Place for the Printer
❏
If you use a printer stand, make sure it can support at least 75 lb (34 kg).
Never use a stand that tilts the printer.
Unpacking the Printer
w
Place the printer on a flat, stable surface. The printer will not operate
properly if it is tilted.
WARNING
The printer weighs 75 lb
(34 kg), so do not try to
lift it alone.
2
❏
Keep the printer away from direct sunlight, strong light, heat sources, or
excessive moisture or dust; or places subject to rapid changes in temperature
and humidity, or shocks and vibrations.
❏
Keep your computer system away from potential sources of electromagnetic
interference, such as loudspeakers or the base units of cordless telephones.
❏
Place the printer near a wall outlet where you can easily unplug the power
cord.
Placez l’imprimante près d’une prise de courant où la fiche peut être débranchée
facilement.
34kg
Make sure you have these items:
❏
Position the power cord and interface cable so they do not interfere with
paper feeding.
❏
Avoid electrical outlets controlled by wall switches or automatic timers, or
outlets on the same circuit as large motors or other appliances that can cause
voltage fluctuations. Power interruptions can erase your printer or
computer memory.
❏
Use a grounded power outlet; do not use an adapter plug.
❏
Do not block, cover, or insert objects into openings in the printer cabinet.
ribbon cartridge
printer
printer software
screwdriver
power cord
Remove and save the protective packing materials as described on the
Notice Sheet.
Setting Up the Printer 3
English
Setting Up the Printer
Installing the Ribbon Cartridge
1.
Make sure the printer is turned off. (The switch should be in the O
position.)
2.
Open the top cover and slide the print head to the position shown, marked
by the
symbol.
3.
Unpack the ribbon cartridge and
remove the black plastic separator.
4 Installing the Ribbon Cartridge
4.
Holding the sides of the cartridge, place the notch on each end onto the
metal posts inside the printer. Then tilt the cartridge down into the printer
until it clicks into place.
5.
Lift up the black plastic ribbon guide and slide it down behind the print
head until it clicks into place. Do not twist or crease the ribbon.
6.
Slide the print head back and forth to make sure it moves freely. If not, lift
up the ribbon guide and try again.
English
ribbon tightening knob
7.
Turn the ribbon-tightening knob to remove any slack.
8.
Close the top cover.
Note:
For safety reasons, the printer will not work if the top cover is not closed completely.
Installing the Ribbon Cartridge 5
Connecting the Power Cord
Make sure the printer is turned off.
Then plug the power cord into the
AC inlet on the back of the printer
and connect the other end to a
properly grounded electrical outlet.
3.
Use the appropriate cable to connect the printer to your computer.
USB
Connecting the Printer to Your Computer
You can connect your printer using the following interfaces:
❏
IEEE-1284-compatible parallel interface (use a shielded, twisted-pair
parallel cable with a 36-pin Centronics® compatible connector)
❏
USB (Universal Serial Bus) interface (use a shielded USB cable)
❏
RS-232C serial interface (use a null modem cable)
❏
Type-B optional interface (see the Reference Guide to install an optional
interface card)
IEEE1284 (PARALLEL)
Note:
You can connect to multiple interfaces simultaneously; the printer switches interfaces
automatically when it receives data.
1.
Make sure your printer and computer are turned off.
2.
Open the printer’s interface cover.
6 Connecting the Power Cord
RS-232C (SERIAL)
6.
Installing the Printer Software
Turn on your printer.
English
The Epson® printer software on the CD-ROM supports Windows® 95, 98, Me,
2000, XP, and NT® 4.0.
1.
Make sure the printer is connected to your computer, but turned off.
2.
Turn on your computer and wait for Windows to load.
3.
Insert the printer software CD-ROM. You see this screen:
c
Caution:
Before turning on the printer, be sure you have removed all protective
materials or you may seriously damage the printer. (See the unpacking
instructions provided with the printer.)
After a moment, the software begins installing. Follow any on-screen
instructions until you return to the Installation screen.
Note:
If the New Hardware Found screen or any other wizard appears when you
turn on your printer, click Cancel.
❏
If it does not appear, double-click Setup.exe on the CD-ROM.
4.
5.
Select Install Printer Software and click
agreement.
❏
. You see the software license
Read the license agreement and click Accept. You see this window:
7.
If you’re asked to insert a Windows CD-ROM, insert it and click OK.
Close the Windows installer screen to continue installing the driver.
When the installation is complete, follow the instructions below to install
the Reference Guide and the Remote Configuration Manager utility.
Installing and Viewing the Online Reference Guide
Select Install Reference Guide on the Installation screen and click
The DFX-9000 Reference Guide icon appears on your desktop.
.
To view the Reference Guide, double-click the DFX-9000 Reference Guide icon
or click Start > Programs (or All Programs) > EPSON > DFX-9000 Reference
Guide > Reference Guide.
Installing the Printer Software 7
Installing and Using the Remote Configuration
Manager
The Epson Remote Configuration Manager provides an easy way to change your
printer’s default settings in Windows. Follow these steps to install it:
1.
Select Install EPSON Remote Configuration Manager on the Installation
screen and click .
2.
When you see the InstallShield window, click Yes. You see this screen:
3.
Click Next and follow the on-screen instructions.
4.
When the installation is complete, click Finish. (You may need to close a
window on your screen to see the final installation screen.)
To start the program, select Programs (or All Programs) > Epson Remote
Configuration Mgr > Epson Remote Configuration Manager.
To open the program’s on-screen User’s Guide, select Programs (or All
Programs) > Epson Remote Configuration Mgr > Epson Remote Configuration
Manager User’s Guide.
Note:
If you are using the serial port, you need to switch the printer driver to COM2 before
you run the Remote Configuration Manager. Switch it back to COM1 when you’re
done.
8 Installing and Using the Remote Configuration Manager
Chapter 2
You can print on continuous paper from 3 inches (76.2 mm) to 16.5 inches
(419.1 mm) wide. Your printer senses the paper width automatically.
The printer automatically adjusts to the thickness of the paper loaded when the
platen gap setting is set to Auto in SelecType mode. See “Using SelecType
Mode” on page 18 for details.
Using the Two-Tractor System
Your printer can load paper from a front tractor and a rear tractor. Be sure to
leave enough room around the printer for the two stacks of fresh paper and for
the printed stack. Align your paper supply so the paper feeds smoothly into the
printer.
front tractor
rear tractor
Note:
❏ Make sure your paper matches the specifications described in the on-screen
Reference Guide.
❏
When the optional perforation cutter (part number C81507X) is installed, the
printable width is from 4 inches (101.6 mm) to 16 inches (406.4 mm).
both tractors
Loading Paper On the Front Tractor
Place the paper supply lower than the printer to avoid a paper jam. Make sure
that your stack of printed pages does not interfere with the rear tractor’s paper
supply.
Supported Paper Types and Sizes
1.
Lift up the front cover until it locks in place.
2.
Release the right and left sprockets by pulling the lock levers down.
sprocket lock lever
You can use the following types of continuous paper with either tractor:
❏
Single-sheet
❏
Multi-part
❏
Labels
❏
Continuous forms with labels
❏
Overlapping multi-part forms
Loading Paper 9
English
Loading Paper
3.
Position the left sprocket so the pins are to the left of the arrow mark on the
scale. Push up the sprocket lock lever to lock it in place.
6.
Open both sprocket covers.
arrow mark
sprocket cover
4.
Slide the right sprocket to match the width of your paper. (Do not lock it in
place yet.)
5.
Center the two paper supports between the two sprockets.
7.
Be sure your paper has a clean, straight edge and that the printable side of
the paper is facing up. Fit the first few holes over the sprocket pins and close
the sprocket covers.
8.
Slide the right sprocket until the paper is straight and there is no slack. Lock
the sprocket by pushing up the sprocket lock lever. (The right sprocket may
move slightly.)
sprocket lock lever
paper supports
Note:
For paper less than four inches wide, remove the paper supports by pulling them
off the tractor.
10 Loading Paper On the Front Tractor
Note:
Be careful not to pull the paper too tightly.
9.
Pull the printer’s front cover out slightly, then close it.
11. If the front tractor arrow light is red, press the LF/FF Load button to load
the paper.
English
rear
front
c
Caution:
Do not just push down the front cover; always pull it out slightly before
closing it.
10. Turn on the printer if it is off.
If the rear tractor arrow light is red, press the Front/Rear button to switch to
the front tractor. When the printer switches tractors, it loads the paper
automatically.
The front tractor arrow light turns green and the paper is loaded to the top-ofform position. If you need to adjust the paper position, see “Adjusting the Paper
Position” in your on-screen Reference Guide.
You hear the print head moving to the left and Ready appears on the LCD.
Either the front or rear Tractor Select arrow lights up to indicate the tractor
that was selected last.
Loading Paper On the Front Tractor 11
Loading Paper On the Rear Tractor
1.
Open the printer’s back cover as shown below.
2.
Open the flap at the back.
4.
Position the right sprocket so the pins are to the right of the arrow mark on
the scale. Push up the sprocket lock lever to lock it in place.
arrow mark
5.
Slide the left sprocket to match the width of your paper. (Do not lock it in
place yet.)
6.
Open both sprocket covers.
back flap
3.
Release the right and left sprockets by pulling the lock levers down.
sprocket lock lever
sprocket cover
12 Loading Paper On the Rear Tractor
7.
Make sure your paper has a clean, straight edge and that the printable side
of the paper is facing down. Feed it through the opening at the back.
9.
Slide the left sprocket until the paper is straight. Lock the sprocket by
pushing up the lock lever. (The left sprocket may move slightly.)
English
sprocket lock lever
8.
Fit the first few holes over the sprocket pins and close the sprocket covers.
Note:
Be careful not to pull the paper too tightly.
10. Close the back cover and flap.
Loading Paper On the Rear Tractor 13
11. Turn on the printer if it is off. You hear the print head move to the left and
Ready appears on the LCD. Either the front or rear Tractor Select arrow
lights up to indicate the tractor that was selected last.
12. If the rear tractor arrow light is red, press the LF/FF Load button to load the
paper.
Switching Between Front and Rear Tractors
You can easily switch between paper loaded on the front and rear tractors, and
vice-versa. Just wait for any print jobs to finish before switching tractors.
c
Caution:
Never switch between tractors if labels are loaded in the printer. First remove
the labels by tearing off the fresh supply below the tractor and pressing
LF/FF Load to eject the remaining labels.
1.
Turn on the printer.
2.
If no paper is loaded in the front or rear tractor, load it as described on
page 9 (front) or page 12 (rear).
3.
To tear off any printed pages or excess
paper, press the Tear Off button and
tear off the pages at the perforation.
rear
c
front
If the front tractor arrow light is red, press the Front/Rear button to switch
to the rear tractor. When the printer switches tractors, it loads the paper
automatically.
The rear tractor arrow light turns green and the paper is loaded to the top-ofform position. If you need to adjust the paper position, see “Adjusting the Paper
Position” in your on-screen Reference Guide.
14 Switching Between Front and Rear Tractors
4.
Caution:
Always tear off the printed
document and any excess paper
before switching tractors. If the
perforation does not align with the
tear-off edge, you can adjust it. See
“Adjusting the Tear-Off Position”
in your on-screen Reference Guide.
Press the Front/Rear button to switch
to the other tractor. The selected
tractor light turns green and the paper
advances to the top-of-form position.