1
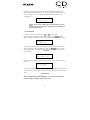
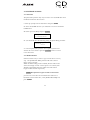
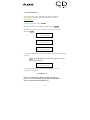
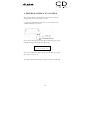
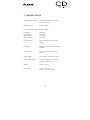
Reference Manual
WARNING
Use of the CD Twin is for the legal backup of licensed materials and
editing of personal data. Any copy of licensed materials is the property of
the author of the copyright holder. Any unauthorized copying, editing, or
resale of copyrighted materials is prohibited by US and International laws.
We discourage owners of the CD Twin from using this product in any
illegal way.
1
1. INTRODUCTION ..............................................4
1.2 PRODUCT OVERVIEW .............................4
1.2.1 Front View..................................................4
1.2.2 Side View....................................................5
1.2.3 Rear View...................................................5
2. SETTING UP THE SYSTEM ...........................6
2.1 STAND ALONE OPERATION WITHOUT
CONNECTING TO A COMPUTER ............................6
2.2 CONNECTING TO A PC AS AN EXTERNAL CDRW VIA USB 2.0 ...................................................6
3. OPERATING GUIDE........................................7
3.1 CD TO CD BACKUP .....................................7
3.2 COPY TRACK (MAKE A COMPILATION
CD)............................................................................8
3.3 CLOSE DISC....................................................9
3.4 MUSIC PLAYER ...........................................10
3.5 SYSTEM FUNCTIONS .................................11
3.5.1
3.5.2
3.5.3
3.5.4
ERASE DISC ...............................................11
RAWCOPY DISC .....................................11
UPGRADE BIOS .....................................12
SYSTEM INFORMATION.....................13
4. EXTERNAL CD-RW TO PC VIA USB 2.0 ...14
5. SPECIFICATIONS ..........................................15
6. TROUBLESHOOTING AND FAQ................16
2
Unpacking
•
•
CD Backup System
Accessories
9 USB Cable
9 AC Power Supply
9 User Manual
9 Nero Express Software
Features
•
•
•
•
•
•
•
CD to CD copy in one easy step
Takes only 4 minutes to backup an entire 74 minute CD
LCD panel allows you to see all functions and copying status
Stand alone operation, no need to connect to your PC to
perform a CD backup
Special track editing function allows you to make a compilation
of your personal audio CDs
Music player can select single tracks or all tracks to play and
repeat
Supports USB2.0 to connect with a PC as an external CD-RW
3
1. INTRODUCTION
The CD Twin is a stylish, new concept for CD backup. With it’s lightweight design, the CD Twin provides not only CD backup, but also
doubles as an audio CD track editing console for making a personal CD.
It can be used as a stand-alone CD player and can also be used as an
external CD-RW when connected to a PC via USB.
The stylish design makes the elegant CD Twin no longer a boring copy
tower. Its portability makes it a great tool for any setting.
1.2 PRODUCT OVERVIEW
1.2.1 Front View
4
1.2.2 Side View
1.2.3 Rear View
5
2. SETTING UP THE SYSTEM
2.1 Stand Alone Operation without Connecting to a Computer
I.
II.
III.
Plug in the power cord
Power up the CD Twin
Wait for the system to initialize
CD Twin
1. Copy Disc
NOTE: Make sure the USB cable is un-plugged when using the
CD Twin in Stand Alone mode.
2.2 Connecting to a PC as an external CD-RW via USB 2.0
I.
II.
Power up the CD Twin
Connect the USB cable from the CD Twin to an available USB
port on your PC
<<< PC Link >>>
NOTE: The CD Twin will automatically switch to PC LINK mode
when the USB cable is connected properly.
NOTE: PC LINK mode is designed to function with WINDOWS
2000 and XP operating systems.
6
3. OPERATING GUIDE
3.1 CD to CD BACKUP
I. Power up the CD Twin and wait for the system to initialize
CD Twin
1. Copy Disc
II. Insert the source disc into the reader CD-ROM [labeled as Reader],
and insert a blank disc into the writer CD-RW [labeled Writer]
III. Press the START button to begin the CD backup process.
IV. The LCD will display the total disc length and the time elapsed while
the CD Twin is in process.
Write
Data CD
[73:51]
00:52
V. The CD-RW will automatically eject when the CD Twin has
successfully completed.
VI. If you would like to make additional copies of the same disc, simply
insert another blank CD-RW into the Writer and press START again.
Waiting ...
Blank Disc
Pressing the CANCEL button will take you back to the Main Menu.
7
3.2 COPY TRACK (Make a Compilation CD)
This function allows you to make a compilation audio CD from a single
CD, or multiple source CDs.
I. Insert the source audio CD into the Reader CD-ROM drive and insert
a blank disc into the Writer CD-RW drive.
II. From the main menu, press the << or >> buttons until
[2. Copy Track] is displayed on the LCD and press the START button.
CD Twin
2. Copy Track
III. Move the cursor under the track that you want to add to the
compilation CD by using the << or >> buttons. After selecting the
track, a letter will be displayed above the track number to denote that this
specific track has been chosen. If you have speakers or headphones
connected to the earphone jack, you will hear the audio of the selected
track. If you would like to cancel a selected track, press the START
button again while the cursor is underneath the track number.
NOTE: If you press the CANCEL button, you will exit [track
selection mode] and return to the main menu.
e
f a
i b
1 2 3 4 5 6 7 8
NOTE: The letters above each selected track represent the order in
which they will be burned onto the compilation CD.
IV. After you are finished selecting all of the tracks for your new
compilation CD, press the >> button until the cursor is under the [OK]
option, all the way to the right. Then simply press the START button and
the CD Twin will copy the selected tracks one by one.
f a
c
13 14 15 16
Track 11
[14.10]
OK
8
06:59
04:43
V. After copying all of the tracks from the first CD, the Reader CDROM drive will automatically eject. Insert the next audio CD, repeating
steps 1 through 4, if you would like to add additional tracks to your
compilation.
CD Twin
2. Copy Track
NOTE: After you have finished all of the track editing, you must
use the [3. Close Disc] function to make your new CD playable on
any standard CD player.
3.3 CLOSE DISC
I. From the main menu, press the << or >> buttons until
[3. Close Disc] is displayed on the LCD and press the START button.
Make sure that your newly burned disc is still in the Writer CD-RW drive.
CD Twin
3. Close Disc
II. The LCD will show the total number of tracks and the available free
space remaining on the CD-RW disc. Press the START button to begin
the closing process. Pressing the CANCEL button will abort the close
disc function.
Track 07
26:15
Free 48:29
Go?
III. The LCD will display the following message during the disc closing
process.
Closing Disc...
00:20
IV. Once the closing disc process has finished, the LCD will return to the
main menu and you may then continue with any other function of the CD
Twin.
ATTENTION!!
After executing the [Close Disc] function, you CAN NOT add any more
tracks to the disc or change the CD in any way!!!
9
3.4 MUSIC PLAYER
This feature allows you to play standard CDs with your CD Twin. Simply
plug in speakers to the earphone output and select a play mode. You can
play an entire CD or pick only songs you would like to hear.
I. Insert an audio CD into either drive, select [Music Player] from the
main menu and press START.
CD Twin
4. Music Player
II. Then select correct the drive to play the CD. Use the << or >>
buttons to select the drive and press START.
Select Target:
<Reader
III. Then select the song tracks that you would like to play by moving the
cursor under the track numbers and pressing START.
ALL 1 2 3 4 5 6
IV. You can choose individual tracks or play the entire CD by selecting
[ALL]. Track selection is made by moving the curser under the track
number with the << or >> buttons and pressing START.
g h
b i
ALL 1 2 3 4 5 6
V. When you are finished selecting the tracks,
press the >> button until the cursor is under
the [OK] option, and press START to enter
[PlayMode]. Select [Once] or [Repeat],
depending on how you would like your music
served up, and press START to play the CD.
The LCD will show the current track and time
elapsed during [PlayMode].
[PlayMode]
Once
Repeat
PlayMode Controls
START – Play/Pause
CANCEL – Stop
>> - Next Song
<< - Previous Song
?
[Music Player]
Track 14 01:29
10
3.5 SYSTEM FUNCTIONS
3.5.1 Erase Disc
The [Erase Disc] function may only be used to erase a CD-RW disc that is
installed in the Writer drive location.
I. Select [5. System] from the main menu and press START.
II. Insert the CD-RW disc that you would like to erase into the Writer
CD-RW drive.
III. Select [5.1 Erase Disc] and press START.
5. System
5.1 Erase Disc
IV. The LCD will show the following during the [Erase Disc] procedure.
Erasing ...
00:06
V. Once the [Erase Disc] function has completed, either insert
another disc to be erased or press the CANCEL button to return
to the main menu.
3.5.2 RAWCOPY Disc
Select this function if you want to copy an entire disc in one easy
step. The [RAWCOPY DISC] function will make a mirror
image of the source disc.
When the RAW reading mode is enabled, all tracks will be read
with a block length of 2352. If this option is not selected, then
all Mode1 and Mode2 data tracks will be read with a block
length of 2048 and 2336 respectively.
NOTE: This option has no effect on audio or CD+G tracks.
Just insert the source disc into the Reader drive and insert a
blank disc into the Writer drive, select [RAWCOPY DISC] and
press START.
11
3.5.3 UPGRADE BIOS
From time to time, Alesis will upgrade the CD Twin’s BIOS.
You can obtain the latest version from the Alesis website at
www.alesis.com.
I. Select [5. System] and press START.
II. Select the function [5.3 Upgrade BIOS] and press START.
III. Select the drive that you would like to upgrade the BIOS for
and press START.
5.3 Upgrade BIOS
5.3.1 SystemBIOS
5.3 Upgrade BIOS
5.3.2 ReaderBIOS
5.3 Upgrade BIOS
5.3.2 WriterBIOS
IV. Insert the BIOS source disc into the selected drive when requested by
the LCD.
NOTE: The LCD will show an error message if the incorrect disc
is inserted into the drive.
*Wrong Disc*
Put in BIOS Disc
V. The CD Twin will auto-detect the latest BIOS version and
then perform the upgrade.
!!! WARNING !!!
Do NOT turn the CD Twin off when the BIOS Upgrade is in
process!! You will not be able to get the unit to boot-up again if
the power is interrupted during this process.
12
3.5.4 SYSTEM INFORMATION
This function will provide you with all of the related information
about your CD Twin. [Product serial number, Model name,
Firmware version, CD-R and CD-RW drive manufacturers and
their respective firmware versions.
Select function [5.4 Machine Info] and press START. You can
scroll through the pages with the << and >> buttons.
Please have this information handy if contacting Alesis customer
service.
5. System
5.4 Machine Info
5006120021
CD Twin
v1.06
[Reader]
EPO Super CD-ROM
[Reader]
F/W: Ver3.31C
[Writer]
AT
API CD-RW 52x32x
[Writer]
F/W: TB56
13
4. EXTERNAL CD-RW to PC VIA USB2.0
This function allows your CD Twin to be used as an external
storage device when connected to your PC.
I. Connect a USB cable from the rear of your CD Twin to an
available USB port on your PC.
II. Power up the CD Twin and it will automatically boot up into
USB mode and the LCD will show [PC Link].
<<< PC Link >>>
III. You should then be able to access the CD Twin as a logical
drive letter from your PC.
To resume stand-alone operation, simply un-plug the USB cable.
14
5. SPECIFICATIONS
Supported Disc Formats
All audio CDs, Data CD, VCD,
CD-1, Photo-CD
Blank Disc Type
CD-R, CD-RW
CD Twin Burning Speed (CD-R/CD-RW)
Copy Disc
Copy Track
Rawcopy Disc
PC via USB2.0
24x (fixed)
16x (fixed)
4x (fixed)
32x (max)
Copy Function
CD to CD, Personal audio CD
editing
Connection
USB 2.0 – connect to PC as external
CD-RW.
Audio Output
Earphone jack (44.1Khz, 16bit
Stereo)
Power Supply
100V~240V, 50/60Hz, AC input
Front Control Panel
2x16 LCD display, 4 control keys
(START, CANCEL, <<, >>)
Weight
3.88 lbs, 1760 g
Dimensions
11.26 x 8.90 x 2.44
286mm x 226mm x 62mm
15
6. Troubleshooting and FAQ
Q: How long does it take to copy a CD?
A: it takes around 4 minutes to copy a 74 minute source disc
Q: Why does the LCD show an error message when you put a CD-R disc
into the CD-RW and execute [Erase Disc] function?
A: CD-R disc is not erasable. Please change it to a CD-RW disc.
Q: When executing [Copy track], the LCD shows error message of:
Waiting ...
[36:57]>[31:18]
A: This means you have selected too many tracks (more than
the available space on the blank disc). You will need to remove
some tracks from your edited list or put in a new CD-R or CDRW disc.
Q: How can I get a BIOS update?
A: See chapter 3.5.3 UPGRADE BIOS
Q: Can I change the CD-ROM or CD-RW?
A: No. There are no user serviceable parts inside.
Q: Why won’t my unit turn on?
A: Make sure you are using the power supply that came with
your unit. Other power supplies will likely not work.
16
Alesis Contact Information
Alesis, LLC
Los Angeles, CA USA
E-mail:
Website:
[email protected]
http://www.alesis.com
Alesis CD Twin Reference Manual
Revision 1.0 by Brooks Bruner
Copyright 2004, Alesis, LLC. All rights reserved
Reproduction in whole or in part is prohibited. CD Twin is a trademark of Alesis,
LLC. Specifications subject to change without notice.
7-51-0165-A
1/14/2004
17