1
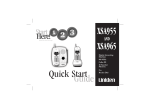
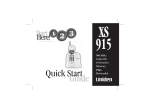
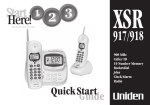
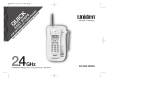
lw
ai t
XS
910
l
ca
pause
redial
Quick Start
Guide
900 MHz
10 Number
Memory
Plus
Rocketdial
GETTING STARTED
INSTALLATION & SAFETY
This symbol
indicates
important
operating
and servicing
instructions.
The earcapof
this telephone
may attract and
retain small
metallicobjects.
Choosing the best location for your phone.
When choosing a location for your phone there are a number of appliances the phone should not be near, and areas you should avoid.
CHARGE the new phone
for 20 - 25 hrs.
AVOID Moisture
CHOOSE a central location
AVOID Television sets and
other electronic
appliances
AVOID Microwave
ovens
AVOID Moisture
DON’T overload the
power outlet.
AVOID multi power
boards.
AVOID Computers
AVOID other cordless phones
AVOID connecting
more than
Note: Ringing will not be impaired by adding extra cordless handsets.
Page i
3
phones as ringing
may be impaired
Start
Here!
Installing the Handset Battery
Installing the Base Unit
• Plug the telephone cord into the Base Unit,
then into the telephone socket on the wall.
• Plug the AC Adaptor cord into the Base Unit,
then the AC Adaptor into the wall power
point.
• Press the AC Adaptor cord into the curved
recess under the Base Unit.
New Zealand
Main Base
Australia
Tel Line Adaptor (Not supplied)
Power Point
• Press the battery cover and slide it off.
• Connect the battery plug to the socket at the rear of the battery compartment.
Make sure that the plug is the right way round.
The RED and BLACK battery wires must match the RED and BLACK printed on
the phone case for the plug to fit properly. Press firmly until it clicks into place.
Making a Call
Answering a Call
• Handset on Base Unit:
• Pick up the handset and press
Remove the handset from the base
Dial the phone number
and speak (Auto Talk).
• To hang up - press
• Handset off the Base Unit:
OR
Pick up the handset, press
Place the handset on the Base Unit.
and speak.
• To hang up - press
OR
Place the handset on the base unit.
Page ii
CONTENTS
Travelling Out-of-Range ............................................................4
Selecting a Different Channel ...................................................4
Find Handset ............................................................................4
Call Waiting/Flash .....................................................................4
Memory Dialing
Storing Phone Numbers .............................................................5
Making Calls with Memory Dialing ..............................................5
Chain Dialing .............................................................................. 5
Erasing a Stored Phone Number .................................................5
Rocketdial
Storing the Rocketdial .................................................................6
Making Calls with Rocketdial .......................................................6
Erasing a Rocketdial ...................................................................6
Troubleshooting ....................................................................................7
Warranty .................................................................................................8
Installation & Safety .............................................................................i
Quick Start Guide
Installing the Base Unit ............................................................ii
Installing the Handset Battery ..................................................ii
Making a Call ........................................................................... ii
Answering a Call .......................................................................ii
Contents ...............................................................................................iii
Included in your Package ..................................................................iii
Getting Started
Controls and Functions ............................................................1
Mounting the Base Unit on a wall ............................................1
Battery Maintenance ................................................................2
Using your Phone
Making and Receiving Calls ......................................................3
Adjusting the Ringer Tone and Earpiece Volume ................. 3
Redial .......................................................................................4
INCLUDED IN YOUR PACKAGE
MakeNOTES
sure you have received the following items in the package. If any of these
items are missing or damaged, contact your retailer or place of purchase.
1.
2.
3.
4.
Handset
Base Unit
Battery Cover
SuperChat Rechargeable Battery
5.
6.
7.
AC Adaptor
Telephone Cord
Owners Manual
Page iii
Handset antenna
Handset earpiece
Talk/batt low indicator
flash key
key
key
/pause key
Handset microphone
and ringer speaker
9.
memory key
10.
/call wait key
11.
12.
13.
14.
15.
16.
17.
18.
19.
20.
key
volume key
key
channel key
Handset charging contacts
Statuslight
key
Base charging contacts
Telephone line jack
AC adaptor input
1
16
2
17
3
18
4
5
6
7
19
20
talk
batt low
flash
RocketDial
wai t
1.
2.
3.
4.
5.
6.
7.
8.
m
ca
ll
GETTING STARTED
CONTROLS AND FUNCTIONS
pause
redial
channel
Page 1
13
14
8
15
MOUNTING THE BASE UNIT ON A WALL
You can mount your phone directly to the wall. Before doing this, consider the following:
• Avoid electrical cables, pipes or other items behind the mounting location that could cause a hazard
when inserting screws into the wall.
• Mount your phone within distance of a working phone jack.
• Make sure the wall material is capable of supporting the weight of the base and handset.
• Use screws with anchoring devices suitable for the wall material where the base unit will be placed.
1. Insert two mounting screws into a wall (with their appropriate anchoring device), 8.5cm apart.
Allow about 3mm between the wall and screw heads for mounting the phone.
2. Plug the AC adaptor into the Base Unit and then into a power point.
3. Plug the telephone cord into the Base Unit and then into the telephone socket on the wall.
4. Align the mounting slots on the base with the mounting posts on the wall.
5. Then push in and down until the phone is firmly seated.
9
10
11
12
85mm
GETTING STARTED
BATTERY MAINTENANCE
Use only the
genuine Uniden
Super Chat
Battery supplied
with your phone.
Replacement
Super Chat
Batteries are
available
through the
Uniden Parts
Department.
Battery use time (per charge)
• 10 hours continuous use
• 20 days when handset is in the standby mode.
When the Battery charge becomes low
If the phone is not in use, the 'batt low' indicator flashes and none of the keys will operate. If the phone is in use, the 'batt
low' indicator flashes and the handset beeps. Complete your conversation as quickly as possible and return the handset to the
base unit for charging.
• You cannot overcharge the battery.
• You may return the handset to the charger after each call or when the battery is low.
Cleaning the charging contacts
To maintain a good charge, it is important to clean the charging contacts on the handset and base unit with a dry cloth or a pencil
eraser about once a month. Do not use any liquids or solvents.
SPECIAL
NOTE
Genuine Handset Batteries
The high quality rechargeable batteries supplied with your phone will perform for up to two years or more. In
order to enjoy the best performance from your phone, we recommend you replace your batteries every two years
with a genuine Uniden battery.
Simply visit our website to order a replacement battery:
Uniden Australia Pty Limited
Service Division
www.uniden.com.au
Uniden New Zealand Limited
Service Division
www.uniden.co.nz
Page 2
USING YOUR PHONE
MAKING AND RECEIVING CALLS
Handset on Base
Handset Off Base
To answer a call
Pick up the handset(Autotalk).
Press
or
To make a call
1.
2.
3.
4.
1. Press
.
2. Listen for the dial tone.
.
3. Dial the number.
To hang up
Press
, or return the handset to the
base (AutoStandby).
Press
, or return the
handset to the base
(AutoStandby).
To redial
1.
2.
3.
4.
1. Press
.
2. Listen for the dial tone.
3. Press
.
Pick up the handset.
Press
.
Listen for the dial tone.
Dial the number.
.
Pick up the handset.
Press
.
Listen for the dial tone.
Press
.
, any number
(Autotalk).
ADJUSTING THE RINGER TONE AND EARPIECE VOLUME
Handset Ringer Tone
Press
in standby mode to select between the two tones. To listen to and select second tone, press
the first tone is still ringing. The telephone will keep the last setting for all future calls.
Earpiece Volume
a second time while
Press
during a call to select the required volume setting (low, medium, high) for the earpiece of the handset. The telephone
will keep this setting for all future calls.
Ringer Mute
You can temporarily mute the ringer tone. When the handset is off the base and the phone is ringing,
press
. The ringer tone will return to normal with the next incoming call.
Page 3
The
key redials the last number dialed. The redialed number can be up to 24 digits long.
1. Press
.
2. Press
. The last number dialed will be called.
TRAVELLING OUT-OF-RANGE
During a call, noise will increase if you move your handset too far from your base unit. If the range limit of your base unit is
exceeded, your call will terminate within five minutes.
SELECTING A DIFFERENT CHANNEL
If you encounter interference while using your phone, you can manually change the
phone's channel for clear operation. This function works only when the phone is in use.
Press channel . The phone changes to another channel.
FIND HANDSET
To locate the handset (while it's off the base), press
on the base. The handset
beeps for 60 seconds.
Paging is cancelled by pressing any key or when the handset is returned to the base.
talk
If the call waiting tone sounds during a call:
Press
/call wait to switch between callers.
batt low
flash
RocketDial
m
CALL WAITING/FLASH - NEW ZEALAND
If the call waiting tone sounds during a call:
Press flash to switch between callers.
Page 4
wai t
CALL WAITING - AUSTRALIA
ca
ll
USING YOUR PHONE
You must
subscribe
through your
local telephone
company to
receive Call
Waiting services.
REDIAL
MEMORY DIALING
STORING PHONE NUMBERS
In memory
dialling operation,
you must press
a key within 30
seconds or the
phone will return
to standby.
To exit memory
dialing operations,
press
.
The pause
feature is useful
for long distance
calling, credit
card dialling or
sequences of
numbers that
require a pause
between digits.
Memory Dialing allows you to dial a number using just a few key presses. Your XS910 stores up to 10 numbers in the handset.
. The 'talk/batt low' indicator flashes.
1. Press
2. Use the number keys to enter the phone number. The phone number cannot exceed 20 digits.
Use the
/pause to enter a pause in the dialing sequence if required. Each pause counts as one digit and represents
a two second delay of time between the digits.
3. Press
.
4. Enter a number ( 0 - 9 ) to select the memory location where you would like to store the numbers. A confirmation tone
is sounded.
MAKING CALLS WITH MEMORY DIALING
Memory dialing from Talk Mode.
1. Press
. Press
.
2. Enter a number ( 0 - 9 ) to select the memory location of the desired phone number. The number is dialed.
3. To hang up, press
.
CHAIN DIALING
On certain occasions after dailing a number, you may be required to enter an access code such as your account number for
phone banking. You can enter this number into a memory location for later use by doing the following:
1. Store the access code into one of the memory locations ( 0 - 9 ) following the above steps for Storing Phone Numbers.
2. Dial the party or service main number.
3. When you need to enter the special number, press
followed by the memory location ( 0 - 9 ).
ERASING A STORED PHONE NUMBER
1. Press
twice.
2. Enter a number ( 0 - 9 ) to select the memory location you would like to erase.
A confirmation tone is sounded.
Page 5
ROCKETDIAL
ROCKETDIAL
If the Rocketdial
does not have a
stored number,
the handset will
beep rapidly and
the phone will
not dial.
You can store your most frequent dialed number in the Rocketdial location. The Rocketdial allows you to dial a number with one
key press (there is no need to press
. The phone will automatically dial the number stored).
STORING THE ROCKETDIAL
1.
2.
3.
4.
Press
, the 'talk/batt low' indicator flashes.
Enter the phone number you want allocated to Rocket Dial.
Press
.
Press
.
MAKING CALLS WITH ROCKETDIAL
When the phone is in the standby mode, simply press
dialed.
ERASING A ROCKETDIAL
1. Press
2. Press
twice.
. A confirmation tone is sounded.
Page 6
. The number stored in the Rocketdial memory location is instantly
TROUBLESHOOTING
TROUBLESHOOTING
TROUBLESHOOTING
The status light won’t
illuminatewhenthe handset
is placed on the base.
• Make sure the AC adaptor is plugged into the base and wall outlet
• Make sure the handset is properly seated in the base.
• Make sure the charging contacts on the handset and base are clean.
The audio sounds weak
and/ or scratchy.
• Move the handset and/or base to a different location away from
metal objects or appliances and try again.
• Press channel while on a call to change the operating channel.
• Make sure that you are not too far away from the base.
Can’t makeor receive calls.
• Checkboth ends of the telephone line cordare plugged in firmly.
• Make surethe AC adaptor is plugged into the baseand wall outlet.
• Disconnect the AC adaptor for a few minutes, then reconnect it.
• Make sure that you are not too far fromthe base.
• Charge the handset.
The handset doesn't ring or
receive a page.
• The battery pack may be weak.Charge the battery for 20-25hours.
• The handset may be too far away fromthe baseunit.
• Place the baseunit away from appliances or metal objects.
If you still have a problem.
Australia: www.uniden.com.au
Page 7
New Zealand: www.uniden.co.nz
WARRANTY
One Year Limited Warranty
FOR PURCHASING A UNIDEN PRODUCT
THANK YOU
Important:
Warrantor:
Evidence of original purchase is required for warranty service.
Uniden Australia Pty Limited A.B.N. 58 001 865 498
Uniden New Zealand Limited
ELEMENT OF WARRANTY: Uniden warrants to the original retail owner for the duration of this warranty, its XS910 (herein after referred to as the
Product), to be free from defects in materials and craftsmanship with only the limitations or exclusions set out below.
WARRANTY DURATION: This warranty to the original retail owner only, shall terminate and be of no further effect 12 months after the date of original
retail sale. This warranty will be deemed invalid if the product is; (A) Damaged or not maintained as reasonable and necessary, (B) Modified, altered or
used as part of any conversion kits, subassemblies, or any configurations not sold by Uniden. (C) Improperly installed, (D) Repaired by someone other
than an authorised Uniden Repair Agent for a defect or malfunction covered by this warranty. (E) Used in conjunction with any equipment or parts or as
part of a system not manufactured by Uniden, (F) Warranty is only valid in original country of purchase.
PARTS COVERED: This warranty covers for one (1) year, the Base Unit and Handset only. All accessories (AC Adaptor etc) are
covered for 90 days only.
STATEMENT OF REMEDY: In the event that the product does not conform to this warranty at any time while this warranty is in
effect, the warrantor at its discretion, will repair the defect or replace the product and return it to you without charge for parts or
service. THIS WARRANTY DOES NOT COVER OR PROVIDE FOR THE REIMBURSEMENT OR PAYMENT OF INCIDENTAL OR
CONSEQUENTIAL DAMAGES. THIS GUARANTEE IS IN ADDITION TO AND DOES NOT IN ANY WAY AFFECT YOUR RIGHTS UNDER THE
CONSUMER GUARANTEE ACT.
PROCEDURE FOR OBTAINING PERFORMANCE OR WARRANTY: In the event that the product does not conform to this warranty, the Product
should be shipped or delivered, freight pre-paid, with evidence of original purchase (eg. a copy of the sales docket), to the warrantor at:
UNIDEN AUSTRALIA PTY LIMITED
SERVICE DIVISION
345 Princes Highway,
Rockdale NSW 2216
Fx (02) 9599 3278
www.uniden.com.au
UNIDEN NEW ZEALAND LIMITED
SERVICE DIVISION
150 Harris Road,
East Tamaki, Auckland
Fx (09) 274 4253
www.uniden.co.nz
Customers in other states should ship or deliver the Product freight pre-paid to their nearest
Uniden Authorised Repair Centre (Contact Uniden for the nearest Warranty Agent to you).
Page 8
Printed in China
UCZZ01388ZB