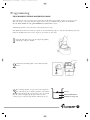
1
TBR15&CAN_IB_Cover_4-11-03(New)
4/11/03
14:37
Page 1
Bread Maker
USE AND CARE GUIDE
MODELS TBR15 AND TBR15CAN
• 11
• F ⁄2 Pou
nd
ast
in u Bake ™ Brea
d
• B nde
r 1 Progr Maker
rea
dp
hou am
D
for
• H ough rogram r
fre
a
o
n
sh
• W rizon d Q s inc
bre
l
u
u
a
t
i
ad
a
k
d
c
l
e
k
• 1
i
-ho up to non-s Brea ng W
hol
ur
Kee fresh tick lo d
eW
pW
hea
bre af p
an
t,
ar m ad
Cyc - 13 h
le
our
del
ay t
ime
r
?
Questions
Call toll free 1-800-947-3744
Monday – Friday, 8:00 a.m. - 5:30 p.m. CST
www.toastmaster.com
TBR15 AND TBR15CAN
TBR15&CAN_IB_4-11-03(New) 11/4/03 3:45 PM Page 1
Table Of Contents
Important Safeguards . . . . . . . . . . . . . . . . . . . . . . . . . . . . . . . . . . . . . . . . . . . . . . . . . . . . . . . . . . . . . . 2
Before Your First Use . . . . . . . . . . . . . . . . . . . . . . . . . . . . . . . . . . . . . . . . . . . . . . . . . . . . . . . . . . . . . . 3
Power Outage . . . . . . . . . . . . . . . . . . . . . . . . . . . . . . . . . . . . . . . . . . . . . . . . . . . . . . . . . . . . . . . . . . 3
Bread Maker Introduction . . . . . . . . . . . . . . . . . . . . . . . . . . . . . . . . . . . . . . . . . . . . . . . . . . . . . . . . . . . 4
Parts . . . . . . . . . . . . . . . . . . . . . . . . . . . . . . . . . . . . . . . . . . . . . . . . . . . . . . . . . . . . . . . . . . . . . . . . . 4
Control Panel . . . . . . . . . . . . . . . . . . . . . . . . . . . . . . . . . . . . . . . . . . . . . . . . . . . . . . . . . . . . . . . . . . 5
Features . . . . . . . . . . . . . . . . . . . . . . . . . . . . . . . . . . . . . . . . . . . . . . . . . . . . . . . . . . . . . . . . . . . . . . 6
Program Specifications Chart . . . . . . . . . . . . . . . . . . . . . . . . . . . . . . . . . . . . . . . . . . . . . . . . . . . . . 7
Display Information at Start . . . . . . . . . . . . . . . . . . . . . . . . . . . . . . . . . . . . . . . . . . . . . . . . . . . . . . . 7
Helpful Hints for Bread and Dough . . . . . . . . . . . . . . . . . . . . . . . . . . . . . . . . . . . . . . . . . . . . . . . . . . . 8
Measuring . . . . . . . . . . . . . . . . . . . . . . . . . . . . . . . . . . . . . . . . . . . . . . . . . . . . . . . . . . . . . . . . . . . . . 8
Dough Ball . . . . . . . . . . . . . . . . . . . . . . . . . . . . . . . . . . . . . . . . . . . . . . . . . . . . . . . . . . . . . . . . . . . . 8
Ingredients . . . . . . . . . . . . . . . . . . . . . . . . . . . . . . . . . . . . . . . . . . . . . . . . . . . . . . . . . . . . . . . . . . . . 9
Substitutes . . . . . . . . . . . . . . . . . . . . . . . . . . . . . . . . . . . . . . . . . . . . . . . . . . . . . . . . . . . . . . . . . . . 11
Bread Mixes and Other Cook Books . . . . . . . . . . . . . . . . . . . . . . . . . . . . . . . . . . . . . . . . . . . . . . . 12
High Altitude . . . . . . . . . . . . . . . . . . . . . . . . . . . . . . . . . . . . . . . . . . . . . . . . . . . . . . . . . . . . . . . . . 12
Freezing Baked Bread . . . . . . . . . . . . . . . . . . . . . . . . . . . . . . . . . . . . . . . . . . . . . . . . . . . . . . . . . . 12
Freezing Dough . . . . . . . . . . . . . . . . . . . . . . . . . . . . . . . . . . . . . . . . . . . . . . . . . . . . . . . . . . . . . . . . 12
Programming . . . . . . . . . . . . . . . . . . . . . . . . . . . . . . . . . . . . . . . . . . . . . . . . . . . . . . . . . . . . . . . . . . . . 13
Programming Bread Maker Programs . . . . . . . . . . . . . . . . . . . . . . . . . . . . . . . . . . . . . . . . . . . . . . 13
Programming Delay Timer . . . . . . . . . . . . . . . . . . . . . . . . . . . . . . . . . . . . . . . . . . . . . . . . . . . . . . 16
Recipes . . . . . . . . . . . . . . . . . . . . . . . . . . . . . . . . . . . . . . . . . . . . . . . . . . . . . . . . . . . . . . . . . . . . . . . . . 17
Breads . . . . . . . . . . . . . . . . . . . . . . . . . . . . . . . . . . . . . . . . . . . . . . . . . . . . . . . . . . . . . . . . . . . . . . 18
FAST BAKE™ Breads and Instructions . . . . . . . . . . . . . . . . . . . . . . . . . . . . . . . . . . . . . . . . . . . . . . 28
Day Old Bread Recipes . . . . . . . . . . . . . . . . . . . . . . . . . . . . . . . . . . . . . . . . . . . . . . . . . . . . . . . . . 33
Quick Breads and Bake . . . . . . . . . . . . . . . . . . . . . . . . . . . . . . . . . . . . . . . . . . . . . . . . . . . . . . . . . . 34
Doughs . . . . . . . . . . . . . . . . . . . . . . . . . . . . . . . . . . . . . . . . . . . . . . . . . . . . . . . . . . . . . . . . . . . . . . 38
Cleaning and Storing . . . . . . . . . . . . . . . . . . . . . . . . . . . . . . . . . . . . . . . . . . . . . . . . . . . . . . . . . . . . . . 54
Before Calling for Service . . . . . . . . . . . . . . . . . . . . . . . . . . . . . . . . . . . . . . . . . . . . . . . . . . . . . . . . . . 55
Questions and Answers . . . . . . . . . . . . . . . . . . . . . . . . . . . . . . . . . . . . . . . . . . . . . . . . . . . . . . . . . 55
Check List . . . . . . . . . . . . . . . . . . . . . . . . . . . . . . . . . . . . . . . . . . . . . . . . . . . . . . . . . . . . . . . . . . . 56
Suggestions . . . . . . . . . . . . . . . . . . . . . . . . . . . . . . . . . . . . . . . . . . . . . . . . . . . . . . . . . . . . . . . . . . . 57
Display Information . . . . . . . . . . . . . . . . . . . . . . . . . . . . . . . . . . . . . . . . . . . . . . . . . . . . . . . . . . . . 58
Service Information . . . . . . . . . . . . . . . . . . . . . . . . . . . . . . . . . . . . . . . . . . . . . . . . . . . . . . . . . . . . 59
Specifications . . . . . . . . . . . . . . . . . . . . . . . . . . . . . . . . . . . . . . . . . . . . . . . . . . . . . . . . . . . . . . . . . . . 59
Recipe Index . . . . . . . . . . . . . . . . . . . . . . . . . . . . . . . . . . . . . . . . . . . . . . . . . . . . . . . . . . . . . . . . . . . . 60
1.
TBR15&CAN_IB_4-11-03(New) 11/4/03 3:45 PM Page 2
READ AND SAVE THESE INSTRUCTIONS
WARNING: A risk of fire and electrical shock exists in all electrical appliances and may cause personal
injury or death. Please follow all safety instructions.
IMPORTANT SAFEGUARDS
When using electrical appliances, basic safety precautions should always be followed to reduce the risk
of fire, electric shock and injury to persons, including the following:
◆
◆
◆
◆
◆
◆
◆
◆
◆
◆
◆
◆
◆
◆
◆
◆
◆
◆
Read all instructions before using this appliance.
Do not immerse cord, plug, or appliance in water or other liquid (see instructions for cleaning).
Do not touch hot surfaces. Always use oven mitts when handling the hot bread pan or bread.
Close supervision is necessary when this appliance is used near children.
This appliance is not for use by children. Keep out of reach of children.
Unplug from outlet when not in use and before cleaning. Allow to cool before attaching or
removing parts.
Avoid touching moving parts. Do not remove the bread pan during operation. Stop pad must be
pressed if bread pan is to be removed before completion.
Do not operate the appliance with a damaged cord or plug, or after the appliance malfunctions, or
has been dropped or damaged in any manner. Return appliance to the nearest authorized service
facility for examination, repair, electrical or mechanical adjustment.
Do not use outdoors or while standing in damp area.
Do not let cord hang over edge of table or counter or touch hot surfaces.
Do not place on or near a hot gas or electric burner or in a heated oven.
To unplug, grip the plug and pull out from the wall outlet. Never pull on the cord.
Do not unplug while unit is in operation.
Do not use appliance except as indicated in these instructions.
Use accessory attachments only if recommended by Toastmaster Inc.
Do not clean with metal scouring pads. Pieces can break off the pad and touch electrical parts.
Bread maker must be placed at least 4 inches (10.2 cm) from walls and edge of counter.
Do not cover bread maker with anything which would prevent the steam from escaping. This may
cause warpage, discoloration, malfunction or even fire.
SAVE THESE INSTRUCTIONS
CAUTION: A short power supply cord is provided to reduce the risk of personal injury resulting from
becoming entangled in or tripping over a longer cord. Extension cords are available from local
hardware stores and may be used if care is exercised in their use. If an extension cord is required,
special care and caution is necessary. Also the cord must be: (1) marked with an electrical rating of
125 V, and at least 10 A., 1250 W., and (2) the cord must be arranged so that it will not drape over the
countertop or tabletop where it can be pulled on by children or tripped over accidentally.
If the appliance is of the grounded type, the extension cord should be a grounding-type 3-wire cord.
ELECTRIC POWER: If electric circuit is overloaded with other appliances, your bread maker may not
operate properly. The bread maker should be operated on a separate electrical circuit from other
operating appliances.
Polarized Plug (Model TBR15)
The model TBR15 appliance has a polarized plug, (one blade is wider than the other). To reduce the
risk of electric shock, this plug is intended to fit into a polarized outlet only one way. If the plug does
not fit fully in the outlet, reverse the plug. If it still does not fit, contact a qualified electrician. Do not
attempt to modify the plug in any way.
2.
Bread Maker Use and Care Guide
TBR15&CAN_IB_4-11-03(New) 11/4/03 3:45 PM Page 3
Grounded 3-Conductor Plug (Model TBR15CAN)
The model TBR15CAN appliance is equipped with a grounded-type 3-wire cord (3-prong plug). This
plug will only fit into an electrical outlet made for a 3-prong plug. This is a safety feature. If the plug
should fail to fit the outlet, contact an electrician to replace the obsolete outlet. Do not attempt to
defeat this safety feature.
This product is for household use only.
Before Your First Use
Please fill out information that follows warranty.
Unpack and clean bread maker; see CLEANING AND STORING.
Place bread maker on a dry, stable surface away from burners and away from areas where cooking
grease or water may splatter onto it. Avoid placing it where it may tip over during use. Place on back
of counter top.
The bread maker will bake up to a 11⁄2 pound loaf of bread. Do not put a larger quantity of ingredients
into the bread pan than recommended. If you do so, the bread may not mix or bake correctly and the
bread maker may be damaged. The maximum amount of ingredients to be used is as follows.
Bread programs — 3 - 31⁄2 cups
Quick Bread programs – 2 - 3 cups
Dough program — 4 - 41⁄2 cups
During first use, this product may smoke and/or emit an odor from mineral oils used in
manufacturing. This is normal for a newly manufactured appliance. Before first use, operate with
empty bread pan inside the bread machine on the FAST BAKE program to burn off the
manufacturing oils. Leave the lid up during the process.
POWER OUTAGE
Your bread maker has a 10-minute power interrupt feature. If the electricity goes off, the memory will
store the course in process for up to 10 minutes. If the power comes back on within this time, the
course will resume where it left off. If the bread maker loses power for more than this time and you
are using any dairy products, perishables or meat in your bread, you should discard the contents of
the recipe and start again with new fresh ingredients due to health and sanitary considerations.
For non-perishable recipes you may try starting the bread maker at the beginning of the course again
for all courses except FAST BAKE™. This may not always produce an acceptable loaf. If you are not
sure when the outage occurred, remove the dough ball from the bread pan and place in an oven-safe
baking container. Allow to double in size and place in a preheated 350°F/177°C oven for 30-45
minutes or until done. The bread will sound hollow when tapped on top of the loaf if it is done.
If you are using the FAST BAKE™ course or if the bread has already begun to bake when the outage
occurs, you must begin with new ingredients.
The power interrupt will not cover power surges. If you experience frequent power surges, use a surge
protector.
3.
TBR15&CAN_IB_4-11-03(New) 11/4/03 3:45 PM Page 4
Bread Maker Introduction
PARTS
Lid (P/N 21929)
Lid Handle
Bread Pan
Handle
Bread Pan (P/N 21930)
Drive Shaft
(inside pan)
(rotates kneading
blade)
Baking Chamber
Control Panel
Air
Exhausts
Power
Supply
Cord
Power
Plug
Kneading Blade
(fits on drive shaft)
(P/N 21495)
The illustrations in this use and care guide are for informational purposes only. You may find your
bread maker and parts look different, however, the steps for operation are the same.
4.
Bread Maker Use and Care Guide
TBR15&CAN_IB_4-11-03(New) 11/4/03 3:45 PM Page 5
Control Panel
NOTE: When using the touchpad controls, be sure to press the pad until you hear a beep.
NOTE: When a bread maker is packaged for shipment, a clear plastic film is placed over the control
panel; carefully peel it off.
DISPLAY
WINDOW
◆
◆
◆
◆
TIMER
◆ Use when setting the TIMER to delay baking.
◆ Press ▲ and ▼ arrows to set timer for delayed completion up to 13 hours later.
◆ Arrows will move time up or down in 10-minute increments. Press and hold button
for faster movement. TIMER is not available on some cycles, please check the Total
Time in the PROGRAM SPECIFICATION CHART.
PROGRAM
◆ Press to select the baking cycle of your choice. The indicator light will be on next to
the program selected. The selected cycle automatically assigns the time needed to
complete the process.
CRUST
COLOR
◆ Press to select the CRUST COLOR for most programs.
◆ Light “L”, Medium “P”, Dark “H”
◆ Bread maker will automatically bake on the medium setting (“P”) unless another is
selected.
START/
STOP
◆ Press to start operation or begin TIMER countdown for delayed completion.
◆ Press and hold until you hear a beep to stop operation or to cancel a TIMER
setting.
Note: Do not press “STOP” when checking the progress of bread.
Indicates the Program number selected, 1 to 8.
Indicates the CRUST COLOR selected.
Indicates minute-by-minute baking time countdown.
Indicates delay, baking time selected.
5.
TBR15&CAN_IB_4-11-03(New) 11/4/03 3:45 PM Page 6
Features
PROGRAM SELECT
The control panel will let you choose different program and crust color for some programs.
All programs except QUICK BREAD, DOUGH and BAKE contain a beep to check the dough ball, to
add additional ingredients (i.e., raisins, nuts, and spices) or to stir ingredients.
BASIC . . . . . . . . . . . . . . . . . . . . . . . . . . . . . . . . . Use these programs for basic bread recipes and most
prepackaged bread mixes. You may choose light,
medium or dark crust color.
FAST BAKE™ 1.5 lb. . . . . . . . . . . . . . . . . . . . . . . Make a loaf of bread in less than one hour by using
this program. Simply use the special instructions and
recipes found in the FAST BAKE™ bread sections of
this recipe book.
FRENCH . . . . . . . . . . . . . . . . . . . . . . . . . . . . . . . This program is best suited for breads low in fat and
sugar, which results in a crisp crust and coarse, chewy
interior.
WHOLE WHEAT . . . . . . . . . . . . . . . . . . . . . . . . If a recipe contains more than 50% whole wheat flour
or when instructed in the recipe, use this program.
SWEET . . . . . . . . . . . . . . . . . . . . . . . . . . . . . . . . This program works best if a recipe is high in fat,
sugar, eggs or cheese.
QUICK BREAD . . . . . . . . . . . . . . . . . . . . . . . . . . This program is used for recipes that contain baking
powder or baking soda rather than yeast to make
bread or cake rise. Scratch cake recipes must be
specially designed for this setting. The Quick Bread
program may also be used to mix and bake a prepackaged cake or quick bread mix (15-18 ounces).
DOUGH . . . . . . . . . . . . . . . . . . . . . . . . . . . . . . . This program is used to prepare dough for making
bread or rolls which are shaped by hand, allowed to
rise a final time before baking in a conventional oven.
BAKE ONLY . . . . . . . . . . . . . . . . . . . . . . . . . . . . This program is used for baking breads or cakes for
longer times in 10-minute increments.
6.
Bread Maker Use and Care Guide
TBR15&CAN_IB_4-11-03(New) 11/4/03 3:45 PM Page 7
Program Specifications Chart (approximate times)
Process
Program
Total
Time
Delay
Timer
1st
Knead
Min.
1st
Rise
Min.
Display
time for
beep**
2nd
Knead
Min.
2nd
Rise
Min.
Rest
Sec.
Final
Rise
Min.
Bake
Min.
Keep
Warm
Min.
BASIC
3:00
13:00
10
20
2:25
15
20
30
55
60
60
WHOLE WHEAT
3:40
13:00
10
25
3:00
20
30
30
70
65
60
FRENCH
3:50
13:00
18
40
2:47
22
20
30
60
70
60
SWEET
2:50
13:00
10
5
2:30
20
30
30
57
FAST BAKE
:58
N/A
13
QUICK BREAD
1:34
N/A
14
DOUGH
1:20
13:00
7
:10-1:00
N/A
BAKE
:57
N/A
5
10
5
18
48
60
35
60
80
60
60
60
50
**Display time for beep tells you when to add additional ingredients, i.e. raisins or nuts, during all
programs except QUICK BREAD, DOUGH and BAKE. Use this time to check dough ball and scrape
ingredients from sides of pan.
The beeper sounds when baking is complete. If you want to serve bread that has just been baked, press
STOP pad and remove. You may remove the bread or leave it in the bread maker. If left, it will
automatically be kept warm for up to 1 hour during the keep warm process on all bake cycles except
DOUGH. The display window will show 0:00, and the colon will flash. At the end of keep warm, the
display window will indicate last program selected.
Display Information at Start
No.
1P
2
3P
4P
5P
6
7
8
Setting
Basic
Rapid
French
Wheat
Sweet
Quick Bread
Dough
Bake Only
Time
3:00
0:58
3:50
3:40
2:50
1:34
1:20
1:00
7.
TBR15&CAN_IB_4-11-03(New) 11/4/03 3:45 PM Page 8
Helpful Hints for Bread and Dough
We recommend that you read the following information before you shop for your ingredients. Your
bread maker will bake up to a 11⁄2 pound loaf of fresh bread containing 3-4 cups of flour. All
ingredients except liquids must be at room temperature and liquids should be approximately
80°F/27°C (baby bottle temperature). When preparing bread for the FAST BAKE™ program, all liquid
temperatures must be 110°-115°F/43°-46°C. Always place the ingredients in the bread pan in the order
listed in the recipe: liquids, dry ingredients and then yeast. Some ingredient amounts are the same for
different size loaves.
MEASURING: THE CORRECT WAY
Be sure to measure accurately for success. Mis-measuring, even slightly, can make a big difference in
your results.
When you are measuring liquids, use a clear glass
or plastic liquid measuring cup. To ensure
accuracy, set the measuring cup on the counter
top and read the measurement at eye level.
To measure your flour, spoon it lightly into a
standard dry ingredient measuring cup and level
it with a straight edge. Also, do not shake the cup
or tap it on the counter top. Do not scoop the
flour with the measuring cup as this tends to pack
more flour than the recipes call for.
MEASURING CUP
1/4 CUP
1/3 CUP
1 CUP
1/2 CUP
1/2 1
tsp tsp
1/4 tsp
1 TBL
Use standard measuring spoons and level with a
straight edge.
GRADUATED
MEASURING
CUPS
GRADUATED
MEASURING
SPOONS
Measurement/Conversion Chart
1 1/2 tsp
3 tsp
=
1/2 TBL
2 TBL =
4 TBL =
5 TBL + 1 tsp
=
1/2 TBL
8 TBL =
1/2 cup
1 TBL 12 TBL =
3/4 cup
=
1 1/2 tsp
16 TBL =
1 cup
1/8 cup3/8 cup=
1/4 cup + 2 TBL
1/4 cup5/8 cup=
1/2 cup + 2 TBL
=
1/3 cup7/8 cup=
3/4 cup + 2 TBL
DOUGH BALL: NECESSARY FOR A SUCCESSFUL LOAF OF BREAD
We have found that liquid amounts called for in a recipe may need to be adjusted slightly because
different climates and seasons result in a wide variety of humidity levels. You should check the dough
ball at the beep during the kneading process, see program specifications. At this point, the ball should
be round, smooth-textured, soft and slightly tacky to the touch. When touched it will leave a little
dough on your finger. Push down any dough or flour that may be on the sides of the pan. If it does
not form a ball and is more like a batter, add 1 tablespoon of bread flour at a time until it reaches the
appropriate consistency. On the other hand, if the moisture is too dry to form a ball, forms more than
one ball, or is a ball but not soft and slightly tacky, add 1 teaspoon of water and allow it to absorb. Add
more water if necessary. Provided you have used all of the ingredients specified in the recipe,
measured the ingredients properly, and have a “good” dough ball, you should achieve a successful loaf
of bread.
8.
Bread Maker Use and Care Guide
TBR15&CAN_IB_4-11-03(New) 11/4/03 3:45 PM Page 9
When preparing bread in the FAST BAKE™ program, the dough ball will be a very soft, loose ball with
a smooth texture and will be sticky to the touch. When touched it will leave dough on your finger.
INGREDIENTS: READ BEFORE SHOPPING
Yeast: The Number One Ingredient
For all programs except FAST BAKE™ we used RED STAR® Active Dry Yeast when we developed the
bread recipes. However, RED STAR® QUICK•RISE™ Yeast may also be used. We found that we did not
have to vary the amount used when we substituted one for the other. When using bread machine yeast,
follow the package instructions.
When developing the FAST BAKE™ program, we found that QUICK•RISE™ or Bread Machine yeast
must be used. They may be substituted in equal amounts. You will find that this program requires
more yeast than other programs.
A 1/4 ounce package of RED STAR® Yeast contains approximately 21⁄4 level teaspoons of yeast. When
the yeast is exposed to oxygen, moisture or warmth, the activity of it deteriorates. Therefore, we
recommend storing yeast in an airtight container and refrigerating for up to 6 weeks or freezing it for
up to 6 months. Measure out the amount you need and allow it to come to room temperature before
using it — this takes about 15 minutes.
If you have any doubt regarding the activity of the yeast, you may use one of the following tests to
determine its strength. Each test calls for a different amount of yeast as a base ingredient. This gives
you more bread choices once the test is complete. The yeast mixture should not be used for the fast
bake program.
To test for one package (21⁄4 teaspoons) of RED STAR® Active Dry or QUICK•RISE™ Yeast, use a liquid
measuring cup and fill to the 1⁄2 cup cup level with 110°-115°F/43°-46°C water. Stir in 1 teaspoon
granulated sugar and 1 package (21⁄4 teaspoons) RED STAR® Active Dry or QUICK•RISE™ Yeast. Leave
your stirring spoon in the cup. Set a timer for 10 minutes. As the yeast absorbs liquid, it will begin to
activate and rise to the surface. If at the end of the 10 minutes the yeast has multiplied to the 1 cup
mark, it is very active. The yeast mixture may be used in your Toastmaster Bread Maker in a recipe that
calls for 21⁄4 teaspoons of yeast. Remember to adjust your recipe for the 1⁄2 cup of water and 21⁄4
teaspoons of yeast used in the test. The sugar does not need to be adjusted. To test for 11⁄2 teaspoons of
RED STAR® Active Dry or QUICK•RISE™ Yeast, use a liquid measuring cup and fill to the 1⁄4 cup level
with 110°-115°F/43°-46°C water. Stir in 1 teaspoon granulated sugar and 11⁄2 teaspoons RED STAR®
Active Dry or QUICK•RISE™ Yeast. Leave your stirring spoon in the cup. Set a timer for 10 minutes. As
the yeast absorbs liquid, it will begin to activate and rise to the surface. If at the end of the 10 minutes
the yeast has multiplied to the 1⁄2 cups mark, it is very active. The yeast mixture may be used in your
Toastmaster Bread Maker in a recipe that calls for 11⁄2 teaspoons or more of yeast. Remember to adjust
your recipe for the 1⁄4 cup of water and 11⁄2 teaspoons of yeast used in the test. The sugar does not need
to be adjusted.
Flour: Bread Flour is Essential for Bread
All types of flour are affected by many factors, such as milling grades, moisture content, length of
storage and manufacturing process. Adjustments to the recipes may need to be made to compensate
for climactic changes in different regions to ensure an excellent loaf.
Bread flour is a definite necessity. Milled from hard winter or spring wheat, it has a higher protein
content that makes it more durable than all-purpose flour. The protein, when mixed with liquid,
becomes gluten.
9.
TBR15&CAN_IB_4-11-03(New) 11/4/03 3:45 PM Page 10
When kneaded, gluten becomes elastic and gives the bread better structure. In contrast, all-purpose
flour, milled from a combination of soft and hard wheat, becomes elastic too easily for use in a bread
maker and quickly loses its ability to stretch well. As a result, bread made from all-purpose flour will be
smaller and more dense. Several well-known mills now market bread flour. It is labeled bread flour on
the package and is available at grocery stores.
Wheat is the only grain that contains the type of protein that becomes elastic when kneaded. Other
flours, such as rye, barley, oats, soy, rice and buckwheat add flavor and fiber to breads but do not add
structure to the dough. Therefore, wheat flour is essential as a base when making bread.
Vital Wheat Gluten is produced by processing white flour one more step. White flour contains both
protein and starch, and mills now can remove most of the starch leaving only the protein (gluten).
When gluten is added to recipes containing whole grain flours, it improves the volume and shape of
the loaf significantly. Many grocery stores stock gluten in the flour section. Health food and nutrition
centers also carry this item.
Flour is best kept in an airtight container. If you are storing the flour for a long period of time, you
may want to keep it in the freezer as the refrigerator tends to dry it out. Whole grain wheat flours,
which have a higher oil content, will become rancid much more quickly than white flour and should
always be kept in the freezer. Be sure, however, to allow all flours to return to room temperature
before placing in the bread maker.
Fat: Dough Enhancer and Conditioner
Our recipes were developed using vegetable oil. You may use any type of oil or substitute in equal
proportions solid shortening or real butter (divide them into small pieces). We have found no
noticeable difference in flavor but the crust may be more crisp with real butter. We do not recommend
the use of margarine as it tends to make the crust tough.
Liquids: Activate the Yeast and Bind the Dough
When we use the term liquid, we are referring to all wet ingredients used in the recipe. For all
programs except FAST BAKE™, it is very important that the liquid temperature is 80°F/27°C. With this
water temperature, the yeast activates gradually to accommodate these programs.
When preparing bread using the FAST BAKE™ program, all liquid temperatures must be 110°115°F/43°-46°C. The warmer temperature is necessary for the yeast to activate quickly to
accommodate this specially designed program.
Eggs are also considered part of the total liquid amount. Eggs should be at room temperature. When
removing them from the refrigerator, place whole uncracked eggs in a bowl of warm water for 15
minutes to bring to room temperature.
Cinnamon and Garlic: Not True Friends of Yeast
Previously, cinnamon and sugar were sprinkled on dough before it was rolled up jelly-roll fashion.
Adding cinnamon and garlic to the dough in a bread maker, however, presents a problem. Cinnamon
and garlic reacts with bread dough just as a meat tenderizer reacts with meat. It breaks down the
structure. Although it smells wonderful as it is baking, the flavor is dissipated in the baking process.
DO NOT ADD MORE THAN LISTED IN THE RECIPE. For more flavor, use cinnamon and garlic as
spread for the bread rather than adding to the dough.
Fruits and Vegetables: Add Flavor and Nutrition
When adding fruits or vegetables to recipes, do not exceed the amount listed. These products, if used
in excessive amounts, may inhibit the rising of the bread.
10.
Bread Maker Use and Care Guide
TBR15&CAN_IB_4-11-03(New) 11/4/03 3:45 PM Page 11
Salt: Regulates Yeast Activity
Salt is necessary to control the activity of yeast, causing it to work slowly and steadily. Without salt, yeast
acts too rapidly. Salt also strengthens the structure of the dough. If too little or no salt is used, the
bread will rise rapidly and then fall. The texture will also be more coarse and/or uneven.
Sugar: Food for Yeast
Sugar is the favorite food of yeast, but too much sugar will cause the yeast to over-react. The loaf of
bread will be small and dense. Dried fruits also contribute sugar to the bread dough. We do not
recommend adding any more than is specified in each recipe. In addition, we do not recommend the
use of artificial sweeteners because the yeast cannot react with them.
SUBSTITUTES
In our test kitchen, we experimented with these ingredient substitutions. We do want to mention that
your results may vary from ours. If you would like to try other substitutions, there are several helpful
hint books available from retail stores to assist you. Of course, we cannot guarantee their results.
Eggs
Liquid egg substitutes may be used as directed on the carton.
Two egg whites may be substituted for one whole egg.
REMEMBER, all egg products must be at room temperature.
Milk
Coffee creamer, non-dairy creamer or dry buttermilk may be substituted for dry milk in equal
proportions. Liquid milk 80°F/27°C may be substituted for water in equal proportions for all bread
programs except FAST BAKE™. The dry milk may then be eliminated all together. The loaf will be
slightly smaller.
Salt
Salt-free recipes are not successful. Dietetically sodium free (less than 5 mg sodium per serving) or low
salt (less than 1⁄2 the sodium of table salt) may be used in equal amounts. The bread will be more
coarse.
Sugar
Honey may be substituted for sugar in equal proportions; reduce the liquid by the same amount.
Brown sugar may be substituted for white sugar in equal proportions. Yeast needs sugar — no artificial
sweetener should be used.
Wheat Flour
For wheat-free bread recipes refer to gluten-free bread books.
Yeast
We used RED STAR® Yeast to develop our recipes. However, any brand may be used. Refer to yeast
ingredient section for other yeast substitutes.
Conversion Chart for Quick-Acting Yeast
1 tsp active dry yeast
1 ⁄2 tsp active dry yeast
21⁄4 tsp active dry yeast
1 TBL active dry yeast
1
=
=
=
=
⁄4 tsp quick-acting yeast
1 tsp quick-acting yeast
11⁄2 tsp quick-acting yeast
2 tsp quick-acting yeast
3
11.
TBR15&CAN_IB_4-11-03(New) 11/4/03 3:45 PM Page 12
Note: The FAST BAKE™ recipes were developed using the quick-acting Red Star™ Quick•Rise™ or bread maker
yeast. DO NOT substitute active dry yeast in these recipes.
BREAD MIXES AND OTHER COOK BOOKS
Use mixes labeled for up to 11⁄2 pound loaves. For best results, use the basic program. Even though we
offer a wide variety of recipes for bread and dough, you may be looking for one that we have not
included in our recipe book. Bread maker helpful hints and recipe books are available at book and
retail stores. They offer a wide variety of recipes. Refer to the features section of this book for the best
bread program to use for other recipes. Minor adjustments may be necessary for best results.
HIGH ALTITUDE
High elevations may make dough rise faster. We recommend that you try the recipe as it is printed
first. The dough ball should be round, smooth-textured, soft and slightly tacky to the touch. If you find
the results are unsuccessful, decrease your yeast 1⁄4 teaspoon at a time. You may also have to increase
the liquid because of the drier air; start with 1 tablespoon and increase it if necessary. The addition of
gluten will help the structure of the bread. The recommended amount is 1 teaspoon per cup of flour
unless specified otherwise in the recipe.
FREEZING BAKED BREAD
When freezing bread and rolls, cool them before wrapping in plastic wrap. Place them in a plastic bag
and seal it. Bread may be frozen for up to six weeks. When you thaw, partially open the wrapping to
allow the moisture to escape gradually for best results.
FREEZING DOUGH
At the end of the dough program, you may remove the dough and freeze it for baking at a later time.
Form the dough into the desired shape and immediately freeze for one hour to harden. Remove from
the freezer and wrap in plastic wrap. Next, place it in a plastic bag and seal. Dough can be kept in the
freezer for up to four weeks. Thaw the dough in plastic bag in the refrigerator overnight or for several
hours. Unwrap and place on baking container. Cover and let stand in warm, draft free place until
double the original size. Because the dough is not room temperature, you will find it takes longer than
usual to rise. Bake according to recipe instructions.
If additional assistance is needed, expert help is available from Toastmaster® (1-800-947-3744) or from
RED STAR® YEAST (1-800-445-4746).
12.
Bread Maker Use and Care Guide
TBR15&CAN_IB_4-11-03(New) 11/4/03 3:45 PM Page 13
Programming
PROGRAMMING BREAD MAKER PROGRAMS
The following are the general steps for using the bread maker. Depending on the program or recipe
that you choose, some steps may not apply or there may be additional steps. Refer to the BASIC
Breads, FAST BAKE™ Breads, QUICK BREADS and DOUGH sections.
Add all ingredients to the pan in the order listed in the recipe.
The illustrations in this use and care guide are for information purposes only. You may find your bread
maker looks different, however, the steps for operation are the same.
1
Open the lid and remove the bread pan by pulling
straight up, using the handle.
2
Mount the kneading blade on the shaft, flat side
down.
3
Place all ingredients, except yeast, in bread pan in
the order listed. Use a rubber spatula to smooth the
dry ingredients in the bread pan; be sure to spread
into all corners. Lightly tap the pan 3 times on the
counter top to settle the ingredients. Add yeast on top.
YEAST
DRY INGREDIENTS
WATER OR LIQUIDS
13.
TBR15&CAN_IB_4-11-03(New) 11/4/03 3:45 PM Page 14
4
Insert bread pan and push down on rim until it snaps
securely into place. Fold handle down.
• If the pan does not snap securely into place, remove
bread pan. Wearing oven mitts, place fingers behind
bread pan clips and gently pull away from oven wall.
Insert bread pan again.
5
Close the lid. Plug into 120 V ~ 60 Hz outlet. The
bread maker display indicator will default to 1P and
then 3:00.
6
Press the PROGRAM button to choose the desired program. Each time the PROGRAM button is
pressed, you will hear a beep and the number in the display window will advance to the next
program. The indicator light next to the program selected will be on.
Press the CRUST COLOR button to choose crust color desired (except for the FAST BAKE™ and
QUICK BREAD programs). When you press the button, you will hear a beep and the display
window will show the color selected.
L = Light color
P = Medium color
H - Dark color
7
Press the START/STOP button. The time left for the program to be finished is displayed. The
timer will count down in one minute increments. All programs except QUICK BREAD, DOUGH
and BAKE will beep to add additional ingredients during
the second knead. Opening the lid will not stop the kneading.
Add ingredients quickly and evenly over dough. Quickly close
the lid to prevent heat loss. At this time also check the dough
ball and use a rubber spatula to scrape ingredients from the
sides of the pan.
14.
Bread Maker Use and Care Guide
TBR15&CAN_IB_4-11-03(New) 11/4/03 3:45 PM Page 15
8
The beeper will sound when the bread is done. Press the
START/STOP button and hold it until you hear a beep.
Hold the lid open while you remove the bread pan using
oven mitts. If you do not stop the unit and remove the bread, it
will automatically go into the keep warm process on all programs
except for DOUGH. Your bread will be kept warm for 1 hour. You
may remove the bread pan at any time during the keep warm
cycle. To turn off the keep warm feature before the 1 hour is up,
press the START/STOP button and hold it until you hear a beep.
NOTE: If you wish to make another loaf of bread right away, allow the bread maker to cool down for
10 to 15 minutes with the cover open and pan removed. If you attempt to use the unit too soon, it will
signal and display will read E:01. Press Start/Stop until screen reverts to setting display and wait until
unit has cooled.
9
Turn the bread pan upside down and shake to release the
bread.
Place the bread upright on a wire rack to cool 20-30 minutes
before cutting. This allows the steam to escape. Be sure to
remove the kneading blade from the bread.
CAUTION:
• The bread pan, kneading blade and bread will be
very hot.
• Always unplug after use.
15.
TBR15&CAN_IB_4-11-03(New) 11/4/03 3:45 PM Page 16
Programming Delay Timer
The delay timer can be set to delay bread making up to 13 hours. At the selected time, delicious bread
will be ready. The delay works for all programs except FAST BAKE™, DOUGH and BAKE.
Add all ingredients to the bread pan in the order listed. It is critical to add the yeast last on top of the
flour, and away from liquid. This will keep the yeast from activating until the bread maker starts to
mix.
Select the PROGRAM and CRUST COLOR. Before pressing START, set the TIMER for the amount of
time you want to wait before the bread is done.
EXAMPLE: It is 9:00 p.m. now. The bread is to be ready at 6:30 a.m. the next morning. Set the
timer for 9:30, because there are 9 hours and 30 minutes between 9:00 p.m. and 6:30 a.m.
16.
1.
When pressed, the time will advance in
10 minute increments.
2.
When constant pressure is applied to the
pad, the time will advance quickly. Once
you count up to 13:00 hours, the timer
starts over again.
3.
Press the Start pad. The time is set, and
the colon blinks. After one minute, 9:29
is displayed, and the timer continues to
count down in 1 minute increments.
Bread Maker Use and Care Guide
NOTE: The bread maker will start
when the timer has counted down to
the start time for the program
selected to begin.
Colon will blink
TBR15&CAN_IB_4-11-03(New) 11/4/03 3:45 PM Page 17
Recipes
Breads . . . As Easy As 1 - 2 - 3
1. Add ingredients to the bread pan in the order listed. Refer to the Helpful Hints for Bread and
Dough for measuring information. Place the bread pan in the bread maker.
2. Close the lid. Select the bread program, choose the Crust Color and press Start.
3. When finished baking, remove bread pan from the bread maker. Invert and shake to remove the
loaf. Allow loaf to cool standing upright on a wire rack before slicing.
Food Guide Pyramid
A Guide To Daily Food Choices
Fats, Oils & Sweets
Group
USE SPARINGLY
Milk, Yogurt, & Cheese
Group
2-3 SERVINGS
Vegetable Group
3-5
SERVINGS
KEY
Fat (naturally occurring and added)
Sugars (added)
Meat, Poultry, Fish, Dry
Beans, Eggs, & Nuts
Group
2-3 SERVINGS
Fruit Group
2-4 SERVINGS
Bread, Cereal,
Rice & Pasta
Group
6-11
SERVINGS
Bread, cereal, pasta, crackers and other grain foods are low in fat and full of energy. The Food Guide
Pyramid says we should eat 6-11 servings daily — more than any other food group. One half-inch slice
of bread is approximately two servings.
17.
TBR15&CAN_IB_4-11-03(New) 11/4/03 3:45 PM Page 18
Bread Recipes
We suggest starting your bread baking with this White Bread recipe. Follow each step carefully. These
steps have been written to eliminate the most common errors in bread maker baking and may be
helpful for any recipe.
White Bread
Water 80°F/27°C
Oil
Sugar
Salt
Bread Flour
RED STAR® Active Dry Yeast
or
RED STAR®
QUICK•RISE™ Yeast
or
Bread Machine Yeast
1.0 lb. loaf
3
⁄4 cup
4 tsp
4 tsp
1 tsp
21⁄4 cups
11⁄2 tsp
1.5 lb. loaf
1 cup
2 TBL
2 TBL
11⁄2 tsp
3 cups
21⁄4 tsp
1 tsp
11⁄2 tsp
1 tsp
11⁄2 tsp
Program: BASIC
1. Remove the bread pan from the bread maker. Attach the kneading blade onto the shaft. Make
sure all ingredients, except water, are at room temperature.
2. Use a liquid measuring cup to measure the water (80°F/27°C/baby bottle temperature) and pour
into the bread pan.
3. Use a measuring spoon to measure the oil and add to the bread pan.
4. Use a measuring spoon to measure the sugar and salt; level off with the straight edge of a knife
and add to the bread pan.
5. Lightly spoon bread flour into a dry measuring cup; level off with the straight edge of a knife and
add to the bread pan. Smooth into all corners. Lightly tap pan on counter 3 times to settle all dry
ingredients.
6. Carefully measure yeast with a measuring spoon; level off with the straight edge of a knife and
add to the bread pan. If using delay timer, make sure yeast is on top of bread flour, away from
liquids.
7. Place the bread pan into the bread maker. Push down on rim until it snaps into place. Close the
lid.
8. Select PROGRAM and CRUST COLOR and set TIMER to delay, or press START for immediate
start.
9. At the beep during the kneading process, check the dough ball. It should be slightly tacky to the
touch. Add more water or flour if necessary; see Dough Ball. At this time, push down any dough
or flour that may be on the sides of the pan.
10. When the beeper sounds, the bread has finished baking and the keep warm cycle will start. The
display window will show 0:00, and the colon will flash.
11. Press Stop and use oven mitts to carefully remove the bread pan at any time during the keep
warm process.
CAUTION: THE OVEN CAVITY, BREAD PAN, KNEADING BLADE AND BREAD WILL BE VERY
HOT. USE OVEN MITTS.
12. Turn bread pan upside down and shake several times to release the bread. Do not use metal
utensils inside the bread pan or machine. Remove the kneading blade and allow loaf to cool
standing upright on wire rack approximately 20-30 minutes before cutting.
18.
Bread Maker Use and Care Guide
TBR15&CAN_IB_4-11-03(New) 11/4/03 3:45 PM Page 19
13. If bread loaf does not easily release from pan, allow it to sit on a heat resistant surface 5 minutes,
then remove. When the bread has completely cooled, approximately 1 hour, store in an air tight
container.
14. UNPLUG UNIT BEFORE CLEANING. DO NOT IMMERSE THE BREAD PAN IN WATER, see
CLEANING AND STORING.
Egg Bread
Egg(s), room temperature plus
enough Water 80°F/27°C to equal
Oil
Sugar
Salt
Bread Flour
RED STAR® Active Dry Yeast
or
RED STAR®
QUICK•RISE™ Yeast
or
Bread Machine Yeast
1.0 lb. loaf
1
3
⁄4 cup
1 TBL
1 TBL
1 tsp
21⁄4 cups
11⁄2 tsp
1.5 lb. loaf
2
1 cup
2 TBL
2 TBL
11⁄2 tsp
3 cups
21⁄4 tsp
1 tsp
11⁄2 tsp
1 tsp
11⁄2 tsp
1.0 lb. loaf
1
3
⁄4 cup
4 tsp
2 TBL
1 tsp
1
⁄2 cup
11⁄2 cups
11⁄2 tsp
1.5 lb. loaf
1
1 cup
2 TBL
3 TBL
11⁄2 tsp
1 cup
2 cups
21⁄4 tsp
1 tsp
11⁄2 tsp
1 tsp
11⁄2 tsp
Program: BASIC
Honey Wheat Bread
Egg, room temperature plus
enough Water 80°F/27°C to equal
Oil
Honey
Salt
Whole Wheat Flour
Bread Flour
RED STAR® Active Dry Yeast
or
RED STAR®
QUICK•RISE™ Yeast
or
Bread Machine Yeast
Program: BASIC
19.
TBR15&CAN_IB_4-11-03(New) 11/4/03 3:45 PM Page 20
Rye Bread
Water 80°F/27°C
Oil
Caraway Seeds
Brown Sugar
Salt
Bread Flour
Medium Rye Flour
RED STAR® Active Dry Yeast
or
RED STAR®
QUICK•RISE™ Yeast
or
Bread Machine Yeast
1.0 lb. loaf
3
⁄4 cup
4 tsp
2 tsp
4 tsp
1 tsp
11⁄2 cups
3
⁄4 cup
11⁄2 tsp
1.5 lb. loaf
1 cup
2 TBL
1 TBL
2 TBL
11⁄2 tsp
2 cups
1 cup
21⁄4 tsp
1 tsp
11⁄2 tsp
1 tsp
11⁄2 tsp
1.0 lb. loaf
3
⁄4 cup
4 tsp
4 tsp
2 tsp
21⁄4 cups
11⁄2 tsp
1.5 lb. loaf
1 cup
2 TBL
2 TBL
1 TBL
3 cups
21⁄4 tsp
1 tsp
11⁄2 tsp
1 tsp
11⁄2 tsp
1.0 lb. loaf
2
⁄3 cup
2 TBL
1 TBL
1 TBL
1
⁄2 tsp
2 cups
11⁄2 tsp
1.5 lb. loaf
1 cup
3 TBL
4 tsp
4 tsp
3
⁄4 tsp
3 cups
21⁄4 tsp
1 tsp
11⁄2 tsp
1 tsp
11⁄2 tsp
Program: BASIC
Onion Bread
Water 80°F/27°C
Oil
Dry Onion Soup Mix
Sugar
Bread Flour
RED STAR® Active Dry Yeast
or
RED STAR®
QUICK•RISE™ Yeast
or
Bread Machine Yeast
Program: BASIC
Pesto Bread
Water 80°F/27°C
Pesto, room temperature
Dry Milk
Sugar
Salt
Bread Flour
RED STAR® Active Dry Yeast
or
RED STAR®
QUICK•RISE™ Yeast
or
Bread Machine Yeast
Program: BASIC
20.
Bread Maker Use and Care Guide
TBR15&CAN_IB_4-11-03(New) 11/4/03 3:45 PM Page 21
Cheese and Cracked Pepper Bread
Water 80°F/27°C
Feta Cheese, room temperature
Dry Milk
Salt
Sugar
Cracked Black Pepper
Bread Flour
RED STAR® Active Dry Yeast
or
RED STAR®
QUICK•RISE™ Yeast
or
Bread Machine Yeast
1.0 lb. loaf
2
⁄3 cup
11⁄2 oz
4 tsp
3
⁄4 tsp
1 TBL
2 tsp
21⁄4 cups
11⁄2 tsp
1.5 lb. loaf
1 cup
21⁄4 oz
2 TBL
1 tsp
2 TBL
1 TBL
3 cups
21⁄4 tsp
1 tsp
11⁄2 tsp
1 tsp
11⁄2 tsp
1.0 lb. loaf
3
⁄4 cup + 2 TBL
4 tsp
1 TBL
1 tsp
1 TBL
21⁄4 cups
1 tsp
11⁄4 tsp
1.5 lb. loaf
1 cup + 2 TBL
2 TBL
3 TBL
11⁄2 tsp
2 TBL
31⁄4 cups
2 tsp
11⁄2 tsp
1 tsp
11⁄4 tsp
1 tsp
11⁄4 tsp
Program: BASIC
Italian Herb Bread
Water 80°F/27°C
Oil
Sugar
Salt
Dry Milk
Bread Flour
Dried Italian Seasoning
RED STAR® Active Dry Yeast
or
RED STAR®
QUICK•RISE™ Yeast
or
Bread Machine Yeast
Program: FRENCH
21.
TBR15&CAN_IB_4-11-03(New) 11/4/03 3:45 PM Page 22
Sunflower and Sesame Seed Bread
Egg room temperature plus
enough Water 80°F/27°C to equal
Oil
Molasses
Sugar
Salt
Bread Flour
Whole Wheat Flour
Sesame Seeds
Cumin Seeds
Sunflower Seeds
RED STAR® Active Dry Yeast
or
RED STAR®
QUICK•RISE™ Yeast
or
Bread Machine Yeast
1.0 lb. loaf
1
3
⁄4 cup
11⁄2 TBL
2 tsp
2 tsp
1 tsp
11⁄2 cups
1
⁄2 cup
11⁄2 TBL
1
⁄4 tsp
11⁄2 TBL
11⁄2 tsp
1.5 lb. loaf
1
1 cup
2 TBL
1 TBL
1 TBL
11⁄2 tsp
21⁄2 cups
1
⁄2 cup
2 TBL
1
⁄4 tsp
2 TBL
2 tsp
1 tsp
11⁄4 tsp
1 tsp
11⁄4 tsp
1.0 lb. loaf
3
⁄4 cup
11⁄2 tsp
1 tsp
21⁄4 cups
11⁄2 tsp
1.5 lb. loaf
1 cup
2 tsp
11⁄2 tsp
3 cups
2 tsp
1 tsp
11⁄4 tsp
1 tsp
11⁄4 tsp
Program: FRENCH
French Bread
Water 80°F/27°C
Sugar
Salt
Bread Flour
RED STAR® Active Dry Yeast
or
RED STAR®
QUICK•RISE™ Yeast
or
Bread Machine Yeast
Program: FRENCH
22.
Bread Maker Use and Care Guide
TBR15&CAN_IB_4-11-03(New) 11/4/03 3:45 PM Page 23
Shredded Wheat Bread
Egg, room temperature plus
enough Water 80°F/27°C to equal
Oil
Molasses
Salt
Bread Flour
Whole Wheat Flour
Mini-Shredded Wheat, crushed
RED STAR® Active Dry Yeast
or
RED STAR®
QUICK•RISE™ Yeast
or
Bread Machine Yeast
1.0 lb. loaf
1
3
⁄4 cup + 1 TBL
2 TBL
2 TBL
1 tsp
1
⁄2 cup
11⁄2 cups
1
⁄2 cup
11⁄2 tsp
1.5 lb. loaf
1
1 cup + 1 TBL
3 TBL
3 TBL
11⁄2 tsp
1 cup
2 cups
3
⁄4 cup
2 tsp
1 tsp
11⁄4 tsp
1 tsp
11⁄4 tsp
1.0 lb. loaf
1
3
⁄4 cup
2 TBL
2 TBL
1 tsp
21⁄4 cups
1 TBL
11⁄2 tsp
1.5 lb. loaf
1
1 cup
3 TBL
3 TBL
11⁄2 tsp
3 cups
11⁄2 TBL
2 tsp
1 tsp
11⁄4 tsp
1 tsp
11⁄4 tsp
Program: WHOLE WHEAT
100% Whole Wheat Bread
Egg, room temperature plus
enough Water 80°F/27°C to equal
Oil
Brown Sugar
Salt
Whole Wheat Flour
Vital Wheat Gluten
RED STAR® Active Dry Yeast
or
RED STAR®
QUICK•RISE™ Yeast
or
Bread Machine Yeast
Program: WHOLE WHEAT
23.
TBR15&CAN_IB_4-11-03(New) 11/4/03 3:45 PM Page 24
Pumpernickel Bread
Water 80°F/27°C
Oil
Molasses
Sugar
Salt
Medium Rye Flour
Whole Wheat Flour
Bread Flour
Unsweetened Cocoa
Instant Coffee
RED STAR® Active Dry Yeast
or
RED STAR®
QUICK•RISE™ Yeast
or
Bread Machine Yeast
1.0 lb. loaf
3
⁄4 cup
1 TBL
1 TBL
1 TBL
1 tsp
1
⁄4 cup
3
⁄4 cup
11⁄4 cups
1 TBL
1 tsp
11⁄2 tsp
1.5 lb. loaf
1 cup
4 tsp
4 tsp
4 tsp
11⁄2 tsp
1
⁄3 cup
1 cup
2 cups
4 tsp
11⁄2 tsp
2 tsp
1 tsp
11⁄4 tsp
1 tsp
11⁄4 tsp
1.0 lb. loaf
1
1 cup
1 TBL
2 TBL
1 tsp
11⁄2 TBL
3 TBL
3 TBL
1 cup
1 cup
11⁄2 tsp
1.5 lb. loaf
1
1 cup + 2 TBL
2 TBL
3 TBL
11⁄2 tsp
2 TBL
1
⁄4 cup
1
⁄4 cup
11⁄2 cups
11⁄2 cups
2 tsp
1 tsp
11⁄4 tsp
1 tsp
11⁄4 tsp
Program: WHOLE WHEAT
Triple Wheat Bread
Egg, room temperature plus
enough Water 80°F/27°C to equal
Oil
Dark Molasses
Salt
Cracked Wheat
Wheat Bran
Wheat Germ
Whole Wheat Flour
Bread Flour
RED STAR® Active Dry Yeast
or
RED STAR®
QUICK•RISE™ Yeast
or
Bread Machine Yeast
Program: WHOLE WHEAT
24.
Bread Maker Use and Care Guide
TBR15&CAN_IB_4-11-03(New) 11/4/03 3:45 PM Page 25
Cranberry Walnut Bread
Egg(s), room temperature plus
enough Milk 80°F/27°C to equal
Butter, room temperature
Sugar
Salt
Lemon Peel
Bread Flour
RED STAR® Active Dry Yeast
or
RED STAR®
QUICK•RISE™ Yeast
or
Bread Machine Yeast
Add at the beep
Dried Cranberries or
Dried Cherries
Walnuts, chopped
1.0 lb. loaf
1
3
⁄4 cup
3 TBL
3 TBL
1 tsp
1
⁄2 tsp
21⁄4 cups
11⁄2 tsp
1.5 lb. loaf
2
1 cup
1
⁄4 cup
1
⁄4 cup
11⁄2 tsp
3
⁄4 tsp
3 cups
21⁄4 tsp
1 tsp
11⁄2 tsp
1 tsp
11⁄2 tsp
⁄4 cup
⁄4 cup
⁄3 cup
⁄3 cup
1
1
1
1
Program: SWEET
25.
TBR15&CAN_IB_4-11-03(New) 11/4/03 3:45 PM Page 26
Rich Sweet Bread
Egg(s), room temperature plus
enough Water 80°F/27°C to equal
Oil
Sugar
Salt
Bread Flour
Raisins
RED STAR® Active Dry Yeast
or
RED STAR®
QUICK•RISE™ Yeast
or
Bread Machine Yeast
Add at the beep
Dried Cranberries or
Dried Cherries
Walnuts, chopped
1.0 lb. loaf
1
3
⁄4 cup
4 tsp
4 tsp
1 tsp
21⁄4 cups
1
⁄3 cup
11⁄2 tsp
1.5 lb. loaf
2
1 cup
2 TBL
2 TBL
11⁄2 tsp
3 cups
1
⁄2 cup
21⁄4 tsp
1 tsp
11⁄2 tsp
1 tsp
11⁄2 tsp
⁄4 cup
⁄4 cup
⁄3 cup
⁄3 cup
1
1
1
1
1.0 lb. loaf
3
⁄4 cup
4 tsp
1
⁄2 tsp
2 tsp
1 tsp
21⁄4 cups
11⁄2 tsp
1.5 lb. loaf
1 cup
2 TBL
3
⁄4 tsp
1 TBL
11⁄2 tsp
3 cups
21⁄4 tsp
1 tsp
11⁄2 tsp
1 tsp
11⁄2 tsp
Program: SWEET
Cinnamon Raisin Nut Bread
Water 80°F/27°C
Oil
Cinnamon
Dark Brown Sugar
Salt
Bread Flour
RED STAR® Active Dry Yeast
or
RED STAR®
QUICK•RISE™ Yeast
or
Bread Machine Yeast
Add at the beep:
Raisins
Nuts
Program: SWEET
26.
Bread Maker Use and Care Guide
⁄3 cup
⁄3 cup
⁄2 cup
⁄2 cup
1
1
1
1
TBR15&CAN_IB_4-11-03(New) 11/4/03 3:45 PM Page 27
Holiday Bread
Water 80°F/27°C
Milk 80°F/27°C
Oil
Salt
Sugar
Bread Flour
RED STAR® Active Dry Yeast
or
RED STAR®
QUICK•RISE™ Yeast
or
Bread Machine Yeast
Add at the beep:
Walnuts, chopped
Candied Fruit
1.0 lb. loaf
1
⁄4 cup
1
⁄2 cup
1 TBL
11⁄2 tsp
3 TBL
21⁄4 cups
11⁄2 tsp
1.5 lb. loaf
1
⁄2 cup
2
⁄3 cup
2 TBL
2 tsp
1
⁄4 cup
31⁄3 cups
21⁄4 tsp
1 tsp
11⁄2 tsp
1 tsp
11⁄2 tsp
⁄3 cup
⁄3 cup
⁄2 cup
⁄2 cup
1
1
1
1
Program: SWEET
27.
TBR15&CAN_IB_4-11-03(New) 11/4/03 3:45 PM Page 28
FAST BAKE™ Breads . . . As Easy As 1 - 2 - 3
The FAST BAKE™ program, with hotter rise and bake temperatures, is convenient for baking a hot
fresh loaf of bread in under an hour. The longer bread programs, with lower rise and bake
temperatures, will bake a taller more developed loaf of bread. And remember, you can always use the
delay feature for the longer programs.
1. Add ingredients to the bread pan in the order listed. Refer to Helpful Hints for Bread and Dough
for measuring information. Place the bread pan in the bread maker.
2. Close the lid. Select the FAST BAKE™ program and press START.
3. When finished baking, remove bread pan from the bread maker. Invert and shake to remove the
loaf. Allow loaf to cool standing upright on a wire rack before slicing.
FAST BAKE™ PROGRAM HINTS
◆ Water temperature must be 110°-115°F/43°-46°C.
◆ Larger amounts of QUICK•RISE™, RapidRise™ or Bread Machine yeast must be used. They may
be substituted in equal amount.
◆ The dough ball for the FAST BAKE™ program should be a very soft, sticky to the touch, loose ball
with a smooth texture. Do not add extra flour.
◆ Check the dough ball at the beep, and if necessary, use a rubber spatula to push any flour or dough
from the sides of the bread pan down into the dough ball.
◆ As a result of the increased temperatures during the rise and bake process, the loaf of bread
produced from this program may have a dark crisp crust with a split on the top side of the loaf.
28.
Bread Maker Use and Care Guide
TBR15&CAN_IB_4-11-03(New) 11/4/03 3:45 PM Page 29
FAST BAKE™ Breads
We suggest starting your FAST BAKE™ bread baking with this White Bread Recipe. Refer to Helpful
Hints for Bread and Dough for measuring information. Follow each step carefully, noticing the water
temperatures must be 110°-115°F/43°-46°C and that QUICK•RISE™, RapidRise or Bread Machine yeast
must be used.
White Bread
Water 110°-115°F/43°-46°C
Oil
Sugar
Salt
Bread Flour
RED STAR®
QUICK•RISE™ Yeast
or
Bread Machine Yeast
1.5 lb. loaf
1 cup + 2 TBL
2 TBL
2 TBL
1 tsp
3 cups
1 TBL
1 TBL
Program: FAST BAKE™
1. Remove the bread pan from the bread maker. Attach the kneading blade onto the shaft. Make
sure all ingredients, except water, are at room temperature.
2. Use a liquid measuring cup to measure the water (110°-115°F/43°-46°C) and pour into the bread
pan.
3. Use a measuring spoon to measure the oil and add to the bread pan.
4. Use a measuring spoon to measure the sugar and salt; level off with the straight edge of a knife
and add to the bread pan.
5. Lightly spoon bread flour into a dry measuring cup; level off with the straight edge of a knife and
add to the bread pan. Smooth into all corners. Lightly tap pan on counter 3 times to settle all dry
ingredients.
6. Carefully measure QUICK•RISE™ yeast with a measuring spoon; level off with the straight edge of
a knife and add to the bread pan.
7. Place the bread pan into the bread maker. Push down on rim until it snaps into place. Close the
lid.
8. Select desired FAST BAKE™ program, and press START.
9. About five minutes into the kneading process, check the dough ball. It should be sticky to the
touch. At this time, push down any dough or flour that may be on the sides of the pan.
10. When the beeper sounds, the bread has finished baking.
11. Use oven mitts to carefully remove the bread pan.
CAUTION: THE OVEN CAVITY, BREAD PAN, KNEADING BLADE AND BREAD WILL BE VERY
HOT. USE OVEN MITTS.
12. Turn bread pan upside down and shake several times to release the bread. Do not use metal
utensils inside the bread pan or machine. Remove the kneading blade and allow loaf to cool
standing upright on wire rack approximately 20 minutes before cutting.
13. When the bread has completely cooled, approximately 1 hour, store in an air tight container.
14. UNPLUG UNIT BEFORE CLEANING. DO NOT IMMERSE THE BREAD PAN IN WATER, see
CLEANING AND STORING.
29.
TBR15&CAN_IB_4-11-03(New) 11/4/03 3:45 PM Page 30
Egg Bread
Egg(s), room temperature plus
enough Water 110°-115°F/43°-46°C to equal
Oil
Sugar
Salt
Bread Flour
RED STAR®
QUICK•RISE™ Yeast
or
Bread Machine Yeast
1.5 lb. loaf
2
1 cup + 2 TBL
2 TBL
2 TBL
1 tsp
3 cups
1 TBL
1 TBL
Program: FAST BAKE™
Pesto Bread
Water 110°-115°F/43°-46°C
Pesto, room temperature
Dry milk
Sugar
Salt
Bread Flour
RED STAR®
QUICK•RISE™ Yeast
or
Bread Machine Yeast
1.5 lb. loaf
1 cup + 2 TBL
3 TBL
4 tsp
4 tsp
3
⁄4 tsp
3 cups
1 TBL
1 TBL
Program: FAST BAKE™
Chevre-Cracked Pepper Bread
Water 110°-115°F/43°-46°C
Feta Cheese, room temperature
Dry Milk
Salt
Sugar
Cracked Black Pepper
Bread Flour
RED STAR®
QUICK•RISE™ Yeast
or
Bread Machine Yeast
Program: FAST BAKE™
30.
Bread Maker Use and Care Guide
1.5 lb. loaf
1 cup + 2 TBL
21⁄4 oz
2 TBL
3
⁄4 tsp
2 TBL
1 TBL
3 cups
1 TBL
1 TBL
TBR15&CAN_IB_4-11-03(New) 11/4/03 3:45 PM Page 31
Potato Bread
Water 115°-125°F/43°-51°C (warm)
Oil
Instant potatoes (buds or flakes)
Salt
Sugar
Bread Flour
RED STAR®
QUICK•RISE™ Yeast
or
Bread Machine Yeast
1.5 lb. loaf
1 cup + 2 TBL
2 TBL
1
⁄2 cup
1 tsp
2 TBL
3 cups
1 TBL
1 TBL
Program: FAST BAKE™
Cheese’n Onion Bread
Water 115°-125°F/43°-51°C (warm)
Salt
Sugar
Sharp Cheddar cheese, shredded
Dried onion
Bread Flour
RED STAR®
QUICK•RISE™ Yeast
or
Bread Machine Yeast
1.5 lb. loaf
1 cup + 2 TBL
3
⁄4 tsp
4 tsp
1
⁄2 cup
4 tsp
3 cups
1 TBL
1 TBL
Program: FAST BAKE™
31.
TBR15&CAN_IB_4-11-03(New) 11/4/03 3:45 PM Page 32
Italian Herb Bread
Water 115°-125°F/43°-51°C (warm)
Oil
Salt
Sugar
Dry milk
Italian Seasoning
Bread Flour
RED STAR®
QUICK•RISE™ Yeast
or
Bread Machine Yeast
1.5 lb. loaf
1 cup + 2 TBL
2 TBL
1 tsp
2 TBL
4 tsp
4 tsp
3 cups
1 TBL
1 TBL
Program: FAST BAKE™
Cranberry Orange Bread
Water 115°-125°F/43°-51°C (warm)
Oil
Dried orange peel
Dried cranberries
Salt
Sugar
Dry Milk
Bread Flour
RED STAR®
QUICK•RISE™ Yeast
or
Bread Machine Yeast
Program: FAST BAKE™
32.
Bread Maker Use and Care Guide
1.5 lb. loaf
1 cup + 2 TBL
2 tsp
2 tsp
1
⁄2 cup
1 tsp
2 TBL
1 TBL
3 cups
1 TBL
1 TBL
TBR15&CAN_IB_4-11-03(New) 11/4/03 3:45 PM Page 33
Day Old Bread Recipes
Breaded Pineapple
Chunked Pineapple
Cornstarch
Sugar
Butter
White Bread, 1 inch cubes
1 15-oz can
2 TBL
1
⁄2 cup
1
⁄4 cup
2 cups
Drain pineapple, reserve juice, Add enough water to juice to equal 1 cup. Mix cornstarch and sugar,
add juice and butter and heat until thick. Pour over pineapple and bread, toss lightly to mix. Bake at
350°F/177°C for 30 minutes.
Bread Pudding
White Bread, 1 inch cubes
Vanilla Cook & Serve Pudding & Pie Filling
Cinnamon
Milk, liquid
11⁄2 cups
1 3-oz box
1 tsp
2 cups
Mix all ingredients in a microwave-safe one quart casserole. Cook uncovered in microwave on high for
7 minutes or until boiling — stir occasionally during the last half of cooking. Or, bake in oven at
350°F/177°C for 30 minutes — stir halfway through cooking time. Serve warm or cold.
Crunchy Bread Snacks
Bread, sliced 1⁄2 inch thick
Butter, melted
Dry Seasoning Mix*
8 slices
⁄4 cup
4 tsp
1
*Use any one of the following: dried spaghetti sauce seasoning, any ranch dressing, Italian herb
seasoning, garlic powder or garlic salt. Amounts may be adjusted to your taste.
Melt butter and seasoning. Place bread on baking container and lightly brush with butter mixture. Bake
at 350°F/177°C for 10-15 minutes or until brown. Allow to cool. Break into bite size pieces.
33.
TBR15&CAN_IB_4-11-03(New) 11/4/03 3:45 PM Page 34
Quick Breads and Bake
Quick Breads and Cakes are made with baking powder and baking soda that are activated by moisture
and heat. The batter is mixed only long enough to blend all the ingredients, then baked immediately.
Full size cake mixes (approximately 18 ounces) and quick bread mixes (approximately 15 ounces)
works well using the QUICK BREAD program. Add ingredients listed on the package and the QUICK
BREAD program will mix and bake the pre-packaged cake or quick bread.
It is suggested that all liquids should be 80°F/27°C (water, milk, eggs, oil, butter) and be placed in the
bottom of the bread pan, dry ingredients on top. After loading the bread pan in the machine, select
the QUICK BREAD cycle.
During the initial mixing of batter, dry ingredients may collect in the corners of the pan. It may be
necessary to help the machine mix by using a rubber spatula along corners to avoid flour clumps.
When the cycle is complete, the machine will beep. Before removing pan from bread machine, test
quick bread or cake for doneness by inserting a toothpick or cake tester into the top center. Remove
the toothpick. If the cake is done, the toothpick will come out clean. However, if there is batter on the
toothpick, set the machine on the BAKE setting to continue to bake additional time as needed. Check
cake after 10 minute increments. Depending on size of quick bread or cake and moistness of the
batter, 10-30 additional minutes may be necessary.
Note that the complete BAKE cycle is 60 minutes and the machine will indicate 1:00.
When baking is complete, remove the pan from the machine and allow the quick bread or cake to
remain in the pan for 10 minutes to “set.” Quick bread or cakes are more fragile than yeast breads.
They must set in the pan before unmolding to allow the steam to subside and the interior of the loaf
to become more firm.
Remove the quick bread or cake from the pan and cool on a rack before slicing.
Apple Walnut
Egg(s), room temperature
Milk 80°F/27°C
Oil
Sugar
Granny Smith Apples, peeled and grated
Walnuts, chopped
All-Purpose Flour
Baking Soda
Baking Powder
Salt
Nutmeg
Cinnamon
Program: QUICK BREAD
34.
Bread Maker Use and Care Guide
Regular
1
1 TBL
2 TBL
1
⁄2 cup
1 cup
1
⁄2 cup
11⁄2 cups
1
⁄2 tsp
1
⁄4 tsp
1
⁄4 tsp
1
⁄4 tsp
1
⁄4 tsp
Large
2
2 TBL
1
⁄4 cup
1 cup
2 cups
1 cup
3 cups
1 tsp
1
⁄2 tsp
1
⁄2 tsp
1
⁄2 tsp
1
⁄2 tsp
TBR15&CAN_IB_4-11-03(New) 11/4/03 3:45 PM Page 35
Banana Nut
Milk 80°F/27°C
Oil
Bananas, ripe and mashed
Eggs, room temperature
Sugar
Dark Brown Sugar, packed
Walnuts, chopped
All-Purpose Flour
Baking Soda
Salt
Regular
1
⁄2 cup
2 TBL
1 cup
2
1
⁄4 cup
1
⁄4 cup
1
⁄2 cup
11⁄2 cups
1 tsp
1 tsp
Large
1 cup
1
⁄4 cup
2 cups
4
1
⁄2 cup
1
⁄2 cup
1 cup
3 cups
2 tsp
2 tsp
Program: QUICK BREAD
Corn
Milk 80°F/27°C
Eggs, room temperature
Oil
Sugar
Salt
All-Purpose Flour
Cornmeal
Baking Powder
Large
1 cup
4
1
⁄3 cup
1
⁄4 cup
1 tsp
22⁄3 cups
1 cup
5 tsp
Program: QUICK BREAD
Cranberry Nut
Milk 80°F/27°C
Egg, room temperature
Oil
All-Purpose Flour
Sugar
Baking Powder
Salt
Dried Cranberries, coarsely chopped
Walnuts, chopped
Large
1 cup
1
2 TBL
21⁄2 cups
3
⁄4 cup
31⁄2 tsp
1 tsp
1 cup
1 cup
Program: QUICK BREAD
35.
TBR15&CAN_IB_4-11-03(New) 11/4/03 3:45 PM Page 36
Banana Chocolate Chip
Bananas, mashed medium ripe
Butter or Margarine, melted
Egg, room temperature
Sour Milk
All-Purpose Flour
Sugar
Baking Soda
Baking Powder
Salt
Nuts, chopped
Chocolate chips
Regular
3
1
⁄4 cup
1
3 TBL or (2 TBL Milk + 1 TBL Vinegar)
21⁄4 cups
1
⁄2 cup
1 tsp
1 tsp
1
⁄2 tsp
1
⁄2 - 3⁄4 cup
1
⁄2 cup
Program: QUICK BREAD
Zucchini
Zucchini, shredded
Oil
Eggs, room temperature
Vanilla
All-Purpose Flour
Sugar
Baking Soda
Cinnamon
Baking Powder
Walnuts, chopped
Large
2 cups (about 2 to 3 medium)
1
⁄2 cup
2
2 tsp
2 cups
1 cup
3
⁄4 tsp
1
⁄2 tsp
1
⁄4 tsp
1
⁄2 cup
Program: QUICK BREAD
Nut Bread
Milk 80°F/27°C
Eggs, room temperature
Oil
All-Purpose Flour
Sugar
Brown Sugar, packed
Baking Powder
Salt
Cinnamon
Nuts, chopped
Program: QUICK BREAD
36.
Bread Maker Use and Care Guide
Large
1 cup
2
3 TBL
23⁄4 cups
1 cup
1
⁄3 cup
31⁄2 tsp
1 tsp
1 tsp
1 cup
TBR15&CAN_IB_4-11-03(New) 11/4/03 3:45 PM Page 37
Date Nut
Orange Juice 80°F/27°C
Egg, room temperature
Butter or Margarine, melted
All-Purpose Flour
Sugar
Baking Powder
Baking Soda
Salt
Dried Dates, chopped
Almonds, slivered
Regular
3
⁄4 cup
1
2 TBL
21⁄2 cups
3
⁄4 cup
2 tsp
1
⁄4 tsp
1 tsp
1 cup
1
⁄2 cup
Program: QUICK BREAD
37.
TBR15&CAN_IB_4-11-03(New) 11/4/03 3:45 PM Page 38
Doughs . . . As Easy As 1 - 2 - 3
1. Add ingredients to the bread pan in the order listed. Refer to Helpful Hints for Bread and Dough
for measuring information. Place the bread pan in the bread maker.
2. Close the lid. Select DOUGH PROGRAM. Press START.
3. Remove the dough from the bread pan when the beeper sounds. Follow shaping and baking
instructions.
◆ If you allow the dough to remain in the bread maker after the cycle is complete, it may over rise
and damage the machine.
◆ Rising times for dough after it is shaped and placed in a baking pan will vary due to recipe,
temperature and humidity level of your kitchen. The optimum temperature of the room for rising
is 80°-85°F/27°-29°C. Rising is the most essential feature in bread making. After the dough comes
out of the bread maker, the dough ferments and rises before punching and resting. The gluten
becomes pliable and elastic with a soft, smooth quality. Fermentation conditions gluten, develops
flavor and leavens the product.
Dough has doubled in bulk when an indentation remains after the tip of a finger is pressed lightly
and quickly into the dough. If the indentation springs back, cover and let rise a few more minutes
and check again. After punching down and dividing dough, cover and let rest 10 minutes. Resting
allows the gluten to relax and makes handling easier. Then shape the dough as desired.
Sometimes a double rising is beneficial especially for whole grain or 100% whole wheat bread. Let
the dough rise once, punch down, let rise again, punch down, let rest 10 minutes and shape.
Crust Treatments (use only with dough program)
Always allow optimum rising of shaped dough. Use a pastry brush to apply glaze. Bake as directed.
Egg Yolk Glaze — For shiny golden crust, mix 1 slightly beaten egg or egg yolk with 1 tablespoon water
or milk.
Egg White Glaze — For a shiny, chewy crust, mix 1 slightly beaten egg white with 1 tablespoon water.
Lightly Floured
Sprinkle enough flour onto work area so that the dough can be handled without sticking.
Shaping Rolls
Cloverleaf Rolls — Shape into 1/2 inch balls. Place 3 balls in each greased muffin tin and let rise until
double in size.
Crisscross Rolls — Shape into balls. Combine two of the balls and roll into a 1/8 inch thick square.
Cut strips 1/8 inch wide and place one strip across the top of each ball. Repeat this process, placing
the second strip in the opposite direction across the top of each ball.
Traditional Rolls — Shape into balls. For “pull apart” rolls, place dough balls with sides touching in a
baking pan. For “individual” rolls place dough balls 2 inches apart on a baking sheet.
Pan Sizes For Pull-Apart Rolls —
For a 1 lb. (9 rolls) recipe, use an 8 x 8 inch baking pan.
For a 1.5 lb. (18 rolls) recipe, use two 8 x 8 inch baking pans.
For a 2 lb. (24 rolls) recipe, use a 9 x 13 inch baking pan.
38.
Bread Maker Use and Care Guide
TBR15&CAN_IB_4-11-03(New) 11/4/03 3:45 PM Page 39
Dinner Roll Dough
Egg, room temperature plus
enough Water 80°F/27°C to equal
Oil
Sugar
Salt
Bread Flour
RED STAR® Active Dry Yeast
or
RED STAR® QUICK•RISE™ Yeast
or
Bread Machine Yeast
9 rolls
1
3
⁄4 cup + 3 TBL
2 TBL
1
⁄4 cup
1
⁄4 tsp
21⁄4 cups
21⁄4 tsp
24 rolls
1
11⁄2 cups + 2 TBL
1
⁄4 cup
1
⁄2 cup
1
⁄2 tsp
41⁄4 cups
31⁄2 tsp
11⁄2 tsp
21⁄2 tsp
11⁄2 tsp
21⁄2 tsp
Program: DOUGH
Method
1. Remove the bread pan from the bread maker. Attach the kneading blade onto the shaft. Make
sure all ingredients, except water, are at room temperature.
2. Place whole uncracked eggs in a bowl of warm water for 15 minutes to bring to room
temperature. To measure egg plus enough liquid to equal — after warming eggs, remove from
shell and place in a liquid measuring cup. Slowly add warm (80°F/27°C/baby bottle temperature)
liquid to measuring cup until it reaches the desired measurement.
3. Use a measuring spoon to measure the oil and add to the bread pan.
4. Use a measuring spoon to measure the sugar and salt; level off with the straight edge of a knife
and add to the bread pan.
5. Lightly spoon bread flour into a dry measuring cup, level off with the straight edge of a knife and
add to the bread pan.
6. Smooth into all corners. Lightly tap pan on counter 3 times to settle all dry ingredients.
7. Carefully measure yeast with a measuring spoon; level off with the straight edge of a knife and
add to the bread pan.
8. Place the bread pan into the bread maker. Press down on rim until it snaps into place. Close lid.
9. Select DOUGH PROGRAM and press START.
10. At the beep during the kneading process, check the dough ball. It should be slightly tacky to the
touch. At this time push down any dough or flour that may be on the sides of the pan.
11. When the beeper sounds, the dough is finished. Use oven mitts to carefully remove the bread
pan.
12. Turn bread pan upside down and shake several times to remove the dough. Do not use metal
utensils inside the bread pan or bread maker.
13. Place on a lightly floured surface. Divide into pieces and shape.
14. Place in a greased baking pan. Cover and let rise in a warm place for 1 hour or until double in
size.
15. Bake at 350°F/177°C for 20-30 minutes, or until done.
16. UNPLUG UNIT BEFORE CLEANING. DO NOT IMMERSE THE BREAD PAN IN WATER, see
CLEANING & STORING.
39.
TBR15&CAN_IB_4-11-03(New) 11/4/03 3:45 PM Page 40
Focaccia Bread Dough
Water 80°F/27°C
Olive Oil
Sugar
Salt
Bread Flour
RED STAR® Active Dry Yeast
or
RED STAR® QUICK•RISE™ Yeast
or
Bread Machine Yeast
1 loaf
1 cup
1
⁄3 cup
2 tsp
1 tsp
3 cups
11⁄2 tsp
1 tsp
1 tsp
Program: DOUGH
Add at the beep:
Dried Italian Seasoning
1 tsp
Garlic-Cheese Topping
Olive Oil
Dried Oregano
Garlic, coarsely chopped
Parmesan Cheese, grated
Salt
⁄4 cup
11⁄2 tsp
1
⁄3 cup
1
⁄3 cup
1
⁄4 tsp
Greek Style Topping
Olive Oil
Onion, thin sliced
Dried Oregano
Feta Cheese, crumbled
Black Olives, sliced and drained
Salt
⁄4 cup
1 cup
11⁄2 tsp
1
⁄3 cup
1
⁄4 cup
1
⁄4 tsp
1
1
Method
1. With oiled hands, evenly press dough into a greased 9 x 13 inch pan. Using your fingertips, make
indentations in the dough.
2. Cover and let rise in a warm place for 30 minutes or until almost double in size. While the dough
is rising, select the topping and prepare.
3. In a skillet, heat olive oil.
For garlic-cheese topping — stir in oregano and garlic then immediately remove from heat.
For Greek topping — add onions and cook until onions are soft but not brown, approximately
5 minutes.
4. Use fingers to press dimples into dough again. Spoon topping mixture evenly over dough.
Sprinkle with remaining ingredients.
5. Bake at 400°F/205°C for 20 minutes or until done.
40.
Bread Maker Use and Care Guide
TBR15&CAN_IB_4-11-03(New) 11/4/03 3:45 PM Page 41
Wheat Dinner Roll Dough
Water 80°F/27°C
Oil
Brown Sugar
Salt
Dry Milk
Bread Flour
Whole Wheat Flour
RED STAR® Active Dry Yeast
or
RED STAR® QUICK•RISE™ Yeast
or
Bread Machine Yeast
9 rolls
3
⁄4 cup
1 TBL
2 TBL
1
⁄2 tsp
1 TBL
11⁄4 cups
1 cup
11⁄2 tsp
24 rolls
11⁄2 cups
2 TBL
1
⁄4 cup
1 tsp
2 TBL
21⁄2 cups
2 cups
3 tsp
1 tsp
11⁄4 tsp
1 tsp
11⁄4 tsp
Program: DOUGH
Method
1. Place on a lightly floured surface. Divide into pieces and shape.
2. Place in a greased baking pan. Cover and let rise in a warm place for 1 hour or until double in
size.
3. Bake at 350°F/177°C for 25-30 minutes, or until done.
Buttermilk Roll Dough
Cultured Buttermilk, liquid 80°F/27°C
Oil
Honey
Salt
Bread Flour
Whole Wheat Flour
Wheat Germ
Baking Soda
RED STAR® Active Dry Yeast
or
RED STAR® QUICK•RISE™ Yeast
or
Bread Machine Yeast
9 rolls
1 cup
3 TBL
11⁄2 TBL
1 tsp
3
⁄4 cup
11⁄3 cups
1
⁄3 cup
1
⁄4 tsp
13⁄4 tsp
18 rolls
11⁄2 cups
1
⁄4 cup
2 TBL
11⁄2 tsp
11⁄4 cups
2 cups
1
⁄2 cup
1
⁄4 tsp
2 tsp
11⁄4 tsp
11⁄2 tsp
11⁄4 tsp
11⁄2 tsp
2 TBL
3 TBL
Program: DOUGH
Topping
Butter, melted
Method
1. Place on a lightly floured surface. Divide into pieces and shape.
2. Place in a greased baking pan. Cover and let rise in a warm place for 1 hour or until double in
size. Brush with melted butter.
3. Bake at 350°F/177°C for 15-20 minutes, or until done.
41.
41.
TBR15&CAN_IB_4-11-03(New) 11/4/03 3:45 PM Page 42
French Bread Dough
(Italian Loaf, French Rolls and French Twists)
Water 80°F/27°C
Sugar
Salt
Bread Flour
RED STAR® Active Dry Yeast
or
RED STAR® QUICK•RISE™ Yeast
or
Bread Machine Yeast
9 rolls
11⁄4 cups
1 TBL
1 tsp
31⁄2 cups
1 TBL
2 tsp
2 tsp
Program: DOUGH
Glaze
Water
Salt
2 TBL
1
⁄2 tsp
Method
1. Place on a lightly floured surface. Roll into a 12 x 18 rectangle. Starting with the longest side, roll
up tightly, pressing the seams to seal and tapering each end.
2. Place the loaf on a greased baking sheet, cover and let rise in a warm place for 40 minutes or
until double in size.
3. With a knife, cut three diagonal slashes across top of the loaf. Combine the glaze ingredients;
brush the loaf.
4. Bake at 400°F/205°C for 20 to 25 minutes, or until done.
Variations
ITALIAN LOAF
Method
1. Use recipe above. Place on a lightly floured surface and shape the dough into one large round
ball.
2. Place the loaf on a greased baking sheet, cover and let rise in a warm place for 40 minutes or
until double in size.
3. With a knife, cut three diagonal slashes across top of the loaf. Combine the glaze ingredients;
brush over loaf. Sprinkle loaf with sesame seeds, poppy seeds, caraway seeds or cracked wheat.
4. Bake at 400°F/205°C for 20 to 25 minutes or until done.
FRENCH ROLLS
Method
1. Use recipe above. Place on a lightly floured surface and divide dough into 12 pieces and shape
into a ball. Pinch the ends of each roll and taper slightly.
2. Place the loaves on a greased baking sheet, cover and let rise in a warm place for 40 minutes or
until double in size.
3. With a knife, cut diagonal slashes across top of the loaf. Combine the glaze ingredients; brush
over loaves.
4. Bake at 400°F/205°C for 15 to 20 minutes or until done.
FRENCH TWISTS
Method
1. Use recipe above. Place on a lightly floured surface and divide dough into 18 pieces. Roll into 14
inch ropes.
2. Fold each rope in half and twist, starting at fold.
3. Place on greased baking sheet and brush with 1/3 cup of melted butter. Cover and let rise in a
warm place until double in size.
4. Brush with glaze.
5. Bake at 400°F/205°C for 12 to 15 minutes or until done.
42.
Bread Maker Use and Care Guide
TBR15&CAN_IB_4-11-03(New) 11/4/03 3:45 PM Page 43
Cheezy Garlic Roll Dough
Egg, room temperature plus
enough Water 80°F/27°C to equal
Oil
Sugar
Salt
Bread Flour
RED STAR® Active Dry Yeast
or
RED STAR® QUICK•RISE™ Yeast
or
Bread Machine Yeast
9 rolls
1
1 cup
2 TBL
1
⁄3 cup
1 tsp
31⁄2 cups
11⁄4 tsp
24 rolls
1
11⁄3 cups
3 TBL
1
⁄2 cup
11⁄2 tsp
41⁄2 cups
2 tsp
1 tsp
11⁄4 tsp
1 tsp
11⁄4 tsp
⁄3 cup
11⁄2 TBL
3 TBL
⁄3 cup
2 TBL
1
⁄4 cup
Program: DOUGH
Topping
Parmesan Cheese
Garlic, minced
Butter, melted
1
2
Method
1. Place on a lightly floured surface. Divide into pieces and shape.
2. Combine cheese and garlic. Dip pieces in melted butter and then in cheese-garlic mixture. Place
coated side up in a greased baking pan, drizzle any remaining topping over rolls.
3. Cover and let rise in a warm place 1 hour or until double in size.
4. Bake at 325°F/163°C for 35-40 minutes, or until done.
Pita Pocket Dough
Water 80°F/27°C
Olive Oil
Sugar
Salt
Bread Flour
Whole Wheat Flour
RED STAR® Active Dry Yeast
or
RED STAR® QUICK•RISE™ Yeast
or
Bread Machine Yeast
20 pita pockets
11⁄3 cups
8 tsp
4 tsp
11⁄4 tsp
2 cups
11⁄3 cups
21⁄2 tsp
13⁄4 tsp
13⁄4 tsp
Program: DOUGH
Method
1. Place on a lightly floured surface. Divide into 10 pieces and shape each piece into a smooth ball.
2. Place 5 balls on a large baking sheet. Place the remaining five balls on another baking sheet. Let
rise about 20 minutes. With fingertips flatten each ball into a 6 inch circle.
3. Bake at 500°F/260°C for 5 minutes until puffed and tops begin to brown.
4. Cut each in half to form 2 pockets.
43.
TBR15&CAN_IB_4-11-03(New) 11/4/03 3:45 PM Page 44
Refreshing Roll Dough
Water 80°F/27°C
Oil
Brown Sugar
Salt
Bread Flour
RED STAR® Active Dry Yeast
or
RED STAR® QUICK•RISE™ Yeast
or
Bread Machine Yeast
18 rolls
1 cup
1
⁄4 cup
1
⁄3 cup
1 tsp
31⁄2 cups
11⁄2 tsp
24 rolls
11⁄2 cups
1
⁄3 cup
1
⁄2 cup
11⁄2 tsp
41⁄2 cups
2 tsp
1 tsp
11⁄4 tsp
1 tsp
11⁄4 tsp
2 TBL
1
⁄2 cup
1
⁄2 cup
1
Program: DOUGH
Topping
Orange Peel, grated
Sugar
Butter, melted
⁄4 cup
⁄4 cup
3
⁄4 cup
3
Method
1. Place on a lightly floured surface. Divide into pieces and shape.
2. Combine orange peel and sugar. Dip pieces in melted butter and then in orange peel-sugar
mixture.
3. Place coated side up in greased baking pan. Drizzle any remaining topping over rolls. Cover and
let rise in a warm place 1 hour or until double in size.
4. Bake at 350°F/177°C for 20-30 minutes, or until done. Serve warm.
44.
Bread Maker Use and Care Guide
TBR15&CAN_IB_4-11-03(New) 11/4/03 3:45 PM Page 45
Challah Bread Dough
regular
1
3
⁄4 cup
2 TBL
11⁄2 TBL
1 tsp
2 cups
1 tsp
large
2
11⁄2 cups
1
⁄4 cup
2 TBL
2 tsp
41⁄2 cups
2 tsp
⁄4 tsp
11⁄4 tsp
3
⁄4 tsp
11⁄4 tsp
Glaze
Egg Yolk(s), beaten
Water
1
1 TBL
2
1 TBL
Topping
Poppy Seeds
1 tsp
11⁄2 TBL
Egg(s), room temperature plus
enough Water 80°F/27°C to equal
Oil
Sugar
Salt
Bread Flour
RED STAR® Active Dry Yeast
or
RED STAR® QUICK•RISE™ Yeast
or
Bread Machine Yeast
3
Program: DOUGH
Method
1. Place on a lightly floured surface. Divide into thirds, making 3 (10 inch long for regular, 13 inch
long for large) ropes with tapered ends. Pinch ropes together at one end, braid together. Pinch
together at other end and secure braid.
2. Transfer braided dough to greased baking sheet; cover and let rise in a warm place for 1 hour or
until double in size.
3. Combine glaze ingredients and brush onto braid. Sprinkle with poppy seeds and bake at
350°F/177°C for 25 minutes, or until done.
45.
TBR15&CAN_IB_4-11-03(New) 11/4/03 3:45 PM Page 46
Whole Wheat Pizza Crust Dough
Water 80°F/27°C
Oil
Sugar
Salt
Whole Wheat Flour
Bread Flour
RED STAR® Active Dry Yeast
or
RED STAR® QUICK•RISE™ Yeast
or
Bread Machine Yeast
1 thick or 2 thin crusts
1 cup
2 TBL
1 TBL
1 tsp
1 cup
11⁄2 cups
21⁄4 tsp
11⁄2 tsp
11⁄2 tsp
Program: DOUGH
Method
1. Place on a lightly floured surface. Divide in half and press onto a 12 inch pizza pan, raising edges.
Sprinkle each pan with 1 tablespoon of cornmeal if desired. Generously prick dough with a fork.
For one 12 inch thick crust do not divide.
2. Bake 400°F/205°C for 10-12 minutes or until edges of crust begin to turn a light golden brown.
Remove, add toppings and return to oven to bake an additional 15-20 minutes.
Pizza Crust Dough
Water 80°F/27°C
Oil
Sugar
Salt
Dry Milk
Bread Flour
RED STAR® Active Dry Yeast
or
RED STAR® QUICK•RISE™ Yeast
or
Bread Machine Yeast
1 thick or 2 thin crusts
3
⁄4 cup
1 TBL
1 TBL
1
⁄2 tsp
1 TBL
21⁄4 cups
1 tsp
2 thick or 4 thin crusts
11⁄2 cups + 3 TBL
2 TBL
2 TBL
1 tsp
2 TBL
41⁄2 cups
2 tsp
⁄4 tsp
11⁄4 tsp
⁄4 tsp
11⁄4 tsp
3
3
Program: DOUGH
Method
1. Place on a lightly floured surface. Divide and press onto a 12 inch pizza pan, raising edges.
2. Spread pizza sauce over the dough and sprinkle with toppings.
3. Bake 425°F/218°C for 20 minutes or until crust is golden brown around edges.
46.
Bread Maker Use and Care Guide
TBR15&CAN_IB_4-11-03(New) 11/4/03 3:45 PM Page 47
Bagel Dough
Water 80°F/27°C
Sugar
Salt
Bread Flour
RED STAR® Active Dry Yeast
or
RED STAR® QUICK•RISE™ Yeast
or
Bread Machine Yeast
8 bagels
1 cup
11⁄2 TBL
1 tsp
3 cups
21⁄4 tsp
11⁄2 tsp
11⁄2 tsp
Program: DOUGH
Glaze
Egg, beaten
1
Toppings (optional)
Sesame Seeds, Poppy Seeds, Cracked Wheat, Wheat Flakes or Dried Onion Flakes
Banana Wheat Bagel Dough
Egg, room temperature plus
enough Water 80°F/27°C to equal
Oil
Honey
Salt
Banana, mashed
Whole Wheat Flour
Bread Flour
RED STAR® Active Dry Yeast
or
RED STAR® QUICK•RISE™ Yeast
or
Bread Machine Yeast
12 bagels
1
1 cup
2 TBL
1 TBL
11⁄2 tsp
1
⁄2 cup
21⁄2 cups
1 cup
21⁄4 tsp
112 tsp
11⁄2 tsp
Program: DOUGH
Glaze
Egg White, beaten
Water
Toppings (optional)
Poppy Seeds, Sesame Seeds
1
1 TBL
Bagel Recipes Method
1. Place on a lightly floured surface. Divide into pieces. Roll each in a small ball, making a hole in
the center of each with thumbs. Gently pull to make a one-inch hole.
2. Place on a greased baking sheet. Cover and let rise in a warm place for 30 minutes or until double
in size.
3. In a 3-quart sauce pan, bring to a boil 2 quarts water and 2 tablespoons sugar. Place a few bagels
at a time in boiling water. Simmer 3 minutes turning once. Remove with slotted spoon and put
back on greased baking sheet.
4. Brush with egg and sprinkle with choice of toppings. Bake at 400°F/205°C for 20-25 minutes or
until done; cool on a wire rack.
47.
TBR15&CAN_IB_4-11-03(New) 11/4/03 3:45 PM Page 48
Almond-Cherry Coffee Cake Dough
Water 80°F/27°C
Oil
Sugar
Salt
Dry Milk
Bread Flour
RED STAR® Active Dry Yeast
or
RED STAR® QUICK•RISE™ Yeast
or
Bread Machine Yeast
1 coffee cake
1 cup
1 TBL
11⁄2 TBL
3
⁄4 tsp
1 TBL
31⁄4 cups
11⁄2 tsp
1 tsp
1 tsp
Program: DOUGH
Filling
Cream Cheese, room temperature
Sugar
Maraschino Cherries, chopped
Milk, liquid
Almond Extract
8 oz
2 TBL
1
⁄2 cup
1 TBL
1
⁄2 tsp
Glaze
Powdered Sugar
Sour Cream
Milk, liquid
Sliced Almonds, to decorate
Maraschino Cherries, quartered, to decorate
⁄2 cup
1 TBL
1-2 TBL
2 TBL
2 TBL
1
Method
1. Place on a lightly floured surface. Roll into a 5 x 10 inch rectangle. Combine filling ingredients
and spread over dough within 1⁄2 inch of edges. Starting with longest side, roll dough up tightly,
pressing edges to seal.
2. Place roll, seam-side down, on a greased baking sheet and join the ends to form a ring; pinch to
seal. With a knife, make cuts 11⁄2 inches apart from the outside edge to within one inch of the
inside edge. Turn each section on its side so filling shows.
3. Cover and let rise in a warm place 1 hour or until almost double in size.
4. Uncover and bake at 375°F/190°C for 20-25 minutes or until done.
5. Combine the first three glaze ingredients, adding only enough milk for drizzling consistency.
Drizzle over the warm coffee cake. Decorate with almonds and cherries. Serve warm.
48.
Bread Maker Use and Care Guide
TBR15&CAN_IB_4-11-03(New) 11/4/03 3:45 PM Page 49
Cinnamon Roll Dough
Egg, room temperature plus
enough Water 80°F/27°C to equal
Oil
Sugar
Salt
Bread Flour
RED STAR® Active Dry Yeast
or
RED STAR® QUICK•RISE™ Yeast
or
Bread Machine Yeast
18 Rolls
1
1 cup
1
⁄4 cup
1
⁄3 cup
1 tsp
31⁄2 cups
11⁄2 tsp
24 Rolls
1
11⁄2 cups
1
⁄3 cup
1
⁄2 cup
11⁄2 tsp
41⁄2 cups
2 tsp
1 tsp
11⁄4 tsp
1 tsp
11⁄4 tsp
Program: DOUGH
Add at the beep:
Walnuts, chopped (optional)
Raisins (optional)
⁄2 cup
⁄2 cup
⁄3 cup
⁄3 cup
1
2
1
2
Filling
Butter, softened
Sugar
Cinnamon
⁄3 cup
⁄3 cup
2 TBL
⁄2 cup
⁄2 cup
3 TBL
Glaze
Powdered Sugar
Milk, liquid
Vanilla
⁄2 cup
3 TBL
1
⁄4 tsp
2
1
1
1
1
1
⁄3 cup
⁄4 cup
1
⁄2 tsp
1
Method
1. Place on a lightly floured surface, roll dough in a 12 x 18 inch rectangle for 18 rolls, (12 x 24 inch
rectangle for 24 rolls) and spread with butter. Combine remaining filling ingredients and sprinkle
over butter. Roll up tightly, jelly-roll style, starting with the longest side and cut into one inch
slices.
2. Place in greased baking pans and let stand in a warm place for 1 hour or until double in size.
3. Bake at 350°F/177°C for 25-30 minutes or until done.
4. Mix glaze ingredients until smooth and drizzle over top.
49.
TBR15&CAN_IB_4-11-03(New) 11/4/03 3:45 PM Page 50
Sticky Breakfast Roll Dough
Egg(s), room temperature plus
enough Water 80°F/27°C to equal
Oil
Sugar
Salt
Bread Flour
RED STAR® Active Dry Yeast
or
RED STAR® QUICK•RISE™ Yeast
or
Bread Machine Yeast
18 Rolls
1
1 cup + 2 TBL
1
⁄4 cup
1
⁄3 cup
1 tsp
31⁄2 cups
11⁄2 tsp
1 tsp
1 tsp
Program: DOUGH
Add at the beep:
Walnuts or Pecans, chopped
Filling
Butter, softened
Sugar
Cinnamon
Topping
Butter, melted
Brown Sugar
⁄2 cup
1
⁄2 cup
⁄3 cup
1 TBL
1
1
⁄4 cup
⁄4 cup
3
3
Method
1. Place on a lightly floured surface, roll dough into a 12 x 18 inch rectangle for 18 rolls and spread
with butter. Combine remaining filling ingredients and sprinkle over dough. Roll up tightly, jellyroll style, starting with the longest side and cut into one inch slices.
2. Combine topping mixture and spread into baking pan. place slices on mixture and let rise in a
warm place for 1 hour or until double in size.
3. Bake at 350°F/177°C for 35 minutes or until done. Invert onto a heat-proof tray.
50.
Bread Maker Use and Care Guide
TBR15&CAN_IB_4-11-03(New) 11/4/03 3:45 PM Page 51
Soft Pretzel Dough
Water 80°F/27°C
Egg Yolk, room temperature
Oil
Sugar
Salt
White Pepper
Bread Flour
RED STAR® Active Dry Yeast
or
RED STAR® QUICK•RISE™ Yeast
or
Bread Machine Yeast
16 pretzels
11⁄4 cups
1
1 TBL
2 TBL
1 tsp
1
⁄8 tsp
31⁄2 cups
1 TBL
2 tsp
2 tsp
Program: DOUGH
Glaze
Egg White
Water
1
1 TBL
Toppings (optional)
Kosher Salt
Sesame Seeds
1 TBL
1 TBL
Method
1. Place dough on a lightly floured surface and cut into pieces. Roll each piece into a 16 inch rope.
Cross the ends of the rope to make a loop; twist the crossed ends once and fold across the loop.
2. Place on a greased baking sheet 11⁄2 inches apart. Brush with glaze and sprinkle with topping. Let
rise until double in size, about 30 minutes. Bake at 375°F/190°C for 15-20 minutes or until done.
Variation
PEPPERONI PRETZEL DOUGH
Method
1. Add 1 cup thin sliced pepperoni and 2 tablespoons Parmesan cheese to dough ingredients.
2. Follow method above for completion.
51.
TBR15&CAN_IB_4-11-03(New) 11/4/03 3:45 PM Page 52
Creamed Soup Bread Bowl Dough
Eggs, room temperature plus
enough Water 80°F/27°C to equal
Oil
Honey
Dry Milk
Salt
Bread Flour
Whole Wheat Flour
Rye Flour
Caraway Seeds
Dehydrated Onions
RED STAR® Active Dry Yeast
or
RED STAR® QUICK•RISE™ Yeast
or
Bread Machine Yeast
4 bowls
2
1 cup + 5 TBL
2 TBL
1
⁄4 cup
3 TBL
2 tsp
21⁄4 cups
1 cup
1 cup
3 TBL
1
⁄4 cup
23⁄4 tsp
13⁄4 tsp
13⁄4 tsp
Program: DOUGH
Note: Any 2 pound bread or dough recipe may be used; mix on dough program.
Method
1. Place dough on a lightly floured surface and divide into 4 equal pieces. Shape into 4 smooth
round balls and place on a greased baking sheet.
2. Cover and let rise in a warm place for 1 hour or until double in size.
3. Bake at 350°F/177°C for 25-30 minutes or until done. Allow to cool completely on a wire rack.
4. With a serrated knife, remove the top 1 inch of each bread bowl. Remove the center, leaving a
shell of 1⁄2 inch on sides and bottom.
5. Fill with approximately 1 cup of creamed soup (non-creamed soup will soak through the bread
bowl too easily.) Cut removed bread into 1 inch pieces and serve with soup.
52.
Bread Maker Use and Care Guide
TBR15&CAN_IB_4-11-03(New) 11/4/03 3:45 PM Page 53
Party Dip Bread Bowl Dough
Water 80°F/27°C
Sugar
Salt
Bread Flour
RED STAR® Active Dry Yeast
or
RED STAR® QUICK•RISE™ Yeast
or
Bread Machine Yeast
1 bowl
11⁄4 cups
1 TBL
1 tsp
31⁄3 cups
1 TBL
2 tsp
2 tsp
Program: DOUGH
Note: Any 1.5 pound bread or dough recipe may be used; mix on dough program.
Method
1. Place dough on a lightly floured surface. Shape into a large smooth round ball and place on a
greased baking sheet.
2. Cover and let rise in a warm place for 1 hour or until double in size.
3. Bake at 350°F/177°C for 30-40 minutes or until done. Allow to cool completely on a wire rack.
4. With a serrated knife, remove the top 1-2 inches of the bowl. Remove the center, leaving a shell of
1
⁄2 inch on sides and bottom.
5. Fill with 3 cups of dip. Cut removed bread into 1 inch pieces and serve with dip.
Shredded Beef Dip
Dried beef, chopped
Cream Cheese, softened
Sour Cream
Green Onions, chopped
Accent® Seasoning
Worcestershire® Sauce
5 oz
2-8 oz pkg.
1
⁄2 cup
6
21⁄2 tsp
to taste
Mix and chill before serving.
Makes 3 cups.
Shrimp Dip
Canned Shrimp, drained and mashed
Cream Cheese, softened
Mayonnaise
Green Onions, chopped
2 small cans
8 oz pkg
1 cup
3
Mix and chill before serving.
Makes 3 cups.
53.
TBR15&CAN_IB_4-11-03(New) 11/4/03 3:45 PM Page 54
Cleaning & Storing
ALWAYS UNPLUG THE UNIT AND ALLOW TO COOL COMPLETELY BEFORE CLEANING.
CAREFULLY UNPACK THE BREAD MAKER AND REMOVE ALL PACKAGING MATERIALS.
Any service requiring disassembly, other than the cleaning described below, must be performed by an
authorized service center. Unauthorized service will void your warranty.
Cleaning
CLEAN-UP OF BREAD MAKER
1. Unplug and allow to cool before cleaning.
2. Remove bread pan from inside the bread maker.
3. Clean exterior of bread maker with a damp cloth and plastic scouring pad if necessary. Do not rub
too hard as the surface may be scratched.
4. Remove any flour, bread crumbs or other food from the inside of the oven cavity using a damp
sponge, cloth or a small portable vacuum cleaner. A plastic scouring pad may be used if necessary.
Do not rub too hard as the surface may be scratched.
5. To clean the glass in the lid, use a glass cleaner or mild detergent and a damp cloth or plastic
scouring pad. Do not use an abrasive cleaner or pad as they might scratch the glass.
6. Rinse with a damp cloth and dry thoroughly.
CLEAN-UP FOR OVER-RISING
1. If the bread should over-rise and hit the cover, extra cleaning will be necessary. Unplug the bread
maker and gently remove cover. Using a nylon spatula or wooden utensil, scrape all loose dough
from inside the cover. Then wash the cover in warm, soapy water.
2. Move bread maker to countertop next to kitchen sink; place on backside. You may want to place it
on a towel to avoid scratching it. Use a pastry brush to “sweep” crumbs from inside the bread maker
and around the hinges. Wipe inside of bread maker with a damp cloth.
3. Using a wet dishcloth or sponge, soak all remaining dry or burned-on dough to loosen. Use a plastic
scrub pad to remove any stubborn spots. Do not use abrasive cleaners or metal scouring pad which
could damage the finish. Rinse well with a damp dishcloth or sponge and dry thoroughly. If any
water has accumulated in the vent of the cover, wipe with a dishcloth or sponge to prevent it from
running down the inside or outside of the bread maker when you stand the unit upright. Carefully
insert cover tabs into the slots and snap into place.
CLEAN-UP OF BREAD PAN AND KNEADING BLADE
DO NOT IMMERSE BREAD PAN OR WASH IN DISHWASHER
1. Allow to cool before cleaning.
2. Fill with hot soapy water and remove kneading blade. If necessary to remove the kneading blade
from the bread pan, allow the soapy water to remain in the pan for up to 30 minutes (longer times
may damage the non-stick surface). It is not necessary to remove the kneading blade for cleaning.
However, if you wish to, it is necessary to do so after each use or it will become increasingly difficult
to release.
3. Wash bread pan and kneading blade with a nylon bristle brush. Do not use steel wool, abrasive
cleaners, or metal utensils on the bread pan or kneading blade as they will damage the non-stick
surface. Normal wear is to be expected. The non-stick may discolor over time and in no way affects
performance.
STORING
◆ All removable parts should be thoroughly cleaned and dried.
◆ Store with lid closed and kneading blade inside bread pan.
54.
Bread Maker Use and Care Guide
TBR15&CAN_IB_4-11-03(New) 11/4/03 3:45 PM Page 55
Before Calling For Service
Questions and Answers
Questions
Answers
1
Why does the height and shape
of bread differ in each loaf?
The height and shape of bread may differ
depending on the ingredients, room
temperature and length of the timer cycle. Also
accurate measurement of ingredients is
essential to make delicious bread.
2
The bread has an unusual
aroma. Why?
Stale ingredients or too much yeast may have
been used. Always use fresh ingredients.
Accurate measurements are essential to make
delicious bread.
3
The kneading blade comes out
with the bread.
This may happen as the kneading blade is
detachable. Use a non-metal utensil to
remove it.
Caution: The kneading blade will be hot.
4
The baked loaf of bread has a
floured corner.
Sometimes flour in the corner of the pan may
not have been completely kneaded into the
dough. Scrape the flour off the loaf with a
spatula.
5
Why can the timer not be set for
more than 13 hours?
Longer delay times could alter the baking
results.
6
Can ingredients be halved or
doubled?
No. If there is too little in the pan, the kneading blade cannot knead well enough. If there is
too much, bread swells out of the pan.
7
Can fresh milk be used in place
of dry milk?
Yes, for all programs except FAST BAKE™. Be
sure to deduct the same measurement of water
to equal liquid substitution (warm to
80°F/27°C). Fresh milk is not recommended
when using the timer, because it may spoil
while setting in the pan.
8
Why is the display flashing E:01?
The bread machine cavity needs to cool down
before making the next loaf of bread.
55.
TBR15&CAN_IB_4-11-03(New) 11/4/03 3:45 PM Page 56
Check List
56.
Bread Maker Use and Care Guide
TBR15&CAN_IB_4-11-03(New) 11/4/03 3:45 PM Page 57
Suggestions
The following suggestions have a corresponding number found on the check list. Be sure to read both.
1.
Plug into 120 V ~ 60 Hz outlet. Refer to power outage instructions. Program was not
selected. Push START/STOP to clear display after last program.
2.
Open lid, remove bread pan and allow to cool.
3.
Wait until course is complete; unplug, allow to cool and clean.
4.
Only open lid during kneading process to check dough ball or to add ingredients.
5.
Remove bread as soon as program is done and place on wire rack.
6.
Allow to cool approximately 20 minutes.
7.
Put kneading blade on the shaft of bread pan.
8.-11.
Check the dough ball at the beep.
Dough should be round, smooth-textured, soft and slightly tacky to the touch. (FAST
BAKE™ dough ball will be sticky to the touch.)
If more like a batter, add 1 TBL flour. Allow to mix; add more if necessary.
If too dry, add 1 tsp water. Allow to absorb; add more if necessary.
12.
Follow recipe.
13.
Increase by 1/4 tsp.
14.
Decrease by 1/4 tsp.
15.
Artificial sugar substitutes not recommended.
16.
Follow recipe or substitution recommendations.
17.
Flours cannot be substituted.
18.
Place yeast on top of flour away from liquids.
19.
Make sure yeast is fresh and room temperature.
20.
Water should be 80°F/27°C for all courses except FAST BAKE™ which should be
110°-115°F/43°-46°C.
57.
TBR15&CAN_IB_4-11-03(New) 11/4/03 3:45 PM Page 58
Display Information
Always use the bread maker in a room that is free of drafts and is at least 55°F/13°C, but not warmer
than 90°F/32°C. Do not use bread maker in an unheated garage, outdoors, near a heat vent, or in
direct sunlight.
Generally the display window will tell you what is happening with your bread maker. Here are some
points to consider.
Messages
Reason
Solution
0:00
(Colon flashing)
Cycle is complete.
Keep Warm is engaged.
Press Start/Stop button to cancel.
E:01
signal beeping
Unit is too hot.
Press Start/Stop button to cancel.
Open cover, remove bread pan and
allow unit to cool with cover open.
L:LL
signal beeping
Room temperature
is too low.
(Below 59°F)
Press Start/Stop button to cancel.
Place bread maker in a warm room
and allow to warm up.
Display Blank
Power has been
interrupted.
Unplug unit and plug back into
outlet. Unit must be reset.
H:HH
signal beeping
Short circuit of
sensor
Send bread maker into Salton,
Inc. for repair or replacement.
58.
Bread Maker Use and Care Guide
TBR15&CAN_IB_4-11-03(New) 11/4/03 3:45 PM Page 59
Specifications
120 V ~ 60 Hz
Power Supply
Power
Consumption
Heater
Kneading Motor
400W
25W
Dimension (WxDxH)
Approx. 9.5”x12”x12.3”
Weight
Approx. 9.5 lb.
59.
TBR15&CAN_IB_4-11-03(New) 11/4/03 3:45 PM Page 60
Recipe Index
BREADS
Cheese and Cracked Pepper . . . . . . . . . . . . . . . 21
Cinnamon Raisin Nut . . . . . . . . . . . . . . . . . . . . 26
Cranberry Walnut . . . . . . . . . . . . . . . . . . . . . . . 25
Egg . . . . . . . . . . . . . . . . . . . . . . . . . . . . . . . . . . . 19
French . . . . . . . . . . . . . . . . . . . . . . . . . . . . . . . . 22
Holiday . . . . . . . . . . . . . . . . . . . . . . . . . . . . . . . . 27
Italian Herb . . . . . . . . . . . . . . . . . . . . . . . . . . . . 21
Honey Wheat . . . . . . . . . . . . . . . . . . . . . . . . . . . 19
Onion . . . . . . . . . . . . . . . . . . . . . . . . . . . . . . . . . 20
Pesto . . . . . . . . . . . . . . . . . . . . . . . . . . . . . . . . . . 20
Pumpernickel . . . . . . . . . . . . . . . . . . . . . . . . . . . 24
Rich Sweet . . . . . . . . . . . . . . . . . . . . . . . . . . . . . 26
Rye . . . . . . . . . . . . . . . . . . . . . . . . . . . . . . . . . . . 20
Shredded Wheat . . . . . . . . . . . . . . . . . . . . . . . . 23
Sunflower & Sesame Seed . . . . . . . . . . . . . . . . . 22
Triple Wheat . . . . . . . . . . . . . . . . . . . . . . . . . . . 24
White . . . . . . . . . . . . . . . . . . . . . . . . . . . . . . . . . 18
100% Whole Wheat . . . . . . . . . . . . . . . . . . . . . . 23
QUICK BREADS AND BAKE
Apple Walnut . . . . . . . . . . . . . . . . . . . . . . . . . . . 34
Banana Chocolate Chip . . . . . . . . . . . . . . . . . . . 36
Banana Nut . . . . . . . . . . . . . . . . . . . . . . . . . . . . 35
Cranberry Nut . . . . . . . . . . . . . . . . . . . . . . . . . . 35
Corn . . . . . . . . . . . . . . . . . . . . . . . . . . . . . . . . . . 35
Date Nut . . . . . . . . . . . . . . . . . . . . . . . . . . . . . . 37
Nut . . . . . . . . . . . . . . . . . . . . . . . . . . . . . . . . . . . 36
Zucchini . . . . . . . . . . . . . . . . . . . . . . . . . . . . . . . 36
DAY OLD BREAD USES
Bread Pudding . . . . . . . . . . . . . . . . . . . . . . . . . . 33
Breaded Pineapple . . . . . . . . . . . . . . . . . . . . . . 33
Crunchy Bread Snacks . . . . . . . . . . . . . . . . . . . . 33
60.
Bread Maker Use and Care Guide
DOUGHS
Almond-Cherry Coffee Cake . . . . . . . . . . . . . . . 48
Bagel . . . . . . . . . . . . . . . . . . . . . . . . . . . . . . . . . 47
Banana Wheat Bagel . . . . . . . . . . . . . . . . . . . . . 47
Buttermilk Roll . . . . . . . . . . . . . . . . . . . . . . . . . 41
Challah Bread . . . . . . . . . . . . . . . . . . . . . . . . . . 45
Cheezy Garlic Roll . . . . . . . . . . . . . . . . . . . . . . . 43
Cinnamon Roll . . . . . . . . . . . . . . . . . . . . . . . . . 49
Creamed Soup Bread Bowl . . . . . . . . . . . . . . . . 52
Dinner Roll . . . . . . . . . . . . . . . . . . . . . . . . . . . . 39
Focaccia Bread . . . . . . . . . . . . . . . . . . . . . . . . . . 40
French Bread . . . . . . . . . . . . . . . . . . . . . . . . . . . 42
Party Dip Bread Bowl . . . . . . . . . . . . . . . . . . . . . 53
Pita Pocket . . . . . . . . . . . . . . . . . . . . . . . . . . . . . 43
Pizza Crust . . . . . . . . . . . . . . . . . . . . . . . . . . . . . 46
Refreshing Roll . . . . . . . . . . . . . . . . . . . . . . . . . 44
Soft Pretzel . . . . . . . . . . . . . . . . . . . . . . . . . . . . . 51
Sticky Breakfast Roll . . . . . . . . . . . . . . . . . . . . . 50
Wheat Dinner Roll . . . . . . . . . . . . . . . . . . . . . . . 41
Whole Wheat Pizza Crust . . . . . . . . . . . . . . . . . . 46
FAST BAKE BREADS
Cheese‘n Onion . . . . . . . . . . . . . . . . . . . . . . . . . 31
Chevre-Cracked Pepper . . . . . . . . . . . . . . . . . . . 30
Cranberry Orange . . . . . . . . . . . . . . . . . . . . . . . 32
Egg . . . . . . . . . . . . . . . . . . . . . . . . . . . . . . . . . . . 30
Italian Herb . . . . . . . . . . . . . . . . . . . . . . . . . . . . 32
Pesto . . . . . . . . . . . . . . . . . . . . . . . . . . . . . . . . . . 30
Potato . . . . . . . . . . . . . . . . . . . . . . . . . . . . . . . . . 31
White . . . . . . . . . . . . . . . . . . . . . . . . . . . . . . . . . 29
TBR15&CAN_IB_4-11-03(New) 11/4/03 3:45 PM Page 61
LIMITED ONE YEAR WARRANTY
Warranty: This Toastmaster® product is warranted to be free from defects in materials or workmanship for a period of (1) year
from the original purchase date. This product warranty covers only the original consumer purchaser of the product.
Warranty Coverage: This warranty is void if the product has been damaged by accident in shipment, unreasonable use, misuse,
neglect, improper service, commercial use, repairs by unauthorized personnel, normal wear and tear, improper assembly,
installation or maintenance abuse or other causes not arising out of defects in materials or workmanship. This warranty is
effective only if the product is purchased and operated in the USA, and does not extend to any units which have been used in
violation of written instructions furnished with the product or to units which have been altered or modified or to damage to
products or parts thereof which have had the serial number removed, altered, defaced or rendered illegible.
Implied Warranties: ANY IMPLIED WARRANTIES WHICH THE PURCHASER MAY HAVE ARE LIMITED IN DURATION TO ONE
(1) YEAR FROM THE DATE OF PURCHASE. Some states do not allow limitations on how long an implied warranty lasts, so the
above limitation may not apply to you.
Warranty Performance: During the above one-year warranty period, a product with a defect will be either repaired or replaced
with a reconditioned comparable model (at our option) when the product is returned to the Repair Center, or the purchase price
refunded. The repaired or replacement product will be in warranty for the balance of the one-year warranty period and an
additional one-month period. No charge will be made for such repair or replacement.
Service and Repair: Should the appliance malfunction, you should first call toll-free 1 (800) 947-3744 between the hours of
9:00 am and 5:00 pm Central Standard Time and ask for CONSUMER SERVICE stating that you are a consumer with a
problem. Please refer to model number TBR15 and TBR15CAN when you call.
In-Warranty Service (USA): For an appliance covered under the warranty period, no charge is made for service or postage.
Call for return authorization (1 800 947-3744).
Out-of Warranty Service: A flat rate charge by model is made for out-of-warranty service. Include $15.00 (U.S.) for return
shipping and handling. We will notify you by mail of the amount of the charge for service and require you to pay in advance
for the repair or replacement.
For Products Purchased in the USA, but Used in Canada: You may return the product insured, packaged with sufficient
protection, and postage and insurance prepaid to the USA address listed below. Please note that all customs duty / brokerage
fees, if any, must be paid by you and we will require you to pay the cost of customs duty / brokerage fees to us in advance of
our performing any service.
Risk During Shipment: We cannot assume responsibility for loss or damage during incoming shipment. For your protection,
carefully package the product for shipment and insure it with the carrier. Be sure to enclose the following items with your
appliance: any accessories related to your problem, your full return address and daytime phone number, a note describing the
problem you experienced, a copy of your sales receipt or other proof of purchase to determine warranty status. C.O.D.
shipments cannot be accepted.
To return the appliance, ship to:
Salton Inc.
Attn: Repair Center
708 South Missouri Street
Macon, MO 63552
Email: [email protected]
www.Toastmaster.com
To contact us, please write to or call:
Salton Inc.
P.O. Box 6916
Columbia, MO 65205-6916
1-800-947-3744
Limitation of Remedies: No representative or person is authorized to assume for us any other liability in connection with the sale
of our products. There shall be no claims for defects or failure of performance or product failure under any theory of tort,
contract or commercial law including, but not limited to negligence, gross negligence, strict liability, breach of warranty and
breach of contract. Repair, replacement or refund shall be the sole remedy of the purchaser under this warranty, and in no
event shall we be liable for any incidental or consequential damages, losses or expenses. Some states do not allow the
exclusion or limitation of incidental or consequential damages, so the above limitation or exclusion may not apply to you.
Legal Rights: This warranty gives you specific legal rights, and you may also have other rights which vary from state to state.
© 2003 Toastmaster Inc.
All Rights Reserved
P/N 61116Rev10/03
Printed in China
61.
TBR15&CAN_IB_4-11-03(New) 11/4/03 3:45 PM Page 62
Keep Dated Sales Receipt for Warranty Service.
Keep this booklet. Record the following for reference:
Date purchased ____________________________________________________________________________
Model number ____________________________________________________________________________
Date code (stamped on bottom)______________________________________________________________
EVERYBODY EATS. It’s a fact of life.
But sometimes preparing
meals can become a chore.
That’s why TOASTMASTER has been invited
into millions of kitchens just like yours
so we can HELP YOU MASTER your
mixing, baking, grilling, toasting,
brewing, heating and serving
tasks WITH EASE AND STYLE.
The TOASTMASTER name stands for a
CELEBRATION of INNOVATION designed
to serve your life and keep you
COOKIN’ IN STYLE.
62.
Bread Maker Use and Care Guide
TBR15&CAN_IB_Cover_4-11-03(New)
4/11/03
14:37
Page 1
Bread Maker
USE AND CARE GUIDE
MODELS TBR15 AND TBR15CAN
• 11
• F ⁄2 Pou
nd
ast
in u Bake ™ Brea
d
• B nde
r 1 Progr Maker
rea
dp
hou am
D
for
• H ough rogram r
fre
a
o
n
sh
• W rizon d Q s inc
bre
l
u
u
a
t
i
ad
a
k
d
c
l
e
k
• 1
i
-ho up to non-s Brea ng W
hol
ur
Kee fresh tick lo d
eW
pW
hea
bre af p
an
t,
ar m ad
Cyc - 13 h
le
our
del
ay t
ime
r
?
Questions
Call toll free 1-800-947-3744
Monday – Friday, 8:00 a.m. - 5:30 p.m. CST
www.toastmaster.com
TBR15 AND TBR15CAN