1
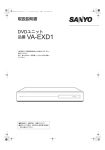
e00_l8hcc_xe_7.book Page 1 Friday, March 11, 2005 7:42 PM External Disc Unit VA-EXD1B VA-EXD1W Instruction manual I About this manual Before installing and using this unit, please read this manual carefully. Be sure to keep it handy for later reference. Acerca de este manual Antes de instalar y usar este aparato, lea detenidamente este manual. Asegúrese de guardarlo a mano para futuras referencias. Über diese Anleitung Lesen Sie bitte diese Bedienungsanleitung vor der Installation und der Verwendung des Gerätes sorgfältig durch. Bewahren Sie die Anleitung zum späteren Nachschlagen auf. Nota su questo manuale Leggere attentamente questo manuale prima di passare all’installazione ed all’uso di questo apparecchio. Conservare il manuale in un posto sicuro per riferimenti futuri. À propos de ce manuel Avant d’installer et d’utiliser cet appareil, veuillez lire ce manuel attentivement. Assurez-vous de le garder à portée de la main pour référence ultérieure. e02_l8hcc_xe_7.fm Page 1 Monday, March 28, 2005 1:16 PM PRECAUTION CAUTION! WARNING: TO REDUCE THE RISK OF FIRE OR ELECTRIC SHOCK, DO NOT EXPOSE THIS APPLIANCE TO RAIN OR OTHER MOISTURE. To avoid electrical shock, do not open the cabinet. Refer servicing to qualified personnel only. If the power supply cord (AC power cord) of this appliance is damaged, it must be replaced. Return to a SANYO Authorised Service Centre for replacement of the cord. THIS PRODUCT UTILIZES A LASER. USE OF CONTROLS OR ADJUSTMENTS OR PERFORMANCE OF PROCEDURES OTHER THAN THOSE SPECIFIED HEREIN MAY RESULT IN HAZARDOUS RADIATION EXPOSURE. DO NOT OPEN COVERS AND DO NOT REPAIR YOURSELF. REFER SERVICING TO QUALIFIED PERSONNEL. Location For EU Users For safe operation and satisfactory performance of your unit, keep the following in mind when selecting a place for its installation: Shield it from direct sunlight and keep it away from sources of intense heat. Avoid dusty or humid places. Avoid places with insufficient ventilation for proper heat dissipation. Do not block the ventilation holes at the top and bottom of the unit. Do not place the unit on a carpet because this will block the ventilation holes. Install the unit in a horizontal position only. Avoid locations subject to strong vibrations. Avoid moving the unit between cold and hot locations. Do not place the unit directly on top of a monitor TV, as this may cause playback or recording problems. Your SANYO product is designed and manufactured with high quality materials and components which can be recycled and reused. This symbol means that electrical and electronic equipment, at their end-of-life, should be disposed of separately from your household waste. Please dispose of this equipment at your local community waste collection/recycling centre. In the European Union there are separate collection systems for used electrical and electronic products. Please help us to conserve the environment we live in! Avoiding Electrical Shock and Fire Do not handle the power cord with wet hands. Do not pull on the power cord when disconnecting it from an AC wall outlet. Grasp it by the plug. If any liquid is spilled on the unit, unplug the power cord immediately and have the unit inspected at a factoryauthorised service centre. Do not place anything directly on top of this unit. SERVICE This unit is a precision instruments and if treated with care, will provide years of satisfactory performance. However, in the event of a problem, the owner is advised not to attempt to make repairs or open the cabinet. Servicing should always be referred to your dealer or Sanyo Authorized Service Centre. CAUTION! Danger of explosion if battery is incorrectly replaced. Replace only with the same or equivalent type recommended by the manufacturer. Discard used batteries according to the manufacture’s instructions. English 1 e00_l8hcc_xe_7.book Page 2 Friday, March 18, 2005 11:34 AM INTRODUCTION Main features CONTENTS Stores recorded images on CD-R/RW and DVD+R/+RW. INTRODUCTION 1 BEFORE USE................................................. 3 Accessories Notes on installation locations......................... 3 Do not put your hand in the disk tray .............. 3 Do not up end the unit..................................... 3 Handling .......................................................... 3 Important recordings ....................................... 3 Optical media .................................................. 3 Do not use warped or cracked disks ............... 3 Disk handling and storage............................... 3 Cleaning the disk............................................. 4 Precautions for the disk................................... 4 Check that you have all the parts shown below. Power cord USB cable 2 NAMES AND FUNCTIONS OF PARTS ......... 5 Front panel ...................................................... 5 Rear panel....................................................... 5 Core clamp (x1) For USB cable OPERATION 1 INSTALLATION AND CONNECTION TO DVR........................................................... 6 Fitting (x1) Screw (x3) Installation ....................................................... 6 Connection ...................................................... 7 2 FORMATTING DISKS .................................... 8 Power cord tie (x3) Formatting CD-RWs and DVD+RWs .............. 8 OTHER Instruction Manual APPENDIX ......................................................... 10 Specifications ................................................ 10 Dimensions ................................................... 10 Copyright z This manual and software are copyrighted by Sanyo Electric Co., Ltd. z Brand and product names used in this manual are the trademarks or registered trademarks of their respective companies. z Except for personal use, copyright law prohibits the use of recorded copyrighted images without the permission of the copyright holder. 2 English e00_l8hcc_xe_7.book Page 3 Friday, March 11, 2005 7:42 PM 1 BEFORE USE Notes on installation locations Optical media Avoid subjecting this unit to sudden impact or vibration. Avoid using it in excessively dusty places. The following precautions should be observed in order to prevent the loss of recorded data: z Do not subject the unit to sudden impact. z Do not use the unit on a vibrating or unstable surface. z Do not use the unit in areas with extreme temperature changes (i.e., 10ºC or more per hour). z Condensation may occur if the unit is moved to an area with a significantly different temperature or high humidity. If the unit is used with condensation inside, operating problems may occur. z The unit has the ventilation holes. Do not block the ventilation holes upon installation. z When installing the unit on a rack, ensure that a gap of at least 5 cm at the sides and 1 cm at the top is provided. z Data recorded on optical disks deteriorates with time depending on storage conditions and the quality of the disk until it is no longer retrievable. For details, read the manual accompanying the disk, or contact the manufacturer. Do not use warped or cracked disks z Do not use warped or cracked disks. Do not use disks repaired with adhesives. Fractured pieces may spray out of the unit causing injury as the disk rotates at high speeds. Do not use disks that have adhesive from tapes or labels on the surface. Disk handling and storage Removing/Inserting the disk from the case Press the center. Do not put your hand in the disk tray Place the disk with the label side up. z This may cause injury. Do not up end the unit z Standing the unit on one end may cause it to topple causing injury or the unit to malfunction. Use the unit in a horizontal position as it is not guaranteed to operate when vertical. Remove the disk without touching the playback side. Handling z When not in use, remove the disk and turn the unit off. z Always remove the disk when carrying the unit. Failure to do so may cause the disk to scratch or the unit to malfunction. Press down. Handling the disk z Do not touch the playback side of the disk. Important recordings z Always perform test recording, and use a computer to confirm whether playback is normal. z Note that Sanyo accepts no responsibility for losses occurring as a result of recording or playback problems caused by malfunction of this unit or any connected devices. English Playback side Storing the disk z Do not store the disk in direct sunlight, high temperatures, high humidity, or dusty environments. z Always place the disk in its case when storing. 3 e00_l8hcc_xe_7.book Page 4 Friday, March 11, 2005 7:42 PM 1 BEFORE USE Cleaning the disk INTRODUCTION z When there are fingerprints or dust on the recording (playback) side of the disk, it may not record properly. Also, image and/or sound quality of playback data may deteriorate. Before recording/playback, remove debris from the disk with a soft cloth by wiping the recording (playback) side outwards from the center. OPERATION Always wipe outwards from the center. z Do not use thinners, benzene, LP cleaners, or static guards as these will damage the disk. z Do not use hairspray or humidifiers near the unit. OTHER Precautions for the disk z Do not adhere paper or stickers to the disk. Do not use disks that have adhesive from tapes or labels on the surface. The disk may become stuck inside the unit and may cause it to malfunction. z Do not use unusually shaped disks (heart-shaped, octagonal, etc.) as these may cause the unit to malfunction. (Unusually shaped disks) z Place the disk in the correct position or else this may cause the disk to scratch or the unit to malfunction. z Scratches, fingerprints, or dust on the disk may prevent it from playing back. z Do not scratch either side of the disk. z Do not bend or flex the disk. z Do not heat the disk. z Even when not played back, the disk is always spinning inside the unit. Therefore, any impact may damage the disk or cause the unit to malfunction. When not in use, remove the disk and disconnect the plug from the wall outlet. 4 English e00_l8hcc_xe_7.book Page 5 Friday, March 11, 2005 7:42 PM 2 NAMES AND FUNCTIONS OF PARTS Front panel 1 2 3 4 5 6 POWER 1. POWER indicator Lights up when the power is on. 4. Access lamp Lights up when the disk is accessed. 2. Microprocessor reset button Resets the microprocessor. 5. Eject button Opens the disk tray. Push the disk tray in to close. 3. Disk tray Inserts CD-R/RWs or DVD+R/+RWs. 6. Emergency eject button Overrides the current process and opens the disk tray. Rear panel 1 2 USB 3 4 2 AC IN ~ MAX100VA 1. USB terminal Socket for the USB cable (accessory) when connecting the external disc unit to the DVR. 3. AC power socket (AC OUT) Socket for the power cord (accessory) when connecting the external disc unit to the DVR. Power is supplied to the DVR. 2. Power cord holder Secure the power cord to the holder using the power cord tie (accessory) as shown in the illustration. 4. AC power socket (AC IN) Socket for the power cord (DVR accessory) when connecting the external disc unit to the wall outlet (Max. 100 VA). English 5 e00_l8hcc_xe_7.book Page 6 Friday, March 11, 2005 7:42 PM 1 INSTALLATION AND CONNECTION TO DVR Installation Call a specialist to install the unit. (Do not try to install the unit yourself.) 3 INTRODUCTION Preparing the DVR Turn the DVR upside down, and use a screwdriver to remove the leg (A). Use the following procedures to attach the external disc unit to the DVR. Docking the unit with the DVR is useful. OPERATION z The external disc unit and the DVR must be off before commencing the following procedures. Preparing the external disc unit 1 (A) Do not lose the four screws as they will be used later. 4 2 Remove the four screws from the sides of the DVR, and remove the cover. Use two screws (accessory) to attach the fitting (accessory) to the external disc unit. Tightening torque: 0.6 N•m - 0.7 N•m z If the HDD is mounted in the slave position, remove the HDD block. Screw Fitting Slave position Front panel side 6 English OTHER Remove the four screws from the top of the external disc unit, and remove the cover. e05_l8hcc_xe_7.fm Page 7 Friday, March 25, 2005 3:48 PM 1 INSTALLATION AND CONNECTION TO DVR Connection Attaching the external disc unit to the DVR 5 Place the DVR on the external disc unit. Use the following procedures to connect the external disc unit to the DVR. (1) Insert the three legs of the DVR into the corresponding holes in the top of the external disk unit. The fitting should be positioned on the outside of the right side of the DVR. 1 Connect the USB cable and two power cords. Use the three power cord ties (accessory) to secure the power cord to the power cord holder. (DVR: one tie, External disc unit: two ties) Power cord (supplied with external disc unit) Fitting Hole Hole (2) Use the remaining screw (accessory) to secure the fitting on to the right side of the DVR. Tightening torque: 0.6 N•m - 0.7 N•m USB cable (supplied with external disc unit) Power cord (supplied with DVR) Attach the core clamp (accessory) to the USB cable near the connection with the DVR. Insert cable all the way so cables are not loose. 2 6 Use the four screws removed in step 1, to secure the DVR from the inside to the external disc unit. When you have finished making all the other connections, make sure the voltage is 120V - 240V AC and then insert the power plug into the wall outlet. There is no power switch. Tightening torque: 0.6 N•m - 0.7 N•m 120 - 240 V AC (50/60 Hz) Screw Screw z If the HDD block was removed in step 4, reattach. Tightening torque: 0.6 N•m - 0.7 N•m 7 Secure the cover on to the DVR using the screws removed in step 4. Tightening torque: 0.6 N•m - 0.7 N•m English 7 e00_l8hcc_xe_7.book Page 8 Friday, March 11, 2005 7:42 PM 2 FORMATTING DISKS 4 Use the following procedures to format CD-RWs and DVD+RWs. Turn the jog dial to select “DISC WRITER”, and then turn the shuttle dial clockwise. The cursor moves to “FORMAT/ERASE START”. Operating the external disc unit 1 Set the CD-RW or DVD+RW in the disk tray. FORMAT/ERASE : DISC WRITER FORMAT/ERASE START -> Operating the DVR (DSR-5016P/5009P) 2 CHANGE:JOG SET:SHUTTLE When the still image on the full screen of the playback is displayed, press the [COPY] button. 5 COPY COPY TO : ARCHIVE AREA UNIT : PICTURES AUDIO : OFF HOW MANY : 1 COPY START -> Turn the shuttle dial clockwise. The <WARNING> screen is displayed. <WARNING> FORMAT : DISC WRITER TYPE : CD-RW VOLUME : 650MB FORMAT/ERASE : COMPACT FLASH FORMAT/ERASE START -> CHANGE:JOG SET:SHUTTLE STORED DATA ON THE DISC WRITER WILL BE ERASED ! FORMAT START Turn the jog dial to select “FORMAT/ ERASE”, and then turn the shuttle dial clockwise. 6 “COMPACT FLASH” flashes. -> Turn the jog dial to select “FORMAT START”, and then turn the shuttle dial clockwise. COPY TO : ARCHIVE AREA UNIT : PICTURES AUDIO : OFF HOW MANY : 1 COPY START -> FORMAT DISC WRITER ! FORMAT/ERASE : COMPACT FLASH FORMAT/ERASE START -> CHANGE:JOG SET:SHUTTLE 8 English OTHER z “FORMAT/ERASE” cannot be selected when the external disc unit is not connected. The COPY indicator on the DVR lights up and the copy setting screen is displayed. 3 OPERATION COPY TO : ARCHIVE AREA UNIT : PICTURES AUDIO : OFF HOW MANY : 1 COPY START -> INTRODUCTION Formatting CD-RWs and DVD+RWs e00_l8hcc_xe_7.book Page 9 Friday, March 11, 2005 7:42 PM 2 FORMATTING DISKS Operating the DVR (DSR-3716P/3709P) 2 When the still image on the full screen of the playback is displayed, press the [COPY] button. The COPY indicator on the DVR lights up and the copy setting screen is displayed. COPY COPY TO : HOW MANY: START ARCHIVE AREA 1 PICTURES -> FORMAT : COMPACT FLASH FORMAT START -> CHANGE:JOG SET:SHUTTLE 3 Select the media for “FORMAT”, and then execute “FORMAT START”. CD-RW formatting starts. COPY TO : HOW MANY: START ARCHIVE AREA 1 PICTURES -> FORMAT : DISC WRITER FORMAT START -> CHANGE:JOG SET:SHUTTLE z The USB terminal is for the use of the recommended Sanyo CD-R/RW drive (sold separately). Nonrecommended peripherals cannot be connected. z For recommended recordable drives, check the Sanyo homepage or ask at your local Sanyo dealer. Sanyo website URL: http://www.sanyosecurity.com English 9 e06_l8hcc_xe_7.fm Page 10 Friday, March 25, 2005 3:59 PM APPENDIX Product name External disc unit Product number VA-EXD1B/W Slim type Recording format ISO9660 Supported media DVD+R/+RW (VA-EXD1B only) and CD-R/RW Terminals USB terminal (USB2.0, series B terminal) (x1) Power supply voltage 120 to 240V AC, 50/60 Hz OPERATION Disk drive INTRODUCTION Specifications 1000 mA Allowable operating temperature 5 - 40ºC Allowable operating humidity 10 - 80% Dimensions 420 (W) x 54 (H) x 329.5 (D) mm Weight 3.9 kg Accessories Power cord (x1), USB cable (x1), Core clamp (x1), Fitting (x1), Screws (x3), Power cord tie (x3), Instruction manual (x1) OTHER Current consumption Note that product appearance and specifications are subject to change without prior notice. Dimensions Units: mm 420 10 54 329.5 10 English e00_l8hcc_xe_7.book Page 11 Friday, March 11, 2005 7:42 PM