1
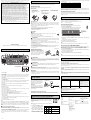
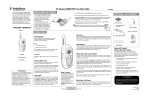
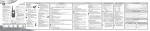
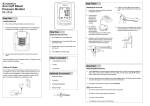
ES
CK-480 32-Mini Key Keyboard
Teclado de 32 miniteclas CK-480
42-4070
USER S GUIDE
USER’S
GUÍA
GU
A DEL USUARIO
bl Built-in speakers
bm PHONES/OUTPUT jack
For connection of optional headphones, audio amplifier or keyboard amplifier. Connecting headphones
automatically cuts speaker output.
bn AC adaptor jack
For connection of optional AC adaptor.
NOTE
A click (which is actually the Tone “TYPEWRITER”) sounds whenever you press the VOLUME buttons, TEMPO
buttons, PATTERN SELECT button, or TONE select buttons. This sound helps you confirm that your entry was
properly registered. In the case of the VOLUME and TEMPO buttons, if you press a button and the click does not
sound, it means that the setting is already at its minimum or maximum.
1. Set the POWER switch to the ON position. At
this time “PIANO” (No. 00) is selected
automatically.
* The selected demonstration tune is played in an endless loop. Press one of the DEMO buttons again, or the
STOP button to stop the tune.
* You cannot use the keyboard and adjust the tempo while the demonstration tune is playing.
* You can adjust the level of volume but a click (Typewriter sound) doesn’t sound.
Set/Press
Selected tone
1
2. Press TONE select buttons “3” and then “6”
to select “JAZZ GUITAR”.
No. 00
PIANO
2
3. Press TONE select buttons “0” and then “6”
to select “PIPE ORGAN”.
No. 36
JAZZ GUITAR
3
No. 06
PIPE ORGAN
* You can also change the selected tone by pressing only one TONE select button. Note the following:
Selected tone
Press
Newly selected tone
No. 36
0
No. 60
No. 60
6
No. 06
No. 06
1
No. 61
● Playing the Demonstration Tunes
Five different demonstration tunes showcase all of the characteristic features and functions of the keyboard. Simply
press one of the DEMO buttons 6, and listen to the keyboard play.
Step
NOTE
Some Tone Bank selections split the keyboard and assign two or four sounds to keyboard. Then, the sound
produced depends on what position of the keyboard you play. For example, BASS/PIANO puts BASS on the left
and PIANO on the right of the keyboard.
Using the Percussion Pads
Your keyboard has a total of 5 percussion pads that let you add unique fill-ins and accents to your performance.
Preset percussion sounds can be triggered by simply tapping the pads with your finger(s).
Power Supply
CK480-ES-1 MA0405-A Printed in China
Be sure to read this User’s Guide and keep it on hand for future reference. Parents or guardians should make sure that young
children using this instrument are familiar with the contents of this User’s Guide.
The two-way power supply of this keyboard lets you use either batteries or household AC power. Always be sure to
turn off power whenever you are not using the keyboard.
Battery Power
Your keyboard has 32 built-in accompaniment patterns, 19 rhythm patterns and 13 FREE SESSION/FUNNY patterns.
Be sure to turn keyboard power off before loading batteries.
Battery Replacement
GUIDELINES LAID DOWN BY FCC RULES FOR USE OF THE UNIT IN THE U.S.A. (not applicable to other areas)
NOTICE
This equipment has been tested and found to comply with the limits for a Class B digital device, pursuant to Part 15 of the
FCC Rules. These limits are designed to provide reasonable protection against harmful interference in a residential
installation. This equipment generates, uses and can radiate radio frequency energy and, if not installed and used in
accordance with the instructions, may cause harmful interference to radio communications. However, there is no guarantee
that interference will not occur in a particular installation. If this equipment does cause harmful interference to radio or
television reception, which can be determined by turning the equipment off and on, the user is encouraged to try to correct
the interference by one or more of the following measures:
• Reorient or relocate the receiving antenna.
• Increase the separation between the equipment and receiver.
• Connect the equipment into an outlet on a circuit different from that to which the receiver is connected.
• Consult the dealer or an experienced radio/TV technician for help.
1. Remove the battery
compartment cover by sliding it
in the direction of the arrow.
Playing Patterns
2. Load 5 AA-size batteries into
the battery compartment.
3. Replace the battery
compartment cover.
• Make sure that the positive (+)
and negative (–) ends are
facing correctly.
RHYTHM:
Percussion instrument rhythm patterns
FREE SESSION: Automatic chord progressions to match rhythms
FUNNY:
Unique sound effects
Using auto-rhythms
There are 19 preset rhythm patterns to choose from.
1. Press the PATTERN SELECT button.
2. Press one of the white keyboard keys. The auto-rhythm pattern labeled above the white key
immediately starts to play.
FREE SESSION/FUNNY select
keys (Black keyboard keys)
FCC WARNING
Changes or modifications not expressly approved by the party responsible for compliance could void the user’s authority
to operate the equipment.
Battery Life
Approximately 12 hours with alkaline batteries (normal temperature and low volume setting). Note that battery life
can be shortened by playing at high volume or by very cold temperatures.
Any of the symptoms listed below can indicate that battery power is too low. Replace batteries as soon as possible
whenever you experience any of the following.
•
•
•
•
•
3. Adjust the tempo using the TEMPO buttons. Each press of ▲ speeds up the tempo, while pressing ▼ slows
it down.
Distorted sound
Sudden output of sound when no keyboard key is pressed
Output of a tone different from the one that is selected
Abnormal rhythm pattern and demo tune play
Sudden loss of sound output
• You can set the tempo level to one of 16 steps.
4. Play along with the selected rhythm pattern.
5. Press the STOP button to stop the auto-rhythm.
DANGER
Alkaline Batteries
Perform the following steps immediately if fluid leaking from alkaline batteries ever gets into your eyes.
1.Do not rub your eyes! Rinse them with water.
2.Contact your physician immediately.
Leaving alkaline battery fluid in your eyes can lead to loss of sight.
Limited One-Year Warranty
This product is warranted by RadioShack against manufacturing defects in material and workman-ship under normal use
for one (1) year from the date of purchase from RadioShack company-owned stores and authorized RadioShack
franchisees and dealers. EXCEPT AS PROVIDED HEREIN, Ra-dioShack MAKES NO EXPRESS WARRANTIES AND ANY
IMPLIED WARRANTIES, INCLUDING THOSE OF MERCHANTABILITY AND FITNESS FOR A PARTICULAR PURPOSE,
ARE LIMITED IN DURATION TO THE DURATION OF THE WRITTEN LIMITED WARRANTIES CONTAINED HEREIN.
EXCEPT AS PROVIDED HEREIN, RadioShack SHALL HAVE NO LIABILITY OR RE-SPONSIBILITY TO CUSTOMER OR
ANY OTHER PERSON OR ENTITY WITH RESPECT TO ANY LIABILITY, LOSS OR DAMAGE CAUSED DIRECTLY OR
INDIRECTLY BY USE OR PERFOR-MANCE OF THE PRODUCT OR ARISING OUT OF ANY BREACH OF THIS
WARRANTY, IN-CLUDING, BUT NOT LIMITED TO, ANY DAMAGES RESULTING FROM INCONVENIENCE, LOSS OF
TIME, DATA, PROPERTY, REVENUE, OR PROFIT OR ANY INDIRECT, SPECIAL, INCIDEN-TAL, OR CONSEQUENTIAL
DAMAGES, EVEN IF RadioShack HAS BEEN ADVISED OF THE POSSIBILITY OF SUCH DAMAGES.
Some states do not allow limitations on how long an implied warranty lasts or the exclusion or limita-tion of incidental or
consequential damages, so the above limitations or exclusions may not apply to you.
In the event of a product defect during the warranty period, take the product and the RadioShack sales receipt as proof
of purchase date to any RadioShack store. RadioShack will, at its option, un-less otherwise provided by law: (a) correct the
defect by product repair without charge for parts and labor; (b) replace the product with one of the same or similar design;
or (c) refund the purchase price. All replaced parts and products, and products on which a refund is made, become the
property of RadioShack. New or reconditioned parts and products may be used in the performance of warranty service.
Repaired or replaced parts and products are warranted for the remainder of the original warranty period. You will be charged
for repair or replacement of the product made after the expiration of the warranty period.
This warranty does not cover: (a) damage or failure caused by or attributable to acts of God, abuse, accident, misuse,
improper or abnormal usage, failure to follow instructions, improper installation or maintenance, alteration, lightning or other
incidence of excess voltage or current; (b) any repairs other than those provided by a RadioShack Authorized Service
Facility; (c) consumables such as fuses or batteries; (d) cosmetic damage; (e) transportation, shipping or insurance costs;
or (f) costs of product removal, installation, set-up service adjustment or reinstallation.
This warranty gives you specific legal rights, and you may also have other rights which vary from state to state.
RadioShack Customer Relations, 200 Taylor Street, 6th Floor, Fort Worth, TX 76102
12/99
CAUTION!
Misuse of batteries can cause them to burst and leak fluid, creating the danger of personal injury, or damage to or
discoloration of clothing, furniture, etc. Be sure to note the following important precautions whenever handling
batteries.
• Make sure that the (+) and (–) ends of the batteries are facing as indicated by the markings on the keyboard.
• Be sure to remove batteries from the keyboard whenever you do not plan to use it for a long time, such as before
going on a trip, etc.
• Never mix batteries of different types.
• Never mix old batteries with new ones.
• Never dispose of batteries by burning them. Never allow the (+) and (–) ends of batteries to become connected
to each other, do not try to take batteries apart, and do not expose batteries to heat.
• Remove batteries from the keyboard immediately after they show signs of losing power.
• Never recharge batteries.
AC Power
AC Adaptor
All Rights Reserved.
RadioShack and RadioShack.com are registered trademarks used by RadioShack Corporation.
12 3
45
7
• You must use a class 2 AC power source that supplies 7.5V DC and delivers at least 300 mA. Its center tip must
be set to negative and its plug must fit the keyboard’s DC 7.5V jack. Using an adaptor that does not meet these
specifications could damage the keyboard or the adaptor.
8
1. Press the PATTERN SELECT button.
2. Press one of the black keyboard keys, and the FREE SESSION/FUNNY pattern labeled above the black key
immediately starts to play.
3. Play along with the selected pattern.
4. Press the STOP button to stop the FREE SESSION/FUNNY play.
NOTE
You can change the FREE SESSION/FUNNY pattern while it is playing by repeating steps 1. and 2. above.
Care of your keyboard
This instrument can cause video or audio interference with TV and radio reception. If this happens, move the
instrument away from the TV or radio.
CAUTION!
6
“FREE SESSION/FUNNY” patterns back up your melodies with full chord progressions, arpeggio patterns, sound
effects and more! There are 13 to choose from, including such standard fare as ROCK, LATIN & POP, and more
exotic patterns like ORIENT, NEW AGE MUSIC and FANFARE.
Do not use near a TV or radio.
Household power outlet
• Key, button, and other names are indicated in the text of this manual using bold type.
Using “FREE SESSION/FUNNY” patterns
Do not overexpose the instrument to direct sunlight, or place it near an air conditioner, or in any extremely hot place.
Back
Guide to each part
NOTE
You can change the auto-rhythm while it is playing by repeating steps 1. and 2. above.
Avoid heat, humidity or direct sunlight.
To power the keyboard from an AC outlet, you need
an AC adaptor and a size M AdaptaplugTM (neither
supplied, available at your local RadioShack store
or online www.RadioShack.com).
© 2004 RadioShack Corporation.
RHYTHM select keys (White keyboard keys)
WARNING!
• Take care to avoid damage to the power cord. Never place heavy objects on the cord and keep it away from heat.
A damaged power cord creates the danger of fire and electrical shock.
CAUTION!
• Always unplug the AC adaptor from the power outlet if you do not plan to use the keyboard for a long time, such
as when leaving on a trip, etc.
• When not using the keyboard, turn off power and unplug the AC adaptor from the power outlet.
Do not use lacquer, thinner or similar chemicals for cleaning.
Clean the keyboard with a soft cloth dampened in a weak solution of water and a neutral detergent. Soak the cloth
in the solution and squeeze until it is almost dry.
NOTE
You may notice lines in the finish of the case of this keyboard. These lines are a result of the molding process used
to shape the plastic of the case. They are not cracks or breaks in the plastic, and are no cause for concern.
Troubleshooting
Problem
No sound
Possible Cause
1. Power supply problem
IMPORTANT!
• Be sure that keyboard power is turned off before connecting or disconnecting the AC adaptor to it.
• The AC adaptor may become warm to the touch after long-term use. This is normal and does not indicate
malfunction.
bl
9
bk
Any of the following symptoms while
batteries are being used.
bl
Connecting Headphones or an External Music
Amplifier
<Back panel>
bm
bn
1 POWER switch
2 VOLUME buttons
Used to adjust the level of the volume. Pressing ▲ increases the volume of the sound, while ▼ decreases
volume. Volume can be set to one of 5 levels. This function does not operate while a sound is being produced.
(Volume is set to its maximum level when power is switched ON.)
3 TEMPO buttons
Press to adjust the tempo of an auto-rhythm or a FREE SESSION/FUNNY pattern.
4 PATTERN SELECT button
Used when selecting one of the 19 auto-rhythms and the 13 FREE SESSION/FUNNY patterns. Press this button
first, and then choose a rhythm or pattern by pressing a keyboard key.
5 STOP button
Press to stop an auto-rhythm, a FREE SESSION/FUNNY pattern or demonstration tune.
6 DEMO buttons
Press these buttons to hear preset demonstration tunes.
7 Percussion pads
8 TONE select buttons
Press to select from among the 100 preset tones, which include instrumental sounds, percussion sounds and
effect sounds.
9 RHYTHM select keys (White keyboard keys)
Press to select an auto-rhythm after pressing the select button.
bk FREE SESSION/FUNNY select keys (Black keyboard keys)
Press to select a FREE SESSION/FUNNY pattern after pressing the select button.
321U-E-001A
2. Headphones connected to the
keyboard.
PREPARATION
Set the volume level low before connecting
headphones or an external amplifier. This
protects against possible hearing damage due
to sudden loud-volume output.
•
•
•
•
•
Dead batteries
Action
1. Check the following points.
• Make sure the (+) and (–) ends of
batteries are facing correctly.
• Check for dead batteries.
• Make sure the AC adaptor is connected
correctly.
2. Disconnect the headphones from the
keyboard.
Replace batteries with new ones or change
to AC power.
Distorted sound
Sudden output of sound when no keyboard key is pressed
Output of a tone different from the one that is selected
Incorrect play of patterns or built-in tunes
Sudden loss of sound output
Headphone
PHONES/OUTPUT jack
Specifications
Headphones
Keyboard:
32 keys, 2.5 octaves (mini-size)
Connecting headphones cuts off output from the
speakers, so you can play without disturbing those
around you, even late at night. Be sure to use
headphones that have a mini plug.
Polyphony:
4 notes maximum
Tones:
100
Patterns:
• RHYTHM: 19
• FREE SESSION/FUNNY: 13
Demo tunes:
10
Tuning:
Fixed; A4 = approx. 442Hz
Speakers:
I/O Terminals:
Mini plug
Music amplifier, audio
equipment, etc.
Music amplifier, audio equipment, etc.
It is up to you to provide a commercially available cord to connect to a music amplifier or other external
equipment. Make sure the cord you use has a mini plug on the end you connect to this keyboard.
Using preset tones
There are 100 preset tones to choose from. Each tone has a 2-digit number. To select
a preset tone, find its preset tone number on the keyboard’s top panel, and enter the
number using the TONE select buttons.
* “PIANO” tone (No. 00) is selected automatically whenever you switch the power of
the keyboard ON.
Example: To select “PIPE ORGAN” (No. 06) after selecting “JAZZ GUITAR” (No. 36).
Power Supply: Two-way
• Five AA-size batteries
Battery Life: Approximately 12 hours on
alkaline batteries
• AC Adaptor
Power Consumption: 7.5V
1.6W
Dimensions:
61.8(W) x 17.6(D) x 6.0(H) cm
(24 3/8 x 6 15/16 x 2 3/8 inch)
Two; Ø8.0cm (output: 0.5W + 0.5W)
Weight:
Approximately 1.2kg(2.6lbs) (without batteries)
• Power Supply: DC 7.5V jack
• Headphones/Output: Stereo mini jack
(Output is monaural)
(output impedance: 100 Ω,
output voltage: 2.0V (RMS) MAX)
• Design and specifications are subject to change without notice.
Asegúrese de leer esta guía del usuario y guardarla para tenerla como referencia futura. Los padres o tutores deben asegurarse
de que los niños que usan este instrumento se familiaricen con los contenidos de la guía del usuario.
Garantía limitada de un año
Este producto está garantizado por RadioShack contra defectos de fabricación en el material y mano de obra bajo
condiciones normales de uso durante un (1) año a partir de la fecha de compra en tiendas propiedad de la empresa
RadioShack, franquicias y distribuidores autorizados de RadioShack. EXCEPTUANDO LO AQUÍ ESTABLECIDO,
RadioShack NO OFRECE GARANTÍAS EXPLÍCITAS Y LAS GARANTÍAS IMPLÍCITAS, INCLUYENDO LA GARANTÍA
DE QUE EL PRODUCTO PODRÁ SER COMERCIALIZADO Y QUE ES ADECUADO PARA UN FIN ESPECÍFICO,
TIENEN UNA DURACIÓN LIMITADA AL PERÍODO DE VIGENCIA DE LAS GARANTÍAS LIMITADAS AQUÍ
EXPUESTAS POR ESCRITO. EXCEPTUANDO LO AQUÍ ESTABLECIDO, RadioShack NO TENDRÁ
RESPONSABILIDAD NI OBLIGACIÓN ALGUNA HACIA EL CLIENTE U OTRA PERSONA O ENTIDAD CON
RESPECTO A LAS RESPONSABILIDADES, PÉRDIDAS O DAÑOS CAUSADOS DIRECTA O INDIRECTAMENTE POR
EL USO U OPERACIÓN DEL PRODUCTO O RESULTANTES DE UNA VIOLACIÓN DE ESTA GARANTÍA,
INCLUYENDO PERO SIN LIMITARSE A, DAÑOS CAUSADOS POR INCONVENIENCIA, PÉRDIDA DE TIEMPO,
DATOS, BIENES, INGRESOS O GANANCIAS, O DAÑOS INDIRECTOS, ESPECIALES, INCIDENTALES O
CONSECUENCIALES, AÚN SI SE HA NOTIFICADO A RadioShack DE LA POSIBILIDAD DE TALES DAÑOS.
Algunos estados no permiten limitantes a la duración de una garantía implícita ni la exclusión o limitación de los daños
incidentales o consecuenciales, por lo que es posible que las limitaciones o exclusiones mencionadas más arriba
puedan no ser de aplicación.
En caso de defecto del producto durante el período de garantía, lleve el producto y el recibo de compra que sirve
de comprobante de la fecha de compra a cualquier tienda RadioShack. Salvo si la ley dispone lo contrario,
RadioShack a su opción: (a) corregirá el defecto reparando el producto sin cargo alguno por componentes y mano
de obra; (b) reemplazará el producto por otro igual o de características similares; o (c) reembolsará el precio de
compra. Todos los productos y componentes reemplazados, así como los productos cuyo costo es reembolsado,
pasan a ser propiedad de RadioShack. Pueden utilizarse componentes y productos nuevos o reacondicionados para
llevar a cabo el servicio de garantía. Los componentes y productos reparados o reemplazados están garantizados
por el período remanente de la garantía original. La reparación o sustitución del producto no serán gratuitas después
de la expiración del período de garantía.
Esta garantía no cubre: (a) daños o averías causadas por o atribuibles a causa fortuita, abuso, accidente, mal uso,
uso anormal o impropio, falta de atención a las instrucciones, instalación o mantenimiento impropio, alteración, caída
de rayos u otra incidencia de excesivo voltaje o corriente; (b) reparaciones no efectuadas por un taller autorizado por
RadioShack; (c) consumibles tales como fusibles o pilas; (d) daños a la apariencia; (e) costos de transporte, envío o
seguro; o (f) costos de recogida, instalación, servicio de ajuste o reinstalación.
Esta garantía le otorga derechos legales específicos, si bien también puede tener otros derechos que varían de un
estado a otro. La traducción al español se provee solamente para su conveniencia. En caso de discrepancias entre las
versiones en inglés y en español, prevalecerá la versión en inglés.
RadioShack Customer Relations, 200 Taylor Street, 6th Floor, Fort Worth, TX 76102
12/99
* También puede cambiar el sonido seleccionado presionando solamente un solo botón de selección TONE.
Observe lo siguiente:
Fuente de alimentación
Sonido seleccionado
Presione
Sonido nuevo seleccionado
Los dos modos del suministro de alimentación de este teclado le permiten usar pilas o la alimentación de CA de
línea normal. Asegúrese siempre de desactivar la alimentación cuando no utilice el teclado.
No. 36
0
No. 60
No. 60
6
No. 06
Alimentación por pilas
No. 06
1
No. 61
Asegúrese de desactivar la alimentación del teclado antes de colocar las pilas.
Cambio de pilas
1. Retire la cubierta del
compartimiento de pilas
deslizándola en la dirección de
la flecha.
2. Coloque las 5 pilas de tamaño
AA en el compartimiento de
pilas.
3. Vuelva a colocar la cubierta
del compartimiento de pilas.
• Asegúrese de que los polos
positivo (+) y negativo (–) se
orientan correctamente.
NOTA
Algunas selecciones del banco de sonido dividen el teclado y asignan dos o cuatro sonidos al teclado. Entonces,
el sonido producido depende en la posición del teclado en la que se ejecuta. Por ejemplo, BASS/PIANO coloca
BASS sobre la izquierda y PIANO sobre la derecha del teclado.
Uso de los pulsadores de percusión
Su teclado tiene un total de 5 pulsadores de percusión que le permiten agregar rellenos y acentos originales a sus
ejecuciones. Los sonidos de percusión programados pueden ser activados mediante un simple golpecito a los
pulsadores con sus dedos.
Ejecutando los patrones
El teclado tiene 32 patrones de acompañamiento, 19 patrones de ritmo y 13 patrones FREE SESSION/FUNNY.
Duración de pilas
Aproximadamente 12 horas con las pilas alcalinas (temperatura normal y ajuste de volumen bajo). Tenga en
cuenta que la duración de las pilas puede acortarse cuando se ejecuta en altos volúmenes o en temperaturas muy
bajas.
Cualquiera de los síntomas siguientes puede indicar que la alimentación mediante pilas está muy baja. Cambie
las pilas tan pronto como sea posible cuando observe lo siguiente.
•
•
•
•
•
RHYTHM:
Patrones de ritmo de instrumentos de percusión.
FREE SESSION: Progresiones de acordes automáticos para adecuarse a los ritmos.
FUNNY:
Efectos de sonidos únicos.
Uso de los ritmos automáticos
Se pueden seleccionar desde los 19 patrones de ritmo automático existentes.
1. Presione el botón PATTERN SELECT.
Sonido distorsionado.
Generación repentina de sonido aun cuando no se presiona ninguna tecla del teclado.
Generación de un sonido diferente al sonido seleccionado.
Ejecución anormal de melodía de demostración y patrón de ritmo.
Pérdida repentina de salida del sonido.
2. Presione una de las teclas del teclado blanco. Y el patrón de ritmo automático
rotulado sobre la tecla blanca inmediatamente comienza a ejecutarse.
Teclas de selección
FREE SESSION/FUNNY
(Teclas negras del
teclado)
PELIGRO
Pilas alcalinas
Si el fluido que fuga de las pilas alcalinas llega a ponerse en contacto con sus ojos, realice los pasos
siguientes:
1.¡No frote sus ojos! Enjuague con agua.
2.Comuníquese con su médico inmediatamente.
Dejando el fluido de pilas alcalinas en sus ojos puede ocasionar la pérdida de su vista.
¡PRECAUCION!
Una mala manipulación de las pilas puede ocasionar que exploten o tengan fugas del electrólito lo cual puede
ocasionar el peligro de lesiones personales, daños o decoloración de ropa, muebles, etc. Siempre que manipule
las pilas asegúrese de tener en cuenta las precauciones siguientes.
• Asegúrese de que los polos (+) y (–) de las pilas se orientan de acuerdo a las marcas en el teclado.
• Asegúrese de retirar las pilas del teclado siempre que no lo vaya a usar por un largo tiempo, tal como cuando
se va de viaje, etc.
• No mezcle pilas de diferentes tipos.
• No mezcle pilas usadas con pilas nuevas.
• No descarte las pilas ni las queme. No permita que los polos (+) y (–) de las pilas se pongan en contacto uno con
otro, ni trate de desarmar las pilas, ni tampoco las exponga al calor.
• Retire las pilas del teclado inmediatamente luego de que muestren signos de pérdida de potencia.
• No recargue las pilas.
© 2004 RadioShack Corporation.
Todos los derechos reservados.
RadioShack y RadioShack.com son marcas comerciales empleadas por RadioShack Corporation.
Alimentación mediante CA
Guía de cada parte
• Los nombres de las teclas, botones y otros nombres se indican en el texto de este manual impresos en negrita.
12 3
45
6
7
8
Adaptador de CA
• Debe disponer de un adaptador de corr. alt. / corr. cont. que suministre 7,5 voltios y por lo menos 300 mA de
corriente continua (C.C.). La punta del centro debe estar puesta en negativo y la clavija debe ser la adecuada
para el enchufe de corriente continua del teclado. Si se emplea un adaptador que no satisfaga estas
especificaciones, podrí dañarse el teclado o el adaptador.
• Tenga cuidado para evitar daños al cable de alimentación. No coloque objetos pesados sobre el cable y manténgalo
alejado del calor. Un cable de alimentación dañado crea el peligro de incendios y descargas eléctricas.
¡PRECAUCION!
<Panel posterior>
• Desenchufe siempre el adaptador de CA del tomacorriente de CA si no va a usar el teclado durante un largo
periodo de tiempo, tal como cuando se va de viaje, etc.
• Cuando no utilice el teclado, desactive la alimentación y desenchufe el adaptador de CA desde el tomacorriente.
bm
bn
1 Interruptor POWER
2 Botones VOLUME
Se usan para ajustar el nivel del volumen. Presionando ▲ aumenta el volumen del sonido, mientras ▼
disminuye el volumen. El volumen puede ajustarse a uno de los 5 niveles. Esta función no opera mientras se
está produciendo un sonido. (El volumen se ajusta a su nivel máximo cuando se enciende la unidad.)
3 Botones TEMPO
Presione para ajustar el tempo de un ritmo automático o un patrón FREE SESSION/FUNNY.
4 Botón PATTERN SELECT
Se usa cuando se selecciona uno de los 19 ritmos automáticos y los 13 patrones FREE SESSION/FUNNY.
Primero presione este botón, y luego elija un ritmo o patrón presionando una tecla en el teclado.
5 Botón STOP
Presione para detener un ritmo automático, un patrón FREE SESSION/FUNNY o melodía de demostración.
6 Botones DEMO
Presione estos botones para escuchar las melodías de demostración programadas.
7 Pulsadores de percusión
8 Botones de selección TONE
Presione para seleccionar entre los 100 sonidos programados, que incluyen sonidos de instrumentos, sonidos
de percusión y sonidos de efectos.
9 Teclas de selección RHYTHM (Teclas blancas del teclado)
Presione para seleccionar un ritmo automático luego de presionar el botón selector.
bk Teclas de selección FREE SESSION/FUNNY (Teclas negras del teclado)
Presione para seleccionar el patrón FREE SESSION/FUNNY luego de presionar el botón de selección.
¡IMPORTANTE!
• Asegúrese de que la alimentación del teclado está desactivada antes de conectar o desconectar el adaptador
de CA al teclado.
• El adaptador de CA puede llegar a calentarse luego de un largo tiempo de uso. Esto es normal y no indica
ninguna falla de funcionamiento.
Conectando un auricular o un amplificador de
sonido externo
bn Toma de adaptador de CA
Para la conexión del adaptador de CA opcional.
NOTA
Siempre que se presionan los botones VOLUME, botones TEMPO, botón PATTERN SELECT, o botones de
selección TONE, suena un ruido metálico (que realmente es el sonido “TYPEWRITER”). Este sonido ayuda a
confirmar que su ingreso ha sido adecuadamente registrado. En el caso de los botones TEMPO y VOLUME, si
presiona un botón y no se escucha el sonido metálico, significa que el ajuste se encuentra en su mínimo o
máximo.
● Ejecución de las melodías de demostración
Cinco melodías diferentes de demostración muestran todas las características y funciones del teclado. Simplemente
presione uno de los botones DEMO 6, y escuche la ejecución del teclado.
* La melodía de demostración seleccionada se ejecuta en un ciclo sin fin. Para parar la melodía, presione
nuevamente una de los botones DEMO o el botón STOP.
* No puede usarse el teclado y ajustar el tempo mientras se está ejecutando la melodía de demostración.
* El nivel de volumen puede ajustarse pero no se escuchará el ruido metálico (sonido “TYPEWRITER” (máquina
de escribir)).
321U-E-002A
Uso de los patrones “FREE SESSION/FUNNY”
Los patrones “FREE SESSION/FUNNY” hacen de fondo a sus melodías con progresiones de acordes completos,
patrones de arpegio, ¡efectos de sonido y aun más! Hay 13 para elegir, incluyendo tales patrones estándares como
ROCK, LATIN y POP, y los patrones más exóticos semejante a ORIENT, NEW AGE MUSIC y FANFARE.
1. Presione el botón PATTERN SELECT.
NOTA
Puede cambiarse el patrón FREE SESSION/FUNNY mientras se está ejecutando, repitiendo los pasos 1. y 2. anteriores.
Cuidado de su teclado
Evite el calor, la humedad y los rayos solares directos.
No utilice el instrumento cerca de una radio o TV.
Este instrumento puede ocasionar interferencias de video o audio en la recepción de TV o radio. Si esto ocurre,
aleje el instrumento del TV o radio.
No limpie el instrumento con líquidos disolventes de lacas ni agentes químicos
similares.
Limpie con un paño limpio humedecido en una solución suave de agua y detergente neutro. Humedezca el paño
en la solución y estrújelo hasta dejarlo casi seco.
NOTA
Se pueden observar líneas en el acabado de la caja de este teclado. Estas líneas son un resultado de un proceso
de moldeo usado para dar forma al plástico de la caja. No son grietas ni fisuras en el plástico, por lo tanto no deben
ser motivos de preocupación.
Solución de problemas
Problema
PREPARACION
Ajuste a un nivel de volumen bajo antes de conectar
los auriculares o un amplificador externo. Esto
protege contra posibles daños al oído debido a una
repentina generación de un volumen sonoro.
Auricular
Sin sonido
Causa posible
Acción
1. Problema de fuente de alimentación.
1. Compruebe los puntos siguientes.
• Compruebe que los polos positivo (+)
y negativo (–) de las pilas se orientan
correctamente.
• Compruebe para ver si las pilas están
agotadas.
• Compruebe que el adaptador de CA se
encuentra conectado correctamente.
2. Desconecte los auriculares del teclado.
Toma PHONES/OUTPUT
Auriculares
2. Auriculares conectados al teclado.
Conectando auriculares corta la generación de
sonido desde los altavoces, de modo que puede
tocar sin molestar a sus vecinos, aun tarde durante
la noche. Cerciórese de usar auriculares que
tengan una minitoma.
Minitoma
Amplificador de sonido,
equipo de audio, etc.
Cualquiera de los síntomas siguientes
mientras se están usando las pilas.
•
•
•
•
•
Amplificador de sonido, equipo de audio, etc.
Pilas agotadas
Cambie las pilas usadas por pilas nuevas
o cambie a la alimentación de CA.
Sonido distorsionado.
Generación repentina de sonido aun cuando no se presiona ninguna tecla del teclado.
Generación de un sonido diferente al sonido seleccionado.
Ejecución incorrecta de patrones o melodías incorporadas.
Pérdida repentina del sonido.
También puede usar un cable disponible comercialmente para conectar a un amplificador de sonido u otro equipo
externo. Cerciórese de que el cable que usa tenga una minitoma en el extremo que conecta a este teclado.
Especificaciones
bl Altavoces incorporados
bm Toma PHONES/OUTPUT
Para la conexión de auriculares opcionales, amplificador de audio o amplificador de teclado. La conexión de
los auriculares automáticamente corta la salida del altavoz.
NOTA
Puede cambiarse el ritmo automático mientras se está ejecutando, repitiendo los pasos 1. y 2. anteriores.
No exponga el instrumento a los rayos solares directos, ni lo coloque cerca de un acondicionador de aire, o en
áreas sujetas a altas temperaturas.
¡ADVERTENCIA!
bl
5. Para detener el ritmo automático presione el botón STOP.
4. Presione el botón STOP para detener la ejecución de FREE SESSION/FUNNY.
¡PRECAUCION!
bk
• Se puede ajustar el nivel del tempo a uno de los 16 pasos.
4. Ejecute junto con el patrón de ritmo seleccionado.
3. Ejecute junto con el patrón seleccionado.
Tomacorriente de línea normal
9
3. Ajuste el tempo usando los botones TEMPO. A cada presión de ▲ aumenta el tempo, mientras presionando
▼ lo disminuye.
2. Presione una de las teclas negras del teclado, y el patrón FREE SESSION/FUNNY rotulado sobre la tecla
negra comienza inmediatamente a ejecutarse.
Puede suministrarse corriente al teclado con un
adaptador de corriente directa de 7,5 voltios, de 300
mA por lo menos, y un adaptador AdaptaplugTM de
tamaño M (no se incluyen). Puede adquirir el
adaptador y el adaptador Adaptaplug en cualquier
tienda RadioShack de la localidad.
Parte trasera
bl
Teclas de selección RHYTHM (Teclas blancas del teclado)
Utilización de los sonidos programados
Hay una selección de 100 sonidos programados. Cada sonido tiene un número de 2
dígitos. Para seleccionar un sonido programado, busque el número del sonido
programado sobre el panel superior del teclado, e ingrese el número usando los
botones de selección TONE.
* Sonido “PIANO” (No. 00) se selecciona automáticamente siempre que enciende el
teclado.
Teclado:
32 teclas, 2,5 octavas
(tamaño mini)
Polifonía:
máximo de 4 notas
Sonidos:
100
Patrones:
• RHYTHM: 19
SESSION/FUNNY: Consumo de energía: 7,5 V
• FREE
1,6 W
13
Dimensiones:
61,8 (An) x 17,6 (Pr) x 6,0 (Al) cm
10
Peso:
Aproximadamente 1,2 kg (sin pilas)
Fija; A4 = aprox. 442 Hz
• El diseño y las especificaciones están sujetos a cambios sin
Dos; Ø 8,0 cm
previo aviso.
(salida: 0,5 W + 0,5 W)
Melodías de demostración:
Afinación:
Ejemplo: Para seleccionar “PIPE ORGAN” (No. 06) luego de seleccionar “JAZZ GUITAR”
(No. 36).
1. Ajuste el interruptor POWER en la posición
ON. En este momento automáticamente se
selecciona el sonido “PIANO” (No. 00).
Paso
Ajuste/Presione
Altavoces:
Sonido seleccionado
1
2. Para seleccionar “JAZZ GUITAR”, presione
los botones de selección TONE “3” y luego
“6”.
No. 00
PIANO
2
No. 36
JAZZ GUITAR
3. Para seleccionar “PIPE ORGAN” presione los
botones de selección TONE “0” y luego ”6”.
3
No. 06
PIPE ORGAN
Terminales de entrada/salida (I/O):
• Fuente de alimentación:
Toma de 7,5 V de CC.
• Auriculares/Salida:
Minitoma estéreo
(La salida es monofónica.)
(impedancia de salida: 100
Ω, voltaje de salida: 2,0 V
(eficaz) MAX.)
Fuente de alimentación:
Dos modos
• Cinco pilas de tamaño AA
Duración de pilas: Aproximadamente
12 horas con las pilas alcalinas
• Adaptador de CA