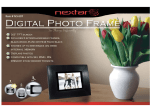
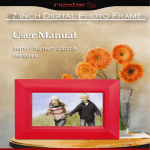
Download Nextar N7-115 Digital Photo Frame User Manual
Transcript
Table of Contents
Warning......................................................................................................................................................... 1
Safety precautions....................................................................................................................................... 1
Introduction.................................................................................................................................................. 1
1. Features..................................................................................................................................................... 1
2. Packaging Check List................................................................................................................................. 1
3. Specifications............................................................................................................................................. 1
Product Diagram.......................................................................................................................................... 2
A. Top View.................................................................................................................................................... 2
B. Front View.................................................................................................................................................. 2
C. Rear View.................................................................................................................................................. 2
D. Side View.................................................................................................................................................. 2
Using Your Digital Picture Frame............................................................................................................... 3
Viewing Modes............................................................................................................................................... 3
File Saving..................................................................................................................................................... 3
Technical Notes............................................................................................................................................3
Question/Troubleshooting Guide...............................................................................................................3
1
Warning
Please turn off the power when inserting or removing any memory card. Otherwise, it may
cause damage to the memory cards and the unit.
Safety precautions
1) Use only the supplied adaptor with Input 100-240V, Output 12V.
2) Turn off power before cleaning. Use only a soft cloth to clean the unit. Do not use liquid cleaners.
3) Avoid exposing the unit to extreme heat.
4) Do not disassemble the Digital Picture Frame, otherwise it may result in electric shock and void your
warranty.
Introduction
Your new Digital Picture Frame lets you view digital pictures from memory cards easily and quickly.
No computer or printer is needed: the display includes a convenient slide show mode, which starts
automatically when the Frame is turned on.
Supports many popular memory card types.
The device is conveniently portable: take it with you anywhere to share photos with family and friends.
A step beyond the traditional photo frame. View tens or even hundreds of digital photos without the need to
pay for printing.
1. Features
● 7 inch TFT LCD
● Supports Secure Digital (SD), Multimedia Card (MMC) memory card formats
● View the pictures from memory cards directly
● Resolution: 480X234 pixels
● Supports high resolution photos
● Automatic start of slide show
2. Packaging Check List
● Digital Picture Frame
● User Manual
● Quick Start Guide
● AC Adaptor
3. Specifications
Panel Size
Resolution
Brightness
Contrast
Viewing Angle
Response Time
Screen Size Mode
File Format Type
Max.Photo Size
Power Requirement
Power Consumption
Operating Temperature
Storage Temperature
7 inches
480X234
200cm²
300
65/65/45/65(CR>10, B/L ON)
15ms Ton
16:9
JPEG
10megapixels
12V DC
<5 W
14~158 F°
-4~176 F°
2
Product Diagram
A. Top View
Button
1.
Press to pause or resume playback.Press the button
longer to turn on and turn off the power.
Button
2.
Press to see the next picture.
Button
3.
Press to see the previous picture.
B.
Front View
4. Rotate Button
Press to rotate picture during PLAY
mode.Press to adjust the timing of slide show
function during PAUSE mode.
5. MODE Button
Press to change the aspect ratio between Pan
Scan, Fill, Original, Auto Fill, Height Fill and
Width Fill during PLAY mode. Press to zoom
in and zoom out during PAUSE mode.
C. Rear View
Install the stand into the hole. Photo
frame can be placed horizontally or
vertically.
1. LCD Screen
D.Side View
1. SD /MMC Card Port
Insert SD/MMC card into this port.
2. DC 12V IN
Connect supplied adaptor.
3
Using Your Digital Picture Frame
Install the stand for tabletop display. Connect the AC adaptor. Insert a memory card in the Digital Picture
Frame (with the card’s electrical contacts towards the front of the unit.). A slide show will begin automatically.
button. The word Pause will appear on the screen briefly and the slide show will be stopped.
Press the
The current photo will remain on the screen until the button is pressed again, at which time the slide show will
resume.
button. The Rotate button allows photos to be
To display the previous or next picture, press the
adjusted for proper viewing. Press repeatedly to rotate the current picture clockwise: 90°→ 180° → 270°.
Viewing Modes
Press the MODE button to select display mode: Pan Scan, Fill, Original, Auto Fill, Height Fill and Width Fill
File Saving
Photos must be saved in the JPEG format in order to be viewed on the Digital Picture Frame. Nearly all digital
cameras will save images in this format by default. Photos that have been saved with certain image editing
programs may fail to display properly.
Technical Notes
1. Your Digital Picture Frame is a sophisticated electronic device. Do not drop or subject the unit to jarring or
strong vibrations.
2. Avoid placing the Digital Picture Frame in areas of high humidity or where it might be subjected to
splashing.
3. The panel is made of plastic and can be easily damaged. Avoid sharp objects.
4. Use only a soft dry cloth to clean the screen.
Question/Trouble-shooting Guide
This chapter presents some suggestions to trouble-shoot any problems you may encounter while using the
device. Even if the following guide fails to solve your problem, please do not disassemble the device, but refer
the problem to our professional staff. Please see below for contact details.
1. Question: What kind of photos does this device support?
Answer: The Frame will display digital photos that are stored in the JPEG format which is the standard
format for nearly all digital cameras. Some cameras allow images to be stored as TIFF or RAW files as well
as JPEG, but only the JPEG format is compatible with the Frame.
2. Question: What should I do if the system does not respond when the power is turned on?
Answer: Please make sure the unit is properly connected to a power source. If so, turn the unit off, reconnect
the power and turn it on again.
3. Question: Why is the memory card not recognized?
Answer: The memory card might be inserted improperly or is not pushed in far enough. If the card is inserted
in the right direction and is still not recognized, turn off the unit, remove and reinsert the card, and start again.
4
This device complies with part 15 of the FCC Rules. Operation is subject to the following two conditions:
(1) This device does not cause harmful interference.
(2) This device must accept any interference received, including interference that may cause undesired
operation.
FCC Compliance
This device complies with Part 15 of the FCC Rules. Operation is subject to the following two conditions: (1)
this device may not cause harmful interference, and (2) this device must accept any interference received,
including interference that may cause undesired operation.
Note: This equipment has been tested and found to comply with limits for Class B digital device, pursuant to
part 15 of the FCC Rules. These limits are designed to provide reasonable protection against harmful
interference in a residential installation. This equipment generates, uses and can radiate radio frequency
energy and, if not installed and used in accordance with the instructions, may cause harmful interference to
radio or television reception, which can be determined by turning the equipment off and on, the user is
encouraged to try to correct the interference by one or more of the following measures:
1. Reorient or relocate the receiving antenna. 2. Increase the separation between the equipment and the
receiver. Connect the equipment into an outlet on a circuit different from that to which the receiver is
connected. 3. Consult the dealer or an experience radio/TV technician for help.
Nextar™ is a trademark of Nextar (Hong Kong) Limited
Nextar may find it necessary to modify, amend or otherwise change or update this manual.
We may reserve the right to do this at any time, without any prior notice.
All specifications and features are subject to change without notice.
Please visit us at www.nextar.com
Or write us at:
Nextar Inc.
1661 Fairplex Dr.
La Verne, CA91750
USA
5


