1
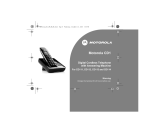
Motorola D1110 series
Digital Cordless Phone with
Answer Machine
Warning
Use only rechargeable batteries.
Charge the handset for 24 hours before use.
Welcome...
to your new Motorola D1111 Digital Cordless Phone!
•
Wall mountable freedom base – all handsets fully cordless for locating anywhere
within range.
•
1.6” colour display.
•
100 Name and number phonebook.
•
Copy phonebook entries between other handsets.
•
Screensaver clock display.
•
Answer machine with 12 minutes digital recording time.
•
Send and receive text messages.1
•
Caller Display shows you who’s calling and see details of the last 30 callers in a
Calls list.2
•
Register up to 5 handsets to a single base and register each handset with up to 4
different bases.
•
Make internal calls, transfer external calls, hold 3-way conversation between two
internal callers and an external caller.
1
You must subscribe to your network provider’s Caller Display Service for text
messaging to work and you must not withhold your telephone number. A quarterly
fee may be payable. Some other network provider lines may not be compatible
with this text messaging service.
You must subscribe to your network provider’s Caller Display or Call Waiting
service for these features to work. A quarterly fee may be payable.
2
Please note that this equipment is not designed for making emergency telephone
calls when the power fails. Alternative arrangements should be made for access
to emergency.
This User Guide provides you with all the information
you need to get the most from your phone.
Before you make your first call you will need to set up your phone.
Follow the simple instructions in ‘Getting Started’, on the next few pages.
IMPORTANT
Only use the telephone line cord supplied.
This equipment is not designed for making emergency telephone calls when the
power fails. Alternative arrangements should be made for access to emergency
services.
Got everything?
•
D1111 handset
•
D1111 base
•
Quick start guide
•
2 x AAA NiMH rechargeable batteries
•
Mains power adaptor for the base
•
Telephone line cord
•
Wall mounting screws and wall plugs
If you have purchased a D1111 multiple pack you will also have the following
additional items:
•
D1111 handset & charger
•
2 x AAA NiMH rechargeable batteries
•
Mains power adaptor for the charger
1. Getting started................................................................................ 6
Location............................................................................................ 6
Setting up ......................................................................................... 6
Connecting up the large base .......................................................... 6
Connecting the handset and charger (Multi-pack only).................... 6
Set date and time manually.............................................................. 7
2. Getting to know your phone.......................................................... 8
Overview of your handset................................................................. 8
Handset Display ............................................................................... 9
Display icons .................................................................................... 9
Overview of the base........................................................................ 9
Navigating the menus..................................................................... 10
Menu map ...................................................................................... 11
Character map................................................................................ 12
3. Using the phone ........................................................................... 13
Switch the handset on / off ............................................................. 13
Make a call ..................................................................................... 13
Preparatory dialling ........................................................................ 13
End a call........................................................................................ 13
Receive a call ................................................................................. 13
Adjust the earpiece/receiver volume .............................................. 13
Secrecy .......................................................................................... 13
Call another handset ...................................................................... 13
Transfer a call................................................................................. 13
3-way conference call..................................................................... 13
Make a handsfree call .................................................................... 14
Answer a call in handsfree ............................................................. 14
Redial a number from the redial lists.............................................. 14
Save a number from the redial list to the phonebook..................... 14
Delete a redial number/delete all redial.......................................... 14
To lock the keypad ......................................................................... 14
Paging/Find handset ...................................................................... 14
Store a name and number.............................................................. 15
Open the phonebook during a call. ................................................ 15
View an entry.................................................................................. 15
Dial an entry ................................................................................... 15
Edit a name and number ................................................................ 15
Edit ringtone ................................................................................... 16
Delete an entry ............................................................................... 16
Delete entire phonebook ................................................................ 16
4
Copy an entry to another handset.................................................. 16
Copy the entire phonebook to another handset ............................. 16
Memory status................................................................................ 16
4. Handset settings .......................................................................... 17
Handset ringtone............................................................................ 17
Handset ringer volume ................................................................... 17
Receiver volume ............................................................................ 17
Handset name................................................................................ 17
Wallpaper ....................................................................................... 17
Menu colour ................................................................................... 17
Screensaver ................................................................................... 18
Light timeout................................................................................... 18
Display contrast.............................................................................. 18
Auto talk ......................................................................................... 18
Key beep ........................................................................................ 18
PABX access code......................................................................... 18
5. Base settings................................................................................ 19
Base ringtone ................................................................................. 19
Base ringer volume ........................................................................ 19
Dialling mode ................................................................................. 19
Ring priority .................................................................................... 19
Recall mode ................................................................................... 19
First ring ......................................................................................... 19
System PIN .................................................................................... 20
Restore default settings ................................................................. 20
Default settings .............................................................................. 20
ECO mode ..................................................................................... 21
6. Clock & alarm ............................................................................... 21
Date & time .................................................................................... 21
Set alarm........................................................................................ 21
Alarm on /off................................................................................... 21
Switch off alarm ring....................................................................... 22
Time format .................................................................................... 22
7. Event Reminder............................................................................ 22
Add a new event ............................................................................ 22
Switch off reminder ring ................................................................. 22
Show reminder details.................................................................... 23
Edit reminder.................................................................................. 23
Send reminder as a text message ................................................. 23
Delete reminder ............................................................................. 23
Delete all reminders ....................................................................... 23
8. Calls lists ...................................................................................... 24
Caller Display................................................................................. 24
Calls lists........................................................................................ 24
New calls alert................................................................................ 24
View new missed calls ................................................................... 24
View and dial from a Calls list ........................................................ 24
Copy a Calls list number to the phonebook ................................... 24
Send a text message to a Calls list number................................... 25
Delete an entry............................................................................... 25
Delete all entries ............................................................................ 25
9. Call Waiting .................................................................................. 25
10. Voicemail ...................................................................................... 25
11. Room Monitor............................................................................... 26
To switch Room Monitor On .......................................................... 26
To change the monitor level........................................................... 26
To set the dial out number ............................................................. 26
12. Answer machine .......................................................................... 27
Base control keys........................................................................... 27
Switch the answer machine on / off ............................................... 27
Answer delay ................................................................................. 27
Switch message alert tone on / off................................................. 27
On-screen alert .............................................................................. 28
Record your own outgoing message ............................................. 28
Voice prompts or outgoing message language.............................. 28
Check or delete your outgoing message ....................................... 28
Select outgoing message mode..................................................... 29
Record a memo ............................................................................. 29
Call screening ................................................................................ 29
Message playback ......................................................................... 29
Delete all old messages................................................................. 29
Switch remote access On or Off. .................................................. 30
Change the remote access PIN ..................................................... 30
Switch your answer machine on remotely ..................................... 30
Operating your answer machine from another phone.................... 30
13. Text messaging.............................................................................31
Subscribe to the text messaging service ........................................31
Send a text message ......................................................................31
Standard text entry .........................................................................32
Receiving and reading text messages ............................................32
Read a new message .....................................................................32
Read, forward, delete, view and save numbers of texts
in the Inbox .....................................................................................33
Edit or send texts in the Drafts box .................................................33
Forward or delete texts in the Outbox.............................................33
Edit templates .................................................................................33
Deleting texts ..................................................................................34
Add or change Service Centre numbers.........................................34
Set send centre...............................................................................34
Message alert tone .........................................................................34
Set message size ...........................................................................34
Add a user mailbox .........................................................................34
Open and read a mailbox text.........................................................35
Edit a user mailbox .........................................................................35
Delete a user mailbox .....................................................................35
Set common mailbox sub address..................................................35
14. Using additional handsets ...........................................................36
Registering an additional handset ..................................................36
Select a base ..................................................................................36
De-register a handset .....................................................................36
15. Help ................................................................................................37
16. General information......................................................................38
Safety and Electromagnetic Interference/Compatibility
information ......................................................................................38
Cleaning..........................................................................................39
Environmental .................................................................................39
Product disposal instructions ..........................................................39
Warranty Information ......................................................................40
R&TTE ............................................................................................40
Declaration of Conformance ...........................................................40
Connecting to a switchboard ..........................................................40
Inserting a pause ............................................................................40
Recall..............................................................................................41
17. Wall mounting ...............................................................................41
5
1. Getting started
WARNING
Do not place your D1111 in the bathroom or other humid areas.
Location
WHICH POWER ADAPTOR?
The power adaptor with a clear connector is for the base unit and the
power adaptor with a red colour connector is for the charger unit.
Connecting up the large base
You need to place your D1111 base within 2 metres of the mains power
socket and telephone socket so that the cables will reach.
Make sure it is at least 1 metre away from other electrical appliances to
avoid interference. Your D1111 works by sending radio signals between
the handset and base. The strength of the signal depends on where you
place the base. Putting it as high as possible ensures the best signal.
To wall mount your D1111 base, see “Wall mounting” on page 41.
HANDSET RANGE
The D1111 has a range of 300 metres outdoors when there is a clear line
of sight between the base and handset. Any obstruction between the
base and handset will reduce the range significantly. With the base
indoors and handset either indoors or outdoors, the range will normally
be up to 50 metres. Thick stone walls can severely affect the range.
SIGNAL STRENGTH
The
icon on your handset indicates when you are in range. When out
of range of the base, the screen shows Searching… and the
flashes.
During call, if the handset goes out of range the handset will emit out out
of range warning tone.
If you are on a call, the line will hang up if the handset moves out of range
of the base. Move back within in range. The handset will automatically reconnect to the base.
Plug the power adapter with clear connector into the socket marked
on the underside of the base and plug the other end into the mains power
wall socket and switch the power on.
Connecting the handset and charger (Multi-pack only)
If you have purchased a multiple pack, this process will need to be carried
out for all handsets and chargers:
1. Plug the power adapter with red connector into the socket marked
on the underside of the charger.
Setting up
IMPORTANT
The base station must be plugged into the mains power at all times. Do
not connect the telephone line cord into the wall socket until the handset
is fully charged. Only use the power and telephone cables supplied with
the product.
6
Getting started
2. Insert the 2 x AAA NiMH batteries supplied into the handset. Then
slide the compartment cover into place.
3. Place the handset on the charger to charge for at least 24 hours.
When the handset is fully charged the
icon will indicate that it is
fully charged.
4. When the handset is fully charged after 24 hours, plug the telephone
line cord from the large base into the telephone wall socket.
Date and time
IMPORTANT
Warning! Use only rechargeable batteries. If non-rechargeable batteries
are used WRONG BATTERY will be displayed and charging will be stopped.
Please replace with rechargable batteries.
If you do not have a Caller Display service you can set the date and time
manually.
BATTERY LOW WARNING
If the
icon shows a red segment in the display, you will need to
recharge the handset before you can use it again.
During charging, the
icon will scroll in the display.
BATTERY PERFORMANCE
In ideal conditions, fully charged batteries should give about 10 hours talk
time or 100 hours standby time on a single charge.
Providing you have subscribed to your network’s Caller Display service,
the date and time is set automatically for all handsets when you receive
your first call.
The date and time is recorded with each answer machine message you
receive.
Set date and time manually
1. Press Menu and scroll u or d to Clock & Alarm then press Select .
2. Date & Time is highlighted. Press Select.
3. Enter the date using the format DD/MM/YY e.g. 01 09 08 for 1st
September 2008. Enter the time in 12 or 24 hour time format. Press
Save. To change the Time Format see page 22.
4. Press > or Back until you return to standby.
Your D1111 is now ready for use.
Note that new batteries do not reach full capacity until they have been in
normal use for several days.
To keep your batteries in the best condition, leave the handset off the
base for a few hours at a time.
Running the batteries right down at least once a week will help them last
as long as possible.
The charge capacity of rechargeable batteries will reduce with time as
they wear out, giving the handset less talk/standby time. Eventually they
will need to be replaced.
After charging your handset for the first time, subsequent charging time
is about 6–8 hours a day. Batteries and handset may become warm
during charging. This is normal.
Getting started
7
2. Getting to know your phone
Overview of your handset
A Earpiece
B Display
See page 9 for an overview of the display icons.
C Option button (left)
Press to open the Menu.
Press to select options displayed on screen.
8
D Option button (right)
In standby, press to open the phonebook menu, page 14.
Press to select options displayed on screen.
E Redial/ Up
In standby, press to open and scroll through the Redial list, page 14.
In talk mode, press to adjust volume.
In menu mode, press to scroll through the options.
When storing an entry in the phonebook, press and hold to enter a Pause,
page 40.
F Talk/ Handsfree
In standby mode, press to make and receive calls, page 13.
In talk mode, press to switch handsfree on and off, page 14.
G End call/ Power on/off
Press to end a call, page 13.
In menu mode, press to return to standby.
In standby, press and hold to switch the handset off. When off, press to
switch the handset back on.
H Phonebook/ Down
In standby, press to open and scroll through the Names list, page 15.
In talk mode, press to adjust volume.
In menu mode, press to scroll through the options.
I
Navigator glow ring
Illuminates when the phone is in use. Flashes to indicate new event, eg.
missed call.
J *
Press and hold to switch between Tone and Pulse dialling, page 19
K #/ Lock
Press and hold to lock the keypad, page 14.
To unlock, select Unlock and follow the on screen instructions.
L Int (Intercom)
Used for internal calls, page 37.
M R (Recall)
For use with switchboard/PABX.
Getting to know your phone
Handset Display
Battery
status
Scrolls when
charging
The approximate power levels of your battery are indicated as below:
Range
indicator
Flashes when
out of range or
not registered
Battery is fully charged.
Battery is partially charged.
Battery is running low.
Battery is almost fully discharged (Red).
Handset
name/
number
Display icons
Displayed in standby mode to indicate handset is in range of the base.
Flashes if you move out of range.
* For this feature to work you must subscribe to your network provider’s
Caller Display service. A quarterly fee may be payable.
NOTE
When the memory for TAM, text or voicemail messages is full, a white line
will appear below their corresponding reminder icon.
Overview of the base
Displayed if ECO Mode is switched on
Handset ringer volume is Off.
Displayed in handsfree talk mode.
Answer machine is On.
An alarm is set.
The keypad is locked.
You have answer machine messages.
You have text messages.*
You have voicemail messages.*
You have missed calls.*
Getting to know your phone
A Paging Key
In standby, press to ring the handset(s), page 14.
Press and hold to enter registration mode when registering handsets,
page 36.
B Volume Up
C Volume Down
9
D LED Indicator
Indicates when the answer machine is on or off, and how many messages
you have.
When answer machine is ON
Displays the number of
messages
When memory is full and answer
machine is ON
Alternates between "F" and
message number
During Remote Access of the answer
machine
Displays "A"
When recording incoming/outgoing
messages and memo
Displays "r"
During volume adjustment
Displays "0" - "9" or "H" for
highest volume
When answer machine is OFF with
no activity
Displays "-"
On startup
Flash between "C" and
message number if the time
has not been set
Navigating the menus
Your D1111 has an easy to use menu system.
Each menu has a list of options, which you can see on the menu map on
the following page.
When the handset is switched on and in standby:
1. Press Menu to open the main menu.
2. Then u use d or buttons to scroll through the available options.
3. Press the Select option button to select a menu option or the Back
option button to go back to the previous screen.
To return to the previous menu level, press Back.
To exit the menu and return to standby, press >.
If no buttons are pressed for 30 seconds, the handset returns to standby
automatically.
E Skip Backwards/Replay
F Answer machine On/Off
G Skip Forward
H Stop
I Play/Pause
J Delete
For more information on these control keys, see page 27
10
Getting to know your phone
Menu map
Text
Messaging
Answer
Machine
Calls Lists
Reminder
Clock & Alarm
Settings
Registration
Extra
Names
Press Names
during a call:
Write Message
Play
Missed Calls
Set Handset
Register Handset
Room Monitor
Play All
Received Calls
Alarm
Ringtone
Select Base
From menu in
standby:
Phonebook list
is displayed.
Drafts
Answer On/Off
Dialled Calls
If there is an
Event, the
following options
will be displayed.
Date & Time
Inbox
Time Format
Ringer Volume
De-register
Search
Select OPTIONS:
Outbox
Templates
Delete Messages
Text Settings
Service
Centres
Mailbox
Number
Message Size
Message Alert
Users
Record Memo
Outgoing
Message
Delete Calls
Add Event*
Show Details
Edit Event
Delete Messages
Send as a Text
Answer Settings
Delete Event
Language
Delete All Events
Answer Mode
Answer Delay
Message Alert
Remote Access
Receiver Volume
Handset Name
Language
Wallpaper
Menu Colour
Screensaver
Light Timeout
Add Entry
Add Entry
Copy Phonebook
Show Details
Dialling Codes
Edit Entry
Memory Status
Delete Entry
Delete
Phonebook
d
Press in
standby:
Display Contrast
Phonebook list
is displayed
Auto Talk
Select OPTIONS:
Key Beep
Show Details
PABX Access
Code
Send Message
Edit Entry
Set Base
Ringtone
Ringer Volume
*If there is already an event on the list, "Event" is displayed.
Otherwise, "Add Event" is displayed.
Copy Entry
Ringtone
Delete Entry
Dialling Mode
Ring Priority
Recall Mode
First Ring
System PIN
Master Reset
ECO Mode
Getting to know your phone
11
Character map
When display language is Türkçe - the character mapping is as follow:
Key
Key
Case
1
2
L/U*
1
2
Case
4
5
6
7
8
9
L
,
-
?
!
¡
¿
'
@ :
a
b
c
2
ä
æ
å
à
ç
A
C
2
Ä
d
e
f
3
è
U
D
E
F
3
É
L
g
h
i
4
U
G
H
I
4
L
j
k
l
5
U
J
K
L
5
L
m
n
o
U
M
N
O
6
L
p
q
r
s
6
ö
Ö
Ø
Ñ
7
ß
S
7
L
t
u
v
8
ù
U
T
U
V
8
Ü
L
w
x
y
z
9
L/U
Space
Ç
3
4
ò
R
Y
1
é
ø
Q
X
/
5
P
W
Æ Å
;
ì
U
Z
ñ
ü
9
0
L/U
bring up symbol table
L/U
short press to switch between Abc, abc, ABC and 123 mode
*L = Lower
U = Upper
12
B
L
U
0
*
#
.
L/U*
U
3
Assigned characters and symbols
6
7
8
9
0
*
#
Assigned characters and symbols
.
,
-
?
!
'
L
a
b
c
2
â
ç
U
A
B
C
2
Â
Ç
L
d
e
f
3
U
D
E
F
3
L
g
h
i
4
ğ
õ
U
G
H
I
4
Ğ İ
L
j
k
l
5
U
J
K
L
5
L
m
n
o
6
U
M
N
O
6
Ö
L
p
q
r
s
7
ş
U
P
Q
R
S
7
Ş
t
u
v
8
ü
û
U
T
U
V
8
Ü
Û
L
w
x
y
z
9
U
W
X
Y
Z
9
Space
;
/
1
ö
L
L/U
@ :
0
L/U
bring up symbol table
L/U
short press to switch between upper and lower case letters
*L = Lower
U = Upper
Getting to know your phone
3. Using the phone
Secrecy
CALL TIMER
Your handset will automatically time the duration of all external calls. The
handset display shows the duration the phone is off-hock both during and
for a few seconds after your call.
1. During a call, press Secrecy. The display shows Secrecy On and your
caller cannot hear you.
2. Press Off to return to your caller.
Switch the handset on / off
1. In standby, press and hold > to switch the handset off. When off,
press > to switch back on.
Make a call
During a call, you can talk to someone nearby without your caller hearing.
Internal calls
Call another handset
If you have more than one handset registered to the base, you can make
internal calls between two handsets.
1. Press <.
2. When you hear the dial tone, dial the number.
1. Press I then the number (1-5) of the handset you want to call.
2. Press OK to dial.
Preparatory dialling
When an internal call is received, the display shows Internal Call Handset X
(where X is the calling handset) and the handset number.
1. Dial the number first. If you make a mistake press Clear to delete the
last digit.
2. Press < to dial.
If the number dialled matches an entry in the phonebook, the name is
displayed.
Transfer a call
You can transfer an external call to another handset registered to the
base.
During your call:
1. Press < to answer the call.
1. Press I then the handset number (1-5) you want.
2. Press OK to dial or press End to cancel the calls request and return to
the caller.
3. When the other handset answers you can announce the caller.
4. Press > to complete the transfer or I to switch back and forth
between both callers.
If the other handset does not answer, press End to return to your original
caller.
Adjust the earpiece/receiver volume
3-way conference call
End a call
1. Press >.
Receive a call
When you receive an external call, the phone rings. The display shows
External Call and the caller’s number or, if the number matches an entry
stored in the phonebook, the name is displayed.
1. During a call, press u or d to increase or decrease the volume. The
display shows the level.
Using the phone
You can hold a 3-way conference call between 2 internal callers and 1
external caller.
13
During a call to an external caller:
1.
2.
3.
4.
5.
Press I then the handset number (1-5) you want.
Press OK to dial.
When the other handset answers you can announce the caller.
Press Join to begin the conference call. Display shows Conference Call .
Press > to hang up.
Handsfree
Handsfree lets you talk to your caller without holding the handset. It also
enables other people in the room to listen to your conversation over the
loudspeaker.
Make a handsfree call
1. Dial the number then press <.
2. Press < again. The
icon is displayed and you hear your call
over the handset loudspeaker.
3. Press < to switch the call between the earpiece and the loudspeaker.
4. Press > to end the call.
During a handsfree call, press u or d to change the volume.
Answer a call in handsfree
When the phone rings, press < twice to answer in handsfree talk mode.
Redial
The last 20 telephone numbers called are saved to a redial list. You can
then select any of the numbers to redial, delete or copy to the phonebook.
Redial numbers can be up to 32 digits long.
Redial a number from the redial lists
Delete a redial number/delete all redial
Please see “Delete a redial number/delete all redial” on page 14 for
instructions and select the Dialled Calls option.
To lock the keypad
You can lock the keypad so that it cannot be used accidentally while
carrying it around.
IMPORTANT
When the keypad is locked you can still answer incoming calls and
operate the handset as normal. When the call is ended, the keypad lock
comes on again.
1. Press and hold #.
is displayed. To unlock the keypad:
2. Press Unlock. Display shows Press # to Unlock Keys.
3. Press #.
Paging/Find handset
You can alert a handset user that they are wanted or locate a missing handset.
Paging calls cannot be answered by a handset.
1. Press p on the base. All handsets registered to the base will ring
and display Paging Call.
2. Press p on the base again to stop the ringing or, on any handset,
press Stop or any button on the handset to stop all handsets ringing.
Phonebook
You can store up to 100 names and numbers in the phonebook. Names
can be up to 12 characters long and numbers up to 24 digits. You can
also select different ring tones for phonebook entries.
1. Press u the last number you called is displayed.
2. Press u or d to scroll to the number you want.
3. Press < to dial.
Save a number from the redial list to the phonebook
Please see “Copy a Calls list number to the phonebook” on page 24 for
instructions and select the Dialled Calls option.
14
Using the phone
SEARCH ALPHABETICALLY
Press d
Or
Press Names.
Search is highlighted. Press Select.
The list of entries is displayed.
Enter the first letter of the name you want. The first name beginning with
that letter is displayed.
Scroll d to view any other entries beginning with that letter.
Store a name and number
If you subscribe to a Caller Display Service and want the name of your
caller displayed instead of the number, save the full telephone number
including the dialling code to your phonebook.
You can store multiple entries with the same name but, to prevent
unnecessary duplicates, you can only store one number once.
1. From standby, press Names. The phonebook menu is displayed.
2. Search is highlighted. Scroll d to Add Entry and press Select.
3. Enter the name and press OK.
When storing a name the first character is upper case and the rest lower case.
To change the case manually, Press #.
To store a Pause in the number field, press and hold u.
To store a Recall in the number field, press R.
4. Enter the number and press Save.
5. Scroll u or d to the ringtone you want and press Select. The display
shows <NAME> Saved and returns to the phonebook menu.
6. Press Back to return to the previous menu level or > to return to
standby.
ENTERING NAMES
Use the keypad letters to enter names, e.g. to store TOM:
Press 8 once to enter T.
Press 6 three times to enter O.
Press 6 once to enter M.
Using the phone
WRITING TIPS
Press Clear to delete the last character or digit.
Press u or d to move backwards or forwards through character/digits.
Press # to switch between upper and lower case.
Press 0 to insert a space.
Use 1 for other punctuation characters.
You must enter a name to go with a number.
Open the phonebook during a call.
1. During your conversation, press Names.
2. Press Options to select Add Entry, Show Details, Edit Entry or Delete Entry.
View an entry
1.
2.
3.
4.
5.
Press d. The first entry is displayed.
Scroll u or d to the entry you want or search alphabetically.
Press Options. The display highlights Show Details.
Press Select to display the name, number and ringtone.
Press Dial to call the number or Back to return to the previous level.
Dial an entry
1. In standby, press d. The first entry is displayed.
2. Scroll u or d to the entry you want or search alphabetically.
3. Press < to dial the displayed number.
Edit a name and number
Press d.
Scroll u or d to the entry you want.
Press Options and scroll d to Edit Entry and press Select .
Press Clear to delete characters, use the keypad to enter new ones
then press OK.
5. Press Clear to delete digits, use the keypad to enter new ones then
press Save.
6. Scroll u or d to the ringtone you want and press Select to save the
entry.
7. Press Back to return to the previous menu level.
1.
2.
3.
4.
15
Edit ringtone
Copy the entire phonebook to another handset
1.
2.
3.
4.
In just a few minutes, you can copy all your phonebook contacts to
another handset.
Press d.
Scroll u or d to the entry you want.
Press Options and scroll d to Ringtone and press Select .
Scroll u or d to the ringtone you want or select Default Melody and
select Select .
5. Press Back to return to the previous menu level.
Delete an entry
1.
2.
3.
4.
5.
Press d.
Scroll u or d to the entry you want.
Press Options and scroll d to Delete Entry and press Select.
Press Yes to confirm or No to cancel.
Press Back to return to standby.
Delete entire phonebook
1.
2.
3.
4.
Press Names.
Scroll u or d to Delete Phonebook and press Select .
Press Yes to confirm or No to cancel.
Press Back to return to standby.
Copy an entry to another handset
When you have more than one handset registered to your D1111 base,
you can copy entries between handsets.
At the handset you are copying from:
Press Names.
Scroll d to Copy Phonebook and press Select .
To Handset is displayed. Press Select.
Available handsets are displayed. Scroll u or d to the handset you
want and press Select . When completed the display shows the
number of entries copied.
5. Press Back to return to the previous menu level.
1.
2.
3.
4.
At the receiving handset:
1. The display shows Copy Phonebook? Press Yes to begin copying or No to
cancel.
Memory status
You can check how much of the phonebook memory is available.
1.
2.
3.
4.
Press Names.
Scroll d to Memory Status and press Select.
Display shows the number of Memory Used and Memory Free entries.
Press Back to return to the previous menu level.
Press d.
Scroll u or d to the entry you want.
Press Options and scroll d to Copy Entry and press Select.
To Handset is displayed. Press Select.
Available handsets are displayed. Scroll u or d to the handset you
want and press Select. Copy Phonebook? is prompted on the receiving
handset. Press Yes to accept or No to cancel. When completed the
sending handset displays <NAME> Copied.
6. Press Back to return to the previous menu level.
1.
2.
3.
4.
5.
16
Using the phone
You can set different ringtones for external calls and internal calls.
4. Press u or d to display the volume level you want. Press Save to
confirm.
5. Press Back to return to the previous menu level or > to return to
standby.
Select from 10 handset ringtones.
Handset name
You will hear a sample ring for each one you highlight.
If you are using more than one handset with your D1111 base, you can give
each handset a personalised name to easily distinguish between the handsets.
4. Handset settings
Handset ringtone
Press Menu, scroll d to Settings and press Select.
Set Handset is highlighted. Press Select.
Ringtone is highlighted. Press Select.
Press u or d to highlight External Call or Internal Call. Press Select to
confirm.
5. Scroll u or d to highlight the ringtone you want.
6. Press Select to confirm.
7. Press Back to return to the previous menu level or > to return to
standby.
1.
2.
3.
4.
Handset ringer volume
The handset has 5 ringer volume settings plus Off.
If the volume is set to Off the
icon is displayed.
Press Menu, scroll d to Settings and press Select.
Set Handset is highlighted. Press Select.
Scroll d to Ringer Volume and press Select.
Press u or d to display the volume level you want. Press Save to
confirm.
5. Press Back to return to the previous menu level or > to return to
standby.
1.
2.
3.
4.
Receiver volume
This sets the standard volume level for the handset earpiece. There are
8 levels to choose from.
1. Press Menu, scroll d to Settings and press Select.
2. Set Handset is highlighted. Press Select .
3. Scroll d to Receiver Volume and press Select.
Handset settings
A name can be up to 10 characters long.
1.
2.
3.
4.
5.
Press Menu, scroll d to Settings and press Select .
Set Handset is highlighted. Press Select.
Scroll d to Handset Name and press Select.
Use the keypad to enter the name and press Save.
Press Back to return to the previous menu level or > to return to
standby.
Wallpaper
1.
2.
3.
4.
5.
6.
7.
Press Menu, scroll d to Settings and press Select .
Set Handset is highlighted. Press Select.
Scroll d to Wallpaper and press Select.
Scroll u or d to the wallpaper you want and press View.
On the preview screen, scroll u or d to see available wallpapers.
Press Use to confirm the wallpaper.
Press Back to return to the previous menu level or > to return to
standby.
Menu colour
Press Menu, scroll d to Settings and press Select .
Set Handset is highlighted. Press Select.
Scroll d to Menu Colour and press Select .
Scroll u or d to select the colour you want: blue, orange or pink and
press Select.
5. Press Back to return to the previous menu level or > to return to
standby.
1.
2.
3.
4.
17
Screensaver
When the screensaver is set to Clock an analogue clock is displayed.
The screensaver comes on when the screen backlight switches off in
standby mode. To change the backlight timeout setting, see Light timeout.
1.
2.
3.
4.
5.
6.
Press Menu, scroll d to Settings and press Select.
Set Handset is highlighted. Press Select.
Scroll d to Screensaver and press Select .
Scroll u or d to set the Screensaver to Clock or Off.
Press Select to select Clock .
Press Back to return to the previous menu level or > to return to
standby.
Light timeout
Set how long the backlight stays on after the handset has returned to
standby screen.
1.
2.
3.
4.
5.
Press Menu, scroll d to Settings and press Select.
Set Handset is highlighted. Press Select.
Scroll d to Light Timeout and press Select.
Scroll u or d to set the timeout period you want then press Select .
Press Back to return to the previous menu level or > to return to
standby.
Display contrast
1.
2.
3.
4.
5.
Press Menu, scroll d to Settings and press Select.
Set Handset is highlighted. Press Select.
Scroll d to Display Contrast and press Select.
Scroll u or d to Low, Medium or High then press Select.
Press Back to return to the previous menu level or > to return to
standby.
Auto talk
If you set Auto Talk to ON, when you receive an incoming call you can answer
it just by lifting your handset from the charger. You do not need to press <.
3. Scroll d to Auto Talk and press Select .
4. Scroll u or d to On or Off then press Select .
5. Press Back to return to the previous menu level or > to return to
standby.
Key beep
When you press a button on the D1111 handset you hear a beep. You
can switch this on or off.
1.
2.
3.
4.
5.
Press Menu, scroll d to Settings and press Select .
Set Handset is highlighted. Press Select.
Scroll d to Key Beep and press Select .
Scroll u or d to Off or On then press Select .
Press Back to return to the previous menu level or > to return to
standby.
PABX access code
If your D1111 is connected to a switchboard, you may need to enter a
one-digit access code in the dialling sequence to be able to connect to the
outside line.
The access code will be displayed at the beginning of a number on the
screen.
The access code will not be used when you dial the number yourself
(rather than for example from the phonebook). This allows you to make
calls to other switchboard extensions.
Press Menu, scroll d to Settings and press Select .
Set Handset is highlighted. Press Select.
Scroll d to PABX Access Code and press Select .
Scroll u or d to On, Off or Set Code then press Select .
If you select Set Code, enter the switchboard access code e.g. 9 then
press Save.
5. Press Back to return to the previous menu level or > to return to
standby.
1.
2.
3.
4.
1. Press Menu, scroll d to Settings and press Select.
2. Set Handset is highlighted. Press Select.
18
Handset settings
5. Base settings
Base ringtone
Select from 5 base ringtones.
You will hear a sample ring for each one you highlight.
1. Press Menu, scroll d to Settings and press Select.
2. Scroll d to Set Base and press Select .
3. Ringtone is highlighted. Press Select.
4. Scroll u or d highlight the ringtone you want.
5. Press Select to confirm.
6. Press Back to return to the previous menu level or > to return to
standby.
Ring priority
When you have more than one handset registered to your base, you can
set one handset to ring before the other handsets. This allows one
handset user to answer all incoming first, like a receptionist.
Choose All Handsets if you want all handsets to ring at the same time or
Select Handset to nominate a handset to ring two times before the others.
1.
2.
3.
4.
Press Menu, scroll d to Settings and press Select .
Scroll d to Set Base and press Select.
Scroll d to Ring Priority and press Select .
Press u or d to highlight All Handsets or Select Handset then press Select.
5.
u or d to highlight the handset you want then press Select.
Scroll u or d to the number of rings you want to set 2, 4 or 6 and press
Select.
Press Back to return to the previous menu level or > to return to
If you choose Select Handset all available handsets are displayed. Scroll
Base ringer volume
The base has 5 ringer volume settings plus Off.
Press Menu, scroll d to Settings and press Select.
Scroll d to Set Base and press Select .
Scroll d to Ringer Volume and press Select.
Press u or d to display the volume level you want. Press Select to
confirm.
5. Press Back to return to the previous menu level or > to return to
standby.
1.
2.
3.
4.
Dialling mode
Your D1111 is pre-set to Tone dialling. You should not normally need to change
this setting. The dial mode options are Tone or Pulse.
1. Press Menu, scroll d to Settings and press Select.
2. Scroll d to Set Base and press Select .
3. Scroll d to Dialling Mode and press Select.
4. Press u or d to highlight Pulse or Tone then press Select to confirm.
5. Press Back to return to the previous menu level or > to return to
standby.
standby.
Recall mode
1.
2.
3.
4.
5.
Press Menu, scroll d to Settings and press Select .
Scroll d to Set Base and press Select.
Scroll d to Recall Mode and press Select.
Press u or d to highlight Recall 1 or Recall 2 then press Select to confirm.
Press Back to return to the previous menu level or > to return to
standby.
First ring
If you have subscribed to your network’s Caller Display service, your D1111
does not ring until the caller information has been received and displayed.
However, if you want your handset to ring without waiting for the caller
information to be displayed, set First Ring to On. Please note that this will
mean the first ring you hear will be the default ringtone. This will change
to any ringtone you have set once the caller information is displayed.
1. Press Menu, scroll d to Settings and press Select .
2. Scroll d to Set Base and press Select.
3. Scroll d to First Ring and press Select .
Base settings
19
4. Press u or d to On or Off then press Select to confirm.
5. Press Back to return to the previous menu level or > to return to
standby.
Default settings
System PIN
Handset Ringtone
Melody 3
Handset Ring Volume
3
Receiver Volume
4
The System PIN is used when changing certain settings and registration
/ de-registration. The default setting is 0000. You can change this to your
own preferred number up to 8 digits.
When you enter a PIN the digits are shown as ****.
1.
2.
3.
4.
5.
6.
7.
Press Menu, scroll d to Settings and press Select.
Scroll d to Set Base and press Select.
Scroll d to System PIN and press Select.
Enter the old PIN (original setting 0000) and press OK.
Enter the new PIN and press OK.
Re-enter the new PIN and press OK.
Press Back to return to the previous menu level or > to return to
standby.
Restore default settings
You can restore your D1111 to its default (original) settings.
It will not affect the phonebook, calls list or user’s data, including
personal/recorded outgoing messages and answer machine messages.
All handsets registered to the base will be retained. All text, answer
machine, handset and base settings will be reset.
1.
2.
3.
4.
5.
20
Handset Name
Handset
Key Beep
On
Auto Talk
On
Screensaver
Clock
Base Ringtone
Melody 1
Base Ring Volume
3
Dialling Mode
Tone
First Ring
Off
System PIN
0000
ECO Mode
Off
Room Monitor
Off
Answer Machine
On
Outgoing Message
Answer & Record
Ring Delay
6 rings
Press Menu, scroll d to Settings and press Select.
Scroll d to Set Base and press Select.
Scroll d to Master Reset and press Select.
Select Yes to confirm or No to cancel.
Enter the system PIN (original setting 0000) then press OK. The
display will show Reset Compete and the unit will restart.
Base settings
ECO mode
To reduce the level of power emissions, you can select low power or ECO
mode. When the ECO mode is set to On, the base transmission power will
be reduced.
To turn ECO Mode to On or Off:
1.
2.
3.
4.
Press Menu, scroll d to Settings and press Select.
Scroll d to Set Base and press Select .
Scroll d to ECO Mode and press Select.
Press u or d to highlight On or Off then press Select to confirm.
The display will show Set to ON or Set to OFF depending on the selection
together with a confirmation tone.
Signal icon in
ECO mode
6. Clock & alarm
Date & time
If you subscribe to your network’s caller display service, the base sets the
date and time for all handsets whenever a call is received. You can
manually set the time on an individual handset.
1.
2.
3.
4.
5.
Press Menu, scroll d to Clock & Alarm and press Select .
Date & Time is highlighted, press Select.
Enter the date using the format DD/MM/YY.
Enter the time and press Save.
Press Back to return to the previous menu level or > to return to
standby.
Set alarm
When the alarm is set, the display shows the
icon.
Each handset can have a different alarm setting.
When set to ON,
icon is displayed in place of the standard signal icon.
NOTE
When ECO mode is set to ON, the handset range will be reduced.
Press Menu, scroll d to Clock & Alarm and press Select .
Scroll d to Alarm and press Select .
Press u or d to select On and press Select .
Press u or d to select Once, Monday-Friday or On Daily and press Select.
Enter the time you want the alarm and press Save.
Press Back to return to the previous menu level or > to return to
standby.
If the alarm was set to Once, the
will disappear from the screen.
1.
2.
3.
4.
5.
6.
If set to On Daily or Monday-Friday, the
will remain on the screen.
Alarm on /off
Once an alarm has been set, you can switch the setting On or Off.
1.
2.
3.
4.
Clock & alarm
Press Menu, scroll d to Clock & Alarm and press Select .
Scroll d to Alarm and press Select .
Press u or d to select On or Off and press Select .
Press Back to return to the previous menu level.
21
Switch off alarm ring
When the alarm goes off, press Stop.
If you are using the handset to make a call when the alarm ring is due, the
flashes and you hear a beep in the earpiece.
7. Event Reminder
Add a new event
Time format
Use your D1111 to remind you of details of up to five events such as
birthdays, anniversaries or appointments. The entry can be up to 24
characters long.
Set the time format to 12 or 24 hour setting.
Up to 24 characters can be entered as the subject.
1.
2.
3.
4.
Press Menu, scroll d to Clock & Alarm and press Select.
Scroll d to Time Format and press Select .
Press u or d to select 12 Hour or 24 Hour and press Select.
Press Back to return to the previous menu level.
1. Press Menu, scroll d to Reminder and press Select.
2. If no previous event is stored, Add Event is highlighted. Press Select .
Or
If events are already stored, they are listed. Press Options. Add Event is
highlighted. Press Select.
3. Enter the subject and press Save.
4. Enter the date (DD/MM) and press Save.
5. Enter the time (HH:MM) and press Save. If the current time format
setting is 12 hour, select am or pm.
6. Press u or d to select Silent or Alarm and press Select .
If you press Alarm:
Scroll u or d to select Once or Annually and press Select .
If Once is selected, scroll u or d to select when you want to receive
the reminder At event time or 30 min before. Press Select. Display shows
Saved.
If Annually is selected, then the alarm will sound at the event’s time.
7. Press Back to return to the previous menu level or > to return to
standby.
If you select a silent reminder, the event subject is displayed on screen
but no alarm will sound.
When the event memory is full, the display shows Memory Full. You must
delete an event before you can add a new one.
Switch off reminder ring
1. The event is displayed. Press View to stop the alarm and see the details
of the event. Or press Back to stop the alarm and return to the standby
screen. If no button is pressed, the alarm stops after one minute.
22
Event Reminder
Show reminder details
1. Press Menu, scroll d to Reminder and press Select.
2. Stored events are displayed. If required, scroll d to the event you
want and press Options.
3. Scroll d to Show Details and press Select. The description, date and time
of the reminder are displayed.
4. Press Back to return to the previous menu level or > to return to
standby.
Edit reminder
1. Press Menu, scroll d to Reminder and press Select .
2. Stored events are displayed. If required, scroll d to the event you
want and press Options.
3. Scroll d to Edit Event and press Select.
4. Edit the subject and press Save.
5. Edit the date and time then press Save.
6. Press u or d to select Silent or Alarm and press Select .
If you press Alarm:
Scroll u or d to select Once or Annually and press Select .
If Once is selected, scroll u or d to select when you want to receive
the reminder At event time or 30 min before. Press Select. Display shows
Saved.
If Annually is selected, then the alarm will sound at the event’s time.
7. Press Back to return to the previous menu level or > to return to
standby.
3. Scroll d to Delete Event and press Select.
4. Press Yes to confirm or No to cancel.
5. Press Back to return to the previous menu level or > to return to
standby.
Delete all reminders
1.
2.
3.
4.
5.
Press Menu, scroll d to Reminder and press Select .
Stored events are displayed. Press Options.
Scroll d to Delete All Events and press Select .
Press Yes to confirm or No to cancel.
Press Back to return to the previous menu level or > to return to
standby.
Send reminder as a text message
1. Press Menu, scroll d to Reminder and press Select.
2. Stored events are displayed. Scroll d to the event you want and press
Options.
3. Scroll d to Send as a Text and press Select.
4. The event is displayed. Press Options to select Send option and enter a
destination key.
Delete reminder
1. Press Menu, scroll d to Reminder and press Select .
2. Stored events are displayed. Scroll d to the event you want and press
Options.
Event Reminder
23
8. Calls lists
IMPORTANT
To use Caller Display you must first subscribe to the service from your
network provider. A quarterly fee may be payable.
To ensure the caller's name is displayed, make sure you have stored the
full telephone number, including the dialling code in the phonebook.
If the caller’s number is stored in the phonebook, the name assigned to it
is displayed.
If the number is unavailable, Unavailable will be displayed.
If the call is from an international number, International will be displayed.
If the call is from the operator, Operator will be displayed.
If the call is from a payphone, Payphone will be displayed.
If the call is from a ringback request, Ringback will be displayed.
Caller Display
If you have subscribed to a Caller Display Service, you will be able to see
your caller’s number on your handset display (provided it is not withheld)
prior to answering the call.
If your caller’s name and number are stored in the phonebook and a
name/number match is found, you will see the caller’s name on the
display instead.
Calls lists
Each handset can hold details of up to 30 answered or unanswered calls
and 20 dialled calls.
The caller’s details are stored in a Calls list whether you answered the call
or not. When the list is full, and a new call is received, the oldest entry will
be deleted automatically.
View new missed calls
1. When you see the new calls alert, press View. You can now scroll u or
d through the Missed Calls list.
2. Press Options. Show Details is highlighted. Press Select to see the
number, date and time of the call.
3. Press Back to return to the previous menu level or > to return to
standby.
View and dial from a Calls list
1. Press Menu, scroll d to Calls Lists and press Select . Missed Calls is
highlighted. Scroll u or d to choose Missed Calls, Received Calls or Dialled
Calls .
2. Press Select . You can now scroll u or d through the list.
3. Press Options. Show Details is highlighted.
4. Press Select to see the caller’s number, date and time of call.
5. Press Dial to call the number.
6. Press Back to return to the previous menu level or > to return to
standby.
Copy a Calls list number to the phonebook
1. Press Menu, scroll d to Calls Lists then press Select . Missed Calls is
highlighted.
If required, scroll u or d to Received or Dialled Calls then press Select .
2. Scroll u or d to the entry you want and press Options.
3. Scroll d to Save Number. Press Select.
4. Enter a name then press OK. The number is displayed, press Save.
If you need to edit the number, use Clear to delete any unwanted digits,
then enter new ones using the keypad.
5. Scroll u or d to the ringtone you want and press Select.
6. Press Back to return to the previous menu level or > to return to
standby.
See “Entering names” and “Writing tips” on page 15.
New calls alert
When you have missed calls, the display shows You have X new missed calls.
If you press Back, the screen returns to standby and the
icon is
displayed.
24
Calls lists
Send a text message to a Calls list number
1. Press Menu, scroll d to Calls Lists then press Select. Missed Calls is
highlighted.
If required, scroll u or d to Received or Dialled Calls then press Select.
2. Scroll u or d to the entry you want and press Options.
3. Scroll d to Send Message. Press Select.
4. Write the message then press Options.
5. Send is highlighted. Then press Select . (You can save, insert a symbol,
emoticon or template).
6. The number is pre-entered on the Send to screen, press Send to send
the message.
7. Press Back to return to the previous menu level or > to return to
standby.
See page 31 for more information on text messaging.
Delete an entry
1. Press Menu, scroll d to Calls Lists then press Select. Missed Calls is
highlighted.
If required, scroll u or d to Received or Dialled Calls then press Select.
2. Scroll u or d to the entry you want and press Options.
3. Scroll d to Delete Call. Press Select.
4. Press Back to return to the previous menu level or > to return to
standby.
Delete all entries
You can delete all entries in an individual Calls list or all entries from all
Calls lists.
9. Call Waiting
You must subscribe to your network’s Caller Display service for Call
Waiting to work. A quarterly fee may be payable.
1. During a call, you hear a soft beep in the earpiece and the display
shows the number of the caller or the name if it matches an entry in
your phonebook. If these are not available, the display shows Call
Waiting.
2. Press R to put your current caller on hold and speak to the new
caller.
3. Press R again to switch between both callers (In some countries,
it is required to dial R + 2).
4. Press > to finish the current call or > to end both calls.
10. Voicemail
If you have subscribed to your network operator’s voicemail messaging
service, your handset can inform you when you receive new voicemail.
If you have new voicemail, You have new voicemail is displayed.
• Press Listen to dial the voicemail number preset on the handset. If your
voicemail number is different to the number stored in the handset, you
can manually dial your preferred voicemail number.
• Or press Back to listen to your voicemail at a later time. A reminder
icon
will be displayed.
1. Press Menu, scroll d to Calls List then press Select. Missed Calls is
highlighted.
If required, scroll u or d to Delete Calls press Select.
2. Scroll u or d to highlight Missed Calls, Received Calls, Dialled Calls or All
Calls. Press Select.
3. Press Yes to confirm or No to cancel.
4. Press Back to return to the previous menu level or > to return to
standby.
Call Waiting
25
11. Room Monitor
You can use your D1111 handset to monitor the sounds in another room.
If the sounds reach a certain level the handset will automatically dial out
to a preset external number or to another handset. When the Room
Monitor is set to On, the handset will display Room Monitor On and only the
microphone will be active to monitor the sound levels in the room. Both
the speaker and receiver will be set to Off and the handset will not ring if
there’s any incoming call.
To switch Room Monitor On
1. Press Menu, scroll d to Extra then press Select. Room Monitor is
highlighted. Press Select. Mode will be highlighted.
2. Press Select , scroll d to On then press Select. Set to ON is displayed for 2
seconds. The handset returns to idle screen and disply as Room
Monitor On.
To switch off Room Monitor press Off.
To change the monitor level
The monitor level can be set to High or Low, the default setting is Low.
Internal
1. Press Select and the registered handset will be listed, for example
Handset 2.
2. Scroll u or d to select the handset the Room Monitor will call if the noise
levels reach a certain level.
3. Press Select and Set to handset 2 is displayed.
NOTE
If only one handset is registered the display prompts Not available and
returns to the previous screen. You must register additional handsets
before the handsets will be displayed and make Internal calls.
NOTE
If the Room Monitor is triggered to call a handset or number and the
called handset is on a call, an alert tone of 3 beeps will be heard. If the
Room Monitor is triggered continuously the alert beap will be emiitted
every 5 seconds.
WARNING
This product is not intended for use as a baby safety device and is not a
substitute for adult supervision.
To increase the sensitivity of the Room Monitor:
1. Press Menu, scroll d to Level, press Select and scroll u or d to select Low
or High setting.
To set the dial out number
1. Press Menu, scroll d to Call to and press Select.
2. Use the u or d key to select External or Internal .
External
1. Press Select and Enter Number: prompt will be displayed.
2. Enter the number and press Save. Saved will be displayed.
When Room Monitor is switched on and the sound level reaches a
certain level the number will be automatically dialled.
26
Room Monitor
12. Answer machine
Your D1111 can digitally record up to 12 minutes of messages or up to
59 messages. Each message can last up to a maximum of 3 minutes. As
well as recording incoming messages, you can record memos for other
users.
You can operate your answer machine from:
• the base.
• the handset.
• remotely, from any other Touchtone™ telephone, see page 30.
You will need to set the date and time (if you have not already done so)
so that you will know when each message was received, see page 21.
Base control keys
o
P
s
r
l
x
+
Press to turn the answer machine on/off
Press and hold to enter the outgoing message (OGM)
selection mode
Press to play all stored messages
Press to pause or resume playback
Press to stop message playback
Skip to the next message during message playback
Select Answer Only OGM during OGM selection mode.
Replay current message
Press twice to skip back to previous message
Select Answer & Record OGM during OGM selection mode.
Delete current message during message playback
Press to delete personal OGM during OGM playback. The
pre-recorded OGM is selected and played.
Increase speaker volume during message playback
Answer machine
-
Decrease speaker volume
For more information on outgoing messages (OGM), see page 28.
Switch the answer machine on / off
1. Press Menu, scroll d to Answer Machine and press Select.
2. Scroll d to Answer On/Off and press Select .
3. Scroll u or d to highlight On or Off and press Select. When switched on,
the handset display shows
in idle.
This can also be done via the base by pressing o on the base.
Answer delay
Answer delay sets the number of times your D1111 will ring before the
answer machine picks up your call and starts playing the outgoing
message.
You can change this setting to between 2–9 rings or Time Saver .
The default setting is 6 rings.
1. Press Menu, scroll d to Answer Machine and press Select.
2. Scroll d to Answer Settings and press Select .
3. Scroll u or d to Answer Delay and press Select.
4. Scroll u or d to the setting you want and press Select .
5. Press Back to return to the previous menu level.
For more information on Time Saver, see “Switch your answer machine
on remotely” on page 30.
Switch message alert tone on / off
When you have new messages, with the audible message alert switched on,
you will hear an audible alert once at the handset and the TAM base will
beep every 10 seconds. The default setting is Off.
1.
2.
3.
4.
5.
Press Menu, scroll d to Answer Machine and press Select.
Scroll d to Answer Settings and press Select .
Scroll u or d to Message Alert and press Select.
Scroll u or d to highlight On or Off and press Select.
Press Back to return to previous menu or > key to return to standby.
27
On-screen alert
When you have new messages, the display shows You have X new messages. If
you press Back, the screen returns to standby and the icon
is displayed.
1. Press Play and scroll u or d to the message you want to play. Press
Play to hear the highlighted message.
Outgoing messages
The outgoing message is the message a caller first hears when the
answer machine picks up their call. There are 2 prerecorded outgoing
messages to choose from or you can record your own.
Record your own outgoing message
Your D1111 comes with two prerecorded outgoing messages, Answer
and Record or Answer Only, but if you wish you can record your own.
ANSWER AND RECORD
The pre-set Answer and Record outgoing message, that allows your
caller to leave a message, is “Hello, your call cannot be taken at the
moment, so please leave your message after the tone”.
Your Answer and Record outgoing message can be up to 3 minutes long
and will replace the prerecorded message.
To record your outgoing message:
Press Menu, scroll d to Answer Machine and press Select .
Scroll d to Outgoing Message and press Select.
Record is highlighted, press Select.
Scroll u or d to Answer & Record or Answer Only and press Select .
The display shows Please speak after the tone.
After the tone, speak your message clearly into the handset then
press Save or # to end recording.
7. Your outgoing message is played back. If you want to delete it, press
Delete during playback. If you press Save or wait for the message to
play back, it will be saved.
1.
2.
3.
4.
5.
6.
Voice prompts or outgoing message language
Only outgoing messages will be available if the following languages are
selected: Nederlands and Türkçe. In other words, no voice prompts
instructions will be available if Nederlands or Türkçe is selected.
1.
2.
3.
4.
Press Menu, display shows Answer Machine and press Select.
Scroll d to Answer Settings and press Select.
Language is displayed, press Select.
Scroll u or d to the language you want and press Select to confirm.
ANSWER ONLY
The pre-set Answer Only outgoing message, where callers hear an
announcement but cannot leave a message, is “Hello, your call cannot be
taken at the moment and you cannot leave a message, so please call
later”.
Check or delete your outgoing message
When recording your Answer Only message, remember to advise your
caller that they will not be able to leave a message.
1.
2.
3.
4.
5.
6.
Your Answer Only message can be up to 3 minutes long (maximum
recording length) and will replace the pre-recorded message.
However, you should try to keep your message short to allow time for
recording memos, or incoming messages when using Answer and
Record mode.
28
Deleting a personal outgoing message automatically reinstates the
prerecorded outgoing message.
You cannot delete a pre-recorded message.
Press Menu, scroll d to Answer Machine and press Select .
Scroll d to Outgoing Message and press Select .
Scroll d to Play and press Select.
Scroll u or d to Answer & Record or Answer Only and press Select.
Press d to Personal OGM and press Select .
The message is played. Press OK to stop playback or press Delete to
delete a personal OGM.
7. Press Back to return to the previous menu level.
Answer machine
Select outgoing message mode
Message playback
Choose which outgoing message you want to be played to callers.
Each message is played back with day and time of the call announced.
The caller’s number is displayed (if stored in the phonebook).
Press Menu, scroll d to Answer Machine and press Select .
Scroll d to Answer Settings and press Select.
Answer Mode is highlighted, press Select.
Scroll u or d to Answer & Record or Answer Only and press Select .
If there is a personal OGM saved, press u or d to Default OGM or
Personal OGM and press Select. Your selection is confirmed. If there is no
personal OGM saved the default OGM will be selected.
6. Press Back to return to the previous menu level.
1.
2.
3.
4.
5.
Record a memo
Memos can only be recorded via the handset.
Press Menu, scroll d to Answer Machine and press Select .
Scroll d to Record Memo and press Select.
The display shows Please speak after the tone .
After your hear the tone, speak your memo then press Save or # to
end recording.
5. Your memo is played back. If you want to delete it, press
Delete during playback. If you press Save or wait for the message to
play back, it will be saved.
6. Press Back to return to the previous menu level.
1.
2.
3.
4.
Call screening
When a memo is played back, Memo is displayed on the handset.
1. Press Menu and scroll d to Answer Machine .
Press Select.
2. Play is highlighted. Press Select to choose which messaes you want to
play or scroll d to Play All and press Select to play all messages.
3. Press < to switch between the earpiece and handset loudspeaker.
During playback press Options then scroll u or d to: Pause, Repeat
Message, Skip Forward, Skip Backward, Delete.
4. Press Select to choose the highlighted option. At the end of playback,
press Back to return to the previous menu level.
KEYBOARD SHORTCUTS
During playback:
1 To pause
2 To resume
3 To repeat message
4 To play previous message
5 To delete current message
6 To play next message
When the answer machine is on and takes a call, you can use the
loudspeaker to listen to the caller leaving a message. You can then
identify the caller and decide whether to take the call in person.
Delete all old messages
1. When your D1111 rings, wait for the answer machine to take the call.
When the caller begins leaving a message, the display shows
Recording. Press Screen to hear the caller.
2. To interrupt and speak to the caller directly, press <. Or, after the
caller has hung up, and the display shows You have a new message, press
Play to play new messages.
3. Press Back to return to the previous menu level.
While screening, you can adjust the volume by pressing u or d.
1. Press Menu, scroll d to Answer Machine and press Select.
2. Scroll d to Delete Messages and press Select .
3. Display shows Delete all old messages? Press Yes to confirm or No to
cancel.
4. Press Back to return to the previous menu level.
Answer machine
Answer Machine messages that are not deleted are automatically saved.
New / unplayed messages cannot be deleted.
29
MEMORY FULL
If the memory is within 10 seconds of becoming full while a caller is
leaving a message, they will hear, “Please complete your message within
10 seconds”. If they are still talking when the memory becomes full the
caller hears, “Thank you for calling”, and the machine will hang up.
The OGM will set to Answer Only. You must delete messages before your
D1111 can record new messages.
Remote access
You can operate your answer machine from any Touchtone™ phone by
calling your D1111 and entering a 4 digit security code. Depending on the
language you have selected for your answer machine, for example,
Türkçe - voice prompt instructions will not be available.
Switch remote access On or Off.
1.
2.
3.
4.
5.
Press Menu, scroll d to Answer Machine and press Select.
Scroll d to Answer Settings and press Select.
Scroll u or d to Remote Access and press Select.
Scroll u or d to highlight On or Off and press Select .
Press Back to return to previous menu or > key to return to standby.
Change the remote access PIN
1. Press Menu, scroll d to Answer Machine and press Select.
2. Scroll d to Answer Settings and press Select .
3. Scroll u or d to Remote Access and press Select.
4. Scroll u or d to highlight Set Remote PIN and press Select .
5. Enter the Old 4-digit PIN and press Save. (Default setting = 0000)
6. Enter the new 4-digit Pin and press Save.
7. Enter the new PIN again and press Save.
8. Press Back to return to previous menu or > key to return to standby.
It is advisable to make a note of your new PIN code and keep it
somewhere safe.
Switch your answer machine on remotely
If you forget to switch your answer machine on, you can do it remotely
from another phone.
1. Dial your telephone number and let it ring. After 14 rings you will hear
your outgoing message.
2. Press *, then enter your security code.
(Default setting = 0000)
3. Press 0 and your answer machine will switch on ready to answer
incoming calls.
Time saver
When you ring in to access your messages remotely, if your answer
machine is set to time saver and you have new messages it will answer
after 2 rings, if you do not have any new messages, it will answer after 6
rings. This means you can hang up after 3 rings knowing you have no
new messages, saving you time and the cost of the call.
You cannot use this feature if you have certain network features active as
the call will be intercepted before the 20 rings.
Operating your answer machine from another phone
1. Dial your phone number. When you hear your outgoing message,
press *.
2. Enter your 4 digit PIN. (Default setting = 0000)
This PIN is different from the System PIN used when resetting the unit or
when registering/de-registering handset.
30
Answer machine
3. Use the keypad to operate your answer machine:
DTMF
code
Operations
with Voice Prompts
with Outgoing Messages
*
To enter remote access mode To enter remote access mode
1
To hear main menu
No action
2
To play all messages
To play all messages
3
To play new messages
To play new messages
4
To skip back during messages To skip back during
messages
5
To delete during messages
To delete during messages
6
To skip forward during
messages
To skip forward during
messages
7
To set answer mode
No action
8
To record a new OGM
No action
9
To switch answer machine off To switch answer machine off
0
To switch answer machine on To switch answer machine on
If you have any new messages they will be played after you have entered
your security PIN code.
If you enter an incorrect PIN code you will hear ‘Incorrect security code or
two beeps (error beeps). Please enter your security code’ . You can try
entering the code again. If it is still incorrect you will hear the voice prompt
or two beeps (error beeps) and your D1111 will hang up.
13. Text messaging
Welcome to the text messaging Service on your D1111. Your D1111 can
send and receive text messages from participating mobile networks and
compatible landline telephones in the UK.
IMPORTANT
You must subscribe to your Network Provider’s Caller Display service so
that you can use text messaging and you must not withhold your
telephone number.
A quarterly fee may be payable, please contact your network provider for
more details.
Subscribe to the text messaging service
In some country when you send your first text message from your D1111
you will automatically be registered for the service.
If you have Set-Up problems, please check with your Network provider.
Send a text message
If you are writing a text and you receive a call, the text will be displayed
again when Write Message is selected.
1.
2.
3.
4.
Press Menu, Text Messaging is displayed, press Select.
Write Message is highlighted. Press Select.
Use the keypad to enter your message.
Press Options.
Send is highlighted Press Select to send the message. Enter the phone
number or press Search to open the phonebook then
scroll to the number you want and press Select . Now
press Send.
Or scroll u or d to:
Save
Insert Symbol
Text messaging
Press Select to save the message in the Drafts folder.
Press Select. The symbol table is displayed. Press u or
d to highlight the symbol you want then press Insert.
31
Insert Emoticon
Press Select. The Emoticon table is displayed. Press u
or d to highlight the Emoticon you want then press
Insert.
Receiving and reading text messages
Your D1111 can store up to a total of 50 short messages across all
handset Outboxes, Drafts boxes and Inboxes.
When you receive a new text message, the
with You have X new messages .
Insert Template
Press Select. The list of templates is displayed. Press u
or d to highlight the Template you want then press
Insert.
5. When sending a message, the display shows Sending Message then
Message Sent.
WRITING TIPS
Press Clear to delete incorrect characters.
Use u or d to move the cursor through the text, if you want to insert/
delete text.
UPPER & LOWER CASE
Press # to switch between upper case and lower case letters.
Maximum number of characters in a text message is 160. The display
shows a character countdown from 160 down to 0 (Unless message size
is set to 612 characters).
If the text is unsuccessful, the message Message Sending Failed! will be
displayed.
In order to send and receive text messages you must not withhold your
number.
Standard text entry
With standard text entry you can enter a word by pressing each letter
button a number of times to display the character you want on the screen.
For example, to write the word “Hello”, press 4 twice, 3 twice, 5
three times, 5 three times and 6 three times.
32
icon is displayed along
DO YOU HAVE TWO TEXT PHONE BASES CONNECTED TO THE
SAME PHONE LINE?
If you have two text phone base stations plugged into one line, you are
likely to experience problems receiving text messages. Normally, only
one SMS enabled base unit (DECT or cordless) can be plugged into any
line.
If you do want to use two base units and still receive written text you must
delete receive service centre number from one of the base stations. To
do this on your D1111, see page 34.
This will allow you to send text via either base station but texts will only
be received on the product with the active receive centre number.
If the base unit with the active receive centre number is a DECT product
then all handsets registered to will be able to receive text messages.
MEMORY FULL ALERT
If the text mailboxes are full when you attempt to write a new message
the display shows Memory Full Delete Messages. You must delete messages
before you can write and send a new one.
Read a new message
Received messages are stored in the Inbox.
1. The Inbox is opened and the list of messages displayed. If you press
Back the message is stored in the Inbox for reading later.
2. In the Inbox scroll u (to more recent messages) or d (to earlier list of
messages) through the list of messages.
3. Highlight the message you want to read and press Read or press Back
to return to Text messaging menu.
4. Press > to return to standby.
Text messaging
Read, forward, delete, view and save numbers of texts
in the Inbox
When you see the new message alert, if you press Back the message is
stored in your Inbox so you can read it later.
1. To open the Inbox, press Menu, Text Messaging is displayed. Press Select.
2. Scroll d to Inbox and press Select.
If you have new messages (indicated by a green dot), you will go
straight to the Inbox, if not scroll d to Inbox and press Select .
3. Scroll u or d to the message you want and press Read. Scroll u or d
through the message.
4. Press Options and scroll u or d to:
Reply
Press Select. Write your reply then press Options and
select Send.
Forward
Press Select. The message is displayed. Press Options.
Display highlights Send. Press Select and enter a
number or search for the number then press Send.
Message Details
You can see who sent the message and then call
them. Press Select the sender’s number is displayed.
Press Dial if you want to call the number.
Use Number
Delete
To call the sender, press Select . The display shows Call.
Press Select to call the sender OR to save the number,
scroll d to Save and press Select. Enter a name and
press OK, edit the number if required then press Save.
Scroll u or d to the ringtone and press Select. The
number is saved in the phonebook.
Press Select. Press Yes to confirm or No to cancel.
Edit or send texts in the Drafts box
If you save a message to complete or send later it will be stored in the
Drafts box. Only one message can be saved in each user’s Drafts box.
1. To open the Drafts box, press Menu, Text Messaging is displayed. Press
Select.
2. Scroll d to Drafts and press Select .
Text messaging
3. Press Edit to edit your message content.
4. Press Options and scroll u or d to Send, Save, Insert Symbol, Insert Emoticon
and Insert Template.
5. When sending a message, the display shows Sending Message then
Message Sent.
Forward or delete texts in the Outbox
Your D1111’s outbox is like a redial list. It holds a copies of up to 5 sent
messages. When the Outbox is full, a new message replaces the oldest.
1. To open the Outbox box, press Menu, Text Messaging is displayed. Press
Select. Scroll d to Outbox and press Select.
2. Scroll u or d to the message you want and press Read. Scroll u or d
through the message.
3. Press Options and scroll u or d to:
Forward
Press Select . The message is displayed. Press Options.
Display highlights Send. Press Select and enter the
number or press Search to search the phonebook.
When the number is entered, press Send.
Delete
Press Select then press Yes to confirm or No to cancel.
4. Press > to return to standby.
Edit templates
You can set the templates to your preferred message, up to a maximum
of 32 characters. You can store up to 3 templates
1. Press Menu, Text Messaging is displayed. Press Select scroll d to Templates
and press Select.
2. Scroll u or d to the template you want and press Options.
Edit
Press Select . Press Clear to delete characters. Enter
your template text and press Save.
Delete
Press Select . Press Yes to confirm or No to cancel.
3. Press > to return to standby.
If you delete a template without replacing the text it is marked as Empty.
33
Deleting texts
1. Press Menu, Text Messaging is displayed. Press Select scroll d to Delete
Messages and press Select.
2. Scroll u or d to Inbox, Drafts, Outbox or All Messages and press Select.
3. Press Yes to confirm or No to cancel.
4. Press Back to return to standby.
Selecting All messages will delete all messages stored in your Inbox,
Outbox and Drafts box.
Service Centre numbers
To send and receive text messages you need the telephone number of
your Network’s text Centre. If you accidentally delete the Outgoing or
Incoming Service Centre numbers you will need to re-enter them in order
for your text Service to work. You can enter up to 4 Service Centre
numbers – two incoming and two outgoing.
If you have more than one ‘Server Centre’ stored on your D1111 you will
need to select which one you want to use for sending (see next section).
Add or change Service Centre numbers
1. Press Menu, Text Messaging is displayed. Press Select, scroll u or d to
Text Settings and press Select.
2. Service Centres is highlighted press Select.
3. Scroll u or d to Receive Centres or Send Centre and press Select .
4. Scroll u or d to Receive Centre 1 or Receive Centre 2, or Send Centre 1 or Send
Centre 2 and press Select.
5. Enter the number for the centre and press Save.
6. Press Back to return to the previous menu level. To return to standby,
close the cover or press >.
Set send centre
1. Press Menu, Text Messaging is displayed. Press Select. Scroll u or d to
Text Settings and press Select.
2. Service Centres is highlighted press Select.
3. Press Select again to choose Set Send Centre.
4. Scroll u or d to Receive Centre 1 or Receive Centre 2 or Send Centre 1 or Send
Centre 2 and press Select.
5. Press Back to return to the previous menu level.
34
Message alert tone
When you receive a text message, the message alert tone will sound.
These beeps can be switched on or off.
1. Press Menu, Text Messaging is displayed. Press Select . Scroll d to Text
Settings and press Select.
2. Scroll d to Message Alert and press Select.
3. Scroll u or d to On or Off and press Select .
4. Press Back to return to the previous menu level.
Set message size
A standard text message is 160 characters long. You can set a message
to be up to 612 characters and the message will be sent as up to 4 linked
messages each up to 160 characters long.
1. Press Menu, Text Messaging is displayed. Press Select. Scroll d to Text
Settings and press Select.
2. Scroll d to Message Size and press Select.
3. Scroll u or d to highlight 160 or 612 characters, then press Select.
4. Press Back to return to the previous menu level.
User areas
Your D1111 is pre-set to make all text messages available to every user,
with all messages sent from and received at a ‘Common Box’.
To keep your messages private, you can set up to 4 PIN protected personal
user areas (sub-addresses). Each personal user area has its own Inbox
and Outbox which are only accessible when the correct PIN is entered.
You can also keep a common box sub address for incoming messages
that do not need to be kept private.
Add a user mailbox
If you set-up personal user boxes you must tell people your user area
number. They must put the relevant user area number at the end of your
telephone number when they send you a text message. If they do not
include the user area number, the messages will be stored in the common
box and will be accessible to all users of your D1111.
Text messaging
The mailbox number can only be any number from 0-9 but must not be
the same as another user’s mailbox number or the common or public box
number.
1. Press Menu, Text Messaging is displayed. Press Select. Scroll d to Text
Settings and press Select.
2. Scroll d to Users and press Select.
3. User 1 is highlighted. Scroll u or d to select another User.
4. Press Options. Edit is highlighted. Press Select.
5. Enter the user name (up to 8 characters) and press Save.
6. Use the single digit mailbox number displayed or enter your own
single digit mailbox number then press Save.
7. Enter a 4-digit mailbox PIN and press Save.
8. Enter the password again and press Save.
9. Press Back to return to the previous menu level.
Open and read a mailbox text
Once mailboxes have been set, when you open the Text Messaging menu,
the mailboxes in use will be displayed. You can open the General User
Mailbox without any password but each user area requires you to enter
the 4-digit password PIN.
1. The display shows You have X new messages.
2. Press Read. The mailboxes are displayed. Mailboxes with new
messages are marked with green dots.
3. Scroll d to the mailbox you want and press Select.
4. Enter the mailbox 4-digit PIN and press OK.
5. Scroll u or d to the message you want and press Read.
Or
1. If you have previously pressed Back, the display shows
.
2. Press Menu, the text icon is displayed. Press Select . Mailboxes with
new messages are marked with green dots.
3. Scroll d to the mailbox you want and press Select.
4. Enter the mailbox 4-digit PIN and press OK.
5. Scroll d to Inbox and press Select.
6. Scroll u or d to the message you want and press Read.
Text messaging
Edit a user mailbox
1. Press Menu, Text Messaging is displayed. Press Select . Scroll d to the
mailbox you want to edit and press Select.
2. Enter the 4 digit mailbox password PIN and press OK.
3. Scroll u or d to Text Settings and press Select .
4. Scroll u or d to Users and press Select.
5. Scroll u or d to the user mailbox you want to edit and press Options.
6. Edit is highlighted, press Select .
7. Enter the current mailbox PIN and press OK.
8. Enter the new name and press Save.
9. Enter the new one-digit mailbox number and press Save.
10. Enter the new 4-digit mailbox password and press Save.
11. Re-enter new 4-digit the password and press Save.
12. Press Back to return to the previous menu level or > to return to
standby.
Delete a user mailbox
1. Press Menu, Text Messaging is displayed. Press Select. Scroll d to the
mailbox you want to edit and press Select.
2. Enter the 4 digit mailbox password PIN and press OK.
3. Scroll u or d to Text Settings and press Select .
4. Scroll u or d to Users and press Select.
5. Scroll u or d to the user mailbox you want to delete and press Options.
6. Scroll d to Delete and press Select.
7. Press Yes to confirm or No to cancel.
8. Enter the current mailbox PIN and press OK.
9. Press Back to return to the previous menu level or > to return to
standby.
Set common mailbox sub address
Press Menu, Text Messaging is displayed. Press Select.
Scroll u or d to Text Settings and press Select .
Scroll d to Mailbox Number and press Select.
Enter the single digit mailbox number you want and press Save. If you
enter a number already in use, you hear an error beep. Enter a
different number.
5. Press Back to return to the previous menu level or > to return to
standby.
1.
2.
3.
4.
35
13. Using additional handsets
You can use up to five D1111 additional handsets with your D1111 base
to extend your phone system without needing to install extension sockets
for each new phone.
Your D1111 handset can also be registered to up to 3 other bases. You
can then select the base you would prefer to use.
If you have purchased a D1111 multiple pack any additional handsets
come pre-registered to the base.
If you have purchased an additional handset separately you must register
it to your D1111 base before it can be used.
Registering an additional handset
At the base:
1. Press and hold p for 2 seconds until the base Power starts flashing.
The base will remain in registration mode for 90 seconds.
At the handset:
1. If the handset is new and the display shows Please Register. Press Menu.
Scroll u to Registration. Press Select .
Or
If the handset has already been registered to another base the
standby display is shown. Press Menu, scroll u or d to Registration and
press Select.
2. Register Handset is highlighted. Press Select.
3. Bases are displayed. If necessary, scroll u or d to a new base you
wish to register your D1111 handset to and press Select .
4. Enter the system PIN and press OK. (Default setting = 0000)
5. The display shows Searching Base X (where X is the chosen base
number) then Handset Registered.
The handset is automatically assigned the next available handset
number.
If registration is not successful first time, please repeat the process again
in case the base registration period ran out of time.
Select a base
If your D1111 handset is registered to more than one base, you can select
which base to use.
1. Press Menu, scroll u or d to Registration and press Select.
2. Scroll d to Select Base and press Select.
3. All base numbers are displayed. (In use) is added to bases where the
handset was previously registered to. Scroll u or d to the base you
want and press Select .
4. Display shows Searching Base…. then the standby display for that base.
De-register a handset
Use one handset to de-register another. You cannot de-register the
handset you are using.
1.
2.
3.
4.
5.
6.
Press Menu, scroll u or d to Registration and press Select.
Scroll d to De-register and press Select.
Enter the system PIN and press OK. (Default setting = 0000)
Scroll u or d to the handset you want to de-register and press Select.
Press Yes to confirm or No to cancel.
Press Back to return to the previous menu level or > to return to
standby.
If there are already 5 handsets registered to the base, the registration will fail.
You must de-register another handset before you can register the new one.
36
Using additional handsets
15. Help
Phone does not work
• Have you installed the batteries correctly?
• Check that the mains power is correctly connected.
No dial tone
• Is the telephone cord of the base plugged into the phone socket?
• Check that the mains power is correctly connected to the base and to
the handset charger(s).
• Only use the telephone cord supplied with the phone.
Cannot dial out or receive calls
• Check that the mains power is correctly connected.
• The batteries may need recharging.
• Has there been a power cut? If so, place the handset back on the base
for 10 seconds and try again. If it still does not work disconnect the
batteries and mains power for 10 minutes, then reconnect and try again.
You have a dial tone, but the phone will not dial out
• You may need to change the dial mode from tone to pulse, see
page 19.
• If you are connected to a switchboard, check whether you need to dial
an access code.
Handset does not ring
• The ringer volume may be switched off, see page 17.
• Check that the mains power is correctly connected.
• Check that the line cord is connected.
• Make sure the handset is registered to the base, see page 36.
No display
• The batteries may be flat, dead or incorrectly inserted. Recharge or
replace the batteries.
•
•
•
•
icon flashes
Is the handset registered correctly to the base, see page 36.
Check that the mains power is correctly connected.
Check that the handset is within range of the base.
The batteries are low, place the handset on the base/charger to
recharge.
Help
icon not scrolling
• Try cleaning the charging contacts.
• Check that the mains power is correctly connected.
You hear the busy tone when you press <.
• Make sure the handset is in range of the base.
• Another handset registered to your D1111 base may be on the line.
Answer machine does not record any messages
• The memory may be full. Play and delete old messages, see page 29.
Answer machine messages have the wrong date and time
• Have you set the date and time? See page 21.
No Caller Display number/name displayed
• Have you subscribed to a Caller Display service from your network
provider? See page 24.
• The caller may have withheld their number.
• An exact name/number match was not found in your directory. Check
that you have stored the full STD dialling code.
Cannot register a handset to a base
• You can register a total of 5 handsets to your D1111 base and you can
register your D1111 handset to up to 4 bases. Check that you have not
exceeded the limits.
• Check that you have entered the correct PIN number (default PIN
0000).
• Check that you are at least one metre away from other electrical
equipment to avoid interference when registering.
Base unit does not ring
• Have you connected the telephone line correctly?
• Is the base ringer set to off?
• You may have a faulty line or socket. Try using another socket or line.
Buzzing noise on my phone or on other electrical equipment nearby
• Sometimes your D1111 can interfere with other electrical equipment if
it is placed too close. It is recommended that you place your D1111 at
least one metre away from electrical appliances or metal obstructions
to avoid any risk of interference.
37
Possible problems with text messaging
16. General information
Text messages cannot be sent and screen displays Message Sending
IMPORTANT
This equipment is not designed for making emergency telephone call
when the power fails. Alternative arrangements should be made for
access to emergency services.
Failed
• The base station power supply or telephone line cord might not be
properly connected. Check that the base station power supply is
plugged into the mains socket and switched on and that the telephone
is plugged into the telephone wall socket.
• There might be a fault on the line. Check your telephone line is
working properly.
• You might have deleted the server number in error. See page 34 for
instructions on how to enter the number.
Cannot send text
• The send and receive service center numbers are pre-programmed. If
you need to change them, please refer to “Add or change Service
Centre numbers” on page 34 or contact your service provider.
Cannot receive text
• For some network operator, you will not be able to receive text
messages until you have first sent a message. The first message sent
registers you with the text service.
• More than one text messaging product is plugged into the line.
Remove other products.
• Check service centre number is correct.
• Ensure you have subscribed to a Caller Display service and that it is
active. You can check this by noting if your phone displays your
caller’s number when you receive an incoming call.
• If you are using personal user areas please ensure you have given
people your user area number and that they are entering it to the end
of your telephone number when sending you a text message.
You keep hearing an error beep
• You have pressed the wrong button in a sequence. Check the prompts
in the display or refer to instructions in this user guide.
38
This product is intended for connection to analogue public switched
telephone networks and private switchboards in United Kingdom.
Safety and Electromagnetic Interference/Compatibility
information
• Only use the power supply suitable for this product range. Using an
unauthorised power supply will invalidate your guarantee and may
damage the telephone.
• Use only the approved rechargeable batteries supplied.
• Do not open the handset (except to replace the handset batteries) or
the base. This could expose you to high voltages or other risks.
• Radio signal transmitted between the handset and base may cause
interference to hearing aids.
• Your product may interfere with other electrical equipment, e.g. TV
and radio sets, clock/alarms and computers if placed too close. It is
recommended that you place your product at least one metre away
from such appliances to minimise any risk of interference.
• All batteries can cause property damage and/or bodily injury such as
burns if a conductive material such as jewellery, keys, or beaded
chains touch exposed terminals. The conductive material may
complete an electrical circuit (short circuit) and become quite hot.
Exercise care in handling any charged battery, particularly when
placing it inside a pocket, purse, or other container with metal objects.
• Never dispose of batteries in a fire. There is a serious risk of explosion
and/or the release of highly toxic chemicals.
• It is recommended that advice from a qualified expert be sought
before using this product in the vicinity of emergency/intensive care
medical equipment.
General information
• Medical Devices
• Pacemakers: The Advanced Medical Technology Association
(AdvaMed) recommends that a minimum separation of 15 cms (6
inches) be maintained between a handheld wireless device and a
pacemaker. These recommendations are consistent with those of
the U.S. Food and Drug Administration.
• Persons with pacemakers should:
- ALWAYS keep the handheld wireless device more than 15 cms
from their pacemaker when the handheld wireless device is
turned ON.
- Not carry the handheld wireless device in the breast pocket.
- Use the ear opposite the pacemaker to minimize the potential for
interference.
- Turn the handheld wireless device OFF immediately if you have
any reason to suspect that interference is taking place.
• Hearing Aids
Some digital wireless radios may interfere with some hearing aids.
In the event of such interference, you may want to consult your
hearing aid manufacturer to discuss alternatives.
• Other Medical Devices
If you use any other personal medical device, consult the
manufacturer of your device to determine if it is adequately
shielded from RF energy. Your physician may be able to assist
you in obtaining this information.
Cleaning
• Clean the handset and base (or charger) with a damp (not wet) cloth,
or an anti-static wipe.
• Never use household polish as this will damage the product. Never
use a dry cloth as this may cause a static shock.
Environmental
• Do not expose to direct sunlight.
• The handset may become warm when the batteries are being charged
or during prolonged periods of use. This is normal. However, we
recommend that to avoid damage you do not place the product on
antique/veneered wood.
General information
• Do not stand your product on carpets or other surfaces which
generate fibres, or place it in locations preventing the free flow of air
over its surfaces.
• Do not submerge any part of your product in water and do not use it in
damp or humid conditions, such as bathrooms.
• Do not expose your product to fire, explosive or other hazardous
conditions.
• There is a slight chance your phone could be damaged by an
electrical storm. We recommend that you unplug the power and
telephone line cord during an electrical storm.
Product disposal instructions
• European Union (EU) Waste of Electrical and Electronic
Equipment (WEEE) directive
The European Union's WEEE directive requires that products sold into
EU countries must have the crossed out trashbin label on the product
(or the package in some cases). As defined by the WEEE directive,
this crossed-out trashbin label means that customers and end-users
in EU countries should not dispose of electronic and electrical
equipment or accessories in household waste. Customers or endusers in EU countries should contact their local equipment supplier
representative or service centre for information about the waste
collection system in their country.
• The Waste of Electrical and Electronic Equipment (WEEE) Directive
(2002/96/EC) has been put in place to recycle products using best
available recovery and recycling techniques to minimize the impact on
the environment, treat any hazardous substances and avoid the
increasing landfill.
Product disposal instructions for residential users
When you have no further use for it, please remove any batteries and
dispose of them and the product per your local authority’s recycling
processes. For more information please contact your local authority or
the retailer where the product was purchased.
39
Product disposal instructions for business users
Technical Information
Warranty Information
How many telephones can I have?
All items of telephone equipment have a Ringer Equivalence Number
(REN), which is used to calculate the number of items which may be
connected to any one telephone line. Your D1111 has a REN of 1. A total
REN of 4 is allowed. If the total REN of 4 is exceeded, the telephones may
not ring. With different telephone types there is no guarantee of ringing,
even when the REN is less than 4.
Business users should contact their suppliers and check the terms and
conditions of the purchase contract and ensure that this product is not
mixed with other commercial waste for disposal.
The authorized Motorola dealer or retailer where you purchased your
Motorola product will honour a warranty claim and/or provide warranty
service.
Please return your cordless telephone to your dealer or retailer to claim
your warranty service. Do not return your telephone to Motorola. In order
to be eligible to receive warranty service, you must present your receipt
of purchase or a comparable substitute proof of purchase bearing the
date of purchase. The telephone should also clearly display the serial
number. The warranty will not apply if the type or serial numbers on the
product have been altered, deleted, removed, or made illegible.
What Is Not Covered By The Warranty
• Defects or damage resulting from use of the Product in other than its
normal and customary manner or by not following the instructions in
this user manual.
• Defects or damage from misuse, accident or neglect.
• Defects of damage from improper testing, operation, maintenance,
adjustment, or any alteration or modification of any kind.
• Breakage or damage to aerials unless caused directly by defects in
material or workmanship.
• Products disassembled or repaired in such a manner as to adversely
affect performance or prevent adequate inspection and testing to
verify any warranty claim.
• Defects or damage due to range.
• Defects or damage due to moisture, liquid or spills.
• All plastic surfaces and all other externally exposed parts that are
scratched or damaged due to normal use.
• Products rented on a temporary basis.
• Periodic maintenance and repair or replacement of parts due to
normal usage, wear and tear.
40
Any additional handsets and chargers that you register have a REN of 0.
R&TTE
This product is intended for use within United Kingdom for connection to
the public telephone network and compatible switchboards.
This equipment complies with the essential requirements for the Radio
Equipment and Telecommunications Terminal Equipment Directive
1999/5/EC. including compliance with ICNIRP standard for
electromagnetic energy exposure.
Declaration of Conformance
Motorola hereby declares that this product is in compliance with the essential
requirements and other relevant provisions of Directive 1999/5/EC.
The Declaration of Conformance for this product range is published on
the website:
http://www.motorola.com/eu/radios/technicaldocumentation
Connecting to a switchboard
This product is intended for use within United Kingdom for connection to
the public telephone network.
Inserting a pause
With some switchboards, after dialling the access code you may have to
wait for a moment while the switchboard picks up an outside line so you
will need to enter a pause in the dialing sequence.
General information
Press and hold u to insert a pause (P) before entering the telephone
number.
17. Wall mounting
You may also need to enter a pause when storing international numbers
or charge card numbers.
IMPORTANT
Before you wall-mount your D1111, check that you are not drilling into any
hidden wiring or pipes.
Before you drill, make sure the power and telephone line cables will reach
the sockets.
1. Use the following templates to mark the drilling locations.
• To wall-mount the base, drill two holes in the wall 4.5cm apart
horizontally using an 8mm drill bit.
Recall
You may need to use the recall function if you are connected to a
switchboard/PABX (Private Automatic Branch Exchange), contact your
PABX supplier for further information.
• To wall-mount the charger, drill two holes in the wall 3.2cm apart
horizontally using an 8mm drill bit.
Wall mounting
41
2. Insert the wall plugs if necessary, then insert the screws leaving
about 5mm protruding from the wall on which to hang the phone.
3. Pull the base/charger out of the stand and slot the holes on the back
of the base over the screw heads and gently pull the base/charger
down to make sure it is securely in place.
42
Wall mounting
, the Stylized M Logo and
all other trademarks indicated as such herein are
trademarks of Motorola, Inc. ® Reg. U.S. Pat. & Tm. Off.
© Motorola, Inc. 2008
Printed in P.R.C
Version 3 (06112008-UK)