1
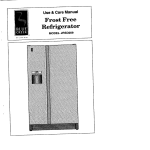
mJENN.AIR
Use & Care Manual
Frost
Free Refrigerators
MODELSJRT1960,JRT2160,JRTD229,
JRT199,JRT219,JRTF1960,JRTF2160
I
Model
Printed in U.S.A.
1996Jenn-Air
JRTD229
PartNo._70304-1
Cat. No.STU1960UA
1/g6
Your Jenn-Air frost-free refrigerator was designed, engineered, and manufactured to the highest standards of quality and performance. Since this manual
explains how you can obtain the best use of your Jenn-Air, it is essential that
you follow the instructions carefully.
Should you have any questions about using your Jenn-Air appliance, write to
us. Be sure to provide the model number of your appliance. Jenn-Air Customer
Assistance, c/o Maytag Customer Service, PO Box 2370, Cleveland, TN
37320-2370.
THE MODEL
YOU NAVE SELECTED
MAY NOT HAVE ALL OF THESE
FEATURES
Automatic Ice M_ker Energy Saver
and Automatic
Switch
Light
Dispenser Bin
RViinkR efrigernttr°;
Crisper
Cover
Adjustable Glass
Sealed
Crisper
Drawer
Sealed
Crisper
Egg
Caddy
Dairy
Compartment
Model
2
Tender
JRTD229
SHOWN
1. Use the three-pronged plug only with a grounding receptacle to provide protection
from electrical shock. This appliance must be installed in accordance with the
installation and grounding instructions on page 4-5.
2. Unplug your refrigerator before cleaning condenser, replacing a light bulb, or
making any repairs. Any servicing shouLdbe performed by a qualified technician.
3. Lncase of power failure, minimize door openings. If powerfailure is of long duration,
protect frozen food by placing blocks of dry ice on top of the packages, or check with
a local frozen foods locker plant about temporary storage. Frozen foods which have
thawed completely should not be refrozen.
4. Any electric service cord that becomes frayed or damaged should be immediately
repaired or replaced. Never unplug your appliance by pulling on the power cord.
5. Your refrigerator should not be operated in the presence of explosive fumes.
6. Remove the doors from any out-of-use refrigerator to prevent child entrapment and
suffocation.
7. DO not place fingers or hands on the automatic ice making mechanism while the
refrigerator is plugged in. This will help protect you from possible Lnjury. Ltwill also
prevent interference with moving parts of the ejector mechanism and the heating
element that releases the cubes.
If you are installing your new refrigerator yourself, please follow these helpful suggestions.
1. Remove base skids,
i [-j
I-J] IL
2. Remove all exterior and interior tape carefully and
,, ,_ll
retain old tape. Make a small pad of this tape to pick
off any remainingtape residues. This will eliminate the
need to use dangerous Solvents of any kind.
3. Remove and discard the cantilever shelf packing clips
located just above each shelf where they hook onto
the frame. To remove the red plastic clip, wiggle it
sideways and pull straight out.
4. Select a location for your new refrigerator away from any heat sources. Allow a free
flow of air through the front base grille.
5. Your model should not be installed where the room temperature will go below
55°,=. because Jt will not run frequently enough to maintain proper temperature in
the freezer.
To enhance its appearance, maintain efficient performance and for proper function of
the ice maker, your refrigerator should be level. Using a carpenter's level, check your
refrigerator to make sure it is level front to back and side to side. The front wheels were
adjusted at the factory so the cabinet would be level. However, jarring in transit, or
standing the refrigerator on an uneven floor may cause the cabinet to appear unlevel.
If leveling is necessary, remove the base grille and adjust:
Models JRT199, JRT219, JRTD229
TUaN
CLOCKWISE
TO
TOlock the cabinet in place, turn down one or
bothlocking feet, located nearthe front wheels.
Rear leveler feet are not required.
I ._.
ifthe floor is notlevel and it is necessary to raise
the rear of the cabinet, we suggest rolling the
rear wheels on to a piece of plywood or other
xt_
shim
material,
r-,
RAISE CABINET CORNER
TURN COUNTER-CLOCKWISE
To LOWER CABINET CORNER
Models JRT1960, JRTF1960, JRT2160, JRTF2160:
The refrigerator has 4 wheels and a leveling
i
I
I
_
,
I
I
the cabinet. To adjust, turn the leveling screw
clockwiseto raiseor counterclockwiseto lower.
screw beneath each front corner at the base of
_-
Your refrigerator is designed to operate on a nominal 115
volt, 15 amp., 60 cycle line. There should be a separate,
grounded circuit, serving this refrigerator only, DO NOT use
ing plug for your protection against possible electrical shock
hazards. It must be plugged into a grounding receptacle.
Where
a standardistwo
prong waft
is encountered,
Your refrigerator
equipped
withreceptacle
a three-pronged
groundit is the personal responsibility and obligation of the cuetomer to have it replaced with a properly grounded threeprong wall receptacJe. DO NOT, under any circumstances,
cut or remove the third (ground) prong from the power cord.
DO NOT use an adapter plug,
_ _L
_
pQ_VER SUppLy CORO
._t. _-P.o.G
_o,_,_ p_.
•
_u.D,_ T_
WALL
.ECE.'.CLE
$ OH pQV#_ _ORO
,,o_,_,_o.,E,_
o_oo,_oo_
TH_,N
S_WN HE_t.
• LOCATIQN O_ p_NG
Your refrigerator may have been built with the doors hinged to the right or hinged to the
left. Refer to the following instructions for door reversal.
Phillips screwdriver
End wrench (5/16")
5/16'r Socket and ratchet
T25 Socket wrench
Putty knife
1. Turn the fresh food control to OFF, unplug the refrigerator end remove all food from
the interior.
2. Remove the handles from the doors and set aside. The bottom mounting screw on
the lower door handle is covered with a cap. Carefullypry it out to expose the screw.
The cap should be saved for reassembly after the handle is remounted. On the side
(front) ofthe lower doorthat you are going to installthe handle,removethe smallround
screwhole plug with puttyknife and press it intothecorresponding holeon the opposite
side of the door.
3. Using a 5/16" socket and ratchet or end wrench, remove the screws from the upper
hinge. Carefully lift the door (including the upper hinge) off of the center hinge and
place iton a padded surface to prevent scratching. Avoid losing the spacer that was
between the hinge and the cabinet top.
4. Using a putty knife, pry the plug button cover from the plastic bushing at the top of
the door. Save the cover for future use.
5. Lift the upper hinge and the spacer washers from the door and install them at the
opposite corner.
6. Position the plug button cover, saved from step 4, over the old hinge bushing and
press it into place.
7. Pry out the 3 plastic plug buttons from the cabinet top and press them into the
opposite corner.
8. Unscrew the hinge pin out of the center hinge on the top of the lower door. Carefully
lift the lower door off the lower hinge and place it on a padded surface. If the metal
hinge pin pulls out of the lower hinge when the door is removed, pull it out of the door
bottom and press it back into the hinge.
9. With the T25 socket wrench and 5/16" socket and ratchet, remove the screws from
the center hinge and spacer from the cabinet. Transfer the two screws from the left
end of the divider bar to the right end. Installthe center hinge and spacer on the left
end of the divider bar the same way it was installed on the right end. Tighten both
screws until they are just snug, then turn them one-half turn more.
10. Pry the plug cover from the plastic bushing at the top of the lower door and press
into the plastic bushing on the opposite side of the door.
11. Remove the base grille by grasping at both ends and pulling it straight out.
12. Remove the hinge cover by squeezing both sides together.
13. Use a 5/16" socket and ratchet to remove the two screws from the bottom hinge.
Save the spacer.
14. Pull the metal hinge pin from the side of the lower hinge and place it, including the
spacer washer, into the top hole.
6
15. Pry out the two screw hole plug buttons on the bottom left side of the top door and
lower door. On some models, remove the door stops (metal plates) on the bottom
of eachdoor and install them on opposite sides. Press in the plug buttons in the holes
on the right side of both doors.
16. Set thelower door on the bottomhinge, making surethe hinge pinentersthe bushing
in the door bottom.
17. While hoWtirtcjthe doer in a clesed positlen, take the canter hinge pin that was
removed in step 8 and screw it through the left hole of the center hinge and into the
bottom doorbushing. Make surethe long pin goes intothe bottom door and the short
pin goes into the top door.
18. Set the upper door on the center hinge, making sure the hinge pin enters the door
bushing. When you close the door, the gasket should hold it in place.
19. Making sure to use the same number of spacers that were originally used beneath
the upper hinge, install the hinge mountingscrews. Beforetigbteningthesescrews,
make sure the top of the door is level with the cabinet top, and the space between
the door is equidistant across the entire front. Avoid over-tightening these screws.
Tighten both until they are just snug, then turn them in another one-half turn.
20. Examine the door gasket all around each door, making sure no gaps are visible
betweenthegasketandcabinet. Ifagapshows, trystretchingthegasketaway#om
the door. The magnet will contact the cabinet surface.
21. Insta}]the handles on opposite sides of the doors as shown.
22. To replace the base grille, line up its spring clips with the square openings in the
cabinet and tap each end in until the grille locks in place. Replace hinge cover.
23. Replace all food and return the fresh food control to its usual operating position.
17 j./
_
.....
J
UPPER
DOOR
_ 7
"
LOWER
DOOR
HANDLE
I
=
II
_J
n
Handle
.
._,_ /
I
extension
(some models)
/
I
HANDLE [IF USED)
EXTENSION
I
Your new refrigerator has two controls. One for
regulating the temperature in the fresh food compartment and one for the freezer. The fresh food
compartment and the freezer compartment controis are located at the top front of the fresh food
compartment. Turn both controls to "No. 5" to start
your refrigerator.
9 is coldest
Saves
Energy /_.
\/
I"
I
$
" I
ReducesExterior
Moisture
U
m
I
The"No.9"freezercontrolsettingisrecommended
for short term use only.
_
9 is coldest
Your refrigerator may run for several hours when you first start it. This is normal and
shouldn't be cause for alarm.
TOstart"
Changing either control will have some
effect on the temperature of the other compartment.
Refrigerat°rtc*°
WARM:
Refngerator too COI O:
Set fresh food coctrol on "5_
Set frsezer contmt on '¢J"
Tum_esh_,_to_e_
h_lherrtumbe_
Tum fresh f°°d c°nt(°t t° l_e:c
/ower numb_.
Turn freezer con_-olto next
tn a day or two, you may decide that one or
both compartments should be colder or
warmer.
If so, adjust the control(s) as
instructed in the accompanying chart.
F_zer_ WARM:
Fteezer_oOOLD
hlghernumbe
K
Turn#eezeroontro/tonext
_wer number
Refng
eraterOFF
Setfreshf°°dr_°ntroltoOFF.
IMPORTANT: Except when starting, do not change either control more than one number
at a time. Allow 24 hours for temperature to stabilize before resetting.
At times, the front surfaces of your refrigerator cabinet may be warm to the touch. This
is a normal function of your refrigerator. This feature prevents moisture from condensing
on the outside of your refrigerator during humid weather.
This condition may be
noticeable when you first start your refrigerator, during hot weather, and during
excessive or lengthy door openings.
The Energy Saver switch controls a heater designed to prevent moisture acoumulation
between the refrigerator and freezer door frame. During humid weather, moisture
collects on objects that are cooler than the surrounding air. This condensation can be
eliminated by applying a small amount of heat to the surface upon which the water
accumulates.
When the Energy Saver switch is on "Saves Energy", no heat is applied to the surface.
It is saving both energy and money. If humidity increases and condensation appears,
turn the Energy Saver switohto "Reduces Exterior Moisture". Be sure to turn the Energy
Saver switch back to "Saves Energy" as the humidity drops to save energy.
In areas of relatively high humidity, the Energy Saver Switch in the "Reduces
Exterior Moisture" position will minimize any collection of moisture on the outside
surface of the cabinet.
For efficient energy use:
1. Besure the refrigeratoris level and ventilation around thefront grille is not blocked,
2. Check door sealsoccasionallyfor leakage, Check at various places,top, bottom,
and sides.
3, Check the temperature;avoid unnecessarycold settings.
4, Keep the freezer near full capacity; less cold air is lost during door openings.
5. Let hot dishes cool before putting into refrigerator or freezer,
6, Cover liquids; if uncovered, the unit must work longer.
7, Clean refrigerator condenser coils at least twice a year.
To maintain the natural flavor, moisture, and nutrition of fresh foods, we recommend
that all dishes, trays, and containers of food be covered.
tioned to suit your special needs. To remove
a shelf, lift the rear straight up a fraction of an
inch and pull straight out. To lock into another
position, tilt the shelf with the front up. Insert
hooks into desired
frame
openings
the
Adjustable
cantilever
shelves
canand
belet
posishelf settle into place. Make sure it
is securely locked at the rear.
_li_ll
1
The Temp Control Drawer, between the top and second shelves, provides short term
storage of fresh meats without freezing. This drawer will provide extra chilling only if the
cantilever shelf that supports the Temp Control Drawer is in the 2nd, 3rd, or 4th shelf
adjusting positions. Keep the drawer tightly closed at all times.
The slidinglever on the back wall, above the drawer enables you to vary the internal
temperaturesinsidethedrawer. Withthe leversetat the "Cold"position,thetemperature
insidethe drawerwill becoolerandyou can storemostgoodqualitymeatsseveraldays.
All meats or poultryshouldbe storedintheir originalstore wrappingsor in plasticbags
to reducethe evaporationof moisturefrom them.
To removethe Temp ControlDrawer, pull it out until it stops. Then applya littlemore
pressure and pull completelyout.
To use your wine rack fit it along
either side of any refrigerator
shelf and lay the wine bottle on
the rack.
III
10
,,,/"
The Sealed Crispers are ideal for storing vegetables and fruit. Keep your crispers tightly
closed to insure freshness. Storing leafy vegetables, such as celeryand lettuce in plastic
bags, reduces moisture evaporation.
The crispers slide out for easy access to foods stored within. They are completely
removable for cleaning (hand wash onty) or for use elsewhere fn your kitchen,
The crisper cover also serves as a refrigerator storage shelf. To remove for cleaning,
push up on the glass cover from underneath and carefully remove.
The humidity control levers are located on the shelf above the crisper drawers. The slide
control should generally be set at the "Low" setting for fruits and the "High" setting for
vegetables.
Occasionally, you may notice water droplets on the back wall. This is normal.
Defrost water isused to maintain humidity level and helps keepfood fresh longer.
Excess water drains into the defrost pan beneath the cabinet and evaporates.
11
Your model has an egg caddy that fits securely on a door shelf. This egg caddy can be
removed and carried to your working area.
Door gaskets are magnetized to insure an air tight seal all around, These gaskets cling
to the cabinet front, once the doors are closed to within their magnetic range.
uo.
oosve
as
teo
oer
position on the door. Lift the shelf straight up until it clears
the retainerson the door liner and pull straight out. Reverse
this procedure when replacing a shelf.
Some models have a bottle retainer located on the lower refrigerator door shelf. It
preventstall bottles from falling out when the door is opened or closed. The bottle retainer
can be adjusted to any position on the shelf by sliding sideways.
All models have a Shelf Tender located on one of the refrigerator door shelves. It
provides upright storage for packages or bottles. The Shelf Tender can be adjusted to
any position on the shelf by sliding sideways.
12
To maintainthenatural flavor, moisture, and nutritionoffrozen foods, and toprevent
freezer burn, we recommend that all foods be wrapped or sealed properly.
end up approximately 1/4"(2) push the shelf to the right
as far as it will go into the sockets (3) lift the left end up
approximately3"and (4) pullthe right end barsout of the
socket in the side wall.
Some models have an expandable-width freezer shelf
which adjusts sideways to open up a full-height space
for tall packages, such as pizza. The right side of the
shelf is supported by a wide leg that slides sideways in
channels on the underside of the shelf. The sheff can
also adjust to two heights. This requires removing the
shelf from the freezer, slidingthe leg out of the channels,
re-inserting it in the alternate height position and returning the shelf to the freezer, hanging on the alternative
T
FREEZER
SHELF
_
"_-_
]
_
._
__
g//////I/I
panded fully to the right wall surface, unless vertical
storage of narrow packages is desired.)
hooks
(usua"Y'
the
dght
supp°rt
se=i°n
w"'beex"L
Some models have a tilt out basket on thelower shelf of
the freezer door. Tiltingthe basket forward by its upper
edge provides easy access to packages, A slight push
upward will tilt the basket back to its proper stored
position.
13
__
_
_
_
li
]l
IIl\\\\\\\\\_\_;.;;_-----------------_J_-.,_
11
f-
.P) Ill[
Your refrigerator comes equipped with ice cube trays and a storage bin (on most
models.) To release frozen cubes, hold the trays upside down and twist both ends.
Some models are designed so an Automatic (oe Maker can be easily installed whenever
you want it. Order the ice maker kit number shown on the label on the cabinet back. The
kit contains installation instructions, water connection instructions and other information
concerning the ice maker operation.
The water inlet tubing assembly required to complete the water connection to the water
valve is located in the crisper drawer in a bag. Connect the ice maker to the water supply
as instructed in the separate Lnstructions,furnished with the refrigerator.
The automatic ice maker is designed to furnish a continual supply of ice cubes. The
amount of ice produced depends on the temperature in the freezer section of your
refrigerator. The colder the freezer section, the more ice is produced. We suggest you
start with your refrigerator and freezer controls at their mid settings. In most cases, this
is satisfactory. If the door to the refrigerator or freezer is opened frequently or
temperatures in the kitchen are abnormally high, a colder setting may be necessary.
After your model has been installed and the water supply connected to the ice maker,
it may take 8 to 12 hours before the ice maker furnishes any usable ice cubes. The first
one or two harvests will probably contain undersized and irregular cubes because of
air in the supply line. The initial harvest may also contain impurities from the new water
supply piping. Therefore, all cubes from the first two or three harvests should be
discarded.
Under certain rare circumstances, ice cubes may be discolored, usually appearing with
a green-bluish hue. The cause of this unusual discoloration is apparently a combination
of factors such as certain characteristics of local waters, household plumbing and the
accumulation of copper salts in an inactive water supply line which feeds the ice maker.
Continued consumption of such discolored ice cubes may be harmful to health. If such
discoloration is observed, discard the ice cubes and contact the dealer from whom the
ice maker or refdgerator was purchased.
Ice cubes that have been in the ice storage for a considerable length of time may pick
up oft-flavor taste, stick together, and gradually become smaller. We suggest that these
cubes be thrown away. We also suggest using an open box of baking soda in the
refrigerator for food odor absorption.
Certain sounds may accompany the various cycles of the ice maker. Examples are: (1)
the motor may have a slight hum, (2) the cubes will rattle asthey fall intoan empty storage
bin, and (3) the water valve may click or "buzz" occasionally. All of these sounds are
normal and should be ignored.
14
Note: When dispensing ice cubes, it is importantthat you use only the ice supplied by
thisicernaker. Ice from anyothersourceoouldcauseanicejam. Ifthis happens, remove
and discard all ice from the storage bin and any ice lodged in the ice chute.
AUTOMATIC
ICE MAKER
Your automaticice maker islocated near the
top of the freezer compartment behind the Ice
Access Panel. To gain access to the ice
/
SENSOR
ARM
p/
_
The ice maker has a wire sensor arm that is
making mechanism,
connectedto
a shut-off
liftswitch.
the Ice This
Access
armPanel.
stops
_
OFF
the mechanism when the ice cube storage
bin isfull, and restartsit after several ice cubes
have been used. You can use the stop arm to stop all productionof ice at any time. All
you need to do is raise the arm into the OFF position.
The ice maker should be turned off (arm up) when;
1. Ice storage bin is to be removed for extended period of time.
2. Refrigerator is not to be used for a considerableamount of time, such as vacations.
Also, turn off the water supply to the ice maker in this instance, if practical.
3. Water supply is to be shut-off for several hours.
the
freezer
compartment
cooled
Water
fillsthe
emptycubehas
mold
(Fig.to
1)freezwhen
ing temperature. Cold air is forced direCtly
over mold.
_FILL
_
i
When frozen, the cubes are rotated up and
out of the mold (Fig. 2). The sweeper arm
1
ejects them into the ice storage bin below.
Fig. |
frozen cubes.
Fig.
3
15
=_"
ICE
]..,_----ICE
BIN
2==J===_==_
d_"'_
However, the mold has been refilled and
cubes frozen so the new supply is ready
when needed. As soon as ice is removed
from the bin,the sensorarm signalsthat more
is needed. The ice maker resumes operation
by eiecting ready-and-waiting
p'-
,_-_1_,_.
The sensor arm (Fig. 3) senses when the
bin is full and signals the ice maker to stop
ejecting more cubes,
TueE
IL_¢_'_
_
Lift the front of the Automatic Dispenser bin and pull it straight out. Wash the bin
occasionally in mild soap and lukewarm water. To replace the bin, push it all the way
back until the bottom of the bin is behind the raised edge at the front of the shelf it rests
on. Make sure the tabs, at the back of the bin, that turn the spiral auger are positioned
between the prongs from the auger motor.
Prevent ice cubes from missing your glass by holding it as
high as possible (just below the ice chute). Press the glass
against the padded lever at the left side of the fountain. To
stop dispensing ice, release pressure just enough to stop the
dispenser motor and leave the glass in place to hold the door
open until ice stopsfalling. With a little practice, you will learn
to anticipate when to release pressure to prevent an unwanted dispense of ice, which occurs each one and one half
seconds.
After installation, it may take 1 to 2 days to fill the Automatic
Dispenser bin with ice cubes.
To dispense water, press a container against the padded lever
at the right side of the fountain. To stop the water flow, release
pressure. To minimize splashing, hold the container as high
as possible.
When you first operate your dispenser or after reconnecting
water to your refrigerator, air will escape from the dispenser for
a few minutes before water begins to flow. Draw 10 glasses of
water and empty them in the kitchen sink. This will insure
complete filling of the reservoir with fresh water.
16
Do not discard water into the grille at the bottom of the fountain. This is a spill area, not
a drain, Normal spil}s wi}lbe evaporated in the recessed area below the spil_shelf grille.
Excessive spills should be removed with an absorbent sponge or cloth. The spill area
should be cleaned occasiona}ly.
The push button light switch is located behind the panel at the top on the right side of
your fountain. For replacement, use a 120v, 7 watt bulb.
A chi}dproof }ock is located behind the panel at the top on the left side of the dispenser.
This push button switch will turn your ice and water dispensers on or off.
17
It is recommended that you disconnect the power cord before cleaning.
Your refrigerator can be rolted out for cleaning. Turn the levelers, at each front corner
of the cabinet,counterclockwise untilthey turn freely. Then pull the cabinet straight out.
Note: If you have an Automatic Ice Maker installed, we recommend that you turn off the
water supply before moving the cabinet.
After cleaning behind your refrigerator, push it back and turn the levelersclockwise until
they touch the floor and lock the cabinet in place.
Use mild soap and water, DO NOT use scouring powders, automobile wax, or furniture
polish. Rinse with clear water.
Door gaskets may be cleaned with soap and water, a baking soda solution, or mild
scouring powder.
Clean both compartmentsand inner door panels with mild soap and water. Do not use
an abrasive powder, solvent, polish cleaner or undiluted detergent.
You may notice a slight discoloration appearing at the top and near the center of the back
wall of the fresh food compartment. This is no cause for alarm, but it should be cleaned
off periodically.
When cleaning a glass cantilever shelf, you can remove it and submerge the entire
assembly in warm water. Never use hot water. Always allow glass to warm up to room
temperature before immersing in warm water.
18
Defrost water drains into a shaJIowpan beneath the
/'/_'/.-_ _
midity, water could remain in the pan. This pan should
be cleaned once a month with a strong solution of soap
and water.
cabinet
anddefrost
evaporates.
During
of high
To remove
pan, grasp
theperiods
base gri}le
on huboth ends and pull it strafghtout. Slide the pan out from
j_.___l
1111
To replace the defrostpan, positionthe side flanges to
underneath
the cabinet.
fit
over the slide
rails and push it in until it stops.
SUPPORT RALL_
_,FROiT
PAN_ _
To replace the base gdlte, line up the spring cfips on the base gdlle with the square
openings on the refrigerator. Tap each end in until the base grille locks in place.
To allow your refrigerator to run more efficientiy, the base grille and the area around
the condenser should be cleaned at least
twice a year. The area aroundthe condenser can be cleaned whenever the refrigerator
is moved during routine house-cleaning.
Unplug the refrigerator and move it away
from the wail Vacuum the condenser and
cabinet normally sits. Plug in the reffigerabase
grille
area and the area where the _OEF"OST
tor after
cleaning.
I
_A,
_o_._
O_,E_
""_.S_G,_Le
TOoJeanthe base grille, grasp both ends and pull straight out. After cleaning, replace
the base grifle.
To replace the base grille, line up the spring clips on the base grille with the square
openings on the refrigerator. Tap each end in until the base grille locks in place.
19
It is recommendedthat you disconnectthe powercord before replacing light bulbs.
Always use a 40 watt, standard base, appliance type bulb when replacing a light.
Replacefreezerbulbby:(1) usingtwohandsspreadeachsideof the lightcoveroutward
and pullto thefront;(2) unscrewand replacebulb;(3) pushrighthandsideof lightcover
towardbackof freezer engagingthe tab intothe slot. Then pushleft side towardback
engagingthe left tab into the slot.
If you wi(ibe gone for a month or less, leave the control knob at its usual setting.
During 7ongerabsences, (a) remove all food, (b) disconnect from electrical outJet, (c)
clean the refrigerator thoroughly, including defrost pan, (d) leave doors open to prevent
odor formation, e) turn off supply water for ice maker, if pra_ical.
20
Problems? Save yourself the inconvenience of unnecessary service calls; check these
first:
Refrigerator runstoo frequently.
• Frequent running provides more stable temperatures.
• Too many door openings.
• Prolonged door openings.
Refrigerator runs too long.
• Under normal conditions, due to larger size and colder temperatures, modern
refrigerators run a greater percentage of the time.
• Prolonged or frequent door openings,
• Condenser needs cleaning.
• Poor air circulation around condenser.
Refrigerator won't run.
• Temperature control turned to OFF.
• Power cord not plugged in.
• No power at electrical outlet.
• House fuse blown or circuit breaker tripped.
Cabinet vibrates.
• Cabinet not level.
• Weak floor.
Warm air from cabinet bottom.
• Normal air flow for condenser circulation.
Front cabinet surface warm to touch.
• Special design to prevent condensation during periods of high humidity or frequent
door openings.
Moisture on outside surface.
• Hot, humid weather increases condensation. When humidity drops, condensation
disappears. During hot humid weather, turn the Energy Saver switch to "Reduces
Exterior Moisture".
Sizzling sound in freezer.
• Normal sound caused by defrost water dripping on defrost mechanism.
Water on floor under cabinet.
• Defrost pan missing orn ot positioned correctly.
21
Water in fresh food compartment
s Cabinet not level.
• Drain tube plugged.
bottom.
Noisy operation.
• Fan noise perfectly normal in frost-free refrigerators. You may not be used tothis
if previous model was manual defrost,
• Cabinet not level.
• Weak floor,
• Defrost pan not positioned correctly.
Odor in cabinet.
• Defrost pan needs cleaning.
• Food left uncovered,
• Interior needs cleaning.
Foods dry out (Fresh or Frozen).
• Packages not wrapped or sealed properly,
• Cdsper not tightly closed.
Fresh food compartment too cold.
• Refrigerator control set too cold.
Fresh food compartment too warm,
• Refrigerator control set too warm.
• Freezer control set at coldest position.
• Prolonged door openings.
Freezer compartment too warm,
• Freezer control set too warm,
• Prolongeddoor openings.
Ice cubes evaporate.
• Cold air moving over ice cubes causes shrinkage.
Automatic ice maker not operating
• Stop arm in OFF position.
• Water supplyturned off.
• Water pressuretoo low.
• Freezer too warm.
Ice Dispenser not operating.
• Ice jam in the dispenser,
• Ice maker not operating,
22
Water Dispenser not operating.
• Water suppiyturned off.
• Water pressuretoo low.
Cabinet light not working.
• Bulb burnedout.
• No powerat outlet.
Water appears on back wall of fresh food compartment
• Normalfunctionduringdefrostcycle. Water flowstothe bottomof the compartment
and drains into the defrost pan.
If You Need Service
• Callthedealerfromwhomyourappliancewaspurchasedor theauthorized JennAir Service Contractor listed in the Yellow Pages. Your Jann-Air Contra_or can
provide better and faster service ifyou can accurately describe problems and give
model and serial number of the appliance. Be sure to retain proof of purchaseto
vedfy warranty status. Refer to WARRANTY for further information of owner's
responsibilities for warranty service.
• If the dealer or service company cannot resolve the problem, write to Jenn- Air
Customer Assistance, c/o Maytag Customer Service, PO Box2370, Cleveland, TN
37320-2370, 1-800-688-1100. (U.S. and Ontario) or 1-423-559-3646.
• Use and care manuals, service manuals, and parts catalogs are available from
Jenn-Air Customer Assistance, c/o Maytag Customer Service.
All specifications subject to change by manufacturer without notice.
23