1
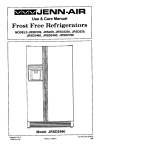
Use & Care Manual
Frost Free
Refrigerator
MODEL JRSD209
8y
J£NN.AIR**
Your Blue Creek frost-free
the highest standards
refrigerator
was designed,
of quality and performance.
engineered,
and manufactured
Since this manual explains
can obtain the best use of your refrigerator, It Is essential
carefully.
to
how you
that you follow the instructions
Should you have ar_y questions about using your appSance, wdte to us. Be sure to previde
the model number of your appriance.
,Jenn-AIr Customer
Assistance,
Customer
Service, PO Box 2370, Cleveland, TN 37320-2370
Automatic
Conven(ence
Frse=er
Door
Shelves
Ice Maker
Tamp
and
Automatic
Dispenser
Bin
Control
& Drawer
Refrigerator
Dairy
Compartment
Egg
Cecfdy
Light
Adlustsble
Sealed
Adlustable
Shelves
¢/o May'tag
Bulk
Glass
Storage Cantilever
Basket
Shelves
;Crispers
Removable
Base Grille
Lift-Off
Shelves
Retainer
1. Use the three-pronged p}ug on}y with a grounding receptacle to provide protection
from e/ectdcal shock (see below). This appliancemust be installed in accordance
with the Installationand grounding instructions on pages 3-4.
2, Unplug your refrigerator before cleaning condenser, replacing a light bulb, or
making any repairs. Any servicingshouEdbe performed by a qualified technician.
3. In case of power failure, minimize door openings, if powerfailure is of long duration,
protectfrozen food by placingblocks of dry ice on top of the packages,or check with
a local frozenfoods lockerplant about temporary storage. Frozen foods which have
thawed completely should not be refrozen.
4, Any electdo servicecord that becomes frayed or damaged should be immediately
repaired or replaced. Never unplug your appliance by pulling on the power cord.
5. Your refrigeratorshould not be operatedin the presence of exp]osivefumes.
6. Removethe doorsfrom anyout-el-use refrigeratorto preventchildentrapmentand
suffocation,
7. Do not place fingers or hands on the automatic ice making mechanism while the
refrigeratoris pluggedin. Thiswill helpprotectyoufrom possibleinjury. It willalso
preventinterferencewith moving parts of the ejector mechanismand the heating
elementthat releasesthe cubes.
Your refrigeratoris designed to operate on a nominal 115
IF:=:
WW_ 3-P_
groundedcircuit,servingth)srefrigeratoronly. DO NOT use
Your refrigerator is equipped with a three-prongedgrounding plug for your protection againstpossible electrical shock
volt,
15 amp.,
60 cycle
line. There
be areceptacle.
separate,
hazards.
It must
be plugged
into a should
grounding
Where
a standardtwoprongwallreceptacleisencountered,
an extensioncord.
it iS the personal responsibilityand obligationof the customer to have it replaced with a properly grounded threeprongwall receptacle. DO NOT, underany circumstances,
cut or removethe third (ground)prongfrom the powercord.
DO NOT use an adapter plug,
3
=ou,_.apLUG"
po.t. _"PPL_
Co.o
I /
_
r.4_UN01NGT'rl=E
WALL
.Ec¢_
,_,,._b,_,,t,_,lo._,_,,oo,_
THAN
_HC_NHERE.
Ifyou are installingyour new refrigeratoryourself,please renewthese helpful suggestions.
1. Remove base skids.
Ill_ll I
2. Remove all exterior and interior tape carefully and
retain old tape. Make a smallpad of this tape to pick
off any remainingtape residues.This willeliminatethe
need to use dangeroussolventsof any kind.
3. Remove and discard the cantilever shelf packing
clips locatedjust above each shelf where they hook
ontotheframe. To removethe red plasticclip,wiggle
it sideways and pull straightout.
4. Selecta locationfor your newrefdgeretoraway fromany heatsources. Allow a free
flow of air throughthe front base grille.
5. Your model shouldnot be installed where the room temperaturewill go below
55°F. becauseit will not run frequently enoughto maintafnproper temperaturein
the freezer.
To enhance its appearance, maintain efficient performanceand for proper functionof
the ice maker, your refrigeratorshould be level. Usinga carpenter's level, check your
refrigeratorto make sure it is levelfrontto back and side to side. The front wheelswere
adjustedat the factory so the cabinet wouldbe level. However,jarring in transit, or
standingthe refflgerstoron anunevenfloormay causethedoerstoshiftoutofalignment.
If levelingis necessary, removethe base gdlle and adjustthe wheel with a screwdriver
as shown.
TOtookthe cabinet in p(aca, turn down one or both
locking feet, located near the front wheels. Rear
leveler feet are not required.
_._ _mf_cO..E.
r_l,
TURNCLOCKWISETO
10 I_AISECA_N_I"CO_IE_
[]!
TO COSRECTTH_;
TIES,
NERANI_S
CORNER
_,L_GN
CONS}-
R AI SI.=.RIGHT
COR-
TO CORRECT
LOWER ME_"
UNTIL
AORO_S
LEFT CORNER
SCORE
TOP
THiS CONSrrlON,
_II_'OR
_R
RAISE
SIGHT
CORHERUNTILDOORSALIGHACROSS
OF
TOP OF CAI_NET.
CASlNET,
Tl_
4
COUNTER.CLOCk_*,'I_
Your new refrigeratorhastwo controls. Onefor regulatingthe temperaturein the fresh
food compartmentand one for the freezer. Bothcontrolsare locatedat the upperrear
of the refrigeratorcompartment,just belowthe light shield.
To startyourrefrigerator,settherefrigeratorcontrol
on "6"and set the freezer controlon "D".
_,=_
,_,_
Let the refrigeratorrunat leasttwo hoursbefore
loadingit with food.
IMPORTANT; In a dayor so, you my decidethat one or bothcompartmentsshouldbe
colderor warmer. DO NOT changeeithercontrolmorethan one letteror one number
at a time. Nlow 24 hoursfor temperatureto stabilizebeforeadjustingthesettingagain.
This does notapply when you first start your refrigerator.
To turnoff yourrefrigerator,set the refrigeratorcontrolon OFF.
At times, the front surfaces of your refrigeratorcabinet may be warm to the touch. This
isa normalfunctionof yourrefrigerator.Thisfeaturepreventsmoisturefromcondensing
on the outside of your refrigeratorduring humid weather. This condition may be
noticeable when you firs! start your refrigerator, dudng hot weather, and during
excessiveor lengthydoor openings.
For efficient energy use:
1. Be surathe refdgeratoris level and ventilatJon
araundthe frontgd]leJsnotblocked.
2. Check doorseals occasionallyfor leakage. Check at variousplaces:top, bottom,
and sides.
3. Check the temperature;avoid unnecessarycold settings.
4. Keep the freezer near full capacity;lesscold air is lost duringdoor openings.
5. Let hot dishescool before putting intorefrigeratoror freezer.
6. Cover liquids;if uncovered,the unit mustwork longer.
7. C_eanrefrigeratoroondensercoils at least twice a year,
$
To maintainthenatural flavor, moisture,and nutritionof fresh foods,we recommendthat
all dishes, treys, and containersof food be covered.
tioned to suit your special needs. To remove
a shelf, lift the rear straightup a frastlon of an
inch and pull straightout. To lock into another
position,tilt the shelf with the front up. Insert
hooks into desired frame openings and 1stthe shelf settle into place. Make sure it is
securely locked at the rear. Some models have slide out shelves that are designed to
contain spills. Height adjustments are made the same way, being careful that the
movable shelf remains fully in the frame.
Slide-out shelves move on plasticrelis and may be easily pulled forward for access to
foods placed toward the rear. To remove a slide-out sheff,pull it toward you until it stops,
then lifl the front edge slightly and pull completely out.
The Temp ControlDrawerprovidesshortterm storageof fresh meatswithoutfreezing.
The shelfwiththe Temp ControlDrawer can be placedin one of three positions.When
adjusting this shelf, removethe drawer and look at the back wall of the drawer. It is
necessaryforthe air inlettube at the back of the refrigeratorto line up at the top,middle
or bottom of the air slots In the back of the drawer. Set the temperaturecontrol to the
coldest positionwhen adjustingthe Temp Control Drawer. Once adjustment has been
made, replacethe drawerand set the controlto the desired setting.
The controlknobis locatednear the refrigeratorcontrol. Asthe knobisturnedfromthe
"Cool"settingtowardthe "Cold"setting,thetemperaturewiUget colder, Selectthe "Cool"
settingfor storageof luncheonmeat and cheese. Selectthe "Cold" settingfor storage
of fresh meats.
All meats or poultry shouldbe storedin theiroriginal storewrappingsor in plasticbags
to reducethe evaporationof moisturefrom them, Keep your Temp Control Drawer
tightly closed at all times to obtain best results.
The Sealed Crispersare idealfor storingvegetables and fruit. Keep yourcrisperstightly
closedto insurefreshness. Storing leafy vegetables, such ascelery and lettuce in plastic
bags, reduces moisture evaporation.
The crispers slide out for easy access to foods stored within, They are completely
removable for cleaning (hand wash only) or for use elsewhere in your kitchen.
The top crisper cover also serves as a refrigerator storage shelf. To remove the crisper
cover for cleaning, lift the front edge and pull straight out.
The humiditycontrol leveris located on the shelf above the crisper drawers. The slide
controlshouldgenerallybe set at the "Low"settingfor fruitsand the "High" setting for
vegetables.
Touse
ne
rw,
either side of any refrigerator
shelf,engageitsrear notchto the
shelf back corner. Lay the wine
bottle on the rack.
7
All doors containbuilt-in mechanismsthat automaticallypull them completely shut once
they are closed to within 6 inches of the cabinet, All doors also have magnetic door
gaskets that cling to the cabinetfront, onoe the doors are closed to within their magnetic
range. It is important that your refrigerator be reasonably level for the door closures to
function properly.
Door shelf frontscan be removedfor easy cleaningof the door
liner and shelf fronts. Lift the shelf front straight up until it clears
the retainer on the door liner and pull straight out. Reverse this
procedure when replacing the door shelf front.
'
Lift-off door shelves may be easily adjusted to another position on _, "x_'_-_lI
the door. Lift the shelf straight up until it clears the retainers on the
door liner and pull straight out, Reverse this procedure when
replacing a shelf.
]
_1_
Some models have a bottle retainer located on the lower refrigeratordoor shelf. It
preventstall bottlesfrom fallingout when the door is openedor closed. To attachthe
retainer on the shelf front, havethe smoothside facingforward, alignthe retainerwith
thefront lipof the shelffront and snap into position.The bottle retainercan be adjusted
to any positionon the shelf by slidingsideways.
All models have a Shelf Tender located on one of the refrigerator door shelves. It
providesuprightstoragefor packagesor bottles. The Shelf Tender can be adjustedto
any positionon the shelf by slidingsideways.
To maintainthe naturalflavor, moisture,and nutritionof frozen foods, and to prevent
freezer burn, we recommendthat all foods be wrapped or sealed properly.
The freezer shelves can be adjusted up or down or __
removedto accommodatevarious sized packages. To
removea shelf,lift upon rightsideofshelfandpushtothe
right. Then, tiltsheff and remove.
To replacea freezer shelf:(1) tiltthe shelf and insertright
rodends intoupper portionof oblong holes in the freezer
side wall;and (2) lowerthe left side of the shelf and insert in oblongholesin the left side
of the freezer wall. Make sure the shelf is secure before loading.
To removethe freezer basket;(1) pullthebasketpartiallyout;(2) reachto theback ofthe
basketand pivotthe metal clipsup to a horizontalposition;and (3) pull the basketout.
When replacingthe basket, reversethe removalprocedure.
g
The water inlettubing assembly required to complete the water connectionto the water
valveis locatedinthe crisperdrawer ina bag. Connectthe icemakertothe water supply
as instructedin the separate instructions,furnishedwith the refrigerator.
The automaticice maker is designed to furnish a continual supply of ice cubes. The
amount of ice produceddepends on the temperature in the freezer section of your
refrigerator.The colderthefreezer section,the more ice isproduced.We suggestyou
startwithyourrefrigeratorand freezercontrolsat theirmidsettings. In mostcases,this
is satisfactory. If the door to the refrigeratoror freezer is opened frequentlyor
temperatures In the kitchen are abnormally high, a colder setting may be necessary.
Afteryour model has been installedand the watersupplyconnectedto the ice maker,
itmay take 8 to 12 hoursbeforethe ice makerfurnishesany usable icecubes, The first
one or two harvests will probably contain undersized and irregularcubes because of
air in the supplyline. The initialharvestmay alsocontainimpuritiesfromthe newwater
supply piping. Therefore, all cubes from the first two or three harvests should be
discarded.
Undercertain rare circumstances,icecubes may be discolored,usuallyappearingwith
a green-bluishhue. The causeof this unusualdiscolorationisapparentlya combination
of factors such as certain characteristicsof local waters, householdplumbingand the
accumulationof coppersalts in an inactive watersupplyline which feeds the ice maker.
Continuedconsumptionof such discoloredicecubesmay be injuriousto health. If such
discolorationis observed,discardthe ice cubesand contactthe dealer from whomthe
ice maker or refrigeratorwas purchased.
Ice cubes that have been in the ice storage for a considerable length of time may pick
up off-flavor taste, sticktogether, and gradually become smaller. We suggest that these
cubes be thrown away. We also suggest using an open box of baking soda in the
refrigerator for food odor absorption.
Certain soundsmay accompany the various cycles ofthe ice maker. Examplesare: (f)
the motor may have a slighthum, (2) the cubes will rattle as they fall intoan empty storage
bin, and (3) the water valve may click or "buzz" occasionally. All of these sounds are
normal and should be ignored.
Note: When dispensing ice cubes, it is importantthat you use only the ice supplied by
this icemaker. Icefromanyothersourcecouldcause an icejam. If thishappens,remove
and discard all ice from the storagebin and any ice lodged in the ice chute.
10
AUTOMATIC
ICE MAKER
Your automatic ice maker is located near the top of
the freezer compartmentbehind the Ice Access
Panel. To gain access to the ice making mechanism,lift the Ice AccessPanel.
rI
f
SENSOR
/
'_--
ARM
/-._ or_
The ice maker has e wire sensorarm that is connetted to a shut-off switch. This arm stops the
mechanismwhen the ice cube storage bin is full,
and restartsit afterseveral ice cubes have been used. You can use the stoparm to stop
all productionof iceat anytime. Allyou needto do israisethe arm intothe OFF position.
The ice maker should be turned off (arm up) when:
1. Ice storage bin is to be removed for extended period of time.
2. Refrigeratoris notto be used fora considerabletime, suchas vacations. Also,turn
off the water supply to the ice maker in this instance, if practical.
3. Water supplyis to be shut-offfor several hours.
Water fills the emptycube mold(Fig. 1) when the
freezer
compartmenthas
cooledtofreezingmold.
tem- F*_'[
tg_
perature.
Coldair isforceddirectlyoverthe
When
frozen,
the
cubes
are
rotated
up
and
out
TUB_
FILL
_d_- -
of
the mold (Fig. 2). The sweeper arm ejects them
intothe ice storagebin below.
i_,_
l_jg.
2
The sensorarm (Fig.3) senseswhenthe binisfull
and signalsthe ice maker to stop ejectingmore
However,the moldhasbeenrefilledandcubes
frozensothenewsupplyis readywhenneeded.
As soon as ice is removedfrom the bin, the
sensorarm signalsthat moreis needed. The
icemakerresumesoperationbyejectingreadyand-waitingfrozen cubes.
cubes.
11
iCE
..=-.--ICE
II
iI
Fig.
DOWN
FOR
1,ON,,
.Posmo.
e,N
L_ the front of the AutomaticDispenser bin and pull _tstraight out. Wash the bin
occasionally in mild soap and lukewarm water. To replace the bin, push it all the way
back until the bottom of the bin isbehind the raised edge at the front of the shelf it rests
upon. Make sure the tabs, at the back of the bin, that turn the spiral augerare positioned
between the prongs from the auger motor.
Water/Ice
Control
For dispensingice cubes, the slide control must be
movedtothe "Cube" position(center). For dispensing
crushedice, movethe controlto the "Crushed"position
(left).
For dispensingchilled water, the slide control must be
moved completely to the "Water" position (right).
Water from the dispenser is chilled. For colder water
simply add ice before dispensing the water. Also, the
first glass of water dispensed eachtime may be warmer
than consecutive glasses. It will be cooler if a full glass
of water fs dispensed rather than a partial glass. Fill a
containerwith ice before adding liquid to prevent splashing.
Dispensing
To filla glass,positionthe glassagainstthe top portion
oftheactuatorpad andpress,Holdthe glass high in the
dispenser opening to reduce the ice falling outside
the glass.
Somecrushedice may be dispensedeven thoughyou
selectedCUBE. Thishappensoccasionallywhena few
cubes accidentallyget channeled in the crusher.
Whenchangingfromcrushedicetocubes,somecrushed
icemay bedispensed.Thismayalsohappenifirregular
sized cubesor ice chipsare in the storagebin,
Theremay bea delaywhenyouswitchfromcubestocrushedice, Ittakes a few seconds
for the cubesto be channeled in the crusher. Crushedice pieceswill vary in size and
shape.
12
Ice shouldnotbe dispenseddirectlyintothinglasses,finechina ordelicate crystal-- they
can crackor chipfromthe combinedpressureof your handpressingthem againstthe
actuatorpad and ice droppingintothe container,
Ice otherthan that producedbyyour ice makershouldnot be addedto the icestorage
bin - it may not crush and/or dispenseproperly.
For targequantitiesof cubedice, removethe ice directlyfrom the storage bin. Do not
operatethe ice dispensercontinuouslyfor more than five minutes.
If the ice dispenseris not usedfrequently,icecubes may clumptogetherand may need
to be brokenapart or discarded.
Releasethe pressureon the padand hardthe containerin positionmomentarilyto catch
thelast piecesof ice ordropsof water. The ice deliverydoorwill remainopenfor a short
time. When it closesyou may hear a closingsound.
Do not discardwater intothe grilleat the bottom of the fountain. This is a spillarea, not
a drain. Normal spills will be evaporated in the recessedarea below the spilr shelf grille.
Excessivespills should be removed with an absorbent sponge or cloth. The spill area
should be cleaned occasionally.
The pushbutton lightswitchislocated behindthe panel at the top and on the rightside
of your fountain, For replacement, use a 120v, 7 watt bulb.
A child proof tookis located behind the panel at the top and on the left side of the
dispenser. This toggre switch will turn your ice and water dispensers on or off.
13
It is recommended that you disconnect the power cord before cleaning.
Your refrigeratorcan be roiledout for cleaning. Turn the levelers,at each frontcorner
of the cabinet,counterclockwise untiltheyturn freely. Then pullthe cabinetstraight
out. Note: Ifyou have an AutomaticIce Maker installed,we recommendthat you turn
offthe water supplybefore movingthe cabinet.
Aftercleaningbehindyourrefrigerator,pushitbackand turnthe levelersclockwise until
they touchthe floor and lockthe cabinet in place.
Use mildsoapand water, DO NOT usescouringpowders,automobilewax, or furniture
polish. Rinsewith clear water.
Door gaskets may be cleaned with soap and water, a baking soda solution,or mild
scouring powder.
Clean bothcompartmentsand innerdoor panelswith mild soap and water. Do not use
an abrasive powder,solvent, polishcleaner or undiluteddetergent.
When cleaninga glass cantilevershelf, you can remove it and submergethe entire
assemblyinwarmwater. Never usehotwater. Always allow glass to warm up to room
temperature before immersing in warm water.
14
Defrostwafer drainsintoa shallowpan beneaththe
cabinetand evaporates. Duringperiods of high
humidity,watercouldremain in the pan. This pan
should be cleaned once a month with a strong
solutionof soap and water. It is locatedbehindthe
base gfige. To removethe base grille,grasp itat
both ends and pull straightout.
j./_-_f---_
Liftthe frontof the defrostpanand pullit straight out.
,_,o_
_,L,
To replacethe defrostpan, reverse procedureas
_l
shown.
To replacethe base griUe,line up the spring clips
on the base grillewiththe square openingsin the
cabinet and gentlytap each end in untilthe gdlle
___'__
__
locks in place.
._,Lj_
TO allow your refrigeratorto run more efticiently,the base gdlle and the area around
the condensershouldbe cleaned at least
twicea year. The areaaroundthecondenser can be cleanedwheneverthe refrigerator
is moved during routine house-cleaning.
Unplug the refrigeratorand move it away
fromthe wall. Vacuumthe condenserand
base grille area and the area where the
cabinetnormallysits.
Plugin the refrigerator after cleaning.
To clean the base grille, grasp both ends
and pullstraightout. Aftercleaning,replaoe
the base grille.
1S
]
JI
_'_
o=_sr_,
_
..
,_F,o=_
OpEN END
._s_,,_
PA1_ _*
eASE_.,LU_
it is recommended thatyou disconnectthe powercord before replacing light bulbs.
To replace the upper refrigerator light bulb:(t) graspthe lightshield neartheendsand
pull out untilthe shieldpulisfree ofthe retainerlugs;(2) unscrewbulb and replacewith
a 40 watt appliancebulb;and (3) hookthe light shield over the upper retainer lugsand
press in at the bottom until the shieldsnaps in place.
To replace the lower refrigerator light bulb on some models: (1) removethe Temp
ControlDrawer;(2) usingtwo hands,spreadthe top ad bottomof the light shieldvertically
awayfrom each otherand pulltothe frontto remove;(3) unscrewthe bulb and replace
it with a 40 watt showcase bulb; (4) usingtwo hands, spread the top and bottomof the
lightshieldand pushitintoplaceengagingtabsin slots;and (5) replacetheTemp Control
Drawer.
To replace the freezer light bulb: (f) remove the ice cube dispenser bin and the top
freezer shelf;(2) unhookthe tabs on the top of the lightshieldby pressingin withyour
thumb onthe center topof the lightshield; (3) pivotthe shield down;(4) unscrewthe bulb
when it is cooland replaceitwitha standard40 watt appliancebulb;(5) pivottheshield
up intoplace, snapping the tabs intothe slots: (6) replace the freezer shelf and the ice
cube dispenserbin.
If you will be gonefor a monthor less, leave the control knob at itsusual setting.
During longerabsences, (a) removeall food, (b) disconnectfrom electricaloutlet, (c)
cleanthe refrigeratorthoroughly,includingdefrostpan, (d) leave doorsopento prevent
odorformation,and e) turnoff water supplyto ice maker, if practical.
16
Problems? Save yourselfthe nuisanceof unnecessaryservicecalls; checkthesefirst:
Refrigerator run•too frequently.
• Frequentrunningprovidesmore stabtetemperatures.
• Too many door openings.
• Prolongeddoor openings.
Refrigerator run• too long.
• Under normalconditions,due to largersize and co(dertemperatures,modern
refrigeratorsrun a greater percentageof the time.
• Prolongedor frequent door openings.
• Condenser needs cleaning.
• Poor air circulationaround condenser.
Refrigerator won't run.
• Temperaturecontrelturned to OFF.
• Power cord not pluggedin.
• No powerat electricaloutlet.
• Housefuse blownor circuitbreaker tripped.
Cabinet vibrates.
• Cabinet not level
• Weak floor.
Warm air from cabinet bottom.
• Normalair flow for condensercimulation.
Front cabinet surface warm to touch.
• Special designto prevent condensationduringperiodsof high humidity.
Moisture on outside surface.
• Hot, humidweather increasescondensation.When humiditydrops,condensation
disappears.
Red glow visible in freezer.
• Reflectionof defrostmechanismduring normaldefrostcycle.
Sizzling sound in freezer.
• Normal soundcaused by defrostwater drippingon defrost mechanism.
17
Water on floor under cabinet.
• Defrostpan missingor not positionedcorrectly.
• Water connectionloose on water valve.
Noisy operation.
• Fan noise perfectlynormal in frost-free refrigerators. You may not be used to this
if previousmodelwas manual defrost.
• Cabinet not level,
• Weak floor.
• Defrost pan not positionedcorrectly.
Odor in cabinet.
• Defrostpan needs cleaning,
• Food left uncovered.
• Intedor needs cleaning.
Food• dry out (Fresh or Frozen),
• Packages not wrapped or sealed properly.
• Crispernot tightlyclosed.
Fresh food compartment too cold.
• Refrigeratorcontrolset too cold.
Fresh food compartment too warm.
• Refrigeratorcontrolset too warm.
• Freezer controlset at coldestposition.
• Prolongeddoor openings.
Freezer compartment too warm.
• Freezer controlset too warm.
• Prolonged door openings.
Ice cube• evaporate.
# Cold air movingover ice cubes causes shrinkage.
Automatic ice maker not operating.
• Stop arm in OFF position.
• Water supplyturnedoff.
• Water pressuretoo low.
• Freezer too warm.
Ice
•
•
•
•
•
Dispenser not operating.
Ice jam in the dispenser.(Clear with plasticor wooden utensil.)
Ice maker not operating.
The padlock switchactivated.(Toggleswitch to check.)
The ice is clumpedin the bin. (Break up or discard.)
An icejam in the crusher.(Remove icefrom storagebinand turnaugerby hand.)
18
Water Dispenser not operating.
• Water supplyturned off.
• Water pressuretoo low.
Cabinet light not working.
• Bulb burned out.
• NOpower at outlet.
If You Need Service
• CaU the dealer from whom your appliance was purchasedor the authorized
Jenn-AirServiceContractorlistedintheYellow Pages. YourJenn-AirContractor
can providebetterandfasterserviceifyou canaccuratelydescribeproblemsand
givemodelandsedalnumberoftheappliance,Besuretoretainproofofpurchase
to verify warrantystatus. Refer to WARRANTY for further informationof owner's
responsibilitiesfor warranty service.
• If the dealer or service companycannot resolvethe problem, writeto Jenn- Air
CustomerAssistance,c./oMaytag CustomerService,PO Box2370, Cleveland,
TN 37320-2370, 1-800-688-1100.
• Use and care manuals,servicemanuals,and parts catalogsare available from
Jenn-AirCustomerAssistance,clo Maytag Customer Service.
All specificationssubjectto change by manufacturerwithoutnotice.
19