Download GPX PF150B Digital Photo Keychain User Manual
Transcript
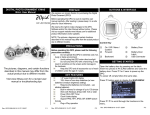
FCC WARNINGS FEATURES INCLUDED NOTE: This equipment has been tested and found to comply with the limits for a Class B digital device, pursuant to Part 15 of the FCC Rules. These limits are designed to provide reasonable protection against harmful interference in a residential installation. This equipment generates, uses, and can radiate radio frequency energy and, if not installed and used in accordance with the instructions, may cause harmful interference to radio communications. However, there is no guarantee that interference will not occur in a particular installation. If this equipment does cause harmful interference to radio or television reception, which can be determined by turning the equipment off and on, the user is encouraged to try to correct the interference by one or more of the following measures: • Digital Photo Frame Keychain displays photos and pictures • JPEG Picture File Format • 1MB Memory Built In, can store up to 60 Pictures • Mini USB 1.1 Jack • Supports USB Sync and Charging when connecting to PC • Supports Multiple Picture Download through PC through Conversion Program • 1.5” Color Display • 128 x 128 pixel • 65K Color • Auto Off times • Auto Power Off Interval: None, 3, 5, 10, 15, 30, 45, 60 min • Digital Clock & Calendar • DC-Powered: Built-In Rechargeable Battery, up to 4 Hours Display Time • Recharge from PC through Mini USB 1.1 Jack • Supports USB Sync and Charging at the same type when plugged in to PC • Keychain • USB Cable • File Conversion / Compression Software (stored on the Digital Photo Keychain’s internal memory) Reorient or relocate the receiving antenna. Increase the separation between the equipment and receiver. Connect the equipment into an outlet on a circuit different from that to which the receiver is connected. Consult the dealer or an experienced radio/TV technician for help. DISPLAY MINI USB CONNECTION RESET Press to reset the digital photo keychain to it’s default settings. MENU Press and hold to power the digital photo keychain off and on. Press to access the main menu and make selections. FILE COMPATIBILITY MAIN MENU CLOCK & CALENDAR USB Connect To set the clock and calendar, select Date/ Clock Set from the main menu, then select Set Clock. Use when connecting the Digital Photo Keychain to a computer. Date/Clock Set Use to view a digital or analog clock, the calendar, or to set the clock or calendar. Slide Show • JPEG Use to turn the slide show feature off or on. COMPUTER SYSTEM REQUIREMENTS Auto Off • Windows XP (PC) • Windows Vista (PC) • Windows 7 (PC) • Linux (PC) • Mac OSX (Mac) Use to set a number of minutes before the Digital Photo Keychain automatically shuts off. Backlight Use to adjust the brightness of the backlight. UP/DOWN () Press to skip through photos, or to navigate through the menu. Exit Press the UP/DOWN () button to adjust the year, month, day, hour, minute, and second. Press the MENU button to save the adjusted year, month, day, hour, minute, and second. International Support To download this User’s Guide in English, Spanish, or French, visit the support section at www.gpx.com. Para transferir esta guía de usuario en inglés, español, o francés, visite la sección de la ayuda en www.gpx.com. Pour télécharger ce guide de l’utilisateur en anglais, espagnol, ou français, visitez la section de soutien chez www.gpx.com. Contact Information Address: 2116 Carr Street, St. Louis MO, 63106 Phone: 1-314-621-2881 Fax: 1-314-588-1805 CONNECTING TO A COMPUTER USING THE SOFTWARE (PC) LOADING PHOTOS (PC) SOFTWARE INSTALLATION (MAC) LOADING PHOTOS (MAC) Once connected to a computer, the Digital Photo Keychain will automatically begin charging. Follow the instructions for Connecting the Digital Photo Keychain to a computer. Follow the instructions for Using the Software (PC). Follow the instructions for Connecting the Digital Photo Keychain to a computer. Follow the instructions for Software Installation (Mac). 1 Connect the Digital Photo Keychain to a computer (Windows, Apple, or Linux) using the included USB cable. Plug the mini-USB plug into the MINI-USB CONNECTION on the Digital Photo Keychain. Plug the larger USB plug from the cable into a computer. 2 Press the MENU button to access the main menu. 3 Highlight USB CONNECT and press the MENU button. 4 Highlight YES and press the MENU button. 1 Once connected, the Digital Photo Keychain will show up on the connected computer as if it were a connected USB thumb drive, external hard drive, or memory card under “My Computer”. 2 Navigate to the connected keychain’s drive (DPFMate) on the computer and double click on it. This will run the included software on your computer. 1 Navigate to the connected keychain’s drive (DPFMate) on the computer and double click on it. 2 In the DPFmate software file browser, navigate to the desired JPEG to add to the Digital Photo Keychain, and double click on it. 3 Drag the photo to adjust the cropping as needed. 4 Click the ADD button. 5 Click the DOWNLOAD button to download the selected file to the Digital Photo Keychain. 1 Once connected, the Digital Photo Keychain will show up on the connected computer as if it were a connected USB thumb drive, external hard drive, or memory card on the desktop. 2 Navigate to the connected keychain’s drive on the computer. 3 Open the drive on the computer and drag the MacDPFmate.zip onto your desktop. 4 Double click on the MacDPFmate.zip file. 5 Drag the resulting MacDPFmate.app file to your “Applications” folder. PF150 Digital Photo Keychain 1 Double click on the MacDPFmate.app file to open the software. 2 In the MacDPFmate software file browser, navigate to the desired JPEG to add to the Digital Photo Keychain, and double click on it. 3 Drag the photo to adjust the cropping as needed. 4 Click the ADD button. 5 Click the DOWNLOAD button to download the selected file to the Digital Photo Keychain. Email: [email protected] Parts Email: [email protected] Website: www.gpx.com USER’S GUIDE V:1206-0817-09


