1
GEAppliances.com
Safety Instruc_tions
Operating
the
on
Dehumidifier
the
How
. ..........
the
5
............
Dehumidifier
Installing
4
..............
a LocaOon
the
5
Operates
V(ater
Bucket
. . .5
.......
Removing
Collected
_4'ater
V(ater Level
...................
6
......
6
6
Care and Cleaning
Air Fiher
. ....................
7
Cleaning
the Coil ..............
Grille and Case ................
VVater Bucket
..................
7
7
7
Troubleshooting
8
Tips
Consumer
Support
Consumer
Support
Product
Registration
_'arranty
..........
............
.........
12
9, 10
....................
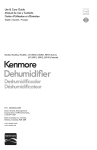
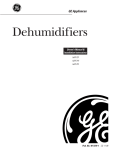
*ENERGY
A HG3OLH
A HG40L H*
AHG5OLH*
Controls
Defrost
Choosing
2, 3
Instruc_tions
About
AutomaOc
...........
STAR
®
labeled
11
product
ENERGY
STAR
As an ENERGYSTAR¢_partner,
determined
that this product
(;E has
meets the
ENERGY
enero"_
STAR ® guidelines
for
etticienc'_,
Write the model and serial numbers here:
Model #
Serial #
You can find them on a label on the back
of the dehumidifier
behind the bucket.
3828A20315S
49-7504
11-04JR
IMPORTANTSAFETYINFORMATION.
READALLINSTRUCTIONSBEFOREUSING.
WARNING!
For your safe_ the information in this manual must be followed to minimize the risk of fire, electric shock
or personal injury.
SAFETY
PRECAUTIONS
When using this dehumidifier, always follow basic safety precautions, including the following:
•
Use this appliance
only %r its intended
purpose as described
in this Owner's
Manual.
•
This dehumidifier
must be properly
installed
and grounded
as described
in this manual
before
it is used.
Never operate this dehumidifier
in an area
that is likely to accumulate standing water.
If this condition dex>lops, for your safety
disconnect
the power supply before
stopping into the wamn
•
Nexex unplug your dehumidifier
by pulling
on the power cord. Always grip plug firmly
and pull straight out flom the receptacle.
•
Repair or replace immediately all eleca'ic
service cords that have become flayed
or otherxvise damaged. Do not use a cord
that shows cracks or abrasion damage
along its length or at either rite plug or
connector
end.
•
Turn the dehumidifier
OFFand unplug
before making any repairs or cleaning.
it
NOTE:V\:estrongly recommend
that any
servicing be performed
by a qualified
indix idual.
For your safety, do not store or use
combustible
materials, gasoline or other
flammable
vapors or liquids in the vicinity
of this or any other appliance.
All dehumidifiers
contain refligerants,
which under federal law must be remoxed
prior
rid of
check
about
m product disposal. If you are getting
an old product with refrigerants,
with the company handling
disposal
what to do.
HOWTOCONNECT
ELECTRICITY
Do not, under any circumstances, cut or remove
the third (ground) prong from the power cord.
For personal safe_ this appliance must be
properly grounded.
Where a 9-prong wall outlet is encounmred,
it is your personal responsibility and obligation
to haxe it replaced xvith a properly gTounded
3-piong wall outlet.
The power cord of dfis appliance is equipped
with a 3q)rong (gTounding)
plug which mates
with a standard 3-prong (grounding)
wall
outlet m minimize the possibility of electric
shock hazard flom this appliance.
The dehumidifier
should always be
plugged into its own individual electrical
oudet, which has a x_ltage rating matching
the rating plato.
Haxe the wall outlet and circuit checked by a
qualified electrician to make sure the outlet is
properly grounded.
2
This provides the best performance
and also
prexents oxerloading
house wiring circuits,
which cou]d cause a fire hazard flom
oxeflteated
wires.
GEAppl_nce_com
USEOFEXTENSION
CORDS
Because of potential safety hazards under
certain conditions, we strongly recommend
against the use of an extension cord.
However, if you must rise an extension
cord, it is absolutely
necessary that it be
a Ui,-listed,
14 gauge, 3-wire grounding
type appliance
extension
cord having a
grounding
type plug and outlet and that
tile electrical
rating of the cord be
15 amperes
(minimum)
and 195 volts.
USEOFADAPTER
PLUGS
Because of potential safety hazards under
certain conditions, we strongly recommend
against the use of an adapter plug.
However, if you must use an adapter,
where local codes permit, a temporary
connection may be made to a properly
grounded
2-i)rong wall outlet by use of
a Ui,-lismd adapter
available at most
local hardware
stores.
Tlle larger slot in tlle adapter
must be
aligned with tile larger slot in the wall
outlet to provide proper polarity in the
connection
of the power cord.
When disconnecung
the power cord flom
the adapter, always hold tile adaptor in place
with one hand while pulling the power cord
plug with tile other hand. If this is not done,
tile adaptor ground
mrmina] is very likely to
break with repeated
use.
If tile adapter ground
terminal
1)teaks,
DO NOT USE tile dehumidifier
until a proper
ground
has been established.
Attaching the adapter ground terminal to a waft
outlet cover screw does not ground the appfiance
unless the cover screw is metal, not insulated, and
the wall outlet is grounded threugh the house wiring.
Youshould have the circuit checked by a qualified
electrician to make sure the outlet is properly
grounded.
READANDFOLLOW
THISSAFETY
INFORMATION
CAREFULLY.
SAVETHESEINSTRUCTIONS
About the controlson the dehumidifier.
• HIGH
jO
BUCKET
FULL
• LOW
POWER
0
POWER Pad
@
HUMIDITY CONTROLPads
Controls
Press to
The
turn
the
lmmidiq'
level
O
on and
delmmidifier
off.
Humidity)
For
ai_; press
()mtrols
Press
can be set within
the
fan
moisture
RH
been
in 5% increments.
a lower
percent
the
',_llue
•
pad
and
damper
to a higher
ai_; press
percent
control
24 hou_
the
wflue
achieve
damper
level
the
fi)r the
humidity'
air than
to a lower
to
reduced
and
set
HlGHfor
X*\]_en the
the
quiet
thn
speed.
m'a_mum
humidity
operation
control
to
has
is
LOW.
(%).
•
pad
and
set
dehumidifier
level.
desired,
If you
set the
HUMIDITY LEVELDISPLAY
Displays
percent
Its accuracy
(%),
When
you fit_t use the dehumidifier,
set the
humidity
control
to 45% or 50%. Allow at
least
HIGHor LOWfim
set to
O
D)r
speed.
remowfl,
preferred,
drier
lira
to set to
Set the
a range
of 35% RH (Relative Humidity) to 70%
(Relative
FAN SPEEDPad
to
still have
O
humidit,_
is (+/-
lexel.
5%).
BUCKETFULLLED
Indicates
fill level,
presence
of bucket
and
its
humidity
setting,
OtherFeatures
BUCKETFULLLight
Power Outage
Glows when the bucket is read)' to be emptied,
or when the btlcket is removed or not replaced
in the l)r(>per position.
If a I)ower
outage
unI)lugged,
the
Switch shuts oft the
dehumidifier
when the bucket is fifll, or when
the bucket is removed or not replaced in the
proper position. _Mso, when the bucket is out
of position, the unit will beep 3 times.
Auto Defrost
X._]_en fi'ost builds up on the cooling coils,
the compressor
will wcle off until the fl'ost
disappears.
The lira continues to run.
4
Note: If 0N is in the
or if the
HUMIOIrI'CONrBOL
unit
will display
its prh)r
displa 5 the
dehumidifier
operating
contintlOtlsl
5 but a specific
level is not set. You will need to reset
Auto Shut Off
The Water I,e\'el Control
occurred
unit
t(> the
desired
was
setting.
humidity
the
level.
Auto Restart
Once power is restored after a power outage,
the unit automatically
resumes operation
atter
a 2 minute delay:
is
Usingthe dehumidifier.
GEAppliances.com
When first using the dehumidifier, operate the unit continuously 24 hours.
How the Dehumidifier Operates
Moist,
hmnid
air is drawn
dehunfidif_'ing
coil.
over
Moisture
a cold
in the
O0ndenser
refrigerated
Humidib/sensor
air condenses
on this coil and drains into a bucket (or through
the bucket into a hose and drain).
Dry, clean air is drawn through
the condenser
where it is heated and discharged
out the fl'ont
grille into the room.
It is normal for the surrounding air to become slightly
warmer as the dehumidifier operates.
This wamfing effect flu'ther
humidit), ot the SmTotmding
reduces
ai_:
the relative
Dry air out
Gardenhoseconnector Bucket
Compressor
Choosing a Location
A dehumidifier
little
operating
or no effect
in dDing
in a basement
an ac!iacent
YES
will have
NO
enclosed
storage area, such as a closet, mfless there is
adequate circulation of air in and out of the area.
• Place the dehumidifier on a smooth, level floor
strong enough to support the unit with a full bucket
of water.
12 18" rain.
• Allowatleast 12-18inches of airspace on allsides
of the unit for good air circulation.
• Place the dehumidifier& an area where the
temperaturewill not fall below 65°t:(18°C).Thecoils
can become covered with frost at temperatures
below 65°F,which may reduce performance.
• Use the dehumidifier& cooking,laundnA,bathing
and dishwashingareas that have excessive
moisture.NOTE:Placethe dehumidifieraway
from the clothes dryer.
• Use the dehumidifierto prevent moisturedamage
anywhere books or valuablesare stored.
NOTE"Thedehumidifierhas rollers to aid placement,
but it shouldonly be rolled on smooth, flat surfaces.
Do not attempt to roll the dehumidifieron carpet or
over objects.
• Use the dehumidifier& a basementto help prevent
moisture damage.
•
Thedehumidifiermust be operatedin an enclosed
area to be most effective.
• Closeall doors, windows and other outside openings
to the room.
Automatic Defrost
When
builduI)
the
on
dehmnidifier
the
ewq_orator
shut off the compressm:
to Hm to draw air across
control
coil,
senses
fix)st
When
it will automatically
The tim will continue
the coil and melt the
fl'ost.
the
automatically
coil is defl'osted,
restart
and
the
compressor
dehmnidif_ing
Mll
will resume.
Usingthe dehumidifier.
Always make sure the water bucket is locked into place on the dehumidifier.
Removing Collected Water
There are 3 ways to remove collected water:
[]
Use the bucket "x,_hen the bucket is relnoved,
the unit will shut off. Empq and replace the
bucket.
[]
Use a hose. Water can be automatically
[]
Use a floor drain. The unit can also be placed
oxer a floor drain. Using a drill, make a hole
at the end of the nozzle located on the lower
left side of the bucket,
Drill
emptied into a floor drain by attaching a
water hose (not included)
to the bucket hose
nozzle. Using a drill, make a hole at the end
of the nozzle located on the lower left side of
the bucket. Attach a water hose to the bucket
nozzle. Fasten by hand only.
Drill hole:
Attach hose:
\
NOTE:Thenozzlecannot be fixed after puncture. Use
an ordinary garden hose cap (not included) to reclose
if necessary
NOTE:Avoidusing mechanical tools to tighten the
water hose to the bucket nozzle.Thismay damagethe
threads on the nozzle.
Nozzle
Hose
Installing the Water Bucket
Lift the bucket
and hook
the slots on each side
onto the posts on the back of the dehmnidifie_:
The bucket should lock secm'elx in place.
Post
Water Level
The dehumidifier
will turn off automatically
when the bucket is flfl], or when the bucket is
removed or not replaced in the proper position.
The bucket must be replaced in the proper position for
the dehumidifier to work. The light will be on and the
dehumidifier will not run if the bucket is not in the
proper position.
Make sm'e the bucket is locked securely in place
by pressing down on the ui)per back edge of the
bucket. It will be firefly seated when l)roperly
installed.
Careand cleaning of the dehumidifier.
CEAppliances.com
Turn the dehumidifier off and remove the plug from the wall outlet before cleaning.
Grille and Case
To clean the case:
Use water and a mild
bleach or abrasives.
If cabinet
a good
paint
grade
chips,
enamel
Toclean the frontgrille:
detergent.
you
paint
can
Do not
touch
use
Use a vacuum am_chment
or brush.
it up with
to prevent
rtlst.
Air Filter
The air filter is on the back of the dehumidifie_:
It should be checked and cleaned at least every
30 days or more often if necessary.
NOTE: DO NOT rinse or put the filter in an automatic
dishwasher.
CAUTION: DO NOT operate the dehumidifier without
the filter because dirt and lint will clog it and reduce
performance.
NOTE:Avoidusinga dishwasher to clean the filter.
Toremove:
Flex the filter at the lower eight corner and
slide the upper eight side to the left. Release
all of the tabs and relnove the filter: _,_ash it in
warn/soap)'
water Rinse and let the filter dry
befiwe repladng
it.
Toreplace:
Hold the
place the
Slide the
the other
filter with the middle tab at the top and
bottom (ff the filter in the filter hook.
side filter tabs into the side slots and press
three tabs into their slots.
Cleaning the Coil
After removing
the air tilte_; clean the coil
with a soft brush when
the soil is soft and wet.
NOTE:Do not allow water to enter the
electrical/machine compartmentthrough
the circular opening behind the coil.
Do not spraythecoil with a hose.
Water Bucket
E\'et T few weeks, cinse the inside of the water
bucket with a mild detergent
to prevent gro_h
of mold, mildew and bacteYia.
NOTE:Avoid using a dishwasher to clean the
water bucket
7
Before you call for service...
TroubleshootingTips
Save time and money/. Review the chart below first and you may not need to call for service.
Problem
Possible Causes
Dehumidifier
The
does
is unplugged,
not start
dehmnidifier
The
fuse
breaker
* Make
is blown/circuit
does
not
dry theairas #should
the
has
level
reached
or bucket
Bucket
is not
proper
position.
the
• Check
is tripped,
preset
sure
into
Dehumidifier
Dehumidifier
What To Do
its
is full.
the
house
fuse/circuit
the
occm's.
Did not allow enough
time
to remove the moisture,
• _]/en
Airflow
• Make
is pushed
completely
Empty
breaker
box
and
replace
breaker:
deh mnidifier
• See the
plug
dehunfidilier's
flBe or reset
• The
in the
the
outlet.
automatically
the
bucket
turns
and
replace
Installing the Water Bucket
fix_t installed,
allow
off when
this
i)roperlv.
section.
at least
24 houi_
to maintnin
the desired dryness.
is restricted.
stu'e
blocking
there
the
are no
fl'ont
curt;fins,
or back
blinds
or flH'nitm'e
of the delmmidflie_:
See the
Choosinga Location section.
The Hmnidfity
Control
not be set low enough,
Doors
and windows
be closed tightly,
Clothes
blowing
air into
• Press the Humidity Control
h umidi F setting.
may
may
not
• Check
that
are securely
dryer may be
moisture-laden
the room.
Room
temperature
is too
low.
all (loo_,
closed.
Area
to be
dehumidified
Doors
removal
• Rei&r
Frostappears on
the coils
m'e open.
• Close
DehtunidJfier
has been recently
turned
on or room temperature
is below
Fan noise
Air
the
Water
Bucket
on floor
65°F
connection
Water
bucket
is best
room
temperatures
rate. This
trait
above
to the
chari
openings
the dryer:
outside.
at higher
room
temperatures.
will reduce
the moisture
is designed
to be operated
at
(l 8°C).
65°F
below
other
the
to see
if the
capaci_'
of your
is adequate.
all (loo_
and
windows
to the
outside.
• This is nomml.
Frost will usually disappear
within 60 minutes.
See the Automatic Oefrost section.
(18°C).
is moving
through
dehumidifier.
drain
and
• Moisture
dehmnidifier
and windows
windows
dehmnidifier
a_m' fl'om
should
be xented
to the
I,ower
remowd
is too large,
pad to lower
• Install the
The drxer
teml)eratures
Dehumidifierruns
too much
•
• This
hose
may
be
is natural.
• Check
the
hose
if one
is attached.
loose.
is not
• See the
Installing the Water Bucket
section.
all of the way ha.
What dehumidifier do you need?
Condition
without
During warm
dehumidification--
and humid
Area (in square
outdoor conditions
500
1000
1500
feet)
2000
2500
3000
Moderately damp--Space feels damp
and has musty odor only in humid weathe_
AHG30
AHG30
AHG30
AHG30
AHG40
AHG40
Very damp--Space always feels damp and has musty
odo_ Damp spots show on walls or floo_
AHG30
AHG30
AHG30
AHG40
AHG40
AHG40
Wet--Space feels and smells wet. Walls or floor sweat,
or seepage is present.
AHG30
AHG30
AHG40
AHG40
AHG40
AHG50
Extremely
AHG30
AHG30
AHG40
AHG40
AHG50
AHG50
8
wet--Laundry
drying, wet floor, high-load
conditions
Table indicates recommended GEdehumidifier models, based on the area of the space to be dehumidified and the conditions that would exist in that space when a
dehumidifier is not in use. Dehumidification variables also include such other factors as climate, laundry equipment, number of family members, number of doors and
windows end degree and intensity of area activity,
GE Service
Protection
Plus 'M
GE, a name recognized worldwide %r quality' and dependability,
oflers y'ou
Service Protection Plus'_'--comprehensive
protection
on all y'our appliances-No Matter What Brand!
Benefits
Include:
We71CoverAny Appliance.
Anywhere. Anytime.*
• Backed by GE
• All brmads covered
• Unfimited
•
•
•
•
service
calls
All parts mad labor costs included
No out-of-pocket
expenses
No hidden
deductibles
One 800 number
to call
You will be completely
satisfied with our service protection
or you ma} request
on the remaining
value of 3our contract.
No questions
asked. It's that simple.
,your inone,_
back
Protect yore" reffigerat(m
dishwasher;
washer and dryer; range, TV, VCR and much more--rely
brand!
Plus there's
no extra charge tot eulergency
ser;'ice and low inonthly
financing
is available.
Even icelnaker
coverage
and tood spoilage
protection
is ottered.
You can rest eas> knowing
that all your valuable
household
products
are protected
against expensive
repairs.
Place your
foY
UlOI'e
"*Allbrands
confidence
in (;E and
call us in the IU.S. toll-free
at _tllt._Z_.ZZZ_
inloi'u/ation.
cmered,
up to 2(}years old. in the contin< nlal I_.S.
_..
(2."._22..............
Please place in envelope and mail to:
General Electric Company
Warranty Registration
EO. Box 32150
Louisville,
Department
KY 40232-2150
9
Consumer
Product
Ownership
Registration
Dear Customer:
Thank
you for purchasing
_A/e are proud
Follow
our product
and thank
you for placing
your confidence
in us.
to ha_e you as a customer!
these
three
Complete
your
and
to protect
your
new
mail
Consumer
Product
Ownership
Registration
ttaw'
steps
the
today.
peace
of
mind of knowing
w(
call colltact
VOl/ ill
tile tmlikely
satbly
exent
appliance
investment:
Atter mailing tile
registration below,
store this document
Read your Owner's
Manual
carethllv.
in a saib place. It
contains inlormation
operate
It will help
you
yol/r
appliance
lle',_
properly.
you will need should
you require service.
Our selwice number is
800.GE.CARES
of a
modification.
(800.432.2737).
Model
Number
Serial
I
Important:
I
I
Number
I
I
If you did not get a registration
card with your
product,
detach and return the form below to
ensure that your product
is registered,
or register
online at GEAppliances.com.
._,,_
Consumer
Product
Ownership
Model
I,,,,,,
MI:
M*>,.
Mix_,
I
I
I
I
I
I
I
I
I
I
I
I
I
I
I
I
I
I
I
I
Apt. #
I
i
I
I
I
I
I
I
I
ciw
I
I
I
I
I
I
I
I
I
Placed
hi Use
Monlh
, I
Ill
I , Serial
, , Number
, , ,
, , , , , I
I
_1 r( (!1
Addr(';s
l )ale
Ms.
(MI ll(lx
Registration
Number
I
Fir',l
Name
, I
I
Lasll
Nain(!
I
I
I
I
I
I
I
I
I
I
I
I
I
I
I
I
I
I
I
I
I
I
I
I
I
I
I
I
EqnailAddress*
I
I
,arl , I
, , I
Pholl(
Nt/llll)(!r
I
Zip
I
i , I-I , ,
* Please provide your eqnail address to receive, via eqnail, discounts, special ottk,p, and other important
communications
trolll (_E Appliances
(GEA).
Check here if you do not want to receive communications
ti-om GEA's caretully selected partners.
GEAppliances
BE Consumer
Louisville,
www,
/0
FAII.I 7RE T() C()MPI.ETE
x,_L\RRAN'IY RI (;I ITS.
AND RE'F[ RN Tt tIS CARD DOES NOT DIMINISII
Y( )l JR
& hldustrial
Kentucky
GEAppliaoees,
com
For intormation
about GEA's prixacy and data usage polic?; go to _avw.GEAppliances.com
on 'Prixacy Policy" or call 800.626.2224.
and click
Dehumidifier Warranty.
All warranty service provided by our Factory Service Centers, or
an authorized Customer Care®technician. Toschedule service,
on-line, 24 hours a day, vis# us at GEAppfiances.com, or call
800.GE.CARES (800.432.2737).
Staple your receipt here.
Proof of the original purchase
date is needed to obtain service
under the warrant}4
For The Period Of."
We Will Replace:
One Year
From the date of the
originalpurchase
Anypattof the dehunfidifier
which fifils due to a defect in materials or workananship,
During this full one-year warranty, GE will also provide, free of charge, all labor
and in-home service to replace the (lele('ti\'e part,
Five }'ears
From the date of the
originalpurchase
During
The compressor
if it should
this five-year
in-home
service
to teach
you how
fifil due
warranty,
to repair
to a defect
GE will also
or replace
the
in materials
provide,
or workmanship,
free of charge,
all labor
and
compressoi:
What Is Not Covered:
• Service
trips
to your
home
to use the
• In commercial
product.
• hnproper
have
h_staJlation,
an installation
of hnproper
or hlstaller.
electrical,
• Failure
locations
labor
necessary
to a location
where
it is accessible
individual
technician.
delivery
or maintenance.
problem,
dehumidJfyhlg
or if the
capacity,
You m*e responsible
plumbing
of the product
product
or due
provide
reasonable
resulting
to mlreasonable
and
your
for providing
aJld other
connecting
from
necessary
is
dealer
adequate
modJficatimls
ma_ltenm_ce.
failure
• Replacement
breakers.
• Failure
facilities.
use including
the
unit
by an
If you
dehumidifier
contact
to move
for service
due
of house
to corrosion
fuses or resetting
on models
of circuit
not corrosion-
protected.
to the
to
• Dmnage
voltage,
to the product
accident,
fire,
caused
floods
by improper
• Incidental
or consequential
dmnage
defects
with this dehumidifier.
• Dmnage
caused
after
power
supply
or acts of God.
caused
by possible
delivery.
This warranty is extended to the original purchaser and any succeeding owner for products purchased for home
use within the USA. In Alaska, the warranty excludes the cost of shipping or service calls to your home.
Some states do not allow the exclusion or limitation of incidental or consequential damages. This warranty gives
you specific legal rights, and you may also have other rights which vary from state to state. To know what your
legal rights are, consult your local or state consumer affairs office or your state's Attorney General
Warrantor: General Electric Company. Louisville, KY 40225
11
ConsumerSupport.
l
Haxe a question or need assistance with your appliance?
Try the (;E Appliances
_.Vebsite 24 hom_ a day
any da} of the }ear! For greater comenience
and faster se_ice
you can now download Owner's Manuals,
order parts, catalogs, or e_en schedule set\ice on-line. Y)u can also "_sk Our Team of Experts .....
gEAppliancesWebsite
VO[II" questions
and
so
Illtlch
GEAppliances.com
illOi'e...
ScheduleService
Expert GE repair
_our comenience
business hom_.
GEAppliances.com
service is onl} one step away ti'om }our doo_: Get on-line and schedule your service at
24 l/om_ any (lax of tile year! Or call 800.GE.CARES
800.432.2737)
during n{mnal
RealLife DesignStudio
GEAppliances.com
GE supports tile Uni\'ex_al Design concept--l)roducts,
services
people ot all ages, sizes and capabilities. We recognize the need
mental abilities and impaim/ents.
For details of GE's Univex_al
design ideas for people with disabilities, check out Oily Website
800.TDD.GEAC
(800.833.4322).
and environments
that can be used by
to design fin" a wide range of physical and
Design applications,
including
kitchen
today For tile hearing impaired, please call
ExtendedWarranties
GEAppliances.com
Pro'chase a (;E extended
warrant_ and learn about special discounts that are ax filable while your warranty
is still in effect. You can purchase it on-line an}time, or call 800.626.2224
during nomml business hom_.
(;E (]onsulner
Home Ser\ices will still be there alter your warrant} expires.
f
Individuals
qualified
to se_ice
their own appliances
can have parts or accessories sent directl} to their
cards are accepted).
Order on-line today 24 l/om_ e'_e_-vday or
during nomml business hom_.
I homes
PartsandAccessories
(VISA, MasterCard
and Discover
by phone
at 800.626.2002
GEAppliances.com
Instructions contained in this manual cover procedures to be performed by any user. Other servicing generally
should be referred to qualified service personnel. Caution must be exercised, since improper servicing may cause
unsafe operation.
ContactUs
GEAppliances.com
If you are not satisfied with tile service you receive ti'om GE, contact us on our _.Vebsite with all tile details
including yore" phone numbe_; or write to: General Manage_; Customer Relations
GE Appliances,
Appliance
Park
I,ouisville, KY 40225
Register
your new applim_ce
on-line---at
l RegisterYourAppliance
enhanced
COllli//tlni('ation
and
l)i'()illl)t
54m may also mail in tile pre-pfinted
12
your convenience!
service
registration
tinder
tile
Timel}
teli/ls
card included
product
registration
of }OILY _V}llTallty;
in tile packing
should
will allow fin"
GEAppliances.com
tile
need
alJse.
material.
Printed in China