Download Epson L-410 Digital Camera User Manual
Transcript
L-410Basics.book Page 1 Tuesday, June 22, 2004 4:22 PM
Camera Basics
L-410Basics.book Page 2 Tuesday, June 22, 2004 4:22 PM
COPYRIGHT NOTICE
All rights reserved. No part of this publication may be reproduced, stored in a
retrieval system, or transmitted, in any form or by any means, electronic,
mechanical, photocopying, recording, or otherwise, without the prior written
permission of Seiko Epson Corporation. The information contained herein is
designed only for use with this Epson product. Epson is not responsible for
any use of this information as applied to other equipment.
Neither Seiko Epson Corporation nor its affiliates shall be liable to the
purchaser of this product or third parties for damages, losses, costs, or expenses
incurred by the purchaser or third parties as a result of accident, misuse, or
abuse of this product or unauthorized modifications, repairs, or alterations to
this product, or (excluding the U.S.) failure to strictly comply with Seiko
Epson Corporation’s operating and maintenance instructions.
Seiko Epson Corporation shall not be liable for any damages or problems
arising from the use of any options or any consumable products other than
those designated as Original Epson Products or Epson Approved Products by
Seiko Epson Corporation.
TRADEMARKS
Epson, Epson Stylus, Epson PRINT Image Framer, and PRINT Image
Matching are registered trademarks and P.I.F. and PictureMate are trademarks
of Seiko Epson Corporation. PhotoPC is a registered trademark and Epson
Store and SoundAdvice are service marks of Epson America, Inc.
General notice: Other product names used herein are for identification
purposes only and may be trademarks of their respective owners. Epson
disclaims any and all rights in those marks.
RESPONSIBLE USE OF COPYRIGHTED MATERIALS
Digital cameras, like photocopiers and conventional cameras, can be misused
by improper copying of copyrighted material. While some countries’ laws
permit limited copying in certain circumstances, those circumstances may not
be as broad as some people assume. Epson encourages each user to be
responsible and respectful of the copyright laws when using digital cameras.
© 2004 Epson America, Inc. 6/04
2
CPD-18422
L-410Basics.book Page 3 Tuesday, June 22, 2004 4:22 PM
Contents
Introduction
5
About the Software
Optional Accessories
Finding More Information
6
7
8
Getting Started
9
Unpacking Your Camera
Installing the Battery
Turning Your Camera On and Off
Setting the Language, Date, and Time
Using Memory Cards
Installing the Software
9
10
11
11
12
14
Taking and Viewing Photos
17
Taking Photos in Automatic Mode
Taking Photos in Manual Mode
Camera Settings
Continuous Shooting
Recording Videos
Taking Photos With Fun Frames
Playing Back Photos and Videos
18
19
21
23
24
25
27
3
L-410Basics.book Page 4 Tuesday, June 22, 2004 4:22 PM
Deleting Photos
Adding or Changing Frames
28
29
Printing Your Photos
31
Connecting the Camera to Your Printer
Printing Photos
Making Print Settings
32
34
38
Solving Problems
39
Camera Problems
Image Problems
Miscellaneous Problems
List of Error Messages
Where To Get Help
39
41
42
43
45
Appendix
47
Specifications
Important Safety Instructions
FCC Compliance Statement
Declaration of Conformity
Epson America, Inc. Limited Warranty
47
49
53
54
55
Index
59
4
L-410Basics.book Page 5 Tuesday, June 22, 2004 4:22 PM
Introduction
Your new Epson® PhotoPC® L-410 is a compact digital
camera that lets you capture all the special moments in
your life and print high-quality photos without a
computer. Its features include:
◗
4.0 megapixel resolution, for clear, beautiful photos
◗
3x optical zoom and 3x digital zoom
◗
Continuous shooting mode that lets you take up to
three photos per second
◗
Direct printing to supported Epson Stylus® Photo
and PictureMate™ printers
◗
Epson PRINT Image Framer® (P.I.F.™) for adding
fun frames to your photos—without a computer
◗
PRINT Image Matching® II technology, so you can
get the best possible prints
5
L-410Basics.book Page 6 Tuesday, June 22, 2004 4:22 PM
About the Software
The CD-ROM that came with your camera includes the
following software for Windows® and Macintosh®:
◗
A selection of PRINT Image Framer frames for
holidays, birthdays, and other special occasions (in
addition to the frames already loaded on the camera)
◗
P.I.F. Designer for creating original frames and
modifying the included frames
◗
P.I.F. Tool for transferring frames from your
computer to the camera
◗
Your Epson PhotoPC L-410 Camera User’s Guide,
which includes information and instructions for all
the features of your camera
◗
A USB driver that lets you transfer photos to your
computer in Windows 98SE. (If you have a newer
version of Windows or a Macintosh, you don’t need
to install the USB driver.)
◗
Apple® QuickTime™ program for playing videos on
your computer
◗
Adobe® Acrobat® Reader to view the Camera User’s
Guide
See page 14 for instructions on installing the software.
6
L-410Basics.book Page 7 Tuesday, June 22, 2004 4:22 PM
Optional Accessories
Epson offers an AC adapter (B867062) for use with any
standard electrical outlet. This is particularly useful when
you are printing from the camera.
You can purchase the adapter from the Epson StoreSM at
(800) 873-7766 or visit www.epsonstore.com (U.S. sales
only). In Canada, please call (800) 463-7766 for dealer
referral.
You can also use the following types of memory cards:
◗
SD™ card (Secure Digital) up to 512MB
◗
MM card (Multimedia, MMC V 2.1 or later) up to
512MB
Epson recommends SD cards manufactured by
Panasonic,® SimpleTech,™ and Lexar Media.™ For
maximum performance, make sure the memory card has
a recording/transfer speed of 10MB per second.
7
L-410Basics.book Page 8 Tuesday, June 22, 2004 4:22 PM
Finding More Information
This book includes all the information you need to take
pictures and print them right from your camera. For
more information, check the following:
◗
The Epson PhotoPC L-410 Camera User’s Guide
provides information and instructions for all the
camera’s features, including troubleshooting tips. To
open the guide, double-click the icon on your
desktop.
See pages 14 to 15 for instructions on installing the
Camera User’s Guide.
◗
For instructions on using the P.I.F. software, open
the Help menu and select User’s Guide.
◗
If you still have questions after checking the
information listed above, contact Epson Technical
Support as listed on page 45.
8
L-410Basics.book Page 9 Tuesday, June 22, 2004 4:22 PM
Getting Started
To start using your camera, all you need to do is install
the batteries, turn on the camera, and set the current
date. You should also install the software on your
computer. Follow the instructions in this section to get
started.
Unpacking Your Camera
Make sure you have all the items shown below:
Camera
PC USB cable (B)
CR-V3 battery
Software CD-ROM
Printer USB cable (A)
9
L-410Basics.book Page 10 Tuesday, June 22, 2004 4:22 PM
Installing the Battery
1 Turn the camera upside
down.
2 Slide the battery cover until
it pops up as shown:
3 Insert the battery into the
compartment, positioning
the + and – ends as shown:
CR-V3
battery
AA
batteries
Note:
You can use either a CR-V3 battery, like the one included
with the camera, or two AA batteries.
4 Press down on the battery
cover and slide it back into
place.
10
L-410Basics.book Page 11 Tuesday, June 22, 2004 4:22 PM
Turning Your Camera On and Off
◗
To turn on the camera, press the POWER button.
The lens cover opens and the lens pops out.
◗
To turn off the camera, press the POWER button.
The lens retracts and the lens cover closes.
POWER button
Setting the Language, Date, and Time
When you turn on the camera for the first time, you
need to set the language, date, and time.
1 Press the OK button to select English. You see the
Date/Time screen.
2 Press the u or d button to change the
date format to M.D.Y.
3 Press the r button to move to the time
format.
4 Press the u or d button to change the time format
to 12 hr.
11
L-410Basics.book Page 12 Tuesday, June 22, 2004 4:22 PM
5 Press the r button to move to the date.
6 Press the u or d button to change the month.
7 Repeat steps 5 and 6 for each item on the screen.
8 Press the OK button.
Using Memory Cards
You can take pictures and save them in the camera
without a memory card. However, you can store more
pictures when you use a memory card. You can use either
of the following types of cards:
◗
SD card (Secure Digital) up to 512MB
◗
MM card (Multimedia, MMC V 2.1 or later) up to
512MB
Caution:
Make sure the camera is turned off before installing or
removing a memory card. Make sure you insert the card in
the correct orientation, or you may damage the camera and
card.
12
L-410Basics.book Page 13 Tuesday, June 22, 2004 4:22 PM
Installing a Memory Card
1 Make sure the camera is turned off.
2 Slide the battery cover until
it pops up.
3 Position the card as shown
and slide it all the way into
the slot:
4 Press down on the battery
cover and slide it back into place.
Removing a Memory Card
1 Make sure the camera is turned off.
2 Slide the battery cover until it pops up.
3 Push in the memory card to release it. The card pops
out.
4 Pull out the memory card.
5 Press down on the battery cover and slide it back
into place.
13
L-410Basics.book Page 14 Tuesday, June 22, 2004 4:22 PM
Installing the Software
To take advantage of all of your camera’s special features,
make sure you install the software on your computer
from the CD-ROM that came with the camera.
Windows
1 Insert the software CD-ROM in your computer’s
CD-ROM or DVD drive. The Installer starts
automatically. If it doesn’t start, do the following:
◗
Windows XP: Click Start, click My
Computer, then double-click Epson.
◗
Windows 98SE, Me, and 2000: Double-click
My Computer, then double-click Epson.
2 Read the license agreement, then click Agree. You
see the Software Installation screen:
14
L-410Basics.book Page 15 Tuesday, June 22, 2004 4:22 PM
3 Click Install, then follow the on-screen instructions
to install each program.
If you don’t have Adobe Acrobat Reader or
QuickTime on your system, click Custom instead of
Install. Select the programs you want to install and
click Install. Then follow the on-screen instructions.
If you see a message asking you to restart, select No,
I will restart my computer later, and click Finish.
4 When installation is complete, click Exit.
5 When you see the product registration screen,
register your camera as instructed. At the last screen,
click Done or close your browser.
Macintosh
1 Insert the software CD-ROM in your Macintosh’s
CD-ROM or DVD drive.
2 Double-click the CD-ROM icon if necessary, then
double-click the EPSON icon.
3 Read the license agreement, then click Agree.
15
L-410Basics.book Page 16 Tuesday, June 22, 2004 4:22 PM
You see the Software Installation screen:
4 Click Install.
If you don’t have Adobe Acrobat on your Macintosh,
click Custom instead of Install. Select Adobe
Acrobat Reader and click Install.
5 Enter your administrator name and password if
necessary. You may have to do this more than once.
6 Follow the on-screen instructions to install each
program. Click Quit to continue, as needed.
7 When installation is complete, click Exit.
8 When you see the product registration screen,
register your camera as instructed. At the last screen,
click Done or close your browser.
16
L-410Basics.book Page 17 Tuesday, June 22, 2004 4:22 PM
Taking and Viewing Photos
You can take several different types of photos with your
camera, as described below:
◗
Automatic photos: Use automatically adjusted
settings for great snapshots. All you have to do is
point and shoot.
◗
Manual photos: Fine-tune your shots by adjusting
a variety of camera settings, including resolution,
exposure compensation, sensitivity, white balance,
and more.
◗
Continuous photos: Capture a series of shots, up
to 3 photos per second.
◗
Videos: Record videos with sound. The length of
the video is limited only by the amount of storage
you have.
◗
PRINT Image Framer (P.I.F.) photos: Take photos
with fun frames for holidays and special occasions.
This section explains how to take photos and videos and
view them on your camera’s LCD screen.
17
L-410Basics.book Page 18 Tuesday, June 22, 2004 4:22 PM
Taking Photos in Automatic Mode
The automatic photography mode lets you capture highresolution images without making any complicated
settings. You can use the zoom buttons to move in closer
to your subject and/or set the flash for indoor or lowlight photographs.
In automatic mode, images are captured at a resolution
of
N2304 (2304 × 1728 pixels). If you want to change
this setting, use manual mode as described on page 19.
Note:
You can also use the macro and/or
self-timer features
in automatic mode. For instructions, see the Camera User’s
Guide on your computer. See page 14 for instructions on
installing the Camera User’s Guide and software.
Before you start, make sure the batteries are installed
and the camera is turned on as described on pages 10
and 11.
1 Turn the Mode dial to
automatic.
2 Make sure you are at least 20 inches (50 cm) away
from your subject.
18
◗
To zoom in on your subject, press the
(telephoto) button.
◗
To zoom out, press the
button.
T
W (wide-angle)
L-410Basics.book Page 19 Tuesday, June 22, 2004 4:22 PM
3 Center your subject in the middle of the square
focus frame on the screen.
The default flash setting is automatic, indicated by
icon on the LCD screen. The flash will go off
the
automatically whenever necessary.
If you want to change the flash setting, press the r
button. See page 22 for a list of flash settings.
4 Press and hold the shutter button halfway. The focus
frame turns green and the focus is set. If you want to
reframe your picture, move the camera until the
photo you want appears on the screen.
5 Press the shutter button all the way down. The
camera beeps as it captures the image.
Note:
The LCD screen may turn off to save battery power after
you take a picture. Press any button or turn the Mode dial to
turn the screen back on.
Taking Photos in Manual Mode
If you are an advanced photographer, you may want to
use manual mode. This allows you to select the quality
(resolution), white balance, light sensitivity, and
exposure compensation. You can also select special scene
modes for portraits or landscape photos, or turn the
LCD screen off to save battery power.
19
L-410Basics.book Page 20 Tuesday, June 22, 2004 4:22 PM
Before you start, make sure the batteries are installed and
the camera is turned on, as described on pages
10 and 11.
1 Turn the Mode dial to
manual.
If you want to turn the LCD screen off to save
battery power, press the DISP button twice. You will
have to use the viewfinder instead of the screen to
frame your shot.
2 If you want to adjust the quality (resolution) or
other settings, press the MENU button. See page 22
for a list of available settings. For more information,
see the Camera User’s Guide on your computer.
3 Make sure you are at least 20 inches (50 cm) away
from your subject.
◗
To zoom in on your subject, press the
(telephoto) button.
◗
To zoom out, press the
button.
T
W (wide-angle)
4 Center your subject in the middle of the square
focus frame on the screen.
The default flash setting is automatic, indicated by
icon on the LCD screen. The flash will go off
the
automatically whenever necessary.
20
L-410Basics.book Page 21 Tuesday, June 22, 2004 4:22 PM
If you want to change the flash setting, press the r
button. See page 22 for a list of flash settings.
5 Press and hold the shutter button halfway. The focus
frame turns green and the focus is set. If you want to
reframe your picture, move the camera until the
photo you want appears on the screen.
6 Press the shutter button all the way down. The
camera beeps as it captures the image.
Note:
The LCD screen may turn off to save battery power after
you take a picture. Press any button or turn the Mode dial to
turn the screen back on.
Camera Settings
Camera settings are displayed on the LCD screen. Press
the DISP button to turn the display on or off.
Exposure compensation,
sensitivity, and white
balance
Focus frame
Flash
Battery life
Quality
Zoom bar
Number of photos
you can take
21
L-410Basics.book Page 22 Tuesday, June 22, 2004 4:22 PM
Settings and Icons
Self-timer
Focus frame
(2 seconds),
(10 seconds)
Place your subject within the focus frame. When
you press the shutter button halfway, the focus
frame turns green.
Battery life
Zoom bar
The digital zoom indicator appears when digital
zoom is enabled.
Scene mode
Landscape mode,
Exposure
compensation
(+2.0 to -2.0)
Sensitivity
(Auto, 100, 200, 400)
White balance
(Auto,
Daylight,
Cloudy,
Incandescent,
Fluorescent,
Quality
F2304,
N1600,
Macro mode
Macro
Flash
Shooting
mode
Photos left
Warning
22
F1600,
N640
Portrait mode
F640,
Mercury)
N2304,
Auto-flash,
Flash off,
Auto red-eye
reduction,
Fill-in flash,
Slow synchro
Continuous shooting mode,
125 (for example)
Camera shake
Video mode
L-410Basics.book Page 23 Tuesday, June 22, 2004 4:22 PM
Continuous Shooting
In Continuous Shooting mode, you can capture a series
of photos by holding the shutter button down. You can
take up to three photos per second at maximum speed.
Note:
To shoot at the maximum speed, you need an SD memory
card with a recording/transfer speed of 10MB/second.
Use of the flash is not recommended with continuous
shooting, so make sure you have adequate lighting.
1 Turn the Mode dial to
continuous shooting.
2 If you want to adjust the quality (resolution) or
other settings, press the MENU button. See page 21
for a list of available settings. For more information,
see the Camera User’s Guide on your computer.
3 Make sure you are at least 20 inches (50 cm) away
from your subject.
◗
To zoom in on your subject, press the
(telephoto) button.
◗
To zoom out, press the
button.
T
W (wide-angle)
4 Center your subject in the middle of the square
focus frame on the screen.
23
L-410Basics.book Page 24 Tuesday, June 22, 2004 4:22 PM
5 Press and hold the shutter button halfway. The focus
frame turns green and the focus is set.
6 Press the shutter button all the way down. While the
shutter button remains fully pressed, photos will be
taken continuously.
Recording Videos
You can record videos with sound. The length of the
video is limited only by the amount of storage available
in your camera or memory card.
1 Turn the Mode dial to
video. The number in the
lower left corner of the LCD screen always starts at 0
in video mode.
2 Press the MENU button. The Movie menu is
displayed.
3 Press the r button.
4 Select the desired quality by using the u d buttons,
then press the OK button.
Lower resolution settings (320 × 240 or 160 × 120)
will let you take longer videos, but they will play in a
smaller window if you view them on your computer.
5 Press the MENU button to exit the menu.
24
L-410Basics.book Page 25 Tuesday, June 22, 2004 4:22 PM
6 If you want to zoom in on your subject, press the
T (telephoto) button. (You can’t zoom in or out
once you start recording.)
7 Press the shutter button all the way down to start
recording.
8 Press the shutter button again to stop recording.
Taking Photos With Fun Frames
You can use P.I.F. (PRINT Image Framer) to take
pictures with a variety of frames for holidays and special
occasions.
Frames are already stored in your camera, and additional
frames are copied to your computer when you install the
camera software. You can use the PRINT Image Framer
Tool to copy the frames from your computer to the
camera.
25
L-410Basics.book Page 26 Tuesday, June 22, 2004 4:22 PM
You can also modify the frames or create original frames
using PIF Designer. See pages 14 to 15 for instructions
on installing the software.
To take a picture with a frame:
1 Turn the Mode dial to
automatic or
manual.
2 Press the
P.I.F. button. The first frame stored in
the camera is displayed.
If you want to select a frame stored on the memory
card, press the r button after pressing the
P.I.F.
button.
3 Select the frame you want by using the u d buttons,
then press the OK button. The selected frame is
displayed on the LCD screen.
Frames are available in both horizontal and vertical
designs. Make sure you choose the right orientation
for the picture you want to take.
4 Press the
T (telephoto) button to zoom in on your
subject if necessary.
5 Center your subject in the frame.
6 Press and hold the shutter button halfway. The focus
frame turns green and the focus is set.
26
L-410Basics.book Page 27 Tuesday, June 22, 2004 4:22 PM
7 Press the shutter button all the way down. The
camera beeps as it captures your picture.
You can now print your framed picture directly from the
camera on supported Epson printers. For instructions on
printing from the camera, see page 31.
Note:
You can also add or change a frame on an existing picture in
your camera. See page 29 for instructions.
Playing Back Photos and Videos
You can play back your pictures and videos on the
camera’s LCD screen. You can also delete any photos you
don’t want to save.
1 Turn the Mode dial to
playback. The last photo
you took is displayed.
◗
To view the next photo, press the r button.
Hold the r button down to fast-forward.
◗
To zoom in on a photo, press the T button. To
pan over to another part of the image, press the
u d l r buttons. Press the W button to
zoom out.
◗
To play a video, press the OK button. (The
icon appears on video images.) To stop the
video, press the l button.
27
L-410Basics.book Page 28 Tuesday, June 22, 2004 4:22 PM
2 To view 6 photos at once, press the
W button.
◗
To select a photo, press the u d l r buttons.
◗
To view the selected photo with the full screen,
press the T or OK button.
Deleting Photos
You can easily delete the currently displayed image, a
series of images, or all images in the camera.
1 Turn the Mode dial to
playback.
2 To delete the currently displayed photo, press the
d button. Select OK by using the u d buttons,
then press the OK button. The photo is deleted.
3 To delete a series of photos, press the MENU button.
Playback Menu 1 is displayed.
4 Select Delete Individual Images by using the
u d buttons, then press the r button.
5 Select the photo to delete by using the l r buttons.
6 Select OK by using the u d buttons, then press the
OK button. The photo is deleted.
7 If you want to delete another photo, repeat steps 5
and 6.
28
L-410Basics.book Page 29 Tuesday, June 22, 2004 4:22 PM
8 Press the MENU button twice to exit the menu.
Adding or Changing Frames
You can add or change a P.I.F. frame on an existing
photo, using any of the frames stored in your camera or
on your memory card. See page 25 for more information
about P.I.F.
To add or change a frame:
1 Turn the Mode dial to
playback.
2 Select the photo that you want to add a frame to (or
change frames on), by using the l r buttons.
3 Press the
P.I.F. button. You see the first frame
stored in the camera or on your memory card.
If you want to switch between frames in the camera
and frames on the memory card, press the l r
buttons.
4 Select the frame you want by using the u d buttons,
then press the OK button.
You see your picture in the frame you selected.
You can now print your framed picture directly from the
camera on supported Epson printers. For instructions on
printing from the camera, see page 31.
29
L-410Basics.book Page 30 Tuesday, June 22, 2004 4:22 PM
30
L-410Basics.book Page 31 Tuesday, June 22, 2004 4:22 PM
Printing Your Photos
You can print your photos directly from the camera to
supported Epson printers, using Epson 4 × 6 Premium
Glossy Photo Paper.
You can include the date the photo was taken, print with
or without borders, or print an “album” of several photos
on one 4 × 6-inch sheet of paper.
You can also print photos with P.I.F. frames to create
greeting cards, keepsakes, and more.
The camera supports the printers listed below.
◗
To connect to the Epson Stylus Photo R200, use the
printer cable labeled with the letter A on the small
end.
◗
To connect to any of the other printers listed below,
use the PC cable labeled with the letter B.
Printer cable (A)
PC cable (B)
Epson Stylus Photo R200
Epson Stylus Photo R300
Epson Stylus Photo RX600
PictureMate
31
L-410Basics.book Page 32 Tuesday, June 22, 2004 4:22 PM
You can also run maintenance programs for the Epson
Stylus Photo R200 printer directly from the camera. For
instructions, see the Camera User’s Guide on your
computer. See page 14 for instructions on installing the
guide and software.
Note:
Future products may be added to the list of supported
printers. Check the Epson web site at www.epson.com for
more information.
Connecting the Camera to Your Printer
Make sure the camera is turned off before you begin.
You can conserve battery power by using the optional
AC adapter when you print from the camera. See the
Camera User’s Guide on your computer for instructions.
1 Locate the correct cable for your printer, as shown
on page 31.
2 Connect the large end of the cable to the correct
port on your printer.
32
L-410Basics.book Page 33 Tuesday, June 22, 2004 4:22 PM
◗
On the Epson Stylus Photo R200, shown below,
the port is labeled USB.
Epson Stylus Photo R200
◗
On the other supported printers listed on
page 31, the port is labeled EXT I/F.
3 Open the connector cover on the side of the camera
and plug the small end of the cable into the camera’s
USB port as shown.
Connection for the
Epson Stylus Photo R200
Connection for other supported
Epson printers
4 Turn on the camera.
33
L-410Basics.book Page 34 Tuesday, June 22, 2004 4:22 PM
Printing Photos
You can print all the photos in the camera, or select the
ones you want to print.
Images with P.I.F. frames must be printed directly from
the camera.
Before you start, make sure your printer is set up and has
ink installed. Load 4 × 6 inch Epson Premium Glossy
Paper, following the instructions that came with your
printer.
Printing the Photo Displayed on the Screen
1 Connect the camera to the printer as described on
page 32 and turn on the camera.
2 Turn the Mode dial to
playback and use the l r
buttons to display the photo you want to print.
3 Press the
button. The Print menu is displayed.
4 Press the OK button to select Print This Image.
5 If you want to print just one copy, go to step 7.
If you want to print more than one copy, press the
OK button and use the u button to select the
number of copies you want. Then press OK.
34
L-410Basics.book Page 35 Tuesday, June 22, 2004 4:22 PM
6 Press the d button to select Print Settings, then
press OK.
7 Press the r button to select Paper Type, then press
the d button to select 4 × 6in.Prem.Glossy and
press OK.
If you want to print a photo with white borders, turn
off the date stamp, or change other settings, see
page 38.
8 Press the
button to start printing. When printing
is complete, press the OK button.
Note:
If you need to cancel printing, press the MENU button.
Printing All Your Saved Photos
You can print all photos stored in the camera.
1 Connect the camera to the printer as described on
page 32 and turn on the camera.
2 Turn the Mode dial to
playback, then press the
button.
3 Select Print All Images by using the u d buttons,
then press the OK button.
35
L-410Basics.book Page 36 Tuesday, June 22, 2004 4:22 PM
4 If you want to print more than one copy of each
picture, press the OK button and use the u button
to select the number of copies you want. Then press
OK.
5 Make sure the paper type is set to 4 × 6in. Prem.
Glossy. If you want to turn off the date stamp or
change other settings, see page 38.
6 Press the
button to start printing. When printing
is complete, press the OK button.
Printing Selected Photos
You can select individual photos to print.
1 Connect the camera to the printer as described on
page 32 and turn on the camera.
2 Turn the Mode dial to
playback, then press the
button.
3 Choose Select Images by using the u d buttons,
then press the OK button.
4 Select the photos to print by using the l r buttons,
then select the number of copies by using the u d
buttons.
5 Press the
36
button.
L-410Basics.book Page 37 Tuesday, June 22, 2004 4:22 PM
6 Make sure the paper type is set to 4 × 6in. Prem.
Glossy. To change settings, see page 38.
7 Press the
button to start printing. When printing
is complete, press the OK button.
Printing Several Photos on One Sheet
You can print several photos on one sheet of 4 × 6-inch
paper (up to 4 photos on the Epson Stylus Photo R200
or up to 3 on other supported printers).
1 Connect the camera to the printer as described on
page 32 and turn on the camera.
2 Turn the Mode dial to
playback, then press the
button. The Print menu is displayed.
3 Choose Select Images by using the u d buttons,
then press the OK button.
4 Select the photos by using the l r buttons, then
select the number of copies by using the u d buttons.
5 Press the MENU button.
6 Select Print an Album by using the u d buttons.
7 Select the number of photos per page by using the
l r buttons, then press the OK button. If you want
to change print settings, see page 38.
37
L-410Basics.book Page 38 Tuesday, June 22, 2004 4:22 PM
8 Press the
button to start printing. When printing
is complete, press the OK button.
Note:
You can’t print images with P.I.F. frames when you select
Print an Album.
Making Print Settings
You can make the following settings when printing
images directly from the camera:
◗
Printing with or without white borders
◗
Printing the date (not available with frames)
◗
Printing with normal or high quality
Note:
You can also set the paper type to choose 4 × 6 inch or
10 ×15 cm paper. Make sure you change this setting to
4 × 6in. Once you change it, the camera will retain this
setting. 10 ×15 cm paper is not available in the U.S.
1 On the preview screen, select Print Settings by
using the u d buttons, and then press the OK
button.
2 Select the item to set by using the u d buttons, then
press the OK button.
3 Select the setting by using the u d buttons, then
press the OK button.
38
L-410Basics.book Page 39 Tuesday, June 22, 2004 4:22 PM
Solving Problems
Before you call for help, check this list of common
problems and possible solutions. For more
troubleshooting tips, check the Camera User’s Guide on
your computer.
Camera Problems
The camera has no power.
◗
The camera may have shut off automatically to save
power. Press the POWER button to turn on the
camera.
◗
Make sure the battery or batteries have power and
are correctly installed. Try replacing the batteries. See
page 10 for instructions.
The camera does not take a photo after you press the
shutter button.
◗
Make sure the battery or batteries have power and
are correctly installed, and the camera is turned on.
◗
Check the number in the lower left corner of the
LCD screen. If the number is 0, the memory card
(or internal memory) is full. Transfer the photos to a
computer and delete them from the camera.
39
L-410Basics.book Page 40 Tuesday, June 22, 2004 4:22 PM
The camera does not react when you press the buttons.
◗
If the lights on the back of the camera are flashing,
try turning the camera off and then on again.
◗
If the power does not turn off, remove the battery,
reinstall it, and turn the power on. If the lights are
still flashing, contact Epson as described on page 45.
The camera takes too long to take a photo.
If you press the shutter button all the way down, the
camera has to focus and set the exposure before the
shutter releases. Press and hold the button halfway to set
the focus, then press it all the way down to take a photo.
The flash doesn’t work.
◗
Make sure the flash is not set to
◗
If you’re using one of the automatic flash modes, the
flash only works when there is insufficient light.
(flash off ).
The LCD screen is hard to see.
Turn the Mode dial to SETUP and adjust the LCD
Brightness setting.
40
L-410Basics.book Page 41 Tuesday, June 22, 2004 4:22 PM
Nothing appears on the LCD screen.
◗
The screen may have shut off automatically to save
power. Press any button or turn the Mode dial.
◗
Press the DISP button to change the LCD screen
setting.
◗
When the camera is connected to a printer or
computer, the LCD screen is disabled.
Image Problems
Images are out of focus.
◗
Make sure you place your subject in the center of the
focus frame and press the shutter button halfway.
You can then reframe your picture before you press
the button all the way down.
◗
Make sure you are at least 20 inches away from your
subject (or 4.3 inches in Macro mode).
◗
Make sure the lens is clean. If not, blow off any loose
dust, then breathe on the lens and wipe it with a
soft, dry cloth.
◗
If the captured image is blurred, you may have
moved the camera. Hold the camera in the proper
position when shooting, with your arm close to your
body. Use a tripod for night scenes and other low
light situations.
41
L-410Basics.book Page 42 Tuesday, June 22, 2004 4:22 PM
Images are too dark (underexposed) or too bright
(overexposed).
◗
Make sure the flash is not set to
◗
If you are using the flash, make sure you are within
range (between 2.3 and 8.5 feet for automatic
mode). See the Camera User’s Guide on your
computer for more information.
◗
If you are shooting a close-up in macro mode, try the
(flash off ) setting.
◗
If you are using manual mode, you can adjust the
exposure compensation or light sensitivity settings.
See the Camera User’s Guide for instructions.
(flash off ).
Miscellaneous Problems
The color is incorrect or lines appear on the printed
picture.
◗
Make sure you load 4 × 6-inch Epson Premium
Glossy Photo Paper in your printer.
◗
You may need to run one of the printer maintenance
programs. If you are using the Epson Stylus Photo
R200, see the Camera User’s Guide on your
computer. For other printers, see the instructions
that came with the printer.
42
L-410Basics.book Page 43 Tuesday, June 22, 2004 4:22 PM
The wrong date and/or time is printed.
Turn the Mode dial to SETUP and press the r button
to select Setup Menu 2. Use the d button to select
Date/Time, then adjust the setting. See page 11 for
more information.
You see an error message when you try to open the
Camera User’s Guide.
Install Adobe Acrobat Reader from the CD-ROM that
came with the camera. See pages 14 to 15 for
instructions.
List of Error Messages
The following list includes the most common error
messages. For a complete list, see the Camera User’s
Guide on your computer.
Error message
Description
This memory card is Slide the lock on the side of the card to
write-protected.
release it.
Memory card error.
Check the memory
card.
Remove the memory card and replace it.
See page 12 for instructions. Contact the
card manufacturer for more information.
No memory card
inserted.
Insert a memory card, following the
instructions on page 12.
43
L-410Basics.book Page 44 Tuesday, June 22, 2004 4:22 PM
Error message
Description
Not enough free
space in the
camera’s memory
(or memory card).
Make room by deleting photos. See page 28
for instructions.
This frame cannot
be used with this
camera.
The file size of the frame exceeds the
camera’s limit. Use the PIF Designer
software to simplify the frame.
P.I.F. Frame does not The link between the photo and frame has
exist or is unusable. been broken or the frame itself has been
deleted. For more information, see the
Camera User’s Guide on your computer.
This image cannot
be displayed.
Images from another camera or other
source may not display on your camera.
Ink is too low to
perform this
operation.
The ink level is too low for head cleaning.
Replace the cartridge(s) following the
instructions that came with the printer.
Printer error.
Turn the printer off and check to see if there
is anything stuck inside. Then turn the
printer back on.
This image cannot
be printed.
Images from another camera or other
source may not print. Try printing from your
computer instead.
Could not print.
Retry?
Restart the printer or wait until the current
print job is finished and then try again.
The CD-R/DVD-R tray on the printer is not
The printer is
currently configured closed. Close the tray.
to print on a CD or
DVD.
44
L-410Basics.book Page 45 Tuesday, June 22, 2004 4:22 PM
Error message
Description
A communication
error has occurred.
Either the cable has been disconnected or
the power has been turned off. Check that
the cable is connected, turn the power back
on, and try again.
This function is not
available.
The printer does not support this function.
Run the printer maintenance program from
your computer instead of the camera.
Where To Get Help
Epson provides technical assistance 24 hours a day
through the electronic support services and automated
telephone services listed below.
Service
Access
World
Wide Web
From the Internet, you can reach Epson Support at
http://support.epson.com. At this site, you can
download drivers and other files, look at product
documentation, access troubleshooting
information, and receive technical advice through
e-mail.
Automated
Telephone
Services
A variety of automated help services are available
24 hours a day, seven days a week. To use these
services, you must have a touch tone telephone and
call (800) 922-8911. Your Epson SoundAdviceSM
Express Code is 70580. Use this code to quickly
select the Epson PhotoPC L-410 in SoundAdvice.
45
L-410Basics.book Page 46 Tuesday, June 22, 2004 4:22 PM
To speak to a technical support representative, dial:
◗
U.S.: (562) 276-4303, 6 AM to 6 PM, Pacific Time,
Monday through Friday.
◗
Canada: (905) 709-3839, 6 AM to 6 PM, Pacific
Time, Monday through Friday.
Toll or long distance charges may apply.
Please have the following information ready:
◗
Product name (Epson PhotoPC L-410)
◗
Product serial number (located on the bottom of the
camera)
◗
Proof of purchase (such as a store receipt) and date of
purchase
◗
Computer configuration and operating system
version
◗
Description of the problem
You can purchase ink cartridges, paper, manuals, and
accessories from the Epson Store at (800) 873-7766 or
visit www.epsonstore.com (U.S. sales only). In Canada,
please call (800) 463-7766 for dealer referral.
46
L-410Basics.book Page 47 Tuesday, June 22, 2004 4:22 PM
Appendix
Specifications
Effective pixels
4.07 megapixels
Image recording Still picture: 2304 × 1728 pixels
capacity
Video:
640 × 480 pixels
Image file type
JPEG (EXIF 2.2), AVI
Camera file
system
DCF file format, DPOF 1.1
Internal memory 16MB
Compatible
memory cards
SD memory card (Up to 512MB),
Multimedia card (Up to 512MB, MMC ver 2.1 or
later, Hitachi® or SanDisk® recommended)
Lens
Focal length: f=5.6 to 16.8 mm (equivalent to a 34
to 102 mm lens on a 35 mm camera)
Aperture:
F2.8/F4.9
Zoom:
Collapsible mount 3× zoom
Digital zoom
2× or 3× zoom (maximum 9× zoom with
simultaneous use of the optical zoom)
Focus mode
Auto focus
Auto-focus range Normal:
Macro:
20 inches to infinity
4.33 to 19.69 inches
Shutter speed
Auto/Flash: 1/30 to 1/2000 second
1/2 to 1/2000 second
Flash off:
Slow synchro: 1 to 1/2000 second
White balance
TTL auto white balance (auto/daylight/cloudy/
incandescent/fluorescent/mercury)
47
L-410Basics.book Page 48 Tuesday, June 22, 2004 4:22 PM
Sensitivity
Auto/fixed (equivalent to ISO 100/200/400)
Viewfinder
Real-image optical view
Flash
Auto/flash off/red-eye reduction/fill-in flash/forced
flash/slow synchro
Self-timer
2 seconds/10 seconds
Photography
mode
Normal/portrait/landscape/macro
LCD monitor
1.5-inch low temperature polysilicon TFT color
LCD monitor
Interface
Full-speed USB 2.0/serial dual interface
(Mass Storage Class)
Power sources
One CR-V3 battery included
Also accepts AA alkaline, NiCad, or NiMH
batteries, including rechargeables
External power
source
Optional AC adapter (B867062)
Dimensions
(height × width
× depth)
2.4 × 3.6 × 1.2 inches (62 × 92.5 × 31.5 mm)
Weight
Approx. 0.3 lb (152 g)
Temperature
Operating: 41 to 95 °F (5 to 35 °C )
Storage: –4 to 140 °F (–20 to 60 °C)
Electrical
Input voltage: DC 3.4 V
48
L-410Basics.book Page 49 Tuesday, June 22, 2004 4:22 PM
Important Safety Instructions
Using the camera
◗ Do not expose the camera to severe impact. Doing so may cause
malfunctions, especially while the camera is operating.
◗ Follow all warnings and instructions marked on this product.
◗ Do not insert objects into the slots or openings on this product.
◗ Do not touch the components inside this product unless
◗
◗
◗
◗
◗
◗
◗
◗
instructed to do so in the user documentation. Never force this
product’s components into place. Although this product is
designed to be sturdy, rough handling can damage it.
Never spill liquid onto this product.
If this product emits unusual noises, odors, or smoke, cancel the
current operation and turn it off immediately. Remove the
batteries and disconnect the AC adapter from the product, then
unplug the AC adapter from the power outlet.
To prevent fire or electric shock, do not cover this product with a
blanket or other covering that may give off a static electric shock.
To prevent fire or electric shock, do not expose this product or its
options to rain or moisture.
To prevent fire or explosion, do not use this product where
flammable or volatile gas is stored.
Do not use this product outdoors during a thunderstorm.
Do not use this product after moving it between extreme
temperatures, which may cause condensation to form on
electronic parts.
Use only the recommended AC adapter (B867062) for this
product.
49
L-410Basics.book Page 50 Tuesday, June 22, 2004 4:22 PM
Using the battery
◗ If battery acid gets into your eyes or on your skin, immediately
◗
◗
◗
◗
◗
◗
◗
◗
◗
◗
◗
◗
◗
◗
◗
◗
◗
◗
rinse the affected area thoroughly with water and seek medical
treatment. If a battery is swallowed, seek medical treatment
immediately.
Use only AA-size batteries or a CR-V3 type battery for the camera
according to the directions in the user documentation.
Do not use the battery that comes with this product for other
devices.
To protect against short-circuiting, do not remove the outside
sleeve of the battery.
Do not handle the battery with wet hands or use it near water.
Do not expose the battery to water or high humidity.
Do not drop, puncture, disassemble, mutilate, or short-circuit the
battery.
Do not place the battery near or into fire or water.
Do not use a battery that is leaking or damaged in any way.
Keep the battery away from heat sources.
Do not insert objects into any openings in the battery as they may
touch dangerous voltage points or short-circuit components.
Prevent the battery from coming into contact with metal objects
that could short-circuit it, such as coins or keys.
Do not use the battery if its terminals are soiled.
Do not insert the battery into power outlets or other power
sources such as car cigarette lighter sockets.
Do not solder wires or terminals directly to the battery.
Do not touch the battery terminals.
Keep the battery away from open flame.
If overheating, discoloration, or distortion occur, remove the
battery from this product and do not use it.
When using a rechargeable battery, recharge the battery after
discharging it completely.
50
L-410Basics.book Page 51 Tuesday, June 22, 2004 4:22 PM
Storing the battery
◗ When not using this device for a long period, remove the battery
from the product and store it separately.
◗ Do not store the battery where the temperature or humidity is
very high.
◗ Store the battery out of children’s reach.
Disposing of the battery
Before disposing of the battery, make sure you discharge it
completely.
WARNING:
◗ Be sure to completely cover the ends of the battery with tape to
prevent combustion or explosion when disposing of it.
◗ Dispose of used batteries according to the manufacturer’s
instructions and in compliance with all applicable laws. Contact
your local government agency for information about battery
recycling and disposal.
Using a memory card
◗ Only memory cards designed for the product’s specifications can
be used.
◗ The methods for using memory cards vary according to card type.
Be sure to refer to the documentation included with your memory
card for details.
◗ Turn the camera off before installing or removing the memory
card.
51
L-410Basics.book Page 52 Tuesday, June 22, 2004 4:22 PM
Using the LCD monitor
◗ The LCD monitor on this product may contain a few small bright
or dark spots. These are normal and do not mean that your LCD
monitor is damaged in any way.
◗ If the LCD monitor on this product is damaged, consult your
dealer.
◗ If the liquid crystal solution contained in the LCD monitor on
this product leaks out and gets onto your hands, wash them
thoroughly with soap and water. If it gets into your eyes, flush
them immediately with water. If discomfort or vision problems
remain after a thorough flushing, see a doctor immediately.
◗ Only use a soft, dry cloth to clean the display. Do not use liquid or
chemical cleaners.
Storing, maintaining, or transporting the camera
◗ Do not store this product outdoors, near water, or in a location
subject to high temperature or humidity, rapid changes in
temperature or humidity, direct sunlight, or strong light sources.
◗ Unplug this product from the power outlet before cleaning it. Use
a damp cloth for cleaning and do not use liquid or aerosol
cleaners.
◗ Remove the batteries from and unplug this product and refer
servicing to qualified service personnel under the following
conditions: The power cord or plug is damaged; liquid has entered
this product or its options; this product or its options have been
dropped or the case is damaged; this product or its options do not
operate normally or exhibit a distinct change in performance.
WARNING:
Handling the cord on this product or cords associated with
accessories sold with this product, will expose you to lead, a chemical
known to the State of California to cause birth defects or other
reproductive harm. Wash hands after handling.
52
L-410Basics.book Page 53 Tuesday, June 22, 2004 4:22 PM
FCC Compliance Statement
For United States Users
This equipment has been tested and found to comply with the limits
for a class B digital device, pursuant to Part 15 of the FCC Rules.
These limits are designed to provide reasonable protection against
harmful interference in a residential installation. This equipment
generates, uses, and can radiate radio frequency energy and, if not
installed and used in accordance with the instructions, may cause
harmful interference to radio and television reception. However,
there is no guarantee that interference will not occur in a particular
installation. If this equipment does cause interference to radio and
television reception, which can be determined by turning the
equipment off and on, the user is encouraged to try to correct the
interference by one or more of the following measures:
◗ Reorient or relocate the receiving antenna
◗ Increase the separation between the equipment and receiver
◗ Connect the equipment into an outlet on a circuit different from
that to which the receiver is connected
◗ Consult an experienced radio/TV technician for help.
WARNING: The connection of a non-shielded equipment interface
cable to this equipment will invalidate the FCC Certification of this
device and may cause interference levels that exceed the limits
established by the FCC for this equipment. It is the responsibility of
the user to obtain and use a shielded equipment interface cable with
this device. If this equipment has more than one interface connector,
do not leave cables connected to unused interfaces. Changes or
modifications not expressly approved by the manufacturer could void
the user’s authority to operate the equipment.
For Canadian Users
This Class B digital apparatus complies with Canadian ICES-003.
Cet appareil numérique de la classe B est conforme à la norme NMB-003
du Canada.
53
L-410Basics.book Page 54 Tuesday, June 22, 2004 4:22 PM
Declaration of Conformity
According to 47CFR, Part 2 and 15 for Class B Personal Computers
and Peripherals; and/or CPU Boards and Power Supplies used with
Class B Personal Computers:
We:
Epson America, Inc.
Located at:
MS 3-13
3840 Kilroy Airport Way
Long Beach, CA 90806
Telephone : (562) 290-5254
Declare under sole responsibility that the product identified herein,
complies with 47CFR Part 2 and 15 of the FCC rules as a Class B
digital device. Each product marketed is identical to the
representative unit tested and found to be compliant with the
standards. Records maintained continue to reflect the equipment
being produced can be expected to be within the variation accepted,
due to quantity production and testing on a statistical basis as
required by 47CFR §2.909. Operation is subject to the following two
conditions: (1) this device may not cause harmful interference, and
(2) this device must accept any interference received, including
interference that may cause undesired operation.
Trade Name:
Epson
Type of Product: Digital Still Camera
Model:
G921A
Product:
Epson PhotoPC L-410
54
L-410Basics.book Page 55 Tuesday, June 22, 2004 4:22 PM
Epson America, Inc. Limited Warranty
What Is Covered: Epson America, Inc. (“EPSON”) warrants to the
original retail purchaser that the EPSON Digital Camera Product
covered by this limited warranty statement, if purchased new and
operated in the United States or Canada, conforms to the
manufacturer’s specifications and will be free from defects in
workmanship and materials for a period of one (1) year from the date
of original purchase. EPSON also warrants that the included supplied
consumables (i.e. batteries) will perform to the manufacturer’s
specified usage, which usage may expire before the limited warranty
for the EPSON Product. For warranty service, you must provide
proof of the date of original purchase.
What EPSON Will Do To Correct Problems: Should your EPSON
Digital Camera Product prove defective during the warranty period,
please call the EPSON Connection at (562) 276-4303 (U.S.) or
(905) 709-3839 (Canada) for warranty repair instructions and return
authorization. An EPSON service technician will provide telephone
diagnostic service to determine whether the unit requires service. If
service is needed, EPSON will, at its option, repair or exchange the
Epson Product without charge for parts or labor. If the product
requires repair or replacement, it is your responsibility to package it in
its original container or an equivalent, along with proof of the date of
original purchase and ship it to EPSON. Packaging, insurance, and
shipping costs incurred in presenting your EPSON product for
warranty service are your responsibility. Return shipping costs from
the EPSON repair facility are EPSON’s responsibility. When
warranty service involves the exchange of the product or of a part, the
item replaced becomes EPSON property. The replacement product
or part may be new or refurbished to the EPSON standard of quality,
and, at Epson’s option, may be another model of like kind and
quality. Epson’s liability for replacement of the covered digital camera
will not exceed the original retail selling price of the covered digital
camera. Exchange products or parts assume the remaining warranty
period of your original product covered by this limited warranty.
55
L-410Basics.book Page 56 Tuesday, June 22, 2004 4:22 PM
What This Warranty Does Not Cover: This warranty covers only
normal use in the United States and Canada. This warranty does not
apply to refurbished or reconditioned products. This warranty is not
transferable. This warranty does not cover damage to the EPSON
product caused by parts or supplies not manufactured, distributed or
certified by EPSON. This warranty does not cover third party parts,
components or peripheral devices added to the EPSON product after
its shipment from EPSON nor does the warranty cover supplies and
consumables such as lamps, prints, batteries, cables or storage media.
EPSON is not responsible for warranty service should the EPSON
label or logo or the rating label or serial number be removed or should
the product fail to be properly maintained or fail to function properly
as a result of misuse, abuse, improper installation, neglect, improper
shipping, damage caused by external causes such as fire, flood, and
lightning, improper electrical current, software problems, interaction
with non-EPSON products, or service other than by an EPSON
Authorized Servicer. If a claimed defect cannot be identified or
reproduced in service, you will be held responsible for costs incurred.
THE LIMITED WARRANTY ABOVE IS EPSON’ S SOLE
OBLIGATION AND THE REMEDY PROVIDED IS
CUSTOMER’S SOLE REMEDY. EXCEPT FOR THE LIMITED
WARRANTY STATED, EPSON MAKES AND CUSTOMER
GETS NO OTHER EXPRESS OR IMPLIED WARRANTIES
INCLUDING, BUT NOT LIMITED TO, THE IMPLIED
WARRANTIES OF MERCHANTABILITY, NONINFRINGEMENT OR FITNESS FOR A PARTICULAR
PURPOSE. SOME LAWS DO NOT ALLOW THE EXCLUSION
OF IMPLIED WARRANTIES. IF THESE LAWS APPLY, THEN
ALL EXPRESS AND IMPLIED WARRANTIES ARE LIMITED
TO THE WARRANTY PERIOD IDENTIFIED ABOVE.
UNLESS STATED HEREIN, ANY STATEMENTS OR
REPRESENTATIONS MADE BY ANY OTHER PERSON OR
FIRM ARE VOID. EXCEPT AS PROVIDED IN THIS
WRITTEN WARRANTY, NEITHER EPSON AMERICA, INC.,
NOR ITS AFFILIATES SHALL BE LIABLE FOR ANY LOSS,
INCONVENIENCE, OR DAMAGE, INCLUDING DIRECT,
56
L-410Basics.book Page 57 Tuesday, June 22, 2004 4:22 PM
SPECIAL, INCIDENTAL OR CONSEQUENTIAL DAMAGES,
RESULTING FROM THE USE OR INABILITY TO USE THE
EPSON PRODUCT, OR FOR LOST DATA OR LOST
SOFTWARE, WHETHER RESULTING FROM BREACH OF
WARRANTY OR ANY OTHER LEGAL THEORY.
In Canada, warranties include both warranties and conditions.
Some jurisdictions do not allow limitations on how long an implied
warranty lasts and some jurisdictions do not allow the exclusion or
limitation of incidental or consequential damages, so the above
limitations and exclusions may not apply to you. This warranty gives
you specific legal rights, and you may also have other rights which
vary from jurisdiction to jurisdiction.
Epson America, Inc. - P. O. Box 93012 - Long Beach, CA 908093012
57
L-410Basics.book Page 58 Tuesday, June 22, 2004 4:22 PM
58
L-410Basics.book Page 59 Tuesday, June 22, 2004 4:22 PM
Index
A
D
AC adapter (optional), 7
Accessories, 7, 46
Adobe Acrobat Reader, 15, 16
Automatic mode, 18
Date and time setting, 11
Declaration of Conformity, 54
Deleting photos, 28
Direct printing, 31 to 38
B
E
Battery
icon, 22
installing, 10
safety instructions,
Epson
help, 45
photo paper, 31
Store, 7, 46
warranty, 55
Error messages, 43 to 45
50 to 51
C
Cables, 9, 31
Camera
connecting to printer, 32
modes, 17
printing from, 31 to 38
problems, 39
safety instructions, 49
settings, 21 to 22
specifications, 47
turning on/off, 11
warranty, 55
Camera User’s Guide, 43
F
FCC Compliance, 53
Flash, 19, 20, 22
Frames, 25 to 27, 29
I
Icons, 21 to 22
L
Language setting, 11
59
L-410Basics.book Page 60 Tuesday, June 22, 2004 4:22 PM
LCD screen
icons, 21 to 22
safety instructions, 52
turning off, 20
R
Resolution, 18, 20, 22, 24
S
M
Manual mode, 19
Memory cards
installing and removing, 13
requirements, 7
safety instructions, 51
using, 12 to 13
Modes, 17
P
P.I.F., 25 to 27, 29
Photos
deleting, 28
printing, 31 to 38
problems, 41
viewing, 27
PictureMate, 31
Power saving, 19, 21
PRINT Image Framer,
25 to 27, 29
Print settings, 38
Printers, 31, 32
Printing
from camera, 31 to 38
problems, 42
Problems, solving, 39 to 43
60
Safety, 49 to 52
Software
description, 6
installing, 14 to 16
Specifications, 47
T
Technical support, 45
Time and date setting, 11
Troubleshooting, 39 to 43
Turning the camera on/off, 11
V
Videos
playing back, 27
recording, 24
W
Warranty, 55
Z
Zoom, 18, 20, 22
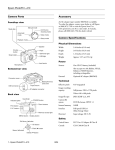
Manual mode
Mode dial
Continuous shooting
mode
USB connector
Battery/memory
card cover
Video mode
Tripod mount
Automatic
mode
AC adapter connector
Setup mode
Playback mode
POWER button
Zoom buttons
Indicator lights
Microphone
Print button
Shutter button
Speaker
MENU button
P.I.F. button
Flash
Memory
access light
Self-timer light
USB light
Display button
Self-timer button
OK button
Flash button
Strap holder
Macro button
Delete button
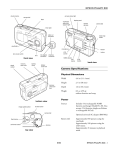
Manual mode
Mode dial
Continuous shooting
mode
USB connector
Battery/memory
card cover
Video mode
Tripod mount
Automatic
mode
AC adapter connector
Setup mode
Playback mode
POWER button
Zoom buttons
Indicator lights
Microphone
Print button
Shutter button
Speaker
MENU button
P.I.F. button
Flash
Memory
access light
Self-timer light
USB light
Display button
Self-timer button
OK button
Flash button
Strap holder
Macro button
Delete button


