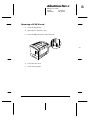
1
BF Proof Sign-off: Nishi Grady _______ _______ Albatross Rev.c A5 size 96/08/23 cover pass 0 Printer Parts printer cover latch control panel extension output tray r0-1 power switch front cover Ethernet interface connector printer cover Parallel B interface connector Parallel C interface connector AC inlet LocalTalk/Serial interface connector (option) cor-1 Proof Sign-off: Nishi Grady Albatross Rev.c _______ _______ A5 size 96/08/23 Front pass 0 title page ® Laser Printer All rights reserved. No part of this publication may be reproduced, stored in a retrieval system, or transmitted in any form or by any means, mechanical, photocopying, recording, or otherwise, without the prior written permission of Seiko Epson Corporation. No patent liability is assumed with respect to the use of the information contained herein. Neither is any liability assumed for damages resulting from the use of the information contained herein. Neither Seiko Epson Corporation nor its affiliates shall be liable to the purchaser of this product or third parties for damages, losses, costs, or expenses incurred by purchaser or third parties as a result of: accident, misuse, or abuse of this product or unauthorized modifications, repairs, or alterations to this product, or (excluding the U.S.) failure to strictly comply with Seiko Epson Corporation’s operating and maintenance instructions. Seiko Epson Corporation shall not be liable against any damages or problems arising from the use of any options or any consumable products other than those designated as Original Epson Products or Epson Approved Products by Seiko Epson Corporation. EPSON and EPSON ESC/P are registered trademarks and EPSON ESC/P 2 is a trademark of Seiko Epson Corporation. Speedo, Fontware, FaceLift, Swiss, and Dutch are trademarks of Bitstream Inc. CG Times and CG Omega are registered trademarks of Miles, Inc. Univers is a registered trademark of Linotype AG and/or its subsidiaries. Antique Olive is a trademark of Fonderie Olive. Albertus is a trademark of Monotype Corporation plc. Coronet is a trademark of Ludlow Industries (UK) Ltd. Arial and Times New Roman are registered trademarks of Monotype Corporation plc. General Notice: Other product names used herein are for identification purposes only and may be trademarks of their respective owners. EPSON disclaims any and all rights in those marks. Copyright © 1996 by Seiko Epson Corporation, Nagano, Japan Reference Guide R L Albatross Rev.c A5 size 96/08/23 Front pass 0 Declaration of Conformity According to ISO/IEC Guide 22 and EN 45014 Manufacturer: Address: SEIKO EPSON CORPORATION 3-5, Owa 3-chome, Suwa-shi, Nagano-ken 392 Japan Representative: Address: EPSON EUROPE B.V. Prof. J. H. Bavincklaan 5 1183 AT Amstelveen The Netherlands Declares that the Product: Product Name: Type Name: Model: Laser Printer EPL-N2000 L240B Conforms to the following Directive(s) and Norm(s): Directive 89/336/EEC: EN 55022 Class A EN 50082-1 IEC 801-2 IEC 801-3 IEC 801-4 EN 61000-3-2 EN 61000-3-3 Directive 73/23/EEC: EN 60950 October 1996 M. Hamamoto President of EPSON EUROPE B.V. ii Albatross Rev.c A5 size 96/08/23 Front pass 0 Contents Getting Started About This Guide . . . . . . . . About Your Printer . . . . . . . Features . . . . . . . . . . . Options . . . . . . . . . . . . ENERGY STAR Compliance . . About Making Printer Settings . Printer Driver . . . . . . . . OneTouch modes . . . . . . SelecType . . . . . . . . . . Remote Control Panel utility Safety Information . . . . . . . . Ozone safety . . . . . . . . . Laser Printer Precautions . . . . Important Safety Instructions . For United Kingdom Users . . . Warnings, Cautions, and Notes . . . . . . . . . . . . . . . . . . . . . . . . . . . . . . . . . . . . . . . . . . . . . . . . . . . . . . . . . . . . . . . . . . . . . . . . . . . . . . . . . . . . . . . . . . . . . . . . . . . . . . . . . . . . . . . . . . . . . . . . . . . . . . . . . . . . . . . . . . . . . . . . . . . . . . . . . . . . . . . . . . . . . . . . . . . . . . . . . . . . . . . . . . . . . . . . . . . . . . . . . . . . . . . . . . . . . . . . . . . . . . . . . . . . . . . . . . . . . . . . . . . . . . . . . . . . . . . . . . . . . . . . . . . . . . . . 1-1 1-3 1-3 1-4 1-5 1-5 1-6 1-6 1-6 1-6 1-7 1-11 1-12 1-16 1-17 1-19 Loading Paper . . . . . . . . . . . . . . Manually loading paper . . . . . . Selecting the paper size . . . . . . . Loading an uncommon paper size Choosing Paper . . . . . . . . . . . . . Labels . . . . . . . . . . . . . . . . . Envelopes . . . . . . . . . . . . . . . Colored paper . . . . . . . . . . . . Transparencies . . . . . . . . . . . . . . . . . . . . . . . . . . . . . . . . . . . . . . . . . . . . . . . . . . . . . . . . . . . . . . . . . . . . . . . . . . . . . . . . . . . . . . . . . . . . . . . . . . . . . . . . . . . . . . . . . . . . . . . . . . . . . . . . . . . . . . . . . . . . . . . . . . . . . . . . . . . . 1-2 1-2 1-5 1-6 1-6 1-7 1-7 1-8 1-8 Chapter 1 . . . . . . . . . . . . . . . . . . . . . . . . . . . . . . . . . . . . . . . . . . . . . . . Paper Handling iii R L Albatross Rev.c A5 size 96/08/23 Chapter 2 Front pass 0 Understanding Your Printer The Control Panel . Overview . . . . Display . . . . . Indicator lights Buttons . . . . . . . . . . . . . . . . . . . . . . . . . . . . . . . . . . . . . . . . . . . . . . . . . . . . . . . . . . . . . . . . . . . . . . 2-2 2-2 2-3 2-4 2-5 Printer Options . . . . . . . . . . . . . . . . . Installing an Optional Paper Tray . . . . . . . Installing the Optional Lower Paper Cassette Installing the Duplex Unit . . . . . . . . . . . Removing the Duplex Unit . . . . . . . . PCMCIA Card . . . . . . . . . . . . . . . . . . Installing a PCMCIA card . . . . . . . . . Removing a PCMCIA card . . . . . . . . Memory Modules . . . . . . . . . . . . . . . . Installing a memory module . . . . . . . Removing a memory module . . . . . . . ROM Module . . . . . . . . . . . . . . . . . . Optional Interfaces . . . . . . . . . . . . . . . Installing the LocalTalk/Serial module . Installing a Type-B Interface Card . . . . Using the Serial Interface . . . . . . . . . . . . Using the serial interface utility . . . . . . . . . . . . . . . . . . . . . . . . . . . . . . . . . . . . . . . . . . . . . . . . . . . . . . . . . . . . . . . . . . . . . . . . . . . . . . . . . . . . . . . . . . . . . . . . . . . . . . . . . . . . . . . . . . . . . . . . . . . . . . . . . . . . . . . . . . . . . . . . . . . . . . . . . . . . . . . . . . . . . . . . . . . . . . . . . . . . . . . . . . . . . . . . . . . . . . . . . . . . . . . . . 3-2 3-3 3-7 3-8 3-12 3-13 3-14 3-15 3-16 3-16 3-20 3-21 3-21 3-23 3-24 3-26 3-28 Chapter 3 iv . . . . . . . . . . . . . . . . . . . . . . . . . . . . . . . . . . . . . . . . . . . . . . . . . . . . . . . . . . . . . . . . . . . . . . Options Albatross Rev.c A5 size 96/08/23 Chapter 4 Front pass 0 Remote Control Panel Utility Remote Control Panel Utility Overview . . . . . When to use the Remote Control Panel utility Installing the Remote Control Panel utility . Accessing the Remote Control Panel . . . . . LaserJet 4/EPSONScript Level 2 Mode . . . . ESCP2 Mode . . . . . . . . . . . . . . . . . . . FX Mode . . . . . . . . . . . . . . . . . . . . . I239X Mode . . . . . . . . . . . . . . . . . . . Page Setup Options . . . . . . . . . . . . . . . . . Type Options . . . . . . . . . . . . . . . . . . . . . Printer Setup Options . . . . . . . . . . . . . . . . Other Options . . . . . . . . . . . . . . . . . . . . More Options . . . . . . . . . . . . . . . . . . . . Duplex Options . . . . . . . . . . . . . . . . . . . . Chapter 5 . . . . . . . . . . . . . . . . . . . . . . . . . . . . . . . . . . . . . . . . . . . . . . . . . . . . . . . . . . . . . . . . . . . . . . . . . . . . . . . . . . . . . . . . . . . . . . . . . . . . . . . . . . . . . . . . . . . . . . . . . . . . . . . . . . . . . . . . . . . . 4-2 4-2 4-3 4-3 4-4 4-5 4-5 4-6 4-6 4-9 4-11 4-14 4-17 4-19 . . . . . . . . . . . . . . . . . . . . . . . . . . . . . . . . . . . . . . . . . . . . . . . . . . . . . . . . . . . . . . . . . . . . . . . . . . . . . . . . . . . . . . . . . . . . . . . . . . . . . . . . . . . . . . . . . . . . . . . . . . . . . . . . . . . . . . . . . . . . . . . . . . . . . . . . . . . . . . . . 5-2 5-3 5-3 5-3 5-4 5-8 5-8 5-9 5-9 5-11 5-12 5-15 5-16 5-17 5-18 5-19 SelecType When to Use SelecType . . . . . . . . SelecType . . . . . . . . . . . . . . . . Buttons . . . . . . . . . . . . . . . Using SelecType . . . . . . . . . . SelecType menus . . . . . . . . . Understanding SelecType Settings . Test Menu . . . . . . . . . . . . . Emulation Menu . . . . . . . . . Printing Menu . . . . . . . . . . . Tray Size Menu . . . . . . . . . . Config Menu . . . . . . . . . . . Setup Menu . . . . . . . . . . . . Parallel B Menu, Parallel C Menu Serial Menu . . . . . . . . . . . . L/T Menu, AUX Menu . . . . . . LJ4 Menu . . . . . . . . . . . . . . . . . . . . . . . . . . . . . . . . . . . . . . . . . . . . . . . . . . . . . . . . . . . . . . . . . . . . . . . . . . . . . . . . . . . . . . . . . . . . . . . . . . . . . . . . . . . . . . . . . . . . . . . . . . . . . . v R L Albatross Rev.c A5 size 96/08/23 Front pass 0 Using the OneTouch Modes . . . . . . . . Using Other Emulation Modes . . . . . . Changing emulation modes . . . . . . ESC/P 2 or FX Mode . . . . . . . . . . . . I239X Mode . . . . . . . . . . . . . . . . . EPSON GL/2 Mode . . . . . . . . . . . . . Before printing in EPSON GL/2 mode GL2 Menu . . . . . . . . . . . . . . . . Chapter 6 . . . . . . . . . . . . . . . . . . . . . . . . . . . . . . . . . . . . . . . . . . . . . . . . . . . . . . . . . . . . . . . . . . . . . . . . . . . . . . . . . . . . . . . . . . . . . . . . . . . . . . . . 5-21 5-23 5-23 5-24 5-27 5-28 5-29 5-30 . . . . . . . . . . . . . . . . . . . . . . . . . . . . . . . . . . . . . . . . . . . . . . . . . . . . . . . . . . . . . . . . . . . . . . . . . . . . . . . . . . . . . . . . . . . . . . . . . . . . . . . . . . . . . . . . . . . . . . . . . . . . . . . . . . . . . . . . . . . . . . . . 6-2 6-2 6-5 6-9 6-14 6-15 6-18 6-28 6-29 6-32 6-32 6-32 6-33 6-34 6-35 6-36 6-37 6-37 Troubleshooting and Maintenance Introduction . . . . . . . . . . . . . . . . . . . . . . . Paper Jam and Feeding Problems . . . . . . . . . . . Preventing paper feed and paper jam problems Print Quality Problems . . . . . . . . . . . . . . . . . Memory Problems . . . . . . . . . . . . . . . . . . . Option Problems . . . . . . . . . . . . . . . . . . . . Status and Error Messages . . . . . . . . . . . . . . . Hex Dump Mode . . . . . . . . . . . . . . . . . . . . Replacing the Imaging Cartridge . . . . . . . . . . . Optimizing Print Quality . . . . . . . . . . . . . . . . Adjusting RITech . . . . . . . . . . . . . . . . . . The RITech setting . . . . . . . . . . . . . . . . . Adjusting print density . . . . . . . . . . . . . . Resetting the Printer . . . . . . . . . . . . . . . . . . Cleaning the Printer . . . . . . . . . . . . . . . . . . . Removing spilled toner . . . . . . . . . . . . . . Cleaning the printer case . . . . . . . . . . . . . . Transporting the Printer . . . . . . . . . . . . . . . . vi . . . . . . . . Albatross Rev.c A5 size 96/08/23 Front pass 0 Appendix A Technical Specifications Paper . . . . . . . . . . . . . . . . . . . . . . . . . Specifications . . . . . . . . . . . . . . . . . . . Printer . . . . . . . . . . . . . . . . . . . . . . . . . General . . . . . . . . . . . . . . . . . . . . . . Environmental . . . . . . . . . . . . . . . . . Mechanical . . . . . . . . . . . . . . . . . . . . Electrical . . . . . . . . . . . . . . . . . . . . . Interface . . . . . . . . . . . . . . . . . . . . . . . . Parallel B interface . . . . . . . . . . . . . . . . Parallel C interface . . . . . . . . . . . . . . . Ethernet Interface . . . . . . . . . . . . . . . . Options and Consumables . . . . . . . . . . . . . 250 Sheet Lower Paper Cassette (C81269✽)/ 250 Sheet Paper Tray (C81270✽) . . . . . . . 500 Sheet Lower Paper Cassette (C81264✽)/ 500 Sheet Paper Tray (C81266✽) . . . . . . . Duplex Unit (C81268✽) . . . . . . . . . . . . . Imaging Cartridge (S051035) . . . . . . . . . . . . . . . . . . . . . . . . . . . . . . . . . . . . . . . . . . . . . . . . . . . . . . . . . . . . . . . . . . . . . . . . . . . . . . . . . . . . . . . . . . . . . . . . . . . . . . . . . . . . . . . . . . . . . . . . . . . . . . . . . . A-2 A-2 A-3 A-3 A-4 A-4 A-5 A-5 A-5 A-7 A-12 A-12 . . . . . . . . . . A-12 . . . . . . . . . . A-13 . . . . . . . . . . A-13 . . . . . . . . . . A-14 Appendix B Symbol Sets Introduction to Symbol Sets . . . . . . . . . . . . . In LJ4 Emulation Mode . . . . . . . . . . . . . . . . International Set for ISO sets . . . . . . . . . . . In ESC/P 2 or FX Modes . . . . . . . . . . . . . . . International Character Sets . . . . . . . . . . . Characters available with the ESC (^ command In I239X Emulation Mode . . . . . . . . . . . . . . In EPSON GL/2 Mode . . . . . . . . . . . . . . . . . . . . . . . . . . . . . . . . . . . . . . . . . . . . . . . . . . . . . . . . . . . . . . . . . . . . . . . . . . . . . . . . . . . . . . . . B-2 B-3 B-18 B-19 B-23 B-24 B-24 B-24 vii R L Albatross Rev.c A5 size 96/08/23 Front pass 0 Appendix C Command Summary LaserJet 4 (LJ4) Emulation Commands GL/2 context commands . . . . . . ESC/P 2 and FX Commands . . . . . . ESC/P 2 mode . . . . . . . . . . . . FX mode . . . . . . . . . . . . . . . PJL Commands . . . . . . . . . . . . . I239X Emulation Commands . . . . . Page format . . . . . . . . . . . . . Text . . . . . . . . . . . . . . . . . . Auxiliary Functions . . . . . . . . . AGM Mode . . . . . . . . . . . . . . . . . . . . . . . . . . . . . . . . . . . . . . . . . . . . . . . . . . . . . . . . . . . . . . . . . . . . . . . . . . . . . . . . . . . . . . . . . . . . . . . . . . . . . . . . . . . . . . . . . . . . . . . . . . . . . . . . . . . . . . . . . . . . . . . . . . . . . . . . . . . . . . . . . . . . . . . . . . . . . . . . . . . C-3 . C-7 . C-9 . C-9 . C-12 . C-15 . C-16 . C-16 . C-17 . C-18 . C-19 . . . . . . . . . . . . . . . . . . . . . . . . . . . . . . . . . . . . . . . . . . . . . . . . . . . . . . . . . . . . . . . . . . . . . . . . . . . . . . . . Appendix D Working with Fonts Printer and Screen Fonts Available Fonts . . . . . Adding More Fonts . . . Downloading fonts . Selecting Fonts . . . . . . . . . . . . . . . . . . . . . . . . . . . . . . . . . . . . . . . . . . . . . . Appendix E Map of SelecType Menus Glossary Index viii D-2 D-3 D-6 D-6 D-6 Proof Sign-off: Nishi Grady _______ _______ Albatross Rev.c R Reference Guide A5 size Introduction ’96/08/23 pass 0 Getting Started The EPSON EPL-N2000 printer combines high performance and reliability with a wide range of features. To get started with your laser printer, please: ❏ Read the safety information, laser printer precautions, and important safety instructions in this section. ❏ Use your Getting Ready! guide to set up and test your new printer as well as learn how to find more information about the printer software in online help. See this guide for detailed information about your printer. About This Guide This guide contains information about using your printer. For information about installing and setting up the printer, see the Getting Ready! guide. Chapter 1, “Paper Handling,” contains information on loading paper. Also consult this chapter when you need information about printing on special paper. Chapter 2, “Understanding Your Printer,” describes how to use the printer’s control panel. Chapter 3, “Options,” gives step-by-step instructions for installing the printer options. Chapter 4, “Remote Control Panel Utility,” describes the printer settings that can be modified with the Remote Control Panel utility. Read this chapter if you are not able to modify a printer setting from your software. Getting Started 1 L Albatross Rev.c Reference Guide A5 size Introduction ’96/08/23 pass 0 Chapter 5, “SelecType,” contains detailed information on the settings you can make in SelecType. Read this chapter if you are not able to modify a printer setting from your software. Chapter 6, “Troubleshooting and Maintenance,” gives helpful information for what to do if you encounter a printer error and provides instructions on how to maintain your printer. Appendix A, “Technical Specifications,” contains technical information about your printer. Appendix B, “Symbol Sets,” lists the symbol sets available in each emulation mode with the tables of the characters for each set. Appendix C, “Command Summary,” lists the commands that can be embedded in print jobs to control the printer. This appendix is intended for advanced users only. Appendix D, “Working with Fonts,” describes the steps you need to follow to add more fonts and lists the available fonts with samples. Appendix E, “Map of SelecType Menus,” lists the SelecType menus and the order in which you access them. This appendix is useful when you use SelecType. 2 Getting Started Albatross Rev.c R Reference Guide A5 size Introduction ’96/08/23 pass 0 About Your Printer Your printer is the latest in EPSON’s advanced line of laser printers. It emulates the Hewlett-Packard® LaserJet 4 (LJ4) printer, allowing you to print using the wide variety of software programs that support HP LaserJet printers. The printer’s 600-dpi (dots per inch) resolution is enhanced by EPSON’s Resolution Improvement Technology (RITech), which smoothes the jagged edges of diagonal lines in both text and graphics. This gives your documents a clean, crisp look that contributes to a professional appearance. The printer is easy to install and use. You simply set up the printer, connect it to your computer, and install the printer driver as described in the Getting Ready! guide. The printer supports ECP mode in Microsoft® Windows® 95. ECP mode is useful for high-speed data transfer and bidirectional communication with your computer. Features The printer comes with a full set of features that contributes to ease of use and consistent, high-quality output. The main features are described below. High-quality printing Your printer provides 600-dpi printing at a speed of up to 20 pages per minute. You’ll appreciate the professional print quality produced by your printer and its quick processing speed. Wide variety of fonts The printer comes with a selection of 45 scalable fonts, and one bitmap font in LJ4 emulation mode to provide you with the fonts you need to create professional-looking documents. The fonts included with the printer are listed in Appendix D. Getting Started 3 L Albatross Rev.c Reference Guide A5 size Introduction ’96/08/23 pass 0 Toner Save Mode To reduce the amount of toner used in printing documents, you can print rough drafts by clicking the Toner Save box in the printer driver (explained in the next pages). Options Memory The printer comes with 4 MB of memory, which can be expanded up to 68 MB. Interface/Module The printer comes with two built-in bidirectional parallel interfaces and one built-in Ethernet interface. You can install a Type-B serial, coax, or twinax interface by removing the Ethernet interface card, and you can install a LocalTalk/Serial interface module. Paper Cassette The 250 Sheet Paper Tray (C81270✽: variable paper size up to A3) and 500 Sheet Paper Tray (C81266✽: A4) automatically feed paper without reloading. Using the 500 Sheet Lower Paper Cassette (C81264✽) allows you to preload up to 1,150 sheets of paper. MP (Multi Purpose) Tray 500 Sheet Paper Tray (standard) 500 Sheet Lower Paper Cassette (option) 150 500 500 1,150 To load many sheets of non-A4 size paper, use the 250 Sheet Lower Paper Cassette (C81269✽: variable paper size up to A3). The Duplex Unit (C81268✽) is useful for printing on both sides of paper. See Chapter 3 for more information on printer options. 4 Getting Started Albatross Rev.c R Reference Guide A5 size Introduction ’96/08/23 pass 0 ENERGY STAR Compliance As an International ENERGY STAR Partner, EPSON has determined that this product meets the International ENERGY STAR Program guidelines for energy efficiency. The International ENERGY STAR Program promotes the voluntary development of energy-efficient computers, printers, and other peripheral equipment. About Making Printer Settings To print, you will need to make some printer settings. This printer offers four ways to make printer settings: ❏ Printer driver (software that runs or “drives” your printer) ❏ OneTouch modes (control panel shortcuts that allow you to make several settings quickly) ❏ SelecType (control panel functions that allow you to make even more settings than the printer driver) ❏ Remote Control Panel utility (software that emulates your printer control panel) If you use a Windows application, use the printer driver that came with the printer to make settings. For details on your printer driver, see “Accessing Online Help” in your Getting Ready! guide. If you use a DOS application, make the print settings in the application. For details, see your DOS application manual. If you cannot make all the settings you need through the Windows printer driver or DOS application, use SelecType (OneTouch modes) or the Remote Control Panel utility. Getting Started 5 energy L Albatross Rev.c Reference Guide A5 size Introduction ’96/08/23 pass 0 Printer Driver Use the printer driver to easily and conveniently make new printer settings. Most users may never need to use anything besides their application software and the printer driver to make printer settings. You can access the printer driver through an application‘s Print command or by choosing your printer in the Printers folder/program group in your operating system. Be aware that settings you make in your application software overide printer driver settings. Use the driver’s online help for more information. To access online help, see your Getting Ready guide. OneTouch modes Use the OneTouch modes on the printer control panel to make printer settings when you cannot make a setting in your application software. The OneTouch modes are the easiest way to make several basic settings from the printer’s control panel; however, your software application and printer driver in some cases override these settings. See “Using the OneTouch Modes” on page 5-20 for more information. SelecType Use the SelecType buttons and display on the printer control panel to make printer settings when you cannot make a setting in your application software. SelecType has more detailed options than the OneTouch modes but it may take a few extra steps to make those settings. See “Using SelecType,” Chapter 5, for more information. Remote Control Panel utility Use the Remote Control Panel utility when the printer is not easily accessible and you want to make SelecType settings. This utility allows you to make SelecType settings from your computer; however, it only works in DOS. See “Using the Remote Control Panel Utility,” Chapter 4, for more information. 6 Getting Started Albatross Rev.c R Reference Guide A5 size Introduction ’96/08/23 pass 0 Safety Information Laser safety This printer is certified as a Class 1 laser product under the U.S. Department of Health and Human Services (DHHS) Radiation Performance Standard according to the Radiation Control for Health and Safety Act of 1968. This means that the printer does not produce hazardous laser radiation. Since radiation emitted by the laser is completely confined within protective housings and external covers, the laser beam cannot escape from the machine during any phase of user operation. For European users United Kingdom The EPL-N2000 is a page printer which utilizes a semiconductor laser. There is no possibility of danger from the laser, provided the printer is operated according to the instructions in the guides provided. Since radiation emitted by the laser is completely confined within protective housings, the laser beam cannot escape from the machine during any phase of user operation. w Warning: Use of controls or adjustments or performance of procedures other than those specified in this guide, may result in hazardous radiation exposure. This is a semiconductor laser. The maximum power of the laser diode is 5.0 × 10- 3 W and the wavelength is 785 +25 nm. −15 Getting Started 7 L Albatross Rev.c Reference Guide A5 size Introduction ’96/08/23 pass 0 Denmark Advarsel Usynlig laserstråling ved åbning, når sikkerhedsafbrydere er ude af funktion. Undgå udsættelse for stråling. Klasse 1 laser produkt der opfylder IEC825 sikkerheds kravene. Finland and Sweden EPL-N2000 on lasertoiminen sivukirjoitin. Laserista ei aiheudu käyttäjälle vaaraa, kun kirjoitinta käytetään käyttöohjeiden mukaisesti. Laserin aiheuttama säteily jää kokonaisuudessaan suojarakenteiden sisäpuolelle, eikä lasersäde pääse laitteen ulkopuolelle sit käytettäessä. VAROITUS! Laitteen käyttäminen muulla kuin tässä käyttöohjeessa mainitulla tavalla saattaa altistaa käyttäjän turvallisuusluokan 1 ylittävälle näkymättömälle lasersäteilylle. VARNING! Om apparaten används på annat sätt än i denna bruksanvisning specificerats, kan användaren utsättas för osynlig laserstrålning, som överskrider gränsen för laser klass 1. LUOKAN 1 LASERLAITE KLASS 1 LASER APPARAT Kirjoittimen taakse kuvan osoitamiin paikkoihin on kiinnitetty tarrat, jotka osoittavat, että kirjoitin on B.S.7192 ja IEC 825-määräysten mukainen luokan 1 laserlaite. Jos kirjoittimen kuori poistetaan, näkyviin tulee kolmas, alla oleva tarra. 8 Getting Started Albatross Rev.c R Reference Guide A5 size Introduction ’96/08/23 pass 0 Norway Advarsel Dersom apparatet brukes på annen måte enn spesifisert i denne bruksanvisning, kan brukeren utsettes for unsynlig laserstråling som overskrider grensen for laser klasse 1. Dette er en halvleder laser. Maksimal effeckt til laserdiode er 5.0 × 10⁻³ W og bolgelengde er 785 +25 nm. −15 CDRH regulations The Center for Devices and Radiological Health (CDRH) of the U.S. Food and Drug Administration implemented regulations for laser products on August 2, 1976. Compliance is mandatory for products marketed in the United States. The label shown below indicates compliance with the CDRH regulations and must be attached to laser products marketed in the United States. int-2 Getting Started 9 L Albatross Rev.c Reference Guide A5 size Introduction ’96/08/23 pass 0 Laser safety labels w Warning: Use of controls, adjustments, or performance of procedures other than those specified in this guide may result in hazardous radiation exposure. Your printer is a Class 1 laser product as defined in IEC 825 specifications. The label shown below is attached in countries where required. rg-1 Internal laser radiation Max. Radiation Power 8.8 × 10 - 4 W Wave Length 785 +25 nm −15 This is a Class IIIb Laser Diode Assembly that has an invisible laser beam. The printer head unit is NOT A FIELD SERVICE ITEM. Therefore, the printer head unit should not be opened under any circumstances. 10 Getting Started Albatross Rev.c R Reference Guide A5 size Introduction ’96/08/23 pass 0 For Denmark, Finland, Sweden, and Norway users An additional laser warning label is affixed to the inside of the printer, as shown below. rg-2 Ozone safety Ozone emission Ozone gas is generated by laser printers as a by-product of the printing process. Ozone is produced only when the printer is printing. Ozone exposure limit The recommended exposure limit for ozone is 0.1 parts per million (ppm) expressed as an average time-weighted concentration over an eight (8) hour period. The EPL-N2000 laser printer generates <0.01ppm for 8 hours of continuous printing when considering a closed room of approximately 1000 cu ft (8’ × 10 ’ × 12 ’). Getting Started 11 L Albatross Rev.c Reference Guide A5 size Introduction ’96/08/23 pass 0 Minimize the risk To minimize the risk of exposure to ozone, you should avoid the following conditions: ❏ Use of multiple laser printers in a confined area (see above) ❏ Operation in conditions of extremely low humidity ❏ Poor room ventilation ❏ Long, continuous printing together with any of the above Printer location The printer should be located so that the exhaust gases and heat generated are: ❏ Not blown directly into the user’s face ❏ Vented directly out of the building whenever possible Laser Printer Precautions This printer uses laser technology. The following list of precautions applies whenever you open the printer cover. Even if you are familiar with other types of printers, be sure to follow these precautions carefully to ensure safe, efficient operation. 12 Getting Started Albatross Rev.c R Reference Guide A5 size Introduction ’96/08/23 pass 0 ❏ Be careful not to touch the fuser, which is marked CAUTION Hot Surface Avoid Contact. If the printer has been in use, the fuser can be very hot. CAUTION Hot Surface Avoid Contact rg-3 ❏ Avoid touching the components inside the printer unless instructed to do so in this guide. ❏ Never force the printer’s components into place. Although the printer is designed to be sturdy, rough handling can damage it. ❏ Be sure not to scratch the surface of the drum. When you remove the imaging cartridge from the printer, always set the unit on a clean, smooth surface. Also, avoid touching the drum, since oils from your skin can permanently damage its surface and may affect print quality. ❏ Do not turn the cartridge upside down or stand it on its sides. Getting Started 13 L Albatross Rev.c Reference Guide A5 size Introduction ’96/08/23 pass 0 ❏ Protect the light-sensitive drum from exposure to light. Avoid exposing the imaging cartridge to room light any longer than necessary. Do not open the drum’s protective cover. Overexposing the drum may cause abnormally dark or light areas to appear on the printed page and reduce the service life of the drum. rg-4 14 ❏ When handling the cartridge, always set it on a clean, smooth surface. ❏ Do not attempt to modify or take apart the cartridge. It cannot be refilled. ❏ Try not to touch the toner and avoid all contact with your eyes. ❏ Do not use a cartridge for at least one hour after moving it from a cool to a warm environment. Getting Started Albatross Rev.c R Reference Guide A5 size Introduction ’96/08/23 pass 0 ❏ Avoid touching the glass in front of the laser beam; otherwise, print quality may decline. rg-5 To get the best print quality, do not store the imaging cartridge in an area subject to direct sunlight, dust, salty air, or corrosive gasses (such as ammonia). Avoid locations subject to high temperatures or humidity or abrupt changes in temperature or humidity. Also, be sure to keep the consumable components out of the reach of children. Hinweis: Die Geräteanschlußleitung muß den einshlägigen Normen genügen. Es muß eine dreiadrige Leitung verwendet werden. Die Anshlußleitung darf nicht leichter als H05VV-F order H05VVH2-F sein. Maschinenlärminformations-Verordnung-3. GSGV, 18. 01. 1991: Der arbeitsplatzbezogene schalldruckpegel beträgt 70 dB (A) oder weniger gemäß ISO 7779. Getting Started 15 L Albatross Rev.c Reference Guide A5 size Introduction ’96/08/23 pass 0 Important Safety Instructions Read all of these instructions before operating your printer. 16 ❏ Follow all warnings and instructions marked on the printer. ❏ Unplug this printer from the wall outlet before cleaning. ❏ Use a damp cloth for cleaning and do not use liquid or aerosol cleaners. ❏ Do not use this printer near water. ❏ Do not place the printer on an unstable cart, stand, or table. ❏ Slots and openings in the cabinet and the back or bottom are provided for ventilation. Do not block or cover them. Do not put the printer on a bed, sofa, rug, or other similar surface or in a built-in installation unless proper ventilation is provided. ❏ Use the type of power source indicated on the label. If you are not sure of the type of power available, consult your dealer or local power company. ❏ If you are unable to insert the plug into the outlet, contact your electrician to replace your obsolete outlet. ❏ Do not put your printer where the cord will be walked on. ❏ If you use an extension cord, make sure that the total of the ampere ratings on the products plugged into the extension cord does not exceed the extension cord ampere rating. Also, make sure that the total of all products plugged into the wall outlet does not exceed 15 amperes. ❏ Never push objects of any kind through cabinet slots as they may touch dangerous voltage points or short out parts that could result in a risk of fire or electric shock. Never spill liquid of any kind on the printer. Getting Started Albatross Rev.c R Reference Guide A5 size Introduction ’96/08/23 pass 0 ❏ Except as specifically explained in this guide, do not attempt to service this product yourself. Opening or removing those covers that are marked “Do Not Remove” may expose you to dangerous voltage points or other risks. Refer all servicing in those compartments to service personnel. ❏ Unplug this printer from the wall outlet and refer servicing to qualified service personnel under the following conditions: A. When the power cord or plug is damaged or frayed. B. If liquid has been spilled into it. C. If it has been exposed to rain or water. D. If it does not operate normally when the operating instructions are followed. Adjust only those controls that are covered by the operating instructions since improper adjustment of other controls may result in damage and will often require extensive work by a qualified technician to restore the product to normal operation. E. If it has been dropped or the cabinet has been damaged. F. If it exhibits a distinct change in performance, indicating a need for service. For United Kingdom Users Use of options Epson (UK) Limited shall not be liable against any damages or problems arising from the use of any options or consumable products other than those designated as Original EPSON Products or EPSON Approved Products by Epson (UK) Limited. Getting Started 17 L Albatross Rev.c Reference Guide A5 size Introduction ’96/08/23 pass 0 Safety information Warning: This appliance must be earthed. Refer to rating plate for voltage and check that the appliance voltage corresponds to the supply voltage. Important: The wires in the mains lead fitted to this appliance are coloured in accordance with the following code: Green and yellow—Earth Blue—Neutral Brown—Live If you need to fit a plug: As the colours of the mains lead of this appliance may not match any coloured markings used to identify the terminals in a plug, please proceed as follows: ❏ The green and yellow wire must be connected to the terminal in the plug which is marked with the letter E or the Earth symbol (G). ❏ The blue wire must be connected to the terminal in the plug marked with the letter N. ❏ The brown wire must be connected to the terminal in the plug marked with the letter L. If damage occurs to the plug, replace the cord set or consult a qualified electrician. Replace fuses only with a fuse of the correct size and rating. 18 Getting Started Albatross Rev.c R Reference Guide A5 size Introduction ’96/08/23 pass 0 Warnings, Cautions, and Notes w c Warnings must be followed carefully to avoid bodily injury. Cautions must be observed to avoid damage to your equipment. Notes contain important information and useful tips on the operation of your printer. Getting Started 19 L Albatross Rev.c Reference Guide A5 size Introduction ’96/08/23 pass 0 20 Getting Started Proof Sign-off: Nishi Grady Albatross Rev.c _______ _______ A5 size 96/08/23 R Chapter 1 Pass 0, DR Chapter 1 Paper Handling 1 Loading Paper . . . . . . . . . . . . . . Manually loading paper . . . . . . Selecting the paper size . . . . . . . Loading an uncommon paper size . . . . . . . . . . . . . . . . . . . . . . . . . . . . . . . . . . . . . . . . . . . . . . . . . . . . . . . . 1-2 1-2 1-5 1-6 Choosing Paper . Labels . . . . . Envelopes . . . Colored paper Transparencies . . . . . . . . . . . . . . . . . . . . . . . . . . . . . . . . . . . . . . . . . . . . . . . . . . . . . . . . . . . . . . . . . . . . . . 1-6 1-7 1-7 1-8 1-8 . . . . . . . . . . . . . . . . . . . . . . . . . . . . . . . . . . . . . . . . . . . . . . . . . . . . . . . . . . . . Paper Handling 1-1 L Albatross Rev.c A5 size 96/08/23 Chapter 1 Pass 0, DR Loading Paper This section covers how to manually load paper to check print quality after each page is printed and how to choose special media. To load paper normally, see your Getting Ready guide. To load paper in an optional lower paper tray, see page 3-3. Note: If the weight of your paper is not between 60 to 90 g/m2 (16 to 24 lb), decrease the number of sheets you load. Manually loading paper You can manually load paper in the MP Tray. Manually loading paper can be helpful when you want to check the print quality after each page is printed. This loading procedure is almost the same as the procedure for automatic paper feeding, except you load paper sheet-by-sheet in the MP Tray, send print data to print the first page, and press the On Line button to print each following page. 1-2 Paper Handling Albatross Rev.c A5 size 96/08/23 Chapter 1 Pass 0, DR To load paper manually, follow the steps below. 1. Access the printer driver menus in one of the following ways: Note: If you have not installed the printer driver, see your Getting Ready! guide for installation instructions. ❑ For access through your application software, click the Print or Printer Setup command in the File menu. You also may need to click Setup, Options, Properties, or a combination of these buttons. ❑ For direct access through Windows 95, click Start, point to Settings, and click Printers. Next, right-click the EPSON EPL-N2000 icon and click Properties in the menu that appears. Be sure to right-click the printer icon. Then select the Details tab at the top of the window, and click the Setup button. ❑ For direct access through Windows 3.1, Windows 3.11 for Workgroups, and Windows NT 3.51, double-click the Printers icon in the Control Panel dialog box. Next, click EPSON EPL-N2000 in the Installed Printers list box, and then click the Setup button. 2. The Printer Settings menu appears. Click on the arrow next to the Paper Source box to see the list of sources available. Click Manual Feed. 3. Click the Paper tab to see the Paper menu. Click the arrow next to the Paper Size box to see the list of available paper sizes. Scroll through this list and click on the paper size that matches the paper you will load in the printer. Paper Handling 1-3 R L Albatross Rev.c A5 size 96/08/23 Chapter 1 Pass 0, DR 4. If the correct paper size is already loaded, skip to step 4. Otherwise, open the front cover, and remove any paper remaining in the MP Tray. Insert a sheet or stack of the correct size paper into the MP Tray with the printable side up, as far as it will go. Adjust the paper guides to match the paper size you are loading. r1-3 5. Send a print job from your application. The control panel display shows Manual Feed and the selected page size. 6. Press On Line to print. The sheet of paper is loaded and printed. 7. Press On Line again to print the next page of print data, if necessary. Repeat this step for every page to be printed. 1-4 Paper Handling Albatross Rev.c A5 size 96/08/23 Chapter 1 Pass 0, DR Selecting the paper size By default, the printer driver is set up for A4 size paper to be loaded. If you load paper of a different size, you need to change the paper size setting using one of the following methods. Using the printer driver: Choose the paper size on the Printer Settings menu or the Paper menu. For more information on using the printer driver, see online help in the driver. Using the Remote Control Panel utility: Bring up the Remote Control Panel by typing EPRCPO at the DOS prompt. Select the appropriate emulation from the main Remote Control Panel window and click the Page Setup button. Then choose the paper size. Using the SelecType mode: For information on changing the paper size in SelecType mode, see Chapter 5. Paper Handling 1-5 R L Albatross Rev.c A5 size 96/08/23 Chapter 1 Pass 0, DR Loading an uncommon paper size To load an uncommon, or custom, paper size from 92 × 140 mm (3.6 × 5.5 inches) to 330.2 × 483 mm (13 × 19 inches), use the MP Tray (as described in your Getting Ready guide) and make the size setting according to one of the following methods: ❑ Access the printer driver, click inside the paper size box on the paper menu, and type an original name for your paper. When you finish adjust the Width, Height, and Measurement Unit settings to match your custom paper, press the Enter key and your custom paper size will be saved. ❑ Access the Remote Control Panel utility (see Chapter 4) and set page size to Custom. ❑ Access SelecType mode (see Chapter 5) and set page size to CTM (custom). Choosing Paper Note: Since the quality of any particular brand or type of paper may be changed by the manufacturer at any time, EPSON cannot guarantee the quality of any type of paper. Always test samples of paper stock before purchasing large quantities or printing large jobs. You can use many kinds of media including stock paper, envelopes, labels, and overhead projector transparencies. The printer feeds most types of media automatically from the MP Tray. This section describes the paper feed and delivery choices and how to select and load paper. The type of paper you use in your printer can affect the quality of your printed output. The smoother the paper you use, the smoother and sharper your printing looks. 1-6 Paper Handling Albatross Rev.c A5 size 96/08/23 Chapter 1 Pass 0, DR For best results, store your paper supply in its original wrapper. Your printout can be marred by moisture absorbed in the paper. Do not store paper in a humid or damp environment. Below are some recommendations for selecting paper and other print media for the printer. Labels Use only labels designed for laser printers or plain-paper copiers. Use the MP Tray to print on these materials. To prevent the adhesive from coming into contact with printer parts, always use labels that completely cover the backing sheet so that no gaps occur between the individual labels. You should test the label sheet for leaking adhesive by pressing a sheet of paper on top of a sheet of labels. If the paper sticks to the label sheet when you lift it off, do not use the labels. Envelopes Load envelopes in the MP Tray with the flap edge first and the print surface facing up. The printing quality on envelopes may be irregular because different parts of an envelope have different thicknesses. If the printing is too light, adjust the print density with the printer driver, the Remote Control Panel utility, or SelecType. Note: Because thickness and surface characteristics are especially important for envelopes, test a sample for print quality and proper feeding before you buy a large number of envelopes. Paper Handling 1-7 R L Albatross Rev.c A5 size 96/08/23 Chapter 1 Pass 0, DR Colored paper You can use colored paper as long as it meets the weight limits shown in the paper specifications. Do not, however, use coated paper (paper to which a clear or colored coating has been added). Transparencies You can use overhead projector transparencies and adhesive drafting film if they are made for use with plain-paper copiers or laser printers. Use the MP Tray to print on these materials. 1-8 Paper Handling Proof Sign-off: Nishi Grady Albatross Rev.c _______ _______ A5 size ’96/08/23 R Chapter 2 pass 0 Chapter 2 Understanding Your Printer The Control Panel . Overview . . . . Display . . . . . Indicator lights . Buttons . . . . . . . . . . . . . . . . . . . . . . . . . . . . . . . . . . . . . . . . . . . . . . . . . . . . . . . . . . . . . . . . . . . . . . . . . . . . . . . . . . . . . . . . . . . . . . . . . . . . . . . . . . . . . . . . . . . . . . . . . . . . . . . . . . 2-2 2-2 2-3 2-4 2-5 2 Understanding Your Printer 2-1 L Albatross Rev.c A5 size ’96/08/23 Chapter 2 pass 0 This chapter shows you how to use the control panel. Getting acquainted with your printer’s control panel may help you get more from your printer. For more information on the SelecType settings available from the control panel, including the OneTouch modes, see Chapter 5. Appendix E shows all SelecType menu categories and options. It can be used as a guide whenever you use SelecType. The Control Panel Overview The printer control panel gives you easy control over most common printer operations. The panel is made up of three elements: a liquid crystal display, indicator lights, and buttons. The display and indicator lights tell you the current status of the printer, and you can use the buttons to select printer settings and functions. However, software settings usually override these settings. 2-2 Understanding Your Printer Albatross Rev.c A5 size ’96/08/23 R Chapter 2 pass 0 Display The display shows the following: ❑ Status messages, such as Warming Up , indicate the printer’s current status. ❑ Error messages, such as Paper Out , identify maintenance procedures you must perform or error conditions you need to correct. ❑ SelecType options, such as Emulation , allow you to control printer mode, font selection, paper handling, and several other printer functions. For solutions to error messages and maintenance information, see Chapter 6. For full information on SelecType, see Chapter 5. Paper Source Page Size Manual Feed Orientation RITech Copies MP Tray Size Toner Save Mode Menu Item Value Enter r2-1 Status Sheet SelecType Alt Continue Form Feed On Line Reset Understanding Your Printer 2-3 L Albatross Rev.c A5 size ’96/08/23 Chapter 2 pass 0 Indicator lights On Line On when the printer is on line, indicating the printer can receive and print data. When the printer is off line, this light is off. The light flashes as the system switches between on-line and off-line status. Form Feed On when data is received and stored in the printer’s buffer but not yet printed. Flashing indicates the printer is processing data. When no data remains in the printer buffer (the section of memory reserved for receiving data), this light is off. Continue Flashes when an error is detected or a maintenance procedure must be performed. At the same time, an error or maintenance message appears on the display. OneTouch mode 1 On when the printer is in OneTouch mode 1. For details on the OneTouch modes, see page 5-21. p1new OneTouch mode 2 On when the printer is in OneTouch mode 2. For details on the OneTouch modes, see page 5-21. p2new SelecType On when the printer is in SelecType mode. See Chapter 5 for more information. p3new 2-4 Understanding Your Printer Albatross Rev.c A5 size ’96/08/23 R Chapter 2 pass 0 Buttons Paper Source Page Size Manual Feed Orientation RITech Copies MP Tray Size Toner Save Mode Menu Item Value Enter Item Menu Continue (Reset) SelecType Value Enter (Status Sheet) Form Feed Status Sheet On Line SelecType Alt Continue Form Feed On Line Reset On Line Switches the printer between on line and off line status. SelecType (ALT) Selects a OneTouch mode or SelecType mode. Press this button once to enter OneTouch mode 1. Press this button again to enter OneTouch mode 2. Press this button once more to enter SelecType mode. Pressing this button while in SelecType mode returns the printer to on line status. See Chapter 5 for more information. ALT + Menu, Item, Value, or Enter Advances the parameter or setting shown to the next value in each group. If used in combination with the ALT button in SelecType mode, it returns the parameter or setting shown to its previous value. Understanding Your Printer 2-5 r2-1 L Albatross Rev.c A5 size ’96/08/23 2-6 Chapter 2 pass 0 Menu Selects the corresponding OneTouch mode setting listed above this button, or selects the SelecType menu if in SelecType mode. Press this button when the printer is on line to enter SelecType mode. Item Selects the corresponding OneTouch mode setting listed above this button or selects the function available within the current menu after entering the SelecType mode. Value Selects the corresponding OneTouch mode option listed above this button, or selects the parameter available within the current item, after entering the Item of the SelecType mode. Enter (Status Sheet) Selects the corresponding OneTouch mode option listed above this button, or accepts the setting currently shown on the display as a new setting when in SelecType mode. Press this button two times when the printer is on line to print the status sheet. Form Feed When the printer is off line and data remains in the printer’s memory (Form Feed light is on), prints out the data and clears the buffer. Continue (Reset) Enables the printer to resume printing after certain maintenance-required conditions or errors have been cleared. If the Continue light is flashing, read the status or error message on the display and correct the problem as described in Chapter 6. If used in combination with the ALT button, the printer is reset. Understanding Your Printer Proof Sign-off: Nishi Grady _______ _______ Albatross Rev.c R Reference Guide A5 size Chapter 3 ’96/08/23 DR, pass 0 Chapter 3 Options Printer Options . . . . . . . . . . . . . . . . . . . . . . . . . . . . 3-2 Installing an Optional Paper Tray . . . . . . . . . . . . . . . . . 3-3 Installing the Optional Lower Paper Cassette . . . . . . . . . . 3-7 Installing the Duplex Unit . . . . . . . . . . . . . . . . . . . . . 3-8 Removing the Duplex Unit . . . . . . . . . . . . . . . . . . 3-12 PCMCIA Card . . . . . . . . . . . . . . . . . . . . . . . . . . . . 3-13 Installing a PCMCIA card . . . . . . . . . . . . . . . . . . . 3-14 Removing a PCMCIA card . . . . . . . . . . . . . . . . . . . 3-15 Memory Modules . . . . . . . . . . . . . . . . . . . . . . . . . . 3-16 Installing a memory module . . . . . . . . . . . . . . . . . . 3-16 Removing a memory module . . . . . . . . . . . . . . . . . 3-20 ROM Module . . . . . . . . . . . . . . . . . . . . . . . . . . . . . 3-21 Optional Interfaces . . . . . . . . . . . . . . . . . . . . . . . . . 3-21 Installing the LocalTalk/Serial module . . . . . . . . . . . . 3-23 Installing a Type-B Interface Card . . . . . . . . . . . . . . 3-24 Using the Serial Interface . . . . . . . . . . . . . . . . . . . . . . 3-26 Using the serial interface utility . . . . . . . . . . . . . . . . 3-28 Options 3-1 3 L Albatross Rev.c Reference Guide A5 size Chapter 3 ’96/08/23 DR, pass 0 Printer Options You can add to your printer’s capabilities by installing any of the following options: ❑ 250 Sheet Paper Tray (C81270✽) increases paper feeding capacity for many sizes of paper up to A3 size paper. The supported paper sizes are shown below. A3, B4, F4, A4, B5, A5, Ledger, Legal, GLG, Letter, GLT, Exective, HLT Note: The asterisk (✽) is a substitute for the last digit of the product number, which varies by country. 3-2 ❑ 500 Sheet Paper Tray (C81266✽: A4) increases paper feeding capacity. This tray can hold up to 500 sheets of A4 size paper. ❑ 500 Sheet Lower Paper Cassette (C81264✽) and 250 Sheet Lower Paper Cassette (C81269✽) are automatic paper feeders that fit directly beneath the printer. Each paper cassette can house either the standard (500 Sheet) Paper Tray or an optional (250 or 500 Sheet) Paper Tray. ❑ Duplex Unit (C81268✽) is useful for printing on both sides of paper. ❑ Optional memory modules expand your printer’s memory. See page 3-16. ❑ EPSONScript Level 2 ROM module (C83226✽) generates crisp PostScript output. See page 3-21. Options Albatross Rev.c R Reference Guide A5 size Chapter 3 ’96/08/23 DR, pass 0 ❑ Optional interface cards and modules provide a link that enables you to use the EPL-N2000 with a LocalTalk network, IBM mainframe, and so on. With the optional interfaces, you can connect up to five different interfaces to this printer. See page 3-21. If you purchased your printer and options at the same time, first set up the printer and run the print test by following the instructions in the Getting Ready! guide. Then install the options. c Caution: Before installing an option, carefully read the manual that comes with that option. Installing an Optional Paper Tray When installing the 250 Sheet Paper Tray, you can use any of the following paper sizes: A3, B4, F4, A4, B5, A5, Ledger, Legal, GLG, Letter, GLT, Exective, HLT 1. Pull out the paper tray from the lower paper cassette, if necessary. ill Options 3-3 L Albatross Rev.c Reference Guide A5 size Chapter 3 ’96/08/23 DR, pass 0 2. Open the cover of the paper tray. n1-5 3. Press down the plate in the paper tray until it locks into position. n1-6 4. Slide the paper guide out. 34-p68 3-4 Options Albatross Rev.c Reference Guide A5 size Chapter 3 ’96/08/23 DR, pass 0 R 5. Fan a stack of paper and tap it on a flat surface to even the edges. Insert the paper printable side up into the tray. 35-p68, 36-p68 Note: The direction you should load the paper depends on the paper size; see the table below. Paper size Side towards back of printer A4, B5, A5, Letter, GLT, HLT Long side of paper A3, B4, F4, Ledger, Legal, GLG, Exective Short side of paper 6. Adjust the paper guide to match the paper size. Make sure the corners of the paper are underneath the tabs. n1-10 Options 3-5 L Albatross Rev.c Reference Guide A5 size Chapter 3 ’96/08/23 DR, pass 0 7. Close the cover of the paper tray and replace the paper tray in the paper cassette. r3-1 8. Adjust the extension output tray to match the size of your paper. r3-2 3-6 Options Albatross Rev.c R Reference Guide A5 size Chapter 3 ’96/08/23 DR, pass 0 Installing the Optional Lower Paper Cassette The optional lower paper cassette gives you a third paper source, in addition to the MP Tray and standard lower paper cassette. This section describes how to install the cassette and load paper. 1. Turn off the printer. 2. Unplug the printer’s power cord from the electrical outlet and from the printer. 3. Remove all interface cables from the interface connectors. 4. Lift the printer. Make sure the printer and cassette are facing the same way. Align the pins on the cassette with the holes on the bottom of the printer, and then lower the printer until it rests securely on the cassette. r3-3 Note: The printer is heavy, so you may need to have someone help you lift it. Options 3-7 L Albatross Rev.c Reference Guide A5 size Chapter 3 ’96/08/23 DR, pass 0 5. Reconnect any interface cables you removed. 6. Make sure the power is turned off and then plug the power cord into the printer and into an electrical outlet. 7. Turn on the printer. To confirm that the lower paper cassette is installed correctly, print a status sheet. If the cassette is not listed on the status sheet, try reinstalling it. Be sure to select the paper source in your application program. Since the selection method varies from application to application, see your software documentation for more information. Installing the Duplex Unit Note: Only the follwing paper sizes are compatible with the Duplex Unit.. A3, B4, F4, A4, B5, International B5, A5, Ledger, Legal, GLG, Letter, GLT, Exective, HLT To efficiently print on both sides of a sheet of paper, install the Duplex Unit as described below. 1. Turn off the printer. 2. Unplug the power cable from the electrical outlet. 3. Remove all interface cables from the interface connectors. 3-8 Options Albatross Rev.c R Reference Guide A5 size Chapter 3 ’96/08/23 DR, pass 0 4. Facing the back of the printer, remove the screw and the cover as shown below. Note: Keep the screw and the cover in case you need to remove the Duplex Unit or need to transport the printer. r3-4 5. Attach the hooks that came with the Duplex Unit to the printer. tori-bb Options 3-9 L Albatross Rev.c Reference Guide A5 size Chapter 3 ’96/08/23 DR, pass 0 6. Align the hooks on the printer with the holes at the bottom of the Duplex Unit. tori-aa 7. Attach the Duplex Unit to the printer, making sure the connectors and screws enter the proper holes. c Caution: Do not take off your hand until secure the Duplex Unit with the screws that came with the unit. Because the Duplex Unit may come off the printer, and damaged. to-tu3 3-10 Options Albatross Rev.c R Reference Guide A5 size Chapter 3 ’96/08/23 DR, pass 0 8. Secure the Duplex Unit with two screws that came with the unit. c Caution: Be sure to secure the screws all the way; otherwise the printer may be damaged. r3-5 9. Reconnect any interface cables you removed. 10. Make sure the power is turned off and then plug the power cord into the printer and into an electrical outlet. 11. Turn on the printer. To confirm that the Duplex Unit is installed correctly, print a status sheet. If the unit is not listed on the status sheet, try reinstalling it. Note: Select Duplex On on the Printing Menu in SelecType before using the Duplex Unit; the default setting is Off. Options 3-11 L Albatross Rev.c Reference Guide A5 size Chapter 3 ’96/08/23 DR, pass 0 Removing the Duplex Unit 1. Perform steps 1 to 3 in “Installing the Duplex Unit,” page 3-8. 2. Facing the back of the printer, remove the two screws that secure the Duplex Unit to the printer. c Caution: Be sure you or someone else supports the Duplex Unit during removal; otherwise, the Duplex Unit may come off the printer and be damaged. r3-6 3. Pull the Duplex Unit, then lift it up gently. r3-7 3-12 Options Albatross Rev.c Reference Guide A5 size Chapter 3 ’96/08/23 DR, pass 0 4. Remove the two hooks from the printer. Note: Save the hooks, in case you need to install the unit again in the future. 5. Secure the screw and the cover that you removed earlier when installing the Duplex Unit in step 4 on page 3-9. 6. Follow steps 9 through 11 in the previous section to complete the procedure. PCMCIA Card Install a PCMCIA card to increase printer memory. You can use any PCMCIA card that is compatible with the following: ❑ PCMCIA ver. 2.1 compliance ❑ Card Type: SRAM, EEPROM, Flash ❑ Slot Type: Type 1, Type 2 Options 3-13 R L Albatross Rev.c Reference Guide A5 size Chapter 3 ’96/08/23 DR, pass 0 Installing a PCMCIA card 1. Turn off the printer. 2. Open the IC card slot cover. r3-a 3. Insert the PCMCIA card as shown. Be sure the back side of the card is facing the inside of the printer. r3-b back side 4. Close the slot cover. 5. Turn on the printer. 3-14 Options Albatross Rev.c R Reference Guide A5 size Chapter 3 ’96/08/23 DR, pass 0 Removing a PCMCIA card 1. Turn off the printer. 2. Open the IC card slot cover. 3. Press the Eject button to eject the card. r3-c 4. Close the slot cover. 5. Turn on the printer. Options 3-15 L Albatross Rev.c Reference Guide A5 size Chapter 3 ’96/08/23 DR, pass 0 Memory Modules By installing a Single In-line Memory Module (SIMM) in both open slots, you can increase printer memory up to 68 MB. You may want to add additional memory if you are having difficulty printing complex, graphics-intensive pages or if you regularly use numerous downloaded fonts. You can purchase SIMMs from various vendors. Be sure the SIMM you purchase meets the following requirements: ❑ 72-pin type ❑ Capacity of 1, 2, 4, 8, 16, or 32 MB ❑ Access speed of 70ns or less ❑ Dimensions within 108 mm (4.25 inches) × 39 mm (1.53 inches), with a thickness of 10 mm (0.4 inch) Installing a memory module 1. Turn off the printer. w Warning: To avoid electrical shock, do not attempt to install a SIMM unless the printer is turned off. 2. Unplug the power cable from the electrical outlet. 3. Remove all interface cables from the interface connectors. 3-16 Options Albatross Rev.c R Reference Guide A5 size Chapter 3 ’96/08/23 DR, pass 0 4. Pull the latch on the right toward you to open the printer cover. g-1 5. Facing the left side of the printer, loosen the three screws that secure the side cover. r3-8 Options 3-17 L Albatross Rev.c Reference Guide A5 size Chapter 3 ’96/08/23 DR, pass 0 6. Remove the printer’s side cover. r3-9 7. Insert the SIMM module into RAM SLOT 1 (if occupied use RAM SLOT 2), making sure the pin numbers of the slot and the SIMM match, either 1 or 72. ROM SLOT RAM SLOT 1 r3-10n RAM SLOT 2 3-18 Options Albatross Rev.c Reference Guide A5 size Chapter 3 ’96/08/23 DR, pass 0 R 8. Press the module in firmly until it clicks into place. Do not apply too much force. r3-11 9. Replace the printer’s side cover and secure the three screws that you loosened earlier. r3-13 Options 3-19 L Albatross Rev.c Reference Guide A5 size Chapter 3 ’96/08/23 DR, pass 0 10. Gently press down on the printer cover until it clicks shut. r3-14 Removing a memory module 1. Perform steps 1 through 6 in the previous section to access the printer’s SIMM socket. 2. Pull the metal clips on each side of the SIMM socket outward to release the memory module. r3-12 3-20 Options Albatross Rev.c Reference Guide A5 size Chapter 3 ’96/08/23 DR, pass 0 3. Grasp both sides of the SIMM and pull it out as shown above. 4. Follow steps 9 through 10 in the previous section to complete the procedure. ROM Module You can install the EPSONScript Level 2 module (C83226✽) using the same basic steps as those used to install the memory module. See “Installing a memory module” for installation instructions. However, this must be installed in the ROM SLOT rather than in the RAM SLOT. Optional Interfaces This section describes how to install the LocalTalk/Serial modules and optional Type-B interface cards listed below. ❑ To add a serial or parallel interface to your printer, use one of the following: LocalTalk/Serial module 32 KB Serial Interface Card 32 KB Parallel Interface Card C82334✽ C82307✽ C82310✽ The LocalTalk/Serial module provides your printer with either an RS-232C or current loop serial connection. ❑ To add a direct connection to an IBM mini or mainframe system, use one of the following: Coax Interface Card Twinax Interface Card C82314✽ C82315✽ Options 3-21 R L Albatross Rev.c Reference Guide A5 size Chapter 3 ’96/08/23 DR, pass 0 The coax and twinax connectors each contain a parallel interface. Since the printer’s built-in parallel interface remains active, this gives you three parallel interfaces and a coax or twinax interface. Print jobs can be sent to any connection, and the printer automatically switches between the active ports. The twinax interface is compatible with the following IBM systems: AS-400, System 36, 5251 (model 12), System 34, System 38, and 5294. When equipped with an EPSON twinax interface, the printer can be used in place of the following IBM system printers: 4210, 5224 (models 1 and 2), 5256 (models 1, 2, and 3), 3218 (non IPDS), 4214 (model 2), 5225 (models 1, 2, 3, and 4), and 5219 D01, D02. The coax interface allows the printer to be connected to the following IBM control units and mainframe systems: 3174, 3276, 4274, and 3270. ❑ 3-22 To add a direct connection to your GPIB network, use the GPIB Interface Card (C82323✽). Options Albatross Rev.c Reference Guide A5 size Chapter 3 ’96/08/23 DR, pass 0 R Installing the LocalTalk/Serial module Note: When using the module in LocalTalk mode, you should remove the Ethernet interface connector. For instructions on how to remove the connector, see “Installing a Type-B interface card,” steps 1 to 4, on the next page. 1. Perform steps 1 to 6 in “Installing a memory module,” page 3-16, to access the printer’s SIMM SLOT. 2. Select one of the following interface settings: RS-232C type serial interface, current loop type serial interface, or LocalTalk interface, using a jumper switch and the two slide switches on the module. The default selection is LocalTalk. If you want to select the serial interface settings, change the jumper and the two slide switches to the serial interface positions as shown below. Note: Make sure both slide switches are set to the same position; otherwise, the printer will not operate correctly. 4-2new Options 3-23 L Albatross Rev.c Reference Guide A5 size Chapter 3 ’96/08/23 DR, pass 0 3. Position the module as shown below; then carefully insert its connector into printer connector CN4. Secure the module with the two screws that come with it. r3-15 4. Perform steps 9 to 10 on page 3-19 to complete this procedure. You can verify whether the interface is correctly installed by printing a status sheet. Installing a Type-B Interface Card 1. Turn off the printer. w Warning: High voltages are present inside the printer when the power is on. Do not attempt to install the card unless the printer is turned off. 2. Unplug the power cable from the electrical outlet. 3. Turn the printer so its back faces you. 3-24 Options Albatross Rev.c Reference Guide A5 size Chapter 3 ’96/08/23 DR, pass 0 R 4. Loosen the two screws that secure the Ethernet interface connector card and remove the card. cor-3 5. With the component side of the Type-B interface card facing the outside of the printer, slide the interface card into the grooves in the interface slot as shown below. Push it in firmly to lock the card into place. r3-17nn Options 3-25 L Albatross Rev.c Reference Guide A5 size Chapter 3 ’96/08/23 DR, pass 0 6. Secure the Type-B interface card with the two retaining screws. r3-18 You can verify the interface is correctly installed by printing a status sheet. Using the Serial Interface To use a serial interface, you must purchase an appropriate interface cable. EPSON supplies several types of interface cables. You can use any interface cable that meets the printer specifications listed below. See your computer manual for any special computer requirements. 3-26 ❑ RS-232C Cable (9 pin) C836152 (2.0 m) from mini DIN (printer) to D-SUB 9-pin (computer) for RS-232C; for direct printer to computer connection ❑ RS-232C Cable (25 pin) C836151 (2.0 m) form mini DIN (printer) to D-SUB 25-pin (computer) for RS-232C; for direct printer to computer connection Options Albatross Rev.c Reference Guide A5 size Chapter 3 ’96/08/23 DR, pass 0 ❑ Current Loop Cable C836141 (0.4 m) from mini DIN (printer) to D-SUB 25-pin (interface cable) for both RS-232C and Current loop; a cable extension for printer to interface cable connection If you installed a serial interface, you need to ensure that the printer and the computer are using the same serial settings. If the serial settings do not match, you must make the appropriate settings. The settings can be changed either in the printer or computer. See the next section for information about the serial interface utility that comes with your printer. The default serial settings for the optional serial interface are listed below. To change the serial settings, see the interface card’s manual if you are using a Type-B serial interface or if you installed a LocalTalk/Serial module. For information about your computer’s serial settings, see your computer manual. Serial type: Word length: Baud rate: Parity: Stop bit: DTR: XON/XOFF: RS-232C 8 9600 NONE 1 OFF ON You also need to change the port setting of your computer if it is not already set to the serial port. The following procedures describe how to change the port setting in Windows 3.1, Windows 3.11 for Workgroups and Windows 95. To change the setting using non-Windows software, see your software manual. Options 3-27 R L Albatross Rev.c Reference Guide A5 size Chapter 3 ’96/08/23 DR, pass 0 For Windows 3.1 and Windows 3.11 for Workgroups 1. In the Main window, double-click the Control Panel icon. 2. Double-click the Printers icon. 3. In the Printers dialog box that appears, click the Connect button. 4. Select a COM (serial) port. 5. Click the OK button to save this setting. For Windows 95 1. Click the Start button, point to Settings, and then click Printers. 2. Right-click the Epson EPL-N2000 icon, and click Properties in the menu that appears. Be sure to right-click your printer. 3. Select the Details tab. 4. Click the arrow next to the Printer Port drop-down list. Then select a COM (serial) port. 5. Click OK to save this setting. Using the serial interface utility You can use the serial interface utility that comes with your printer to specify the port and the baud rate of your computer for the serial interface connection. This utility is included in the Remote Control Panel utility. For details on installation of the Remote Control Panel utility, see Chapter 4. 3-28 Options Albatross Rev.c Reference Guide A5 size Chapter 3 ’96/08/23 DR, pass 0 Your printer supports the following serial interface baud rates: 300, 600, 1200, 2400, 4800, 9600, 19200, 38400, and 57600. If you want to use your printer with a higher baud rate that is supported by your computer system, you can use the utility to match the baud rate between the computer and printer. Note: This utility may not work with all computer systems. 1. Type HSERIAL at the DOS prompt and press Enter to bring up the list of parameters for the port and the baud rate selection. C:\HSERIAL 2. Select the appropriate parameters from the list and type the following: C:\HSERIAL /P=n /B=m n = parameter for the port selection m = parameter for the baud rate selection For example, if you would like to use the COM1 port with the 57600 baud rate, type the following: C:\HSERIAL /P=1 /B=576 If you need help, type the following: C:\HSERIAL\? Options 3-29 R L Albatross Rev.c Reference Guide A5 size Chapter 3 ’96/08/23 DR, pass 0 3-30 Options Proof Sign-off: Nishi Grady _______ _______ Albatross Rev.c A5 size ’96/08/23 R Chapter 4 DR, pass 0 Chapter 4 Remote Control Panel Utility Remote Control Panel Utility Overview . . . . . . When to use the Remote Control Panel utility . Installing the Remote Control Panel utility . . Accessing the Remote Control Panel . . . . . . LaserJet 4/EPSONScript Level 2 Mode . . . . . ESCP2 Mode . . . . . . . . . . . . . . . . . . . . FX Mode . . . . . . . . . . . . . . . . . . . . . . I239X Mode . . . . . . . . . . . . . . . . . . . . . . . . . . . . . . . . . . . . . . . . . . . . . . . . . . . . . . . . . . . . . . . . . . . . . . . . . . . . 4-2 4-2 4-3 4-3 4-4 4-5 4-5 4-6 Page Setup Options . . . . . . . . . . . . . . . . . . . . . . . . . 4-6 Type Options 4-9 . . . . . . . . . . . . . . . . . . . . . . . . . . . . Printer Setup Options . . . . . . . . . . . . . . . . . . . . . . . . 4-11 Other Options . . . . . . . . . . . . . . . . . . . . . . . . . . . . 4-14 More Options . . . . . . . . . . . . . . . . . . . . . . . . . . . . 4-17 Duplex Options . . . . . . . . . . . . . . . . . . . . . . . . . . . 4-19 4 Remote Control Panel Utility 4-1 L Albatross Rev.c A5 size ’96/08/23 Chapter 4 DR, pass 0 Remote Control Panel Utility Overview The Remote Control Panel utility is software that allows you to change printer settings, such as the print quantity, paper size, and RITech setting. When to use the Remote Control Panel utility You do not normally need to use the Remote Control Panel to change printer settings. Most software programs let you change settings that affect the final printed output, and any settings you make from your software override those made from the Remote Control Panel. However, if you are not able to change printer settings from your software program or if you are running DOS, the Remote Control Panel will allow you to: ❑ specify the size of paper loaded in the paper tray ❑ turn the Toner Save Mode on and off ❑ change the density setting or RITech setting ❑ change the emulation mode ❑ turn the Standby mode on and off ❑ specify the Top Offset and Left Offset Note: When the printer is shared by more than one user, the settings may be changed by other users. Even if the Remote Control Panel window shows your desired setting, always click the Send button. 4-2 Remote Control Panel Utility Albatross Rev.c A5 size ’96/08/23 Chapter 4 DR, pass 0 R Installing the Remote Control Panel utility To install the utility, follow these steps: 1. Insert the floppy disk containing the utility into your computer’s disk drive. 2. Type SETUP at the DOS prompt and press Enter. A:\SETUP 3. Follow the instructions on the screen to install the utility. Accessing the Remote Control Panel To start the Remote Control Panel, type the following at the DOS prompt and press Enter. (If you changed the default directory during installation, type that directory instead.) C:\EPSONRCP\EPRCPP The main Remote Control Panel menu appears. rcp2 Remote Control Panel Utility 4-3 L Albatross Rev.c A5 size ’96/08/23 Chapter 4 DR, pass 0 Click the button for the emulation mode you want to configure. Note: EpsonScript Level 2 is available only when the EpsonScript Level 2 option is installed. LaserJet 4/EPSONScript Level 2 Mode rcp1 The main menu displays the current printer settings for the selected printer mode. The buttons on the left open dialog boxes so you can change the settings listed under Printer Status. Print ERR SHEET for EpsonScript* Turn this setting on if you want a printed record of EpsonScript Level 2 errors. When an error is detected, the printer prints a sheet listing the type of error. *Available only when the EpsonScript Level 2 option is installed 4-4 Remote Control Panel Utility Albatross Rev.c A5 size ’96/08/23 Chapter 4 DR, pass 0 R ESCP2 Mode rcp3 FX Mode rcp4 Remote Control Panel Utility 4-5 L Albatross Rev.c A5 size ’96/08/23 Chapter 4 DR, pass 0 I239X Mode rcp5 Page Setup Options Clicking the Page Setup button on the Remote Control Panel menu opens the following menu: no7aa 4-6 Remote Control Panel Utility Albatross Rev.c A5 size ’96/08/23 Chapter 4 DR, pass 0 If you are unable to make the settings that are available on the Page Setup menu from your software program, make the settings on this menu as follows: Page Size Selects the default paper size. You should change this item only if you cannot change the paper size from your software program. If your paper size is not listed below, you can define a new size using the Custom setting. Use the following settings when defining a custom page size: 92 to 330.2 mm × 140 to 483 mm. The Page Size options are as follows: A3+ A3 B4 LT (Letter) A4 A5 Ledger B5 HLT (Half letter) LGL (Legal) GLT (Government letter) GLG (Government legal) EXE (Executive) F4 MON (Monarch) C10 (Commercial 10) DL C5 IB5 (International B5) C6 Custom Remote Control Panel Utility 4-7 R L Albatross Rev.c A5 size ’96/08/23 Chapter 4 DR, pass 0 Copies Selects the number of copies to be printed. You can enter any number from 1 to 999. You should specify the number of copies from your software program. Form Specifies the number of horizontal lines on a page. You can enter any number from 5 to 128. This setting is available only in LJ4 mode. Orientation Specifies whether the page is printed in portrait (default) or landscape orientation. The pages in this manual are printed in portrait orientation. Paper Feed Allows you to select how paper is fed into the printer or where paper is fed from. Your choices are Automatic (paper is fed from whichever tray has the correct paper size), Manual (you must manually feed paper in the MP Tray), MP Tray, Lower Cassette 1, and Lower cassette 2 (if installed). The default is Automatic. 4-8 Remote Control Panel Utility Albatross Rev.c A5 size ’96/08/23 Chapter 4 DR, pass 0 R Type Options Clicking the Type button on the Remote Control Panel menu opens the following menu. Note: The Type menu is available only in LJ4 mode. no8aa If you are unable to make the settings that are availabe on the Type menu from your software program, make the settings on this menu as follows: Typeface Specifies the typeface to use. Pitch / Point Size Specifies the point size for proportional and scalable fonts. The range of point sizes is 4.00 to 999.75. It also specifies the pitch for fixed pitch fonts. The range of pitch is 0.44 to 99.99. Remote Control Panel Utility 4-9 L Albatross Rev.c A5 size ’96/08/23 Chapter 4 DR, pass 0 Symbol Set Specifies the symbol set to use. If the typeface you selected is not available for the symbol set you select, the typeface is replaced with the currently selected symbol set. The following symbol sets are available: Roman-8 Italian Swedis2 UK German 8859-2 ISO PsMath WiTurkish VeMath Math-8 PcTk437 PsText IBM-DN PcMultilingual VeUS PcE.Europe WiAnsi Norweg1 ECM94-1 ANSI ASCII French2 Legal Spanish 8859-9 ISO MsPublishing DeskTop WiE.Europe Windows IBM-US VeInternational PiFont Other Note: ❑ The following symbol sets cannot be selected with the Swiss 721 SWM and Dutch 801 SWM fonts: PsMath, MsPublishing, VeMath, Math-8, and PiFont. ❑ 4-10 The characters 9Bh to 9Fh in the VeInternational and VeUS symbol sets cannot be printed when either the Swiss 721 SWM or Dutch 801 SWM font is selected. Remote Control Panel Utility Albatross Rev.c A5 size ’96/08/23 Chapter 4 DR, pass 0 R Printer Setup Options Clicking the Printer Setup button on the Remote Control Panel menu opens the following menu: no9aa If you are unable to make the settings that are available on the Printer Setup menu from your software program, make the settings on this menu as follows: Remote Control Panel Utility 4-11 L Albatross Rev.c A5 size ’96/08/23 Chapter 4 DR, pass 0 Page Protect Use this list to make use of the Page Protect function. This allows you to allocate additional printer memory for printing data, as opposed to receiving it. You may need to use Page Protect if you are printing a highly complex page. If a Print Overrun error occurs, change the setting to ON and reprint your data. This reduces the amount of memory reserved for receiving data so your computer may take longer to send the print job, but it will allow you to print complex jobs. Page Protect usually works best if set to Auto. You will need to increase your printer’s memory if memory errors continue to occur. Note: Changing the Page Protect setting reconfigures the printer’s memory which causes any downloaded fonts to be erased. Resolution Selects the resolution you want to use for printing. The available settings are 600 dpi (default) and 300 dpi. RITech Allows you to adjust the RITech (Resolution Improvement Technology) setting or turn it off. See “Optimizing Print Quality” on page 7-27 for more information about RITech. Ordinarily, the RITech setting should not have to be changed. The RITech options are Light, Medium, Dark, and Off. Density Adjusts the print density to make the printout darker or lighter. Click the appropriate arrow key to darken or lighten the output. 4-12 Remote Control Panel Utility Albatross Rev.c A5 size ’96/08/23 Chapter 4 DR, pass 0 Auto Continue Permits the printer to automatically recover from a Print Overrun, Mem Overflow, or Paper Set error. The printer continues printing within a few seconds after one of these problems occurs. When Auto Continue is off, you must press the button on the control panel to resume printing. In most cases, leave Auto Continue off so you can tell when an error occurs and make the necessary corrections. You might want to set Auto Continue on when printing long jobs or when you are away from the printer for long periods. Toner Save Mode Turns the Toner Save mode on. When turned on, the printer saves toner by substituting a gray shade for the black inside of characters. The characters are outlined in full black on the right and lower edges. Image Optimum Reduces the amount of graphics data when the data reaches the memory limit, allowing complex documents to be printed. When this mode is on, graphics quality is reduced. The options are Off, On, and Auto. On and Auto are the same. Paper Type Allows you to use various types of paper. Thin W is useful for the regular size plain paper under 75g/m2. Thick N is useful for irregular size plain paper and envelopes that are less than 257mm wide. Trnsprnc is useful for transparencies. Paper Type usually works best if set to Normal. Next Turn to the next page. Prev Turn to the previous page. Remote Control Panel Utility 4-13 R L Albatross Rev.c A5 size ’96/08/23 Chapter 4 DR, pass 0 Other Options Clicking the Other button brings up the following dialog box. This menu is available only in ESC/P 2, FX, or I239X emulation modes. no10aa Condensed (ESCP2, FX only) Use this option to change the character spacing. Condensed printing is useful for spreadsheets and other applications that need to fit a large amount of information on each line. However, 15-cpi characters cannot be condensed. T.Margin Use this option to specify the distance from the top of the sheet to the baseline of the first printable line. This is measured in 0.05 inch increments. 4-14 Remote Control Panel Utility Albatross Rev.c A5 size ’96/08/23 Chapter 4 DR, pass 0 Text Use this option to set the page length in lines. The unit of measure for this option is a 1/6 inch line. If you change the Orientation, Page Size, or T.Margin settings, the page length setting automatically returns to the default setting for each paper size. AutoCR Use the automatic carriage return option to perform a carriage-return line-feed (CR-LF) operation whenever the print position exceeds the right margin. If Auto CR is Off, the printer does not print characters beyond the right margin, and it does not perform a linewrap until it receives a CR. Most software programs take care of this function. AutoLF If you set AutoLF to Off, the printer does not send an automatic line feed (LF) command with each carriage return (CR). When you set AutoLF to On, the printer adds a line feed to each carriage return it receives. If your text lines overprint each other, set AutoLF to On. BitImage With BitImage set to Dark or Light, your printer can correctly emulate the graphics densities set with the printer commands. If you select Dark, the bit image density is high. If you select Light, the bit image density is low. With BitImage set to BarCode, your printer converts bit images to bar codes by automatically filling in any vertical gaps between dots. This produces unbroken vertical lines that can be read by a bar code reader. BarCode is not available in I239X mode. This mode reduces the size of the image being printed and may cause some distortion when printing bit-image graphics. Remote Control Panel Utility 4-15 R L Albatross Rev.c A5 size ’96/08/23 Chapter 4 DR, pass 0 ZeroChar This option determines whether the printer prints a slashed zero (0) or an unslashed zero (0). This feature is useful for clearly distinguishing between an uppercase letter O and zero when printing documents such as program lists. Alt.Graphics (I239X only) Turns the Alternate Graphics option on or off. The default setting is OFF. Character Set (I239X only) Selects the character table 1 or 2. Next (I239X only) Turn to the next page. Prev (I239X only) Turn to the previous page. 4-16 Remote Control Panel Utility Albatross Rev.c A5 size ’96/08/23 Chapter 4 DR, pass 0 R More Options Clicking the More button on the Remote Control Panel menu opens the following menu: no11aa If you are unable to make the settings available on the More menu from your software program, make the settings on this menu as follows: Source Symbol Set (LJ4 only) Available only when an optional font ROM is installed while in the LJ4 emulation mode. Destination Symbol Set (LJ4 only) Available only when an optional font ROM is installed while in the LJ4 emulation mode. Remote Control Panel Utility 4-17 L Albatross Rev.c A5 size ’96/08/23 Chapter 4 DR, pass 0 Top Offset Allows you to adjust the vertical printing position on the page. The setting is in millimeters. You can move the printing position by approximately 0.5 mm increments from the top edge (the parameters are from -9 to 99). Left Offset Allows you to adjust the horizontal printing position on the page. The setting is in millimeters. You can move the printing position by approximately 0.5 mm increments from the left edge (the parameters are from -9 to 99). Standby Sets the Standby mode to Enable or Disable. When Standby is enabled, the printer goes into a sleep mode if it is not used for 30 minutes. The printer begins warming up as soon as you send data; it warms up and is ready to print in about 60 seconds. When Standby is disabled, the printer stays warmed up and ready to print. Timeout Sets the length of time the printer waits before looking for the next print job. If the printer is online and receives no new data for the number of seconds specified, the printer automatically switches to the next channel that receives data. Paper Size Ignore Selects whether a paper size error is ignored when it occurs. Turning this item on causes the printer to print even if the image size exceeds the printable area for the specified size of paper. This may cause smudges, because of toner that is not transferred onto the paper properly. When this item is off, the printer stops printing if a paper size error occurs. 4-18 Remote Control Panel Utility Albatross Rev.c A5 size ’96/08/23 Chapter 4 DR, pass 0 R Country (ESCP2, FX only) Selects the international character set. CG Table (ESCP2, FX only) Selects the character tables. Character tables contain the characters and symbols used in different languages. The printer prints text based on the selected character table. Code Page (I239X only) Selects the character tables. Character tables contain the characters and symbols used in different languages. The printer prints text based on the selected character table. Duplex Options Clicking the Duplex button on the Remote Control Panel menu opens the following menu: rcp6 If you are unable to make the setting available on the Duplex menu from your software program, make the setting on this menu as follows: Remote Control Panel Utility 4-19 L Albatross Rev.c A5 size ’96/08/23 Chapter 4 DR, pass 0 Duplex Selects the duplex printing on or off. This item is available only when the Duplex Unit is installed. Binding Selects the binding direction of the printout. This item is available only when the Duplex Unit is installed. Start Page Specifies to print from either front or back at first. This item is available only when the Duplex Unit is installed. Back Shift Adjusts the printing position on the back side when printing on both sides. Use this if the printout on the back side is not where you expected. This item is available only when the Duplex Unit is installed. 4-20 Remote Control Panel Utility Proof Sign-off: Nishi Norum Grady Albatross Rev. c _______ _______ _______ A5 size 96/08/23 R Chapter 5 Pass 0, DR Chapter 5 SelecType 5 When to Use SelecType . . . . . . . . . . . . . . . . . . . . . . . 5-2 SelecType . . . . . . . Buttons . . . . . . Using SelecType . SelecType menus . . . . . . . . . . . . . . . . . . . . . . . . . . . . . . . . . . . . . . . . . . . . . . . . . . . . . . . . . . . . . . . . . . . . . . . . . . . . . . . . . . . . . . . . . . . . . . . . . 5-3 5-3 5-3 5-4 Understanding SelecType Settings . Test Menu . . . . . . . . . . . . . . Emulation Menu . . . . . . . . . Printing Menu . . . . . . . . . . . Tray Size Menu . . . . . . . . . . Config Menu . . . . . . . . . . . . Setup Menu . . . . . . . . . . . . Parallel B Menu, Parallel C Menu Serial Menu . . . . . . . . . . . . L/T Menu, AUX Menu . . . . . . LJ4 Menu . . . . . . . . . . . . . . . . . . . . . . . . . . . . . . . . . . . . . . . . . . . . . . . . . . . . . . . . . . . . . . . . . . . . . . . . . . . . . . . . . . . . . . . . . . . . . . . . . . . . . . . . . . . . . . . . . . . . . . . . . . . . . . . . . . . . . . . . . . . . . . . . . . . . . . . . . . . . . . . . . . . . . . . . . . . . . . . . . . . 5-8 5-8 5-9 5-9 5-11 5-12 5-15 5-16 5-17 5-18 5-19 Using the OneTouch Modes . . . . . . . . . . . . . . . . . . . . 5-21 Using Other Emulation Modes . . . . . . . . . . . . . . . . . . . 5-23 Changing emulation modes . . . . . . . . . . . . . . . . . . 5-23 ESC/P 2 or FX Mode . . . . . . . . . . . . . . . . . . . . . . . . 5-24 I239X Mode . . . . . . . . . . . . . . . . . . . . . . . . . . . . . . 5-27 EPSON GL/2 Mode . . . . . . . . . . . . . . . . . . . . . . . . . 5-28 Before printing in EPSON GL/2 mode . . . . . . . . . . . . 5-29 GL2 Menu . . . . . . . . . . . . . . . . . . . . . . . . . . . . 5-30 SelecType 5-1 L Albatross Rev. c A5 size 96/08/23 Chapter 5 Pass 0, DR When to Use SelecType In general, use SelecType only for settings you cannot make in your software, including the following: ❑ Changing the emulation modes and selecting the IES (Intelligent Emulation Switching) mode ❑ Specifying the channel and configuring the interface ❑ Choosing the size of the memory buffer used to receive data You should keep in mind the following points when using SelecType settings: 5-2 ❑ A number of SelecType settings can also be made using the OneTouch modes, printer driver, and Remote Control Panel utility. ❑ Application programs may send commands to the printer that override SelecType settings. If you are not getting the results you expect, check your application software settings. ❑ To see the current SelecType settings, print a status sheet. ❑ A map of all available SelecType menus is included in Appendix E. SelecType Albatross Rev. c A5 size 96/08/23 R Chapter 5 Pass 0, DR SelecType Before entering and using SelecType, you should understand how the buttons on the printer’s control panel work. Buttons The functions of the control panel buttons on the printer change when in SelecType mode. Paper Source Page Size Manual Feed Orientation RITech Copies MP Tray Size Toner Save Mode Menu Item Value Enter r2-1 Status Sheet SelecType Alt Continue Form Feed On Line Reset Using SelecType Note: You can directly access certain menu items using the OneTouch modes. For more information, see “Using the OneTouch Modes” on page 5-21. 1. To enter SelecType mode, press Menu. SelecType 5-3 L Albatross Rev. c A5 size 96/08/23 Chapter 5 Pass 0, DR 2. To change the settings, press Menu, Item, or Value. ❑ To select a new menu (menu category), press Menu. ❑ To select an item (setting) in a menu, press Item. ❑ To select a value (parameter) for an item, press Value. ❑ To accept a new setting, press Enter. ❑ Press ALT to select a menu, item, or parameter in reverse order. See Appendix E for a map showing the order that selecType menus are displayed in. 3. To exit SelecType mode, press On Line or SelecType. SelecType menus This section gives a brief description of the menus in SelecType and lists the settings available on each menu. For more detailed descriptions of the settings, see “Understanding SelecType Settings” on page 5-8. Test Menu These settings select and perform the printer’s internal test printing. You can obtain information on the printer’s current settings, available fonts, and a brief summary of features. Also see page 5-8. Status Sheet, LJ4 Font Sample, ESCP2 Font Sample, FX Font Sample, I239X Font Sample, PS Status Sheet*, PS Font Sample*, PS Fact Sheet*, Ext Printer Info** * available only when the EPSONScript Level 2 is installed **available only when there is the data in installed optional ROM 5-4 SelecType Albatross Rev. c A5 size 96/08/23 Chapter 5 Pass 0, DR Emulation Menu These settings select the default emulation for each interface. Also see page 5-9. Parallel B, Parallel C, Serial*, L/T*, AUX** * available only when the LocalTalk/Serial module is installed **available only when the optional interface is installed. Printing Menu These settings are made in everyday use. Most can be set using your software. Always check the software settings, because the software settings override the Printing Menu settings. Also see page 5-9. Paper Source, Page Size, Orientation, Copies, Manual Feed, Resolution, Duplex*, Binding*, Start Page* * available only when the Duplex Unit is installed Tray Size Menu These settings display the paper size loaded in each paper tray. This may be different from the size set in Page Size, which specifies the size of the image the printer produces internally. Also see page 5-11. MP Tray Size, LC1 Size, LC2 Size Config Menu These settings affect the printer’s performance. Also see page 5-12. RITech, Toner Save, Density, Top Offset, Left Offset, Back Shift, Size Ignore, Auto Cont, Page Protect, Image Optimum, Paper Type SelecType 5-5 R L Albatross Rev. c A5 size 96/08/23 Chapter 5 Pass 0, DR Setup Menu These settings provide the printer with information necessary for printing. Also see page 5-15. Interface, Time Out, Standby, Lang, Printer Name, Toner, Page Count, SelecType Init Parallel B, Parallel C Menu These settings control communication between the printer and the computer when using a parallel interface. Also see page 5-16. Speed, Bi-D, Buffer Size Serial Menu* These settings control the serial interface settings. These settings are necessary for correct communication between the printer and the computer. Also see page 5-17. Word Length, Baud Rate, Parity, Stop Bit, XOn/XOff, DTR, Buffer Size *Available only when the LocalTalk/Serial module is installed and it is set to serial interface. See Chapter 3, “ Options,” for more information. L/T*, AUX** Menu This setting controls the optional interface settings. Also see page 5-18. Buffer Size * Available only when the LocalTalk/Serial module is installed and it is set to LocalTalk interface. See Chapter 3, “ Options,” for more information. **Available only when the Type B interface is installed. 5-6 SelecType Albatross Rev. c A5 size 96/08/23 Chapter 5 Pass 0, DR LJ4 Menu These settings control the fonts and symbol sets when in LJ4 mode. Also see page 5-19. FontSource, Font Number, Pitch, Height, SymSet, Form, Source SymSet, Dest SymSet GL2 Menu These settings are available only when the printer is in GL2 mode. Also see page 5-28. PS Menu These settings are available only when EPSONScript Level 2 is installed. For more information, refer to the EPSONScript Level 2 manual. ESCP2 Menu These settings are available only when the printer is in ESC/P 2 mode. Also see page 5-24. FX Menu These settings are available only when the printer is in FX mode. Also see page 5-24. I239X Menu These settings are available only when the printer is in I239X mode. Also see page 5-27. SelecType 5-7 R L Albatross Rev. c A5 size 96/08/23 Chapter 5 Pass 0, DR Understanding SelecType Settings Read this section for a complete description of the settings available on the SelecType menus. Test Menu For the settings below, press Enter to print. No values are selectable by pressing Value. c Caution: After you print these samples, user-defined data stored in the printer such as download fonts may be erased depending on which sample you printed. Status Sheet, PS Status Sheet*, PS Fact Sheet* Prints a sample printout describing the current printer features. Use this option to check whether your printer is working correctly. LJ4 Font Sample, ESCP2 Font Sample, FX Font Sample, I239X Font Sample, PS Font Sample* Prints a sample of the fonts available for your selected printer emulation. *Available only when EPSONScript Level 2 is installed. EXT PRINT INFO Prints any information in the optional ROM. This item is available only when the optional ROM is installed and data is stored in it. 5-8 SelecType Albatross Rev. c A5 size 96/08/23 Chapter 5 Pass 0, DR Emulation Menu Use this menu to select the printer emulation mode. You can specify different emulations for each interface; in other words, for each computer you connect. Since each emulation mode has its own specific options, make settings in the LJ4, ESCP2, FX, GL2, or I239X menus, as necessary. The options you can set are the same for every interface. Setting Parameter Parallel B, Parallel C, Serial, LT, AUX LJ4, ESCP2, FX, I239X, PS*1, GL2, Auto *1 Available only when the EPSONScript Level 2 module is installed. Note: The default setting may change depending on which option is installed. Print a status sheet to confirm the current default settings. Printing Menu The settings in the Printing Menu can be set from within your software. The settings you make in your software override SelecType settings. All items in the Printing Menu except Resolution can be accessed directly with the OneTouch Modes. See “Using the OneTouch Modes” later in this chapter. Paper Source Specifies whether paper feeds into the printer from the MP Tray, the standard lower paper cassette, or from an optional lower paper cassette. If you select Auto, paper feeds from the tray containing the paper that matches the paper selected in the Page Size setting. SelecType 5-9 R L Albatross Rev. c A5 size 96/08/23 Chapter 5 Pass 0, DR Page Size Specifies the paper size. Orientation Specifies whether the page is printed in portrait or landscape orientation. This page is printed in portrait orientation. Copies Selects the number of copies to be printed, up to 999. Manual Feed Selects manual feed mode for the MP Tray. For details on manual feed mode, see Chapter 1. Resolution Switches the resolution between 300 and 600 dpi. Duplex Selects the duplex printing on or off. This item is available only when the Duplex Unit is installed. Binding Selects the binding direction of the printout. This item is available only when the Duplex Unit is installed. eng 5-10 SelecType Albatross Rev. c A5 size 96/08/23 Chapter 5 Pass 0, DR Start Page Specifies to print from either front or back at first. This item is available only when the Duplex Unit is installed. Setting Parameter Paper Source Auto, MP, LC1, LC2 Page Size A4, A3, A5, B4, B5, LT, HLT, LGL, GLT, GLG, B, EXE, F4, MON, C10, DL, C5, C6, IB5, CTM, A3+ Orientation Port, Land Copies 1- 999 Manual Feed Off, On Resolution 600, 300 Duplex Off, On Binding Long Edge, Short Edge Start Page Front, Back Tray Size Menu Use this menu to makes the MP Tray paper size setting and check the currently loaded paper size in the standard and optional paper cassettes, if installed. MP Tray Size Allows you to set the paper size for the MP Tray. Note: You can also make the MP Tray Size setting directly from OneTouch Mode 2. SelecType 5-11 R L Albatross Rev. c A5 size 96/08/23 Chapter 5 Pass 0, DR LC1 Size Displays the actual paper size loaded in the standard lower paper cassette. Note: LC1 Size and LC2 Size only display the currently loaded paper size. You cannot change this parameter, it is set automatically. LC2 Size Displays the actual paper size loaded in the optional lower paper cassette. Setting Parameter MP Tray Size, LC1 size, LC2 size A4, A3, A5, B4, B5, LT, HLT, LGL, GLT, GLG, B, EXE, F4, MON*, C10*, DL*, C5*, C6*, IB5*, A3+* *Only usable in MP Tray Config Menu RITech Produces smoother and crisper lines, text, and graphics. If you change this setting, you can check the print quality by printing a status sheet from the SelecType Test Menu. Note: You can also make the RITech setting directly from OneTouch Mode 2. 5-12 SelecType Albatross Rev. c A5 size 96/08/23 Chapter 5 Pass 0, DR Toner Save Turns the Toner Save mode on. When turned on, the printer saves toner by substituting a gray shade for the black inside of characters. The characters are outlined in full black on the right and lower edges. Note: You can also make the Toner Save setting item directly from OneTouch Mode 2. Density Adjusts the print density to make your printout lighter or darker. Note: Increasing the print density increases toner consumption. If you select darker print, you may need to replace the imaging cartridge more often. Top Offset Makes fine adjustments to the vertical position of the printing on the page. c Caution: Be sure that the printed image does not exceed the edge of paper. Otherwise, you may damage the printer. Left Offset Makes fine adjustments to the horizontal position of the printing on the page. This is useful for fine adjustment when you are using the manual feed mode. c Caution: Be sure that the printed image does not exceed the edge of paper. Otherwise, you may damage the printer. SelecType 5-13 R L Albatross Rev. c A5 size 96/08/23 Chapter 5 Pass 0, DR Back Shift Adjusts the printing position on the back side when printing on both sides. Use this if the printout on the back side is not where you expected. This item is available only when the Duplex Unit is installed. Size Ignore Selects whether a paper size error is ignored. Turning this item on causes the printer to print even if the image size exceeds the printable area for the specified size of paper. This may cause smudges because of toner that is not transferred onto the paper properly. When this item is off, the printer stops printing if a paper size error occurs. Auto Cont Permits the printer to automatically continue printing after a certain period of time when one of the following errors occurs: Paper Set, Print Overrun and Mem Overflow. When this option is off, you must press the Continue button to resume printing. Page Protect Allocates additional printer memory for printing data, as opposed to receiving it. You may need to use Page Protect if you are printing a highly complex page. If a Print Overrun error occurs, change the setting to ON and reprint your data. This reduces the amount of memory reserved for receiving data so your computer may take longer to send the print job, but it will allow you to print complex jobs. Page Protect usually works best if set to Auto. You will need to increase your printer’s memory if memory errors continue to occur. Note: Changing the Page Protect setting reconfigures the printer’s memory which causes any downloaded fonts to be erased. 5-14 SelecType Albatross Rev. c A5 size 96/08/23 Chapter 5 Pass 0, DR Image Optimum Reduces the amount of graphics data when the data reaches the memory limit, allowing complex documents to be printed. When this mode is on, graphics quality is reduced. Paper Type Allows you to use various types of paper. Thin is useful for the regular size plain paper under 75g/m2. Thick is useful for irregular size plain paper over 75g/m2 and envelopes that are less than 257mm wide. Trnsprnc is useful for transparencies. Paper Type usually works best if set to Normal. Setup Menu Interface Specifies whether the printer can receive data through all the interfaces available or only through the one selected. Time Out Sets the length of time the printer waits when it is on line and no new data is received. When this time is up, the printer searches for new print data on other channels. Standby Saves power by reducing the power to the fixing heater if the printer receives no data for 60 minutes. In this mode, the printer begins warming up as soon as you press send print data; it then warms up and is ready to print in about 70 seconds. Lang Specifies the language displayed on the control panel and printed on the status sheet. SelecType 5-15 R L Albatross Rev. c A5 size 96/08/23 Chapter 5 Pass 0, DR Printer Name Displays the printer name instead of Ready when the printer is standing by. Toner Displays the amount of toner left in the imaging cartridge. E****F E*** F E** F E* F E F (100-75%) (75-50%) (50-25%) (25-0%) (0%) Page Count Displays the total number of sheets printed by this printer. SelecType Init. Erases all the SelecType settings you have changed, and resets them to the factory default settings. Parallel B Menu, Parallel C Menu Speed Specifies the pulse width of the ACKNLG signal on receiving data in the Compatibility mode or Nibble mode. When this option is set to Fast, the pulse width is about 10 m S. When this option is set to Normal, the pulse width is about 1 m S. Bi-D Enables or disables bidirectional communication. 5-16 SelecType Albatross Rev. c A5 size 96/08/23 Chapter 5 Pass 0, DR Buffer Size Determines the amout of memory to be used for receiving data and printing data. If set to Maximum, more memory is allocated for receiving data. If set to Minimum, more memory is allocated for printing data. The factory default setting is Normal. Serial Menu Word Length You can select an 8-bit or 7-bit word length. See your computer manual and software documentation for the proper setting. The factory setting is 8-bit. Baud Rate Use this option to set the data transfer rate (baud) for the serial interface. The baud rate is measured in bits per second (bps). See your computer manual and software documentation for the proper setting. Parity When this option is set to None, parity checking is disabled. The parity bit, if used, provides a basic form of error detection. See your computer manual and software documentation for the proper setting. Stop Bit Use this option to set the number of stop bits for each character of information sent to the printer. Stop bits signal the end of a character. SelecType 5-17 R L Albatross Rev. c A5 size 96/08/23 Chapter 5 Pass 0, DR XOn/XOff Use this option to set XOn/XOff communications protocol to On, Off, or Robust. You can use XOn/XOff protocol in combination with the DTR option setting. If set to Robust, the printer sends an XOn signal every second the printer is waiting to receive data. DTR Use DTR (Data Terminal Ready) to turn the printer’s DTR communications protocol on or off. You can use DTR protocol in combination with the XOn/XOff option setting. Buffer Size Determines the amount of memory to be used for receiving data and printing data. If set to Maximum, more memory is allocated for receiving data. If set to Minimum, more memory is allocated for printing data. The factory default setting is Normal. L/T Menu, AUX Menu Buffer Size Determines the amount of memory to be used for receiving data and printing data. If set to Maximum, more memory is allocated for receiving data. If set to Minimum, more memory is allocated for printing data. The factory default setting is Normal. 5-18 SelecType Albatross Rev. c A5 size 96/08/23 Chapter 5 Pass 0, DR LJ4 Menu Note: If you always use the HP LaseJet 4 printer driver in your software, you should change settings using your software. The software settings always override the LJ4 menu options. FontSource Selects the default font source. Font Number Selects the default font number from the default font source. Pitch Specifies the default font pitch if the font is scalable and fixed-pitch. You can select from 0.44 to 99.99 CPI, in increments of 0.01 CPI. Height Specifies the default font height if the font is scalable and proportional. You can select from 4.00 to 999.75 points, in increments of 0.25 points. SymSet Selects the default symbol set. If the font you selected in FontSource and Font Number is not available in the new SymSet setting, the Fontsource and the Font Number values are automatically replaced with the default value. Form Selects the number of lines for the selected paper size and orientation. This causes a line spacing (VMI) change also, and the new VMI value is stored in the printer. This means that later changes in the Page Size or the Orientation settings cause changes in the Form value, based on the stored VMI. SelecType 5-19 R L Albatross Rev. c A5 size 96/08/23 Chapter 5 Pass 0, DR Source SymSet Available only when an optional font ROM is installed. Dest SymSet Available only when an optional font ROM is installed. Setting Parameter FontSource Resident, SIMM, Card, Download Font Number 0 ~ 65535 Pitch 0.44 ~ 99.99 cpi Height 4.00 ~ 999.75 pt. SymSet Roman-8, ECM94-1, 8859-2 ISO, 8859-9 ISO, IBM-US, IBM-DN, PcMultiling, PcE.Europe, PcTk437, WiAnsi, WiE.Europe, WiTurkish, DeskTop, PsText, VeInternati, VeUS, MsPublishin, Math-8, PsMath, VeMath, PiFont, Legal, UK, ANSI ASCII, Swedis2, Italian, Spanish, German, Norweg1, French2, Windows Form 5 ~ 128 Lines Source SymSet 0 ~ 3199 Dest SymSet 0 ~ 3199 For details on the ESCP2, FX, and I239X menus, refer to “Using Other Emulations” later in this chapter. 5-20 SelecType Albatross Rev. c A5 size 96/08/23 Chapter 5 Pass 0, DR R Using the OneTouch Modes The OneTouch modes are part of SelecType mode, but they are more limited and easier to use. The settings you make in these modes and SelecType are reflected in each other. To enter OneTouch mode 1, press the SelecType button (repeatedly if necessary) until the light next to Paper Source comes on indicating the printer is now in OneTouch mode 1. The current OneTouch mode 1 settings for Paper Source, Page Size, Manual Feed, and Orientation are shown on the display above the corresponding setting. For example, Port or Land is shown above Orientation. OneTouch mode 1 p1new To enter OneTouch mode 2, press the SelecType button (repeatedly if necessary) until the indicator light next to RITech comes on indicating the printer is now in OneTouch mode 2. The current OneTouch mode 2 settings for RITech, Copies, MP Tray Size, and Toner Save Mode are shown on the display above the corresponding setting. For example, On or Off is shown above Toner Save Mode. OneTouch mode 2 p2new To make OneTouch settings, access one of the modes as described above and press the button located under the setting you want to change to cycle forward through the available options. You can also press ALT (SelecType) and the button to cycle backward through the available options. SelecType 5-21 L Albatross Rev. c A5 size 96/08/23 Chapter 5 Pass 0, DR Paper Source Specifies whether paper feeds into the printer from the MP Tray, the standard lower paper cassette, or from the optional lower paper cassette (if installed). If you select Auto , the paper source containing the paper that matches the setting in the Page Size menu will be used. Page Size Specifies the paper size. Manual Feed Turns Manual Feed on or off for the MP Tray. For details on the Manual Feed mode, see Chapter 2. Orientation Specifies whether the page is printed in portrait (Port ) or landscape (Land ) orientation. RITech Allows you to make the RITech setting: Dark , Medium , Light , Off . RITech produces smoother and crisper lines, text, and graphics. If you change this setting, you can check the print quality by printing a status sheet from the SelecType Test Menu. Copies Selects the number of copies to be printed, up to 999. MP Tray Size Allows you to set the paper size for the MP Tray. Toner Save Mode Turns the Toner Save Mode on or off. When turned on, the printer saves toner by substituting a gray shade for the black inside of characters. The characters are outlined in full black on the right and lower edges 5-22 SelecType Albatross Rev. c A5 size 96/08/23 Chapter 5 Pass 0, DR Using Other Emulation Modes Your printer is designed to work best in its LJ4 emulation mode. If you want to use an emulation other than LJ4, you can select ESC/P 2, FX, I239X, or GL/2 emulation mode. Match the emulation mode in the Emulation Menu with drivers or print data already formatted for EPSON LQ or FX series printers, or IBM printers. The available emulation modes are LJ4 (default), GL2, I239X, ESC/P 2, and FX. The printer’s intelligent emulation switching (IES) feature automatically switches between emulation modes, depending on the received data. To enable intelligent emulation switching, select Auto on the Emulation Menu using the printer driver [confirm], the Remote Control Panel utility, or the SelecType mode. Changing emulation modes To change the printer emulation mode, follow these steps. 1. Press Menu to enter SelecType. 2. Press Menu several times until EMULATION MENU appears on the display. 3. Press Item to select the interface you want to configure. 4. Press Value to select the emulation mode. When your desired emulation appears, press Enter. An asterisk (*) appears at the right of the display. If you need to make more SelecType changes, continue to read the following section. If not, press On Line. The printer goes back to on line status, as indicated by the On Line light. SelecType 5-23 R L Albatross Rev. c A5 size 96/08/23 Chapter 5 Pass 0, DR ESC/P 2 or FX Mode This section lists the ESCP2 menu and FX menu options. Unless specifically mentioned, the same items are available for either mode. Font The Font option selects a font by typeface. The factory default font is Courier. After selecting the desired font, you can also adjust the character spacing and size of the font with the Pitch and Condensed options described below. Pitch You can select a character pitch of 10, 12, or 15 characters per inch (cpi), or choose proportional spacing. Condensed Use this option to change the character spacing. Condensed printing is useful for spreadsheets and other applications that need to fit a large amount of information on each line. However, 15-cpi characters cannot be condensed. T.Margin Use this option to specify the distance from the top of the sheet to the baseline of the first printable line. This is measured in 0.05 inch increments. Text Use this option to set the page length in lines. The unit of measure for this option is a 1/6 inch line. If you change the Orientation, Page Size, or T.Margin settings, the page length setting automatically returns to the default setting for each paper size. 5-24 SelecType Albatross Rev. c A5 size 96/08/23 Chapter 5 Pass 0, DR CG Table Use the character generator table option to select the graphics character table, or the italics table. The graphics table contains graphic characters for printing lines, corners, shaded areas, international characters, Greek characters, and mathematical symbols. Selecting the italics table defines the upper half of the character table as italic characters. Country Use this option to select one of the fifteen international symbol sets. See “Symbol Sets” in the Appendix for samples of the characters in each country’s symbol set. AutoCR Use the automatic carriage return option to perform a carriage-return line-feed (CR-LF) operation whenever the print position exceeds the right margin. If Auto CR is Off, the printer does not print characters beyond the right margin, and it does not perform a linewrap until it receives a CR. Most software programs take care of this function. AutoLF When you set AutoLF to Off, the printer does not send an automatic line feed (LF) command with each carriage return (CR). When you set AutoLF to On, the printer adds a line feed to each carriage return it receives. If your text lines overprint each other, set AutoLF to On. Bit Image With Bit Image set to Dark or Light, your printer can correctly emulate the graphics densities set with the printer commands. When you select Dark, the bit image density is high. When you select Light, the bit image density is low. SelecType 5-25 R L Albatross Rev. c A5 size 96/08/23 Chapter 5 Pass 0, DR The BarCode setting converts bit images to bar codes by automatically filling in any vertical gaps between dots. This produces unbroken vertical lines that can be read by a bar code reader. BarCode is not available in I239X mode. This mode reduces the size of the image being printed and may cause some distortion when printing bit-image graphics. ZeroChar This option determines whether the printer prints a slashed zero (0) or an unslashed zero (0). This feature is useful for clearly distinguishing between an uppercase letter O and zero when printing documents such as program lists. The table below shows the available parameters for each setting in ESC/P 2 and FX modes. See the previous pages for a detailed description of each setting. Setting Parameter Font Courier, Prestige, Roman, Sans serif, Roman T*, Orator S, Sans H*, Script, OCR B Pitch 10 cpi, 12 cpi, 15 cpi, Prop. Condensed Off, On T. Margin 0.40 - 1.50 inch Text 1 - 81 Lines CG Table PcUSA, Italic, PcMultilin, PcPortugue, PcCanFrenc, PcNordic, PcTurkish2, PcE. Europe, BpBRASII, BpAbicomp Country USA, France, Germany, UK, Denmark, Sweden, Italy, Spain1, Japan, Norway, Denmark2, Spain2, LatinAmeric, Korea*, Legal* Auto CR On, Off Auto LF Off, On Bit Image Dark, Light, BarCode ZeroChar 0, 0 *Available only in ESC/P 2 mode. 5-26 SelecType Albatross Rev. c A5 size 96/08/23 Chapter 5 Pass 0, DR I239X Mode I239X mode emulates IBM 2390/2391 Plus commands. For detailed information on most of the settings and parameters in the table below, refer to the previous section. Setting Parameter Font Courier, Prestige, Gothic, Orator, Script, Presentor, Sans serif Pitch 10 cpi, 12 cpi, 15 cpi, 17 cpi, 20 cpi, 24 cpi, Prop. Code Page 437, 850, 860, 863, 865 T. Margin 0.30 - 1.50 inch Text 1 - 81 Lines Auto CR Off, On Auto LF Off, On Alt. Graphics Off, On BitImage Dark, Light ZeroChar 0, 0 Character Set 1, 2 Code Page (I239X only) Selects the character tables. Character tables contain the characters and symbols used in different languages. The printer prints text based on the selected character table. Alt.Graphics (I239X only) Turns the Alternate Graphics option on or off. The default setting is OFF. Character Set (I239X only) Selects character table 1 or 2. SelecType 5-27 R L Albatross Rev. c A5 size 96/08/23 Chapter 5 Pass 0, DR EPSON GL/2 Mode Note: You cannot change the GL/2 Mode items by SelecType. To change these items, use the GL/2 command listed in Appendix C. In EPSON GL/2 mode, you can use your printer with plotter applications. EPSON GL/2 has two operational modes. One is the LJ4GL2 mode; the other is the GLlike mode. The GLlike mode emulates some of the HP-GL plotter commands and includes all of the commands found in LJ4GL2 mode, plus two additional commands. The table below shows the differences between these modes. For more information on GL/2 commands in LJ4 emulation mode, see Appendix C. Command 5-28 LJ4GL2 mode GLlike mode Orientation Printer setting Landscape only Plotter unit 1/1016 inch 1/1021 inch Picture frame Same as LaserJet 4 mode Depends on the hard-clip limit Default position of P1 and P2 Lower left and lower right corners, respectively, of picture frame inside of picture frame Undefined commands First character is ignored First two characters are ignored CS, CA commands Not supported Partially supported PG, AF commands Not supported Supported Results when a DT command with no second parameter is sent Terminator is not plotted Terminator is plotted ESC %#A commands Supported Not supported SelecType Albatross Rev. c A5 size 96/08/23 Chapter 5 Pass 0, DR Before printing in EPSON GL/2 mode You may need to change printer settings depending on your output needs. First, check the print settings to make sure they match the data you are trying to print. Check the following items; the information may be necessary later. Paper size: Printer’s paper size setting Driver (plotter selection): HP-GL/2 or HP-GL plotters Pen configuration: Plot origin: Orientation: Pen number, pen width Center or Corner GLlike, landscape only LJ4GL2, landscape or portrait If you need to configure the printer settings, first switch the emulation (see page 5-23) and then change the settings using the printer driver, the Remote Control Panel utility, or SelecType. Note: Settings or data saved in printer RAM (such as downloaded fonts) may be erased when you switch emulation. SelecType 5-29 R L Albatross Rev. c A5 size 96/08/23 Chapter 5 Pass 0, DR GL2 Menu GL Mode Selects the mode, GLlike or LJ4GL2. Scale Switches between original size or reduced size printing. Also, determines the reduction scale for reduced printing. You can print the data originally created for the paper size selected in the Scale setting onto the paper selected in the Page Size setting. For example, you can scale an A3 size page to an A4 size page. Origin Sets the origin for the plotter-unit coordinate system to the lower left corner (Corner) or to the center of the hard-clip limit (Center). Pen Selects the color of the printed characters. Pen 0 is white, which means the background is printed instead of the character, like a caution or warning symbol in this book. All others are black, like the characters in this sentence. (Pens 2-6 are different colors for color printers.) 5-30 SelecType Albatross Rev. c A5 size 96/08/23 R Chapter 5 Pass 0, DR End Determines the type of line ending. See the illustration below. Butt Square Triangular Round end Join Defines how the ends of lines are joined. See the illustration below. NONE MITERED MITEREDBEVELED ROUND BEVELED TRIANGULAR Pen 0, Pen 1, Pen 2, Pen 3, Pen 4, Pen 5, Pen 6 Selects the line width. You can select a value from 0.05mm to 5.00mm, in increments of 0.05 mm. SelecType 5-31 join L Albatross Rev. c A5 size 96/08/23 5-32 Chapter 5 Pass 0, DR SelecType Proof Sign-off: Nishi Norum Grady Albatross Rev.c _______ _______ _______ A5 size 96/08/23 R Chapter 6 Pass 0, DR Chapter 6 Troubleshooting and Maintenance Introduction . . . . . . . . . . . . . . . . . . . . . . . . . . . . . 6-2 Paper Jam and Feeding Problems . . . . . . . . . . . . . . . . . 6-2 Preventing paper feed and paper jam problems . . . . . . . 6-5 Print Quality Problems . . . . . . . . . . . . . . . . . . . . . . . 6-9 Memory Problems . . . . . . . . . . . . . . . . . . . . . . . . . . 6-14 Option Problems . . . . . . . . . . . . . . . . . . . . . . . . . . . 6-15 Status and Error Messages . . . . . . . . . . . . . . . . . . . . . 6-18 Hex Dump Mode . . . . . . . . . . . . . . . . . . . . . . . . . . 6-28 Replacing the Imaging Cartridge Optimizing Print Quality . Adjusting RITech . . . The RITech setting . . . Adjusting print density . . . . . . . . . . . . . . . . . . . . . . . . . . . . . 6-29 . . . . . . . . . . . . . . . . . . . . . . . . . . . . . . . . . . . . . . . . . . . . . . . . . . . . . . . . . . . . . . . . . . . . . . . . 6-32 6-32 6-32 6-33 Resetting the Printer . . . . . . . . . . . . . . . . . . . . . . . . . 6-34 Cleaning the Printer . . . . . . . . . . . . . . . . . . . . . . . . . 6-35 Removing spilled toner . . . . . . . . . . . . . . . . . . . . . 6-36 Cleaning the printer case . . . . . . . . . . . . . . . . . . . . 6-37 Transporting the Printer . . . . . . . . . . . . . . . . . . . . . . 6-37 Troubleshooting and Maintenance 6-1 6 L Albatross Rev.c A5 size 96/08/23 Chapter 6 Pass 0, DR Introduction This chapter provides the information necessary for you to keep the printer in optimum condition. This chapter tells you how to ❑ Solve problems you may encounter ❑ Replace consumables ❑ Optimize print quality Also included is a complete description of the status, error, and warning messages shown on the printer’s control panel display. Paper Jam and Feeding Problems The printer stops and the Feed Jam message appears. 1. Open the front cover. Carefully remove all the paper in the MP tray along with any sheets that have fed part way into the printer. r6-1 6-2 Troubleshooting and Maintenance Albatross Rev.c A5 size 96/08/23 R Chapter 6 Pass 0, DR 2. Open the printer cover. Be sure to remove any pieces of paper that may have torn off or are remaining in the printer. w Warning: Opening the printer cover exposes the fuser, which is marked by a CAUTION Hot Surface Avoid Contact label. Be careful not to touch the fuser. If necessary, remove the Imaging Cartridge and any paper left in the paper feed path, and then reinsert the Imaging Cartridge. 3. Close the printer cover. Tap the edges of the paper stack on a flat surface and carefully reload it into the paper bin. (Do not reload curled or wrinkled sheets.) Close the front cover. 4. The jammed page’s print data is automatically reprinted. Feed Jam when using the lower paper cassette 1. Remove the paper tray from the lower paper cassette. 2. Remove any folded paper from the paper cassette, and discard any curled or wrinkled sheets. r6-2 Troubleshooting and Maintenance 6-3 L Albatross Rev.c A5 size 96/08/23 Chapter 6 Pass 0, DR 3. Tap the edge of the paper stack. Then reinsert it into the paper tray making sure the paper is evenly aligned and rests below the maximum paper mark. Make sure you are using the correct paper size. Also make sure you are using paper that meets the specifications for this printer. 4. Reinstall the paper tray in the lower paper cassette. 5. Press the Continue button. The jammed page’s print data is automatically reprinted. The printer stops and the Paper Jam message appears. 1. Open the printer cover and remove the Imaging Cartridge. w Warning: Opening the printer cover exposes the fuser, which is marked by a CAUTION Hot Surface Avoid Contact label. Be careful not to touch the fuser. 2. Gently pull out the paper. If it tears, make sure you remove any pieces remaining in the printer. r6-3 6-4 Troubleshooting and Maintenance Albatross Rev.c A5 size 96/08/23 Chapter 6 Pass 0, DR Note: Because the toner on the paper inside the printer may not have been fixed on the page, toner may come off on your hands when you remove the paper. If you spill toner on your clothing, rinse it off with cold water. Using hot water may leave a permanent stain. 3. Reinstall the Imaging Cartridge. Then close the printer cover. 4. After a paper jam, the jammed page’s print data is automatically reprinted. Preventing paper feed and paper jam problems If you have frequent paper feed or paper jam problems, use this checklist of corrective measures: ❑ Use a higher-quality paper, one that is not too thin or rough. ❑ Fan the stack of paper and then tap its edges to align it before you load it. ❑ Be sure that you do not load too much paper in the tray. ❑ Be sure to adjust the paper guides so that the paper can slide in and out freely. ❑ Never let more than 500 sheets accumulate in the output tray on top of the printer. ❑ Try turning over the stack of paper in the tray. Most packages of paper indicate the best side with an arrow on the end of the package. Make sure the best side is loaded face up. Troubleshooting and Maintenance 6-5 R L Albatross Rev.c A5 size 96/08/23 Chapter 6 Pass 0, DR The display panel stays blank when you turn the printer on. Turn off the printer and check the power cable connections between the printer and the electrical outlet; then turn the printer back on. If the electrical outlet is controlled by an outside source such as a wall switch, make sure the switch is turned on or plug another electrical device into the outlet to check whether the outlet is operating properly. The On Line light is on but nothing prints. Your computer may not be properly connected to the printer. Perform the procedure described in “Testing the computer-to-printer connection” in the Getting Ready! booklet. The interface cable may not be plugged in securely. Check both ends of the cable between the printer and the computer. Make sure that your interface cable meets the specifications for the printer and computer. If you are using the serial interface, set the baud rate, protocol, data bit, and related settings. See your computer manual for the correct settings and interface requirements. If you are using the parallel interface, set the Speed setting (on either the Parallel B or C menu) to match the value the computer requires. Make sure that your software is properly set up for your printer. The Imaging Cartridge may be empty. Replace it as described at the end of this chapter. 6-6 Troubleshooting and Maintenance Albatross Rev.c A5 size 96/08/23 Chapter 6 Pass 0, DR The printer doesn’t print and the On Line light is off. Press On Line once to put the printer on line (the On Line light comes on). A font selected with software commands won’t print. The selected font is not installed in your printer. Be sure you have installed the correct font. See Appendix D for more information. Some or all of the output is garbled. If you use the Remote Control Panel, check whether any Remote Control Panel settings have been changed by another user. Make sure that both ends of the interface cable are plugged in securely. Make sure you use a double-shielded, twisted-pair interface cable no longer than six feet in length for Parallel B; no longer than 30 feet in length for Parallel C. The Image Optimum setting may be set to Auto or On. If it is, fonts other than you expect may be printed to increase the printing speed. Turn the Image Optimum setting off in the printer driver, the Remote Control Panel utility, or SelecType. The emulation setting for that port may not be correct. Specify the emulation mode with the Remote Control Panel utility or SelecType. If the printer still does not print correctly, contact your dealer or a qualified service person. Troubleshooting and Maintenance 6-7 R L Albatross Rev.c A5 size 96/08/23 Chapter 6 Pass 0, DR The position of the printout is not correct. Make sure that you are using the correct page length and margin settings in your application program. Graphics don’t print correctly. Make sure that your software program is set for the printer emulation you are using. For example, if you are using the LJ4 emulation, be sure that your graphics software is set for a LaserJet 4 printer. If you are using a serial interface, make sure that you set the appropriate protocol settings in the SelecType Serial Menu. Graphics require large amounts of memory; see “Memory Problems” in this chapter for more help. The Remote Control Panel utility does not function as expected. Your settings may have been changed by your software program, which overrides the Remote Control Panel utility. Initialize the printer as described later in this chapter. SelecType does not function as expected. Software programs override SelecType settings. Use software settings instead of SelecType settings whenever possible. Your settings may have been changed by your software program. Perform a factory reset (initialize) with the SeleType Init function in the SelecType Setup Menu. For more information, see Chapter 5. 6-8 Troubleshooting and Maintenance Albatross Rev.c A5 size 96/08/23 Chapter 6 Pass 0, DR You may not have reset the printer after making settings. Press the ALT button and Continue button at the same time to reset the printer and enable the new settings. When transporting the printer c Caution: Whenever you ship or transport the printer, first remove the Imaging Cartridge and place it in a plastic bag. Seal the bag to prevent the fine toner particles from spilling into the printer or onto your clothing. Print Quality Problems Dark or dirty background Lighten the Density setting using the Remote Control Panel utility, the printer driver, or the SelecType Config Menu. Clean the paper path inside the printer with a clean, dry cloth. Clean internal printer components by printing three pages with only one character per page. There may be a problem with the Imaging Cartridge. Remove the cartridge, shake it from side to side, and then reinstall it. If this does not solve the problem, replace the Imaging Cartridge as described later in this chapter. Troubleshooting and Maintenance 6-9 R L Albatross Rev.c A5 size 96/08/23 Chapter 6 Pass 0, DR Vertical black or white bands or lines Clean the printer lens. Remove the Imaging Cartridge and place it on a clean, flat surface. Clean the lens as shown below. r6-4 Wipe the lens from end to end with a dry, lint-free cloth. Then reinsert the imaging cartridge in the printer and close the printer cover. If the problem persists, install a new imaging cartridge as described later in this chapter and print several pages to check the print quality. 6-10 Troubleshooting and Maintenance Albatross Rev.c A5 size 96/08/23 Chapter 6 Pass 0, DR Horizontal black or white bands appear in your printout, or the printer prints a blank page Install a new Imaging Cartridge as described later in this chapter. Uneven darkness Take out the Imaging Cartridge, shake it from side to side, and reinstall it. Your paper may be moist or damp. Printing is sensitive to moisture absorbed by the paper. Do not store your paper in a humid or damp environment. Install a new Imaging Cartridge as described later in this chapter. Then print several pages to check the print quality. Toner smudges Remove the Imaging Cartridge, shake it from side to side to distribute the toner, and wipe the bottom of it with a clean, dry cloth. Clean the paper path inside the printer using a clean, dry cloth. Clean internal printer components by printing three pages with only one character per page. If the problem remains, replace the Imaging Cartridge as described later in this chapter. Troubleshooting and Maintenance 6-11 R L Albatross Rev.c A5 size 96/08/23 Chapter 6 Pass 0, DR Missing areas on printed image Your paper may be moist or damp. Printing is sensitive to moisture absorbed by the paper. The higher the moisture content in the paper, the lighter the printed output. Do not store your paper in a humid or damp environment. You may not be using the correct type of paper for your printer. If the surface of your paper is too rough, printed characters appear distorted or broken. Smooth, high-quality copier paper is recommended for best results. See “Paper Specifications” in Appendix A for information on choosing paper. Completely blank pages If after checking the SelecType Toner option in the Setup Menu, the Toner message indicates that the amount of toner is low (E* F), read “Replacing the Imaging Cartridge” starting on page 6-28. Check that the Imaging Cartridge is installed as described in the Getting Ready! booklet or in “Replacing the Imaging Cartridge” on page 6-28. The problem may be with your software program or interface cable. Print out a status sheet. If blank pages continue to print, the problem may be with the printer. Turn off the printer and contact your dealer. 6-12 Troubleshooting and Maintenance Albatross Rev.c A5 size 96/08/23 Chapter 6 Pass 0, DR Printed image is light or faint Darken the Density setting using the printer driver, Remote Control Panel utility, or the SelecType Config Menu. Your paper may be moist or damp. Printing is sensitive to moisture absorbed by the paper. The higher the moisture content in the paper, the lighter the printed output. Do not store your paper in a humid or damp environment. Take out the Imaging Cartridge, shake it from side to side to distribute the toner, and then reinstall it. If the problem persists, replace the Imaging Cartridge as described at the end of this chapter. The Toner Save mode may be on. Turn off the Toner Save mode using the printer driver, the Remote Control Panel utility, OneTouch mode 2, or SelecType. Image is too dark The Density setting may be incorrect. Change the print density using the printer driver, the Remote Control Panel utility, or the SelecType Config Menu. If the problem persists, replace the Imaging Cartridge as described at the end of this chapter. Troubleshooting and Maintenance 6-13 R L Albatross Rev.c A5 size 96/08/23 Chapter 6 Pass 0, DR Non-printed side of the page is dirty Toner may have spilled in the paper feed path. Remove the Imaging Cartridge and then clean the paper path of the printer using a soft, lint-free cloth. c Caution: Opening the printer exposes the fuser, which is marked by a CAUTION Hot Surface Avoid Contact label. Be careful not to touch the fuser. Memory Problems Mem Overflow This message indicates that you need to simplify the page you are trying to print, change your memory allocation, or add more memory to your printer. Try simplifying your page by reducing the number or size of fonts or the number or size of graphics, or both. When using a PCMCIA card, ROM SIMM, or NLSP ROM, turn off the printer, then remove the module. Image Optimum The printer cannot print at the requested quality level because of insufficient memory, and the printer reduces the quality automatically so that the printer can continue printing. Check to see if the printout is acceptable. If not, add more memory (for a permanent solution) or set Device Resolution to LOW (300 dpi) and Page Protect to Auto temporarily in the printer driver. 6-14 Troubleshooting and Maintenance Albatross Rev.c A5 size 96/08/23 Chapter 6 Pass 0, DR Option Problems The message Illegal AUX I/F Card or Illegal I/F Module appears The message Illegal AUX I/F Card means that the printer cannot read the installed optional interface card. Turn off the printer, then remove the card. The message Illegal I/F Module means that the printer cannot read the installed optional LocalTalk/Serial module. Turn off the printer, then remove the module. Illegal AUX I/F Card indicates both the LocalTalk/Serial module (set in LocalTalk) and the LocalTalk Type B I/F card are installed simultaneously. Remove one of them. Make sure the I/F card is listed in the table of installable ones in Appendix A. Paper does not feed from the optional lower paper cassette Be sure you have selected the proper paper tray in your software. There may be no paper in the lower paper cassette. Load it with paper. Be sure that the lower paper cassette is properly installed and that you have not tried to load it with too many sheets of paper. The cassette can hold a maximum of 500 sheets or 250 sheets (depending on the tray) of 75g/m2 (20 lb) paper. The lower paper cassette may not be installed properly. See Chapter 3 for instructions on installing the lower paper cassette. Troubleshooting and Maintenance 6-15 R L Albatross Rev.c A5 size 96/08/23 Chapter 6 Pass 0, DR Feed Jam when using the optional lower paper cassette See “Feed Jam when using the lower paper cassette”, on page 6-3. Feed Jam when using the Duplex unit 1. Press the top of the Duplex unit and open the cover. r6-5 2. Remove any folded paper from the unit, and discard any curled or wrinkled sheets. Then close the cover. If you cannot remove the paper, follow the step 3 and 4. r6-6 6-16 Troubleshooting and Maintenance Albatross Rev.c A5 size 96/08/23 R Chapter 6 Pass 0, DR 3. Pull open the lower cover. n6-7 4. Remove any folded paper from the unit, and discard any curled or wrinkled sheets. Then close the cover. r6-8 5. The jammed page’s print data is automatically reprinted. Troubleshooting and Maintenance 6-17 L Albatross Rev.c A5 size 96/08/23 Chapter 6 Pass 0, DR Even with additional memory installed, complex pages don’t print and the Mem Overflow message still appears. The Page Protect setting in the printer driver, the Remote Control Panel utility, or SelecType may need to be changed. See “Memory Problems” in this chapter for more information. You may not have installed enough memory. If you are printing at 600 dpi, printing at 300 dpi may solve the problem. Status and Error Messages This section contains an alphabetical list of status, error, and warning messages that appear in the control panel display. Card Battery Low The battery of the optional PCMCIA card is low. Change the battery in the card. Change Card Battery The battery of the optional PCMCIA card is used up. Change the battery in the card. Check Duplex P-Size The paper size setting is different from the size loaded in the printer. Check to see if the correct size of paper is loaded in the tray. Open the printer cover or Duplex Unit cover, then pull out the paper and close the cover. The print data is automatically reprinted. 6-18 Troubleshooting and Maintenance Albatross Rev.c A5 size 96/08/23 Chapter 6 Pass 0, DR If you turn on Size Ignore in the SelecType Config menu, this error does not occur. Check Paper Size The paper size setting is different from the size loaded in the printer. Check to see if the correct size of paper is loaded in the tray; then press the Continue button to clear the message. If you turn on Size Ignore in the SelecType Config menu, this error does not occur. Check Serial I/F This error occurs in serial interfaces. To correct the error, reset the printer by pressing ALT and Reset at the same time. Then set the parity, band rate, number of data bits, and number of stop bits to match the computer. Duplex Mem Overflow There is not enough memory for duplex printing. The printer prints only on the top side and ejects the paper. To correct this error, follow the steps below. If Auto Cont is Off in the SelecType Config menu, (1) press Continue or (2) reset the printer by pressing the ALT and Reset at the same time. If Auto Cont is On in the SelecType Config menu, the error is corrected automatically. Troubleshooting and Maintenance 6-19 R L Albatross Rev.c A5 size 96/08/23 Chapter 6 Pass 0, DR Duplex print was off Turn Duplex mode on in the SelecType menu, then press Continue to clear the message. If this doesn’t solve the problem, one of the conditions below has occured and needs to be fixed. 1) Paper Size is incorrectly set to CTM, MON, C10, DL, C5, or C6; set this option to a supported paper size. 2) Paper Type is set to something other than Normal; set this to Normal. 3) The Duplex Unit is not installed; install the Duplex Unit. 4) The paper size, paper feed, or paper type is different from the top and bottom. To clear the error message, (1) press Continue or (2) reset the printer by pressing ALT and Reset at the same time. EPL-N2000 When Printer Name is on in the SelecType Setup menu, this message appears. Feed Jam Paper is not feeding into the printer from the specified feeder (or cassette) or has jammed on its way into the printer. Remove the jammed paper. See page 6-2 for feed jams in the printer. See page 6-3 for feed jams in the optional paper cassette. See page 6-5 for advice on preventing this problem. 6-20 Troubleshooting and Maintenance Albatross Rev.c A5 size 96/08/23 Chapter 6 Pass 0, DR Form Feed When the printer is off line and data remains in the printer’s memory, pressing Form Feed prints out the data and clears the buffer. After printing, Ready appears on the display. Illegal AUX I/F Card The printer cannot read the installed optional interface card. Turn off the printer, then remove the card. Both the LocalTalk/Serial module (set in LocalTalk) and the LocalTalk Type B interface card are installed simultaneously. Remove one of them. Illegal Card An incompatible PCMCIA card is installed in the printer. To correct this error, (1) turn off the printer and remove the card, then turn on the printer, or (2) remove the card while the printer is on, then press the Continue button. Illegal I/F Module The printer cannot read the installed optional LocalTalk/Serial module. Turn off the printer, then remove the module. Troubleshooting and Maintenance 6-21 R L Albatross Rev.c A5 size 96/08/23 Chapter 6 Pass 0, DR Image Optimum The printer cannot print at the requested quality level because of insufficient memory, and the printer reduces the quality automatically so that the printer can continue printing. Check to see if the printout is acceptable. If not, add more memory (for a permanent solution) or set Device Resolution to Low (300 dpi) and Page Protect to Auto temporarily in the driver. Manual Feed XXX Manual Feed mode is specified for the current print job. Make sure the paper size indicated by XXX is loaded in the MP Tray, then press On Line. If you do not want to print this job in manual mode, press Continue. The printer feeds paper according to the Paper Source setting. For detailed information on the Manual Feed mode, see Chapter 1. Mem Overflow The printer has insufficient memory available for the current task. To correct the error, press Continue. If the message remains, press Reset. You can also clear this error by turning the printer off and back on again. However, it may be necessary to reduce the number or size of fonts, reduce the number or size of graphics, lower the resolution, or add more memory to the printer. 6-22 Troubleshooting and Maintenance Albatross Rev.c A5 size 96/08/23 Chapter 6 Pass 0, DR Operate Error Card The PCMCIA card is installed or removed while the printer is on. To correct the error, (1) reset the printer by pressing ALT and Reset at the same time or (2) turn off the printer; then turn it back on. Paper Jam Paper is jammed in the paper path. Open the printer cover and clear the jammed paper as described in the PAPER JAM section in this chapter. After the jam is cleared, the jammed page’s print data is automatically reprinted. w Warning: Opening the printer cover exposes the fuser, which is marked by a CAUTION Hot Surface Avoid Contact label. Be careful not to touch the fuser. Paper is jammed in the Duplex unit. Open the Duplex unit cover and clear the jammed paper; then close the cover. After jam is cleared, the jammed page’s print data is automatically reprinted. Paper Out XXX YY There is no paper in the specified paper source (XXX). Load paper of the indicated size (YY) into the source. See your Getting Ready! booklet or Chapter 1 for instructions on loading paper. Troubleshooting and Maintenance 6-23 R L Albatross Rev.c A5 size 96/08/23 Chapter 6 Pass 0, DR Paper Set XXX YY The paper loaded in the tray (XXX) does not match the required paper size, (YY). Replace the paper with the correct size of paper and press Continue. Print Overrun The time required to process data exceeds the print engine speed because the volume of data is too great. Press Continue to resume printing. If this message appears again, change the Page Protect setting in SelecType Config Menu. Printer Open The printer cover is open. Close the printer cover to continue printing. Ready The printer is ready to receive data or print. Reset The printer’s current interface has been reset and the buffer is cleared. However, other interfaces are still active and retain their settings and data. 6-24 Troubleshooting and Maintenance Albatross Rev.c A5 size 96/08/23 Chapter 6 Pass 0, DR Reset All All printer settings have been reset to the user default configuration, the last settings that were saved. Reset to Save You have changed the SelecType setting but the new setting is not activated immediately after exiting SelecType. To activate the new setting, do one of the following: (1) exit SelecType by pressing Continue or On Line (the new setting is activated after the current print job is finished), or (2) reset the printer by pressing ALT and Reset at the same time. Self Test The printer is performing its internal check cycle. It finishes soon. ROM Check The printer is checking the ROM. RAM check The printer is checking the RAM. Troubleshooting and Maintenance 6-25 R L Albatross Rev.c A5 size 96/08/23 Chapter 6 Pass 0, DR Service Req.CXXX Service Req.EXXX A controller error or a print engine error has been detected. Write down the error number listed on the display and turn off the printer. Wait at least five seconds and then turn it back on. If the error message still appears, turn off the printer, unplug the power cord, and contact a qualified service person. Standby The printer is in its low power state; however, it is still on line if the On Line light is on. Toner Low The printer is almost out of toner. You should prepare a new imaging cartridge; the toner will be out soon. Toner Out You must replace the imaging cartridge. Replace it as described later in this chapter. Press Continue to print one more page. Turn Paper The paper’s direction set in LC1 or LC2 is not correct. To correct this error, reset the direction. 6-26 Troubleshooting and Maintenance Albatross Rev.c A5 size 96/08/23 Chapter 6 Pass 0, DR Write Error Card The card is not able to write or the card is not installed. Otherwise, writing to the card was not finished correctly. To correct this error, (1) turn off the printer and remove the card, then turn on the printer, (2) remove the card while the printer is on, then press the Continue button, or (3) reset the printer by pressing the ALT and Reset button at the same time. Writing Card The printer is writing data in the PCMCIA card. Warming Up The printer is warming up. Troubleshooting and Maintenance 6-27 R L Albatross Rev.c A5 size 96/08/23 Chapter 6 Pass 0, DR Hex Dump Mode Hex Dump Mode (also called data dump) is a special feature that makes it easy for experienced users to find the cause of communication problems between the printer and the computer. In Hex Dump Mode the printer produces an exact printout of the codes it receives. 1. Make sure the paper is loaded and the printer is off. 2. Hold down the Form Feed button while you turn on the printer. Make sure you hold the button down until you see the message HEX Dump on the display. 3. Run any program that causes the printer to print. Your printer prints out all the codes it receives in hexadecimal format. 4. To turn off the Hex Dump Mode, turn off the printer or reset it by pressing and holding the ALT and Continue buttons at the same time. When Reset All appears on the display, release the buttons. 6-28 Troubleshooting and Maintenance Albatross Rev.c A5 size 96/08/23 Chapter 6 Pass 0, DR Replacing the Imaging Cartridge The Imaging Cartridge prints up to 10,000 pages depending upon the complexity of your print jobs. If your printed images become faint, enter the SelecType Setup menu to use the Toner function to find out approximately how much toner remains in the imaging cartridge. Simply count the asterisks between the E (empty) and the F (full) on the display. Each asterisk represents about 25% of the total toner capacity. If you see only one asterisk on the display indicating that there is less than 25% toner left, you should get ready to replace the Imaging Cartridge. When replacing a cartridge, be sure to use the S051035 Imaging Cartridge. Even if you have a cartridge other than S051035, do not use it; order the S051035 cartridge that is specially designed for your high-quality 600 dpi printer. w Warning: Do not touch the fuser, which is marked with a CAUTION Hot Surface Avoid Contact label. 1. Make sure the printer is turned on. 2. Gently open the printer cover and remove the Imaging Cartridge by pulling it up toward you. 3. Dispose of the used Imaging Cartridge with nonburnable items. c Caution: Do not turn the Imaging Cartridge upside down. Do not expose the Imaging Cartridge to light any longer than necessary. Troubleshooting and Maintenance 6-29 R L Albatross Rev.c A5 size 96/08/23 Chapter 6 Pass 0, DR 4. While holding the cartridge horizontally, gently shake it a few times to distribute the toner evenly. s-8 5. Set the Imaging Cartridge on a clean, flat surface. Firmly grip the tab on the right side of the Imaging Cartridge. Pull the clear seal all the way out with firm, even pressure as shown. s-9 6-30 Troubleshooting and Maintenance Albatross Rev.c A5 size 96/08/23 R Chapter 6 Pass 0, DR 6. Insert the pins on each side of the Imaging Cartridge into the grooves inside the printer, and slide the cartridge gently into place. Then push down the handle until the Imaging Cartridge is horizontal. r6-9 7. Gently press down on the printer cover until it clicks shut. r6-10 c Caution: Never transport the printer with the Imaging Cartridge installed. Troubleshooting and Maintenance 6-31 L Albatross Rev.c A5 size 96/08/23 Chapter 6 Pass 0, DR Optimizing Print Quality Adjusting RITech Resolution Improvement Technology (RITech) is EPSON’s new printer technology that improves the appearance of printed lines, text, and graphics. The RITech setting The factory setting for RITech gives the best quality text and graphics for nearly all purposes. You may not need to set or adjust anything. Occasionally, however, adjusting the RITech setting may further improve the print quality. For example, you may want to change the setting after you replace an imaging cartridge or if you notice that your printing is not as smooth and crisp as it should be. Before adjusting the RITech setting, print a status sheet for a RITech test pattern to help you in determining which setting is best for you. Note: Before printing a status sheet, turn the Toner Save Mode off with the Windows driver, the Remote Control Panel, or the SelecType mode. The RITech test pattern is not printed when the Toner Save Mode is on. RIT,RITA out of adjustment 6-32 Troubleshooting and Maintenance optimal setting Albatross Rev.c A5 size 96/08/23 Chapter 6 Pass 0, DR If the test pattern seems too heavy, change the setting to Light as described below; if it seems too light, change the setting to Dark; if you are printing gray shading or screen patterns, change the setting to Off. To change the RITech setting, follow these steps: Using the printer driver: Changing the RITech setting on the Printer SelecType menu in the printer driver. Using the Remote Control Panel utility: Bring up the Remote Control Panel utility by typing EPRCPO at the DOS prompt; select the appropriate emulation from the main Remote Control Panel window; click the Printer Setup button; then change the RITech setting. Using SelecType: For information on using SelecType, see Chapter 5. If the pattern still needs to be improved, you may have to change the print density setting. For a darker RITech setting, make the print density lighter and vice versa. See the next section for more information. Adjusting print density Do not change the print density unless it is necessary. Changing the print density affects all text and graphics, so check the new setting by printing several pages with various kinds of text and graphics. If your test pages are too light or too dark, adjust the print density by using the printer driver, the Remote Control Panel utility, or the SelecType mode. Troubleshooting and Maintenance 6-33 R L Albatross Rev.c A5 size 96/08/23 Chapter 6 Pass 0, DR Using the printer driver: Change the Density setting on the Printer SelecType menu in the printer driver. Using the Remote Control Panel utility: Bring up the Remote Control Panel utility by typing EPRCPO at the DOS prompt; select the appropriate emulation from the main Remote Control Panel window; click the Printer Setup button; then change the Density setting. Using the SelecType mode: For information on using SelecType, see Chapter 5. Note: Increasing the print density increases toner consumption. If you select darker print, you may need to replace the Imaging Cartridge more often. Resetting the Printer There are two ways to reset (return to a fixed set of conditions) the printer. Reset Reset the settings for the emulation mode and interface you are using now by holding down ALT and Reset until Reset appears on the display. You can reset the printer anytime a printout is not being sent on the interface you are using. Reset all Reset the settings for all emulation modes and interfaces by holding down ALT and Reset until Reset All appears on the display. You can also reset all emulation modes and interfaces by turning off and turning on the printer. Note: Reset all clears all print jobs received from all interfaces, so be careful not to disrupt someone else’s print job. 6-34 Troubleshooting and Maintenance Albatross Rev.c A5 size 96/08/23 Chapter 6 Pass 0, DR R Cleaning the Printer The printer needs only minimal cleaning. If you notice a decline in print quality, clean the glass lens and the inside of the printer, as described in this section. You should also clean the paper feeder and the printer cover every few months. These procedures are described later in this section. Follow the steps below to clean the inside of the printer and the paper feeder: 1. Make sure the printer is turned off. 2. Open the printer cover. w Warning: Opening the printer exposes the fuser, which is marked by a caution label. If you have used the printer recently, the fuser may be hot; be careful not to touch it. Let the printer cool before you clean the inside. 3. Remove the imaging cartridge from the printer. 4. Remove any dirt with a soft cloth. r6-11 Troubleshooting and Maintenance 6-35 L Albatross Rev.c A5 size 96/08/23 Chapter 6 Pass 0, DR 5. Reinstall the Imaging Cartridge. 6. Close the printer cover. 7. Open the front cover and clean the paper feeder with a soft cloth. Removing spilled toner If toner spills inside the printer, do not use the printer until you remove all the spilled toner. Follow these steps: 1. If only a small amount of toner is present, carefully wipe out the inside of the printer with a dry cloth. 2. If a large amount of toner is present, use a small vacuum cleaner (available from computer supply stores) to remove it. c Caution: Toner or any other fine powder can damage some vacuum cleaners. Be sure to read the instructions for your vacuum cleaner before you use it on spilled toner. Note: If you spill toner on your clothing, rinse it off with cold water. Do not use hot water; it may cause the toner to leave a permanent stain. 6-36 Troubleshooting and Maintenance Albatross Rev.c A5 size 96/08/23 Chapter 6 Pass 0, DR Cleaning the printer case If the printer’s outer case is dirty or dusty, turn off the printer and clean it with a soft, clean cloth dampened with a mild detergent. c Caution: Never use alcohol or thinner to clean the printer cover; these chemicals can damage the components and the case. Be careful not to get water on the printer mechanism or any electronic components. Transporting the Printer If you need to transport your printer some distance, carefully repack it using the original box and packing materials as follows: 1. Turn off the printer. 2. Open the printer cover and remove the Imaging Cartridge. 3. Unplug the power cord from the electrical outlet; then disconnect the interface cable from the printer. 4. Remove the optional lower paper cassette, if installed. 5. Attach the protective materials to the printer; then repack the printer in its original box. c Caution: Do not expose the Imaging Cartridge to light any longer than necessary. Troubleshooting and Maintenance 6-37 R L Albatross Rev.c A5 size 96/08/23 6-38 Chapter 6 Pass 0, DR Troubleshooting and Maintenance Proof Sign-off: Nishi Norum Grady Albatross Rev.c _______ _______ _______ A5 size 96/08/23 R Appendix A pass 0 Appendix A Technical Specifications Paper . . . . . . . . . . . . . . . . . . . . . . . . . . . . . . . . . . . A-2 Specifications . . . . . . . . . . . . . . . . . . . . . . . . . . . . A-2 Printer . . . . . . . General . . . . Environmental Mechanical . . Electrical . . . . . . . . . . . . . . . . . . . . . . . . . . . . . . . . . . . . . . . . . . . . . . . . . . . . . . . . . . . . . . . . . . . . . . . . . . . . . . . . . . . . . . . . . . . . . . . . . . . . . . . . . . . . . . . . . . . . . . . . . . . . . . . . . . . . . . . . . . . . . . A-3 A-3 A-4 A-4 A-5 Interface . . . . . . . . . Parallel B interface . Parallel C interface Ethernet Interface . . . . . . . . . . . . . . . . . . . . . . . . . . . . . . . . . . . . . . . . . . . . . . . . . . . . . . . . . . . . . . . . . . . . . . . . . . . . . . . . . . . . . . . . . . . . . . . . . . . . . A-5 A-5 A-7 A-12 Options and Consumables . . . . . . . . . . . . . 250 Sheet Lower Paper Cassette (C81269✽)/ 250 Sheet Paper Tray (C81270✽) . . . . . . . 500 Sheet Lower Paper Cassette (C81264✽)/ 500 Sheet Paper Tray (C81266✽) . . . . . . . Duplex Unit (C81268✽) . . . . . . . . . . . . . Imaging Cartridge (S051035) . . . . . . . . . . . . . . . . . . . . A-12 . . . . . . . . . . A-12 . . . . . . . . . . A-13 . . . . . . . . . . A-13 . . . . . . . . . . A-14 Technical Specifications A-1 A L Albatross Rev.c A5 size 96/08/23 Appendix A pass 0 Paper Specifications Note: Since the quality of any particular brand or type of paper may be changed by the manufacturer at any time, EPSON cannot guarantee the guality of any type of paper. Always test samples of paper stock before purchasing large quantities or printing large jobs. Paper Types: Plain paper, recycled paper, labels, envelopes, transparencies, colored paper, card stock, letter head Note: Use recycled paper under normal temperature and humidity conditions only. Poor quality paper may reduce print quality, cause paper jams and other problems. Paper weight: Plain paper Card stock 60 to 90 g/m2, 16 to 24 lb 90 to 157 g/m2, 24 to 42 lb Paper size: Paper A-2 Technical Specifications A3+ (328 mm × 453 mm) A3 (297 mm × 420 mm) B4 (257 mm × 364 mm) A4 (210 mm × 297 mm) A5 (148 mm × 210 mm) B5 (182 mm × 257 mm) Ledger (11 mm × 17 inches) Letter (8.5 × 11 inches) Half-Letter (5.5 × 8.5 inches) Legal (8.5 × 14 inches) Government Letter (8.5 × 10.5 inches) Government Legal (8.5 × 13 inches) Executive (7.25 × 10.5 inches) F4 (210 mm × 330 mm) Custom (92 ~ 216 mm 148.5 ~ 356 mm) Albatross Rev.c A5 size 96/08/23 Envelopes: c Appendix A pass 0 Monarch (3 7/8 × 7 1/2 inches) Commercial 10 (4 1/8 × 9 1/2 inches) DL (110 mm × 220 mm) C5 (162 mm × 229 mm) International B5 (176 mm × 250 mm) C6 (114 mm × 162 mm) Caution: Only load paper sizes that are listed above. Printable area: 4 mm minimum margin on all sides (A3+: 297 mm × 420 mm) Note: Printable area varies according to the emulation mode. Printer General Printing method: Laser beam scanning and dry electrophotographic process Resolution: 600 × 600 dpi Printing speed: Up to 20 pages per minute with A4/letter depending on the font and quantity of data First print: Less than 16 seconds with A4/letter Warm-up time: About 70 seconds at normal temperature Paper feed: Automatic or manual feed Paper feed alignment: Center alignment for all sizes Input paper supply (75g/m2 paper): Paper eject: Up to 150 sheets in the MP Tray Up to 500 sheets in the lower paper cassette Up to 10 envelopes, depending on thickness Face down Technical Specifications A-3 R L Albatross Rev.c A5 size 96/08/23 Appendix A pass 0 Paper eject capacity (75g/m2 paper): 500 sheets Internal emulation: HP LaserJet4 emulation (LJ4 mode) HP-GL/2 emulation (GL2 mode) ESC/P 24-pin printer emulation (ESC/P2 mode) ESC/P 9-pin printer emulation (FX mode) IBM Proprinter emulation (I239X mode) Optional emulation: EPSONScript Level 2 Resident fonts: 45 scalable fonts, and one bitmap font (in LJ4 mode) RAM: 4 MB, expandable up to 68 MB Environmental Temperature: Operation: Storage: 10 to 35ºC (50 to 95ºF) 0 to 35ºC (32 to 95ºF) Humidity: Operation: Storage: 15 to 85% RH 30 to 85% RH Altitude: 2,500 meters (8200 feet) maximum Mechanical A-4 Dimensions and weight: Height: Width: Depth: Weight: Durability: 5 years or 360,000 sheets, whichever comes first Technical Specifications 408 mm (16.1 inches) 561 mm (22.1 inches) 545.5 mm (21.5 inches) Approx. 17 kg (34.7 lb) including the imaging cartridge Albatross Rev.c A5 size 96/08/23 Appendix A pass 0 Electrical 120 V model 230 V model Voltage 108 V to 132 V 207 V to 253 V Rated frequency 50 Hz to 60 Hz ± 3 Hz 50Hz to 60Hz ± 3Hz Rated current 7A 4A Power consumption Less than 750 W Less than 750 W Power consumption * in Standby mode Less than 45 W Less than 45 W * No option installed Note: Check the label on the back of the printer for the voltage of your printer. Interface Parallel B interface The parallel B (IEEE 1284-I compliant) interface connector pin assignments are shown in the table below. Pin No. Direction IEEE 1284-B connector Compatibility Nibble nStorbe ECP 1 IN 2 IN/OUT DATA1 HostClk 3 IN/OUT DATA2 4 IN/OUT DATA3 5 IN/OUT DATA4 6 IN/OUT DATA5 7 IN/OUT DATA6 8 IN/OUT DATA7 9 IN/OUT DATA8 10 OUT nACK PtrClk PeriphClk 11 OUT Busy PrtBusy PeriphAck Technical Specifications A-5 R L Albatross Rev.c A5 size 96/08/23 Appendix A pass 0 Pin No. Direction IEEE 1284-B connector Compatibility Nibble ECP 12 OUT PError AckDataReq nAckReverse 13 OUT Select 14 IN nAutoFd Xflag HostBusy 15 NC 16 GND 17 CG 18 OUT HostAck PeripheralLogic High 19 - 30 GND 31 IN 32 OUT nlnit nFault nReverse Request nDataAvail 33 GND 34 NC 35 OUT 36 IN nPeriphRequest +5V nSelectln IEEE1284 Active Note: The column heading “Direction” refers to the direction of signal flow as viewed from the printer. A-6 Technical Specifications Albatross Rev.c A5 size 96/08/23 Appendix A pass 0 Parallel C interface The parallel C (IEEE 1284-II compliant) interface connector pin assignments and a description of the interface signals are shown in the table below. Pin No. Direction IEEE1284-C connector Compatibility Nibble ECP PtrBusy PeriphAck 1 OUT Busy 2 OUT Select 3 OUT nAck PtrClk PeriphClk 4 OUT nFault nDataAvail nPriphRequest 5 OUT PError AckDataReq nAckReverse 6 IN/OUT DATA1 7 IN/OUT DATA2 8 IN/OUT DATA3 Xflag 9 IN/OUT DATA4 10 IN/OUT DATA5 11 IN/OUT DATA6 12 IN/OUT DATA7 13 IN/OUT DATA8 14 IN 15 IN nStrobe 16 IN nSelectln 17 IN nAutoFd 18 IN HostLogicHigh OUT PeripheralLogic High 19 - 35 36 nlnit nReverseRequest HostClk IEEE1284 Active HostBusy HostAck GND Note: The column heading “Direction” refers to the direction of signal flow as viewed from the printer. Technical Specifications A-7 R L Albatross Rev.c A5 size 96/08/23 Appendix A pass 0 nStrobe/HostClk Compatibility mode: Latch pulse used to read in print data. When low, DATA is valid. negotiation phase: Latch pulse used to read in extensibility request values. Nibble mode: Always high. ECP mode: Used to transfer data and addresses from the host to the printer with handshaking via PeriphAck (Busy). DATA1 to DATA8 (bidirectional, but may always be an input if ECP or EPP mode is not supported) Compatibility mode: Forward channel data. negotiation phase: Extensibility request value. Nibble mode: Not used. ECP mode: Bi-directional data. nACK/PtrClk/PeriphClk All modes: DATA8 is the MSB, DATA1 is the LSB. Compatibility mode: Acknowledgment low pulse in order to indicate that data was transferred from the host. negotiation phase: Low signal indicates IEEE 1284 is supported; set to high afterwards to indicate that the Xflag and “data available” flag are valid. reverse data transfer phase: In nibble mode, a low signal indicates that the nibble data is valid. reverse idle phase: When switched from low to high, generates an interrupt that notifies the host that there is data available. ECP mode: Used to transfer data from the printer to the host with handshaking via HostAck (nAutoFd). A-8 Technical Specifications Albatross Rev.c A5 size 96/08/23 Appendix A pass 0 Busy/PtrBusy/PeriphClk Compatibility mode: High signal indicates that the printer is not ready to receive data. negotiation phase: Reflects the BUSY status of the forward channel. reverse data transfer phase: In nibble mode, this signal serves as nibble data bit 3 and then 7. reverse idle phase: Reflects the BUSY status of the forward channel. ECP mode: Used for forward direction flow control. In reverse direction, this signal is used as a ninth data bit that indicates whether the data signals indicates a command or data. PError/AckDataReq/nAckReverse Compatibility mode: High signal indicates that a feed jam occurred in the paper supply section, or that there is no paper in the paper tray. negotiation phase: High signal indicates whether or not IEEE 1284 is supported or not. Afterwards, this signal conforms with nDataAvail (nFault). reverse data transfer phase: In nibble mode, this signal serves as nibble data bit 2 and then 6. reverse idle phase: High until the host requests a data transfer. Afterwards, this signal conforms with nDataAvail (nFault). ECP mode: Low signal authorizes nReverseRequest. The host looks at this signal in order to determine whether or not it has permission to drive the data signals. Select/Xflag Compatibility mode: Always high. negotiation phase: Xflag indicates the extensibility flag. Used to respond to the extensibility request value sent from the host. reverse data transfer phase: In nibble mode, this signal serves as nibble data bit 1 and then 5. reverse idle phase: Same as negotiation phase. ECP mode: Same as negotiation phase. Technical Specifications A-9 R L Albatross Rev.c A5 size 96/08/23 Appendix A pass 0 nAutoFd/HostBusy/HostAck Compatibility mode: Not used. negotiation phase: In order to request 1284 mode, this signal is set low and IEEE 1284 Active (nSelectln) is set high. Afterwards, this signal is set high when PtrClk (nAck) is set low. reverse data transfer phase: In nibble mode, setting this signal low indicates to the printer that the host is ready to receive data. When this signal is subsequently set high, it indicates that the host received the data. reverse idle phase: This signal is set high in response to a PtrClk (nAck) low pulse in order to return to the reverse data phase. If this signal is set high at the same time that IEEE 1284 Active (nSelectln) is set low the IEEE 1284 idle phase is aborted and the interface returns to compatibility mode. ECP mode: Used for reverse direction flow control. Also used for handshaking via PeriphClk (nAck). NC Not used. PeripheralLogicHigh Parallel B: NC. Parallel C: Pull up to +5V with 3.9 KΩ. nlnit/nReverseRequest Compatibility mode: When a low signal is detected, the printer is deemed to be BUSY until the low signal is released. negotiation phase: Always high. reverse data transfer phase: Always high. ECP mode: Low when switching to reverse direction. The peripheral device has permission to drive the data signals only when this signal is low and IEEE 1284 Active is high. A-10 Technical Specifications Albatross Rev.c A5 size 96/08/23 Appendix A pass 0 nFault/nDataAvail/nPeriphRequest Compatibility mode: Low signal indicates that an error occurred. negotiation phase: This signal is set high in order to authorize 1284 compatibility. In nibble mode, after the host sets HostBusy (nAutoFd) high, this signal is set low in order to indicate that the transmission data is ready. reverse data transfer phase: This signal is set low in order to indicate to a nibble mode host that the transmission data is ready. Afterwards, this signal serves as nibble data bit 0 and then 4. reverse idle phase: Indicates whether or not the data is valid. ECP mode: This signal is set low to request communications with the host. Valid in both forward and reverse direction. nSelectln/IEEE1284 Active Compatibility mode: Always low. negotiation phase: This signal is set high at the same time that HostBusy is low in order to request 1284 mode. reverse data transfer phase: This signal is set high to indicate that the bus direction is from the printer to the host. This signal is set low to terminate 1284 mode, setting the bus direction from the host to the printer. reverse idle phase: Same as reverse data transfer phase. ECP mode: Always high. This signal is set low to terminate ECP mode and return to compatibility mode. HostLogicHigh NC. (Not used.) GND Twisted pair return signal. CG Connected to the printer chassis. This signal and GND are connected. +5V Pull up to +5V with 1 KΩ Technical Specifications A-11 R L Albatross Rev.c A5 size 96/08/23 Appendix A pass 0 Ethernet Interface You can use a IEEE 802.3 10BASE2 RG-58A/U coaxial cable via BNC connector or IEEE 802.3 10BASE-T straight-through twisted pair modular cable via RJ45 connector. Options and Consumables 250 Sheet Lower Paper Cassette (C81269✽)/ 250 Sheet Paper Tray (C81270✽) Paper size: A3, B4, F4, A4, B5, International B5, A5, Ledger, Legal, GLG, Letter, GLT, Exective, HLT Paper weight: 60 to 90 g/m2 (16 to 24 lb) Paper feed: Automatic feed delivery system Cassette capacity up to 250 sheets (75 g/m2 or 20 lb paper) Feeding speed: For the first sheet with A4 or letter, 16 seconds or less; subsequent sheets with A4 or letter, 20 pages per minute Paper types: Plain paper, such as copier paper, and recycled paper AC power supply: DC 5V supplied by the printer Dimensions and weight: A-12 Height 104.5 mm (4.1 inches) Width 545 mm (21.5 inches) Depth 520 mm (20.5 inches) Weight 5.5 kg (12.1 lb) Technical Specifications Albatross Rev.c A5 size 96/08/23 Appendix A pass 0 500 Sheet Lower Paper Cassette (C81264✽)/ 500 Sheet Paper Tray (C81266✽) Paper size: A4 Paper weight: 60 to 90 g/m2 (16 to 24 lb) Paper feed: Automatic feed delivery system Cassette capacity up to 500 sheets (75 g/m2 or 20 lb paper) Feeding speed: For the first sheet, 16 seconds or less; subsequent sheets, 20 pages per minute Paper types: Plain paper, such as copier paper, and recycled paper AC power supply: DC 5 V supplied by the printer Dimensions and weight: Height 104.5 mm (4.1 inches) Width 545 mm (21.5 inches) Depth 377 mm (18.9 inches) Weight 5.0 kg (11.0 lb) Duplex Unit (C81268✽) Paper size: A3, B4, F4, A4, B5, International B5, A5, Ledger, Legal, GLG, Letter, GLT, Exective, HLT Paper weight: 60 to 90 g/m2 (16 to 24 lb) Feeding speed: For the first sheet with A4 or letter, 26 seconds or less; subsequent sheets with A4 or letter, 12 pages per minute AC power supply: DC 24 V supplied by the printer Dimensions and weight: Height 243.5 mm (9.6 inches) Width 424 mm (16.7 inches) Depth 71 mm (2.8 inches) Weight 2.0 kg (4.4 lb) Technical Specifications A-13 R L Albatross Rev.c A5 size 96/08/23 Appendix A pass 0 Imaging Cartridge (S051035) Storage temperature: 0 to 35°C (32 to 95°F) Storage humidity: 30 to 85% RH Shelf life: 18 months after production Life: Up to 10,000 pages under the following conditions: Letter or A4-size paper, continuous printing, and 5% print ratio The number of pages you can print with an imaging cartridge varies depending on the type of printing. If you print a few pages at a time or print dense text exceeding the 5% print ratio, your cartridge may print fewer pages. A-14 Technical Specifications Proof Sign-off: Nishi Grady _______ _______ Albatross Rev.c A5 size 96/08/23 R Appendix B pass 0 Appendix B Symbol Sets Introduction to Symbol Sets . . . . . . . . . . . . . . . . . . . . . . B-2 In LJ4 Emulation Mode . . . . . . . . . . . . . . . . . . . . . . . . . B-3 International Set for ISO sets . . . . . . . . . . . . . . . . . . . . B-18 In ESC/P 2 or FX Modes . . . . . . . . . . . . . . . . . . . . . . . . B-19 International Character Sets . . . . . . . . . . . . . . . . . . . . B-23 Characters available with the ESC (^ command . . . . . . . . . B-24 In I239X Emulation Mode . . . . . . . . . . . . . . . . . . . . . . . B-24 In EPSON GL/2 Mode . . . . . . . . . . . . . . . . . . . . . . . . . B-24 B Symbol Sets B-1 L Albatross Rev.c A5 size 96/08/23 Appendix B pass 0 Introduction to Symbol Sets Your printer can access a variety of symbol sets. Many of these symbol sets differ only in the international characters specific to each language. Note: Normally, your software handles fonts and symbols, so you probably never need to adjust the printer’s settings. If you are writing your own printer control programs, or if you are using older software that cannot control fonts, refer to the following sections for symbol set details. When you are considering which font to use, you should also consider which symbol set to combine with the font. Available symbol sets vary depending on which emulation mode you use and which font you choose. B-2 Symbol Sets Albatross Rev.c A5 size 96/08/23 Appendix B pass 0 In LJ4 Emulation Mode The following table lists the symbol sets available in LJ4 emulation mode. A table of the characters for each set is included later in this chapter. Symbol set name Roman-8* (includes another 19 sets) Roman Extension ECM94-1 Legal 8859-2 ISO PsMath 8859-9 ISO WiTurkish MsPublishing VeMath DeskTop Math-8 WiE.Europe PcTk437 Windows PsText IBM-US IBM-DN McText PcMultilingual VeInternational VeUS PiFont PcE.Europe Symbol WiAnsi Wingdings Symbol set ID for ESC ( 8U 0E 0N 1U 2N 5M 5N 5T 6J 6M 7J 8M 9E 9T 9U 10J 10U 11U 12J 12U 13J 14J 15U 17U 19M 19U 579L Available typefaces (see next page) 43 typefaces + bitmap** bitmap 43 typefaces + bitmap 43 typefaces + bitmap 43 typefaces + bitmap 35 typefaces 43 typefaces + bitmap 43 typefaces 35 typefaces 35 typefaces 43 typefaces 35 typefaces 43 typefaces 43 typefaces 43 typefaces 43 typefaces 43 typefaces + bitmap 43 typefaces + bitmap 43 typefaces 43 typefaces + bitmap 43 typefaces 43 typefaces 35 typefaces 43 typefaces Symbol Set SWA 43 typefaces More WingBats SWM * The other 19 sets are the following: Norweg1, Italian, Swedish, ANSI ASCII, UK, French, German, Spanish, Norweg2, French2, HP German, JIS ASCll, HP Spanish, Chinese, IRV, Swedis2, Portuguese, IBM Portuguese, and IBM Spanish. These are partial variations of the Roman-8 set. **“ Bitmap” means the “ Line Printer” typeface. All other typefaces are scalable. Symbol Sets B-3 R L Albatross Rev.c A5 size 96/08/23 Appendix B pass 0 The 35 and 43 typefaces refer to those shown in the table below: Typefaces B-4 35 43 Flareserif 821 SWC Incised 901 SWC Clarendon Condensed SWC Ribbon 131 SWC Original Garamond SWC Audrey Two SWC Zapf Humanist 601 SWC Swiss 742 Condensed SWC N N N N N N N N N N N N N N N N Swiss 721 SWM Dutch 801 SWM — — N N Courier SWC Letter Gothic SWC Dutch 801 SWC Swiss 742 SWC N N N N N N N N Symbol Sets Albatross Rev.c A5 size 96/08/23 Appendix B pass 0 R Roman-8 (8U) Romon-8 ECM94-1 (0N) ECM94-1 Symbol Sets B-5 L Albatross Rev.c A5 size 96/08/23 Appendix B pass 0 Legal (1U) LIGAL 8859-2 ISO (2N) 8859-2 B-6 Symbol Sets Albatross Rev.c A5 size 96/08/23 Appendix B pass 0 R PsMath (5M) PsMath 8859-9 ISO(5N) 8859-9 Symbol Sets B-7 L Albatross Rev.c A5 size 96/08/23 Appendix B pass 0 WiTurkish (5T) WiTurkish MsPublishing (6J) MsPublishing B-8 Symbol Sets Albatross Rev.c A5 size 96/08/23 Appendix B pass 0 R VeMath (6M) VeMath DeskTop (7J) DeskTop Symbol Sets B-9 L Albatross Rev.c A5 size 96/08/23 Appendix B pass 0 Math-8M Math-8 WiE.Europe (9E) WiE.Europe B-10 Symbol Sets Albatross Rev.c A5 size 96/08/23 Appendix B pass 0 R PcTk437 (9T) PcTk437 Windows (9U) Windows Symbol Sets B-11 L Albatross Rev.c A5 size 96/08/23 Appendix B pass 0 PsText (10J) PsText IBM-US (10U) IBM-US B-12 Symbol Sets Albatross Rev.c A5 size 96/08/23 Appendix B pass 0 R IBM-DN (11U) IBM-DN McText (12J) McText Symbol Sets B-13 L Albatross Rev.c A5 size 96/08/23 Appendix B pass 0 PcMultilingual (12U) PcMulti VeInternational (13J) Velnter B-14 Symbol Sets Albatross Rev.c A5 size 96/08/23 Appendix B pass 0 R VeUS (14J) VeUS PiFont (15U) PiFont Symbol Sets B-15 L Albatross Rev.c A5 size 96/08/23 Appendix B pass 0 PcE.Europe (17U) Pce.Europe Symbol (19M) Symbol B-16 Symbol Sets Albatross Rev.c A5 size 96/08/23 Appendix B pass 0 R WiAnsi (19U) WiAnsi Wingdings (579L) Wingdings Symbol Sets B-17 L Albatross Rev.c A5 size 96/08/23 Appendix B pass 0 International Set for ISO sets To obtain the symbol sets listed below, substitute the characters in the ANSI ASCII sets with the characters in the table below. ASCII code hex Iso set ANSI ASCII (0U) Norweg 1 (0D) French (0F) HP German (0G) Italian (0l) JlS ASCII (0K) Swedis 2 (0S) Norweg 2 (1D) UK (1E) French 2 (1F) German (1G) HP Spanish (1S) Chinese (2K) Spanish (2S) IRV (2U) Swedish (3S) Portuguese (4S) IBM Portuguese (5S) IBM Spanish (6S) B-18 Symbol Sets 23 24 40 5B 5C 5D 5E 60 7B 7C 7D 7E Albatross Rev.c A5 size 96/08/23 Appendix B pass 0 R In ESC/P 2 or FX Modes PC 437, 850, 860, 863, 865 857, 852, BRASCII, Abicamp PC 437 EPSON Roman N × × Courier SWC N N × EPSON Sans serif N × × EPSON Prestige N × × EPSON Script N × × Letter Gothic SWC N N × Swiss 721 SWM N N × Dutch 801 SWM N N × OCR B × × N *Available only in ESC/P 2 mode. PC437 (U.S./Standard Europe) PC437 Symbol Sets B-19 L Albatross Rev.c A5 size 96/08/23 Appendix B pass 0 PC850 (Multilingual) PC860 (Portuguese) PC850, 860 PC863 (Canadian-French) PC865 (Norwegian) PC863, 865 B-20 Symbol Sets Albatross Rev.c A5 size 96/08/23 PC857 (PcTurk2) Appendix B pass 0 R PC852 (East Europe) PC857, 852 BRASCII Abicomp BRA,Abi Symbol Sets B-21 L Albatross Rev.c A5 size 96/08/23 Appendix B pass 0 Italic Italic No characters are available for hex code 15 in the italic character table. B-22 Symbol Sets Albatross Rev.c A5 size 96/08/23 Appendix B pass 0 International Character Sets You can select one of the following international character sets using either SelecType or the ESC R command. For example, when you select “Italic France” in SelecType, the characters in the “France” row in the table below are used in the italic character table. Country ASCII code hex 23 24 40 5B 5C 5D 5E 60 7B 7C 7D 7E USA France Germany UK Denmark Sweden Italy Spain Japan Norway DenmarkII Spain II Latin America Korea* Legal* * Available for ESC/P 2 emulation only Symbol Sets B-23 R L Albatross Rev.c A5 size 96/08/23 Appendix B pass 0 Characters available with the ESC (^ command To print the characters in the table below, use the ESC (^ command. In I239X Emulation Mode Available symbol sets in I239X mode are PC437, PC850, PC860, PC863, and PC865. Refer to “ESC/P 2 or FX modes” in the previous section. Available fonts are EPSON Sans Serif, Courier SWC, EPSON Prestige, EPSON Gothic, EPSON Presentor, EPSON Orator, and EPSON Script. In EPSON GL/2 Mode Available symbol sets in EPSON GL/2 mode are the same as those in LaserJet 4 emulation mode. Refer to the section on LaserJet 4 mode. B-24 Symbol Sets Proof Sign-off: Nishi Grady Albatross Rev.c _______ _______ A5 size 96/08/23 R Appendix C pass 0 Appendix C Command Summary C LaserJet 4 (LJ4) Emulation Commands . . . . . . . . . . . . . . . . C-3 GL/2 context commands . . . . . . . . . . . . . . . . . . . . . . C-7 ESC/P 2 and FX Commands . . . . . . . . . . . . . . . . . . . . . . C-9 ESC/P 2 mode . . . . . . . . . . . . . . . . . . . . . . . . . . . . C-9 FX mode . . . . . . . . . . . . . . . . . . . . . . . . . . . . . . . C-12 PJL Commands . . . . . . . . . . . . . . . . . . . . . . . . . . . . . C-15 I239X Emulation Commands Page format . . . . . . . Text . . . . . . . . . . . . Auxiliary Functions . . . AGM Mode . . . . . . . . . . . . . . . . . . . . . . . . . . . . . . . . . . . . . . . . . . . . . . . . . . . . . . . . . . . . . . . . . . . . . . . . . . . . . . . . . . . . . . . . . . . . . . . . . . . . . . . . . . . . . . . . . . . . . C-16 C-16 C-17 C-18 C-19 Command Summary C-1 L Albatross Rev.c A5 size 96/08/23 Appendix C pass 0 Your printer has the ability to emulate the following printers depending on the printer emulation mode: LJ-4 Hewlett-Packard LaserJet 4 (PCL5e) ESC/P 2 EPSON LQ-570 (24-pin) FX EPSON FX-870/1170, or LX-100 (9-pin) GL/2 Hewlett-Packard GL/2 graphics language In addition, the following printer control languages are supported: PJL Printer Job Language EJL EPSON Job Control Language This appendix lists the printer commands for these modes. Most of the commands closely emulate the original printer or the control language; however, some have operational differences because the printers use different technologies. Additional information is provided in the descriptions of control commands with these differences. For more information on emulation modes, refer to the following sections: C-2 Changing the emulation mode Chapter 5 Available symbol sets or character tables Appendix B Using the printer as an ESC/P 2 printer Chapter 5 Using the printer as an FX printer Chapter 5 Using the printer as a GL/2 plotter Chapter 5 Command Summary Albatross Rev.c A5 size 96/08/23 Appendix C pass 0 LaserJet 4 (LJ4) Emulation Commands This section lists the printer commands supported in the LJ4 emulation mode. For more information on printer commands, see HewlettPackard’s LaserJet 4 reference manual. Job control Reset Number of copies Universal exit language Long-edge (left) offset registration Short-edge (right) offset registration Unit of measure ESC E ESC &l#X ESC%#X ESC &l#U ESC &l#Z ESC &u#D Page control Paper source Page size Page length Orientation Print direction Top margin Text length Left margin Right margin Clear horizontal margins Perforation skip Horizontal Motion Index (HMI) Vertical Motion Index (VMI) Line spacing ESC &l#H ESC &l#A ESC &l#P ESC &l#O ESC &a#P ESC &l#E ESC &l#F ESC &a#L ESC &a#M ESC 9 ESC &l#L ESC &k#H ESC &l#C ESC &l#D Command Summary C-3 R L Albatross Rev.c A5 size 96/08/23 Appendix C pass 0 Cursor positioning Vertical position ESC &a#R ESC *p#Y ESC &a#V Horizontal position ESC &a#C ESC *p#X ESC &a#H Half line feed ESC = Line termination Push/pop position ESC &k#G ESC &f#S Font selection Primary symbol set Secondary symbol set Primary spacing Secondary spacing Primary pitch Secondary pitch Set pitch mode Primary height Secondary height Primary style Secondary style Primary font stroke weight Secondary font stroke weight Primary typeface family Secondary typeface family Primary font default Secondary font default Enable underline Disable underline Transparent print data C-4 Command Summary ESC (id ESC )id ESC (s#P ESC )s#P ESC (s#H ESC )s#H ESC &k#S ESC (s#V ESC )s#V ESC (s#S ESC )s#S ESC (s#B ESC )s#B ESC (s#T ESC )s#T ESC (3@ ESC )3@ ESC &d#D ESC &d@ ESC &p#X[data] Albatross Rev.c A5 size 96/08/23 Appendix C pass 0 Font management Assign font ID Font and character control Set symbol set Define symbol set Symbol set control Select primary font with ID# Select secondary font with ID# ESC *c#D ESC *c#F ESC *c#R ESC (f#W[data] ESC *c#S ESC (#X ESC )#X Soft font creation Font descriptor Download character Character code ESC )s#W[data] ESC (s#W[data] ESC *c#E Raster Graphics Raster resolutions Raster graphics presentations Start raster graphics Raster Y offset Set raster compression mode Transfer raster data by row End raster graphics (version B) End raster graphics (version C) Raster height Raster width ESC *t#R ESC *r#F ESC *r#A ESC *b#Y ESC *b#M ESC *b#W[data] ESC *rB ESC *rC ESC *r#T ESC *r#S Print model Select current pattern Select source transparency mode Select pattern transparency mode Rectangle width (PCL unit) Rectangle width (decipoints) Rectangle height (PCL unit) Rectangle height (decipoints) Fill rectangular area ESC *v#T ESC *v#N ESC *v#O ESC *c#A ESC *c#H ESC *c#B ESC *c#V ESC *cP Command Summary C-5 R L Albatross Rev.c A5 size 96/08/23 Appendix C pass 0 User-defined pattern management/creation Pattern ID Define pattern User-defined pattern control Set pattern reference point ESC *c#G ESC *c#W[data] ESC *c#Q ESC *p#R Macros Macro ID Macro control ESC &f#Y ESC &f#X Status readback Set status readback location type Set status readback location unit Inquire status readback entity Flush all pages Free memory space Echo ESC *s#T ESC *s#U ESC *s#I ESC &r#F ESC *s1M ESC *s#X Programming hints End-of-line wrap Enable display functions Disable display functions ESC &s#C ESC Y ESC Z PCL vector graphics switching / set-up picture frame Enter PCL mode Enter GL/2 mode GL/2 plot horizontal size GL/2 plot vertical size Set picture frame anchor point Picture frame horizontal size Picture frame vertical size C-6 Command Summary ESC %#A ESC %#B ESC*c#K ESC*c#L ESC*c0T ESC*c#X ESC*c#Y Albatross Rev.c A5 size 96/08/23 Appendix C pass 0 GL/2 context commands Dual context extensions Enter PCL mode Reset Primary font Secondary font Scalable or bitmapped fonts ESC %#A ESC E FI FN SB Palette extensions Transparency mode Screened vectors Number of Pens TR SV NP Vector Group Arc absolute Arc relative Absolute arc three point Bezier absolute Bezier relative Plot absolute Plot relative Pen down Pen up Relative arc three point Polyline encoded AA AR AT BZ BR PA PR PD PU RT PE Polygon Group Circle Fill rectangle absolute Fill rectangle relative Edge rectangle absolute Edge rectangle relative Fill wedge Edge wedge Polygon mode Fill polygon Edge polygon CI RA RR EA ER WG EW PM FP EP Command Summary C-7 R L Albatross Rev.c A5 size 96/08/23 Appendix C pass 0 Character Group Select standard font Select alternate font Absolute direction Relative direction Absolute character size Relative character size Character slant Extra space Standard font definition Alternate font definition Character fill mode Label origin Label Define label terminator Character plot Transparent data Define variable text path SS SA DI DR SI SR SL ES SD AD CF LO LB DT CP TD DV Line and fill attribute group Line type Line attribute Pen width Pen width unit selection Select pen Symbol mode Fill type Anchor corner Raster fill definition User defined line type LT LA PW WU SP SM FT AC RF UL Configuration and status group Scale Input window Input P1 and P2 Input relative P1 and P2 Default values Initialize Rotate coordinate system Comment C-8 Command Summary SC IW IP IR DF IN RO CO Albatross Rev.c A5 size 96/08/23 Appendix C pass 0 ESC/P 2 and FX Commands This section lists the printer commands supported in the ESC/P 2 and FX emulation modes. ESC/P 2 mode General operation Initialize printer Control paper loading/ejecting ESC @ ESC EM n Paper feeding Carriage return Form feed Line feed Select 1/8-inch line spacing Select 1/6-inch line spacing Set n/180-inch line spacing Set n/360-inch line spacing CR FF LF ESC 0 ESC 2 ESC 3 n ESC + n Page format Set page format Set page length in defined units Set page length in lines Set page length in inches Set bottom margin for continuous paper Cancel top/bottom margin for continuous paper Set left margin Set right margin ESC ( c nn ESC ( C nn ESC C n ESC C 0 n ESC N n ESC O ESC l n ESC Q n Command Summary C-9 R L Albatross Rev.c A5 size 96/08/23 Appendix C pass 0 Print position motion Set absolute horizontal print position Set relative horizontal print position Set absolute vertical print position Set relative vertical print position Set horizontal tabs Tab horizontally Set vertical tabs Tab vertically Advance paper n/180 inch Reverse paper n/180 inch ESC $ n1 n2 ESC \ n1 n2 ESC ( V nn ESC ( v nn ESC D nn HT ESC B nn VT ESC J n ESC j n Font selection Select typeface Select font by pitch and point Select 10.5 point, 10 cpi Select 10.5 point, 12 cpi Select 10.5 point, 15 cpi Turn proportional mode on/off Select LQ or draft Select italic font Cancel italic font Select bold font Cancel bold font Master select Control code set/clear Select print Pitch C-10 Command Summary ESC k n ESC X nn ESC P ESC M ESC g ESC p 1/0 ESC x n ESC 4 ESC 5 ESC E ESC F ESC ! n ESC I 1/0 ESC c Albatross Rev.c A5 size 96/08/23 Appendix C pass 0 Font enhancement Select condensed printing Cancel condensed printing Select double-width printing (one line) Turn double-width printing on/off Cancel double-width printing (one line) Turn double-height printing on/off Select double-strike printing Cancel double-strike printing Select superscript printing Select subscript printing Cancel superscript/subscript printing Select line/score Turn underline on/off Select character style SI DC2 SO ESC W 1/0 DC4 ESC w 1/0 ESC G ESC H ESC S 0 ESC S 1 ESC T ESC ( - nn ESC - 1/0 ESC q n Spacing Set intercharacter space Define unit ESC SP n ESC ( U nn Character handling Assign character table Select character table Select an international character set Define download character Copy ROM to RAM Select user-defined set Enable printing of upper control codes Enable upper control codes Print data as characters ESC ( t nn ESC t n ESC R n ESC & nn ESC : 0 n 0 ESC % n ESC 6 ESC 7 ESC ( ^ nn Bit image Selection and printing of bit image Select graphic mode Print raster graphics ESC * nn ESC ( G nn ESC . c v hm Command Summary C-11 R L Albatross Rev.c A5 size 96/08/23 Appendix C pass 0 FX mode Printer commands arranged by topic The following section lists and describes all FX and LQ commands by topic. Printer operation Initialize printer Control paper loading/ejecting ESC @ ESC EM n Data control Carriage return CR Vertical motion Form feed Set page length in lines Set page length in inches Set skip over perforation Cancel skip over perforation Line feed Select 1/8-inch line spacing Select 7/72-inch line spacing Select 1/6-inch line spacing Select n/216-inch line spacing Perform n/216-inch line spacing Tab vertically Set vertical tabs FF ESC C n ESC C 0 n ESC N n ESC O LF ESC 0 ESC 1 ESC 2 ESC 3 n ESC J VT ESC B nn Note: Your printer will not print characters beyond one page length (set with the ESC C or ESC C0 commands), while an FX printer might print them. C-12 Command Summary Albatross Rev.c A5 size 96/08/23 Appendix C pass 0 Horizontal motion Set absolute horizontal print position Set relative horizontal print position Set left margin Set right margin Tab horizontally Set horizontal tabs ESC $ n1 n2 ESC\n1 n2 ESC l n ESC Q n HT ESC D nn Overall printing style Select letter quality or draft ESC x n Note: The print quality and speed cannot be changed even if you send the ESC x command. Select typeface family Master select ESC k n ESC ! n Print size and character width Select 10 cpi Select 12 cpi Turn proportional mode on/off Select condensed mode Cancel condensed mode Select double-width mode (one line) Cancel double-width mode (one line) Turn double-width mode on/off Turn double-height printing on/off ESC P ESC M ESC p 1/0 SI DC2 SO DC4 ESC W 1/0 ESC w 1/0 Command Summary C-13 R L Albatross Rev.c A5 size 96/08/23 Appendix C pass 0 Font enhancement Select emphasized mode Cancel emphasized mode Select double-strike mode Cancel double-strike mode ESC E ESC F ESC G ESC H Note: The ESC G and ESC E commands produce identical effects, so you cannot obtain darker print by combining the two. Select superscript/subscript mode Cancel superscript/subscript mode Select italic mode Cancel italic mode Turn underline mode on/off ESC S 0/1 ESC T ESC 4 ESC 5 ESC - 1/0 Word processing Set intercharacter space Select character tables Assign character tables Select international character set Printable code area expansion Enable upper control codes ESC SP n ESC t n ESC ( t nn ESC R n ESC 6 ESC 7 User Defined Characters Define user-defined characters ESC & nn Note: The appearance of characters defined using ESC & may differ slightly from an actual FX printer. Copy ROM to RAM Select user-defined set Printable code area expansion ESC : 0 n 0 ESC % n ESC I n Bit image Select graphics mode Selection and printing of bit image C-14 Command Summary ESC * m n ESC ^ m n Albatross Rev.c A5 size 96/08/23 Appendix C pass 0 PJL Commands This section lists the available commands for printer job language mode (PJL). For more information on PJL, refer to the Printer Job Language Technical Reference Manual from Hewlett-Packard. COMMENT @PJL COMMENT [words] [<CR>] <LF> DEFAULT @PJL DEFAULT [LPARM: ***] variable = value [<CR>] <LF> DINQUIRE @PJL DINQUIRE [LPARM: ***] variable [<CR>] <LF> ECHO @PJL ECHO [Words] [<CR>] <LF> ENTER @PJL ENTER LANGUAGE = *** [<CR>] <LF> EOJ @PJL EOJ [NAME= ***] [<CR>] <LF> INFO @PJL INFO read only variable [<CR>] <LF> INITIALIZE @PJL INITIALIZE [<CR>] <LF> INQUIRE @PJL INQUIRE [LPARM: ***] variable [<CR>] <LF> JOB @PJL JOB [NAME = ***][START = ***][END = ***][<CR>] <LF> OPMSG @PJL OPMSG DISPLAY = *** [<CR>] <LF> RDYMSG @PJL RDYMSG DISPLAY = *** [<CR>] <LF> RESET @PJL RESET [<CR>] <LF> SET @PJL SET [LPARM: ***] variable = value [<CR>] <LF> STMSG @PJL STMSG DISPLAY = *** [<CR>] <LF> UEL <ESC>%-12345X USTATUS @PJL USTATUS variable = value [<CR>] <LF> USTATUSOFF @PJL USTATUSOFF [<CR>] <LF> PJL @PJL [<CR>] <LF> Command Summary C-15 R L Albatross Rev.c A5 size 96/08/23 Appendix C pass 0 I239X Emulation Commands This section lists the printer commands supported in the I239X emulation mode. For more information on these commands, see IBM’s 2390/2391 reference manual. Page format Printable area Set page length in lines Set page length in inches Set skip perforation Cancel skip perforation Set horizontal margins ESC C n ESC C NUL n ESC N n ESC O ESC X Line spacing Set line space to 1/8-inch Set line space to 7/72-inch Activate line spacing for text Set line spacing for graphics (n/180, n/216, or n/360 inch) Set line spacing for text (n/72 inch) ESC 0 ESC 1 ESC 2 ESC 3 n ESC A n Unit definition Set vertical units (1/180, 1/216, or 1/360 inch) ESC [ \ Set vertical tab stops Set default tab stops Set horizontal tab stops ESC B ESC R ESC D Tab C-16 Command Summary Albatross Rev.c A5 size 96/08/23 Appendix C pass 0 Paper feeding/print position motion Carriage return Line feed Form feed Move paper vertically (n/180, n/216, or n/360 inch) Automatic line feed Reverse line feed Back space Space Horizontal tab Vertical tab Move current print position (1/120 inch) Set top of form CR LF FF ESC J ESC 5 ESC ] BS SP HT VT ESC d ESC 4 Text Font selection Select 10 pitch font Select 12 pitch font Start 17 cpi printing Start 17 cpi printing Proportional spacing Begin subscript/superscript End subscript/superscript Select font and pitch Select print or font Select character set 2 Select character set 1 Select page code Print one character Print character from A Code Page DC2 ESC: SI ESC SI ESC P ESC S ESC T ESC[I ESC I ESC 6 ESC 7 ESC[T ESC ^ ESC \ Command Summary C-17 R L Albatross Rev.c A5 size 96/08/23 Appendix C pass 0 Font enhancement Continuous overscore Continuous underline Score select Select print type style Begin double-width printing by line Begin double-width printing by line End double-width printing by line Double-width printing Begin empahsized (bold) print End empahsized (bold) print Begin double-strike print End double-strike print ESC_ ESCESC[ESC[@ SO ESC SO DC4 ESC W ESC E ESC F ESC G ESC H Bit image Normal density bit image graphics Double-density bit image graphics (half speed) Double-density bit image graphics (normal speed) High-density bit image graphics Graphic print mode ESC K ESC L ESC Y ESC Z ESC [g Bar code Bar code set up Bar code transfer ESC [f ESC [P- Auxiliary Functions Initialize Set initial conditions ESC [K Data input control Cancel 1 line C-18 Command Summary CAN Albatross Rev.c A5 size 96/08/23 Appendix C pass 0 Auxiliary function Select paper tray ESC [F AGM Mode Line spacing Set line spacing for graphics (n/180, n/216, or n/360 inch) Set line spacing for text (n/60 inch) ESC 3 ESC A Paper feeding/print position motion Move paper vertically (n/180, n/216, or n/360 inch) Line feed ESC J LF Bit image Normal-density bit image graphics Double-density bit image graphics (half speed) Double-density bit image graphics (normal speed) High-density bit image graphics Graphic print mode Select graphic mode ESC K ESC L ESC Y ESC Z ESC [g ESC * Command Summary C-19 R Proof Sign-off: Nishi Grady Albatross Rev.c _______ _______ A5 size ’96/08/23 R Appendix d pass 0 Appendix D Working with Fonts Printer and Screen Fonts . . . . . . . . . . . . . . . . . . . . . . D-2 Available Fonts . . . . . . . . . . . . . . . . . . . . . . . . . . . D-3 Adding More Fonts . . . . . . . . . . . . . . . . . . . . . . . . . Downloading fonts . . . . . . . . . . . . . . . . . . . . . . . D-6 D-6 Selecting Fonts . . . . . . . . . . . . . . . . . . . . . . . . . . . . D-6 Working with Fonts D-1 D L Albatross Rev.c A5 size ’96/08/23 Appendix d pass 0 Read this section if you would like to know more about fonts and see samples of the installed fonts. To select a font, use your application program. Font problems are uncommon but some may occur, such as: ❑ The printer substitutes a font other than the one you selected with your software. ❑ The printed page does not exactly match what is on screen. These kinds of problems usually occur if you use an emulation other than LJ4 or when you are trying to print fonts that are not installed in the printer. If you have font problems, read “Printer and Screen Fonts” below to find out how to fix them. Printer and Screen Fonts Fonts are installed on both the printer and the computer. The printer fonts, which reside in printer memory, are used by the printer to print text. Screen fonts, which are stored in your computer, are used to display text on screen to represent the fonts that will be printed. Two separate sets of fonts are needed because the monitor and printer have different requirements for producing fonts. The monitor normally uses bitmap fonts that are specially designed for the screen’s resolution. A bitmap is a dot-by-dot representation of an image or character. The printer, however, uses an outline font that is created from a mathematical formula that describes the outline of each character. Using outline fonts allows the printer to render any character in the requested size. D-2 Working with Fonts Albatross Rev.c A5 size ’96/08/23 R Appendix d pass 0 d-1 screen font printer font Note: The distinction between printer and screen fonts is not as important when you are using TrueType fonts, which are included with Windows. TrueType is an outline font format that can be used by both the printer and the screen. Available Fonts The following table lists the fonts that are installed on your printer. The names of all the fonts appear in your software’s font list if you are using the driver provided with the printer. (If you are using a different driver, all of these fonts may not be available.) The fonts provided with the printer are shown in the following table. LJ4/GL2 mode Font name Scalable font HP equivalent Dutch 801 SWC Roman, Bold, Italic, Bold Italic CG Times® Zapf Humanist 601 SWC Demi, Bold, Demi Italic, Bold Italic CG Omega® Ribbon 131 SWC - Coronet Clarendon Condensed SWC - Claredon Condensed Swiss 742 SWC Medium, Bold, Italic, Bold Italic, Condensed, Bold Condensed, Condensed Italic, Bold Condensed Italic Univers® Incised 901 SWC Medium, Black, Italic Antique Olive Working with Fonts D-3 L Albatross Rev.c A5 size ’96/08/23 Appendix d pass 0 Font name Scalable font HP equivalent Original Garamond SWC Medium, Bold, Italic, Bold Italic Garamond Andrey Two SWC - Marigold Flareserif 821 SWC Medium, Extra Bold Albertus Swiss 721 SWM Roman, Bold, Oblique, Bold Oblique Arial® Dutch 801 SWM Roman, Bold, Italic, Bold Italic Times New Symbol Set SWA - Symbol More WingBats SWM - Wingdings Courier SWC Medium, Bold, Italic, Bold Italic Courier Letter Gothic SWC Roman, Bold, Italic Letter Gothic Font name Bitmap font HP equivalent Line Printer − Line Printer When selecting fonts in your software program, choose the font name listed in the HP equivalent column. ESC/P 2 and FX modes Font name Scalable font EPSON Roman - EPSON Sans serif - Courier SWC Medium, Bold EPSON Prestige - EPSON Script - Swiss 721 SWM* Roman, Bold Dutch 801 SWM* Roman, Bold Letter Gothic SWC Roman, Bold * Available only in ESC/P 2 mode. D-4 Working with Fonts Albatross Rev.c A5 size ’96/08/23 Appendix d pass 0 Font name Bitmap font OCR B - Font name Scalable font EPSON Sans serif - Courier SWC Medium, Bold EPSON Prestige - EPSON Gothic - EPSON Presentor - I239X mode EPSON Orator - EPSON Script - Font name Bitmap font OCR B - To see the font samples, use the Test Menu in SelecType. 1. Make sure that paper is loaded. 2. Press Menu while the printer is on line. 3. Press Item until the font sample you want appears. 4. Press Enter, a Font Sample sheet is printed. Working with Fonts D-5 R L Albatross Rev.c A5 size ’96/08/23 Appendix d pass 0 Adding More Fonts Fonts that reside on your computer’s hard disk can be downloaded, or transferred, to the printer so they can be printed. Downloaded fonts, also called soft fonts, remain in printer memory until you turn off the printer or otherwise reinitialize it. If you plan on downloading many fonts, make sure your printer has sufficient memory. Downloading fonts Most font packages make it easy to install fonts by providing their own installer. The installer gives you the option of having the fonts automatically downloaded whenever you start your computer or having fonts downloaded only when you need to print a particular font. If you’re running Windows, you can also install fonts by clicking on the Fonts icon in the Control Panel. Once installed, the fonts are available in all your Windows applications. Selecting Fonts Whenever possible select fonts from the font list in your software application. See your software documentation for instructions. If you are sending unformatted text to the printer directly from DOS or if you are using a simple software package that does not include font selection, you can select fonts with the Remote Control Panel utility. For instructions, see Chapter 5. Note: Selecting a font using the Remote Control Panel utility is not recommended. Selecting fonts from your software program is easier, and any font selection you make from your software overrides the selection you make from the Remote Control Panel. D-6 Working with Fonts Proof Sign-off: Nishi Grady _______ _______ Albatross Rev.c A5 size 96/08/23 R Appendix E A5 size pass 0 Appendix E Map of SelecType Menus E Map of SelecType Menus E-1 L Albatross Rev.c A5 size 96/08/23 Appendix E A5 size pass 0 Switching between SelecType Menus The following menu maps show the possible menus and options in SelecType. KEY Pressing the Menu button displays the next menu. Pressing the Alt + Menu buttons displays the prior menu. ( ) This is only available with option. new-1 E-2 Map of SelecType Menus Albatross Rev.c A5 size 96/08/23 Appendix E A5 size pass 0 R new-2n Map of SelecType Menus E-3 L Albatross Rev.c A5 size 96/08/23 E-4 Appendix E A5 size pass 0 Map of SelecType Menus Proof Sign-off: Nishi Grady _______ _______ Albatross Rev.c A5 size ’96/08/23 R Glossary DR, pass 0 Glossary ASCII American Standard Code for Information Interchange. A standardized way of assigning codes to characters and control codes. The system is widely used by manufacturers of computers, printers, and software. auto line feed A printer feature in which each carriage return code (CR) is automatically accompanied by a line feed (LF) code. bitmap font The dot-by-dot representation of a font. Bitmap fonts are displayed on computer screens and printed on dot matrix printers. See outline font. buffer See memory. character set A collection of letters, numbers, and symbols used in a particular language. cpi (characters per inch) A measure of the size of fixed-width text characters. default A value or setting that takes effect when the printer is turned on, reset, or initialized. dots per inch (dpi) The number of dots per inch is a measure of printer resolution. The higher the number of dots, the higher the resolution. download To transfer information from the computer to the printer. download font A font that is loaded into the printer’s memory from an outside source, such as a computer. Also called soft font. dpi See dots per inch. driver The part of a software program that converts commands from the program into commands used by the printer. Also known as the printer driver. Glossary 1 L Albatross Rev.c A5 size ’96/08/23 Glossary DR, pass 0 drum The part of the printer mechanism where the image is formed and transferred to the paper. emulation See printer emulation. fixed-width font A font whose characters are allotted the same amount of horizontal space, no matter the width of the character. Thus the uppercase M receives the same amount of space as the letter l. font A set of characters and symbols that share a common typographic design and style. font family The collection of all sizes and styles of a font. halftone A grayscale image that is composed of small dots. The dots can be close together to create black or more widely spaced to create gray or white areas in the image. Newspaper photographs are common examples of halftones. imaging cartridge The imaging cartridge contains a photosensitive print drum and a supply of toner. initialization The act of returning the printer to its defaults (fixed set of conditions). interface The connection between the printer and the computer. A parallel interface transmits data one character or code at a time, and a serial interface transmits data one bit at a time. landscape Printing that is oriented sideways on the page. This orientation gives you a page that is wider than it is high and is useful for printing spreadsheets. memory The part of the printer’s electronic system that is used to store information. Some information is fixed and is used to control how the printer operates. Information that is sent to the printer from the computer (such as downloaded fonts) is stored in memory temporarily. See also RAM and ROM. 2 Glossary Albatross Rev.c A5 size ’96/08/23 R Glossary DR, pass 0 orientation Refers to the direction in which characters are printed on a page. This direction is either portrait, like this page, or landscape with the text printed on a page turned sideways. outline font A font whose outline is described mathematically, allowing it to be rendered (printed or drawn) smoothly at any size. PCL The command language built into the Hewlett-Packard LaserJet series printers. photoconductor unit A component of the printer that contains a photosensitive print drum. pitch A measure of the number of characters per inch (cpi) for fixed-width fonts. point size The height of a particular font as measured from the top of the tallest character to the bottom of the lowest. A point is a typographic unit of measure equivalent to 1/72 of an inch. portrait Printing that is oriented upright on the page (as opposed to landscape, in which printing is oriented sideways on the page). This is the standard orientation for printing letters or documents. printer driver See driver. printer emulation A set of operating commands that determines how data sent from the computer is interpreted and acted upon. Printer emulations replicate existing printers, such as the HP LaserJet 4. proportional font A font whose characters have varying amounts of horizontal space depending on the width of the character. Thus the uppercase M takes up more horizontal space than the lowercase l. RAM Random Access Memory (RAM) is where temporary information is stored. Remote Control Panel A software utility used to make changes to printer settings, including print quality, paper size, and RITech. Glossary 3 L Albatross Rev.c A5 size ’96/08/23 Glossary DR, pass 0 reset To refresh the printer’s memory and erase the current print jobs. resident font A font that is stored permanently in the printer’s memory. resolution A measure of the fineness and clarity of images produced by the printer or monitor. Printer resolution is measured in dots per inch. Monitor resolution is measured in pixels. RITech Resolution Improvement Technology. A feature that smooths the jagged edges of printed lines or shapes. ROM Read Only Memory (ROM) is where permanent information is stored. sans serif font A font lacking serifs. scalable font See outline font. SelecType A feature of the printer that allow you to set printer values and control most of the printer’s function from the control panel. serif The small decorative strokes that come off the main lines of a character. status sheet A report that lists the printer settings and other printer information. symbol set A collection of symbols and special characters. Symbols are assigned to specific codes in a character table. TrueType An outline font format that was developed jointly by Apple Computer and Microsoft Corporation. TrueType fonts are outline fonts that can be easily resized for screen display or for printing. 4 Glossary Proof Sign-off: Nishi Grady _______ _______ Albatross A5 size 08-23-96 Rev.c R Index DR, pass 0 Index A E Adjusting print density, 6-32 RITech, 6-31 ALT, 2-5 AUX Menu, 5-18 ECP mode, A-5−11 Emulation Menu, 5-9 Emulation Modes ESCP2, 5-24 FX, 5-24 GL/2, 5-28 I239X, 5-27 LJ4, 5-19 Envelops, 1-7 Error messages, 6-18 ESCP2 Menu, 5-24 B Button, 2-5 C Check Paper Size error, 6-19 Cleaning printer, 6-34 Colored paper, 1-8 Config Menu, 5-12 Consumables Imaging Cartridge, A-14 replacing, 6-28 specifications, A-14 Continue, 2-6 Control panel, 2-2−6 Copies, 4-8, 5-10, 5-22 F Feed Jam, 6-2, 6-20 Font available, D-3 downloading, D-6 printer, D-2 samples, 5-8, D-5 screen, D-2 selecting, D-6 Form Feed, 2-6 FX Menu, 5-24 D Data dump mode, 6-27 Density, 4-12, 5-13 DOS, 5-2 Duplex Unit, 3-8 G GL/2 emulation mode, 6-27 context commands, C-7 GL/2 Menu, 5-28 H Hex dump, 6-27 IN-1 L Albatross A5 size 08-23-96 Rev.c Index DR, pass 0 I M I239X Menu, 5-27 Image Optimum, 4-13, 5-15 Imaging cartridge installing, 6-28 life, A-14 Installing Duplex Unit, 3-8 LocalTalk/Serial module, 3-23 250 Sheet Paper Tray, 3-3 memory module, 3-16 optional interface card, 3-21 PCMCIA card, 3-14 Intelligent Emulation Switch, 5-23 Interface options, 3-21 Item, 2-6 Manual Feed, 5-22 Mem Overflow error, 6-14, 6-22 Memory Module, 3-16 Mode LJ4, B-3 PJL, C-15 MP Tray Size, 5-22 J Jams Feed, 6-2, 6-20 Paper, 6-2, 6-23 Preventing jams, 6-5 L Labels, 1-7 LaserJet 4 (LJ4) emulation mode command, C-3 LJ4 Menu, 5-19 Loading paper manually, 1-2 LocalTalk/Serial module, 3-23 Lower Paper Cassette, 3-7 LocalTalk Menu, 5-18 IN-2 O OneTouch Modes, 5-21 On Line, 2-5 Orientation, 4-8, 5-22 P Page Size, 4-7, 5-22 Paper choosing, 1-6 jam problems, 6-2, 6-23 loading, 1-2 loading manually, 1-2 size, 1-5 specifications, A-2 Paper feed, 4-8 Paper Jam, 6-2, 6-23 Paper size, 1-5 Paper Source, 5-22 Parallel interface specifications, A-5−11 Parallel B Menu, 5-16 Parallel C Menu, 5-16 PCMCIA card, 3-14 PJL mode, C-15 Print density, 6-32 Printer specifications, A-3 Printing Menu, 5-9 Albatross A5 size 08-23-96 Problem memory, 6-14 paper jam, 6-2, 6-23 print quality, 6-9 Rev.c R Index DR, pass 0 W Weight, A-4 R RAM, 3-16 Remote Control Panel utility, 4-2 Replacing Imaging Cartridge, 6-28 Reset, 2-6, 6-23 Reset All, 6-24, 6-33 RITech, 4-12, 5-12, 6-31 S SelecType, 5-3 Serial interface utility, 3-28 Serial Menu, 5-17 Setup Menu, 5-15 Status Sheet, 2-6, 5-8 Symbol Sets, B-2 T Test Menu, 5-8 Toner, 6-28 Toner Low, 6-26 Transparencies, 1-8 Troubleshooting error messages, 6-18 paper jam, 6-2, 6-23 print quality, 6-9 U Utility Remote Control Panel, 4-2 serial interface, 3-26 IN-3 L Albatross A5 size 08-23-96 IN-4 Rev.c Index DR, pass 0 EPSON OVERSEAS MARKETING LOCATIONS EPSON AMERICA, INC. EPSON UK LTD. 20770 Madrona Ave. Campus 100, Maylands Avenue, P.O. Box 2842 Hemel Hempstead, Herts, Torrance, CA 90509-2842 HP2 7TJ, U.K. Phone: (800) 922-8911 Phone: (+44) 01442 61144 Fax: (310) 782-5220 Fax: (+44) 01442 227227 EPSON DEUTSCHLAND GmbH EPSON FRANCE S.A. Zülpicher Straße 6, 68 bis, rue Marjolin 40549 Düsseldorf Germany 92300, Levallois-Perret, France Phone: (0211) 56030 Phone: 33.1.40.87.37.37 Telex: 8584786 Telex: 610657 EPSON AUSTRALIA PTY. LTD. EPSON SINGAPORE PTE. LTD. 70 GIBBES STREET, CHATSWOOD 2067 NSW. No. 1 Temasek Avenue #36-00 Phone: 2-9903-9000 Millenia Tower, Singapore 039192 Fax: 2-9903-9177 Phone: (065) 33 77 911 Fax: (065) 33 41 185 EPSON HONG KONG LTD. EPSON TAIWAN TECHNOLOGY & Rooms 4706-10, 47/F, TRADING LTD. China Resources Bldg., 10F, No. 287 Nanking E. Road, Sec. 3, 26 Harbour Road, Wanchai, Hong Kong Taipei, Taiwan, R.O.C. Phone: 2585-4300 Phone: (02) 717-7360 Fax: 2827-7083 Fax: (02) 712-9164 EPSON ITALIA S.p.A. EPSON IBERICA S.A. V.le F.lli Casiraghi 427 Av. de Roma, 18-26 20099 Sesto S.Giovanni 08290 Cerdanyola del Valles MI, Italy Barcelona, Spain Phone: 2-262331 Phone: 582. 15.00 Fax: 2-2440750 Fax: 582. 15.55 SEIKO EPSON CORPORATION EPSON PORTUGAL, S.A. (Hirooka Office) R. do Progresso, 471, 1º Perafita 80 Harashinden, Hirooka 4460 Matosinhos, Portugal Shiojiri-shi, Nagano-ken Phone: (02) 996 14 02 399-07 Japan Fax: (02) 996 14 11 1996 October EPSON® IMPORTANT NOTICE Using the LocalTalk Interface with EPL-N2000PS Version Printers The EPL-N2000PS is supplied with interfaces for connection to either EtherNet or LocalTalk Networks. As shipped, the EPL-N2000PS has the EtherNet interface installed. Should you wish to connect to a LocalTalk network, the EtherNet interface MUST be removed prior to installation of the LocalTalk interface. To remove the EtherNet interface and install the LocalTalk interface please follow the instructions in your printer reference guide pages 3-23 to 3-24. Note: Please keep this sheet with your reference manual. EPLN2000PS-EUL01