1
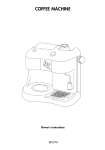
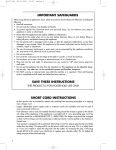
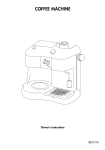
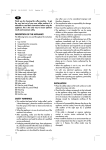
EC190/200 GB
2-01-2003
10:24
Pagina 6
IMPORTANT SAFEGUARDS
When using electrical appliances, basic safety precautions should always be followed, including the
following:
• Read all instructions.
• Do not touch hot surfaces. Use handles and knobs.
• To protect against fire, electrical shock and personal injury, do not immerse cord, plug or appliance
in water or other liquid.
• Never allow the appliance to be used by children or unfit persons.
• Unplug from the outlet when not in use and before cleaning. Allow to cool before fitting or taking off
parts, and before cleaning the appliance.
• Do not operate with a damaged cord or plug, or after the appliance malfunctions, or has been
damaged in any manner. Return the appliance to the nearest authorized service facility for
examination, repair or adjustment.
• The use of accessory attachments or spare parts not recommended by the appliance manufacturer
may result in fire, electrical shock or personal injury.
• Do not use outdoors.
• Do not let the cord hang over the edge of the table or counter, or touch hot surfaces.
• Do not place on or near a hot gas or electrical burner, or in a heated oven.
• Plug cord into the wall outlet. To disconnect, turn any control to “off”, then remove plug from wall
outlet.
• Do not use the appliance for other than the intended use. This appliance is to be utilized for domestic
use only. Any other use is to be considered improper and therefore, dangerous.
• DO NOT unscrew or remove boiler cap while the machine is in operation. Wait until brewing cycle
is completed and all water and steam has been used up.
SAVE THESE INSTRUCTIONS
THIS PRODUCT IS FOR HOUSEHOLD USE ONLY
SHORT CORD INSTRUCTIONS
-
-
6
A short power cord is provided to reduce risks resulting from becoming entangled in or tripping over
a longer cord.
Longer, detachable power supply cords or extension cords are available and may be used if care is
exercised in their use.
If an extension cord is used, the marked electrical rating should be at least as great as the electrical
rating of the appliance. If the appliance is provided with 3- wire, grounding type cord, the extension
should be a GROUNDING TYPE 3 - WIRE CORD. The longer cord should be arranged so that it will
not drape over the counter-top or table top where it can be pulled on by children or tripped over.
Your product is equipped with a polarized alternating current line plug (a plug having one blade wider
than the other). This plug will fit into the power outlet only one way. This is a safety feature. If you are
unable to insert the plug fully into the outlet, try reversing the plug. If the plug should still fail to fit,
contact your electrician to replace your obsolete outlet. Do not defeat the safety purpose of the
polarized plug.
EC190/200 GB
2-01-2003
10:24
Pagina 7
Thank you for choosing this coffee machine. To get
the very best out of your new coffee machine it is
advisable to read these instructions before using the
appliance. This is the only way to ensure optimum
results and maximum safety.
DESCRIPTION OF THE APPLIANCE
The following terms are used throughout the instruction
manual
1
2
3
4
5
6
7
8
9
10
11
12
13
14
15
16
17
18
19
20
Filter holder for ground coffee
Filter for coffee powder with creamer
Filter for pods (if fitted)
Filter holder for pods (if fitted)
Steam release knob
Coffee tamper
Black area inside for positioning cups
Power supply cable
OK’ light (coffee/water or steam)
‘ON/OFF’ light
Selector knob
Espresso function
“O” OFF position
Steam position
Coffee measuring spoon
Boiler outlet
Delivery tube
Cappuccino function (for milk frothing)
Water tank
Lid for water tank
SAFETY WARNINGS
• This machine has been built to “make coffee” and to
“reheat beverages”; please be careful to avoid burns
from the sprays of hot water or steam and avoid any
improper use.
• When the appliance is in use, do not touch any of the
machine’s hot surfaces
• After unpacking, make sure that the machine is
complete and undamaged. In case of doubt, do not
use the appliance and seek the advice of a qualified
service professional.
• Packaging materials (plastic bags, foam polystyrene,
etc.) should not be left within the reach of children as
this could be a potential source of danger.
• This appliance is to be utilized for domestic use only.
Any other use is to be considered improper and
therefore, dangerous.
• The manufacturer takes no responsibility for damage
derived from improper use.
• Never touch the appliance with wet or damp hands
• The appliance is not intended for use by young
children or infirm persons without supervision.
• Your children should be supervised to ensure that
they do not play with the appliance.
• In case of breakdown or malfunctioning, turn off the
appliance immediately and do not touch it. For
repairs, please contact a Service Centre authorized
by the manufacturer and request the use of original
replacement parts only. The lack of respect for this
point may compromise the safe use of the appliance.
• The power supply cable of this appliance must never be
replaced by the user, because its replacement requires
the use of special tools. If the cable should become
damaged, or in case it needs to be replaced, please go
to a Service Centre authorized by the manufacturer.
INSTALLATION
• Place the coffee maker on flat work surface at a safe
distance from taps and sinks.
• Check that the voltage corresponds to that indicated on
the appliance rating plate. The appliance must always
be connected to a well-earthed socket rated at 10 A
minimum. The manufacturer is not liable for damage
caused by inadequate earthing of the appliance.
• In the event of incompatibility between the plug on
the appliance and the socket, have the plug replaced
with another of the right type by a qualified
professional.
• Never install the machine in an environment that can
reach a temperature less than or equal to 0°C (if the
water in it freezes, the coffee maker may be
damaged).
• When the machine is in operation, any additional
cable can be stored in the machine by inserting it
back into the cable supply outlet.
• The power cable can be positioned to the right or
left, depending on where the nearest power outlet to
the appliance is located, by lodging it in the
corresponding guides underneath the appliance
(Fig. 1).
• When changing the position of the power cable,
check that it is properly secured by the special clips
underneath the appliance (Fig. 1).
HOW TO PREPARE ESPRESSO COFFEE
FILLING THE WATER TANK:
To remove the water tank lid (fig.2) simply pull upwards
(fig 3) and fill the tank at the sink (fig 4). Do not exceed
the MAX level on the water tank. The tank may also be
filled without removing it, simply by pouring water into
it directly from a jug.
Replace the tank by connecting the valve at the bottom
of the tank with the hole in the base on the machine.
7
EC190/200 GB
2-01-2003
10:24
Pagina 8
WARNING: it is completely normal for there to be water
in the compartment under the tank; as a result, this
compartment should be dried using a clean sponge.
Note: Do not operate the appliance without water in
the tank and always remember to fill the tank when
theater level goes below the MIN level
PREHEATING THE COFFEE MACHINE
To ensure your espresso coffee is dispensed at the right
temperature it is essential that the coffee unit is preheated.
Turn the selector knob so that the intended line on the
selector knob points to the boiler on function
(fig.5)
at least half an hour before making the coffee, making
sure that the filter holder is hooked to the machine
(always make sure that the steam knob is closed).
1.Attach the empty filter holder (without coffee) to the
machine by positioning it under the boiler outlet with
the handle towards the left (fig 6). Push upwards
and at the same time turn the handle as far right as
possible. It does not matter if the handle is not
centrally aligned with the machine, as long as the
filter holder is firmly attached to the appliance.
2.Position a cup under the filter holder. Use the same cup that
the coffee will be served in, so that it may be preheated.
3.Wait until the orange “OK” light comes on (fig 7)
and turn the selector knob to the espresso function
position
(fig. 8) Allow water to flow until the
orange “OK” light goes out, then stop the flow of
water by turning the selector knob to the boiler on
function
(fig 5)
4.Empty the cup, wait until the “OK” pilot light comes on
again and repeat the whole operation one more time.
HOW TO PREPARE ESPRESSO COFFEE:
1.After carrying out the preheating of the machine as
described in the preceding section, place the filter for
coffee powder with creamer in the filter holder, making
sure the tab is correctly inserted in the corresponding
slot, as shown in Fig. 9.
To prepare just one cup of coffee, fill the filter with 1
even measuring spoon of ground coffee, around 7
grams (Fig. 10). To prepare two cups of coffee, on the
other hand, use the filter with the creamer and fill it with
two scant measuring spoons of ground coffee (around
6+6 grams). Fill the filter in small doses to avoid spilling
the coffee.
Note: use high quality, finely-ground coffee for
espresso coffee makers.
2.Distribute the ground coffee uniformly and press it
lightly with the pressing pad (Fig. 11).
3.Remove any excess coffee from around the edges of
the filter.
4.Place the cup or cups (cups can be preheated by rinsing
under hot water) on the black part of the removable drip
8
tray (fig 12). Ensure that the cup or cups line up with the
dispensing holes on the filter holder.
5.Wait until the “OK” light comes on (fig 7) and turn
the selector knob to the espresso function
position (fig 8). Allow water to flow until the desired
quantity is reached, then stop the flow of water by
turning the selector knob to the boiler on function
(fig 5)
6.To detach the filter holder, turn the handle from right
to left.
ATTENTION: to avoid spraying, never detach the
filter holder while the machine in brewing coffee.
NOTE:Pressing the coffee is very important in order
to prepare a food coffee. However if you press too
hard, coffee will come out slowly and cream will be
of a dark colour. If you press to light, coffee will come
out too fast and cream will be a very light color.
7.To remove the used coffee, hold the filter locked with
the special lever that is built into the handle and let
the coffee fall out by knocking the overturned filter
holder (Fig. 13).
8.To switch off the coffee machine, turn the selector knob on
the appliance to the OFF position “O” (fig. 14).
ATTENTION: The first time that coffee is prepared, it is
necessary to wash all of the accessories and the
internal circuits of the machine, preparing at least five
coffees without using the ground coffee
HOW TO PREPARE COFFEE USING THE FILTER
HOLDER FOR PODS (if fitted):
• Preheat the machine as described in the
‘Preheating the Coffee Machine’ section, making
sure to leave the filter holder attached to the unit.
Following this procedure ensures that the coffee is
delivered at a hotter temperature, as well as
guaranteeing that the seal of the filter holder
gaskets is more effective.
• Press the filter holder button and insert the pod into
the filter (fig 15).
Note: Use pods which conform to the ESE standard:
this will be indicated on the packaging by the
following symbol:
The ESE standard is a system accepted by the leading
coffee pod manufacturers, and allows espresso coffee
to be prepared simply and without any mess.
EC190/200 GB
2-01-2003
10:24
Pagina 9
3.Attach the filter holder onto the machine, moving
from left to right (fig 6).
IMPORTANT: Should the coffee holder for pods be
used after one for ground coffee, it’s necessary to
clear the ground coffee remained in the espresso
boiler outlet. This cleaning operation is necessary in
order to avoid water leackages from the coffee
holder for pods while coffee is being proposed.
4.Proceed as in points 4, 5 and 6 in the previous
section on how to prepare espresso.
5.To remove the pod, press the button on the filter
holder and simply lift the pod out
6.To turn the coffee machine off, turn the selector knob on
the appliance to the Off position “O” (fig.14).
If you use the “iIIycaffe” coffee pods, use the special
filter holder. Insert the coffee pod ensuring the name
“iIIy” is facing down and the long side of the pod is
positioned as shown in figure.
been reached (the ideal temperature is 60°C), stop
the delivery of steam by turning the steam knob in a
clockwise direction and at the same time positioning
the selector knob at “O” (fig. 14).
7.Pour the frothed milk into the cups containing the
espresso coffee. Your cappuccino is now ready. Add
sugar to taste and, if desired, sprinkle a little
powdered chocolate on top of the froth.
Note: to prepare the coffee after having frothed the
milk, first let the boiler cool down, otherwise the
coffee will be burnt. To cool the boiler down, place a
container underneath the outlet, turn the selector
knob to the “espresso” position and allow the water
to flow out until the ‘OK’ light goes off. Return the
selector knob to the
position and then prepare
the coffee as described in the previous paragraph.
IMPORTANT: always clean the milk frother and steam
nozzle immediately after use. Proceed as follows:
1 By turning the steam knob (fig. 18), allow a little
steam to come out for a few seconds. Then close
firmly by turning clockwise.
HOW TO MAKE CAPPUCCINO
1.Prepare espresso coffee, using cups that are large
enough for cappuccinos (see “How to prepare
espresso coffee).
2.Turn the selector knob to the
position (fig. 16)
Wait until the orange “OK” light comes on, to
indicate that the boiler has reached the ideal
temperature for producing steam.
3.In the meantime, fill a container with approximately
3 fl. oz of milk for each cappuccino to be prepared.
The milk must be cold from the refrigerator (not
warm!). In choosing the container, bear in mind that
the volume of the milk will increase by 2 or 3 times.
Semi skimmed milk gives best results.
NOTE: We suggest you used semi-skimmed milk at
refrigerator temperature.
4.Position the container with the milk in it under the
milk frother (fig. 17).
5.Immerse the cappuccino maker nozzle about 5mm
deep into the milk and turn the steam knob in an
anti-clockwise direction (fig. 18) (by turning the knob
to a greater or lesser extent, it is possible to vary the
quantity of steam that comes out from the cappuccino
maker). At this point, the milk will begin to increase
in volume and to appear frothy.
6.When the volume of the milk has doubled, fully
immerse the milk frother and continue heating the
milk (Fig. 19). Once the desired temperature has
2 Unscrew the milk frother by turning it clockwise (Fig.
20), and then clean it thoroughly in lukewarm water.
3 Check that the three holes in the milk frother, as
shown in Fig. 21, are not blocked. If necessary,
unblock them using a pin.
4.Clean the steam delivery tube, being careful to avoid
being burnt.
5.Screw the milk frother back on.
PRODUCING HOT WATER
1.Turn on the coffee unit by turning the selector knob to
the
position (fig. 5).
2.Position a container under the cappuccino maker;
3.When the ‘OK’ pilot light comes on, position the
selector knob at
(fig. 8) and at the same time turn
the steam knob in an anti-clockwise direction (fig.
19); hot water will come out from the cappuccino
maker;
4.To stop the flow of hot water, turn the steam knob in a
clockwise direction and position the selector knob at “O”
(fig. 14).
CLEANING AND MAINTENANCE
1. Before performing cleaning or maintenance
operations, turn the machine off, allow it to cool
down and unplug it from the power outlet.
Warning: when cleaning, never immerse the machine
in water: it is an electrical appliance!
9
EC190/200 GB
2-01-2003
10:24
Pagina 10
CLEANING THE FILTER HOLDER FOR GROUND
COFFEE
Every so often, the filter holder for ground coffee
should be cleaned, as follows:
- Remove the filter for coffee powder with creamer
- Clean the inside of the filter holder. Never wash it in the
dishwasher.
- Unscrew the ring from the creamer (Fig. 22) in the
direction shown by the arrow on the ring itself.
- Remove the creamer from the filter support, pressing it
from the side of the ring.
- Remove the gasket.
- Rinse all the components. Check that the openings in the
mesh filter are not blocked. To unblock the holes,
carefully clean it in hot water, rubbing it with an
abrasive pad.
- Replace the filter and the gasket on the plastic disk, as
shown in Figure 23. Replace the whole assembly in the
steel filter support (Fig. 23).
- Finally tighten the ring.
CLEANING THE FILTER HOLDER FOR PODS (IF
SUPPLIED)
Every so often, the filter holder for pods should be
cleaned, as follows:
• press the filter holder button and remove the filter
(fig. 24) and the creamer ,if supplied. Clean the inside
of the filter holder. Never wash the filter holder in the
dishwasher.
• check that the pinholes of the filter are not blocked. If
necessary, clean it carefully with hot water, scrubbing
it with an abrasive pad.
• replace the filter.
CLEANING THE ESPRESSO BOILER OUTLET
At least once a year, it is necessary to clean the outlet
of the espresso boiler in the following manner:
• check that the coffee machine is not warm and the
plug is detached from the mains;
• using a screwdriver, unscrew the screw that holds the
outlet of the espresso boiler (fig. 27);
• using a moist cloth, clean the area of the boiler
where the outlet was positioned (fig. 28);
• brush the outlet with a little dish-washing liquid until
all the pinholes are clean
• rinse the outlet under the tap, still scrubbing it;
• replace the outlet of the espresso boiler.
OTHER CLEANING OPERATIONS
1.Do not use solvents or detergents in cleaning the
coffee maker. Use a soft, damp cloth.
2.Remove the drip-trays, empty them and wash them
periodically
ATTENTION: during cleaning, never immerse the unit
in water – it is an electrical appliance.
10
DESCALING
It is advisable to clean the calcium from the machine
every 200 cups of coffee. It is recommended that
specific (store-bought) products for descaling of
espresso coffee machines be used. If such products are
not available, it is possible to proceed as follows:
1.Fill the tank with water using 1 liter of water;
2.Dissolve 2 spoonfuls (about 30 grams) of citric acid
in the water (available from chemists);
3.Turn the selector knob to the
position and wait
until the ‘OK’ light comes on.
4.Check that the filter holder is not attached and place
a container under the outlet of the machine;
5.Turn the selector knob to the
position and allow
half of the solution in the tank to flow out. Then stop
the flow by turning the selector to the “O” position.
(fig. 14).
6.Allow the solution to act for about 15 minutes, then start
up the flow again until the tank is completely empty;
7.To eliminate the remains of the solution and the
calcium, rinse the tank well, fill it with clean water
and replace.
8.Turn the selector knob to the
position and allow
all of the remaining solution in the tank to flow out
(fig. 8).
9.Turn the selector knob to the
position (fig.5) and
repeat operations 7 and 8 one more time.
Repairs for malfunctioning caused by problems of
calcium build-up are not covered by the guarantee if
the descaling process described above is not carried
out regularly.
EC190/200 GB
2-01-2003
10:24
PROBLEM
Espresso coffee no longer
comes out.
Pagina 11
POSSIBLE CAUSES
•The coffee is damp and/or
excessively pressed
• The holes in the filter holder spouts
are blocked.
• The outlet of the espresso boiler is
blocked.
• The tank is badly inserted and the
SOLUTION
• Prepare the coffee again, pressing it more
lightly and/or changing the powder
• Clean the holes in the spouts.
• Clean as indicated in the “Cleaning
the espresso boiler outlet” section.
• Press the tank lightly so as to open
the valve at the bottom.
valve at the bottom is not open.
Espresso coffee drips from the
edges of the filter holder,
instead of from its holes.
• The filter holder is badly inserted.
• The gasket of the espresso boiler has
lost elasticity.
• The holes in the filter holder spouts
are blocked.
The espresso coffee is cold.
• The ‘OK’ pilot light was not on when
the coffee delivery switch was pressed.
• The preheating was not carried out
The pump is too noisy.
The coffee cream is lightcoloured (the coffee comes
out quickly from the spout).
•Attach the filter holder on correctly and
turn it all the way.
• Have the espresso boiler gasket replaced
at an Service Centre
• Clean the holes in the spouts.
• Wait until the OK pilot light comes on
• Carry out the preheating as indica ted in
the “Preheating the coffee unit” section.
•The cups were not preheated
.•Preheat the cups by rinsing them in hot
water.
• The water tank is empty.
• Fill the tank.
• The tank is inserted wrongly and the
valve at the bottom is not open.
• Press the tank lightly so as to open
the valve at the bottom.
• The ground coffee has not been
• Tamper the ground coffee down
pressed enough.
• The quantity of ground coffee is
more.
• Increase the quantity of coffee.
scarce.
• The quantity of ground coffee is too
much
• Unsuitable quality of ground coffee.
• The ground coffee is too tightly
The coffee cream is dark (the
coffee comes out slowly from
the spout).
pressed
.•The espresso boiler outlet is blocked
• The quantity of ground coffee is too
much.
• Decrease the quantity of ground cof
fee.
• Press the coffee less.
•Clean the outlet as described in
“Cleaning the espresso boiler outlet”
section.
• Decrease the quantity of ground cof
fee.
•Unsuitable quality of ground coffee.
• Change the quality of ground coffee
• The coffee is too finely ground.
• Only use ground coffee for espresso
coffee makers. Do not use damp coffee.
The coffee has an acidic taste.
• The unit was not sufficiently rinsed
after the descaling process
procedure.
• Rinse the unit as described in the
“descaling” section.
The milk does not froth when
making a cappuccino.
• The milk is not cold enough.
• Always use milk at refrigerator tem
perature.
• Clean the holes of the cappucino
maker, especially those shown in
fig. 21
• The cappuccino maker is dirty.
11
•Change the quality of ground coffee
EC190/200 GB
2-01-2003
10:24
Pagina 12
Limited Warranty
What Does This Warraty Cover? We warrant each Espresso Coffee Machine to be free from defects in material
and workmanship. Our obligation under this warranty is limited to replacement or repair, free of charge at our
factory or authorized service centers, of any defective part or parts there of other than parts damaged in transit,
which shall be returned to us, transportation prepaid. This warranty shall apply only if the Espresso Coffee Machine
is used in accordance with the factory directions which accompany it.
How Long Does The Coverage Last? This warranty runs for one year from the date of delivery and applies
only to the original purchaser.
What Does This Warranty Not Cover? This warranty does not cover defects or damage of the Espresso Coffee
Machine which result from repairs or alterations to the machine outside our factory or authorized service centers, nor
shall it apply to any Espresso Coffee Machine which has been subject to abuse, misuse, negligence or accidents.
Also, consequential and incidental damages resulting from the use of this product or arising out of any breach of
contract or breach of this warranty are not recoverable under this warranty. Some states do not allow the exclusion
or limitation of incidental or consequential damages, so the above limitation may not apply to you.
How Do You Get Service? If repairs become necessary or spare parts are needed, plase write to:
De’Longhi America Inc.
Park 80 West Plaza One, 4th floor
Saddle Brook NJ 07663
or call Service Tel. No 1-800-322-3848
or visit our internet site:
www.delonghiusa.com
The above warranty is in lieu of all other express warranties and representations; All implied warranties are limited
to the applicable warranty period set forth above. This limitation does apply if you enter into an extended warranty
with De’Longhi. Some states do not allow limitations on how long an implied warranty lasts, so the above exclusions
connection with the sale or use of its Espresso Coffee Machine.
How Does State Law Apply? This warranty gives you specific legal rights, and you may also have other rights
which vary from state to state.
GARANTIE
Nous garantissons que tous les APPAREILS ELECTRIQUES DE’ LONGHI sont exempts de tout
défaut de matériaux et de manufacture. Notre obligation sous cette garantie est limitée au
remplacement ou à la réparation gratuite dans notre usine de toutes les pièces défectueuses
autre que les pièces endommagées durant le transport, qui nous seront retournées - transport
pré-payé - en dedans d’un an après la livraison à l’acheteur - utilisateur. Cette garantie ne sera
applicable que si l’appareil a été utilisé selon les instructions du fabricant qui accompagnent
l’appareil, et sur courant alternatif (AC). Cette garantie remplace toutes les autres garanties et
représentations, exprimées ou impliquées, et toute autre obligation ou responsabilité de notre
part. Nous n’autorisons aucune autre personne ou compagnie à assumer pour nous une
quelconque responsabilité en relation avec la vente ou l’utilisation de nos appareils.
Cette garantie ne s’appliquera ni aux appareils qui seront réparés ou endommagés hors de
notre usine, ni aux appareils qui auront été sujets à une mauvaise utilisation, à une négligence
ou à un accident.
Si des réparations ou des pièces de rechange sont nécessaires, vous êtes priés d’écrire à:
De’Longhi America Inc.
Park 80 West Plaza One, 4th floor
Saddle Brook NJ 07663
Tel. No 1-800-322-3848
ou bien contacter notre site Internet:
www.delonghiusa.com
12