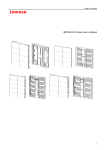
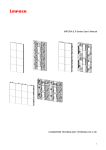
1
ATION
VENTIL
DOWNDRAFT
USE
AND CARE MANUAL
MANUAL
INSTALLATION
MODEL:
HDDW
36DS
MODELS:
CVS2
TABLE OF CONTENTS
Safety Instructions . . . . . . . . . . . . . . . . . . . .3+4
Features . . . . . . . . . . . . . . . . . . . . . . . . . . . . 5
Operation . . . . . . . . . . . . . . . . . . . . . . . . . . . 6
Filters and Maintenance . . . . . . . . . . . . . . . . 7
Care and Cleaning . . . . . . . . . . . . . . . . . . . . 8
Fig. 1
GAZ
Replacing the Bulbs . . . . . . . . . . . . . . . . .
9
Troubleshooting guide . . . . . . . . . . . . . . .
10
Customer Services . . . . . . . . . . . . . . . . .10+11
Before Calling for Service . . . . . . . . . . . . .
10
Cover How to Obtain Service . . . . . . . . . .
10
Warranty . . . . . . . . . . . . . . . . . . . . . . . . .
11
Data Plate Information . . . . . . . . . . . . . . .
11
Abb. 1
ELECTRO
PAGE 2
IMPORTANT SAFETY INSTRUCTIONS
READ ALL INSTRUCTIONS BEFORE USING THE APPLIANCE.
READ AND SAVE THESE INSTRUCTIONS.
WARNING – TO REDUCE THE RISK OF INJURY
TO PERSONS IN THE EVENT OF A COOKTOP
GREASE FIRE, OBSERVE THE FOLLOWING:
WARNING – TO REDUCE THE RISK OF A RANGE
TOP GREASE FIRE:
a)
b)
Never leave surface units unattended at high
settings. Boilovers cause smoking and greasy
spillovers that may ignite. Heat oils slowly on
low or medium settings.
Always turn hood ON when cooking at high
heat or when flambéing food (i.e. Crepes
Suzettes, Cherries Jubilee, Peppercorn Beef
Flambé).
c)
Clean ventilating fans frequently. Grease
should not be allowed to accumulate on fan or
filter.
d)
Use proper pan size. Alwaxs use cookware
appropriate for the size of the surface element.
Cauition: Grease left on filters can remelt and
move into the vent.
When children become old enough to use the
appliance, it is the legal responsibility of the
parents or legal guardians to ensure that they
are instructed in safe practices by qualified
persons.
a)
SMOTHER FLAMES with a close-fitting lid,
cookie sheet, or metal tray, then turn off the
burner. BE CAREFUL TO PREVENT BURNS.
If the flames do not go out immediately. EVACUATE AND CALL THE FIRE DEPARTMENT.
b)
NEVER PICK UP A FLAMING PAN. You may
be burned.
c)
DO NOT USE WATER, including wet dish
cloths or towels. A violent explosion will result.
d)
Use an extinguisher ONLY if:
1)
You know you have a Class ABC extinguisher, and you already know how to
operate it.
2)
The fire is small and contained in the
area where it started.
3)
The fire department is being called.
4)
You can fight the fire with your back to
an exit.
WARNING: Whenever possible, do not operate
blower during a cooktop fire. However, DO NOT
REACH THROUGH FIRE TO TURN OFF BLOWER.
PAGE 3
SAFETY INSTRUCTIONS
Carefully clean the extractor hood before switching on
for the first time.
Do not place any objects on the extractor hood.
The sliding surfaces of the filter drawer must not be
dirty.
Slide marks may occur. However, these will not impair
function.
When moving the filter drawer, do not place hand in
the marked areas, danger of crushing!
PAGE 4
FEATURES
Chimney
panelling
IMPORTANT NOTES:
❑ The Instructions for Use apply to several versions of
this appliance. Accordingly, you may find descriptions
of individual features that do not apply to your
specific appliance.
Light / fan
switches
❑ This extractor hood complies with all relevant safety
regulations.
Repairs should be carried out by qualified technicians
only.
Improper repairs may put the user at considerable
risk.
❑ Before using your appliance for the first time, please
read these Instructions for Use carefully. They contain
important information concerning your personal safety
as well as on use and care of the appliance.
Filter grille
❑ Please retain the operating and installation instructions
for a subsequent owner.
Lighting
TRANSPORTATION PROTECTION
DEVICE:
EXHAUST-AIR MODE:
❑ The transportation protection device prevents the filter
drawer from sliding out.
❑ The extractor-hood fan extracts the kitchen vapours
and conveys them through the grease filter into the
atmosphere.
❑ Check that the fitter has removed the transportation
protection device (see installation manual).
❑ The grease filter absorbs the solid
particles in the kitchen vapours.
❑ Please retain the transportation protection device in
case you move house.
❑ The kitchen is kept almost free of grease and odours.
D When the extractor hood is operated in exhaust-air
mode simultaneously with a different burner which
also makes use of the same chimney (such as gas, oil
or coal-fired heaters, continuous-flow heaters, hot-water
boilers) care must be taken to ensure that there is an
adequate supply of fresh air which will be needed by the
burner for combustion.
Safe operation is possible provided that the underpressure
in the room where the burner is installed does not exceed
4 Pa (0.04 mbar).
This can be achieved if combustion air can flow through
non-lockable openings, e.g. in doors, windows and via the
air-intake/exhaust-air wall box or by other technical
measures, such as reciprocal interlocking, etc.
If the air intake is inadequate, there is a risk of
poisoning from combustion gases which are drawn
back into the room.
An air-intake/exhaust-air wall box by itself is no guarantee
that the limiting value will not be exceeded.
Note: When assessing the overall requirement, the
combined ventilation system for the entire household must
be taken into consideration. This rule does not apply to the
use of cooking appliances, such as hobs and ovens.
GAS HOBS / GAS COOKERS:
Do not use all the gas hotplates simultaneously for a
prolonged period (max. 15 minutes) at maximum thermal
load, otherwise there is a risk of burns if the housing
surfaces are touched or a risk of damage to the extractor
hood. If the extractor hood is situated over a gas hob,
operate the hood at maximum setting if three or more gas
hotplates are operated simultaneously.
PAGE 5
OPERATION
Switching the fan OFF:
The most effective method of removing vapours
produced during cooking is to:
❑ Switch the ventilator ON
as soon as you begin cooking.
❑ Press the 0 button.
The displayed { goes out shortly
afterwards.
❑ Switch the ventilator OFF
a few minutes after you have finished cooking.
Display for fan setting
Or:
Fan follow-on
❑ Keep pressing the – button until the fan switches off.
The displayed { goes out shortly afterwards.
Intensive setting:
Maximum power is obtained at the intensive setting.
It is only required for short intervals.
❑ Keep pressing the + button until a ç appears in the
display.
Light
Reduce fan
speed
❑ If the intensive setting is not cancelled by hand, the
fan will automatically switch back to step } after
10 minutes.
Fan ON and
increase speed
Fan follow-on:
Fan OFF
❑ Press the
Acoustic signal:
! button or push in the filter drawer.
The fan runs for 10 minutes at setting 1. At the same
time a dot flashes in the display.
Then the fan switches off automatically.
❑ When a button is pressed, this is verified by an
acoustic signal.
Lighting:
Switching off the acoustic signal:
❑ Briefly press the a button to switch the light on and
off.
❑ Simultaneously press buttons 0 and + until a signal is
emitted after approx. 3 seconds.
❑ The light can be switched on at any time, even though
the fan is switched off.
❑ Adjusting the brightness:
Hold down the a button until the desired brightness is
obtained.
Switching on the acoustic signal:
❑ Repeat the process.
Switching the fan ON
Switching on the light automatically,
e.g. via a timer:
❑ Press the + button or pull out the filter drawer.
❑ Fan and light must be switched off.
Setting the required fan speed:
Switching on:
❑ Press the + button.
The fan speed is increased by one step.
Simultaneously press the – and ! buttons.
❑ After approx. 3 seconds the light switches on to
acknowledge the setting.
❑ Press the – button.
The fan speed is reduced by one step.
Switching off:
Repeat the process with the light switched on.
❑ After approx. 3 seconds the light
switches off to acknowledge the setting.
PAGE 6
FILTERS AND MAINTENANCE
GREASE FILTERS:
Removing and inserting the metal grease
filters:
Metal filters are used to trap the greasy element of the
vapours that develop during cooking.
The filter mats are made from non-combustible metal.
Warning: The halogen bulbs must be switched off and
cool.
Before changing the grease filters, ensure that the filter drawer has been pushed in.
1. Press the catches on the front grease filters and fold
down the grease filters.
Caution:
As the filter becomes more and more
saturated with grease, not only does the risk of it catching
fire increase but the
efficiency of the extractor hood can also be adversely
affected.
Important:
By cleaning the metal grease filters at appropriate intervals,
the possibility of them catching fire as a result of a build-up
of heat such as occurs when deep-fat frying or roasting is
taking place, is reduced.
Saturation indicator:
~
When the grease filters reach saturation point, an acoustic
signal is sounded for 6 seconds after the fan has switched
off, and an ~ appears in the display. The grease filters
should be cleaned straight away.
Cleaning the metal grease filters:
❑ In normal operation (1 to 2 hours daily), the metal
grease filter must be cleaned 1 x a month.
2. Press the catches on the rear grease filters and fold
down the grease filters.
❑ The filters can be cleaned in a dishwasher. It is
however possible that they will become slightly
discoloured.
❑ The filter must be placed loosely, and NOT wedged, in
the dishwasher.
Important:
Metal filters that are saturated with grease should not
be washed together with other dishes etc.
❑ When cleaning the filters by hand, soak them in hot
soapy water first of all.
Do not use aggressive, acidic or caustic cleaners.
Then brush the filters clean, rinse them thoroughly and
leave the water to drain off.
3. Clean the grease filter.
4. Insert the clean filters back into the hood.
5. Cancel the ~ in the display.
❑ Press the button 0.
PAGE 7
CARE AND CLEANING
WARNING. To avoid risk of fire and explosion do not use flammable liquids or solvents.
Always unplug or disconnect the appliance from the power supply before servicing.
Do not clean the extractor hood with abrasive
❑ When cleaning the grease filters, remove grease
deposits from accessible parts of the housing.
This prevents the risk of fire and ensures that the
extractor hood continues operating at maximum
efficiency.
sponges or with cleaning agents which contain sand,
soda, acid or chlorine!
To facilitate cleaning, pull out the filter drawer.
Do not catch hand between the filter brackets, danger of
crushing!
❑ Note: Do not use alcohol (spirit) on plastic surfaces, as
dull marks may appear.
Caution: Ensure that the kitchen is adequately
ventilated. Avoid naked flames!
Clean the operating buttons with a mild soapy solution
and a soft, damp cloth only.
Do not use stainless-steel cleaner to clean the operating
buttons.
Stainless steel surfaces:
❑ Use a mild non-abrasive stainless steel cleaner.
❑ Clean the surface in the same direction as it has been
ground and polished.
❑ We recommend our stainless steel cleaner Fantastik®
or Formula 409® sprayed onto a paper towel.
Do not insert the filter drawer while cleaning it.
Aluminium and plastic surfaces:
Danger of crushing!
❑ Do not use dry cloths.
❑ Use a mild window cleaning agent.
❑ Do not use aggressive, acidic or caustic cleaners.
Observe the warranty regulations in the enclosed
service booklet.
❑ Clean the extractor hood with a hot soap solution or a
mild window cleaner.
❑ Do not scrape off dried-on dirt but wipe off with a
damp cloth.
PAGE 8
REPLACING THE BULBS
1. Switch off the extractor hood and pull out the mains
plug or switch off the electricity supply at the fuse box.
3. Replace the halogen light bulb (conventional halogen
bulb, 12 Volt, max. 20 Watt, G4 bulbholder).
Caution: Plug-in bulbholder.
Take hold of the bulb with a clean cloth.
When switched on, the halogen bulbs become very
hot. Even for some time after the bulbs have been
switched off there is still a risk of burns.
2. Remove the bulb ring with a screwdriver or similar tool.
4. Re-insert the bulb ring.
5. Restore the power by inserting the mains plug or
switching on the fuse.
Note: If the light does not function, check that the bulbs
have been inserted correctly.
PAGE 9
TROUBLESHOOTING GUIDE
Problem
Possible Cause
Remedy
Nothing works – display is not
illuminated
Control button board has become
disconnected.
Contact qualified appliance service
technician.
If an ~ or ã appears in the display
Filters saturated
See ”Filters and Maintenence” Section.
If is not possible to operate the
extractgor hood
Power failure
Disconnect the extractor hood from
the mains electricity supply by pulling
out the plug or switching it off at the
main fuse box.
Wait for approx. 1 minute and then
switch it on again.
CUSTOMER SERVICES
Before Calling for Service
If the blower does not operate:
❑ Ensure that the electrical cord is properly connected and the supply circuit is energized.
❑ Make sure that the blower speed control knob is not in the OFF position.
❑ The manufacturer of the extractor hoods accepts no liability for complaints which can be attributed to the design and
layout of the pipework.
How to obtain Service
For authorized service or parts information, call 1-800-735-4328.
We want you to be a satisfied customer. If a situation arises that has not been resolved to your satisfaction, please let us
know.
Write: Customer Support, BSH Home Appliances, Corp. 5551 McFadden Ave., Huntington Beach, CA 92649,
or call: 1-800-735-4328.
Please include the model number, serial number, and date of original purchase/installation.
PAGE 10
CUSTOMER SERVICES
Warranty
Warranty
What is Covered
Warranty Application
Full One Year Warranty
For one year from the date of installation or date of
occupancy for a new previouslyunoccupied dwelling, any
part which fails in normal home use will be repaired or
replaced free of charge. Save your dated receipt or other
evidence of the installation/occupancy date. BSH will pay
for all repair labor and replacement parts found to be
defective due to materials and workmanship. Service must
be provide by a BSH Authorized Service Agency during
normal working hours.
This warranty applies to appliances used in normal family
households. It does not cover their use in commercial
situations.
This Warranty is for products purchased and retained in
the 50 states of the U.S.A., the District of Columbia and
Canada. The warranty applies even if you should move
during the warranty period. Should the appliance be sold
by the original purchaser during the warranty period, the
new owner continues to be protected until the expirationm
date of the original purchaser’s warranty period.
BSH DOES NOT ASSUME ANY RESPONSIBILITY FOR
INCIDENTAL OR CONSEQUENTIAL DAMAGES. Some
states do not allow the exclusion or limitation of incidental
or consequential damages, so the above limitation or
exclusion may not apply to you. This warranty gives you
specific legal rights and you may also have other rights
which may vary from state to state or province to province.
What is not Covered
1. Service by an unauthorized agency. Damage or repairs
due to service by an unauthorized agency or the use of
unauthorized parts.
2. Service visits to:
❑ Teach you how to use the appliance.
❑ Correct the installation. You are responsible for
providing electrical wiring and other connecting
facilities.
❑ Reset circuit breakers or replace home fuses.
Service Data
For handy reference, the serial tag information has been
affixed below. Keep your invoice for warranty validation.
To obtain service, see previous page.
3. Damage resulting from accident, alteration, misue,
abuse, improper installation or installation not in
accordance with local electrical codes or plumbing
codes, or improper storage of the appliance.
4. Repairs due tro other than normal home use.
Serial Number/Data Plate Location: Are to be found on the name
plate inside the appliance after removal of the filter frame.
We reserve the right to change specifications or design without notice. Some models are certified for use in Cananda.
BSH is not responsible for products which are transported form the U.S. for use in Canada. Check with your local Canadian
distributor or dealer.
PAGE 11
5551 McFadden Avenue, Huntington Beach CA, 92649 • 800-735-4328 • www.thermador.com
9000173706 • 10013 RevB • 07/06 © BSH Home Appliances Corporation • Litho in U.S.A.