1
Appendix D
Assembling the Rooftop or Wall Mount
Assembling the Mount
Assembling the Mount
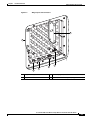
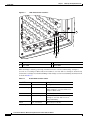
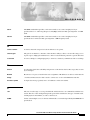
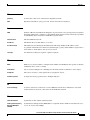
Figure D-1 shows the correct locations for the three bolts.
Figure D-1
Mount Bolt Locations
3
1
88949
2
1
Long flanged hex bolt
2
Carriage bolt
3
Carriage bolt
To assemble the mount, follow the instructions below:
Step 1
Place a washer on the long flanged hex bolt.
Step 2
Place the end of the mast pipe with the bolt holes into the mounting plate (see Figure D-1).
Step 3
Align the holes in the mast pipe with the holes in the mounting plate.
Step 4
Insert the long flanged hex bolt and washer into the upper holes on the mounting plate and through the
mast pipe (see Figure D-1).
Step 5
Place a washer and hex nut on the end of the long flanged hex bolt and hand-tighten.
Step 6
Position the mast pipe and mounting plate as shown in Figure D-1.
Step 7
Align the lower square hole in the mast pipe with the semi-circular cut-out on the mounting plate.
Step 8
Place the carriage bolt into the square hole on the inside of the mast pipe.
Step 9
Place a washer and hex nut on the end of the carriage bolt and hand-tighten.
Step 10
Repeat Steps 8 and 9 for the other square hole.
Cisco Aironet 1400 Series Wireless Bridge Hardware Installation Guide. OL-4072-03
OL-4072-04
D-3