1
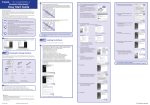
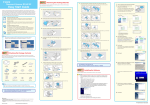
2.
Easy Start Guide
Thank you for purchasing the Canon imageFORMULA DR-2580C.
This Easy Start Guide describes the procedure for setting up the scanner for use. Follow the
procedures outlined in this Easy Start Guide to set up the scanner. Details on using the
scanner are described in the User’s Guide packaged with the scanner. Before you start using
the scanner, make sure to thoroughly read the User’s Guide.
2.
Open the rear cover and remove the protective sheet.
Flip up the retard roller lock lever (1), and slide it to the right (2)
Rear Cover
3.
3. Load the retard roller so that the notch in the roller is aligned with the scanner’s shaft.
After pushing both sides of the rear cover closed, open the document feed tray.
Checking the Packing List
When you unpack your scanner, make sure that it contains all of the following accessories.
If any of the items listed below are missing or damaged, contact your local authorized Canon
dealer or service representative.
Document Feed Tray
4.
4. Slide the lock lever to the left so that it fits into the retard roller hole (1), and then
press the lock lever completely down to lock the retard roller (2).
While squeezing the OPEN knob from both sides, open the upper unit.
Upper Unit
OPEN Knob
DR-2580C Scanner
Doc
n you
or
unp
ack
Ch
serv
ice
DR2580
C Sca
nner
a del
AIS
SH
ENGLI
FRANÇ
CH
DEUTS
L
ESPAÑO
NO
ITALIA
LANDS
NEDER
Roll
Roll
Us
List
t Sc
erís
an
ne
Gui
r
de
Doc
ume
Ada nt
pter Guid
e
s
DRSetu 2580
p Disc C
er
5. Attach the roller cover.
en
Cab
le
er
Unit
App
Soft licat
ware ion
Disc
Job
(U.S War
.A
rant
and y
Can Card
ada
only
ing
Remove the orange protective tape together with the protective sheet.
um
USB
Guid
e
Quic
k Refe
Guid renc
e
e
e Pa
ck
5.
Doc
Scanner
ide
Gu
’s ateu
r
User
I’ buch
e de
handrio
tzer
Guid
usuae
Benu
ll’Utent
g
Guía de
idin
ndle
Guid
rsha
uike
Gebr
utilis
Use
r’s
Document Guide
Adapters
Document
Eas
(Thi y Star
s Man t Guid
ual) e
Reta
rd
ec
kin
g th
USB Cable
um
Ea ent Sc
sy
Sta anner
rt G DR-2
uid 580C
e
Tha
This nk you
proc Eas
for
sca edu y Star purc
the nne res
t Gui has
sca r are outl
de ing
nne des ined des the
Can
r, mak crib in
this crib
e sureed in Eas es the on DRthe y Star proc 258
to
thor Use
edu 0C
t
oug r’s Gui Guide re Doc
ume
hly
de
to for
read pac set sett
nt
ing Sca
the kag up the up
nne
you
Use ed
the
r.
r sca
r’s with scanne sca
Gui the
repr
nne
nne
de.
sca r. Det r for
ese
r, mak
nne ails
ntat
r. Befo on use.
ive. e mis e sure
usin Foll
sing that
ow
re
you g the
the
or
dam it con
star
t usin
age tain
d, s all
g
con of
tact the
you follo
AC
r loca wing
Ada
l auth acc
pter
ess
/Pow
oriz orie
er
ed
s.
Cord
Can
on
Whe
dea
ler
AC Adapter/Power Cord
Labe
ls
Ado
be
Setu
)
Acro
p Disc bat
0880281099-L5T1P7-B
CANON
6390
MISSISSAUGA
DIXIECANADA
RD INC.
ON
L5T
R01
9Z9
(U.S Reg
.A istra
and tion
Can Card
ada
only
Plea
read se
ing
read
this
this
man
ual, manual
keep befo
it in re
a safe usin
g
plac this
e for unit.
futur
)
Afte
e referr you
ence
.
Easy Start Guide
(This Manual)
finis
h
DR-2580C
Setup Disc
User’s Guide
Application
Software Disc
6.
Retard Roller
Roller Unit
Job Labels
Adobe Acrobat
Setup Disc
Check that all the protective tape and protective sheets have been removed,
and then install the roller unit and the retard roller in their designated locations.
7.
Gently close the upper unit.
Make sure it is closed securely by pushing on both edges until you hear a click.
Lock Lever
0880281099-L5T1P7-BR01
CANON CANADA INC.
6390 DIXIE RD
MISSISSAUGA
ON
L5T
Quick Reference
Guide
Warranty Card
(U.S.A and Canada only)
Roller Unit
9Z9
Registration Card
(U.S.A and Canada only)
Retard Roller
Note
●
●
●
●
●
To use the roller unit and retard roller, you need to install them in the scanner.
“Installing the Rollers”
The DR-2580C Setup Disc contains the “DR-2580C Scanner Driver” and
“CapturePerfect 3.0”. For details, refer to "About the Setup Disc" on page 16 of
the User’s Guide.
The following application software is included on the application software disk
that comes with this product.
[Presto! BizCard Reader SE] Name card management software provided with the
multi-language OCR made by NewSoft Technology Corp.
[OmniPage SE]* Optical character recognition (OCR) software with multiple
language support, made by Nuance Communications Inc.
[PaperPort® 11]* File management application that makes it easy to store, organize, and retrieve digital documents, made by Nuance Communications Inc.
* In order to receive support of OmniPage SE and PaperPort® 11, you need to
upgrade to a Professional version.
Please see following URL for upgrade.
http://www.nuance.com/partneroffer/canon
Items included in this package are subject to change without notice.
Keep the package and packing materials for storing or transporting the scanner.
☞
6-1
Follow the steps below to install the roller unit in the upper unit.
The scanner is now ready for use.
1. Flip up the lock lever (1), and slide it to the right (2).
Next, you need to install the scanner software. (☞STEP3)
Installing the Software
2. Load the roller unit onto the scanner’s shaft.
Install the software before connecting the scanner to the computer.
Warning
❏ Do not connect the scanner to the computer before installing the software. If
you connect the scanner and turn it ON before you install the software, the
wizard screen on the right will appear. If this wizard is displayed, click the
[Cancel] button to exit the wizard, and turn the scanner OFF.
3. Slide the protrusion on the roller unit into the groove on the scanner, and then lift the
roller unit into place.
After checking the package contents, you need to prepare the
scanner for use. (☞STEP2)
Removing the Packing Materials and
Installing the Rollers
Wizard Screen (Windows XP)
Perform the following steps to remove the scanner from the box, remove the orange
tape and protective sheets from the scanner, and install the roller unit and retard roller
in the scanner.
1.
❏ Be sure to log on with administrator privileges when logging on to Windows.
4. Slide (1) and close (2) the lock lever to lock the roller unit.
❏ Close all other applications before installing the software.
Peel off all the orange tape from the outer casing.
When peeling off the protective tape fastening the document eject tray extension,
hold the document eject tray extension firmly in place with your hand.
6-2
Follow the steps below to install the retard roller on the inside of the roller cover.
1. Remove the roller cover.
Document Eject Tray Extension
1.
2.
Turn ON your computer.
Insert the DR-2580C Setup Disc into the
computer’s CD-ROM drive.
The setup wizard automatically starts up when
you insert the CD-ROM into the CD-ROM
drive. If the setup wizard does not start up, run
the setup.exe application on the CD-ROM.
■ Trademarks
PUB. CE-IE-637
©CANON ELECTRONICS INC. 2008
PRINTED IN JAPAN
• Canon and the Canon logo are registered trademarks of Canon Inc. in the United States and may also be trademarks or registered trademarks in other countries.
• Microsoft Windows® is a registered trademark of Microsoft USA in the United States and other countries.
• Other brands and product names used in this manual may be trademarks or registered trademarks of their respective companies.
☞Continued on back side
☞Continued from front side
Connecting the Scanner to Your PC
3.
Scanning
Click [Typical Installation].
[Typical Installation] installs all of the software.
If you want to select which parts of the
software to install, click [Custom Installation].
Perform the following steps to connect and register the scanner to your computer.
Warning
❏ Use only the power cord and AC adapter included in the package.
When you have finished installing the software and the scanner has been recognized, you
can load a document and test that scanning is performed correctly.
With the DR-2580C, you can start scanning simply by pressing one of the job buttons on the
left side of the scanner. Perform the following steps to load a document and test that it is
scanned properly with a job button.
❏ Connect the scanner to your computer while the scanner is turned OFF.
❏ Be sure to log on with administrator privileges when logging on to Windows.
4.
Click [Install].
All of the currently displayed software is
installed. To install only selected software, click
[Back] and select [Custom Installation].
5.
6.
1.
1).
Connect the power cord to the AC adapter (1
2.
2).
Plug the AC adapter into the connector on the left side of the scanner (2
3.
3).
Plug the power cord into the power outlet (3
4.
4).
Connect the scanner and your PC with the USB cable (4
5.
Check the connections, and then press the power switch to turn the scanner
5).
ON (5
1.
2.
Open the document feed tray.
3.
Load your document in the document feed tray with the printed side facing up,
and adjust the document guides to the width of the document.
Thoroughly fan the pages of your document, and make sure their edges are
aligned.
Click [Next].
Document Guides
Read the software license agreement, and click
[Yes] if you consent to its conditions.
Installation of the scanner driver starts.
4.
Make sure the feed selection lever is set to the page separation (
) side.
Be careful not to set the feed selection lever to the bypass ( ) side because this
will cause the document pages to feed as a stack, rather than separately. For
details on the feed selection lever, refer to the User’s Guide.
7.
Click [Finish] to complete the installation.
Next, the installation wizard for CapturePerfect
3.0 appears.
Feed Selection Lever
6.
8.
Windows recognizes the DR-2580C as new hardware and performs installation
automatically.
5.
Make sure the eject selection lever is set to the down (U-Turn Path) position.
If the eject selection lever is set to the up (Straight Path) position, document
pages are ejected from the rear of the scanner. For details on the eject selection
lever, refer to the User’s Guide.
Click [Next].
(Windows98/Me/2000)
(WindowsXP)
Eject Selection Lever
9.
10.
Read the software license agreement, and click
[Yes] if you consent to its conditions.
Check the destination folder for the installation,
and click [Next].
6.
Note
●
For Windows XP, a balloon help pop-up appears when installation is finished.
●
The installation finished message does not appear in Windows 98/Me/2000.
●
The scanner is registered on the computer as “CANON DR-2580C USB” in the
“Imaging Device” directory of the Device Manager.
11.
The “Monitor for DR-2580C” window appears at the bottom right of the computer
screen, and scanning starts.
Job Buttons
7.
Installation of CapturePerfect 3.0 starts.
Press job button 3.
When “Sending complete” appears in the monitor window, scanning is finished.
Click [Close] to close the “Monitor for DR-2580C” window.
Click [Finish] to complete the installation of
CapturePerfect 3.0.
Note
●
12.
When all installations are complete, the
installation completed screen appears.
Click [Exit] to exit the installer. Click [Back] to
return to the menu screen.
●
●
To open the Device Manager screen, open “System” in the Control Panel, select
the “Hardware” tab, and click [Device Manager].
The following functions are assigned by default to the job buttons.
Job button 1: Scan start
Job button 2: Scan stop
Job button 3: Scan
●
In Windows XP, “System” appears when the Control Panel is switched to classic
view.
The job button functions can be changed. For details on assigning functions to
job buttons, refer to the User’s Guide.
●
Scanned image files are saved in the “My Pictures folder” in “My Documents.”
(Default)
●
By default, scanned image files are saved as PDF files with a 17-digit file name
that indicates the date and time when the image was scanned.
●
You can change the scan settings and save destination folder by using the “Job
Registration Tool” located in the Programs menu of Windows.
The scanner is now correctly recognized by your computer.
In the last step, you can test that documents are scanned properly.
(☞STEP5)
The setup is now complete
This completes the software installation.
Next, you need to connect the scanner to your computer. (☞STEP4)
This completes the setup of the DR-2580C. Details on how to use the DR-2580C
are described in the User’s Guide packaged with the scanner. Before you start
using the scanner, make sure to thoroughly read the User’s Guide.
● For details on how to use “CapturePerfect 3.0”, refer to CapturePerfect 3.0
Operation Guide in the Programs menu of Windows.
●


![3 Cliquez sur [Installer].](http://vs1.manualzilla.com/store/data/006787798_1-b7982ea2836d79fcb2bb1ff2a5fe9d4a-150x150.png)