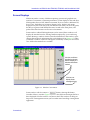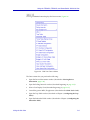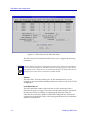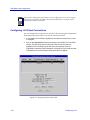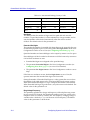
1
Title Page
®
Portable Management Application
for the
FRX4000, FRX6000, and SmartSwitch 1800
User’s Guide
Notice
Cabletron Systems reserves the right to make changes in speciÞcations and other information
contained in this document without prior notice. The reader should in all cases consult Cabletron
Systems to determine whether any such changes have been made.
The hardware, Þrmware, or software described in this manual is subject to change without notice.
IN NO EVENT SHALL CABLETRON SYSTEMS BE LIABLE FOR ANY INCIDENTAL, INDIRECT,
SPECIAL, OR CONSEQUENTIAL DAMAGES WHATSOEVER (INCLUDING BUT NOT LIMITED
TO LOST PROFITS) ARISING OUT OF OR RELATED TO THIS MANUAL OR THE INFORMATION
CONTAINED IN IT, EVEN IF CABLETRON SYSTEMS HAS BEEN ADVISED OF, KNOWN, OR
SHOULD HAVE KNOWN, THE POSSIBILITY OF SUCH DAMAGES.
Virus Disclaimer
Cabletron has tested its software with current virus checking technologies. However, because no
anti-virus system is 100% reliable, we strongly caution you to write protect and then verify that the
Licensed Software, prior to installing it, is virus-free with an anti-virus system in which you have
conÞdence.
Cabletron Systems makes no representations or warranties to the effect that the Licensed Software is
virus-free.
Copyright © 1998 by Cabletron Systems, Inc. All rights reserved.
Printed in the United States of America.
Order Number: 9032412-E2 April 1998
Cabletron Systems, Inc.
P.O. Box 5005
Rochester, NH 03866-5005
SPECTRUM, MiniMMAC, FNB, Multi Media Access Center, and DNI are registered trademarks,
and Portable Management Application, IRM, IRM2, IRM3, IRBM, ESXMIM, ETSMIM, EMME,
EMM-E6, ETWMIM, FDMMIM, FDCMIM, MicroMMAC, MRXI, MRXI-24, NB20E, NB25E, NB30,
NB35E, NBR, SEHI, STHI, TRBMIM, TRMM, TRMM-2, TRMM-4, TRMMIM, TRXI, Media
Interface Module, MIM, and Flexible Network Bus are trademarks of Cabletron Systems, Inc.
UNIX and OPENLOOK are trademarks of Unix System Laboratories, Inc. OSF/Motif and Motif are
trademarks of the Open Software Foundation, Inc. X Window System is a trademark of X Consortium,
Inc. Ethernet and XNS are trademarks of Xerox Corporation. Apple and AppleTalk are registered
trademarks of Apple Computer, Inc. Banyan is a registered trademark of Banyan Systems, Inc.
DECnet is a registered trademark of Digital Equipment Corporation. Novell is a registered trademark
of Novell, Inc. CompuServe is a registered trademark of CompuServe. Sun Microsystems is a
registered trademark, and Sun, SunNet, and OpenWindows are trademarks of Sun Microsystems,
Inc.
i
Restricted Rights Notice
(Applicable to licenses to the United States Government only.)
1.
Use, duplication, or disclosure by the Government is subject to restrictions as set forth in
subparagraph (c) (1) (ii) of the Rights in Technical Data and Computer Software clause at DFARS
252.227-7013.
Cabletron Systems, Inc., 35 Industrial Way, Rochester, New Hampshire 03867-0505.
2.
(a) This computer software is submitted with restricted rights. It may not be used, reproduced, or
disclosed by the Government except as provided in paragraph (b) of this Notice or as otherwise
expressly stated in the contract.
(b) This computer software may be:
(1)
Used or copied for use in or with the computer or computers for which it was acquired,
including use at any Government installation to which such computer or computers may
be transferred;
(2)
Used or copied for use in a backup computer if any computer for which it was acquired
is inoperative;
(3)
Reproduced for safekeeping (archives) or backup purposes;
(4)
Modified, adapted, or combined with other computer software, provided that the
modified, combined, or adapted portions of the derivative software incorporating
restricted computer software are made subject to the same restricted rights;
(5)
Disclosed to and reproduced for use by support service contractors in accordance with
subparagraphs (b) (1) through (4) of this clause, provided the Government makes such
disclosure or reproduction subject to these restricted rights; and
(6)
Used or copied for use in or transferred to a replacement computer.
(c) Notwithstanding the foregoing, if this computer software is published copyrighted computer
software, it is licensed to the Government, without disclosure prohibitions, with the minimum
rights set forth in paragraph (b) of this clause.
(d) Any other rights or limitations regarding the use, duplication, or disclosure of this computer
software are to be expressly stated in, or incorporated in, the contract.
(e) This Notice shall be marked on any reproduction of this computer software, in whole or in part.
ii
Contents
Chapter 1
Introduction to SPMA
for the FRX4000, FRX6000,
and SmartSwitch 1800
Using this Guide............................................................................................................ 1-2
WhatÕs NOT in the FRX UserÕs Guide . . . .......................................................... 1-4
Conventions ................................................................................................................... 1-4
Screen Displays ...................................................................................................... 1-5
Using the Mouse .................................................................................................... 1-6
Getting Help .................................................................................................................. 1-7
FRX4000, FRX6000, and SmartSwitch 1800 Firmware............................................. 1-8
Year 2000 Compliance ........................................................................................... 1-8
Chapter 2
Using the FRX4000, FRX6000, and SmartSwitch 1800
Hub View
Using the Hub View ..................................................................................................... 2-1
Navigating Through the Hub View .................................................................... 2-2
Port and Module Color Codes ...................................................................... 2-4
Using the Mouse in a Hub View Module.................................................... 2-6
The Hub View Front Panel ................................................................................... 2-7
Monitoring Hub Performance................................................................................... 2-10
Selecting a Port Display Form............................................................................ 2-12
Viewing Device Information .............................................................................. 2-16
ConÞguring RLP Protocols................................................................................. 2-16
ConÞguring Serial Port Protocols...................................................................... 2-19
Viewing Serial Port Information........................................................................ 2-20
Serial Port Pin Status .................................................................................... 2-21
Viewing LAN Port Information......................................................................... 2-23
Viewing Statistics ................................................................................................. 2-24
RLP Health..................................................................................................... 2-24
Serial Port Health.......................................................................................... 2-26
LAN Card Health ......................................................................................... 2-27
Viewing Statistics Thresholds ............................................................................ 2-29
RLP Statistics Thresholds ............................................................................ 2-29
Serial Port Statistics Thresholds ................................................................. 2-30
Managing the Hub ...................................................................................................... 2-32
Setting the Polling Intervals ............................................................................... 2-32
Enabling and Disabling Serial Ports.................................................................. 2-34
Applying Port-level Changes............................................................................. 2-34
iii
Contents
Chapter 3
Configuring the Trap Table
About Traps.................................................................................................................... 3-1
Launching the Trap Table............................................................................................. 3-1
ConÞguring Traps ......................................................................................................... 3-3
Trap Messages................................................................................................................ 3-4
Chapter 4
Configuring the Subscriber Table
About Subscriber IDs.................................................................................................... 4-1
Accessing the Subscriber Table ................................................................................... 4-2
ConÞguring the Subscriber Table ............................................................................... 4-3
ConÞguring Routing Table Entries...................................................................... 4-5
ConÞguring Address Table Entries ..................................................................... 4-6
Adding or Modifying Subscriber Table Entries ........................................................ 4-6
Deleting Table Entries............................................................................................ 4-8
Chapter 5
Frame Relay Status and Configuration
ConÞguring Frame Relay Ports................................................................................... 5-2
Port ConÞguration ................................................................................................. 5-2
Changing ConÞguration Values ................................................................... 5-8
Applying Port-level Changes........................................................................ 5-8
DLCI Rate ConÞguration ...................................................................................... 5-8
Changing DLCI Rate Values........................................................................ 5-11
Applying Port-level Changes...................................................................... 5-12
Frame Relay Backup Groups ..................................................................................... 5-12
ConÞguring Frame Relay Backup Groups ....................................................... 5-13
Changing Backup Group Values ................................................................ 5-14
ConÞguring Logical Ports.......................................................................................... 5-15
Changing ConÞguration Values ........................................................................ 5-20
Applying Port-level Changes ............................................................................. 5-20
Viewing Frame Relay Status...................................................................................... 5-20
Management Stats................................................................................................ 5-21
Congestion Stats ................................................................................................... 5-22
Errors...................................................................................................................... 5-23
Chapter 6
X.25 Status and Configuration
ConÞguring X.25 Physical Ports ................................................................................. 6-2
Changing ConÞguration Values .......................................................................... 6-8
Applying Port-level Changes ............................................................................... 6-8
Viewing X.25 Status ...................................................................................................... 6-8
Management Stats.................................................................................................. 6-8
Congestion Stats ..................................................................................................... 6-9
Errors...................................................................................................................... 6-10
iv
Contents
Chapter 7
SNA Status and Configuration
ConÞguring SNA Ports ................................................................................................ 7-2
SDLC Port ConÞguration ..................................................................................... 7-2
Changing ConÞguration Values ................................................................... 7-7
Applying Port-level Changes........................................................................ 7-7
SDLC PU ConÞguration ....................................................................................... 7-7
Changing SDLC PU Subscriber Values ..................................................... 7-10
Applying Port-level Changes...................................................................... 7-10
SDLC PU LLC2 ConÞguration........................................................................... 7-10
Changing SDLC PU LLC2 Values .............................................................. 7-14
Applying Port-level Changes...................................................................... 7-15
SDLC Link Station ConÞguration ..................................................................... 7-15
Changing SDLC Link Station Values ......................................................... 7-18
Applying Port-level Changes...................................................................... 7-18
ConÞguring LLC2 ....................................................................................................... 7-18
Changing ConÞguration Values ................................................................. 7-23
ConÞguring LLC2 Host Connections ............................................................... 7-24
Changing Host Connections ....................................................................... 7-26
Viewing SDLC Status ................................................................................................. 7-26
SDLC Port Statistics............................................................................................. 7-26
SDLC Link Station General Statistics................................................................ 7-29
SDLC Link Station Rx and Tx Statistics............................................................ 7-30
Chapter 8
BSC Interactive Configuration
ConÞguring BSCI Ports ................................................................................................ 8-1
Changing BSCI Port ConÞguration Values ........................................................ 8-6
Applying Port-level Changes............................................................................... 8-6
BSCI Subscriber ID Information ................................................................................. 8-7
Adding or Modifying BSCI Subscriber Information ........................................ 8-9
Applying Port-level Changes............................................................................... 8-9
ConÞguring BSCI Devices ........................................................................................... 8-9
Adding or Modifying BSCI Device Information............................................. 8-11
Applying Port-level Changes............................................................................. 8-11
Chapter 9
IP Interface Configuration
ConÞguring IP Node Defaults .................................................................................... 9-1
ConÞguring IP Interfaces ............................................................................................. 9-2
ConÞguring IP Interface Secondary Addresses................................................. 9-9
Adding or Modifying IP Interfaces .......................................................................... 9-11
Adding or Modifying Secondary Addresses ................................................... 9-12
v
Contents
Chapter 10
IPX Interface Configuration
ConÞguring IPX Node Defaults................................................................................ 10-1
ConÞguring IPX Interfaces ........................................................................................ 10-2
Adding or Modifying IPX Interfaces................................................................. 10-9
ConÞguring IPX Static Routes................................................................................. 10-10
IPX Static SAP ConÞguration ........................................................................... 10-10
Adding or Modifying Static SAP Routes................................................. 10-11
IPX Static Route ConÞguration ........................................................................ 10-12
Adding or Modifying IPX Static Routes.................................................. 10-14
Chapter 11
Bridge Configuration
ConÞguring Device-Level Bridging Parameters .................................................... 11-1
Changing ConÞguration Values ........................................................................ 11-3
ConÞguring Bridge Ports ........................................................................................... 11-4
ConÞguring Frame Relay Bridge Ports............................................................. 11-4
Adding or Modifying Frame Relay Bridge Ports..................................... 11-7
ConÞguring LAN Bridge Ports .......................................................................... 11-7
Adding or Modifying LAN Bridge Ports .................................................. 11-9
Chapter 12
SmartSwitch 1800
Voice Configuration
ConÞguring System-Level Voice Parameters.......................................................... 12-2
Changing Parameter Values ............................................................................... 12-5
Speed Dial ConÞguration........................................................................................... 12-5
Adding or Modifying Speed Dial Numbers .................................................... 12-7
ConÞguring Voice Ports ............................................................................................. 12-8
Changing Port ConÞguration Values .............................................................. 12-15
Applying Port-level Changes ........................................................................... 12-15
ConÞguring Voice Interfaces ................................................................................... 12-15
Adding or Modifying Voice Interfaces............................................................ 12-17
Viewing Voice Statistics ............................................................................................ 12-18
Appendix A FRX4000, FRX6000, and SmartSwitch 1800
MIB Components
IETF MIB Support ........................................................................................................A-1
CSI Netlink MIB Support ............................................................................................A-2
Index
vi
Chapter 1
Introduction to SPMA
for the FRX4000, FRX6000,
and SmartSwitch 1800
Using this Guide; manual conventions; contacting the Cabletron Systems’ Global Call Center; firmware
versions supported by SPMA
Your SPMA for the FRX4000, FRX6000, and the SmartSwitch 1800 management
module provides management support for the FRX4000 stand-alone frame relay
access device; its larger cousin, the FRX6000 scalable chassis; and the innovative
SmartSwitch 1800 frame relay access device. These devices are high-performance
Frame Relay products that combine the capabilities of a frame relay access device
(FRAD) and a router in one box.
The FRX4000 is designed for smaller branch ofÞces that require high performance
to integrate with larger networks over frame relay at access rates up to T1 and
beyond. It supports up to eight serial interfaces (RS232, V.35, or RS422) and one
LAN (Ethernet or Token Ring) interface, and is available in a variety of models
depending on the combination of LAN interface and serial protocols you need.
The FRX6000 is ideal for data centers and concentration sites because of its
scalable rackmount chassis. Its eight slots can support up to two LAN interface
cards and 48 serial interfaces, or as many as 56 (with a single LAN interface) or 64
(with no LAN interface) serial interfaces. Up to eight ports can operate at T1
speeds, and as many as six can operate at E1 speeds. Expansion cards are
available for Ethernet or Token Ring LAN support, and for RS232, V.35, or RS422
serial interfaces; a wide variety of protocol support is also provided.
The SmartSwitch 1800 is a high performance, multiprotocol frame relay access
device that provides multimedia support by adding voice technology to
traditional data applications. Designed for branch ofÞces, it supports four serial
interfaces for WAN and local connectivity (RS232, V.35, or RS422), two analog
RJ45 voice channels, and one LAN (Ethernet or Token Ring) interface.
1-1
Introduction to SPMA for the FRX4000, FRX6000, and SmartSwitch 1800
NOTE
The protocol support functions which are available via your SPMA application will vary
depending on the protocol support you have purchased for your FRX or SmartSwitch
1800 device and the version of Þrmware you are running. For more information about
available protocols and the current availability of SPMA support for those protocols,
contact Cabletron SystemsÕ Global Call Center.
Note that because the FRX4000 and FRX6000 provide virtually the same
functionality, they will be referred to collectively throughout this manual as the
FRX. Where signiÞcant differences exist, they will be noted.
NOTE
SPMA support for the FRX4000, FRX6000 and SmartSwitch 1800 can also be used to
manage new Frame Relay Modules for the SmartSwitch 9000 that are based on FRX
technology: the 9W410 (Ethernet) and the 9W450 (Token Ring). Please note, however,
that at the time of this SPMA release these Frame Relay modules were not yet available;
therefore, this software has not been tested against them, and supplied functionality will
be limited. Full SmartSwitch 9000 Frame Relay Module support will be included in a
future release of SPMA.
Using this Guide
Your SPECTRUM Portable Management Application (SPMA) for the FRX4000,
FRX6000, and SmartSwitch 1800 consists of a number of different applications,
each of which provides a portion of the overall management functionality. Each of
these applications can be accessed from the icon menu (if you are using a
management platform) and from the Stand-alone Launcher or the command line
(if you are running in stand-alone mode); in addition, several applications can
also be accessed from within the Hub View, a graphical display of the device and
its installed interfaces.
This UserÕs Guide describes how to use most of the applications included with the
module; note that the instructions provided in this guide apply to the FRX or
SmartSwitch module regardless of the operating system or management platform
you are using. Instructions for launching each individual function from the
command line (stand-alone mode) are also included in each chapter.
Following is a description of the applications covered in this guide; while we
provide as much background information as we can, we do assume that youÕre
familiar with Ethernet, Token Ring, Frame Relay, and X.25 networks, and with
general network management concepts:
1-2
¥
Chapter 1, Introduction, provides a list of related documentation, describes
certain software conventions, and shows you how to contact the Cabletron
Systems Global Call Center.
¥
Chapter 2, Using the Hub View, describes the visual display of each device
and explains how to use the mouse within the Hub View; some basic functions
(changing the Hub View display, opening menus and windows, enabling and
Using this Guide
Introduction to SPMA for the FRX4000, FRX6000, and SmartSwitch 1800
disabling serial ports, and so on) available only from within the Hub View are
also described. You can access the Hub View application from the icon menu
or the command line.
¥
TIP
Using this Guide
Chapter 3, Trap Table, describes how to conÞgure the deviceÕs trap table,
which controls which management stations will receive traps from a selected
device. The Trap Table application is accessible from the Hub View.
Since these devicesÕ trap tables contain some additional functionality not found in other
Cabletron devices, its operation is described here. Note that the Trap Table chapter
included in the SPMA Tools Guide does not apply to these devices.
¥
Chapter 4, ConÞguring the Subscriber Table, describes how to add, modify,
and delete entries in the subscriber table, which controls the operation of
virtual circuits across the frame relay network. You can access the Subscriber
Table application from the Hub View.
¥
Chapter 5, Frame Relay Status and ConÞguration, describes how to conÞgure
serial ports set to operate using the frame relay protocol (including DLCI
conÞguration); it also describes how to conÞgure logical ports and frame relay
backup groups. Frame relay-speciÞc management, congestion, and error
statistics are also described. Frame relay status and conÞguration options are
available from the Hub View.
¥
Chapter 6, X.25 Status and ConÞguration, describes how to conÞgure serial
ports for X.25 protocol support and provides detailed information about
management, congestion, and error statistics available on the ports. X.25 status
and conÞguration options are available from the Hub View.
¥
Chapter 7, SNA Status and ConÞguration, describes how to conÞgure SNA
ports and provides physical unit and link station parameters. SDLC-speciÞc
port and general statistics are also provided. SNA status and conÞguration
options are available from the Hub View.
¥
Chapter 8, BSC Interactive ConÞguration, describes how to conÞgure binary
synchronous communications (BSC) Interactive ports and provides BSCI
Subscriber and Device information. BSCI conÞguration options are available
from the Hub View.
¥
Chapter 9, IP Interface ConÞguration, describes how to conÞgure an IP
Interface to allow the Internet Protocol (IP) to be executed over a frame relay,
X.25, or LAN interface. IP Interface options are available from the Hub View.
¥
Chapter 10, IPX Interface ConÞguration, describes how to conÞgure an IPX
Interface to allow connections to Novell IPX networks. IPX Interface options
are available from the Hub View.
¥
Chapter 11, Bridge ConÞguration, describes how to set up a bridge interface
and provides detailed information on conÞguring device-level bridging
parameters. It also describes how to conÞgure frame relay and LAN bridge
ports. Bridging conÞguration options are available from the Hub View.
1-3
Introduction to SPMA for the FRX4000, FRX6000, and SmartSwitch 1800
¥
Chapter 12, SmartSwitch 1800 Voice ConÞguration, describes how to
conÞgure the two voice ports on the SmartSwitch 1800 and provides statistical
information about voice trafÞc being transmitted across those ports.
¥
Appendix A, FRX4000, FRX6000, and SmartSwitch 1800 MIB Components,
lists the IETF and proprietary MIBs supported by these devices.
What’s NOT in the FRX User’s Guide . . .
The following standard SPMA tools are available through the FRX4000, FRX6000
and SmartSwitch 1800 modules and are explained in the SPECTRUM Portable
Management Application Tools Guide:
¥
Charts and Meters
¥
MIB I, II
¥
MIBTree
¥
Utilities (Global Community Names, Find MAC Address, and TFTP)
Charts, Graphs, and Meters are accessible from the Hub View and the command
line; the Utilities and MIBTree applications are accessible from the platform
console window Tools menu or the Stand-alone Launcher applications menu, and
MIBTree can also be launched from the command line; and MIB I, II is available
from the icon menu, the Hub View, or the command line.
Instructions on discovering Cabletron devices, creating icons, and accessing the
icon menus within your management platform are included in your Installing
and Using SPECTRUM for... guide. If you are using SPMA for the FRX or
SmartSwitch 1800 in stand-alone mode Ñ that is, without beneÞt of a speciÞc
network management system Ñ instructions for starting each application from
the command line are included in each chapter of this guide and the SPMA Tools
Guide.
Conventions
SPECTRUM Portable Management Applications Ñ including the FRX and
SmartSwitch 1800 module Ñ can work with a number of different network
management systems running on several different operating systems and
graphical user interfaces. This versatility presents two documentation problems:
Þrst, there is no standard terminology; and second, the appearance of the
windows will differ based on the graphical interface in use. For the sake of
consistency, the following conventions will be followed throughout this and other
SPMA guides.
1-4
Conventions
Introduction to SPMA for the FRX4000, FRX6000, and SmartSwitch 1800
Screen Displays
SPMA runs under a variety of different operating systems and graphical user
interfaces. To maintain a consistent presentation, screen displays in this and other
SPMA guides show an OSF/Motif environment. If youÕre used to a different GUI,
donÕt worry; the differences are minor. Buttons, boxes, borders, and menus
displayed on your screen may look a bit different from what you see in the guide,
but theyÕre organized and labelled the same, located in the same places, and
perform the same functions in all screen environments.
Some windows within SPMA applications can be resized; those windows will
display the standard window resizing handles employed by your windowing
system. Resizing a window doesnÕt resize the information in the window; it just
changes the amount of information that can be displayed (see Figure 1-1). When
you shrink a window, scroll bars will appear as necessary so that you can scroll to
view all the information that is available.
Use the scroll bars
provided to choose
what to display in a
window that’s been
resized
Click here to
display footer
message history
Figure 1-1. Window Conventions
Some windows will also contain a
button; selecting this button
launches a History window (Figure 1-2) which lists all footer messages that have
been displayed since the window was Þrst invoked. This window can help you
keep track of management actions you have taken since launching a management
application.
Conventions
1-5
Introduction to SPMA for the FRX4000, FRX6000, and SmartSwitch 1800
TIP
The FRX Hub View application currently prints few footer messages (most of which relate
to loss of contact with the device), so little information will typically be recorded in the
History window; future releases will expand this feature.
Figure 1-2. The History Window
Using the Mouse
The UNIX mouse has three buttons. Procedures within the SPMA document set
refer to these buttons as follows:
Button 1
Button 2
Button 3
Figure 1-3. Mouse Buttons
1-6
Conventions
Introduction to SPMA for the FRX4000, FRX6000, and SmartSwitch 1800
If youÕre using a two-button mouse, donÕt worry. SPMA doesnÕt make use of
mouse button 2. Just click the left button for button 1 and the right mouse button
when instructed to use mouse button 3.
Whenever possible, we will instruct you on which mouse button to employ;
however, menu buttons within SPMA applications will operate according to the
convention employed by the active windowing system. By convention, menu
buttons under the Motif windowing environment are activated by clicking the left
mouse button (referred to as mouse button 1 in SPMA documentation), and there
is no response to clicking the right button (mouse button 3). Under
OpenWindows, menu buttons can be activated by clicking the right button, and
convention dictates that the left button activates a default menu option; within
SPMA, that default option will also display the entire menu. Because of this
difference, references to activating a menu button will not include instructions
about which mouse button to use. All other panels from which menus can be
accessed, and all buttons which do not provide access to menus, will operate
according to SPMA convention, as documented.
Getting Help
If you need technical support related to SPMA, or if you have any questions,
comments, or suggestions related to this manual or any of our products, please
feel free to contact the Cabletron Systems Global Call Center. Before calling,
please have the following information ready:
¥
The product name and part number.
¥
The version number of the program that you need help with. SPMA is
modular, which means each application will have a speciÞc revision number.
Where applicable, an INFO button provides the version number; you can also
view the version number for any application by typing the command to start
the application followed by a -v.
You can contact Cabletron Systems Global Call Center via any of the following
methods:
By phone:
Monday through Friday between 8 AM and 8 PM
Eastern Standard Time at (603) 332-9400.
By mail:
Cabletron Systems, Inc.
PO Box 5005
Rochester, NH 03866-5005
By Internet mail:
[email protected]
FTP:
ftp.ctron.com (134.141.197.25)
Login
Password
By BBS:
Getting Help
anonymous
your email address
(603) 335-3358
1-7
Introduction to SPMA for the FRX4000, FRX6000, and SmartSwitch 1800
Modem Setting
8N1: 8 data bits, 1 stop bit, No parity
For additional information about Cabletron Systems products, visit our
World Wide Web site: http://www.cabletron.com/. For technical support,
select Service and Support.
FRX4000, FRX6000, and SmartSwitch 1800 Firmware
SPMA for the FRX4000, FRX6000, and the SmartSwitch 1800 has been beta-tested
against released Þrmware version 4.0 only; if you have a different version of
Þrmware and experience problems running SPMA, contact Cabletron SystemsÕ
Global Call Center for upgrade information.
This SPMA operates with FRX and SmartSwitch 1800 Þrmware versions 3.3 or
greater. However, due to SNMP limitations in Þrmware versions prior to 4.0, it is
recommended that this SPMA be used in conjunction with Þrmware 4.0 or
greater.
TIP
NOTE
As a general rule, Þrmware versions (and software support) for new products are liable to
change rapidly; contact Cabletron SystemsÕ Global Call Center for information about the
latest customer release of Þrmware and software available.
SPMA support for the FRX4000, FRX6000 and SmartSwitch 1800 can also be used to
manage new Frame Relay Modules for the SmartSwitch 9000 that are based on FRX
technology: the 9W410 (Ethernet) and the 9W450 (Token Ring). Please note, however,
that at the time of this SPMA release these Frame Relay modules were not yet available;
therefore, this software has not been tested against them, and supplied functionality will
be limited. Full SmartSwitch 9000 Frame Relay Module support will be included in a
future release of SPMA.
Year 2000 Compliance
Previous users of SPMA will note a few display changes related to Year 2000
compliance. All SPMA applications now have the ability to display a four-digit
year value where this information is available. For example, the Stand-alone
Launcher window Ñ which uses your workstationÕs system time value to display
the time and date of the last contact change Ñ will now display these date values
with eight digits (05/31/1998) instead of six (05/31/98).
Please keep in mind, however, that SPMAÕs ability to display a four-digit year
value in device-speciÞc windows Ñ such as the Device Status window available
from the Hub View or the Bridge View Ñ is dependent on the ÞrmwareÕs ability
to provide a four-digit value. Not all Þrmware versions support this ability; contact
Cabletron SystemsÕ Global Call Center for information speciÞc to your device
Þrmware.
1-8
FRX4000, FRX6000, and SmartSwitch 1800 Firmware
Chapter 2
Using the FRX4000, FRX6000, and
SmartSwitch 1800 Hub View
Navigating through the Hub View; monitoring hub performance; managing the hub
The heart of the SPECTRUM Portable Management Application (SPMA) for the
FRX4000, FRX6000, and SmartSwitch 1800 is the Hub View, a graphical interface
that gives you access to many of the functions that provide control over the
selected FRX or SmartSwitch device and its installed interfaces.
Using the Hub View
There are two ways to launch the Hub View application: if you are working
within a network management system, you can select the Hub View option from
the icon menu; speciÞc directions for creating an FRX or SmartSwitch icon and
accessing the icon menu can be found in the appropriate Installing and Using...
guide. If you are running the module in a stand-alone mode, type the following at
the command line:
spmarun frx <IP address> <community name>
The community name you use to start the module must have at least Read access;
for full management functionality, you should use a community name that
provides Read/Write access. For more information on community names, consult
the appropriate hardware documentation.
2-1
Using the FRX4000, FRX6000, and SmartSwitch 1800 Hub View
NOTES
The spmarun script invoked Þrst in the above command temporarily sets the environment
variables SPMA needs to operate; be sure to use this command any time you launch an
application from the command line. This script is automatically invoked when you launch
an application from the icon menu or from within the Hub View.
If there is a hostname mapped to your deviceÕs IP address, you can use <hostname> in
place of <IP address> to launch the Hub View. Please note, however, that the hostname is
not the same as the device name which can be assigned via SPMA; you cannot use the
device name in place of the IP address.
Note that the community name required to launch the Hub View application (or add the
device to your management application or the stand-alone launcher database) is the same
as the Node Community Name you must assign when you Þrst conÞgure your device via
console management.
Navigating Through the Hub View
Within the Hub View, you can click mouse buttons in different areas of the
window to access various menus and initiate certain management tasks. The
following diagrams illustrate the information provided in the Hub View and
show you how to use the mouse to display the available menus.
Note that the Hub View display (Figure 2-1, page 2-3) for each device type mimics
that deviceÕs physical appearance: the FRX4000 and the SmartSwitch 1800 are
displayed horizontally, and each contains two ÒmoduleÓ slots (one for the LAN
interface, and one for the RLP card); the FRX6000 is displayed vertically, and
contains eight slots. The type of card (RLP or LAN) installed in each slot, along
with its index number, is indicated by the module title box.
For the FRX4000 and the SmartSwitch 1800, whose conÞgurations are Þxed, slot 1
will always contain the RLP card; slot 2, the selected LAN interface. Since thereÕs
only one of each, each will be indexed 0.
For the FRX6000, RLP indexing is determined by a switch setting on the card
itself; RLPs will be displayed in the Hub View in index order, regardless of their
actual physical placement in the chassis. LAN cards will also be displayed in
index order, after all conÞgured RLPs (again, regardless of actual physical
placement in the chassis).
2-2
Using the Hub View
Using the FRX4000, FRX6000, and SmartSwitch 1800 Hub View
Module Status
LIC Name
Port Status
FRX6000
FRX4000 or SmartSwitch 1800
Figure 2-1. The FRX4000, FRX6000 and the SmartSwitch 1800 Hub Views
NOTE
LAN card indexing is determined simply by the order in which the installed LAN cards
are identiÞed during the initial FRX6000 Þrmware installation. During the Þrmware
installation, you will be prompted to enter the number of LAN cards you have installed,
then prompted to supply their type. The order in which you enter the type information
determines the indexing.
If you have two cards of the same type, you will need to distinguish them by physical
address, as there is no way to control which index is assigned to which card. The physical
address is displayed in the LAN Port Information window, described on page 2-23.
Each module display contains individual port boxes that can display a variety of
information about each port (see Selecting a Port Display Form, page 2-12). For
an RLP, up to eight serial ports can be present (four on each of two possible Line
Interface Cards, or LICs); for a LAN card, only a single port interface is provided.
For the FRX4000 and the SmartSwitch 1800, the Base LIC and Exp (Expansion)
LIC correspond to LIC 1 and LIC 2 on each FRX6000 RLP card.
Using the Hub View
2-3
Using the FRX4000, FRX6000, and SmartSwitch 1800 Hub View
RLP information will only be displayed if the appropriate database record has
been conÞgured via console management (see your hardware documentation for
more information); for RLPs which have been conÞgured in the database but not
yet installed in the chassis, a blue module status will be displayed (see Port and
Module Color Codes, below). RLPs which are present in the chassis but which
have not been conÞgured in the database will not be displayed.
For each conÞgured RLP card, eight serial port status boxes will be displayed
(four for each of two possible LIC cards); however, serial port status information
will only be displayed for ports which are physically present (on an installed LIC
card) and have been conÞgured in the database. Ports which are present but not
conÞgured will display a blank status; if no LIC is present, the value [None] will
be displayed under the appropriate LIC title, and the associated ports will also
display a blank status.
LAN cards will only be displayed when they are both present and conÞgured, as
they are conÞgured during the initial Þrmware installation process, and cannot be
conÞgured unless they are present.
Port and Module Color Codes
Both the module index boxes and the port status boxes are color-coded to indicate
status (see Figure 2-2, below).
Module Index boxes
Port Status
boxes
Figure 2-2. Module and Port Color Codes
2-4
Using the Hub View
Using the FRX4000, FRX6000, and SmartSwitch 1800 Hub View
The module status color code indicates one of two conditions: if a module is both
present in the chassis and conÞgured in the database, its index box will be
color-coded green; if a module has been conÞgured in the database but is not
physically present in the chassis, its index box will be color-coded blue. Modules
which are physically present but not yet conÞgured in the database are not
displayed at all in the Hub View. (For LAN cards, the module status will always
display as green, since they cannot be conÞgured if they are not present.)
The color coding for both serial and LAN ports is based on a combination of
MIB II ifAdminStatus and ifOperStatus, as follows:
Using the Hub View
Green
indicates that both ifAdminStatus and ifOperStatus are
UP.
Blue
indicates that both ifAdminStatus and ifOperStatus are
DOWN.
Red
indicates that there is a mismatch in states: one state is
UP, and the other is DOWN.
Magenta
indicates that the ifOperStatus is testing, or that the
ifOperStatus is DOWN and the ifAdminStatus is testing.
Gray
indicates that the device has returned a value for
ifOperStatus which was not understood by SPMA.
Blank
indicates that no response was received from the port.
Ports which are not present, or present but not
conÞgured in the database, will also display a blank
status.
2-5
Using the FRX4000, FRX6000, and SmartSwitch 1800 Hub View
Using the Mouse in a Hub View Module
For each RLP and LAN card displayed in the Hub View (that is, those which are
at least conÞgured in the database), you can use the mouse to access various
module- and port-level menus and functions, as illustrated below.
When a LIC card is installed, the
current Port Display Form selection is
shown here; a value of [None]
indicates that no LIC is present
Figure 2-3. Mousing Around a Module Display
2-6
Using the Hub View
Using the FRX4000, FRX6000, and SmartSwitch 1800 Hub View
The Hub View Front Panel
In addition to the graphical display of the RLP and LAN cards installed in your
device and/or conÞgured in its database, the Hub View gives you device level
summary information. The following Front Panel information appears to the right
of the module display (for the FRX6000) or below the module display (for the
FRX4000 and the SmartSwitch 1800):
Contact Status is a color code that shows the status of the connection between
SPMA and the device:
¥
Green means a valid connection.
¥
Blue means that SPMA is trying to reach the device but doesnÕt yet know if the
connection will be successful.
¥
Red means that SPMA is unable to contact or has lost contact with the device.
Uptime
The time that the device has been running without interruption. The counter
resets to 00:00:00 (HH:MM:SS) when one of the following occurs:
¥
Power to the device is cycled.
¥
The device is reset manually.
Name
A text Þeld that you can use to help identify the device; you can assign a device
name via the MIB I, II application (described in the SPMA Tools Guide). To view a
name which is longer than the Þeld, click to place your cursor in the text box, and
use the arrow keys to shift the display.
Location
A text Þeld that you can use to help identify the device; you can assign a device
location via the MIB I, II application (described in the SPMA Tools Guide). To
view a location which is longer than the Þeld, click to place your cursor in the text
box, and use the arrow keys to shift the display.
NOTE
Using the Hub View
Although you can erase the current Name and Location values and enter new values in
the text Þelds, you cannot set these values from the Hub View. Any value you attempt to
set will remain in the text Þeld only until the Hub View is closed; to permanently change
the name or location, you must do so via the MIB I, II application (accessible from the
Device menu in the Hub View, from the icon menu, or from the command line). Note that
the footer message indicating that the Name or Location Þeld is read-only is in error; these
Þelds are settable, but they cannot be set from the Hub View.
2-7
Using the FRX4000, FRX6000, and SmartSwitch 1800 Hub View
IP Address
The deviceÕs Internet Protocol address; this Þeld will display the IP address you
have used to create the device icon (if you are running the Hub View from a
management platform) or the IP address you used to launch the Hub View
program (if you are running in stand-alone mode). You cannot change the IP
address from within SPMA.
TIP
For FRX Þrmware versions 3.3.0, 3.3.1, and 4.0, each installed LAN card can be assigned
an IP address. The IP address you use to communicate with the FRX devices via SNMP is
an IP address which has been assigned to a LAN card interface. For FRX6000s which have
two LAN cards installed, each can be assigned its own IP address, if desired; either of these
IP addresses can be used for SNMP communication.
For FRX6000s which do not have a LAN card installed, an IP address can be assigned to
any Frame Relay port which is also running the IP protocol; in this case, you would use
this IP address to communicate with the device via SNMP and SPMA.
2-8
Using the Hub View
Using the FRX4000, FRX6000, and SmartSwitch 1800 Hub View
Clicking the Device button displays the Device menu, Figure 2-4.
Figure 2-4. Hub View Device Menu
The Device menu lets you perform the following:
Using the Hub View
¥
Open the Device Information window (described in Viewing Device
Information, page 2-16).
¥
Open the Polling Intervals window (described beginning on page 2-32).
¥
Select a Port Display Form (described beginning on page 2-12).
¥
Launch the generic MIB I, II application (described in the SPMA Tools Guide).
¥
Open the Trap Table window (described in Chapter 3, ConÞguring the Trap
Table).
¥
Open the Subscriber Table window (described in Chapter 4, ConÞguring the
Subscriber Table).
2-9
Using the FRX4000, FRX6000, and SmartSwitch 1800 Hub View
¥
Open the Frame Relay Backup Group window (described in Chapter 5, Frame
Relay Status and ConÞguration).
¥
Open the IP, IPX, Bridge, and SNA conÞguration windows (described in
Chapters 7, 9, 10 and 11).
¥
Open the Voice ConÞguration windows (described in Chapter 12, Voice
ConÞguration).
Note that the Device menu does not provide access to all of the applications
which are available to the devices; additional applications are available from the
Module and Port menus in the Hub View, and some can only be accessed from the
icon menu (if you are running under a network management platform) and from
the command line (if you are running in stand-alone mode). See Chapter 1,
Introduction to SPMA for the FRX4000, FRX6000, and SmartSwitch 1800, for a
complete list of applications available to the devices and how to access each one.
NOTE
Your Device Menu may not display all of the options listed here. Only those protocols and
interface types for which your node has been conÞgured will be listed on the menu.
Only the SmartSwitch 1800 will display the Voice ConÞguration options.
Clicking mouse button 1 on the Quit button closes all Hub View application
windows; any open applications which can also be accessed from the command
line or from the icon menu will remain open.
Monitoring Hub Performance
The information displayed in the Hub View can give you a quick summary of
device activity, status, and conÞguration. SPMA can also provide further details
about hub performance via its three-level menu structure. The Device, Module,
and Port menus (Figure 2-5, below) give you control over the hub at three levels
and give you access to the tools, menus, and windows that let you monitor
speciÞc aspects of hub performance, change hub display options, and set some
operating and notiÞcation parameters.
2-10
Monitoring Hub Performance
Using the FRX4000, FRX6000, and SmartSwitch 1800 Hub View
Frame Relay, X.25, LAN
and Unconfigured Port Menus
Device Menu
LANCard and RLP
Module Menus
BSCI, Voice, and SDLC
Port Menus
Figure 2-5. The Device, Module, and Port Menus
Monitoring Hub Performance
2-11
Using the FRX4000, FRX6000, and SmartSwitch 1800 Hub View
Hub performance data available through these menus includes:
TIP
¥
Device, Module, and Port conÞguration information.
¥
Generic Module and Port health and threshold statistics.
¥
Serial Port pin status.
¥
Protocol-speciÞc Port-level statistics.
The health and protocol statistics are displayed via the SPMA Meters application; for
more information on how to manipulate meters, see the SPMA Tools Guide.
Selecting a Port Display Form
You can change the type of information displayed for each port in the hub by
using the Port Display Form options available via the Device menu. Changing the
port display form from the Device menu changes the port display for all ports in
the chassis.
To change the port display form:
1. Click on the
button to display the Device menu.
2. Drag down to Port Display Form, then to the side as necessary to select one
of the port display options. The current selection will be displayed in the LIC
name box (for RLPs) or the Interface box (for LAN cards; see Figure 2-3,
page 2-6).
Note that the port color coding does not change based on the selected Port
Display Form; see page 2-4 for more information on color codes.
Port display forms are:
Operation Status
The Operation Status port display form indicates the current value of the
ifOperStatus OID:
2-12
UP
operational status up
DOWN
operational status down
TEST
operational status testing
UNK
unknown; device is returning a value that the software
does not recognize
---
the device is not responding to the request
Monitoring Hub Performance
Using the FRX4000, FRX6000, and SmartSwitch 1800 Hub View
Admin Status
The Admin Status port display form indicates the current value of the
ifAdminStatus OID:
UP
the port has been administratively enabled
DOWN
the port has been administratively disabled
TEST
the port has been administratively placed in a test mode
UNK
unknown; device is returning a value that the software
does not recognize
---
the device is not responding.
Port Type
The Port Type port display form indicates the type of protocol the selected port
has been conÞgured to run, as deÞned by the OID nlIfType. Possible values for any
one port are limited to the protocols that have been installed on that portÕs RLP
card:
X25
indicates that the port has been conÞgured to run the
X.25 protocol -- either ddnX25 or rfc877x25.
sdlc
indicates that the port has been conÞgured to run the
SDLC protocol.
frame
indicates that the port has been conÞgured to run the
Frame Relay protocol.
async
indicates that the port has been conÞgured to run the
asynchronous protocol.
bsci
indicates that the port has been conÞgured to run the
bi-synchronous (two-directional) protocol.
ether (LAN only)
indicates that the port is supporting an Ethernet
connection: either ethernetCsmacd, or iso88023Csmacd.
tr (LAN only)
indicates that the port is supporting a Token Ring
connection.
voice
indicates that the port is supporting a voice connection.
Port State
The Port State display indicates the portÕs readiness (or lack thereof) to establish a
connection and transmit data (as deÞned by the OID nlIfPortStatus):
linkup
A physical electrical connection is present and working
(cable is connected at both ends and the two connected
ports are communicating), but some conÞguration
information is missing or there is a line speed or other
mismatch. This state is one step short of operational.
oper (operational)
The port is functional and capable of data transmission.
Monitoring Hub Performance
2-13
Using the FRX4000, FRX6000, and SmartSwitch 1800 Hub View
2-14
disa (disabled)
The port is operationally disabled.
disc (disconnect)
One of the two endpoints connected via the port has
closed the connection.
conf (conÞgured)
The port has been conÞgured in the database, but the
conÞgured protocol has not been installed on the
associated RLP card.
dial (dialReady)
For a frame relay port, this state indicates that the port
has been conÞgured as a backup port, and it is ready to
be switched into use if needed; for an X.25 port, this state
indicates that the port is ready to transmit or receive
calls.
quies (quiesced)
A port which has been quiesced will be disabled when all
active calls have been completed. No new calls can be
initiated during this delayed disable state. Once a
quiesced port is disabled, it will remain disabled until it
is enabled by management action.
fail (failed)
The port has failed due to a broken cable or other wire
problem, either while moving to the operational state or
after achieving it.
fault (hardware fault)
Indicates that the port has failed due to a hardware
problem on the serial port itself.
na
Not applicable; this value displays for any LAN ports
installed in the device.
other
The port status response received from the device was
not understood by SPMA.
ipl
The port is in a booting state (initial program load). This
is a very brief transitional state that is unlikely to be
displayed.
restar (restarting)
A very brief transitional state that occurs during boot up;
this state is unlikely to be displayed.
onhook
Indicates there is no call in progress and the voice port is
able to accept an incoming call.
offhook
Indicates there is a call in progress and the voice port is
not able to accept an incoming call.
dialing
Indicates a call is being placed but has not been accepted
yet.
active
Indicates a call has been placed and answered.
pending
The device at the remote end has been placed onhook
while the call was still in progress.
Monitoring Hub Performance
Using the FRX4000, FRX6000, and SmartSwitch 1800 Hub View
Connector Type
This port display form indicates the connector type supported by the selected
port. This value (from the OID nlIfConnectorType) is determined by a combination
of cable and physical port type, as follows:
rs232
Indicates an RS232 serial port, which must always use an
RS232 cable.
v35
Indicates a v.35 serial port, which must always use a v.35
cable.
rs449
Indicates an RS422 serial port conÞgured for an RS449
cable.
rs530
Indicates an RS422 serial port conÞgured for an RS530
cable.
x21
Indicates an RS422 serial port conÞgured for an X21
cable.
csudsu (csu/dsu)
Indicates a CSU/DSU interface.
none
This value displays for LAN ports.
voice
This value displays for voice channels.
Speed
Indicates the speed conÞgured for the selected port, as reported by the MIB II OID
ifSpeed. The speed conÞgured for a port must match the speed of the line which
will be connected to that interface, and the speed conÞgured for the port at the
other end of the connection.
Max Packet Size
Displays the size of largest datagram which can be sent or received on this port, in
octets (as reported by the MIB II OID ifMtu). This value is speciÞc to the protocol
running on the selected interface.
IF Index
Displays the MIB II ifIndex value assigned to each port. Note that the displayed
index values do not necessarily increment as you might expect Ñ as the FRX or
SmartSwitch 1800 device boots, each physical or logical port which is detected will
be incrementally assigned an index value, which may result in gaps between the
index values assigned to the physical ports displayed in the Hub View. Note that
the assigned ifIndex values are constant between bootups; however, once the
device reboots, the same ifIndex values will not necessarily be assigned to the
same physical or logical ports (if the deviceÕs conÞguration has changed).
To map logical ports to their physical port locations, use the OID nlIfPhyPort.
TIP
Monitoring Hub Performance
2-15
Using the FRX4000, FRX6000, and SmartSwitch 1800 Hub View
Viewing Device Information
The Device Information window provides some general descriptive information
about the FRX or SmartSwitch 1800 device you are modeling.
To access the window:
1. In the Hub View, click on
to display the Device menu.
2. Drag down to Device Information, and release. The Device Information
window, Figure 2-6, will appear.
Figure 2-6. The Device Information Window
Device information includes:
System Description
Displays the MIB II sysDescr for the selected device; this
description typically includes information about the
Þrmware version currently running.
System Contact
Displays the MIB II sysContact value; this value is settable
via the generic MIB I, II application (accessible from the
Device menu, the icon menu, or from the command line).
See the SPMA Tools Guide for a detailed description of
the MIB I, II application and how to set this value.
Configuring RLP Protocols
The RLP ConÞguration window provides information about the status of each
displayed RLP and lets you view and conÞgure the protocols loaded onto the
selected RLP.
To access the window:
1. In the Hub View, click on the appropriate Module Index or Module Name text
box to display the RLP Menu (see Figure 2-3, page 2-6).
2. Drag down to Configuration, and release. The RLP Configuration window,
Figure 2-7, will appear.
2-16
Monitoring Hub Performance
Using the FRX4000, FRX6000, and SmartSwitch 1800 Hub View
Figure 2-7. The RLP ConÞguration Window and Protocol Menu
RLP status information includes:
Status
A status of Installed indicates that the RLP is physically
present in the chassis, and has been conÞgured in the
database; a status of ConÞgured indicates that a database
record has been conÞgured, but the card is not physically
present in the hub.
Memory
Displays the amount of memory installed on the selected
RLP, either 4 or 8 megabytes.
Monitoring Hub Performance
2-17
Using the FRX4000, FRX6000, and SmartSwitch 1800 Hub View
NOTE
You must have 8 megabytes of memory installed on at least one RLP in the FRX to run
Þrmware version 4.0. If you have RLPs with only 4 megabytes of memory and want to
upgrade them to 8 megabytes, contact CabletronÕs Global Call Center or your local service
representative for more information.
LIC 1 Type/LIC 2 Type Displays the type value for each Line Interface Card
(LIC) installed on the selected RLP: RS232, HS RS232,
v.35, RS422, Voice or Universal. The Universal LIC is
shipped as the Base LIC on the FRX4000 and the
SmartSwitch 1800. It has four ports: port 0 can be
conÞgured for RS232 operation; port 1 can be conÞgured
for RS232 and CSU/DSU operation; ports 2 and 3 can be
conÞgured for RS232, v.35, RS449, RS530, or x.21
operation (depending on the attached cable type).
Protocols
Displays the protocols that have been loaded onto the
selected RLP. On the FRX4000 and SmartSwitch 1800, a
maximum of 11 protocols can be loaded on to RLP0. A
maximum of nine protocols can be loaded on to an FRX
6000 RLP. If less than the maximum number have been
loaded, some of the protocol Þelds will display None.
Only protocols which have been loaded onto the RLP can
be conÞgured to run over that RLPÕs serial ports. You can
change or add protocols for the selected RLP.
On
NOTE
For the FRX4000 and the SmartSwitch 1800, the RLP ConÞguration window and
protocol menu will display all the protocols shown in Figure 2-7, but only those protocols
that were purchased will be conÞgurable.
For the FRX6000, all supported protocols will Þt on one 8-megabyte RLP; however, it is
recommended that no more than seven protocols be conÞgured on any one RLP.
WARNING
The X.25 protocol is always loaded on every RLP; it is a necessary protocol for use by
internal FRX and SmartSwitch 1800 trafÞc and must not be deleted.
Follow these guidelines when conÞguring protocols:
2-18
¥
RIP is a valid choice only if IP is already conÞgured on the same RLP.
¥
If SNMP is conÞgured, IP must also be conÞgured. For the FRX6000, SNMP
and IP can be, but do not have to be, on the same RLP.
Monitoring Hub Performance
Using the FRX4000, FRX6000, and SmartSwitch 1800 Hub View
¥
If LLC2 is conÞgured, Bridge must also be conÞgured. For the FRX6000, both
protocols should be, but do not have to be, on the same RLP. Having them on
the same RLP should provide better performance.
¥
If NVSP is conÞgured, LLC2 and Bridge must also be conÞgured. For the
FRX6000, all three protocols can be, but do not have to be, on the same RLP.
¥
For the FRX6000, IP, SNMP, RIP, IPX, LLC2, NVSP, and Bridge cannot be
conÞgured on more than one RLP each. However, more than one of these can
be on the same RLP. Performance can be enhanced by conÞguring these
protocols on the same RLPs that contain the frame relay ports that will
transport the protocols.
To change or add protocols for the selected RLP:
1. Display the Configuration window for the selected RLP. Each protocol field will
display either a configured protocol or None.
2. To change a protocol, click on the menu button to display a list of options, then
drag up or down to select the option you want.
3. Click on Apply to save your changes.
NOTE
Changing the protocols in the RLP ConÞguration window will enable the protocols on
that RLP, but to make the protocols actually operational you must reboot the device.
Configuring Serial Port Protocols
The Port ConÞguration window lets you conÞgure a protocol for the selected
port.
To access the window:
1. In the Hub View, click on the appropriate Port Index or Port Status text box to
display the Port Menu (see Figure 2-3, page 2-6).
2. Drag down to Configuration, and release. The Port Configuration window,
Figure 2-9, will appear.
Monitoring Hub Performance
2-19
Using the FRX4000, FRX6000, and SmartSwitch 1800 Hub View
Figure 2-8. The Port ConÞguration Window and Protocol Menu
To change or add a protocol for the selected port:
1. Display the Configuration window for the selected port. It will display either a
configured protocol or None.
2. To change a protocol, click on the menu button to display a list of options, then
drag up or down to select the option you want. The Protocol menu will only list
protocols that are supported on that RLP.
3. Click on Apply to save your changes.
Viewing Serial Port Information
The Port Information windows provide the same descriptive information for all
displayed serial ports, regardless of type. Note that this information is only
available for serial ports which are both conÞgured in the database and physically
present in the chassis.
To access serial port information:
1. In the Hub View, click on the appropriate Port Index or Port Status text box to
display the Port Menu (see Figure 2-3, page 2-6).
2. Drag down to Information, and release. The Port Info window, Figure 2-9, will
appear.
Figure 2-9. The Serial Port Information Window
2-20
Monitoring Hub Performance
Using the FRX4000, FRX6000, and SmartSwitch 1800 Hub View
Interface Description:
TIP
Displays a general description of the selected serial
interface (from the MIB II ifDescr), including the index
number assigned to the portÕs RLP; the physical number
assigned to the port interface itself (as designated in the
Port Index box in the Hub View), and a general text
description of the port, including the protocol currently
conÞgured to run over that port.
Note that the index number assigned to the physical port interface is not the same as the
ifIndex assigned to that same physical interface. The physical port indices begin with 0;
the ifIndex values begin at 1.
Port Type:
Displays the type of protocol the selected port has been
conÞgured to run, as deÞned by the OID nlIfType. Note
that this is the same information displayed by the Port
Type port display form (described on page 2-13).
Serial Port Pin Status
You can also view the electrical status of each pin on the cables attached to a serial
port; this information can be useful in tracking down connectivity problems,
especially those related to cable failure.
NOTE
The current version of Þrmware for the SmartSwitch 1800 does not support the Serial
Port Pin Status function on its two voice ports.
To view serial port pin status:
1. In the Hub View, click on the appropriate Port Index or Port Status text box to
display the Port Menu (see Figure 2-3, page 2-6).
2. Drag down to Pin Status, and release. The Pin Status window, Figure 2-10,
will appear.
Monitoring Hub Performance
2-21
Using the FRX4000, FRX6000, and SmartSwitch 1800 Hub View
Figure 2-10. The Pin Status Window
Each cable pin is represented by a colored rectangle labeled with the pin name;
the color-coding tells you whether the pin is active (green; has voltage), inactive
(red; has no voltage), unused (tan, or no color), or its electrical status is unknown
(yellow). Each serial port provides information about the following pins:
TD (transmit data)
Pin will be active when the connection is operational.
RD (receive data)
Pin will be active when the connection is operational.
RTS (request to send)
For some protocols, the pin will become active when the
device wishes to send some data, and become inactive
once the data is sent; for a point-to-point protocol,
however, the pin will always be active.
CTS (clear to send)
The receiving device has responded to a request to send.
DSR (data set ready)
When active, indicates that the remote data
communications equipment (DCE) has signalled that is it
ready.
CD (carrier detect)
When active, indicates that the connected line is
operational (that is, a dial tone or similar indication is
present).
TC (transmit clocking) When active, indicates that clocking is occurring on the
link.
2-22
RC (receive clocking)
When active, indicates that clocking is occurring on the
link.
DTR (data terminal
ready)
When active, indicates that the data terminal equipment
(DTE) is ready.
TTA (transmit timing)
When active, indicates that timing frames are being
transmitted.
Monitoring Hub Performance
Using the FRX4000, FRX6000, and SmartSwitch 1800 Hub View
NOTE
The pin names which end in ÒBÓ Ñ TDB, RDB, CTSB, DCDB, TCB, RCB, TTB, RTSB,
and DSRB Ñ have the same deÞnitions as those listed above, but for the B channel signals
used by V.35 and RS449 interfaces.
Viewing LAN Port Information
The LAN Port Information windows also provide general descriptive information
about the selected port. To access LAN port information:
1. In the Hub View, click on the appropriate Port Index or Port Status text box to
display the Port Menu (see Figure 2-3, page 2-6).
2. Drag down to Information, and release. The Port Info window, Figure 2-11,
will appear.
Note that the Ethernet
and Token Ring port
information windows
contain different
address information
Figure 2-11. LAN Port Information Windows
The windows display the following information:
Interface Description:
Displays a general description of the selected LAN
interface (from the MIB II ifDescr), including the index
number assigned to the portÕs LAN card (0 or 1), and a
general text description of the port (802.5 or Ethernet).
Port Type:
Displays the LAN port type: iso88025 Token Ring, or
ethernet CSMACD.
Monitoring Hub Performance
2-23
Using the FRX4000, FRX6000, and SmartSwitch 1800 Hub View
Address:
TIP
For Token Ring LAN cards, this Þeld displays the locally
administered physical address, if one has been assigned;
if none has been assigned, the Þeld (labeled Local Admin
Address) will displays all zeros. For Ethernet cards, the
factory-set physical address (labeled Physical Address)
will be displayed.
For an FRX6000 with two LAN cards of the same type, note that the only way to
distinguish between the two cards is via the physical address displayed here (since
indexing is unrelated to physical position in the chassis).
Viewing Statistics
The Hub View can provide a variety of statistics at the RLP, serial port, and LAN
card levels that give you an overview of the general health of your network
connections. These statistics are described in the following sections.
TIP
The statistics windows provided via the Hub View display data using the SPMA Meters
application; for more information on how to manipulate the meter display and change
meter settings, see the SPMA Tools Guide.
RLP Health
To access RLP Health statistics:
1. In the Hub View, click on the appropriate Module Index or Module Name text
box to display the RLP Menu (see Figure 2-3, page 2-6).
2. Drag down to Health, and release. The RLP Health Statistics window,
Figure 2-12, will appear.
2-24
Monitoring Hub Performance
Using the FRX4000, FRX6000, and SmartSwitch 1800 Hub View
Figure 2-12. The RLP Health Statistics Window
RLP Health statistics provide the following general usage information for all
ports on the selected card:
Frames Received
The total number of frames received on all active serial
ports on the selected RLP, expressed as a rate
(frames/second).
Frames Transmitted
The total number of frames transmitted by all active
serial ports on the selected RLP, expressed as a rate
(frames/second).
Frames Rejected
The total number of frames rejected by all active serial
ports on the selected RLP, expressed as a rate
(frames/second). Each protocol handles rejected frames a
little differently; in general, however, frames are rejected
because the active protocol has detected an error in the
frame itself.
Frames Retransmitted
The total number of frames retransmitted by all active
serial ports on the selected RLP, expressed as a rate
(frames/second). Frames are typically retransmitted to
correct errors or if the receiving device was too busy to
receive the original frames; a high retransmit rate can
indicate a noisy transmission line. If this value is
consistently above zero and there are no other problems,
you may want to increase the value assigned to the
Retransmission Timer in the port database record. (See
your hardware documentation for more information.)
Monitoring Hub Performance
2-25
Using the FRX4000, FRX6000, and SmartSwitch 1800 Hub View
Frames Queued
The total number of frames from all active serial ports on
the selected RLP currently queued and waiting for
transmission, expressed as a raw value. Queued frames
will be transmitted as soon as device resources permit.
Used Buffers
Displays the percentage of available buffers currently
being used by queued frames.
Serial Port Health
To access Serial Port Health statistics:
1. In the Hub View, click on the appropriate Port Index or Port Status text box to
display the Port Menu (see Figure 2-3, page 2-6).
2. Drag down to Health, and release. The Port Health Statistics window,
Figure 2-13, will appear.
Figure 2-13. The Port Health Statistics Window
The Serial Port Health Statistics windows display the same statistics for each
conÞgured serial port, regardless of type:
2-26
Frames Received
The total number of frames received on the selected
serial port, expressed as a rate (frames/second).
Frames Transmitted
The total number of frames transmitted on the selected
serial port, expressed as a rate (frames/second).
Frames Retransmitted
The total number of frames retransmitted on the selected
serial port, expressed as a rate (frames/second). Frames
are typically retransmitted to correct errors or if the
receiving device was too busy to receive the original
frames; a high retransmit rate can indicate a noisy
transmission line.
FCS Errors
The total number of frames received at the selected serial
port that contained a bad frame check sequence (FCS),
expressed as a rate (errors/second). The frame check
Monitoring Hub Performance
Using the FRX4000, FRX6000, and SmartSwitch 1800 Hub View
sequence (like the CRC, or cyclic redundancy check) is a
value computed at both the sending and receiving ends
of the connection; if the computed values donÕt match,
the frame is assumed to have been corrupted in transit. A
value consistently greater than zero indicates line
problems.
Logical Rejects
The sum of frame rejects Ñ frames which are dropped due
to congestion or some other transmission problem Ñ and
reject frames Ñ protocol frames that notify the sender that
one or more packets is missing from a sequence. The total
is expressed as a rate (rejects/second); a value
consistently greater than zero indicates line problems.
Rx Utilization %
The ratio of non-ßag characters (the space between
frames) to the total number of characters received on the
selected serial port; that is, the percentage of available
bandwidth being utilized.
Tx Utilization %
The ratio of non-ßag characters (the space between
frames) to the total number of characters transmitted on
the selected serial port; that is, the percentage of available
bandwidth being utilized.
LAN Card Health
The LAN Card Health Statistics window provides standard MIB II stats for the
selected LAN interface; note that the same statistics are provided for both
Ethernet and Token Ring interfaces.
To access LAN Card Health statistics:
1. In the Hub View, click on the appropriate Module Index or Module Name text
box to display the LANCard Menu (see Figure 2-3, page 2-6).
2. Drag down to Health, and release. The LAN Health Statistics window,
Figure 2-14, will appear.
Monitoring Hub Performance
2-27
Using the FRX4000, FRX6000, and SmartSwitch 1800 Hub View
Figure 2-14. The LAN Health Statistics Window
MIB II statistics provided are:
2-28
In Octets
(ifInOctets) The total number of octets (or bytes) of data
received at the selected LAN interface, expressed as a
rate (octets/second).
In Ucast
(ifInUcastPkts) The total number of packets received at
the selected LAN interface that were destined for a single
address (unicast), expressed as a rate (packets/second).
In NUcast
(ifInNUcastPkts) The total number of packets received at
the selected LAN interface that were destined for more
than one address (either broadcast or multicast),
expressed as a rate (packets/second).
In Discards
(ifInDiscards) The total number of inbound packets which
were discarded even though no errors were detected,
expressed as a rate (packets/second); well-formed
packets are typically discarded in order to free up buffer
space.
In Errors
(ifInErrors) The total number of inbound packets which
contained errors that prevented them from being
delivered, expressed as a rate (packets/second).
Out Octets
(ifOutOctets) The total number of octets (or bytes) of data
transmitted by the selected LAN interface, expressed as a
rate (octets/second).
Monitoring Hub Performance
Using the FRX4000, FRX6000, and SmartSwitch 1800 Hub View
Out Ucast
(ifOutUcastPkts) The total number of packets transmitted
by the selected LAN interface that were destined for a
single address (unicast), expressed as a rate
(packets/second).
Out NUcast
(ifOutNUcastPkts) The total number of packets
transmitted by the selected LAN interface that were
destined for more than one address (either broadcast or
multicast), expressed as a rate (packets/second).
Out Discards
(ifOutDiscards) The total number of outbound packets
which were discarded even though no errors were
detected, expressed as a rate (packets/second);
well-formed packets are typically discarded in order to
free up buffer space.
Out Errors
(ifOutErrors) The total number of outbound packets
which contained errors that prevented them from being
delivered, expressed as a rate (packets/second).
Viewing Statistics Thresholds
The Hub View provides a way to view trap thresholds that have been set through
console management for RLP and port health statistics. For each RLP and port
statistic, you can specify a threshold that, when crossed, causes a trap to be sent to
a management workstation. A threshold is either a number or a percentage,
depending on the statistic. The valid range for any number threshold is 0 - 65535
with the default value being 0. When the measured value for the health statistic
crosses the threshold (in either direction), a trap is sent to the collecting
management workstation. (For information on designating workstations to accept
traps, see Chapter 3, ConÞguring the Trap Table. For deÞnitions of RLP and
Serial Port Health Statistics, see Viewing Statistics, page 2-24.)
RLP Statistics Thresholds
To view RLP Thresholds:
1. In the Hub View, click on the appropriate Module Index or Module Name text
box to display the RLP Menu (see Figure 2-3, page 2-6).
2. Drag down to Thresholds, and release. The RLP Statistics Thresholds
window, Figure 2-15, will appear.
Monitoring Hub Performance
2-29
Using the FRX4000, FRX6000, and SmartSwitch 1800 Hub View
Figure 2-15. The RLP Statistics Thresholds Window
The RLP Statistics Thresholds window shows the current threshold value (either a
number or a percentage) for the following RLP health statistics (for deÞnitions of
the RLP Health Statistics, see RLP Health, page 2-24):
Percentage of Buffers in Use
Shows the threshold for the Used Buffers
statistic.
Message Queue Length
Shows the threshold for the Frames Queued
statistic.
Received Frames Per Second
Shows the threshold for the Frames Received
Statistic.
Transmitted Frames Per Second
Shows the threshold for the Frames
Transmitted Statistic.
Rejected Frames Per Second
Shows the threshold for the Frames Rejected
statistic.
Retransmitted Frames Per Second
Shows the threshold for the Frames
Retransmitted statistic.
Serial Port Statistics Thresholds
To view Serial Port Thresholds:
1. In the Hub View, click on the appropriate Port Index or Port Status text box to
display the Port Menu (see Figure 2-3, page 2-6).
2-30
Monitoring Hub Performance
Using the FRX4000, FRX6000, and SmartSwitch 1800 Hub View
2. Drag down to Thresholds, and release. The Port Statistics Thresholds
window, Figure 2-16, will appear.
Figure 2-16. The Port Statistics Thresholds Window
The Port Statistics Thresholds window shows the current threshold value (either a
number or a percentage) for the following Port health statistics (for deÞnitions of
the Port Health Statistics, see Serial Port Health, page 2-26):
Received Frames Per Second
Shows the threshold for the Frames Received
statistic.
Transmitted Frames Per Second
Shows the threshold for the Frames
Transmitted statistic.
Retransmitted Frames Per Second
Shows the threshold for the Frames
Retransmitted statistic.
FCS Errors Per Second
Shows the threshold for the FCS Errors
statistic.
Logical Rejects Per Second
Shows the threshold for the Logical Rejects
statistic.
Transmit Error Ratio
Shows the threshold for the Transmit Error
Ratio statistic. This statistic is the ratio of
retransmitted frames per second to
successfully transmitted frames per second
on the port.
Monitoring Hub Performance
2-31
Using the FRX4000, FRX6000, and SmartSwitch 1800 Hub View
Receive Error Ratio
Shows the threshold for the Receive Error
Ratio statistic. This statistic is the ratio of
frames rejected per second to frames
accepted per second on the port.
Transmit Percent Utilization
Shows the threshold for the Tx Utilization %
statistic.
Receive Percent Utilization
Shows the threshold for the Rx Utilization %
statistic.
Managing the Hub
In addition to the performance information described in the preceding sections,
the Hub View also provides you with the tools you need to conÞgure your device
and keep it operating properly. Hub management functions include setting the
polling intervals, and enabling and disabling serial ports.
Setting the Polling Intervals
To set the polling intervals used by SPMA and the FRX:
1. Click on
to display the Device menu.
2. Drag down to Polling Intervals, and release.
Figure 2-17. FRX Hub View Polling Intervals
3. To activate the desired polling, click mouse button 1 on the selection box to
the right of each polling type field.
2-32
Managing the Hub
Using the FRX4000, FRX6000, and SmartSwitch 1800 Hub View
4. To change a polling interval, highlight the value you would like to change, and
enter a new value in seconds. Note that the Use Defaults option must not be
selected, or values will revert back to default levels when you click on
, and your changes will be ignored.
5. If you wish to use your new polling interval settings as the default values that
SPMA will use for each FRX or SmartSwitch 1800 you are managing, use
mouse button 1 to select the Save As Defaults option.
6. If you wish to replace existing values with the current set of default values, use
mouse button 1 to select the Use Defaults option.
7. Click mouse button 1 on
once your changes are complete.
Changes take effect after the current polling cycle is complete.
You can set the update intervals for the following:
Contact Status
This polling interval controls how often the FRX or SmartSwitch 1800 is ÒpingedÓ
to check SPMAÕs ability to maintain a connection with the device.
Device General Status
This polling interval controls how often the Hub View Front Panel Information Ñ
such as Uptime, Device Name, and so forth Ñ and some status information is
updated.
Device Configuration
This polling interval controls how often a survey is conducted of the type of
equipment installed in the FRX or SmartSwitch 1800; information from this poll
would change the Hub View to reßect the addition and/or removal of an RLP or
LAN card.
Port Operational State
This polling interval controls the update of the information displayed in the Port
Status boxes for each port in the hub. Port state information varies according to
the Port Display Form which is currently selected.
Statistics
This polling interval controls how often the information displayed in the Port
Status boxes is updated when the Port Display Form is set to a rate or percentage.
NOTE
Managing the Hub
SPMA generates network trafÞc when it retrieves the above-described information; keep
in mind that shorter intervals mean increased network trafÞc. Range limits for these
polling times are 0-999,999 seconds; however, an entry of 0 will be treated as a 1.
2-33
Using the FRX4000, FRX6000, and SmartSwitch 1800 Hub View
Enabling and Disabling Serial Ports
You can use the Port Menu available for each conÞgured serial port and LAN port
to change the selected portÕs administrative status. To do so:
1. In the Hub View, click on the appropriate Port Index or Port Status text box to
display the Port Menu (see Figure 2-3, page 2-6).
2. Drag down to Enable or Disable, as desired, and release.
Applying Port-level Changes
After you have made any port-level conÞguration changes (such as conÞguring
an SNA or BSCI port), your changes will not take effect until you have done an
on-line update. To do so:
1. In the Hub View, click on the appropriate Port Index or Port Status text box to
display the Port Menu (see Figure 2-3, page 2-6).
2. Drag down to On-line Update and release.
NOTE
2-34
After you have made system-level changes (such as conÞguring an IP Interface), you
must apply those changes by rebooting the FRX or SmartSwitch 1800 device, or through
console management via the [F7] command.
Managing the Hub
Chapter 3
Configuring the Trap Table
A few words about traps; accessing the Trap Table window; configuring the trap table
About Traps
The FRX4000, FRX6000, and the SmartSwitch 1800 have the ability to issue
unsolicited SNMP traps to notify management stations of unusual events. These
traps will not be issued, however, until the deviceÕs trap table has been properly
conÞgured, designating one or more workstations to receive the traps and
selecting the traps that will be sent. This conÞguration can be performed via the
Trap Table.
NOTES
SPMA does not accept the trap messages; that task is left to your network management
platform. (See the appropriate network management system documentation for details
about viewing trap messages.) If you are using SPMA in a stand-alone mode, traps
directed to a workstation which does not have some facility for accepting them will be
ignored.
In addition, so that your network management platform can interpret the FRX trap
messages, you must have properly installed and conÞgured the Cabletron trap Þle
included with your software. This process should have occurred during installation; see
your Installing and Using... guide for details.
Launching the Trap Table
To launch the Trap Table:
1. Click on the
button to display the Device menu.
2. Drag down to Trap Table, and release. The Trap Table window, Figure 3-1, will
appear.
3-1
Configuring the Trap Table
Figure 3-1. The Trap Table
The list box at the top of the window displays the trap table entries that have
already been conÞgured; the Þelds and buttons in the lower portion of the
window allow you to add new entries and modify or delete existing ones. Each
device can support up to 16 entries in its trap table.
Each trap table entry contains the following parameters:
IP Address
Indicates the IP address of the management workstation that will receive traps. Be
sure this is a management workstation which has some facility for accepting and
displaying traps, or traps sent there will be ignored.
Status
Each trap table entry can be either enabled or disabled; when enabled, the entry is
active and the designated traps will be sent when they occur. No traps are sent to
disabled entries.
Severity
Each trap issued by the FRX or SmartSwitch 1800 contains a severity designation,
indicating the importance of the event it is announcing; you can use these levels
to Þlter the traps you wish to send to each designated workstation. Only those
3-2
Launching the Trap Table
Configuring the Trap Table
traps with a severity level equal to or greater than this severity setting will be
forwarded to the associated management workstation. Each trap is assigned one
of four severity levels:
Informational
Indicates an informational event (no action generally
required) or a small conÞguration error. This is a Level 4
severity.
Minor
Indicates a minor fault or trafÞc disturbance;
recommended action typically involves clearing the fault
at the Þrst suitable occasion. This is a Level 3 severity.
Major
Indicates a major fault or link alarm; corrective action
should be taken as soon as possible. This is a Level 2
severity.
Critical
Indicates a serious fault or error that requires immediate
action. This is a Level 1 severity.
Configuring Traps
To add a trap table entry:
1. In the IP Address field, enter the IP address of the workstation to which you
wish to direct trap messages from the selected FRX or SmartSwitch 1800
device. Be sure this is a workstation with some facility for accepting and
displaying SNMP traps.
2. In the Status field, click to either enable or disable your new entry. If you
disable an entry, no traps will be sent to its designated workstation.
3. Use the Severity Level field to select which traps you wish to send to the
selected workstation: only those traps with severity levels equal to or
exceeding the level assigned here will be forwarded to the selected
workstation.
4. Click on
to add your new entry.
To modify an existing entry:
1. In the list box, click to select the entry you wish to modify. The selected entry
will be highlighted. (Note that you can only modify one entry at a time.)
2. Edit the IP Address, Status, and/or Severity Level fields, as desired.
3. Click on
Configuring Traps
to modify the selected entry.
3-3
Configuring the Trap Table
To delete an existing entry:
1. In the list box, click to select the entry you wish to delete. The selected entry
will be highlighted. (Note that you can only delete one entry at a time.)
2. Click on
to delete the selected entry.
Trap Messages
Following are some general descriptions of traps that may be sent by your FRX or
SmartSwitch 1800 device, including the conditions or events they announce, the
level of severity assigned to those conditions or events, the numeric designation
assigned to the trap, and, where appropriate, suggestions for corrective action.
Transmitter Stuck
No clock is being generated.
Severity
Informational (Level 4)
Action
Check conÞgurations and set the clock.
146
Configured for extended sequence numbering, received SABM
181
The Port record is conÞgured for a maximum frame sequence number
(Outstanding Frames) greater than seven, but a command was received setting
the mode to allow a maximum of seven.
Severity
Informational (Level 4)
Configured for normal sequence numbering,
received SABME
182
The Port record is conÞgured for a maximum frame sequence number
(Outstanding Frames) of seven or fewer, but a command was received setting the
mode to allow up to 127.
Severity
Informational (Level 4)
Received FRMR, WXYZ=”n”, control field=”n”,
V(s)=”n”, V(r)=”n”, CMD/RSP=”n”
197
The RLP HDLC frame processor task received a frame reject (FRMR) response to a
previously transmitted frame.
3-4
Severity
Major (Level 2)
Action
The system recovers automatically from this error; however, if
the message is repeated, it may mean that you have a bad
communications line.
Trap Messages
Configuring the Trap Table
SABM/DISC with wrong link address
198
The HDLC frame processor task for the port has received an improperly
addressed frame from the subscriber. This situation usually occurs when the port
and subscriber devices are both conÞgured as logical DCEs or logical DTEs.
Severity
Informational (Level 4)
Action
Modify the Port record so that one end of the connection is a
logical DCE and the other is a logical DTE.
Illegal TC/Gen Clk Combination
219
The software has determined that a port is set to run at an illegal line speed
(throughput class).
Severity
Critical (Level 1)
Action
This is probably a conÞguration error. Check the Port record and
change the throughput class, if necessary.
Excessively noisy line
Self-explanatory.
Severity
Minor (Level 3)
Action
Check the communications line and cables.
250
LP Buf Usage exceeded T: “n” C: “n”
304
The RLP statistic Percentage of Buffers in Use has exceeded the threshold
(T: ÒnÓ) that was set by the user. (C: ÒnÓ is the current value.)
Severity
Informational (Level 4)
Action
If this happens frequently, you may need to reroute some trafÞc.
LP Msg Queued exceeded T: “n” C: “n”
305
The RLP statistic Number of Queued Messages has exceeded the threshold
(T: ÒnÓ) that was set by the user. (C: ÒnÓ is the current value.)
Severity
Informational (Level 4)
Action
If this happens frequently, you may need to reroute some trafÞc.
LP Rcv Frm/Sec exceeded T: “n” C: “n”
306
The RLP statistic Received Frames/Sec has exceeded the threshold (T: ÒnÓ) that
was set by the user. (C: ÒnÓ is the current value.)
Trap Messages
Severity
Informational (Level 4)
Action
If this happens frequently, you may need to reroute some trafÞc.
3-5
Configuring the Trap Table
LP Trn Frm/Sec exceeded T: “n” C: “n”
307
The RLP statistic Transmitted Frames/Sec has exceeded the threshold (T: ÒnÓ)
that was set by the user. (C: ÒnÓ is the current value.)
Severity
Informational (Level 4)
Action
If this happens frequently, you may need to reroute some trafÞc.
LP Rej Frm/Sec exceeded T: “n” C: “n”
308
The RLP statistic Rejected Frames/Sec has exceeded the threshold (T: ÒnÓ) that
was set by the user. (C: ÒnÓ is the current value.)
Severity
Informational (Level 4)
Action
If this happens frequently, check the line for noise and check for
conÞguration errors on both the FRX port and the connected user
device.
LP Rtrn Frm/S exceeded T: “n” C: “n”
309
The RLP statistic Retransmitted Frames/Sec has exceeded the threshold (T: ÒnÓ)
that was set by the user. (C: ÒnÓ is the current value.)
Severity
Informational (Level 4)
Action
If this happens frequently, check the line for noise and check for
conÞguration errors on both the FRX port and the connected user
device.
Rcv Frm/Sec exceeded T: “n” C: “n”
311
The port statistic Received Frames/Sec has exceeded the threshold (T: ÒnÓ) that
was set by the user. (C: ÒnÓ is the current value.)
Severity
Informational (Level 4)
Action
If this happens frequently, you may need to reroute some trafÞc.
Tran Frm/Sec exceeded T: “n” C: “n”
312
The port statistic Transmitted Frames/Sec has exceeded the threshold (T: ÒnÓ)
that was set by the user. (C: ÒnÓ is the current value.)
Severity
Informational (Level 4)
Action
If this happens frequently, you may need to reroute some trafÞc.
RTrn Frm/Sec exceeded T: “n” C: “n”
313
The port statistic Retran Frames/Sec has exceeded the threshold (T: ÒnÓ) that was
set by the user. (C: ÒnÓ is the current value.)
3-6
Severity
Informational (Level 4)
Action
If this happens frequently, check the line for noise, and check for
conÞguration errors on both the FRX port and the connected user
device.
Trap Messages
Configuring the Trap Table
FCS Rej/Sec exceeded T: “n” C: “n”
314
The port statistic FCS Errors/Sec has exceeded the threshold (T: ÒnÓ) that was set
by the user. (C: ÒnÓ is the current value.) A value consistently greater than zero
indicates line problems.
Severity
Informational (Level 4)
Action
If this happens frequently, check the line for noise, and check for
conÞguration errors on both the FRX port and the connected user
device.
Log Rej/Sec exceeded T: “n” C: “n”
315
The port statistic Logical Rejects/Sec has exceeded the threshold (T: ÒnÓ) that was
set by the user. (C: ÒnÓ is the current value.) A value consistently greater than zero
indicates line problems.
Severity
Informational (Level 4)
Action
If this happens frequently, check the line for noise, and check for
conÞguration errors on both the FRX port and the connected user
device.
Trn Err Ratio exceeded T: “n” C: “n”
316
The port statistic Transmit Error Ratio has exceeded the threshold (T: ÒnÓ) that
was set by the user. (C: ÒnÓ is the current value.)
Severity
Informational (Level 4)
Action
If this happens frequently, check the line for noise, and check for
conÞguration errors on both the FRX port and the connected user
device.
Rcv Err Ratio exceeded T: “n” C: “n”
317
The port statistic Receive Error Ratio has exceeded the threshold (T: ÒnÓ) that was
set by the user. (C: ÒnÓ is the current value.)
Severity
Informational (Level 4)
Action
If this happens frequently, check the line for noise, and check for
conÞguration errors on both the FRX port and the connected user
device.
Rcv Port Usage exceeded T: “n” C: “n”
318
The port statistic % Receive Port Utilization has exceeded the threshold (T: ÒnÓ)
that was set by the user. (C: ÒnÓ is the current value.)
Trap Messages
Severity
Informational (Level 4)
Action
If this happens frequently, you may need to add ports or reroute
some trafÞc.
3-7
Configuring the Trap Table
Trn Port Usage exceeded T: “n” C: “n”
319
The port statistic % Transmit Port Utilization has exceeded the threshold (T: ÒnÓ)
that was set by the user. (C: ÒnÓ is the current value.)
Severity
Informational (Level 4)
Action
If this happens frequently, you may need to add ports or reroute
some trafÞc.
Receive Yellow Alarm Condition Set
A Yellow Alarm was received.
Severity
Major (Level 2)
Action
Contact your T1 carrier.
338
Receive Yellow Alarm Condition Set
The condition that caused event 338 has been cleared
Severity
339
Informational (Level 4)
LIC “n” Installed, Not Configured
377
The speciÞed Line Interface Card (LIC) exists in the node, but has not been
conÞgured in the Line Processor Þle.
Severity
Minor (Level 3)
Action
ConÞgure the LIC or remove it from the node.
LIC “n” Configured, Not Installed
378
The speciÞed Line Interface Card (LIC) has been conÞgured in the Line Processor
Þle, but does not exist in the node.
Severity
Critical (Level 1)
Action
Install the LIC or delete its record.
LIC “n” Config Mismatch—Type “n”
379
The interface type of the speciÞed Line Interface Card (LIC) installed in the node
is different from the interface type conÞgured in the Line Processor Þle. As a
result, the software does not load properly and will not operate.
Severity
Major (Level 2)
Action
Change either the card or the Þle.
Link Enabled
The port has been enabled from the On-Line Port Operations menu.
Severity
3-8
400
Major (Level 2)
Trap Messages
Configuring the Trap Table
Link Disabled
The port has been disabled from the On-Line Port Operations menu.
Severity
401
Major (Level 2)
Link Disconnected
For X.25, this means that the link is disconnected and level 2 cannot be
established.
402
For SNA TPAD, this means that an XID command frame has been issued by the
TPAD, but either there has been no response or the received XID data does not
match the XID data conÞgured for the TPAD subscriber.
For SNA HPAD, this means that no XID or SNRM command frame has been
received for any link address conÞgured for the HPAD subscriber.
Severity
Major (Level 2)
Action
Check the hardware at both ends to make sure the devices are
operational and cables are securely connected. For SNA, also
check the conÞguration records to make sure they match the
HPAD/TPAD.
Link Up
The level 2 link is up.
Severity
403
Major (Level 2)
X.25 Link Failed
404
The link has failed; some modem controls are not present, and the physical link is
down.
Severity
Major (Level 2)
Action
Check the modem and cables for secure connections and proper
operation.
Restart with cc “n” dc “n”
405
A Restart has been issued, with the cause code (cc) and diagnostic code (dc)
shown.
Trap Messages
Severity
Informational (Level 4)
Action
Depends on the cause. If necessary, contact your service
representative.
3-9
Configuring the Trap Table
Operational
For all ports except those noted below, this means that the link is up.
406
For SNA TPAD, this means that the XID exchange has been performed, and the
XID data received in the response frame matches the XID data conÞgured for the
TPAD subscriber. The link is ready to establish an X.25 connection with the
remote HPAD.
For SNA HPAD, this means that an XID or SNRM command frame has been
received for at least one of the link addresses conÞgured for the HPAD subscriber.
The link is ready to establish an X.25 connection with the remote TPAD.
Severity
Major (Level 2)
Call Clr LCN = “n” cc = “n” dc = “n”
Self-explanatory.
407
Severity
Informational (Level 4)
Action
Depends on the cause. If necessary, contact your service
representative.
End of IPL
Self-explanatory.
Severity
Informational (Level 4)
PVC is Up
Self-explanatory.
Severity
409
Informational (Level 4)
PVC Reset
A Reset was sent on the PVC.
Severity
408
410
Informational (Level 4)
Received Reset LCN = “n”, cc = “n” dc = “n”
411
A Reset was received on the designated LCN, with the cause code cc and
diagnostic code dc.
Severity
Informational (Level 4)
Received Reset Confirm
A Reset ConÞrmation was received.
Severity
3-10
412
Informational (Level 4)
Trap Messages
Configuring the Trap Table
PAD Link Failed
Self-explanatory.
413
Severity
Major (Level 2)
Action
Check the async PAD port and its cables for proper operation and
secure connection.
Beginning of Congestion
414
The level of Maximum Congestion speciÞed in the Node Defaults record has been
exceeded, and no more events will be put into the event buffer until the Minimum
Congestion level (also speciÞed in the Node Defaults record) has been reached.
Severity
Informational (Level 4)
Action
If this occurs frequently, you may want to increase the level of
Maximum Congestion speciÞed in the Node Defaults record.
End of Congestion, “n” events lost
415
The Minimum Congestion level has been reached. (See event 414, above.)
Severity
Informational (Level 4)
PAD Autocall Retries Exhausted
416
The async PAD retry timer has expired without a connection being established.
Severity
Minor (Level 3)
Action
None; however, if this occurs with any frequency, you may want
to increase the timer (Retry Count) or check the remote async
device for problems.
Frame Relay Link Failed
The physical link is down.
Severity
Critical (Level 1)
Action
Check the cables for secure connections and proper operation.
PU Status p = “n” stn = 0x”n” status = “n”
The SDLC PU status has changed.
Severity
Trap Messages
417
426
Major (Level 2)
3-11
Configuring the Trap Table
Duplicate of DLCI “n” on Port
428
Each connection sharing a DLCI must be on a different logical port, and two
records have been conÞgured in the FRX specifying the same logical port on one
DLCI. (DLCIs are conÞgured in records for logical ports, IP/LLC2/IPX interfaces
over frame relay, and frame relay PVCs.) Only one of the duplicate connections
will come up.
Severity
Minor (Level 3)
Action
Check the database records for the duplicate conÞguration and
change one (or more) of the records.
File Update: FRDLCI.DAT
The Frame Relay DLCI conÞguration Þle has been updated.
Severity
429
Informational (Level 4)
Received Port Disable Request
Self-explanatory.
430
Severity
Critical (Level 1)
Action
None; however, all users of this port should be made aware of the
disable.
Received Port Dump Request
431
The BSC device has experienced a problem that caused it to send a request to send
a dump to the port.
Severity
Critical (Level 1)
Action
Check the device.
Node Under Remote Control
Self-explanatory.
Severity
Informational (Level 4)
Remote Control Released
Self-explanatory.
Severity
433
Informational (Level 4)
Remote Control CXN Clr cc= “n” dc = “n”
A remote control connection was cleared.
3-12
432
Severity
Informational (Level 4)
Action
Depends on the cause.
434
Trap Messages
Configuring the Trap Table
LG Buffer MALLOC Problem PKTs Lost
435
This applies to a debug tool used by service personnel, and will not appear under
normal operation.
Severity
Major (Level 2)
RCV Unknown Event Code from Net.
An unknown event was received from the network.
Severity
Major (Level 2)
RCV Invalid Event Format from Net.
The node has received an event with an invalid format.
Severity
436
437
Informational (Level 4)
DOS Error Handler Exceeded Limit
438
The FRX was performing a DOS operation and, for some reason, could not reach
DOS.
Severity
Major (Level 2)
Action
Reboot the node and watch for error messages during boot-up. If
the problem persists, contact your service representative.
Database Error, Access Restricted
The database is inconsistent with what the software expects.
Severity
Critical (Level 1)
Action
Contact your service representative.
Abrev Addr File Upd: ABVSUB.DAT
The Abbreviated Address Þle has been updated.
Severity
Trap Messages
442
Informational (Level 4)
LP Config File Upd: LPTYPE.DAT
The Line Processor conÞguration Þle has been updated.
Severity
441
Informational (Level 4)
BSC Device File Upd: BSCDSP.DAT
The BSC Interactive Devices Þle has been updated.
Severity
440
Informational (Level 4)
Async Init File Upd: ASYSETUP.DAT
The Async Console Þle has been updated.
Severity
439
443
Informational (Level 4)
3-13
Configuring the Trap Table
Port Config File Upd: PRTPAR.DAT
The Port conÞguration Þle has been updated.
Severity
Informational (Level 4)
Pad Profile File Upd: PROFILE.DAT
The Async PAD ProÞle Þle has been updated.
Severity
3-14
453
Informational (Level 4)
Remote Update File Upd: UPDATE.TXT
A software update has been sent.
Severity
452
Informational (Level 4)
Alarm Enable File Upd: ERRMSG.TXT
The Alarms Þle has been updated.
Severity
451
Informational (Level 4)
X.25 Default File Upd: X25REC.DAT
The Node Þle has been updated.
Severity
450
Informational (Level 4)
Translation File Upd: XLTPAR.DAT
The X.25 Address Translation Template Þle has been updated.
Severity
449
Informational (Level 4)
Statistic Def File Upd: STDPAR.DAT
The Default Statistics Parameters Þle has been updated.
Severity
448
Informational (Level 4)
Subscriber File Upd: SVCSUB.DAT
The SVC Subscriber Þle has been updated.
Severity
447
Informational (Level 4)
Rmt Subscriber File Upd: RSNSVC.DAT
The Remote Subscriber Þle has been updated.
Severity
446
Informational (Level 4)
PVC Config File Upd: PVCSUB.DAT
The PVC Subscriber Þle has been updated.
Severity
445
454
Informational (Level 4)
Trap Messages
Configuring the Trap Table
Login Password Changed
Self-explanatory.
Severity
455
Informational (Level 4)
Operator Logged into Node
456
An async terminal operator has logged into the node via an async PAD port.
Severity
Informational (Level 4)
Operator Logged out of Node
457
The async terminal operator has logged out of the node via the async PAD port.
Severity
Informational (Level 4)
PAD Login File Upd: PADLOG.DAT
The Login Þle has been updated.
Severity
Informational (Level 4)
IP Route File Upd: IPRSUB.DAT
The IP Routing Þle has been updated.
Severity
Trap Messages
463
Informational (Level 4)
LP Buf Usage Under Threshold
The situation that caused event 304 has ended.
Severity
462
Informational (Level 4)
SNMP Community File Upd: COMPAR.DAT
The SNMP Community Table Þle has been updated.
Severity
461
Informational (Level 4)
SNMP Trap File Upd: TRPPAR.DAT
The SNMP Trap Routing Þle has been updated.
Severity
460
Informational (Level 4)
X.25 CUG File Updated: CUGPAR.DAT
The Closed User Group Þle has been updated.
Severity
459
Informational (Level 4)
IP Interface File Upd: IPRSUB.DAT
The IP Routing Þle has been updated.
Severity
458
464
Informational (Level 4)
3-15
Configuring the Trap Table
LP Msg Queued Under Threshold
The situation that caused event 305 has ended.
Severity
Informational (Level 4)
LP Rcv Frm/Sec Under Threshold
The situation that caused event 306 has ended.
Severity
475
Informational (Level 4)
Tran Err Ratio Under Threshold
The situation that caused event 316 has ended.
3-16
474
Informational (Level 4)
Log Rej/Sec Under Threshold
The situation that caused event 315 has ended.
Severity
473
Informational (Level 4)
FCS Rej/Sec Under Threshold
The situation that caused event 314 has ended.
Severity
472
Informational (Level 4)
ReTran Frm/Sec Under Threshold
The situation that caused event 313 has ended.
Severity
471
Informational (Level 4)
Tran Frm/Sec Under Threshold
The situation that caused event 312 has ended.
Severity
469
Informational (Level 4)
Rcv Frm/Sec Under Threshold
The situation that caused event 311 has ended.
Severity
468
Informational (Level 4)
LP Rtrn Frm/S Under Threshold
The situation that caused event 309 has ended.
Severity
467
Informational (Level 4)
LP Rej Frm/Sec Under Threshold
The situation that caused event 308 has ended.
Severity
466
Informational (Level 4)
LP Trn Frm/Sec Under Threshold
The situation that caused event 307 has ended.
Severity
465
476
Trap Messages
Configuring the Trap Table
Severity
Informational (Level 4)
Rcv Err Ratio Under Threshold
The situation that caused event 317 has ended.
Severity
Informational (Level 4)
Port Rcv Usage Under Threshold
The situation that caused event 318 has ended.
Severity
478
Informational (Level 4)
Port Trn Usage Under Threshold
The situation that caused event 319 has ended.
Severity
477
479
Informational (Level 4)
Delete failed—nonexistent interface “n”
480
An IP Interface database record was created for a nonexistent interface. Someone
then deleted the record (using [F4]), which caused this message to be generated.
Severity
Informational (Level 4)
No mem avail processing intface “n”
481
The FRX6000 RLP did not have enough available memory to add the speciÞed
interface.
Severity
Minor (Level 3)
Action
Contact Netlink Support.
Can’t add interface “n”—IPadr err
Self-explanatory.
Severity
Minor (Level 3)
Action
Double-check the conÞgured addresses.
Error adding interface “n”
Self-explanatory.
Severity
Minor (Level 3)
Action
Contact Netlink Support.
Error modifying interface “n”
Self-explanatory.
Trap Messages
Severity
Minor (Level 3)
Action
Double-check the database record.
482
483
484
3-17
Configuring the Trap Table
Interface “n” deleted successfully
Self-explanatory.
Severity
Informational (Level 4)
Interface “n” added successfully
Self-explanatory.
Severity
486
Informational (Level 4)
Interface “n” modified successfully
Self-explanatory.
Severity
485
487
Informational (Level 4)
Error deleting route with destination “n,” mask “n,” router “n”
Self-explanatory.
Severity
Minor (Level 3)
Action
Contact Cabletron SystemsÕ Global Call Center.
488
Route with destination “n,” mask “n,” router “n” deleted successfully 489
Self-explanatory.
Severity
Informational (Level 4)
Error adding route with destination “n,” mask “n,” router “n”
Self-explanatory.
Severity
Minor (Level 3)
Action
Cabletron SystemsÕ Global Call Center.
490
Route with destination “n,” mask “n,” router “n” added successfully 491
Self-explanatory.
Severity
Informational (Level 4)
BAG “n” capped at “n” but trunk MAXDPS “n”
492
The data packet size (MAXDPS) on the trunk caused a greater trafÞc load than the
conÞgured Bandwidth Allocation Class (Group) would allow, so the software
adjusted the bandwidth allocated to this trunk.
Severity
Minor (Level 3)
IPX Route File Upd: IPXRSUB.DAT
The IPX Route Þle has been updated.
Severity
3-18
493
Informational (Level 4)
Trap Messages
Configuring the Trap Table
Alloc Error on Master SNMP Agent
A buffer could not be allocated to process an SNMP message.
Severity
Critical (Level 1)
BPAD: Invalid Q Pkt “n”—PL
An invalid Q packet has been received, disabling the port.
Severity
Minor (Level 3)
Action
ConÞgure the LIC or remove it from the node.
BPAD: Invalid Pkt “n”—PL
An invalid packet has been received, disabling the port.
Severity
Minor (Level 3)
Action
Take the same action as for message 500.
BPAD: Invalid MSG “n”—Link
An invalid message has been received, disabling the port.
Severity
Minor (Level 3)
Action
Take the same action as for message 500.
BPAD: Invalid MSG “n”—Exchange
An invalid message has been received, disabling the port.
Severity
Minor (Level 3)
Action
Take the same action as for message 500.
BPAD: Invalid CUA “n” DUA “n”
An invalid message has been received, disabling the port.
Severity
Minor (Level 3)
Action
Take the same action as for message 500.
LINK: Invalid MSG fc “n”—BPAD
An invalid message has been received, disabling the port.
Severity
Minor (Level 3)
Action
Take the same action as for message 500.
BSCI: Invalid control block
An error has occurred and has disabled the port.
Trap Messages
494
Severity
Minor (Level 3)
Action
Take the same action as for message 500.
500
501
502
503
504
505
513
3-19
Configuring the Trap Table
BSCI: Invalid parameters
514
One or more parameters speciÞed in the Port Parameters record for this port is
invalid. This error disables the port.
Severity
Minor (Level 3)
Action
Correct the Port Parameters record, then reenable the port ([B],
[A], [C] from the Main Menu). If this doesnÕt work, take the same
action as for message 500.
BSCI: Invalid port number or type
515
The port number and/or type speciÞed in the Port record is not valid for BSC
Interactive.
Severity
Minor (Level 3)
Action
Check the Port record.
BSCI: Invalid message transfer
Self-explanatory. This error disables the port.
Severity
Minor (Level 3)
Action
Take the same action as for message 500.
BSCI: Invalid circuit operations
An invalid operation has occurred and has disabled the port.
Severity
Minor (Level 3)
Action
Take the same action as for message 500.
BSCI: Invalid state event action
An invalid operation has occurred and has disabled the port.
Severity
Minor (Level 3)
Action
Take the same action as for message 500.
BSCI: Invalid buffer operations
An invalid operation has occurred and has disabled the port.
Severity
Minor (Level 3)
Action
Take the same action as for message 500.
BSCI: Invalid CRC operations
An invalid operation has occurred and has disabled the port.
3-20
Severity
Minor (Level 3)
Action
Take the same action as for message 500.
516
517
518
519
520
Trap Messages
Configuring the Trap Table
BSCI: Invalid queue operations
An invalid operation has occurred and has disabled the port.
Severity
Minor (Level 3)
Action
Take the same action as for message 500.
BSCI: Invalid protocol operations
An invalid operation has occurred and has disabled the port.
Severity
Minor (Level 3)
Action
Take the same action as for message 500.
BSCI: Invalid CUA, DUA operations
An invalid operation has occurred and has disabled the port.
Severity
Minor (Level 3)
Action
Take the same action as for message 500.
Invalid Line Speed LP “n” Port “n”
Self-explanatory.
Severity
Minor (Level 3)
Action
Correct the line speed in the Port record.
521
522
523
524
I-FRM Blocked-Remote Busy Timeout
530
An RNR (Receive Not Ready) condition on the port has been cleared by
expiration of the Remote Busy Timer, which caused the port to be reset.
Severity
Major (Level 2)
Action
Check the user device for a problem that caused the RNR.
I-FRM Blocked-No Acks from Remote
531
The remote user device is not accepting transmission from the local device, and
the local port has been reset.
Severity
Major (Level 2)
Action
Check the remote device for a problem.
Enter Service Affecting Condition
532
The DTE and DCE exchange messages regularly so that each knows the other is
running and ready. If one end does not respond, this event message is sent and
the link goes down.
Trap Messages
Severity
Major (Level 2)
Action
Check the equipment to see what caused the failure to respond.
3-21
Configuring the Trap Table
Exit Service Affecting Condition
The situation that caused event 362 has ended.
Severity
Major (Level 2)
DLCI “n” Frm Relay PVC Disconnected
Self-explanatory.
Severity
533
534
Informational (Level 4)
DLCI “n” Received Bad Frame
535
Either the DLCI was not conÞgured or the frame was on an unavailable DLCI.
Severity
Minor (Level 3)
Action
ConÞgure the DLCI or resent the frame.
DLCI “n” No Response to STATUS ENQ
There was no response to a status enquiry from the DTE.
Severity
Minor (Level 3)
Action
Check the status of the DCE.
536
DLCI “n” Flow Control On
537
Flow control has been implemented on a frame relay port and data is queued.
Severity
Minor (Level 3)
DLCI “n” Frame Discarded—Flow Ctl
Self-explanatory.
Severity
Minor (Level 3)
Action
The frame must be resent.
DLCI “n” Line does not exist
Self-explanatory.
539
Severity
Minor (Level 3)
Action
Check the conÞguration records for the node, LP and port.
DLCI “n” Not Configured
Self-explanatory.
3-22
538
Severity
Minor (Level 3)
Action
ConÞgure the DLCI in the portÕs database record.
540
Trap Messages
Configuring the Trap Table
DLCI “n” Frame Relay Header Invalid
The header contained an invalid DLCI.
Severity
Minor (Level 3)
Action
Check the conÞguration record for the port.
DLCI “n” PVC does not exist
Self-explanatory.
Severity
Minor (Level 3)
Action
Create a PVC record.
541
542
DLCI “n” Frame Discarded—CIR
543
A frame was discarded, probably because the excess burst size (BE) was exceeded.
Severity
Minor (Level 3)
Action
The frame must be resent.
DLCI “n” frame relay PVC deleted
Self-explanatory.
Severity
Informational (Level 4)
DLCI “n” frame relay PVC connected
Self-explanatory.
Severity
Severity
Minor (Level 3)
Action
Check both ends of the PVC.
DLCI “n” No STATUS ENQ Received
No Status Enquiry was received when one was expected.
Severity
Minor (Level 3)
Action
Check the remote device.
LLC Interface File Upd: LLC2IPAR.DAT
The LLC2 Interface Þle has been updated.
Trap Messages
546
Informational (Level 4)
DLCI “n” Data Received on Inactive PVC
One end of the PVC is probably not up.
Severity
545
547
548
561
Informational (Level 4)
3-23
Configuring the Trap Table
LLC Host File Upd: LLC2HPAR.DAT
The LLC2 Host Þle has been updated.
Severity
Informational (Level 4)
LLC LAN Card File Upd: LANPAR.DAT
The LLC2 LAN Card Þle has been updated.
Severity
641
Informational (Level 4)
IPX Interface File Upd: IPXISUB.DAT
The IPX Interfaces Þle has been updated.
Severity
640
Informational (Level 4)
Bridge Filt App File Upd: BRGFLTAP.DAT
The Bridge Filter Applications Þle has been updated.
Severity
565
Informational (Level 4)
Bridge Filt Def File Upd: BRGFLTD.DAT
The Bridge Filter DeÞnitions Þle has been updated.
Severity
564
Informational (Level 4)
IPX Filt App File Upd: IPXFLTAP.DAT
The IPX Filter Applications Þle has been updated.
Severity
563
Informational (Level 4)
IPX Filter Def File Upd: IPXFPAR.DAT
The IPX Filter DeÞnitions Þle has been updated.
Severity
562
642
Informational (Level 4)
Lan Card Number/Type Mismatch
643
A mismatch has occurred between the LAN card type and the requested interface
type when conÞguring a LAN-based IP or IPX interface.
Severity
Minor (Level 3)
Action
Change the requested LAN card number or LAN card type.
Fr RLP/PORT/DLCI Mismatch
644
A mismatch has occurred between the current conÞguration and the requested
RLP/Port/DLCI when conÞguring a frame relay based IP or IPX interface.
3-24
Severity
Minor (Level 3)
Action
Change the requested RLP/Port/DLCI.
Trap Messages
Configuring the Trap Table
Receive Loss of Sync condition Set
650
The receiving end of the connection has reported a loss of synchronization.
Severity
Major (Level 2)
Action
Check the T1/E1 cable at the local end of the connection. If it is
securely connected and everything else appears operational,
contact your carrier.
Receive Carrier Loss condition Set
651
The receiving end of the connection has reported that the signal from the carrier is
lost.
Severity
Major (Level 2)
Action
Check the T1/E1 cable at the local end of the connection. If it is
securely connected and everything else appears operational,
contact your carrier.
Receive Remote Alarm condition Set
The remote device is not receiving the signal from the local device.
652
Severity
Major (Level 2)
Action
Check the T1/E1 cable at the local end of the connection. If it is
securely connected and everything else appears operational,
contact your carrier.
Receive Loss of Sync condition Cleared
653
The situation that caused event 650 has been Þxed. However, the T1/E1
connection will not be operational if any of events 650-652 have been set but not
cleared.
Severity
Informational (Level 4)
Receive Carrier Loss condition Cleared
654
The situation that caused event 651 has been Þxed. However, the T1/E1
connection will not be operational if any of events 650-652 have been set but not
cleared.
Severity
Informational (Level 4)
Receive Remote Alarm condition Cleared
655
The situation that caused event 652 has been Þxed. However, the T1/E1
connection will not be operational if any of events 650-652 have been set but not
cleared.
Severity
Trap Messages
Informational (Level 4)
3-25
Configuring the Trap Table
SDLC Rem. Link Stn Not Responding
Self-explanatory. (Rem Link Stn is the Remote Link Station.)
Severity
Major (Level 2)
Action
Check the PU to make sure it is operational.
701
SDLC Link Stn Sent DM
702
The link station sent a Disconnect Mode response, and the logical link is down.
Severity
Major (Level 2)
SDLC Link Stn rcvd FRMR, Inv. cmd
704
The remote device received an invalid command and responded with a Frame
Reject.
Severity
Major (Level 2)
SDLC Stn rcvd FRMR, IFLD invalid
705
The remote device received an unpermitted I frame and responded with a Frame
Reject.
Severity
Major (Level 2)
SDLC Stn rcvd FRMR, Nr invalid
706
The remote device received a frame with an invalid N(r) and responded with a
Frame Reject.
Severity
Major (Level 2)
SDLC Stn rcvd FRMR, Ifld too long
707
The remote device received an I frame that was too long and responded with a
Frame Reject.
Severity
Major (Level 2)
SDLC Rem Stn sent Invalid Command
The remote device received an invalid or unsupported command.
Severity
Major (Level 2)
SDLC Rem Stn sent unexpected IFLD
The remote device send an unpermitted I frame.
Severity
3-26
709
Major (Level 2)
SDLC Rem Stn sent invalid Nr
The remote device sent a frame with an invalid N(r).
Severity
708
710
Major (Level 2)
Trap Messages
Configuring the Trap Table
SDLC Rem Stn Exceeded window size
711
The number of frames sent by the remote device has exceeded the window size.
Severity
Major (Level 2)
SDLC Station Inactivity time exp
712
The timer deÞned by the parameters No Response Poll Period and Maximum
Retransmissions in the SNA Port record has expired.
Severity
Major (Level 2)
Action
Check the PU to make sure it is operational.
SDLC XID Retries exhausted
713
The retry limit for XID has been exceeded and link establishment has failed.
Severity
Major (Level 2)
SDLC Rem Stn sent FRMR—no reason
The remote station sent a Frame Reject with no reason.
Severity
714
Major (Level 2)
SDLC Remote RNR limit exceeded
715
The remote station is busy. This could be a hardware or buffer problem in the
remote device.
Severity
Major (Level 2)
Action
Check the hardware and conÞguration at the remote device.
SDLC Rem Tx Frame exceeds MAXDATA
717
A frame transmitted by the remote station exceeds the conÞgured value for
Maximum Bytes per Frame.
Severity
Major (Level 2)
SDLC Rem sent UA in NRM
718
The remote station sent a UA while in Normal Response Mode, which is not
allowed.
Severity
Major (Level 2)
SDLC No DSR on link
A necessary DSR was not received from the DCE.
Trap Messages
Severity
Major (Level 2)
Action
Check the modem to make sure it is operational.
720
3-27
Configuring the Trap Table
SDLC No CTS on link
A necessary CTS was not received from the DCE.
Severity
Major (Level 2)
Action
Check the modem to make sure it is operational.
721
SDLC No External Clock
The necessary clock is not being provided.
Severity
Major (Level 2)
Action
Check the modem to make sure it is operational.
722
SDLC LLC/2 Remote Link Stn lost
The remote station is not responding. Either the Inactivity Timer (Ti) or
Acknowledgment Timer (T2) has expired.
Severity
Major (Level 2)
Action
Check the remote station to make sure it is operational.
736
LLC/2 DM Received
737
The remote station sent a Disconnect Mode response and the logical link is down.
Severity
Major (Level 2)
LLC/2 SABME Received when open
738
The remote station sent a SABME to the local station, but the local station had
already been initialized via a SABMEÑUA exchange.
Severity
Major (Level 2)
Action
None; however, if the problem persists, contact your support
representative.
LLC/2 FRMR Rcvd, Invalid Command
739
The remote device received an invalid or unsupported command, and returned a
Frame Reject.
Severity
Major (Level 2)
LLC/2 FRMR Rcvd, IFLD not permitted
740
The remote device received an I-frame when it was not permitted, and returned a
Frame Reject.
Severity
Major (Level 2)
LLC/2 FRMR Rcvd, Invalid Nr
741
The remote device received an invalid N(R), and returned a Frame Reject.
Severity
3-28
Major (Level 2)
Trap Messages
Configuring the Trap Table
LLC/2 FRMR Rcvd, IFLD too long
742
The remote device received an I frame that was too long, and returned a Frame
Reject.
Severity
Major (Level 2)
LLC/2 FRMR Rcvd, Invalid Command
743
The remote device received an invalid command or response, and returned a
Frame Reject.
Severity
Major (Level 2)
LLC/2 FRMR Sent, IFLD not permitted
744
The remote device sent an I frame when it was not permitted, and a Frame Reject
was returned.
Severity
Major (Level 2)
LLC/2 FRMR Sent, Invalid Nr
745
The remote device sent an invalid N(R), and a Frame Reject was returned.
Severity
Major (Level 2)
LLC/2 FRMR Sent, IFLD too long
746
The remote device sent an I frame that was too long, and a Frame Reject was
returned.
Severity
Major (Level 2)
LLC/2 FRMR Sent, no reason
Self-explanatory.
Severity
Major (Level 2)
LLC/2 FRMR Rcvd, no reason
Self-explanatory.
Severity
747
748
Major (Level 2)
Excessive Link CRC errors
759
Self-explanatory. The line will be shut down and reestablishment will be retried
once every minute.
Severity
Major (Level 2)
SDLC Transmit link error
761
Self-explanatory. The line will be shut down and reestablishment will be retried
later.
Severity
Trap Messages
Major (Level 2)
3-29
Configuring the Trap Table
SDLC Link Stn rcv FRMR, Unexp. IFLD
762
The remote station received an S or U frame with an unexpected I frame attached.
Severity
3-30
Major (Level 2)
Trap Messages
Chapter 4
Configuring the Subscriber Table
About the Subscriber Table and Subscriber IDs; accessing the Subscriber Table window; adding or
modifying a subscriber table entry; editing the Routing and Address tables
The Subscriber Table allows you to add or modify the entries your FRX or
SmartSwitch 1800 will use to establish virtual connections to end-user devices in
the network. These entries contain the assigned subscriber addresses, as well as
information that links those addresses to a speciÞc FRX or SmartSwitch 1800
physical or logical port (or ports). Entries also contain additional information
related to preferred delivery algorithms, alternate routing paths, and transmission
priority.
TIP
The Subscriber Table applies to all serial ports, regardless of protocol; however, it is only
available on devices running Þrmware version 3.3.0 or later.
About Subscriber IDs
Your FRX and SmartSwitch 1800 devices are designed to provide point-to-point
dedicated connections among the devices communicating through their serial
ports. There are two types of connections used to accomplish this: Permanent
Virtual Circuits, or PVCs, which deÞne permanent point-to-point connections
which are always available, even when they are not being used; and Switched
Virtual Circuits, or SVCs, which are established and broken in response to speciÞc
call requests.
Subscriber IDs are used to establish virtual connections between the FRX and
end-user devices (or subscribers) in the network. A Subscriber ID is associated
with at least one physical or logical port on your FRX or SmartSwitch 1800 device,
and includes a number of parameters related to how call requests are routed to
that subscriber. The Subscriber Table allows you to conÞgure this subscriber
information.
4-1
Configuring the Subscriber Table
Accessing the Subscriber Table
To launch the Subscriber Table:
1. In the Hub View, click on the
button to display the Device menu.
2. Drag down to Subscriber Table, and release. The Subscriber Table window,
Figure 4-1, will appear.
Figure 4-1. The Subscriber Table Window
4-2
Accessing the Subscriber Table
Configuring the Subscriber Table
The Subscriber Table window contains three main areas: the Subscriber Table
itself (in the top half of the window), which allows you to add, modify, or delete
subscriber entries; the Routing Table (on the lower left), which allows you to
assign one or more routing paths to a subscriber entry by associating that entry
with one or more physical or logical ports on your device; and the Address Table
(on the lower right), which allows you to assign the addresses that will be used
for call redirection (if those options are speciÞed in the table entry). Each of these
tables is described below.
TIP
If no Close button appears in your window, use the scroll bar to the right of the display to
access the button, which is at the bottom of the window.
Configuring the Subscriber Table
The Subscriber Table displayed at the top of the window is the main table that
allows you to deÞne the subscribers who will be communicating across your FRX
or SmartSwitch 1800 device. To conÞgure a Subscriber Table entry, you must set
the following parameters:
Subscriber ID
Each subscriber is identiÞed by an ID, or address, of up to 15 digits. When
assigning or editing a Subscriber ID, keep the following in mind:
¥
Subscribers using a public data network (PDN) must conform to the format
used by the PDN. (A PDN is a network operated by common carriers or
telecommunications administrations for the purpose of providing data
transmission capabilities to the public.) For example, CCITT recommendation
X.121 speciÞes a format which includes a one-digit international code,
followed by a four-digit Data Network IdentiÞcation Code (DNIC), followed
by up to 10 digits of Network Terminal Number (NTN).
¥
A private network Ñ one that will not communicate with other networks Ñ
can create its own format, using any or all of the available digits as desired.
Since each FRX or SmartSwitch 1800 port can support multiple subscribers,
Subscriber IDs can also use wildcard characters so that all subscribers on a port
can be referenced with a single entry. Two wildcard characters are available:
¥
A question mark (?) in a subscriber ID matches any single digit. For example,
3110?????????? matches any 14-digit address that begins with 3110.
¥
An asterisk, or star (*), matches any combination of digits, including none at
all. For example, 3110*00 is any address that starts with 3110 and ends with 00,
including 311000 but excluding 31100 (overlapping is not allowed). An asterisk
by itself matches any address.
Wildcard characters can also be combined: the address 3110??* matches any
address that begins with 3110 and contains at least two more digits.
Configuring the Subscriber Table
4-3
Configuring the Subscriber Table
Algorithm
The algorithm Þeld allows you to select the means by which call requests are
forwarded to one of several routing paths assigned to the named subscriber. You
can select from among four options:
TIP
Round Robin
As its name implies, this algorithm selects ports
cyclically in numeric order (as conÞgured in the Routing
Table). If a selected port is unreachable or congested, call
requests are forwarded on to the next port in sequence.
Line Failed
The Alternate Route on Line Failure algorithm selects the
Þrst listed port that is not in a failed state. If the selected
port does not make the connection, the call request will
be cleared, even if other ports are available.
Line Busy
The Alternate Route on Line Busy algorithm selects the
Þrst port that is not busy. If that port has failed, the next
available port will be selected.
Least LCN
The Least LCN with Throughput algorithm selects the
line with the smallest load, calculated using the weight
(speed) and number of virtual circuits in use on that line.
(Weights are assigned to each line in proportion to their
throughput within the routing path.)
The alternate routes used by these algorithms are speciÞed in the Routing Table, described
beginning on page 4-5; if you do not wish to use a routing algorithm, simply accept the
default setting and enter only one routing path.
Systematic Redirect
The Systematic Redirect Þeld allows you to specify whether or not calls to the
named subscriber will be automatically redirected to the Þrst alternate subscriber
speciÞed in the Address Table (described beginning on page 4-6). If you select yes,
the original subscriber is skipped and all calls designated for that subscriber will
be redirected to the Þrst alternate address, regardless of the condition of either
path. Any additional conÞgured alternate addresses are ignored.
Redirect Busy
If you enable the Redirect Busy option, calls to the named subscriber will be
redirected to the alternates listed in the Address Table if the primary subscriber
device is busy. Again, be sure youÕve conÞgured the alternate addresses in the
Address Table.
Redirect Out-of-Order
The Redirect on Out-of-Order option allows you to specify that calls to the named
subscriber device will be redirected to the alternate subscribers if the primary
device is out of order.
4-4
Configuring the Subscriber Table
Configuring the Subscriber Table
Priority
The Connection Priority Þeld allows you to conÞgure priorities for trafÞc within
the device: the higher the number assigned to the subscriber, the higher the
priority that subscriberÕs calls will receive relative to other intra-nodal trafÞc.
These priorities have no effect on trafÞc exiting the device.
NOTE
TrafÞc priorities can also be conÞgured for SNA ports with LLC2 connections, logical
ports, LLC2 hosts, LLC2 interfaces, IP interfaces, IPX interfaces, and PVC connections.
When conÞguring priorities, be sure to consider the types of trafÞc being routed on other
connections in the node.
Configuring Routing Table Entries
So that virtual connections can be established with and by each of the subscribers
deÞned in the Subscriber Table, you must associate each Subscriber ID with one
or more physical or logical ports on your FRX or SmartSwitch 1800 device so that
the call requests can be properly routed and the connection established. This is the
function of the Routing Table. Entries which appear in this table are associated
with the Subscriber ID currently selected in the Subscriber Table portion of the
window; each Subscriber ID must have at least one routing table entry, or it will
not function. If you conÞgure more than one routing path (youÕre allowed up to
eight), paths will be selected according to the algorithm speciÞed in the
Subscriber Table (see page 4-4 for more information on routing algorithms).
ConÞguring a Routing Table entry requires the following information:
Path
Designates an index number assigned to the routing table entry; in some cases
(depending on the algorithm speciÞed for the selected subscriber table entry), this
index value will deÞne the order in which routing paths are selected when a call
request is received. You can designate up to eight alternate routes for each
subscriber entry; path values must be assigned sequentially.
LP
Designates the index number assigned to the RLP card which contains the
physical or logical port you wish to assign to the selected Subscriber ID.
Port
Designates the index number assigned to the physical or logical port you wish to
assign to the selected Subscriber ID. Indices 0-7 indicate physical ports; indices
8-63 indicate logical ports.
Configuring the Subscriber Table
4-5
Configuring the Subscriber Table
Configuring Address Table Entries
If you have selected any redirect parameters for a Subscriber Table entry, you
must use the Address Table to designate the alternate subscriber addresses that
will be used by the redirect option(s) you have selected (see page 4-4 for more
information on redirect options). You can designate up to Þve alternate addresses
for each subscriber table entry.
Each address table entry requires the following values:
Index
The index value assigned to the address table entry. Some redirect options use this
value to determine the order in which alternate addresses are selected. Allowable
values are 1 - 5; values need not be assigned sequentially.
Address
Use the address Þeld to enter the Subscriber ID for any alternate subscribers you
wish to associate with the selected subscriber table entry. These alternate
addresses will be used by any enabled redirect options to determine alternate
paths for call requests directed to the selected subscriber. Note that you cannot
use wildcard characters in this Þeld.
Adding or Modifying Subscriber Table Entries
To add or modify a subscriber table entry:
1. If you wish to modify an existing entry, be sure that entry is highlighted in the
Subscriber Table portion of the window.
TIP
Remember, any additions or deletions to the Routing Table or the Address Table actually
modify the selected Subscriber Table entry.
2. In the Subscriber Table portion of the window:
a. Enter the appropriate Subscriber ID value. You can use up to 15 digits,
including the question mark (?) and asterisk (*) wildcards. For subscribers
using a Public Data Network (PDN), be sure the ID you assign follows the
code specifications for that network.
b.
4-6
In the Algorithm field, select the means by which any alternate routing
paths assigned to this subscriber will be selected. (Alternate routing paths
are assigned via the Routing Table, as described in step 3.) If you do not
wish to employ one of the available algorithms, simply accept the default
value and assign only a single routing path.
Adding or Modifying Subscriber Table Entries
Configuring the Subscriber Table
c.
Click Yes on the Systematic Redirect option if you wish all calls to this
subscriber to be redirected to the first alternate address defined in the
Address Table. If you select this option, no calls will be received by the
original subscriber, and only the first alternate subscriber will be used.
Select No if you do not wish to redirect calls in this way.
d. Click Yes on the Redirect Busy option if you wish calls to this subscriber
to be redirected to the defined alternate addresses when the original
subscriber device is busy. Select No if you do not wish to redirect calls in
this way.
e. Click Yes on the Redirect Out-of-Order option if you wish calls to this
subscriber to be redirected to the defined alternate addresses when the
original subscriber device is down. Select No if you do not wish to redirect
calls in this way.
f.
Use the Priority field to configure the priority level that will be assigned to
this subscriber’s calls relative to other intra-nodal traffic. The higher the
priority value, the higher the priority assigned to that subscriber’s calls.
(Note that this value does not effect traffic exiting the device.)
g. Click on
to create a new entry, or on
currently selected in the Subscriber Table list box.
to edit the entry
3. In the Routing Table:
a. If you wish to modify an existing Routing Table entry, be sure that entry is
selected (and remember, any changes you make to the Routing Table
effect the Subscriber Table entry currently highlighted in the top portion of
the window).
b.
In the Path field, enter the index number you wish to assign to the path
you are configuring. These index values will be used in some cases to
determine the order in which the routing paths will be selected; note that
these values must be assigned sequentially.
c.
In the LP field, enter the index number of the RLP card which contains the
physical or logical port you wish to use to reach the subscriber device.
Note that, for an FRX4000 and SmartSwitch 1800, this value will always
be zero.
d. In the Port field, enter the index number of the physical or logical port you
wish to use to reach the subscriber device. Index values 0-7 refer to
physical ports on the selected RLP; values 8-63 denote logical ports.
e. Click on
to create a new entry, or on
to edit the entry
selected in the Routing Table list box. (Note that either adding or
modifying a Routing Table entry automatically modifies the Subscriber
Table entry highlighted in the Subscriber Table list box.)
Adding or Modifying Subscriber Table Entries
4-7
Configuring the Subscriber Table
4. In the Address Table:
a. If you wish to modify an existing Address Table entry, be sure that entry is
selected (and remember, any changes you make to the Address Table
effect the Subscriber Table entry currently highlighted in the top portion of
the window).
b.
In the Index field, enter the index value you wish to assign to the entry
you are configuring. Allowable values are 1-5; these values need not be
assigned sequentially.
c.
In the Address field, enter the Subscriber ID assigned to the subscriber
device you wish to use as a redirect option for the selected subscriber.
How these addresses are used is dependent upon the redirect options
selected for the Subscriber Table entry you’re modifying. Note that you
cannot use wildcards in this field.
d. Click on
to create a new entry, or on
to edit the entry
selected in the Address Table list box. (Note that either adding or
modifying an Address Table entry automatically modifies the Subscriber
Table entry highlighted in the Subscriber Table list box.)
5. Click on
to exit the window.
Deleting Table Entries
You can delete individual entries from any of the three tables in the window; keep
in mind, however, that deleting a Routing Table or Address Table entry simply
modiÞes the selected Subscriber Table entry; deleting a Subscriber Table entry
also deletes all associated Routing Table and Address Table entries by default.
Remember, too, that deleting all Routing Table entries for a Subscriber Table entry
invalidates the entry (as no path to the subscriber device is provided); deleting all
Address Table entries for a Subscriber Table entry invalidates any enabled redirect
options, since no redirect addresses will be deÞned.
To delete an entry from any of the tables:
1. Click to select the entry you wish to delete.
2. Click on
. The selected entry will be removed. If you have deleted a
Subscriber Table entry, all associated Routing Table and Address Table
entries will also be removed.
4-8
Adding or Modifying Subscriber Table Entries
Chapter 5
Frame Relay Status and
Configuration
About using the frame relay protocol; frame relay port and DLCI rate configuration; configuring frame
relay backup groups; logical port configuration; viewing frame relay management, congestion, and
error stats
FRX and SmartSwitch 1800 ports which have been conÞgured to use frame relay
as their layer 2 protocol can be used to carry both frame relay trafÞc and trafÞc
from other protocols which has been encapsulated in frame relay (per RFC 1490).
Each frame relay port can contain multiple logical ports Ñ up to 56 on an
FRX4000 and SmartSwitch 1800, and up to 56 per RLP on an FRX6000 Ñ and each
logical port is assigned a Data Link Connection IdentiÞer (or DLCI), which
identiÞes a point-to-point connection. All 56 logical ports can reside on one
physical port, or be spread among several ports, and each can be conÞgured to
run one or more layer 3 protocols.
For each physical port conÞgured to run frame relay, four conÞguration windows
and three statistical windows are provided:
¥
The Frame Relay Port ConÞguration window allows you to conÞgure basic
operational parameters related to the frame relay protocol, and displays some
general information about the serial port itself and the line to which it is
connected;
¥
The Frame Relay DLCI Rate ConÞguration window allows you to select the
data rate parameters for each DLCI conÞgured on the selected frame relay
port;
¥
The Frame Relay Backup Groups window allows you to conÞgure backup
groups for primary DLCI connections;
¥
The Logical Port ConÞguration window allows you to conÞgure basic
parameters related to logical port operation;
5-1
Frame Relay Status and Configuration
¥
Frame Relay Management Stats provide an overview of the frame
management (LMI or Annex D) in use on the selected port, displayed via
meters;
¥
Frame Relay Congestion Stats provide information about congestion
notiÞcation and discard eligibility frames being transmitted across the port,
also displayed in meters; and
¥
The Frame Relay Errors window provides a single meter, which displays the
current frame discard rate.
These windows and their functions are described in the following sections.
TIP
The statistical windows display their information via the SPMA Meters application; for
more information on how to manipulate and conÞgure these meters, see the SPMA Tools
Guide.
Configuring Frame Relay Ports
Two conÞguration windows allow you to set frame relay operational parameters
for physical ports and speciÞcations for any DLCI conÞgured for a selected frame
relay port: Frame Relay Port ConÞguration, described below, and Frame Relay
DLCI Rate ConÞguration, described beginning on page 5-8.
Port Configuration
Using the Frame Relay ConÞguration window, you can conÞgure some basic
operational parameters for each of your frame relay ports.
To access the window:
1. Click mouse button 3 on the frame relay port of interest to display the Port
Menu.
2. Drag down to Frame Relay Port Configuration, and release. The Frame
Relay Configuration window, Figure 5-1, will appear.
5-2
Configuring Frame Relay Ports
Frame Relay Status and Configuration
Figure 5-1. Frame Relay Port ConÞguration
The Frame Relay ConÞguration window provides the following information:
Max Bytes per Frame
This Þeld speciÞes the size (in bytes) of the largest frame that can be transmitted
across the port. This value is determined by your frame relay service provider.
Line Speed
This Þeld speciÞes the data transmission rate in bits per second. If this port is a
physical DTE, specify the line speed that matches the speed of the device
connected directly to the port. If the port is a physical DCE (i.e., the attached I/O
cable is DCE) specify the clock speed of the serial port you are conÞguring.
Configuring Frame Relay Ports
5-3
Frame Relay Status and Configuration
Possible line speed entries are:
75
150
300
600
1200
2400
4800
9600
14400
19200
24000
28800
38400
48000
56000
64000
72000
112000
128000
168000
192000
224000
256000
280000
320000
336000
384000
392000
448000
504000
512000
560000
576000
616000
640000
672000
704000
728000
768000
784000
832000
840000
896000
952000
960000
1008000
1024000
1064000
1088000
1120000
1152000
1176000
1216000
1232000
1280000
1288000
1344000
1400000
1408000
1456000
1472000
1512000
1536000
1568000
1600000
1624000
1664000
1668000
1728000
1792000
1856000
1920000
1984000
2048000
If you enter a value that is within the valid range but not equal to one of the
values listed above, the speed will be rounded up. If an RS-232 DCE port is
directly connected to the DTE via the standard Cabletron cable, the maximum
supported speed is 64000. If longer cabling is used, the maximum speed is 19200.
N1 Polling Count
The Polling Count speciÞes the number of polling cycles that must pass between
requests for full status reports, which include the status of all PVCs conÞgured on
the physical link. At an interval speciÞed by the T1 Link Integrity Timer
(described below), the logical data terminal equipment (DTE, or user-side
equipment, typically a workstation or router) will send a status enquiry to its
attached DCE (or network-side equipment), requesting the status of the network
link. Each exchange of one enquiry and one response (or status message) deÞnes
one polling cycle. After the number of cycles speciÞed by this value, a request for
a full status report will be sent.
NOTE
If this port is conÞgured as the logical data communications equipment (DCE), status
enquiries will be initiated at its attached DTE (or user-side equipment), and the local node
will respond with status messages. You can determine which link partner is the logical
DTE and which is the logical DCE (network-side equipment) by checking the Logical
DCE Þeld in this window (described below).
N2 Error Threshold
The error threshold deÞnes the number of link reliability and/or protocol errors
that can occur during the period deÞned by the N3 Monitored Events Count
(described below) before the logical DCE is declared inactive.
5-4
Configuring Frame Relay Ports
Frame Relay Status and Configuration
N3 Monitored Events Count
The monitored events count deÞnes the number of error-free polling cycles that
must occur before the DCE is declared active if the Þrst poll resulted in an error. If
the Þrst poll is error-free, the DCE is declared active immediately.
If the N2 Error Threshold is exceeded during the N3 count, the DCE will be
declared inactive, and the N3 count will be restarted.
T1 Link Integrity Timer
This value determines how often (in seconds) the logical DTE will initiate a status
enquiry to its connected DCE, checking the status of the network link. Note that
this value only has an effect when the selected port has been conÞgured as the
DTE (or user-side equipment); see N1 Polling Count, above, for more
information.
T2 Polling Verification Timer
The T2 Polling VeriÞcation Timer determines how long (in seconds) the logical
DCE will wait for a status enquiry from its attached DTE before recording an
error. This value only has an effect when the selected port has been conÞgured as
the DCE.
Maximum Supported VCs
This value deÞnes the maximum number of virtual circuits (or DLCIs) that can be
supported by the selected serial port. This value is generally determined by your
frame relay service provider.
Physical Port Interface
The physical port interface is deÞned by the portÕs connector and cabling type,
and must be conÞgured as follows:
¥
NOTE
For the FRX4000 and SmartSwitch 1800, port 0 and port 1 are always RS-232;
If you have installed the optional CSU/DSU card on an FRX4000 or SmartSwitch 1800,
it will logically take port 1, and you must conÞgure certain CSU/DSU parameters
through console management. Refer to your FRX or SmartSwitch 1800 hardware
documentation for more information.
¥
For the FRX4000, ports 2 and 3 are determined by the attached cables: RS-232,
V.35, RS-449, or X.21;
¥
For the SmartSwitch 1800, ports 2 and 3 are determined by the attached cables:
RS-232, V.35, or RS-449;
¥
For the FRX4000, ports 4-7 are determined by the expansion Line Interface
Card (LIC) and attached I/O cables. Only the valid interfaces will be listed
from the menu button. Possible interfaces are: RS-232, V.35, RS-449, and X.21.
(RS-449 and X.21 interfaces require an RS-422 LIC.)
Configuring Frame Relay Ports
5-5
Frame Relay Status and Configuration
¥
For the FRX6000, ports 0-7 on each RLP are determined by the Line Interface
Card (LIC) and attached I/O cables. Only the valid interfaces will be listed
from the menu button. Possible interfaces are: RS-232, V.35, RS-449, RS-530 and
X.21. (RS-449, RS-530, and X.21 interfaces require an RS-422 LIC.)
Blocked Flag
This value will cause the port to be enabled (if No) or disabled (if Yes) when the
device is powered up or re-booted.Whichever state is selected, the port will
remain in that state until this value is changed or until an enable or disable action
is performed.
Logical DCE
This parameter deÞnes the portÕs role as logical DCE (if Yes) or logical DTE (if
No). The port conÞgured as the DTE serves as the user-side equipment, sending
data to an interface device (DCE, or network-side equipment) for encapsulation in
a frame relay frame and transmission onto the frame relay network. The DTE also
receives de-encapsulated data from the DCE for transmission onto its local
network. Each port must be conÞgured for the opposite value of that conÞgured
for its link partner Ñ that is, a logical DCE must be connected to a logical DTE,
and vice versa.
NOTE
Note that logical and physical DCE and DTE settings are independent of one another; a
port can be both a logical DTE and a physical DCE.
Generate Clock
This setting speciÞes whether the port will generate the clock, or timing,
necessary to synchronize trafÞc over the link. If the port is a physical DCE (as
determined by the portÕs I/O cable interface), specify Yes, since the physical DCE
generates clock. If the port is a physical DTE, specify No.
Receive Clock from DTE
If this parameter is set to Yes, it allows the clock (timing) signal to be looped back
from the DTE using the Terminal Timing (TT) signal, which can be helpful on
high-speed lines. Generally, if the local interface is a physical DCE and the line
speed is above 256 Kbps, this parameter should be set to Yes; however, make sure
the DTE is conÞgured to provide the terminal timing.
Link Layer Management
When Link Layer Management is active, the protocol in use will verify and
maintain the integrity of the link. The setting of this value determines whether
link status enquiries will be used, and what form they will take:
no LMI
5-6
No Local Management Interface (LMI). No status
enquiries will be used; this setting essentially disables
frame relayÕs management abilities. LMI will prevent any
Configuring Frame Relay Ports
Frame Relay Status and Configuration
links from becoming operational unless all DLCI rate
settings match at both ends of the connection; without
LMI, mismatched links may become operational, but
they will behave unpredictably.
LMI rev 1
enquiries from the Local Management Interface (LMI)
will be used;
ansiT1 617 D
enquiries in ANSI T1.617 Annex D format (an ANSI
standard LMI) will be used.
Outgoing Rate Control
This parameter determines whether the rate parameters (CIR, BC, and BE)
assigned to the physical link and/or its virtual circuits will be enforced: Yes or
No. Choosing not to enforce rate parameters allows trafÞc rates to exceed those
conÞgured for the selected circuits, possibly impacting performance. Exceeding
CIR may also lead to additional charges from your frame relay provider.
Bandwidth Allocation
If you have conÞgured Bandwidth Allocation Groups for the selected port (or any
logical ports conÞgured for that port), you can use this Þeld to enable (Yes) or
disable (No) any conÞgured bandwidth allocation parameters. BAGs regulate
bandwidth usage by outgoing trafÞc on the physical link and can ensure that
response time-sensitive trafÞc gets access to the available frame relay bandwidth.
Up to 16 groups can be deÞned and conÞgured through console management
(refer to your FRX or SmartSwitch 1800 hardware documentation for more
information).
NOTE
Bandwidth allocation groups cannot currently be conÞgured via SPMA; for more
information on conÞguring these groups, see your FRX or SmartSwitch 1800 hardware
documentation.
Backup Use Only
This Þeld determines whether all DLCIs on the port will be reserved exclusively
as backups for other DLCIs in the same node. If you select Yes, this port will only
provide backup DLCIs; if you select No, it can provide backup and primary
DLCIs.
If you conÞgure the port for backup use only, make sure no DLCIs on the port
have been conÞgured on an IP, IPX, or LLC2 interface. If this parameter is set to
Yes, the port will remain disabled until needed for backup.
Configuring Frame Relay Ports
5-7
Frame Relay Status and Configuration
Changing Configuration Values
You can edit the values in any Þeld; to do so:
1. To edit a text field, remove the existing value and enter the new value.
2. To edit a field with a menu button, click on the button to display a list of
options, then drag down to select the option you want.
If you have made changes to the fields but would like to revert back to the
previous values, click on the Refresh button.
3. Click on
to save your changes.
Applying Port-level Changes
After you have made any port-level conÞguration changes, your changes will not
take effect until you have done an on-line update. To do so:
1. Click mouse button 3 on the port you have been configuring to display the Port
Menu.
2. Drag down to On-line Update and release.
DLCI Rate Configuration
The Frame Relay DLCI Rate ConÞguration window allows you to set
trafÞc-related operational parameters for each DLCI conÞgured for a selected
frame relay port. Note that the values for these parameters will typically be set by
your frame relay provider; they cannot be freely altered.
NOTE
When conÞguring DLCI rate values in this window, be sure to use the DLCI identiÞers
which apply to the logical ports conÞgured for the serial port youÕve selected.
To access the window:
1. Click mouse button 3 on the frame relay port of interest to display the Port
menu.
2. Drag down to Frame Relay DLCI Rate Configuration, and release. The
Frame Relay DLCI Table window, Figure 5-2, will appear.
5-8
Configuring Frame Relay Ports
Frame Relay Status and Configuration
Figure 5-2. Frame Relay DLCI Table
The Frame Relay DLCI Table window allows you to conÞgure the following
parameters for each DLCI:
NOTE
In the DLCI Table you can conÞgure Primary and Backup DLCIs. If you are conÞguring
a primary DLCI, there are six additional parameters that can only be conÞgured through
console management. They are: Remote RLP, Remote Port, Remote DLCI, Switchover
Timer, Switchback Timer, and Time to Hold Data While Waiting. For information on
conÞguring these parameters, refer to your FRX or SmartSwitch 1800 hardware
documentation.
DLCI
Use this Þeld to enter the identiÞer (16 - 991) for the DLCI whose trafÞc
parameters you wish to conÞgure. These DLCI numbers are typically assigned by
your frame relay service provider.
CIR (In/Out)
Use this Þeld to enter the Committed Information Rate (CIR) assigned to the
selected DLCI by your frame relay provider. This value deÞnes the amount of
data guaranteed to be transmitted over the carrierÕs network. Any burst of data
Configuring Frame Relay Ports
5-9
Frame Relay Status and Configuration
above the deÞned CIR can be marked as discard eligible (DE); frames with the DE
bit set are considered to be excess data, and will be discarded if the network
becomes congested.
TIP
If congestion occurs on the selected DLCI while throughput is greater than the CIR, and
the Outgoing Rate Control parameter (settable via the Frame Relay Port ConÞguration
window, described beginning on page 5-2) is set to Yes, the throughput will immediately
drop to the CIR level.
BC (In/Out)
Use this Þeld to enter the Committed Burst Size (BC) assigned to the selected
DLCI by your frame relay provider. The committed burst size deÞnes the
maximum amount of data (in bits) that the network agrees to transfer, under
normal conditions, during a time interval TC. TC (also called the Òbandwidth
intervalÓ) is calculated by dividing the committed burst size (BC) by the
committed information rate (CIR); it deÞnes the time interval during which the
user can send only BC amount of data and BE excess data (see deÞnition of BE,
below). Any trafÞc which exceeds this burst rate will be marked discard eligible
(DE), and discarded if the network becomes too congested. While sustained BC
trafÞc rates are not guaranteed, BC trafÞc has a higher delivery probability than
BE (described below).
TIP
You can view the amount of trafÞc on the selected physical interface which is marked as
discard eligible via the Frame Relay Congestion Stats window, described beginning on
page 5-22.
BE (In/Out)
Use this Þeld to enter the Excess Burst Size (BE) assigned to the selected DLCI by
your frame relay provider. The excess burst size deÞnes the amount of data (in
bits) over the committed burst size (BC) that the network will attempt to transfer
during the time interval TC (remember, TC is calculated by dividing the
committed burst size (BC) by the committed information rate (CIR)). Any data
exceeding this value will be buffered in the FRX device. Note that DE frames are
considered to be BE excess data.
BECN
The BECN Recovery Count provides a means for controlling the rate of return to
maximum trafÞc ßow after it has been reduced due to congestion. If a packet is
received on the selected DLCI with the BECN (backward explicit congestion
notiÞcation) bit set, the conÞgured BE Out value will be ignored and the effective
value will become zero (limiting trafÞc ßow to the value conÞgured for BC Out).
This limit will remain in place until the DLCI receives a speciÞed number of
sequential packets without the BECN bit set: the number speciÞed by the BECN
Recovery Count. Each time the conÞgured number of sequential packets is
received, the effective BE Out will be increased by one-eighth of the conÞgured
value.
5-10
Configuring Frame Relay Ports
Frame Relay Status and Configuration
Priority
The Outgoing DLCI Priority value allows you to assign relative priority levels to
the DLCIs conÞgured on the selected physical port. The allowable range is 0-4,
with 0 being the lowest priority.
Backup Group Number
Use this Þeld to specify whether this DLCI is a primary or a backup DLCI. If it is a
primary DLCI, enter the number (1-255) that identiÞes the Frame Relay Backup
Group that will take over if this DLCI fails. If it is a backup DLCI, enter 0. A DLCI
cannot be both a backup and a primary DLCI.
NOTE
If you are conÞguring a primary DLCI, you must set this value to 0 until you have
conÞgured a Frame Relay Backup Group (see ConÞguring a Frame Relay Backup Group,
page 5-13). Then, re-access the Frame Relay DLCI Table and specify the desired backup
group.
This parameter is applicable only on an initiating node, which is the node that
will initiate the switchover to a backup DLCI. At switchover, the initiating node
notiÞes the remote (non-initiating) node of the change. Do not conÞgure a Backup
Group Number on this DLCI at the remote (non-initiating) end.
Backup Protocol
This Þeld is only conÞgurable if the Backup Group Number is set to 0, indicating
that the DLCI being conÞgured is a backup DLCI. Set this Þeld to Enabled if this
DLCI will be used as a remote (non-initiating) backup. The DLCI will wait for a
backup protocol message from the initiating end, telling the backup where to
send the rest of the messages. Set this Þeld to Disabled if this DLCI is an initiating
backup.
State
Although it appears to be a settable parameter, the value displayed in the State
Þeld simply indicates the internal status of the entry you are conÞguring: active,
inactive, or invalid. The value displayed here indicates only the deviceÕs efforts to
add the entry to its MIB table.
Changing DLCI Rate Values
To edit the rate values assigned to each conÞgured DLCI:
1. If you wish to modify an existing entry, be sure that entry is highlighted in the
list box portion of the window.
2. Enter and/or edit the values displayed in the text boxes, as desired.
(Remember, some values which are settable from this window must mirror
values received from your service provider or configured elsewhere; be sure
these values match as necessary.)
Configuring Frame Relay Ports
5-11
Frame Relay Status and Configuration
3. Click on
to create a new entry, or on
currently selected in the list box.
to edit the entry
Applying Port-level Changes
After you have made any port-level conÞguration changes, your changes will not
take effect until you have done an on-line update. To do so:
1. Click mouse button 3 on the port you have been configuring to display the Port
Menu.
2. Drag down to On-line Update and release.
Frame Relay Backup Groups
Frame Relay Backup Groups provide frame relay DLCIs with automatic backup
protection should a DLCI fail. DLCIs are conÞgured as either ÒprimaryÓ DLCIs or
ÒbackupÓ DLCIs. This is done either in console management (refer to your FRX or
SmartSwitch 1800 hardware documentation) or in the Frame Relay DLCI Rate
ConÞguration window (see DLCI Rate ConÞguration, page 5-8).
In a backup conÞguration, one end of the link is considered the ÒinitiatingÓ node
and the other is the ÒremoteÓ, or non-initiating, node. The initiating end is the
node that will establish the backup DLCI if it discovers that the primary DLCI is
down. A node can be the initiating node for some backup conÞgurations, and the
remote node for others.
On the initiating node, backup DLCIs are assigned to backup groups. Each group
can contain up to ten backup DLCIs. A backup group is then assigned to one or
more primary DLCI; each DLCI can have just one backup group.
If a node detects a failure in a primary DLCI connection, it will search the backup
group assigned to that primary DLCI, and will select the Þrst available DLCI in
that group as a backup. The backup will become operational and will remain in
that state until the primary becomes active again. If the backup fails while in use,
the node will check the status of the primary, then (if necessary) search the
primaryÕs backup group for another backup.
NOTE
Any sessions in progress when a primary DLCI goes down will not be transferred directly
to the backup DLCI, but will be reset, then established on the backup.
Before conÞguring Frame Relay Backup Groups, you should Þrst conÞgure all the
primary and backup DLCIs using either console management (refer to your FRX
or SmartSwitch 1800 hardware documentation) or the Frame Relay DLCI Rate
ConÞguration window (see DLCI Rate ConÞguration, page 5-8). All DLCI
5-12
Frame Relay Backup Groups
Frame Relay Status and Configuration
parameters can be conÞgured, except specifying a Backup Group Number for the
primary DLCI on the initiating node. The next step is to conÞgure your Backup
Groups using the information in this section. You can then return to your DLCI
conÞguration and enter the appropriate Backup Group Number that will assign a
backup group to each primary DLCI.
Configuring Frame Relay Backup Groups
Use the Frame Relay Backup Groups window to conÞgure backup groups. To
access the window:
1. Click on the
button to display the Device menu.
2. Drag down to Frame Relay Backup Group, and release. The Frame Relay
Backup Group window, Figure 5-3, will appear.
Figure 5-3. Frame Relay Backup Group
The list box at the top of the window displays each backup DLCI and the group it
is assigned to; the Þelds and buttons in the lower portion of the window allow
you to add new entries and modify or delete existing ones.
Each backup DLCI is conÞgured using the following parameters:
Frame Relay Backup Groups
5-13
Frame Relay Status and Configuration
RLP
Indicates the RLP where the physical port on which the backup DLCI is being
conÞgured resides. For the FRX4000 and SmartSwitch 1800 this would always be
0. For the FRX6000 this could be RLP 0 - 7.
Port
Indicates the physical port on which the backup DLCI is being conÞgured.
DLCI
This is the DLCI number of the backup being conÞgured. The DLCI must already
have been created either in console management (refer to your FRX or
SmartSwitch 1800 hardware documentation) or in the Frame Relay DLCI Rate
ConÞguration window (see DLCI Rate ConÞguration, page 5-8).
Group
DeÞnes the frame relay backup group the backup DLCI belongs to. A backup
group is then assigned to one or more primary DLCIs.
Each backup group can contain up to ten backup DLCIs. A DLCI cannot be
assigned to more than one backup group, nor can it be assigned to a backup
group if it is a primary DLCI (one that will be backed up).
Wait Timer
Indicates the time (in seconds) after a primary DLCI failure that the initiating
node will wait for this backup DLCI to become active before checking the next
backup DLCI. If the backup DLCI does not become active before the timer
expires, the node will search the backup group for the next available backup.
Protocol Enabled
If Yes is selected, the backup protocol on the speciÞed DLCI is enabled. This Þeld
should be set to Yes if, and only if, the remote node is a FRX or SmartSwitch 1800
with the backup protocol enabled on the remote DLCI connected to this backup
group entry.
The remote node must be the same one to which the primary DLCI was
connected, and the remote nodeÕs backup DLCI must be on the same RLP as its
primary DLCI. Also, the primary DLCI in the initiating node must have the
remote nodeÕs primary RLP, port, and DLCI conÞgured in its DLCI parameters.
Changing Backup Group Values
To edit the values assigned to each backup DLCI:
1. If you wish to modify an existing entry, be sure that entry is highlighted in the
list box portion of the window.
2. Enter and/or edit the values displayed in the text boxes, as desired.
(Remember, some values which are settable from this window must mirror
values received from your service provider or configured elsewhere; be sure
these values match as necessary.)
5-14
Frame Relay Backup Groups
Frame Relay Status and Configuration
3. Click on
to create a new entry, or on
currently selected in the list box.
NOTE
to edit the entry
After you have made system-level changes (such as conÞguring Frame Relay Backup
Groups), you must apply those changes by rebooting the FRX or SmartSwitch 1800
device, or through console management via the [F7] command.
Configuring Logical Ports
A frame relay port can contain multiple logical ports, allowing multiple protocols
to run over a single physical frame relay port. You can conÞgure up to 56 logical
ports in an FRX4000 or SmartSwitch 1800, and up to 56 logical ports per RLP in an
FRX6000. All 56 logical ports can reside on one physical port, or be spread over
several physical ports.
NOTE
Before conÞguring a logical port, make sure the physical frame relay port on which the
logical port will reside has been conÞgured. Refer to ConÞguring Frame Relay Ports,
page 5-2.
Using the Logical Port ConÞguration window, you can conÞgure some basic
operational parameters for each of your logical ports.
To access the window:
1. Click mouse button 3 on the frame relay port of interest to display the Port
Menu.
2. Drag down to Logical Port Configuration, and release. The Logical Port
Configuration window, Figure 5-4, will appear.
Configuring Logical Ports
5-15
Frame Relay Status and Configuration
Figure 5-4. Logical Port ConÞguration
The Logical Port ConÞguration window allows you to conÞgure the following
parameters:
Logical Port
This Þeld speciÞes the number of the logical port being conÞgured. Valid entries
are 8 - 63.
DLCI Number
Use this Þeld to enter the Data Link Connection IdentiÞer (DLCI), a routing ID
that links the logical port to a virtual connection on the physical frame relay port.
This number is usually assigned by your frame relay provider.
5-16
Configuring Logical Ports
Frame Relay Status and Configuration
You must conÞgure a different DLCI for every logical port on a physical port
because logical ports and DLCIs have a one-to-one relationship. Also, make sure
that each interface (IP, IPX or LLC2) or frame relay bridge port has a different
DLCI. Do not assign a DLCI number that is conÞgured as a frame relay backup
DLCI.
Priority
This Þeld allows you to set a priority for trafÞc within the node. The higher the
number, the higher the priority relative to other intra-nodal trafÞc. These
priorities have no effect on trafÞc exiting a node. When conÞguring priorities, be
careful to consider the types of trafÞc being routed on other connections in the
node.
Bandwidth Allocation Group
Use this Þeld to assign the logical port to one of 16 Bandwidth Allocation Groups
(BAG). BAGs regulate bandwidth usage by outgoing trafÞc on the physical link
and can ensure that response time-sensitive trafÞc gets access to the available
frame relay bandwidth. Up to 16 groups can be deÞned and conÞgured through
console management (refer to your FRX or SmartSwitch 1800 hardware
documentation for more information).
NOTE
Bandwidth allocation groups cannot currently be conÞgured via SPMA; for more
information on conÞguring these groups, see your FRX or SmartSwitch 1800 hardware
documentation.
Max Packet Size
Use this Þeld to specify the maximum data packet size that will be allowed to pass
through this logical port. The packet size included in a call setup packet will be
used, as long as it is smaller than the maximum speciÞed here. Valid values are
128, 256, 512, 1024, 2048 and 4096.
If X.25 will be run over this port, do not conÞgure a size greater than 2048. If 4096
is speciÞed, additional X.25 and frame headers can make the frame too large. The
value of 2048 will not cause a problem, since larger frames will simply be split,
then reassembled at the destination.
Default Packet Size
The value entered in this Þeld will be assigned to an incoming call setup packet if
the packet does not include a packet size. Valid values are 16, 32, 64, 128, 256, 512,
1024, 2048 and 4096.
If X.25 will be run over this port, do not conÞgure a size greater than 2048. If 4096
is speciÞed, additional X.25 and frame headers can make the frame too large. The
value of 2048 will not cause a problem, since larger frames will simply be split,
then reassembled at the destination.
Configuring Logical Ports
5-17
Frame Relay Status and Configuration
Max UnACK Packets/Channel
This speciÞes the maximum number of sequentially numbered frames that can be
waiting for acknowledgment by the destination device. If this number is
exceeded, no frames will be transmitted until an acknowledgment is received.
Setup Packet Window Size
This speciÞes a default window size that will be assigned to an incoming call
setup packet if the packet does not include a window size. Valid values are 1 to 7
packets.
Default Throughput Class
Use this Þeld to specify the value that will be inserted into a Call Request packet if
Throughput Class Negotiation is not enabled or if a throughput class is not
requested in the Call Request. This value should not be higher than the line speed
speciÞed for the physical port.
Enter a number 3 - 13 that corresponds to the following values (in bits per
second):
3 = 75
4 = 150
5 = 300
6 = 600
7
8
9
10
= 1200
= 2400
= 4800
= 9600
11 = 19.2K
12 = 48K
13 = 64K
Closed User Group Member
This Þeld speciÞes whether the port belongs to a Closed User Group (CUG). The
CUG function is a privacy feature that allows the creation of up to 100 groups of
users per port. Members of a CUG can communicate with other members, but
access to and from network users outside that CUG may be denied (determined
by Rcv Calls Outside CUG and Make Calls Outside CUG).
NOTE
Closed User Groups (CUG) are conÞgured using console management. Refer to your
FRX or SmartSwitch 1800 hardware documentation for more information about CUGs
Closed User Group Index
This Þeld is only conÞgurable if the port is a CUG member; it speciÞes which
Closed User Group the port belongs to. The CUG index number is included in call
packets, and is cross-referenced with the CUG Index created through console
management.
Rcv Calls Outside CUG
This Þeld is only conÞgurable if the port is a CUG member; it speciÞes whether
the logical port can receive calls from network users outside that CUG.
5-18
Configuring Logical Ports
Frame Relay Status and Configuration
Make Calls Outside CUG
This Þeld is only conÞgurable if the port is a CUG member; it speciÞes whether
the logical port can make calls to network users outside that CUG.
Encapsulation Method
This Þeld speciÞes whether the trafÞc will be encapsulated by Annex G or RS 1490
for transmission across the frame relay network.
With Annex G, an LAPB frame is encapsulated immediately following the frame
relay header (ßag, 2-byte T1.618 header, LAPB address, LAPB control, LAPB
I-Þeld, [x.25/x.75]). With RFC 1490, the order is: T1.618 header, Q.922 control byte,
Q.933 NLPID, 2-byte level-2 protocol ID, 2-byte level-3 protocol ID, LAPB frame.
¥
RFC 1490 Ñ The protocols will be identiÞed on the DLCI based on their
NLPIDs and (if applicable) level-2 and level-3 headers (e.g., X.25: ßag, T1.618
2-byte header, 0x03 Q.922 control, 0x08 Q.933 NLPID, T1.617 level-2 LAPB PID
0x51 81, T1.617 level-3 PID 0x67 80, LAPB frame).
¥
Annex G Ñ Each protocol must be encapsulated in X.25 for transmission over
a single DLCI, because Annex G allows the DLCI to be used only by X.25. Each
protocol would require its own X.25 virtual circuit and level-3 window.
Blocked Flag
This value will cause the port to be enabled (if No) or disabled (if Yes) when the
device is powered up or re-booted.Whichever state is selected, the port will
remain in that state until this value is changed or until an enable or disable action
is performed.
Flow Control Negotiation
This Þeld allows for negotiation of ßow control parameters (packet and window
sizes for data transmission in either direction) on a per-call basis. If No is selected,
the Default Packet Size and Setup Packet Window Size will be used. If Yes is
selected, a packet and/or window size included in a call packet will be used. (If a
packet and/or window size is not included, the default values will be used.)
Throughput Class Negotiation
This Þeld allows for negotiation of throughput classes for data transmission in
either direction on a per-call basis. If No is selected, the Default Throughput
Class will be used. If Yes is selected, any throughput class included in a call
packet will be used. (If a throughput class is not included, the default value will
be used.)
Prevent Local Charge
This Þeld is used to prevent calls from being charged to this port. If Yes is
selected, incoming calls from the network with Reverse Charging speciÞed will be
rejected and outgoing calls will have Reverse Charging inserted if it is not already
in the call packet. If No is selected, then calls can be charged to this port.
Configuring Logical Ports
5-19
Frame Relay Status and Configuration
Accept Reverse Charge
This Þeld is used to authorize the transmission of incoming calls that request
Reverse Charging. If Yes is selected, a call requesting Reverse Charging will be
accepted. If No is selected, and a call requests Reverse Charging, the call will not
be transmitted.
Fast Select
This Þeld authorizes transmission of incoming calls that request the X.25 Fast
Select facility.
In Call Bar
This is an X.25 facility that prevents the transmission of incoming calls to this
port.
Out Call Bar
This is an X.25 facility that prevents the transmission of outgoing calls from this
port.
Changing Configuration Values
You can edit the values in any Þeld which provides a text box or menu button
selection; to do so:
1. To edit a text field, remove the existing value and enter the new value.
2. To edit a field with a menu button, click on the button to display a list of
options, then drag down to select the option you want.
If you have made changes to the fields but would like to revert back to the
previous values, click on the Refresh button.
3. Click on
to save your changes.
Applying Port-level Changes
After you have made any port-level conÞguration changes, your changes will not
take effect until you have done an on-line update. To do so:
1. Click mouse button 3 on the port you have been configuring to display the Port
Menu.
2. Drag down to On-line Update and release.
Viewing Frame Relay Status
Three additional port-level menu selections provide statistical information
regarding frame relay trafÞc and performance on a selected port.
5-20
Viewing Frame Relay Status
Frame Relay Status and Configuration
TIP
The statistical windows display their information via the SPMA Meters application; for
more information on how to manipulate and conÞgure these meters, see the SPMA Tools
Guide.
Management Stats
The Management Statistics window provides general information about the type
of management trafÞc that is being transmitted across the selected port. To access
the window:
1. Click mouse button 3 on the frame relay port of interest to display the Port
Menu.
2. Drag down to Frame Relay Management Stats, and release. The Frame
Relay Management Statistics window, Figure 5-5, will appear.
Figure 5-5. Frame Relay Management Stats
The Management Stats window provides the following statistical data:
LMI (Transmitted and Received)
Displays the number of management frames using LMI (link management
interface) rev1 format that were transmitted or received across the selected port,
expressed as a rate (frames/second).
ANXD (Transmitted and Received)
Displays the number of management frames using ANSI-deÞned Annex D format
that were transmitted or received across the selected port, expressed as a rate
(frames/second).
Viewing Frame Relay Status
5-21
Frame Relay Status and Configuration
TIP
You can select the type of management frames that will be transmitted across a selected
port by conÞguring the Link Layer Management option in the Frame Relay Port
ConÞguration window, described beginning on page 5-2.
Congestion Stats
The Congestion Statistics window provides information about the rates at which
Discard Eligible and Congestion NotiÞcation frames are being both received and
transmitted. To access the window:
1. Click mouse button 3 on the frame relay port of interest to display the Port
Menu.
2. Drag down to Frame Relay Congestion Stats, and release. The Frame
Relay Congestion Statistics window, Figure 5-6, will appear.
Figure 5-6. Frame Relay Congestion Stats
The Congestion Statistics window provides the following statistical data:
DE (Transmitted and Received)
Displays the number of frames with the discard eligible (DE) bit set that were
transmitted or received on the selected port, expressed as a rate (frames/second).
TrafÞc which exceeds the conÞgured CIR and/or BC parameters will be marked
as discard eligible. (See page 5-9 and following for more information on these
values.)
5-22
Viewing Frame Relay Status
Frame Relay Status and Configuration
BECN (Transmitted and Received)
Displays the number of frames with the BECN (backward explicit congestion
notiÞcation) bit set that were transmitted or received on the selected port,
expressed as a rate (frames/second). BECN frames notify the user that trafÞc sent
in the opposite direction to the received frame may encounter a congested path;
this alerts the device to reduce inbound trafÞc.
FECN (Transmitted and Received)
Displays the number of frames with the FECN (forward explicit congestion
notiÞcation) bit set that were transmitted or received on the selected port,
expressed as a rate (frames/second). FECN frames notify the receiving device
that the frames have been delivered through a congested network path; this alerts
the destination device to slow its transmission rate.
Errors
The Error Statistics window displays the rate at which frames are being discarded
at the selected port. To access the window:
1. Click mouse button 3 on the frame relay port of interest to display the Port
Menu.
2. Drag down to Frame Relay Errors, and release. The Frame Relay Errors
window, Figure 5-7, will appear.
Figure 5-7. Frame Relay Errors
The Errors window provides a single meter displaying the following statistic:
Frames Discarded
Displays the number of incoming and outgoing frames discarded due to
congestion, expressed as a rate (frames/second).
Viewing Frame Relay Status
5-23
Frame Relay Status and Configuration
5-24
Viewing Frame Relay Status
Chapter 6
X.25 Status and Configuration
About using the X.25 protocol; configuring X.25 ports; viewing X.25 management, congestion, and
error stats
An FRX or SmartSwitch 1800 port conÞgured to run X.25 as its layer 2 protocol
can connect to an X.25 DTE or an X.25 network. This allows the port to transmit
X.25 trafÞc, as well as IP and IPX trafÞc (encapsulated as per RFC 1356) and SNA
trafÞc. For any FRX or SmartSwitch 1800 physical ports which have been
conÞgured to use X.25 as their layer 2 protocol (that is, those which display a Port
Type of X25), SPMA provides a variety of statistical information.
For each physical port conÞgured to run X.25, one conÞguration window and
three statistical windows are provided:
¥
The X.25 Physical Port ConÞguration window allows you to conÞgure basic
operational parameters related to the X.25 protocol;
¥
X.25 Management Stats provide management information about standard
LAPB command and response frames, displayed via meters;
¥
X.25 Congestion Stats provide information about standard LAPB command
and response frames related to the level of trafÞc present, displayed in meters;
and
¥
The X.25 Errors window provides information about standard LAPB
command and response frames related to error conditions, also displayed in
meters.
These windows and their functions are described in the following sections.
TIP
The statistical windows display their information via the SPMA Meters application; for
more information on how to manipulate and conÞgure these meters, see the SPMA Tools
Guide.
6-1
X.25 Status and Configuration
NOTE
Note that a frame relay port can support encapsulated X.25 trafÞc on a logical port. For
information on logical ports, see Chapter 5.
Configuring X.25 Physical Ports
The X.25 Physical Port ConÞguration window allows you to set X.25 operational
parameters for physical ports.
To access the window:
1. Click mouse button 3 on the X.25 port of interest to display the Port Menu.
2. Drag down to X.25 Physical Port Configuration, and release. The X.25
Physical Port Configuration window, Figure 6-1, will appear.
Figure 6-1. X.25 Physical Port ConÞguration
6-2
Configuring X.25 Physical Ports
X.25 Status and Configuration
The X.25 Physical Port ConÞguration window provides the following
conÞguration information:
Speed
This Þeld speciÞes the data transmission rate in bits per second. If this port is a
physical DTE, specify the line speed that matches the speed of the device
connected directly to the port. If the port is a physical DCE (i.e., the attached I/O
cable is DCE) specify the clock speed of the serial port you are conÞguring.
Possible line speed entries are:
75
150
300
600
1200
2400
4800
9600
14400
19200
24000
28800
38400
48000
56000
64000
72000
112000
128000
168000
192000
224000
256000
280000
320000
336000
384000
392000
448000
504000
512000
560000
576000
616000
640000
672000
704000
728000
768000
784000
832000
840000
896000
952000
960000
1008000
1024000
1064000
1088000
1120000
1152000
1176000
1216000
1232000
1280000
1288000
1344000
1400000
1408000
1456000
1472000
1512000
1536000
1568000
1600000
1624000
1664000
1668000
1728000
1792000
1856000
1920000
1984000
2048000
If you enter a value that is within the valid range but not equal to one of the
values listed above, the speed will be rounded up. If an RS-232 DCE port is
directly connected to the DTE via the standard Cabletron cable, the maximum
supported speed is 64000. If longer cabling is used, the maximum speed is 19200.
Inactivity Timer
The Inactivity Timer only has a function if the port you are conÞguring is a dial
port; that is, if the port is connected to a dial modem. Use this Þeld to specify an
amount of time (in minutes) that starts as soon as there are no active connections
on a dial port. If the port is a dial-out port, and no new connections are
established before the speciÞed time expires, the port will be disabled until the
next call is placed. If the port is a dial-in port, and no new connections are
established before the time period expires, the port will be disabled until the
Disconnect Timer expires.
Disconnect Timer
The Disconnect Timer only has a function if the port you are conÞguring is a dial
port; that is, if the port is connected to a dial modem.This Þeld speciÞes the length
of time (in seconds) that a dial-in port will remain disabled after the Inactivity
Timer expires.
Configuring X.25 Physical Ports
6-3
X.25 Status and Configuration
Setup Timer
The Setup Timer only has a function if the port you are conÞguring is a dial port;
that is, if the port is connected to a dial modem. The setup timer starts when the
port enters the linkup state. Use this Þeld to enter a time period (in seconds). If
there is no response from the other end before the time period expires, the port
will enter the failed state.
Max Packet Size
Use this Þeld to specify the maximum data packet size that will be allowed to pass
through this X.25 port. The packet size included in a call setup packet will be
used, as long as it is smaller than the maximum speciÞed here. Valid values are
128, 256, 512, 1024, 2048, and 4096.
Default Packet Size
The value entered in this Þeld will be assigned to an incoming call setup packet if
the packet does not include a packet size. Valid values are 16, 32, 64, 128, 256, 512,
1024, 2048, and 4096.
Max UnACK Packets/Channel
This speciÞes the maximum number of sequentially numbered frames that can be
waiting for acknowledgment by the destination device. If this number is
exceeded, no frames will be transmitted until an acknowledgment is received.
Setup Packet Window Size
This speciÞes a default window size that will be assigned to an incoming call
setup packet if the packet does not include a window size. Valid values are 1 to 7
packets.
Default Throughput Class
Use this Þeld to specify the value that will be inserted into a Call Request packet if
Throughput Class Negotiation is not enabled or if a throughput class is not
requested in the Call Request.This value should not be higher than the line speed
speciÞed for the physical port.
Enter a number 3 - 13 that corresponds to the following values (in bits per
second):
3 = 75
4 = 150
5 = 300
6 = 600
7
8
9
10
= 1200
= 2400
= 4800
= 9600
11 = 19.2K
12 = 48K
13 = 64K
Closed User Group Member
This Þeld speciÞes whether the port belongs to a Closed User Group (CUG). The
CUG function is a privacy feature that allows the creation of up to 100 groups of
users per port. Members of a CUG can communicate with other members, but
access to and from network users outside that CUG may be denied (determined
by Rcv Calls Outside CUG and Make Calls Outside CUG).
6-4
Configuring X.25 Physical Ports
X.25 Status and Configuration
NOTE
Closed User Groups (CUG) are conÞgured using console management. Refer to your
FRX or SmartSwitch 1800 hardware documentation for more information about CUGs
Closed User Group Index
This Þeld is only conÞgurable if the port is a CUG member; it speciÞes which
Closed User Group the port belongs to. The CUG index number is included in call
packets, and is cross-referenced with the CUG Index created through console
management.
Rcv Calls Outside CUG
This Þeld is only conÞgurable if the port is a CUG member; it speciÞes whether
the logical port can receive calls from network users outside that CUG.
Make Calls Outside CUG
This Þeld is only conÞgurable if the port is a CUG member; it speciÞes whether
the logical port can make calls to network users outside that CUG.
Connector Type
This Þeld is deÞned by the portÕs connector and cabling type, and must be
conÞgured as follows:
¥
NOTE
For the FRX4000 and SmartSwitch 1800, port 0 and port 1 are always RS-232;
If you have installed the optional CSU/DSU card on an FRX4000 or SmartSwitch 1800,
it will logically take port 1, and you must conÞgure certain CSU/DSU parameters
through console management. Refer to your FRX or SmartSwitch 1800 hardware
documentation for more information.
¥
For the FRX4000, ports 2 and 3 are determined by the attached cables: RS-232,
V.35, RS-449, or X.21;
¥
For the SmartSwitch 1800, ports 2 and 3 are determined by the attached cables:
RS-232, V.35, or RS-449;
¥
For the FRX4000, ports 4-7 are determined by the expansion Line Interface
Card (LIC) and attached I/O cables. Only the valid interfaces will be listed
from the menu button. Possible interfaces are: RS-232, V.35, RS-449, and X.21.
(RS-449 and X.21 interfaces require an RS-422 LIC.)
¥
For the FRX6000, ports 0-7 on each RLP are determined by the Line Interface
Card (LIC) and attached I/O cables. Only the valid interfaces will be listed
from the menu button. Possible interfaces are: RS-232, V.35, RS-449, RS-530 and
X.21. (RS-449, RS-530, and X.21 interfaces require an RS-422 LIC.)
Configuring X.25 Physical Ports
6-5
X.25 Status and Configuration
Dial In/Out
This parameter only has a function if the port you are conÞguring is a dial port;
that is, if the port is connected to a dial modem. It speciÞes whether this port is
connected to a dial modem and, if so, whether connections will be initiated
through dial-in or dial-out calls. (Signaling differences prevent conÞguration for
both dial-in and dial-out on the same port.)
A port speciÞed as Dial Out will establish a link only when an outgoing X.25 call
is placed, at which time the port will raise DTR (Data Terminal Ready) and the
attached modem will dial a stored number to a remote modem to establish an
X.25 connection. A port speciÞed as Dial In will establish a link only when a call
is received.
If the port is conÞgured as a network trunk (see Network Trunk Group below),
the value must be None.
Generate Clock
This Þeld speciÞes whether the port will generate the clock necessary to
synchronize trafÞc over the link. If the port is a physical DCE (determined by the
portÕs I/O cable interface), conÞgure this Þeld as Yes, since the physical DCE
generates clock. If the port is a DTE, conÞgure this Þeld as No.
Receive Clock from DTE
This parameter is relevant only if Connector Type is something other than
RS-232, and the Generate Clock parameter is set to Yes (see above). Selecting Yes
for this Þeld allows the clock to be looped back from the DTE using the TT
(Terminal Timing) signal, which can be helpful on high-speed lines. Generally, if
the local interface is physical DCE and the line speed is above 256 Kbps, this
parameter should be set to Yes. (Make sure the remote DTE is conÞgured to
provide the terminal timing.)
Network Trunk Group
A network trunk is a link between FRX and SmartSwitch 1800 devices over X.25.
You can assign a port to a trunk group which will cause that port to be enabled
when the network trunk is operational, or disabled if the network trunk is not
operational.
NOTE
Although you can use this window to designate an X.25 port as a member of a trunk
group, you must conÞgure the actual network trunk through console management. Refer
to your hardware documentation for more information on network trunks.
Blocked Flag
This value will cause the port to be enabled (if No) or disabled (if Yes) when the
device is powered up or re-booted.Whichever state is selected, the port will
remain in that state until this value is changed or until an enable or disable action
is performed.
6-6
Configuring X.25 Physical Ports
X.25 Status and Configuration
Flow Control Negotiation
This Þeld allows for negotiation of ßow control parameters (packet and window
sizes for data transmission in either direction) on a per-call basis. If No is selected,
the Default Packet Size and Setup Packet Window Size will be used. If Yes is
selected, a packet and/or window size included in a call packet will be used. (If a
packet and/or window size is not included, the default values will be used.)
Throughput Class Negotiation
This Þeld allows for negotiation of throughput classes for data transmission in
either direction on a per-call basis. If No is selected, the Default Throughput
Class will be used. If Yes is selected, any throughput class included in a call
packet will be used. (If a throughput class is not included, the default value will
be used.)
Prevent Local Charge
This Þeld is used to prevent calls from being charged to this port. If Yes is
selected, incoming calls from the network with Reverse Charging speciÞed will be
rejected and outgoing calls will have Reverse Charging inserted if it is not already
in the call packet. If No is selected, then calls can be charged to this port.
Accept Reverse Charge
This Þeld is used to authorize the transmission of incoming calls that request
Reverse Charging. If Yes is selected, a call requesting Reverse Charging will be
accepted. If No is selected, and a call requests Reverse Charging, the call will not
be transmitted.
Fast Select
This Þeld authorizes transmission of incoming calls that request the X.25 Fast
Select facility. This Þeld must be set to Yes if SDLC-LLC2 conversion is conÞgured
over the port, or if the X.25 link is to an X.25 network.
In Call Bar
This is an X.25 facility that prevents the transmission of incoming calls to this
port.
Out Call Bar
This is an X.25 facility that prevents the transmission of outgoing calls from this
port.
Configuring X.25 Physical Ports
6-7
X.25 Status and Configuration
Changing Configuration Values
You can edit the values in any Þeld which provides a text box or menu button
selection; to do so:
1. To edit a text field, remove the existing value and enter the new value.
2. To edit a field with a menu button, click on the button to display a list of
options, then drag down to select the option you want.
If you have made changes to the fields but would like to revert back to the
previous values, click on the Refresh button.
3. Click on
to save your changes.
Applying Port-level Changes
After you have made any port-level conÞguration changes, your changes will not
take effect until you have done an on-line update. To do so:
1. Click mouse button 3 on the port you have been configuring to display the Port
Menu.
2. Drag down to On-line Update and release.
Viewing X.25 Status
For each physical port conÞgured to run X.25, three statistical windows are
provided. These windows provide trafÞc and performance information for the
selected port; they are described in the following sections.
TIP
The statistical windows display their information via the SPMA Meters application; for
more information on how to manipulate and conÞgure these meters, see the SPMA Tools
Guide.
Management Stats
The Management Statistics window provides information about standard LAPB
command and response frames related to management actions taken at the
selected port. To access the window:
1. Click mouse button 3 on the X.25 port of interest to display the Port Menu.
2. Drag down to X25 Management Stats, and release. The X25 Management
Statistics window, Figure 6-2, will appear.
6-8
Viewing X.25 Status
X.25 Status and Configuration
Figure 6-2. X.25 Management Stats
The Management Statistics window provides the following statistical data:
SABM (Transmitted/Received)
A count of the Set Asynchronous Balanced Mode (SABM) commands transmitted
or received across the selected port, expressed as a rate (commands/second).
UA (Transmitted/Received)
A count of the Un-numbered Acknowledgment (UA) responses transmitted or
received across the selected port, expressed as a rate (responses/second).
DISC (Transmitted/Received)
A count of the Disconnect (DISC) commands transmitted or received across the
selected port, expressed as a rate (commands/second).
DM (Transmitted/Received)
A count of the Disconnect Mode (DM) responses transmitted or received across
the selected port, expressed as a rate (responses/second).
Congestion Stats
The Congestion Statistics window provides information about standard LAPB
command and response frames related to the level of trafÞc present on the
selected port. To access the window:
1. Click mouse button 3 on the X.25 port of interest to display the Port Menu.
Viewing X.25 Status
6-9
X.25 Status and Configuration
2. Drag down to X25 Congestion Stats, and release. The X25 Congestion
Statistics window, Figure 6-3, will appear.
Figure 6-3. X.25 Congestion Stats
The Congestion Statistics window provides the following statistical data:
INFO (Transmitted/Received)
A count of the Information Transfer (INFO) commands transmitted or received
across the selected port, expressed as a rate (commands/second).
RNR (Transmitted/Received)
A count of the Receive Not Ready (RNR) supervisory commands or responses
transmitted or received across the selected port, expressed as a rate (commands or
responses/second).
Errors
The Error Statistics window provides information about standard LAPB
command and response frames related to error conditions present on the selected
port. To access the window:
1. Click mouse button 3 on the X.25 port of interest to display the Port Menu.
2. Drag down to X25 Errors, and release. The X25 Error Statistics window,
Figure 6-4, will appear.
6-10
Viewing X.25 Status
X.25 Status and Configuration
Figure 6-4. X.25 Error Stats
The Error Statistics window provides the following statistical data:
FRMR (Transmitted/Received)
A count of the Frame Reject (FRMR) responses transmitted or received on the
selected port, expressed as a rate (responses/second).
Rej (Transmitted/Received)
A count of the Reject (Rej) supervisory commands or responses transmitted or
received on the selected port, expressed as a rate (commands or
responses/second).
Viewing X.25 Status
6-11
X.25 Status and Configuration
6-12
Viewing X.25 Status
Chapter 7
SNA Status and Configuration
Configuring SNA ports; physical unit and LLC2 parameter configuration; configuring link stations;
configuring LLC2 hosts; viewing statistics
SNA ports in the FRX4000, FRX6000, and SmartSwitch 1800 connect IBM hosts
with PUs (physical units), over a frame relay (via RFC 1490) or X.25 (via Annex G)
network. SNA support includes SDLC (Synchronous Data Link Control) for serial
lines and LLC2 (Logical Link Control type 2) for LAN connections.
SDLC-to-LLC2 and LLC2-to-SDLC conversion is performed for transmission over
frame relay.
For each physical port conÞgured to run SNA, six conÞguration windows are
provided:
¥
The SDLC Port ConÞguration window allows you to conÞgure the SNA port
that will connect to user devices;
¥
The SDLC PU ConÞguration window, where you deÞne the physical units
(PU) that will communicate via the SNA port;
¥
The SDLC PU LLC2 ConÞguration window, where you conÞgure the physical
unitÕs LLC2 parameters (if SDLC-LLC2 conversion will be performed on the
PU connection);
¥
The SDLC Link Station ConÞguration window allows you to conÞgure the
SDLC link stations;
¥
The SNA/LLC2 Hosts Table where each SNA/LLC2 host device is conÞgured;
¥
The LLC2 Hosts Connections Tables where LLC2 Host connections are
conÞgured.
7-1
SNA Status and Configuration
In addition, for each SNA port there are four statistical windows provided:
¥
The SDLC Port Stats providing general port statistics;
¥
The SDLC LS General Stats providing link station statistics;
¥
The SDLC LS Rx Stats providing link station receive statistics;
¥
The SDLC LS Tx Stats providing link station transmit statistics.
These windows and their functions are described in the following sections.
TIP
The statistical windows display their information via the SPMA Meters application; for
more information on how to manipulate and conÞgure these meters, see the SPMA Tools
Guide.
Configuring SNA Ports
Each SNA port can be conÞgured to support SNA hosts (PU 2.1, 4.0 HPAD, or
NPAD) or terminals (PU 1.0, 2.0, 2.1 TPAD). A port can also be conÞgured for a
transparent mode (XPAD), which supports HDLC (High-level Data Link Control)
and any of its subset protocols, such as SDLC, LAPB (Link Access Procedure), and
BSC (Binary Synchronous Communications).
SDLC Port Configuration
Using the SDLC Port ConÞguration window, you can conÞgure the SNA port that
will connect to the user devices, if the connection will be SDLC.
To access the window:
1. Click mouse button 3 on the SNA port of interest to display the Port Menu.
2. Drag down to SDLC Port Configuration, and release. The SDLC Port
Configuration window, Figure 7-1, will appear.
7-2
Configuring SNA Ports
SNA Status and Configuration
Figure 7-1. SDLC Port ConÞguration
The SDLC Port ConÞguration window provides the following information:
Packet Size
This Þeld speciÞes the maximum packet size (in bytes) that will be transmitted on
the port. The default value for this parameter is 1024.
Line Speed
This Þeld speciÞes the data transmission rate in bits per second. If this port is a
physical DTE, specify the line speed that matches the speed of the device
connected directly to the port. If the port is a physical DCE (i.e., the attached I/O
cable is DCE) specify the clock speed of the serial port you are conÞguring.
Configuring SNA Ports
7-3
SNA Status and Configuration
Possible line speed entries are:
75
150
300
600
1200
2400
4800
9600
14400
19200
24000
28800
38400
48000
56000
64000
72000
112000
128000
168000
192000
224000
256000
280000
320000
336000
384000
392000
448000
504000
512000
560000
576000
616000
640000
672000
704000
728000
768000
784000
832000
840000
896000
952000
960000
1008000
1024000
1064000
1088000
1120000
1152000
1176000
1216000
1232000
1280000
1288000
1344000
1400000
1408000
1456000
1472000
1512000
1536000
1568000
1600000
1624000
1664000
1668000
1728000
1792000
1856000
1920000
1984000
2048000
If you enter a value that is within the valid range but not equal to one of the
values listed above, the speed will be rounded up. If an RS-232 DCE port is
directly connected to the DTE via the standard Cabletron cable, the maximum
supported speed is 64000. If longer cabling is used, the maximum speed is 19200.
MAX Retries
This is the maximum number of times the port will attempt to send a frame if the
physical unit (PU) is not responding. A larger value increases the probability of an
eventual correct transfer between DTE and DCE, but a smaller value permits
faster detection of a permanent error condition. The default value for this
parameter is 5.
Inactivity Timer
This parameter is only relevant if PAD Type (see below) is HPAD. It is the amount
of time (in seconds) that the FRX will wait with no activity on the port before it
declares the port is down. The default value for this parameter is 50.
Physical Port Interface
The physical port interface is deÞned by the portÕs connector and cabling type,
and must be conÞgured as follows:
¥
NOTE
If you have installed the optional CSU/DSU card on an FRX4000 or SmartSwitch 1800,
it will logically take port 1, and you must conÞgure certain CSU/DSU parameters
through console management. Refer to your FRX or SmartSwitch 1800 hardware
documentation for more information.
¥
7-4
For the FRX4000 and SmartSwitch 1800, port 0 and port 1 are always RS-232;
For the FRX4000, ports 2 and 3 are determined by the attached cables: RS-232,
V.35, RS-449, or X.21;
Configuring SNA Ports
SNA Status and Configuration
¥
For the SmartSwitch 1800, ports 2 and 3 are determined by the attached cables:
RS-232, V.35, or RS-449;
¥
For the FRX4000, ports 4-7 are determined by the expansion Line Interface
Card (LIC) and attached I/O cables. Only the valid interfaces will be listed
from the menu button. Possible interfaces are: RS-232, V.35, RS-449, and X.21.
(RS-449 and X.21 interfaces require an RS-422 LIC.)
¥
For the FRX6000, ports 0-7 on each RLP are determined by the Line Interface
Card (LIC) and attached I/O cables. Only the valid interfaces will be listed
from the menu button. Possible interfaces are: RS-232, V.35, RS-449, RS-530 and
X.21. (RS-449, RS-530, and X.21 interfaces require an RS-422 LIC.)
PAD Type
The most common SNA networking requirement is for communication between
an SNA host computer (PU type 4) and control units (PU type 2). This is
accomplished via an HPAD (Host PAD) and TPAD (Terminal PAD). The host
computer FEP (front end processor) is connected to the HPAD and the cluster
controller is connected to a TPAD.
XPAD is used for networking of statistical multiplexers and other bit-sync
devices.
The default value for this parameter is TPAD.
LPDA Support
This Þeld speciÞes the version, if any, of Link Problem Determination Aid that can
be used by a host program (e.g., NetView or VTAM) or controller program (e.g.,
NCP) to test status and to control the line and remote interface. Select from two
versions, lpda-1 or lpda-2; or select None, if no version will be used. The default
value for this parameter is None.
NRZ Data Encoding
This Þeld determines the level of data encoding. If you select Yes, then NRZ
(Non-Return to Zero) will be on. This means that 1 represents high-level encoding
and 0 is low-level. If you select No, then NRZ is off, which means that 1 represents
no change in level, and 0 is a change.
Always use NRZ for all SNA modes, unless there is a site-speciÞc conÞguration
that needs NRZI (Non-Return to Zero Inverted). In that case, select No because
NRZ off means that NRZI is on.
Generate Clock
This setting speciÞes whether the port will generate the clock, or timing,
necessary to synchronize trafÞc over the link. If the port is a physical DCE (as
determined by the portÕs I/O cable interface), specify Yes, since the physical DCE
generates clock. If the port is a physical DTE, specify No. The default value for
this parameter is Yes.
Configuring SNA Ports
7-5
SNA Status and Configuration
Receive Clock from DTE
This parameter is relevant only if the Physical Port Interface (see above) is
something other than RS-232 and Generate Clock is set to Yes. If this parameter is
set to Yes, it allows the clock (timing) signal to be looped back from the DTE using
the Terminal Timing (TT) signal, which can be helpful on high-speed lines.
Generally, if the local interface is a physical DCE and the line speed is above 256
Kbps, this parameter should be set to Yes; however, make sure the DTE is
conÞgured to provide the terminal timing. The default value for this parameter is
No.
Disable Rqst Disconnect
This parameter is only relevant if the PAD type is HPAD. If this value is set to Yes,
it prevents the HPAD from sending a Disconnect Request to the host if the
HPAD-TPAD connection is broken. The default value for this parameter is No.
Idle Fill Char
This Þeld speciÞes a character that will be inserted into the stream when the SNA
link is idle. The two choices are hex-ff and hex-7e; the default value is hex-ff.
L1 Duplex
This Þeld determines level-1 signal operation on RS-232 ports. If Full is selected,
RTS (Request to Send), CTS, (Clear to Send) and DCD are always high (and are
raised by the appropriate side.
If Half is selected:
¥
When the DTE is ready to transmit, it asserts RTS, waits for CTS to become
high, then starts transmitting. When transmission is Þnished, the DTE drops
RTS (and the DCE should drop CTS). DCD is low during this period.
¥
When the DCE is ready to transmit, it checks to see that RTS and CTS are not
high, then it raises DCD and starts transmitting. When transmission is done,
the DCE drops DCD. RTS and CTS are low during this period
For both Full and Half L1-Duplex, the DTE raises DTR (Data Terminal Ready) and
the DCE raises DSR (Data Set Ready).
The default value for this parameter is Full.
!
This parameter must be conÞgured correctly, or the PU will not become active.
CAUTION
7-6
Configuring SNA Ports
SNA Status and Configuration
Changing Configuration Values
You can edit the values in any Þeld; to do so:
1. To edit a text field, remove the existing value and enter the new value.
2. To edit a field with a menu button, click on the button to display a list of
options, then drag down to select the option you want.
If you have made changes to the fields but would like to revert back to the
previous values, click on the Refresh button.
3. Click on
to save your changes.
Applying Port-level Changes
After you have made any port-level conÞguration changes, your changes will not
take effect until you have done an on-line update. To do so:
1. Click mouse button 3 on the port you have been configuring to display the Port
Menu.
2. Drag down to On-line Update and release.
SDLC PU Configuration
After you have conÞgured the SNA port, you must also deÞne the physical units
(PU) that will communicate via that SNA port. You can use the SDLC Physical
Unit Subscriber Table to deÞne PUs.
To access the window:
1. Click mouse button 3 on the SNA port of interest to display the Port menu.
2. Drag down to SDLC PU Configuration, and release. The SDLC Physical Unit
Subscriber Table, Figure 7-2, will appear.
Configuring SNA Ports
7-7
SNA Status and Configuration
Figure 7-2. SDLC Physical Unit Subscriber Table
The SDLC Physical Unit Subscriber Table allows you to conÞgure the following
parameters:
NOTE
An SNA TPAD subscriber can specify only one remote device, which can be an HPAD or
an X.25 connection to the host. An HPAD subscriber can specify up to 16 remote devices,
any of which can be a TPAD or an X.25 connection to the host. An XPAD subscriber can
specify only one remote device, which must be another XPAD.
Address
This is the SDLC PU Station Address, 00 - ff, that identiÞes the PU you are
conÞguring. It must match the ADDR parameter set in the macro PU in the VTAM
conÞguration.
Local Subscriber Id
This is the subscriber address of the local end of a SNA connection. Enter a
Subscriber ID of up to 15 digits. This is the same subscriber ID that is speciÞed in
the Subscriber Table (see Chapter 4, ConÞguring the Subscriber Table, for
Subscriber ID conventions). Each local subscriber conÞgured here must also be
conÞgured in the Subscriber Table, so that routing information for each subscriber
address can be speciÞed.
7-8
Configuring SNA Ports
SNA Status and Configuration
Remote Subscriber Id
This is the subscriber address of the remote end of a SNA connection. It is used by
the local device to identify where a call is going. Enter a Subscriber ID of up to 15
digits. A Subscriber ID record must also be conÞgured for this address (see
Chapter 4, ConÞguring the Subscriber Table for Subscriber ID conventions).
If the PU is one end of a connection to a logical port in the FRX or SmartSwitch
1800, this ID must match a Subscriber ID conÞgured for the logical port.
LPDA Resource Id
LPDA requires both a PU name and an LU (logical unit) ID. This Þeld identiÞes a
LU on the PU. The Resource ID value must match the NetView LOCADDR. The
default value for this parameter is 0.
LLC2 Connection
This Þeld speciÞes whether SDLC-LLC2 conversion will be done on the PU
connection, either locally or at a remote node via a logical or physical port. If the
PU will be used for SDLC-LLC2 conversion, this Þeld must be set to Yes. The
default value for this parameter is No.
Auto Call Enabled
This parameter enables automatic calling between SNA ports when the controller
(identiÞed by Link Address) becomes active. If Yes is selected on an SNA port, an
X.25 call will be made from the local port to the remote subscriber port.
The default value for this parameter is No. If you have conÞgured the SNA port
with a PAD Type of TPAD, you should set Autocall to Yes. If you have conÞgured
the SNA port with a PAD Type of HPAD, set Autocall to No.
Retry Time
The amount of time (in seconds) between Auto Call retries (see above). If Auto
Call is disabled, (if No was selected), this Þeld will be grayed out. The default
value for this parameter is 60.
Retry Count
The maximum number of times an Auto Call (see above) will be sent. If Auto Call
is disabled, (if No was selected), this Þeld will be grayed out. The default value
for this parameter is 0 (indeÞnite).
L2 Data Mode
This Þeld determines whether transmission will be in one or two directions at the
same time. If you select Two Way Alternate it will be in one direction at a time; if
you select Two Way Simultaneous, it will be in two directions at the same time.
The default value for this parameter is Two Way Alternate.
Configuring SNA Ports
7-9
SNA Status and Configuration
Changing SDLC PU Subscriber Values
To edit the values assigned to each SDLC PU Subscriber:
1. If you wish to modify an existing entry, be sure that entry is highlighted in the
list box portion of the window.
2. Enter and/or edit the values displayed in the text boxes, as desired.
(Remember, some values which are settable from this window must mirror
values configured elsewhere; be sure these values match as necessary.)
3. Click on
to create a new entry, or on
currently selected in the list box.
to edit the entry
Applying Port-level Changes
After you have made any port-level conÞguration changes, your changes will not
take effect until you have done an on-line update. To do so:
1. Click mouse button 3 on the port you have been configuring to display the Port
Menu.
2. Drag down to On-line Update and release.
SDLC PU LLC2 Configuration
If SDLC-LLC2 conversion will be performed on the PU connection, you must
conÞgure the PU LLC2 parameters. You can use the SDLC LLC2 ConÞguration
window to deÞne PUs. (If the PU is not part of an SDLC-LLC2 connection, you do
not have to conÞgure these parameters.)
To access the window:
1. Click mouse button 3 on the SNA port of interest to display the Port menu.
2. Drag down to SDLC PU LLC2 Configuration, and release. The SDLC LLC2
Configuration window, Figure 7-3, will appear.
7-10
Configuring SNA Ports
SNA Status and Configuration
Figure 7-3. SDLC LLC2 ConÞguration window
The SDLC LLC2 ConÞguration window allows you to conÞgure the following
parameters:
Address
This is the SDLC PU Station Address, 00 - ff, that identiÞes the PU you are
conÞguring. It must match the ADDR parameter set in the macro PU in the VTAM
conÞguration.
Local SAP Address
This is the remote service access point (SAP) address used to connect the PU to
the host. This parameter is relevant only in a connection to a 3174 or AS/400-type
setup where a speciÞc source SAP address is required. If the LLC2 session will run
over a native LLC2 frame relay interface, this parameter will be ignored.
Local MAC Address
This address identiÞes the PU to the host. Like the local SAP address, this
parameter is relevant only in a connection to a 3174 or AS/400-type setup where a
speciÞc source MAC address is required. If the LLC2 session will run over a
native LLC2 frame relay interface, this parameter will be ignored.
Configuring SNA Ports
7-11
SNA Status and Configuration
IDBLK
This parameter is used in conjunction with the IDNUM parameter (see below) in
generating the Node Þeld in an XID (Exchange IdentiÞcation) frame (format 0 or
3) to establish a link station connection to the host. If both IDBLK and IDNUM are
set to 0, the Node Þeld of the XID frame will be provided by the attached SDLC
device. The node will send an XID command to the remote node to indicate that
the SDLC device should be polled for an XID.
IDNUM
This parameter is used in conjunction with the IDBLK parameter (see above) in
generating the Node Þeld in an XID frame (format 0 or 3) to establish a link
station connection to the host. If both IDBLK and IDNUM are set to 0, the Node
Þeld of the XID frame will be provided by the attached SDLC device. The node
will send an XID command to the remote node to indicate that the SDLC device
should be polled for an XID.
Ti-Inactivity Timer
This timer is used by the link station to detect an inoperative condition in either
the remote link station or the transmission medium. The timer will be started if
the T1-LLC2 Reply Timer has been reset (see below), if additional LLC protocol
data units (LPDUs) have been sent by the remote link station, and if there are no
outstanding acknowledgments or responses from the local link station.
If the local station does not receive an LPDU before the Ti-Inactivity Timer
expires, the station must send an LPDU with the P bit set to BÕ1Õ to solicit the
remote stationÕs status. Recovery then proceeds as described under T1-LLC2
Reply Timer.
The value is the amount of time in seconds; the default value is 30.
T1-LLC2 Reply Timer
The Reply Timer is used to detect the failure to receive a required
acknowledgment or response from the remote link station. The link station will
start the timer when it transmits either an Information LPDU or a Command
LPDU with the P bit set to BÕ1Õ. (If the LPDU is sent while the timer is already
running, the link station will reset the timer.)
The link station will reset the T1-LLC2 Reply Timer when it receives one of these:
¥
An REJ (Reject) LPDU, provided a Command LPDU with P bit set to BÕ1Õ is not
outstanding;
¥
A Response LPDU with the F bit set to BÕ1Õ;
¥
An Information or Supervisory LPDU with an NR greater than the last NR
received and less than or equal to the line stationÕs VS, provided a Command
LPDU with P bit set to BÕ1Õ is not outstanding.
If additional LPDUs are set from the remote link station after the local station has
reset theT1 timer, the timer will be restarted if acknowledgments of, or responses
to, those LPDUs are outstanding. If no acknowledgments/responses are
outstanding, the link station will start the Ti Inactivity Timer (see above).
7-12
Configuring SNA Ports
SNA Status and Configuration
If the T1 Timer expires and acknowledgments or responses are still outstanding,
the link station will send one of the following, then restart the T1 Timer:
¥
A Supervisory LPDU with the P bit set to BÕ1Õ to solicit remote link station
status
¥
Any Unnumbered LPDUs that were not responded to the Þrst time they were
sent.
If acknowledgments or responses are still outstanding after the number of tries
speciÞed in the N2-Max LPDUs parameter (see below), the link station will
declare the link inoperative.
The value speciÞed for the T1 LLC2 Reply Timer should allow for any delays
introduced by the MAC sublayer (e.g., queuing). The value is the amount of time
in 100 millisecond units; the default value is 10.
T2-Rcv Ack Timer
This is the Receiver Acknowledgment Timer, used by the link station to delay
sending an acknowledgment of a received Information LPDU. The timer is
started when the LPDU is received, and reset when the acknowledgment is sent.
If the timer expires before the acknowledgment is sent, it must be sent as soon as
possible. The value is the amount of time in milliseconds; the default value is 100.
The value must be less than the value for the T1-LLC2 Reply Timer (see above) to
ensure that the remote link station will receive the delayed acknowledgment
before the T1 Timer expires.
N2-Max LPDUs
This is the maximum number of times that an LPDU (including Information
LPDUs resent after a checkpoint operation) will be sent following the expiration
of the T1 Timer. The default value for this parameter is 8.
N3-Max Info LPDUs
This is the number of Information LPDUs that will be received by the local station
before it sends an acknowledgment. This parameter is used in conjunction with
the T2-Rcv Ack Timer to allow stations to reduce trafÞc. A counter is initialized to
the value speciÞed, and is decremented by one each time a valid sequential
Information LPDU is received. When the counter reaches 0, an acknowledgment
is sent. The counter is reset whenever an Information or Supervisory
acknowledgment LPDU is sent by the local station. The default value for this
parameter is 1.
Tw-Max Out LPDUs
This is the maximum number of sequentially numbered Information LPDUs that
the link station can have outstanding. The default value for this parameter is 1.
Bandwidth Allocation Group
This parameter assigns the LLC2 host to one of 16 Bandwidth Allocation Groups
(BAG). The default value for this parameter is 0.
Configuring SNA Ports
7-13
SNA Status and Configuration
BAGs regulate bandwidth usage by outgoing trafÞc on the physical link and can
ensure that response time-sensitive trafÞc gets access to the available frame relay
bandwidth. Up to 16 groups can be conÞgured through console management
(refer to your FRX or SmartSwitch 1800 hardware documentation for more
information).
NOTE
Bandwidth allocation groups cannot currently be conÞgured via SPMA; for more
information on conÞguring these groups, see your FRX or SmartSwitch 1800 hardware
documentation.
Priority
This Þeld prioritizes the interface for trafÞc within the device; the higher the
number, the higher the priority. This priority has no effect on trafÞc exiting the
device. Priorities are conÞgured on all logical interfaces that use a physical frame
relay port. The FRX or SmartSwitch 1800 processor uses these priorities to help
determine the order in which it will process protocols. The default value for this
parameter is 0.
TIP
When conÞguring priorities, be sure to consider the types of trafÞc being routed on other
connections in the node.
Suppress XID
If Yes is selected, this parameter prevents the FRX or SmartSwitch 1800 from
returning an XID (Exchange IdentiÞcation) in response to a null XID. This might
be desirable if the remote TPAD is not running PU 2.1 It should be noted that even
if an XID is sent, an SNRM (Set Normal Response Mode) immediately follows, so
the connection will be established. The default value for this parameter is No.
Changing SDLC PU LLC2 Values
To edit the SDLC PU LLC2 values:
1. If you wish to modify an existing entry, be sure that entry is highlighted in the
list box portion of the window.
2. Enter and/or edit the values displayed in the text boxes, as desired.
(Remember, some values which are settable from this window must mirror
values configured elsewhere; be sure these values match as necessary.)
3. Click on
to create a new entry, or on
currently selected in the list box.
7-14
to edit the entry
Configuring SNA Ports
SNA Status and Configuration
Applying Port-level Changes
After you have made any port-level conÞguration changes, your changes will not
take effect until you have done an on-line update. To do so:
1. Click mouse button 3 on the port you have been configuring to display the Port
Menu.
2. Drag down to On-line Update and release.
SDLC Link Station Configuration
You can use the SDLC Link Station ConÞguration window to conÞgure SDLC link
station entries.
To access the window:
1. Click mouse button 3 on the SNA port of interest to display the Port menu.
2. Drag down to SDLC LS Entries, and release. The SDLC Link Station
Configuration window, Figure 7-4, will appear.
Figure 7-4. SDLC Link Station ConÞguration window
Configuring SNA Ports
7-15
SNA Status and Configuration
The SDLC Link Station ConÞguration window allows you to conÞgure the
following parameters:
Address
This is the SDLC PU Station Address, 00 - ff, that identiÞes the PU you are
conÞguring. It must match the ADDR parameter set in the macro PU in the VTAM
conÞguration.
Name
Enter the name of the local SDLC link station.
Max RX PDU Size
This is the maximum PDU size that the local link station can receive from the
adjacent link station. This value is sent in the XID to the ALS and includes the
Transmission Header (TH) and the Request Header (RH).
Max TX PDU Size
This is the maximum PDU size the local link station can send to the adjacent link
station before having received any XID from the ALS. This value includes the
Transmission Header (TH) and the Request Header (RH).
Reply Timeout
This Þeld speciÞes a reply timeout (in 1/100ths of a second) for an SDLC link
station. If the link station does not receive a response to a poll or message before
the speciÞed time expires, the appropriate error recovery will be initiated. The
default value for this parameter is 100.
Max Rx UnACK I-Frames
This Þeld speciÞes the maximum number of unacknowledged I-frames an SDLC
link station may receive. The default value for this parameter is 7.
Max Tx UnACK I-Frames
This Þeld speciÞes the maximum number of consecutive I-frames an SDLC link
station may send without an acknowledgment. The default value for this
parameter is 1.
Retries in Sequence
This is the number of retries in a retry sequence for the local SDLC link station. A
retry sequence is a series of retransmitted frames (data or control) for which no
positive acknowledgment is received. The default value for this parameter is 15.
Retry Sequence Interval
This is the interval (in 1/100ths of a second) between retry sequences for the local
SDLC link station if multiple retry sequences are speciÞed. The default value for
this parameter is 0.
7-16
Configuring SNA Ports
SNA Status and Configuration
Retry Sequence Repeat Count
This Þeld speciÞes the number of times a retry sequence will be repeated for the
local SDLC link station. The default value for this parameter is 0.
RNR Limit
This speciÞes the length of time (in 1/100ths of a second) an SDLC link station
will allow its adjacent link station to remain in a busy (RNR) state before
declaring it inoperative. A value of 0 means there is no limit. The default value for
this parameter is 18000.
Group Poll Address
This Þeld deÞnes the group poll address for this link station. If group poll is not in
effect for this link station, the value should be 0.
Desired Operational State
This is the desired state of the SDLC station, Active or Inactive. The default value
for this parameter is Active.
Desired State at Startup
This is the desired state at startup of the SDLC station, Active or Inactive. The
default value for this parameter is Active.
Modulus
This parameter speciÞes the modulus for the SDLC link station. The modulus
determines the size of the rotating acknowledgment window used by the SDLC
link station pair. The default value for this parameter is 8.
Data Mode
Use this Þeld to specify whether communications mode with the adjacent link
station is Half (two-way alternate) or Full (two-way simultaneous). The default
value for this parameter is Half.
Support SIM, RIM Frames
This parameter determines whether the link station supports transmission and
receipt of Set Initialization Mode (SIM) and Request Initialization Mode (RIM)
control frames. The default value for this parameter is No.
Transmit-Receive Capabilities
This parameter controls the transmit-receive capabilities for this link station,
two-way alternating (twa) or two-way simultaneous (tws). The selected value
establishes the value of the transmit-receive capability indicator sent in the XID
image to the adjacent link station.
Configuring SNA Ports
7-17
SNA Status and Configuration
Changing SDLC Link Station Values
To edit the SDLC Link Station values:
1. If you wish to modify an existing entry, be sure that entry is highlighted in the
list box portion of the window.
2. Enter and/or edit the values displayed in the text boxes, as desired.
(Remember, some values which are settable from this window must mirror
values configured elsewhere; be sure these values match as necessary.)
3. Click on
to create a new entry, or on
currently selected in the list box.
to edit the entry
Applying Port-level Changes
After you have made any port-level conÞguration changes, your changes will not
take effect until you have done an on-line update. To do so:
1. Click mouse button 3 on the port you have been configuring to display the Port
Menu.
2. Drag down to On-line Update and release.
Configuring LLC2
LLC2 support in the FRX and SmartSwitch 1800 provides a local or remote
connection over frame relay (via RFC 1490) or X.25 (via QLLC) between two SNA
devices, one attached to a LAN and the other attached to either another LAN or a
frame relay-compliant SNA/APPN (Advanced Peer-to-Peer Networking) device.
Each SNA host and terminal accessing the FRX or SmartSwitch 1800, via SDLC,
LLC2, frame relay, or X.25, will appear to a local LLC2-attached terminal or host
as if it is directly connected to the local LAN.
NOTE
If LLC2 is being used, Bridging must also be loaded and conÞgured. You must conÞgure a
Virtual LAN ID to identify a virtual bridge that connects the LLC2 function to LAN
interfaces. See Chapter 11, Bridge ConÞguration, for information on setting the Virtual
LAN ID and other bridging parameters.
You must conÞgure each SNA/LLC2 host device that will connect to an FRX or
SmartSwitch 1800 running LLC2.You can conÞgure a host using the SNA/LLC2
Host Table.
To access the table:
1. Click on the
7-18
button to display the Device menu.
Configuring LLC2
SNA Status and Configuration
2. Drag down to SNA/LLC2 Hosts Table, and release. The SNA/LLC2 Host
Table, Figure 7-5, will appear.
Figure 7-5. The SNA/LLC2 Host Table
The list box at the top of the window displays the LLC2 hosts that have already
been conÞgured. It lists the hostsÕ MAC addresses and identiÞes each LLC2
session as Originated or Terminated. In an Originated session, the host initiates
LLC2 sessions; in a Terminated session, the host accepts sessions destined for the
address. A host-to-terminal connection is always initiated by the terminal.
The Þelds and buttons in the lower portion of the window allow you to add new
entries, and modify or delete existing ones.
The SNA/LLC2 Host Table allows you to conÞgure the following parameters:
Traffic Group
This it the trafÞc group associated with the LLC2 interface. It is always set to 1.
Host Index
This is the host number 0 - 128. The default value is 0.
Configuring LLC2
7-19
SNA Status and Configuration
Session Type
If you select Originated, the FRX or SmartSwitch 1800 will initiate LLC2 sessions
from the conÞgured Host MAC Address. If Terminated, the node will accept
LLC2 sessions destined for the conÞgured Host MAC Address. A host address
can be conÞgured for one Originated and one Terminated session, but no more
than one each. The default value for this parameter is Terminated.
Host MAC Address
This is the MAC address of the host or workstation to which an SNA/LLC2
device needs to connect.
If the remote host will be attached via an Ethernet interface in the FRX or
SmartSwitch 1800 and the remote device is attached via a Token Ring, (or vice
versa), this MAC address will be Òbit-swappedÓ internally, because of the
differences in frame formatting between Ethernet and Token Ring. In this case, the
address must be Òbit-swappedÓ again, so the remote device will receive an
address in the correct format.
Bit swapping is done by reversing the order of the bits (digits) within each byte
(pair of digits) of the hexadecimal address, while leaving the sequence of the
bytes unchanged.
For example, to bit-swap the hex address 400010001088:
1. Break the address into pairs of digits: | 40 | 00 | 10 | 00 | 10 | 88 |
2. Reverse the digits within each pair:
| 04 | 00 | 01 | 00 | 01 | 88 |
3. Replace each digit as specified in the following list. This reverses the binary
bits of each digit. For example, 7 (0111 binary) becomes E (1110 binary).
Digit
Convert to
Digit
Convert to
Digit
Convert to
0
1
2
3
4
5
0
8
4
C
2
A
6
7
8
9
A
B
6
E
1
9
5
D
C
D
E
F
3
B
7
F
Using this example, | 04 | 00 | 01 | 00 | 01 | 88 |
converts to:
| 02 | 00 | 08 | 00 | 08 | 11 |
4. Enter the bit swapped value (e.g., 020008000811) as the Host MAC Address.
This value will arrive at the host as the proper address (e.g., 400010001088)
after being translated.
7-20
Configuring LLC2
SNA Status and Configuration
T1-Reply Timer
The Reply Timer is used to by the local node to detect a failure by the remote
station to send a required acknowledgment or response. The local node will start
the timer when it transmits either an Information LPDU or a Command LPDU
with the P bit set to BÕ1Õ. (If the LPDU is sent while the timer is already running,
the local node will reset the timer.)
The local node will reset the T1-Reply Timer when it receives one of these:
¥
An REJ (Reject) LPDU, provided a Command LPDU with P bit set to BÕ1Õ is not
outstanding;
¥
A Response LPDU with the F bit set to BÕ1Õ;
¥
An Information or Supervisory LPDU with an NR greater than the last NR
received and less than or equal to the line stationÕs VS, provided a Command
LPDU with the P bit set to BÕ1Õ is not outstanding.
If additional LPDUs are set from the remote station after the local node has reset
the T1 timer, the timer will be restarted if acknowledgments of or responses to
those LPDUs are outstanding. If no acknowledgments/responses are
outstanding, the local node will start the Ti-Inactivity Timer (see below).
If the T1 Timer expires and acknowledgments or responses are still outstanding,
the local node will send one of the following, then restart the T1 Timer:
¥
A Supervisory LPDU with the P bit set to BÕ1Õ to solicit remote link station
status;
¥
Any Unnumbered LPDUs that were not responded to the Þrst time they were
sent.
If acknowledgments or responses are still outstanding after the number of tries
speciÞed in the N2-Expired T1 LPDUs parameter (see below), the local node will
declare the link inoperative.
The value speciÞed for the T1-Reply Timer should allow for any delays
introduced by the MAC sublayer (e.g., queuing). The value is the amount of time
in 100 millisecond units; the default value is 10.
T2-Recv Ack Timer
This is the Receiver Acknowledgment Timer, used by the local node to delay
sending an acknowledgment of a received Information LPDU. Delaying
acknowledgments for as long as possible minimizes the number of
acknowledgments that must be sent (since more than one received frame can be
acknowledged with one transmission).
The timer is started when the LPDU is received, and reset when the
acknowledgment is sent. If the timer expires before the acknowledgment is sent, it
must be sent as soon as possible.
Configuring LLC2
7-21
SNA Status and Configuration
The value is the amount of time in milliseconds; the default value is 100. The
value must be less than the value for the T1-Reply Timer (see above) to ensure
that the remote link station will receive the delayed acknowledgment before the
T1 Timer expires.
Ti-Inactivity Timer
This timer is used by the local node to detect an inoperative condition in either the
remote link station or the transmission medium. The timer will be started if the
T1-Reply Timer has been reset (see above), and additional LPDUs have been sent
by the remote link station, and there are no outstanding acknowledgments or
responses from the local node.
If the local node does not receive an LPDU before the Ti-Inactivity Timer expires,
the station must send an LPDU with the P bit set to BÕ1Õ to solicit the remote
stationÕs status. Recovery then proceeds as described under T1-Reply Timer (see
above).
The value is the amount of time in seconds; the default value is 30.
N3-LPDU Count
This is the number of Information LPDUs that will be received by the local node
before it sends an acknowledgment. This parameter is used in conjunction with
the T2-Recv Ack Timer to allow stations to reduce trafÞc. A counter is initialized
to the value speciÞed, and is decremented by one each time a valid sequential
Information LPDU is received. When the counter reaches 0, an acknowledgment
is sent. The counter is reset whenever an Information or Supervisory
acknowledgment LPDU is sent by the local node. The default value for this
parameter is 3.
Tw-LPDUs Outstanding
This is the maximum number of sequentially numbered Information LPDUs that
the local node can have outstanding. When the number is reached, an
acknowledgment will be sent. The default value for this parameter is 7.
N2-Expired T1 LPDUs
This is the maximum number of times that an LPDU (including Information
LPDUs resent after a checkpoint operation) will be sent following the expiration
of the T1 Timer. The default value for this parameter is 8.
Priority
This Þeld prioritizes the interface for trafÞc within the device; the higher the
number, the higher the priority. This priority has no effect on trafÞc exiting the
device. Priorities are conÞgured on all logical interfaces that use a physical frame
relay port. The FRX or SmartSwitch 1800 processor uses these priorities to help
determine the order in which it will process protocols. The default value for this
parameter is 0.
7-22
Configuring LLC2
SNA Status and Configuration
TIP
When conÞguring priorities, be sure to consider the types of trafÞc being routed on other
connections in the node.
Routing Subscriber ID
This Þeld associates a Subscriber ID with the LLC2 host. Enter a number up to 15
digits. An asterisk wildcard can be used as a Þnal digit (but the ? wildcard is not
valid). If fewer than 15 digits are entered, an asterisk must be the Þnal character.
The Routing Subscriber ID partially deÞnes the Local Subscriber ID in the
Connections Table deÞned for each LLC2 host (see ConÞguring LLC2 Host
Connections, page 7-24).
Source MAC Address Mask
This parameter is used to identify the FRX and SmartSwitch 1800 to inbound
frames from a local LAN in an Originated LLC2 session. (If you have selected
Terminated as your Session Type, this Þeld will be grayed out.)
Source address masks and host MAC addresses are placed in a forwarding list
that is checked by the Þrmware when a frame is received. If the MAC address in
an incoming frame matches a conÞgured Source MAC Address Mask, the frame
will be passed through the node for transmission out the frame relay interface.
Enter an address up to eight hexadecimal digits. The Þrst digit must be 4, 5, 6, or
7, and an asterisk wildcard can be used as a Þnal digit. If fewer than eight actual
digits (not including an asterisk) are speciÞed, zeros will be added to total eight
actual digits. This value must not conßict with the Locally Administered MAC
Address described in your FRX and SmartSwitch 1800 hardware documentation.
Interface Number
This read-only Þeld deÞnes the LLC2 interface number associated with this host
entry and will always be 300.
Changing Configuration Values
You can edit the values in any Þeld which provides a text box or menu button
selection; to do so:
1. To edit a text field, remove the existing value and enter the new value.
2. To edit a field with a menu button, click on the button to display a list of
options, then drag down to select the option you want.
If you have made changes to the fields but would like to revert back to the
previous values, click on the Refresh button.
3. Click on
Configuring LLC2
to save your changes.
7-23
SNA Status and Configuration
NOTE
After you have made system-level changes (such as conÞguring LLC2), you must apply
those changes by rebooting the FRX or SmartSwitch 1800 device, or through console
management via the [F7] command.
Configuring LLC2 Host Connections
You can conÞgure the connections for each LLC2 Host by using the Originated or
Terminated Connections Table. To access the Connections Table:
1. In the SNA/LLC2 Host Table, highlight the host whose connections you wish
to configure.
2. Click on the Connections button at the bottom of the SNA/LLC2 Host Table
window. This will bring up the Connections Table for the host that was
highlighted. If the Session Type of that host was Originated, then the
Originated Connections Table will appear. If the Session Type of that host was
Terminated, then the Terminated Connections Table will appear.
Figure 7-6. Originated Connections Table
7-24
Configuring LLC2
SNA Status and Configuration
The list box at the top of the window displays any connections that have already
been conÞgured.The Þelds and buttons in the lower portion of the window allow
you to add new entries, and modify or delete existing ones.
The Connections Table allows you to conÞgure the following parameters:
Sequence
This is simply a sequence number to allow selection of a line in the display.
HSAP
This is the host service access point (HSAP) address used to connect to the host.
This must match the SSAP (source SAP) in a frame received from the local LAN or
the DSAP (destination SAP) in a frame from the remote link station.
Local Subscriber ID
This is the subscriber address assigned to the local end of the SNA connection. If
you are conÞguring an LLC2-to-SDLC link, this address must match the Remote
Subscriber ID parameter conÞgured in the SDLC Physical Unit Subscriber Table
(see SDLC PU ConÞguration, page 7-7). If you are conÞguring an LLC2-to-LLC2
connection, this address must match the Remote Subscriber ID in the remote
nodesÕs Connections Table.
The Local Subscriber ID can be up to 15 digits long, and must begin with all of the
actual Routing Subscriber ID conÞgured in the SNA/LLC2 Host Table. The Local
Subscriber ID can contain an asterisk as the Þnal digit; if so, the asterisk will not
be a ÒuniversalÓ wildcard, but instead will include the range 000-511, or 00-99 if
13 digits precede the wildcard, or 0-9 if 14 digits precede the wildcard.
Remote Subscriber ID
This is the subscriber address assigned to the remote end of the SNA connection.
If you are conÞguring an LLC2-to-SDLC link, this address must match the Local
Subscriber ID parameter conÞgured in the SDLC Physical Unit Subscriber Table
(see SDLC PU ConÞguration, page 7-7). If you are conÞguring an LLC2-to-LLC2
connection, this address must match the Local Subscriber ID in the remote
nodesÕs Connections Table.
The Remote Subscriber ID can be up to 15 digits long. It can contain an asterisk as
the Þnal digit; if so, the asterisk will not be a ÒuniversalÓ wildcard, but instead
will include the range 000-511, or 00-99 if 13 digits precede the wildcard, or 0-9 if
14 digits precede the wildcard.
Type
This read-only parameter is relevant only in an Originated Connections Table,
and is always LLC2.
Configuring LLC2
7-25
SNA Status and Configuration
Changing Host Connections
To edit the Host Connection values:
1. If you wish to modify an existing entry, be sure that entry is highlighted in the
list box portion of the window.
2. Enter and/or edit the values displayed in the text boxes, as desired.
(Remember, some values which are settable from this window must mirror
values configured elsewhere; be sure these values match as necessary.)
3. Click on
to create a new entry, or on
currently selected in the list box.
NOTE
to edit the entry
After you have made system-level changes (such as conÞguring LLC2), you must apply
those changes by rebooting the FRX or SmartSwitch 1800 device, or through console
management via the [F7] command.
Viewing SDLC Status
Four additional port-level menu selections provide statistical information
regarding SDLC trafÞc and performance on a selected SNA port.
TIP
The statistical windows display their information via the SPMA Meters application; for
more information on how to manipulate and conÞgure these meters, see the SPMA Tools
Guide.
SDLC Port Statistics
The SDLC Port Statistics window provides general information about the type of
management trafÞc that is being transmitted across the selected port. To access
the window:
1. Click mouse button 3 on the SNA port of interest to display the Port Menu.
2. Drag down to SDLC Port Statistics, and release. The SDLC Port Statistics
window, Figure 7-7, will appear.
7-26
Viewing SDLC Status
SNA Status and Configuration
Figure 7-7. SDLC Port Statistics
The SDLC Port Statistics window provides the following statistical data:
Invalid LS Addr
The number of frames received by this port with invalid link station (LS)
addresses, expressed as a rate (frames/second).
Dwarf Frames (Received)
The number of frames received by this port which were delivered intact by the
physical layer, but were too short to be legal. A frame is considered to be too short
if it is less than two bytes for a Modulus of 8, or less than three bytes for a
Modulus of 128 (not counting the frame check sequence (FCS)). The number is
expressed as a rate (frames/second).
I-Frames (Received and Transmitted)
The number of I-frames received or transmitted by the SDLC link stations on this
port, expressed as a rate (frames/second).
Viewing SDLC Status
7-27
SNA Status and Configuration
Local Re-Tx I-Frames
The number of I-frames retransmitted by all local SDLC link stations on this port,
expressed as a rate (frames/second).
Remote Re-Tx I-Frames
The number of I-frames retransmitted by remote link stations for all SDLC link
stations on this port, expressed as a rate (frames/second).
Polls (Received and Transmitted)
The number of polls received or sent by this port since the port was created,
expressed as a rate (polls/second).
Poll Responses (Received and Transmitted)
The number of poll responses received or sent by this port since the port was
created, expressed as a rate (poll responses/second).
Physical Failures
The number of times this port has failed due to its physical media since port
startup, expressed as a rate (failures/second).
Busies (Local and Remote)
The number of times the local or adjacent (remote) SDLC link stations on this port
have entered a busy (RNR) state, expressed as a rate (busies/second).
Octets (Received and Transmitted)
The total octets received from or transmitted to adjacent SDLC link stations on
this port, expressed as a rate (octets/second). This number covers the address,
control, and information Þeld of I-frames only.
Protocol Errors
The number of times the SDLC link stations on this port have deactivated the link
as a result of having received a protocol violation from the adjacent link station,
expressed as a rate (deactivations/second).
Inactivity Timeouts
The number of times the SDLC link stations on this port have deactivated the link
as a result of no activity on the link, expressed as a rate (deactivations/second).
RNR Limits
The number of times the SDLC link stations on this port have deactivated the link
as a result of their RNR (busy) Limit Timer expiring, expressed as a rate
(deactivations/second).
Retry Sequence Exp
The number of times the SDLC link stations on this port have deactivated the link
as a result of a retry sequence being exhausted, expressed as a rate
(deactivations/second).
7-28
Viewing SDLC Status
SNA Status and Configuration
SDLC Link Station General Statistics
The SDLC Link Station General Statistics window provides general information
about the link station trafÞc that is being transmitted across the selected port. To
access the window:
1. Click mouse button 3 on the SNA port of interest to display the Port Menu.
2. Drag down to SDLC LS General Stats, and release. The SDLC Link Station
General Statistics window, Figure 7-8, will appear.
Figure 7-8. SDLC Link Station General Statistics
The SDLC Link Station General Statistics window provides the following
statistical data:
Busies (Local and Remote)
The total number of times that the local, or an adjacent (remote), SDLC link
station has entered a busy (RNR) state since link station startup, expressed as a
rate (busies/second).
Protocol Errors
The number of times, since link station startup, when this SDLC link station has
deactivated the link as a result of receiving a frame from its adjacent link station
which was in violation of the protocol, expressed as a rate (deactivations/second).
Inactivity TOs
The number of times, since link station startup, when this SDLC link station has
deactivated the link as a result of no activity on the link, expressed as a rate
(deactivations/second).
Viewing SDLC Status
7-29
SNA Status and Configuration
RNR Limits
The number of times, since link station startup, when this SDLC link station has
deactivated the link as a result of its RNR Limit Timer expiring, expressed as a
rate (deactivations/second).
Retries Exp
The number of times, since link station startup, when this SDLC link station has
deactivated the link as a result of a retry sequence being exhausted, expressed as a
rate (deactivations/second).
SDLC Link Station Rx and Tx Statistics
The SDLC Link Station Rx and Tx Statistics windows provides information about
the link station trafÞc that is being received and transmitted across the selected
port. To access the windows:
1. Click mouse button 3 on the SNA port of interest to display the Port Menu.
2. Drag down to SDLC LS Rx Stats or SDLC LS Tx Stats, and release. The
SDLC Link Station Rx or Tx Statistics window will appear. The SDLC Link
Station Rx Statistics window is shown in Figure 7-9.
Figure 7-9. SDLC Link Station Rx Statistics
7-30
Viewing SDLC Status
SNA Status and Configuration
The SDLC Link Station Rx and Tx Statistics window provides the following
statistical data:
BLU
The total Basic Link Units (BLU) received from or transmitted to an adjacent
SDLC link station since link station startup, expressed as a rate (BLUs/second).
Poll
The total number of polls received from or transmitted to an adjacent SDLC link
station since link station startup, expressed as a rate (polls/second).
Poll Response
The total number of poll responses received from or transmitted to an adjacent
SDLC link station since link station startup, expressed as a rate (poll
responses/second). This value includes I-frames that are received or sent in
response to a poll.
I-Frame
The total number of I-frames received from or transmitted to an adjacent SDLC
link station since link station startup, expressed as a rate (I-frames/second).
UI-Frames
The total number of UI-frames received from or transmitted to an adjacent SDLC
link station since link station startup, expressed as a rate (UI-frames/second).
XID
The total number of XID frames received from or transmitted to an adjacent SDLC
link station since link station startup, expressed as a rate (XID frames/second).
TEST
The total number of TEST frames received from or transmitted to an adjacent
SDLC link station since link station startup, expressed as a rate (TEST
frames/second).
REJ
The total number of REJ frames received from or transmitted to an adjacent SDLC
link station since link station startup, expressed as a rate (REJ frames/second).
FRMR
The total number of Frame Reject (FRMR) Frames received from or transmitted to
an adjacent SDLC link station since link station startup, expressed as a rate
(FRMR frames/second).
SIM
The total number of Set Initialization Mode (SIM) frames received from or
transmitted to an adjacent SDLC link station since link station startup, expressed
as a rate (SIM frames/second).
Viewing SDLC Status
7-31
SNA Status and Configuration
RIM
The total number of Request Initialization Mode (RIM) frames received from or
transmitted to an adjacent SDLC link station since link station startup, expressed
as a rate (RIM frames/second).
DISC
The total number of Disconnect (DISC) requests received from or transmitted to
an adjacent SDLC link station since link station startup, expressed as a rate
(DISCs/second).
UA
The total number of Unnumbered Acknowledgment (UA) requests received from
or transmitted to an adjacent SDLC link station since link station startup,
expressed as a rate (requests/second).
DM
The total number of Disconnect Mode (DM) requests received from or transmitted
to an adjacent SDLC link station since link station startup, expressed as a rate
(requests/second).
SNRM
The total number of Set Normal Response Mode (SNRM/SNRME) requests
received from or transmitted to an adjacent SDLC link station since link station
startup, expressed as a rate (requests/second).
Octets
The total octets received from or transmitted to an adjacent SDLC link station
since link station startup, expressed as a rate (octets/second). This includes the
address, control, and information Þeld of I-frames only.
Retransmits
In the Rx Statistics window, this is the total number of I-frames retransmitted by
the remote link station because the N(s) received from that link station indicated
that one or more I-frames sent by or to that station were lost.
In the Tx Statistics window, this is the total number of I-frames retransmitted to a
remote link station because the N(r) received from that link station indicated that
one or more I-frames sent by or to that station were lost.
This event causes the Þrst missing I-frame of a window and all the subsequent
I-frames to be retransmitted. This value is expressed as a rate
(retransmits/second).
7-32
Viewing SDLC Status
Chapter 8
BSC Interactive Configuration
Configuring BSC Interactive ports; BSCI Subscriber Information; configuring devices connected to
BSCI ports
FRX4000, FRX6000, and SmartSwitch 1800 devices support binary synchronous
communications (BSC) Interactive ports, used to connect IBM 3270 hosts to
remote control units (CU) over frame relay or X.25.
For each physical port conÞgured to run BSC Interactive (BSCI), three
conÞguration windows are provided:
¥
The BSCI Port ConÞguration window allows you to conÞgure basic
parameters related to BSCI port operation;
¥
The BSCI Subscriber Information window provides information on local and
remote subscribers for each BSCI port;
¥
The BSCI Device Information window lets you deÞne the devices connected
to the BSCI ports.
These windows and their functions are described in the following sections.
Configuring BSCI Ports
Using the BSCI Port ConÞguration window, you can conÞgure basic operating
parameters for each of your BSCI ports.
To access the window:
1. Click mouse button 3 on the BSCI port of interest to display the Port Menu.
2. Drag down to BSCI Port Configuration, and release. The BSCI Port
Configuration window, Figure 8-1, will appear.
8-1
BSC Interactive Configuration
Figure 8-1. BSCI Port ConÞguration
The BSCI Port ConÞguration window allows you to conÞgure the following
parameters:
Max Frame Size
Use this Þeld to specify the maximum frame size that will be allowed to pass
through this BSCI port. The default value for this parameter is 4105.
8-2
Configuring BSCI Ports
BSC Interactive Configuration
Line Speed
This Þeld speciÞes the data transmission rate in bits per second. If this port is a
physical DTE, specify the line speed that matches the speed of the device
connected directly to the port. If the port is a physical DCE (i.e., the attached I/O
cable is DCE) specify the clock speed of the serial port you are conÞguring. Valid
values for this parameter are: 75, 150, 300, 600, 1200, 2400, 4800, 9600, 14400, and
19200. The default value for this parameter is 9600.
Retransmission Period
This is the length of time (in milliseconds) before the FRX or SmartSwitch 1800
will retransmit a data frame if the previous transmission of that data frame was
not acknowledged. If the time expires, the timer will be reset, the data frame will
be retransmitted, and the Max Retransmissions counter (see below) will be
incremented.
The default value of 2000 milliseconds allows avoidance of unnecessary
retransmission of frames that have merely been delayed.
Max Retransmissions
This is the maximum number of times the FRX or SmartSwitch 1800 will attempt
to retransmit a data frame after the Retransmission Period (see above) expires. A
larger value for this parameter increases the probability of an eventual successful
transmission, but a smaller value permits faster detection of a permanent error
condition. The default value for this parameter is 5.
Start Sync Chars
This is the number of synchronization characters that will be added to the
beginning of each frame. The default value for this parameter is 2.
Trailing Pad Chars
This is the number of padding characters that will be appended to each frame.
This ensures that the last signiÞcant character is sent before the data transmitter
switches off. The default value for this parameter is 1.
Poll Interval
The amount of time (in milliseconds) between passes through the polling list. The
default value for this parameter is 500.
No Response Timer
This timer begins after the FRX or SmartSwitch 1800 transmits a general poll or a
data frame. It is the amount of time (in seconds) before the FRX or SmartSwitch
1800 transmits an NAK-EOT-General Poll sequence and increments the No
Response Retries count (see below). The timer will stop upon receipt of any valid
frame from the line. The default value for this parameter is 2.
No Response Retries
If a device is not responding to a poll, this count speciÞes how many times the
device will be polled before the general poll sequence bypasses the device and
moves on to the next one. The default value for this parameter is 5.
Configuring BSCI Ports
8-3
BSC Interactive Configuration
Error Retransmit Count
This Þeld speciÞes the number of times the FRX or SmartSwitch 1800 will resend a
block of data after the receiving device has detected an error in the block. The
default value for this parameter is 5.
NAK Retry Count
This count speciÞes the number of times the FRX or SmartSwitch 1800 will send a
frame when the receiving device is returning a NAK (negative acknowledgment).
Multidrop
If this parameter is set to Yes, the transmission will be multidrop (where there are
several stations between end points); if No, the transmission will be
point-to-point. The default value for this parameter is No.
Slow Poll Retry Count
This Þeld is conÞgurable only for ports conÞgured for multidrop (see Multidrop
parameter above). It speciÞes how many times a control unit (CU) that is not
responding will be polled before it is put on the slow poll list. CUs on the slow poll
list are polled with a frequency determined by the Slow Poll Retry Frequency
parameter (see below). The default value for this parameter is 20.
Slow Poll Retry Freq
This Þeld is conÞgurable only for ports conÞgured for multidrop (see Multidrop
parameter above), and determines the frequency that control units (CU) on the
slow poll list are polled. It speciÞes the number of times active CUs will be polled
between pollings of the CUs on the slow poll list (see Slow Poll Retry Count,
above). The higher the number, the more times active CUs will be polled, and the
less frequently CUs on the slow poll list will be polled. The default value for this
parameter is 20.
Use EBCDIC
This read-only parameter indicates that all devices on a line will use the EBCDIC
character set for session polls. Because the FRX and SmartSwitch 1800 only
support the EBCDIC character set, this value is always set to Yes.
Call Info in Request Packet
This read-only parameter is set to Yes, and indicates that call information will be
included in a call request packet.
Transparent Text Supported
This read-only parameter is set to Yes, and indicates that all transmitted
characters, including control character sequences, will be treated as data.
This parameter is useful for transmitting binary data and machine language
computer programs without special coding. Data-link control character sequences
transmitted this way must be preceded by a Data Link Escape (DLE) character (a
value of 10 in hex) in order to be recognized as control characters.
8-4
Configuring BSCI Ports
BSC Interactive Configuration
End-to-End ACK
This read-only parameter is set to No, and indicates that management of
acknowledgments will be handled locally at each end, rather than end-to-end
across the network.
Full Duplex
This read-only parameter is set to Yes, and speciÞes full-duplex transmission.
Physical Port Interface
The physical port interface is deÞned by the portÕs connector and cabling type,
and must be conÞgured as follows:
¥
For the FRX4000 and SmartSwitch 1800, port 0 and port 1 are always RS-232;
¥
For the FRX4000, ports 2 and 3 are determined by the attached cables: RS-232,
V.35, RS-449, or X.21;
¥
For the SmartSwitch 1800, ports 2 and 3 are determined by the attached cables:
RS-232, V.35, or RS-449;
¥
For the FRX4000, ports 4-7 are determined by the expansion Line Interface
Card (LIC) and attached I/O cables. Only the valid interfaces will be listed
from the menu button. Possible interfaces are: RS-232, V.35, RS-449, and X.21.
(RS-449, and X.21 interfaces require an RS-422 LIC.)
¥
For the FRX6000, ports 0-7 on each RLP are determined by the Line Interface
Card (LIC) and attached I/O cables. Only the valid interfaces will be listed
from the menu button. Possible interfaces are: RS-232, V.35, RS-449, RS-530 and
X.21. (RS-449, RS-530, and X.21 interfaces require an RS-422 LIC.)
Blocked Flag
This value will cause the port to be enabled (if No) or disabled (if Yes) when the
device is powered up or re-booted.Whichever state is selected, the port will
remain in that state until this value is changed or until an enable or disable action
is performed. The default value for this parameter is No.
Generate Clock
This setting speciÞes whether the port will generate the clock, or timing,
necessary to synchronize trafÞc over the link. If the port is a physical DCE (as
determined by the portÕs I/O cable interface), specify Yes, since the physical DCE
generates clock. If the port is a physical DTE, specify No. The default value for
this parameter is Yes.
Receive Clock from DTE
This parameter is relevant only if Physical Port Interface (see above) is something
other than RS-232, and Generate Clock (see above) is set to Yes. If this parameter
is set to Yes, it allows the clock (timing) signal to be looped back from the DTE
using the Terminal Timing (TT) signal, which can be helpful on high-speed lines.
Configuring BSCI Ports
8-5
BSC Interactive Configuration
Generally, if the local interface is a physical DCE and the line speed is above 256
Kbps, this parameter should be set to Yes; however, make sure the DTE is
conÞgured to provide the terminal timing. The default value for this parameter is
No.
Clear VC on Last Dev Down
If Yes is selected, this parameter causes the virtual circuit to be cleared when no
terminals are using it. The default value for this parameter is No.
Pad (Packet Assembler/Disassembler) Type
You can designate your port as a TPAD (terminal PAD) or an HPAD (host PAD).
The default value for this parameter is TPAD.
Answer Non Configured
This parameter is conÞgurable only if PAD Type is HPAD. If you select Yes, this
parameter will allow the HPAD to respond to all devices on the line. If you select
No, the HPAD will respond only to those devices that are conÞgured on the node.
The default value for this parameter is Yes.
Connection Without Poll
This parameter is conÞgurable only if PAD Type is TPAD. If you select Yes, this
parameter will activate the TPAD connection without a poll of the connected
device. If No is selected, the TPAD connection will only become activated when
the connected device is polled. The default value for this parameter is Yes.
Changing BSCI Port Configuration Values
You can edit the values in any Þeld which provides a text box or menu button
selection; to do so:
1. To edit a text field, remove the existing value and enter the new value.
2. To edit a field with a menu button, click on the button to display a list of
options, then drag down to select the option you want.
3. Click on
to save your changes.
Applying Port-level Changes
After you have made any port-level conÞguration changes, your changes will not
take effect until you have done an on-line update. To do so:
1. Click mouse button 3 on the port you have been configuring to display the Port
Menu.
2. Drag down to On-line Update and release.
8-6
Configuring BSCI Ports
BSC Interactive Configuration
BSCI Subscriber ID Information
The BSCI Subscriber Information window provides information on local and
remote subscribers for each BSCI port.
A local TPAD subscriber can specify only one remote device, which can be an
HPAD or an X.25 connection to the host. A local HPAD subscriber can specify up
to 16 remote devices, any of which can be a TPAD or an X.25 connection to the
host. Each connection must be assigned a different local subscriber address.
NOTE
You must also conÞgure BSCI Device Information for each remote BSC device (see
ConÞguring BSCI Devices, page 8-9).
Use the BSCI Subscriber Information window to conÞgure the subscriber
addresses for each of your BSCI ports. To access the window:
1. Click mouse button 3 on the BSCI port of interest to display the Port Menu.
2. Drag down to BSCI Port Subscriber Configuration, and release. The BSCI
Subscriber Information window, Figure 8-2, will appear.
Figure 8-2. BSCI Subscriber Information
BSCI Subscriber ID Information
8-7
BSC Interactive Configuration
The top part of the window displays a list of BSCI port subscribers. The bottom
part of the window allows you to modify or add the following BSCI subscriber
information:
Local Subscriber ID
This is the subscriber address of the local end of a BSCI connection. Enter a
Subscriber ID of up to 15 digits. This is the same subscriber ID that is speciÞed in
the Subscriber Table (see Chapter 4, ConÞguring the Subscriber Table, for
Subscriber ID conventions). Each Local Subscriber conÞgured here must also be
conÞgured in the Subscriber Table, so that routing information for each subscriber
address can be speciÞed.
Remote Subscriber ID
This is the subscriber address of the remote end of a BSCI connection. It is used by
the local device to identify where a call is going. Enter a Subscriber ID of up to 15
digits. A Subscriber ID record must also be conÞgured for this address (see
Chapter 4, ConÞguring the Subscriber Table for Subscriber ID conventions).
If the BSCI port is one end of a connection to a logical port in the FRX or
SmartSwitch 1800, this ID must match a Subscriber ID conÞgured for the logical
port.
Connection ID
This number identiÞes the association between a local subscriber and a device
conÞgured in the BSCI Device Information window (see ConÞguring BSCI
Devices, page 8-9).
Auto Call
This parameter is relevant only if the PAD Type speciÞed for this port is TPAD. If
Yes is selected, a TPAD will automatically call its HPAD when the Control Unit
(CU), identiÞed by the Control Unit ID in the BSCI Device Information window
(see ConÞguring BSCI Devices, page 8-9) becomes active. If No is selected, no
automatic call is placed. If the TPAD is connecting to a logical port in the FRX or
SmartSwitch 1800, Auto Call must be set to Yes. The default value for this
parameter is No.
Retry Timer
The amount of time (in seconds) between Auto Call retries (see above). If Auto
Call is disabled, (if No was selected), this Þeld will be grayed out. The default
value for this parameter is 60.
Retry Count
The maximum number of times an Auto Call (see above) will be sent. If Auto Call
is disabled, (if No was selected), this Þeld will be grayed out. The default value
for this parameter is 0 (indeÞnite).
8-8
BSCI Subscriber ID Information
BSC Interactive Configuration
Adding or Modifying BSCI Subscriber Information
To add a new BSCI Subscriber entry:
1. Enter the Local Subscriber ID, the Remote Subscriber ID, and the other
configurable parameters for the entry.
2. Click on
to add your new entry.
To modify an existing entry:
1. In the list box, click to select the Subscriber entry you wish to modify. The
selected entry will be highlighted. (Note that you can only modify one entry at
a time.)
2. Edit the fields, as desired. If you have made some changes but would like to
return to the original values, click on the Refresh button.
3. Click on
to modify the selected entry.
To delete an existing entry:
1. In the list box, click to select the Subscriber entry you wish to delete. The
selected entry will be highlighted. (Note that you can only delete one entry at
a time.)
2. Click on
to delete the selected entry.
Applying Port-level Changes
After you have made any port-level conÞguration changes, your changes will not
take effect until you have done an on-line update. To do so:
1. Click mouse button 3 on the port you have been configuring to display the Port
Menu.
2. Drag down to On-line Update and release.
Configuring BSCI Devices
After you have conÞgured the port and subscriber information discussed in the
previous two sections, you must also deÞne the devices connected to those BSCI
ports.
You do this via the BSCI Device Information window. To access the window:
1. Click mouse button 3 on the BSCI port of interest to display the Port Menu.
2. Drag down to BSCI Device Configuration, and release. The BSCI Device
Information window, Figure 8-3, will appear.
Configuring BSCI Devices
8-9
BSC Interactive Configuration
Figure 8-3. BSCI Device Information
The top part of the window displays a list of conÞgured BSCI devices. The bottom
part of the window allows you to modify or add the following BSCI device
information:
Control Unit ID
This ID is a number 0 through 31 and identiÞes the control unit.
Device Unit ID
Enter a number, 0 through 31. Up to 32 Device Units can be conÞgured for each
Control Unit.
Connection ID
This number identiÞes the association between a local subscriber on a BSCI port
and a device conÞgured here in this table. It must match a Connection ID in the
BSCI Subscriber Information window (see BSCI Subscriber ID Information,
page 8-7). Valid values are 0 through 255. The default value for this parameter is 0.
Single User VC (virtual circuit)
This read-only parameter speciÞes whether each end of the connection is within a
same or different Control Unit/Device Unit pair. This parameter is currently not
supported and is set to No.
8-10
Configuring BSCI Devices
BSC Interactive Configuration
Transparent Text Support
If Yes is selected, then all transmitted characters, including control character
sequences, are treated as data. This parameter is useful for transmitting binary
data and machine language computer programs without special coding.
Data-link control character sequences transmitted this way must be preceded by a
Data Link Escape (DLE) character (a value of 10 in hex) in order to be recognized
as control characters.
The default value for this parameter is No.
Printer Attached
If Yes is selected, the device has an attached printer; if No, it does not. The default
value for this parameter is No.
Adding or Modifying BSCI Device Information
To add a new BSCI Device entry:
1. Enter the Control Unit ID, the Device Unit ID, and the other configurable
values for the entry.
2. Click on
to add your new entry.
To modify an existing Device entry:
1. In the list box, click to select the Device entry you wish to modify. The selected
entry will be highlighted. (Note that you can only modify one entry at a time.)
2. Edit the fields, as desired. If you have made some changes but would like to
return to the original values, click on the Refresh button.
3. Click on
to modify the selected entry.
To delete an existing Device entry:
1. In the list box, click to select the Device entry you wish to delete. The selected
entry will be highlighted. (Note that you can only delete one entry at a time.)
2. Click on
to delete the selected entry.
Applying Port-level Changes
After you have made any port-level conÞguration changes, your changes will not
take effect until you have done an on-line update. To do so:
1. Click mouse button 3 on the port you have been configuring to display the Port
Menu.
2. Drag down to On-line Update and release.
Configuring BSCI Devices
8-11
BSC Interactive Configuration
8-12
Configuring BSCI Devices
Chapter 9
IP Interface Configuration
Configuring IP Node Defaults; IP Interface configuration; Secondary Address configuration
The FRX4000, FRX6000, and the SmartSwitch 1800 support dynamic routing of IP
(internet protocol) trafÞc among IP devices on LANs and routed subnetworks, via
frame relay or X.25. The FRX and SmartSwitch 1800 can also be conÞgured to act
as IP gateways, forwarding IP packets they receive.
Configuring IP Node Defaults
Each FRX or SmartSwitch 1800 device can be conÞgured to support one of three
versions of the Routing Information Protocol (RIP). IP uses RIP update messages
to send and gather information about the internetwork topology. These update
messages are used to construct and maintain routing tables. Routing updates in
any of these three RIP versions can be received; however, the device will only
transmit updates in the one RIP version you conÞgure.
You can conÞgure the device to transmit one of the three following RIP versions:
¥
¥
¥
RIP Version 1
RIP 1 Compatible
RIP Version 2
RIP Version 1 and RIP Version 2 are incompatible with each other on the same
network; however, each is compatible with RIP 1 Compatible. If you are
transitioning a network from RIP Version 1 to RIP Version 2, Þrst reconÞgure
every device to RIP 1 Compatible. When all devices are conÞgured for RIP 1
Compatible, then each device can be conÞgured for RIP Version 2.
You can conÞgure the RIP version for each device through console management,
or through the IP Node window. To access the IP Node window:
1. Click on the
button to display the Device menu.
2. Drag down to IP Node Defaults, and release. The IP Node window,
Figure 9-1, will appear.
9-1
IP Interface Configuration
Figure 9-1. The IP Node Window
3. Use the menu button to select the RIP version you want.
4. Click on
NOTE
to save your selection.
After you have made system-level changes (such as conÞguring IP Node Defaults), you
must apply those changes by rebooting the FRX or SmartSwitch 1800 device, or through
console management via the [F7] command.
Configuring IP Interfaces
An IP interface allows the Internet Protocol to be executed over a frame relay,
X.25, Ethernet, or Token Ring interface. You can display all IP interfaces
conÞgured on the device and conÞgure a new interface through the IP Interface
ConÞguration window.
To access the IP Interface ConÞguration window:
1. Click on the
button to display the Device menu.
2. Drag down to IP Interface Configuration, and release. The IP Interface
Configuration window, Figure 9-2, will appear.
9-2
Configuring IP Interfaces
IP Interface Configuration
Figure 9-2. The IP Interface ConÞguration Window
The list box at the top of the window displays the IP interfaces that have already
been conÞgured; the Þelds and buttons in the lower portion of the window allow
you to add new entries, and modify or delete existing ones.
Following is a description of the IP Interface parameters. The parameters you will
conÞgure for each interface depends on the IP Interface Type you select (see IP
Interface Type deÞnition below).
Interface Number
In this Þeld, enter an interface number 1 to 257. This is merely a sequential
number used to identify the interface. It is a good idea to conÞgure a LAN
interface as interface 0. This ensures that the default IP address used for
Unnumbered Interfaces (see below) will always be the same.
Configuring IP Interfaces
9-3
IP Interface Configuration
IP Interface Type
In this Þeld, use the menu button to select the type of interface you wish to
conÞgure. This selection will change the parameters that appear in the IP
Interface ConÞguration window. Depending on your selection, certain
parameters will be conÞgurable, and others will be grayed out.
There are Þve IP interface types that you can select from:
¥
¥
¥
¥
¥
NOTE
Rfc 877x25 (X.25)
Ethernet Csmacd (Ethernet II)
Iso 88023 Csmacd
Iso 88025 Token Ring
Frame Relay
The Ethernet and Token Ring IP Interface types will be referred to collectively as LAN
interfaces.
Maximum Transmission Unit
This is the maximum size (in bytes) of the data Þeld that can be used to
encapsulate an IP datagram for transmission over the interface. Any datagrams
larger than the Maximum Transmission Unit will be fragmented, resulting in
additional processing on any intermediate routers or gateways, as well as the
destination host. If the maximum Transmission Unit value is less than the size of a
minimal IP datagram, the value will automatically change to the minimal
datagram size. The default value for this parameter is 1500.
Network Mask
This Þeld is used during routing to determine the portion of the IP address
associated with the network and subnetwork (if any). The valid entries are
255.0.0.0 to 255.255.255.255 (255.255.255.255 is only valid on a point-to-point
interface).
The default value for this parameter is conÞgured automatically to reßect the
appropriate address class for the speciÞed Source Address (see below). If the
Source IP Address is changed, the Network Mask will automatically change to a
default value appropriate for the new address. For this reason, conÞgure the
Source IP Address Þrst, then the Network Mask.
If the interface is conÞgured as an Unnumbered Interface (see below), the default
value of Network Mask will be based on the numbered interface that is assigned.
Route Metric Hops
This is the number of network hops (network gateways in the overall path over
the internet) associated with this interface (usually zero). During routing, the
interface with the lowest count will be selected. The default value for this
parameter is 0.
9-4
Configuring IP Interfaces
IP Interface Configuration
ICMP Add Routes
Select Yes or No to specify whether IP may add routes obtained by ICMP
(Internet Control Message Protocol). ICMPÕs error and control function is used to
send redirection options back to the source, if problems are discovered. The
default value for this parameter is Yes.
RIP Delta Updates
This Þeld speciÞes (in seconds) the frequency with which RIP update messages
will be sent to every neighbor node. These messages contain any changes to the
routing table that occurred since the last RIP Full Update (see next deÞnition).
The default value for this parameter is 10.
RIP Full Updates
This Þeld speciÞes (in seconds) the frequency with which updates of the entire
routing table will be sent to every neighbor node, via one or more RIP messages.
The default value for this parameter is 30.
Priority
This Þeld prioritizes the interface for trafÞc within the device; the higher the
number, the higher the priority. This priority has no effect on trafÞc exiting the
device. Priorities are conÞgured on all logical interfaces that use a physical frame
relay port. The FRX or SmartSwitch 1800 processor uses these priorities to help
determine the order in which it will process protocols. The default value for this
parameter is 5.
TIP
When conÞguring priorities, be sure to consider the types of trafÞc being routed on other
connections in the node.
BAG
This parameter is only conÞgurable if you have selected Frame Relay as your
Interface Type. It assigns the IP interface to one of 16 Bandwidth Allocation
Groups (BAG).
BAGs regulate bandwidth usage by outgoing trafÞc on the physical link and can
ensure that response time-sensitive trafÞc gets access to the available frame relay
bandwidth. Up to 16 groups can be conÞgured through console management
(refer to your FRX or SmartSwitch 1800 hardware documentation for more
information).
NOTE
Bandwidth allocation groups cannot currently be conÞgured via SPMA; for more
information on conÞguring these groups, see your FRX or SmartSwitch 1800 hardware
documentation.
Configuring IP Interfaces
9-5
IP Interface Configuration
Source Address
This is the IP address of the end-to-end sender (the IP interface). The valid range
of values (1.0.0.0 to 223.255.255.255) guarantees that you cannot conÞgure all 0s or
all 1s for a network ID, node ID, or subnet ID. If the interface is conÞgured as an
Unnumbered Interface (see below), you will not enter a source address here.
Destination Address
This parameter is only conÞgurable when the Interface Type is X.25, or when the
Interface Type is Frame Relay and the Inverse ARP parameter is Disabled. It is
the IP address of the end-to-end receiver for point-to-point connections. The valid
range of values (1.0.0.0 to 223.255.255.255) guarantees that you cannot conÞgure
all 0s or all 1s for a network ID, node ID, or subnet ID.
Broadcast Address
If you speciÞed a LAN Interface Type, use this Þeld to designate the address used
to send broadcast messages to all LAN hosts on the network. The default value of
the broadcast address will be conÞgured automatically after a Source Address or
Network Mask is speciÞed (see above). The value will be the dotted decimal
notation result of ÒANDingÓ the binary versions of the Source Address and the
Network Mask, then Þlling in the remaining bits with 1s.
If the Source Address or Network Mask is changed, the associated broadcast
address will automatically change to the default value appropriate for the new
address. For this reason, conÞgure the Source Address Þrst, then the Network
Mask, then the Broadcast Address.
LAN Card
If you speciÞed a LAN Interface Type, this number identiÞes the LAN card that
contains the IP interface. Enter 0 for the FRX4000 or SmartSwitch 1800; 0 or 1 for
the FRX6000.
Source Subscriber
This parameter is only conÞgurable if you have selected X.25 as your Interface
Type. This is the Subscriber ID associated with the source IP interface port. A
subscriber ID is an address of up to 15 digits. This address must also be
conÞgured in the Subscriber Table (see Chapter 4, ConÞguring the Subscriber
Table), and cannot contain wildcards. When conÞguring the Subscriber Table for
the source subscriber, do not conÞgure any routing path in the Routing Table.
Destination Subscriber
This parameter is only conÞgurable if you have selected X.25 as your Interface
Type. This is the Subscriber ID associated with the destination IP interface port. A
subscriber ID is an address of up to 15 digits. This address must also be
conÞgured in the Subscriber Table (see Chapter 4, ConÞguring the Subscriber
Table), and cannot contain wildcards. When conÞguring the Subscriber Table for
the destination subscriber, conÞgure the Þrst routing path as the RLP and X.25
port that will be used for the physical interface. (On an FRX6000, that RLP does
not need to be the same one that has IP installed.)
9-6
Configuring IP Interfaces
IP Interface Configuration
SVC Retry Timer
This parameter is only conÞgurable if you have selected X.25 as your Interface
Type. It speciÞes the time (in seconds) between calls that are placed to try to
establish an X.25 connection. The default value for this parameter is 20.
SVC Idle Timer
This parameter is only conÞgurable if you have selected X.25 as your Interface
Type. It speciÞes the amount of time (in minutes) that IP will remain active with
no trafÞc, before the X.25 connection is cleared. The default value for this
parameter is 1.
Max VC
This parameter is only conÞgurable if you have selected X.25 as your Interface
Type. It speciÞes the maximum number of virtual circuits over which IP trafÞc
will be transmitted in parallel. The default value for this parameter is 1.
PVC Connection
This parameter is only conÞgurable if you have selected X.25 as your Interface
Type. Select Yes if the interface is a Permanent Virtual Circuit (PVC); select No if it
is not. The default value for this parameter is No.
Source RLP
This parameter is only conÞgurable if you have selected Frame Relay as your
Interface Type. It identiÞes the RLP for the logical interface at this end of the
frame relay link. Enter 0 for FRX4000 and SmartSwitch 1800 devices (for RLP0);
enter 0 - 7 for an FRX6000.
Source Port
This parameter is only conÞgurable if you have selected Frame Relay as your
Interface Type. It identiÞes the physical frame relay port for the logical interface
at this end of the frame relay link. Make sure the physical frame relay port you
identify is not conÞgured for backup use only.
Source DLCI
This parameter is only conÞgurable if you have selected Frame Relay as your
Interface Type. It identiÞes the DLCI for the logical interface at this end of the
frame relay link. Make sure the DLCI you identify is not part of a frame relay
DLCI backup group or intra-nodal frame relay PVC.
RIP Support
This Þeld speciÞes the level of RIP support on the interface. If you select Enabled,
all RIP messages will be accepted, and messages of the RIP version conÞgured in
IP Node Defaults (see page 9-1) will be transmitted. If you select Disabled, no RIP
messages will be accepted or transmitted. If you select Receive Only, RIP
messages will be accepted, but not transmitted. The default value for this
parameter is Enabled.
Configuring IP Interfaces
9-7
IP Interface Configuration
Inverse ARP
By selecting Enabled in the Inverse ARP Þeld, you can conÞgure a frame relay
interface without specifying a destination IP address. Once the frame relay
interface and its DLCI become active, the IP function in the FRX or SmartSwitch
1800 device sends an Inverse ARP (Address Resolution Protocol) request over the
interface. The response will contain the destination IP address, allowing the IP
interface to become active.
If an ARP request from the FRX or SmartSwitch 1800 receives no response within
Þve seconds, the request will be resent every Þve seconds for an additional Þve
times. If there is still no response, a 30-second timer will start. When the timer
expires, the resend sequence will be repeated.
If you have upgraded your Þrmware to version 4.0, then the default value for IP
interfaces that have already been conÞgured is Disabled. If you are adding a new
interface, the default value is Enabled. If you select Disabled, you must enter a
Destination Address (see deÞnition above).
If Inverse ARP is changed from Enabled to Disabled, the device will immediately
generate an Inverse ARP request.
Proxy ARP
This parameter is only conÞgurable if you have selected a LAN interface as your
Interface Type, and determines whether Proxy ARP (Address Resolution
Protocol) will be supported. Proxy ARP allows an FRX or SmartSwitch 1800 to
respond to ARP requests on one subnet for a host on another subnet. The device
that sent the ARP request thinks the FRX or SmartSwitch 1800 is the destination
host.
If an ARP request is received, the IP function in the FRX or SmartSwitch 1800
checks the address against the Source Address conÞgured on the IP interface. If
the addresses match, a reply will be sent. If the addresses do not match, and Proxy
ARP is Disabled, no response will be sent. If the addresses do not match, and
Proxy ARP is Enabled, the IP function will check to see if the device has a route to
the host or the hostÕs network. If there is a route, and the route is reachable and is
not on the same interface on which the ARP request was received, an ARP
response will be sent.
The default value for this parameter is Disabled.
Unnumbered Interface
This parameter is only conÞgurable if you have selected Frame Relay or X.25 as
your Interface Type. It allows a point-to-point frame relay interface to be
conÞgured without specifying a Source Address (see above). If Yes is selected, the
address of the lowest Interface Number in the FRX or SmartSwitch 1800 is used
as a default source IP address. (The lowest Interface Number is not the lowest
address, but the lowest number, in the range 1 - 257, that identiÞes the interface.)
It doesnÕt matter what type the interface is. All unnumbered interfaces on the
device will use the same default source IP address.
If a new interface with a lower number is added, that interfaceÕs IP address will
become the new default source IP address, but only after you reboot the device.
9-8
Configuring IP Interfaces
IP Interface Configuration
This function will only work if there is at least one numbered interface in the
device. If there isnÕt one, all unnumbered interfaces will remain disabled until a
numbered interface is added.
If you have upgraded your Þrmware to version 4.0, then the default value for IP
interfaces that have already been conÞgured is No. If you are adding a new
interface, the default value is Yes. If you select No, you must enter a Source
Address (see deÞnition above).
Configuring IP Interface Secondary Addresses
If you have selected a LAN interface as your Interface Type in the IP Interface
ConÞguration window, you can use the Secondary button at the bottom of the
window to access the IP Interface Secondary Address ConÞguration window.
This window allows you to conÞgure up to 15 secondary IP addresses on a LAN
interface, providing support for multiple IP subnets on the same physical LAN
segment.
To access the IP Interface Secondary Address ConÞguration window, click on the
Secondary button at the bottom of the IP Interface ConÞguration window. The IP
Interface Secondary Address ConÞguration window, Figure 9-3, will appear.
Figure 9-3. The IP Interface Secondary Address ConÞguration
Configuring IP Interfaces
9-9
IP Interface Configuration
The list box at the top of the window displays the Secondary Addresses that have
already been conÞgured; the Þelds and buttons in the lower portion of the
window allow you to add new entries and modify or delete existing ones.
Following is a description of the Secondary Address parameters:
Sequence Number
In this Þeld, enter a number (1 to 15) to identify the secondary address. The
default value is the next number in sequence.
Network Mask
This Þeld is used during routing to determine the portion of the IP address
associated with the subnetwork. The valid entries are 255.0.0.0 to 255.255.255.255
(255.255.255.255 is only valid on a point-to-point interface).
The default value for this parameter is conÞgured automatically to reßect the
appropriate address class for the speciÞed secondary Source Address (see below).
If the secondary Source IP Address is changed, the Network Mask will
automatically change to a default value appropriate for the new address. For this
reason, conÞgure the secondary Source IP Address Þrst, then the Network Mask.
Route Metric Hops
This Þeld speciÞes the routing metric count associated with the secondary IP
address. This is the number of hops (subnet gateways in the overall path over the
internet) associated with this interface (usually zero). During routing, the
interface with the lowest count will be selected.The default value for this
parameter is 0.
Source Address
This Þeld speciÞes the secondary IP address. The valid range of values (1.0.0.0 to
223.255.255.255) guarantees that you cannot conÞgure all 0s or all 1s for a network
ID, node ID, or subnet ID.
Broadcast Address
This is the broadcast address associated with the secondary IP address. This
address is used to send broadcast messages to all LAN hosts on the subnetwork.
The default value of the broadcast address will be conÞgured automatically after
a secondary Source Address or Network Mask is speciÞed (see above). The value
will be the dotted decimal notation result of ÒANDingÓ the binary versions of the
Source Address and the Network Mask, then Þlling in the remaining bits with 1s.
If the secondary Source Address or Network Mask is changed, the associated
broadcast address will automatically change to the default value appropriate for
the new address. For this reason, conÞgure the Source Address Þrst, then the
Network Mask, then the Broadcast Address.
9-10
Configuring IP Interfaces
IP Interface Configuration
RIP Support
This Þeld speciÞes the level of RIP support for the secondary IP address. If you
select Enabled, all RIP messages will be accepted, and messages of the RIP version
conÞgured in IP Node Defaults (see page 9-1) will be transmitted. If you select
Disabled, no RIP messages will be accepted or transmitted. If you select Receive
Only, RIP messages will be accepted, but not transmitted. The default value of
this parameter is Enabled.
Adding or Modifying IP Interfaces
First, access the IP Interface ConÞguration window (see ConÞguring IP
Interfaces, page 9-2).
To add a new IP interface:
1. Enter the IP Interface Number, the IP Interface Type, and the other
configurable values for each interface.
2. Click on
to add your new entry.
To modify an existing entry:
1. In the list box, click to select the IP Interface you wish to modify. The selected
entry will be highlighted. (Note that you can only modify one entry at a time.)
2. Edit the fields, as desired. If you would like to return to the original values,
click on the Refresh button.
3. Click on
to modify the selected entry.
To delete an existing entry:
1. In the list box, click to select the IP Interface you wish to delete. The selected
entry will be highlighted. (Note that you can only delete one entry at a time.)
2. Click on
NOTE
NOTE
to delete the selected entry.
After you have made system-level changes (such as conÞguring an IP Interface), you
must apply those changes by rebooting the FRX or SmartSwitch 1800 device, or through
console management via the [F7] command.
If you want to delete an interface without deleting a group of associated secondary
addresses, you must Þrst select one of the secondary addresses to be the new Source
Address and delete that secondary address (see Adding or Modifying Secondary
Addresses). Then, modify the Source Address parameter to specify the secondary
address that was deleted.
Adding or Modifying IP Interfaces
9-11
IP Interface Configuration
Adding or Modifying Secondary Addresses
If you have speciÞed a LAN Interface as your IP Interface Type, you can access the
IP Interface Secondary Address ConÞguration window by clicking on the
Secondary button at the bottom of the IP Interface ConÞguration window.
To add a new IP interface Secondary Address:
1. Enter the Sequence Number, the Source Address, and the other
configurable values for the secondary address.
2. Click on
to add your new entry.
To modify an existing entry:
1. In the list box, click to select the IP Interface Secondary Address you wish to
modify. The selected entry will be highlighted. (Note that you can only modify
one entry at a time.)
2. Edit the fields, as desired. If you would like to return to the original values,
click on the Refresh button.
3. Click on
to modify the selected entry.
To delete an existing entry:
1. In the list box, click to select the IP Interface Secondary you wish to delete.
The selected entry will be highlighted. (Note that you can only delete one
entry at a time.)
2. Click on
NOTE
9-12
to delete the selected entry.
After you have made system-level changes (such as conÞguring an IP Interface), you
must apply those changes by rebooting the FRX or SmartSwitch 1800 device, or through
console management via the [F7] command.
Adding or Modifying IP Interfaces
Chapter 10
IPX Interface Configuration
Configuring IPX Node Defaults; IPX Interface configuration; IPX Static SAP and Static Route
configuration
The FRX4000, FRX6000, and the SmartSwitch 1800 support connections to Novell
IPX networks through an IPX (Internet Packet Exchange) Interface. IPX is the
Novell proprietary protocol that speciÞes how information is to be broken into
separate packets, and how those packets are to be addressed in order to be routed
from one Novell NetWare node to another, and from one Novell NetWare
network to another. The IPX interface enables the FRX or SmartSwitch 1800 to
route IPX trafÞc between local LANs, or between LAN-attached workstations and
local or remote servers, via frame relay or X.25.
Configuring IPX Node Defaults
If the FRX4000, FRX6000, or SmartSwitch 1800 is going to support an IPX
interface, certain IPX node parameters must be conÞgured through the IPX Node
Defaults window.
To access the IPX Node Defaults window:
1. Click on the
button to display the Device menu.
2. Drag down to IPX Node Defaults, and release. The IPX Node Defaults
window, Figure 10-1, will appear.
10-1
IPX Interface Configuration
Figure 10-1. The IPX Node Defaults Window
3. In the IPX Network Address field, enter an 8-digit hexadecimal address to
identify the node to the IPX network.
4. In the RIP/SAP Minimum Delay field, enter the minimum delay (in 55
millisecond intervals) between consecutive Routing Information Protocol
(RIP) and Service Advertising Protocol (SAP) transmissions. This parameter
provides compatibility with older Novell servers. The default value for this
parameter is 1.
5. In the Router Name field, enter a router name (up to 48 characters) which
serves as an identifier for the IPX network. It must be unique within the
network. You can enter up to 48 characters, but you can only view 20
characters at a time.
6. Click on
NOTE
to save your selections.
After you have made system-level changes (such as conÞguring IPX Node Defaults), you
must apply those changes by rebooting the FRX or SmartSwitch 1800 device, or through
console management via the [F7] command.
Configuring IPX Interfaces
An IPX interface allows an FRX4000, FRX6000, and SmartSwitch 1800 to connect
to a Novell IPX network. You can display all IPX interfaces conÞgured on the
device and conÞgure a new interface through the IPX Interface ConÞguration
window.
To access the IPX Interface ConÞguration window:
1. Click on the
10-2
button to display the Device menu.
Configuring IPX Interfaces
IPX Interface Configuration
2. Drag down to IPX Interface Configuration, and release. The IPX Interface
Configuration window, Figure 10-2, will appear.
Figure 10-2. The IPX Interface ConÞguration Window
The list box at the top of the window displays the IPX interfaces that have already
been conÞgured; the Þelds and buttons in the lower portion of the window allow
you to add new entries, and modify or delete existing ones.
Following is a description of the IPX Interface parameters. Which parameters you
will conÞgure for each interface depends on the IPX Interface Type you select
(see IPX Interface Type deÞnition below).
Interface Number
In this Þeld, enter an interface number 1 to 64. This is merely a sequential number
used to identify the interface.
Configuring IPX Interfaces
10-3
IPX Interface Configuration
Interface Type
In this Þeld, use the menu button to select the type of interface you wish to
conÞgure. Depending on your selection, certain parameters will be conÞgurable,
and others will be grayed out.
There are four IPX interface types that you can select from:
¥
¥
¥
¥
NOTE
Ethernet
Eight 025 (Token Ring)
X.25
Frl (Frame Relay)
The Ethernet and Token Ring IPX Interface types will be referred to collectively as LAN
interfaces.
Network Address
This Þeld identiÞes the local interface to the Novell network. Enter an address up
to 10 digits in length.
Frame Type
This Þeld depends on the Interface Type you have selected. If you have selected
Ethernet or Token Ring as your interface type, you can use the menu button to
select one of the following four frame types: Type II, Raw, Llc, or Snap. If you
have selected Frame Relay or X.25 as your interface type, your only option is Type
II.
Maximum Transmission Unit
This is the maximum frame size (in bytes) that can be transmitted or received over
the IPX interface. Valid values for frame relay or X.25 interface types are 31 to 4096
bytes; valid values for Ethernet interface types are 45 to 1518 bytes, and valid
values for Token Ring interfaces are 48 to 4096 bytes. The default value for each
interface type is the highest amount.
BAG
This parameter assigns the IPX interface to one of 16 Bandwidth Allocation
Groups (BAG).
BAGs regulate bandwidth usage by outgoing trafÞc on the physical link and can
ensure that response time-sensitive trafÞc gets access to the available frame relay
bandwidth. Up to 16 groups can be conÞgured through console management
(refer to your FRX or SmartSwitch 1800 hardware documentation for more
information).
10-4
Configuring IPX Interfaces
IPX Interface Configuration
NOTE
Bandwidth allocation groups cannot currently be conÞgured via SPMA; for more
information on conÞguring these groups, see your FRX or SmartSwitch 1800 hardware
documentation.
LAN Card
If you speciÞed a LAN Interface Type, this number identiÞes the LAN card that
contains the IPX interface. Enter 0 for the FRX4000 or SmartSwitch 1800; 0 or 1 for
the FRX6000.
Source Subscriber
This parameter is only conÞgurable if you have selected X.25 as your Interface
Type. This is the Subscriber ID that deÞnes an IPX interface in the node, by
associating itself with port 66, a number reserved for the IPX interface.
A subscriber ID is an address of up to 15 digits. This address must also be
conÞgured in the Subscriber Table (see Chapter 4, ConÞguring the Subscriber
Table).
Destination Subscriber
This parameter is only conÞgurable if you have selected X.25 as your Interface
Type. This is the Subscriber ID associated with the physical X.25 port that will be
used for the IPX interface.
A subscriber ID is an address of up to 15 digits. This address must also be
conÞgured in the Subscriber Table (see Chapter 4, ConÞguring the Subscriber
Table).
SVC Retry Timer
This parameter is only conÞgurable if you have selected X.25 as your Interface
Type. It speciÞes the time (in seconds) between calls that are placed to try to
establish an X.25 connection.The default value for this parameter is 20.
SVC Idle Timer
This parameter is only conÞgurable if you have selected X.25 as your Interface
Type. It speciÞes the amount of time (in minutes) that an IPX connection can
remain active with no trafÞc, before the connection is cleared. The default value
for this parameter is 1.
Blocked Flag
This value will cause the port to be enabled (if No) or disabled (if Yes) when the
device is powered up or re-booted. Whichever state is selected, the port will
remain in that state until this value is changed or until an enable or disable action
is performed. The default value for this parameter is No.
Configuring IPX Interfaces
10-5
IPX Interface Configuration
Diagnostics Enabled
This parameter determines the IPX interfaceÕs ability to handle Novell diagnostic
packets. If Yes is selected, IPX will forward or respond to a diagnostic packet
depending on the packetÕs address. If No is selected, the IPX interface will ignore
Novell diagnostic packets. The default value for this parameter is No.
Serialization Enabled
This parameter determines whether NetWare Þle server serialization security
frames will be forwarded on the interface. These broadcast frames are used by
Novell to hold information regarding the licensing of the Þle server executables.
If Yes is selected, these frames will be forwarded; if No, they will not. Selecting
No allows Þltering of these broadcasts to reduce WAN trafÞc, and is not intended
to interfere with copyright-protection mechanisms. The default value for this
parameter is No.
WAN Enabled
This parameter is conÞgurable only if you have selected Frame Relay or X.25 as
your Interface Type. It determines whether NovellÕs IPXWAN protocol will be
used (if Yes) or not (if No) on the IPX interface. IPXWAN speciÞes a method for
IPX routers to communicate across WAN links. The default value for this
parameter is No.
NetBIOS Enabled
This parameter determines whether Novell-encapsulated NetBIOS frames
received on the IPX interface will be processed (if Yes) or discarded (if No). The
default value for this parameter is No.
Periodic SAP Enabled
This Þeld determines whether the FRX or SmartSwitch 1800 will originate
periodic IPX Service Advertising Protocol (SAP) messages from this interface.
(The SAP Enabled parameter must be set to Yes, see below). These messages
inform the network which SAP entries in the routing table are viable. The default
value for this parameter is No.
SAP Enabled
If Yes is selected, the IPX interface will support Service Advertising Protocol
(SAP) processing; if No, it will not. SAP is used by IPX to exchange information
about Novell service-providing nodes, such as Þle servers and print servers that
are available. SAP builds and maintains a database, the Service Advertisement
Table, containing the addresses of and routes to speciÞc service-providing nodes
(servers), and advertises this information over the network. The default value for
this parameter is No.
10-6
Configuring IPX Interfaces
IPX Interface Configuration
Periodic RIP Enabled
This Þeld determines whether the FRX or SmartSwitch 1800 will originate
periodic IPX Routing Information Protocol (RIP) messages from this interface.
(The RIP Enabled parameter must be set to Yes, see below). These messages
inform the network that the route through this interface is viable. The default
value for this parameter is No.
RIP Enabled
If Yes is selected, the IPX interface will support Routing Information Protocol
(RIP) processing; if No, it will not. RIP is the routing protocol used by IPX to build
and maintain routing tables which contain the addresses of and available routes
to all the networks and nodes RIP has learned. The default value for this
parameter is No.
Watchdog Spoofing
This Þeld determines whether this IPX interface will be used by the local node to
respond to keep-alive messages on behalf of the client workstations. Novell
servers periodically issue these messages to all clients, to determine whether each
client is still available. The default value for this parameter is No.
PVC Connection
This parameter is only conÞgurable if you have selected X.25 as your Interface
Type. Select Yes if the interface is a Permanent Virtual Circuit (PVC); select No if it
is not. The default value for this parameter is No.
Source RLP
This parameter is only conÞgurable if you have selected Frame Relay as your
Interface Type. It identiÞes the RLP for the IPX interface at this end of the frame
relay link. Enter 0 for FRX4000 and SmartSwitch 1800 devices (for RLP0); enter
0 - 7 for an FRX6000.
Source Port
This parameter is only conÞgurable if you have selected Frame Relay as your
Interface Type. It identiÞes the physical frame relay port for the IPX interface at
this end of the frame relay link. Make sure the physical frame relay port you
identify is not conÞgured for backup use only as determined by the Backup Use
Only parameter in the Frame Relay Port ConÞguration window. (See Chapter 5,
Frame Relay Status and ConÞguration.)
Source DLCI
This parameter is only conÞgurable if you have selected Frame Relay as your
Interface Type. It identiÞes the DLCI for the IPX interface at this end of the frame
relay link. Make sure the DLCI you identify is not part of a frame relay DLCI
backup group or intra-nodal frame relay PVC.
Transport Time
This is the time (in 55-millisecond units) that it will normally take to forward
frames out the IPX interface. Recommended values are 1 for LAN interfaces and
30 for frame relay or X.25 interfaces. The default value for this parameter is 1. This
Configuring IPX Interfaces
10-7
IPX Interface Configuration
time is used to calculate the least-cost path during routing. If WAN Enabled is set
to Yes (see above), the Transport Time selected here will be overridden by the
value calculated by IPXWAN.
NetBIOS Hops
This is the maximum number of network hops allowed for routing a
Novell-encapsulated NetBIOS frame. Each router in a packetÕs path to the
destination network is one hop. Frames exceeding this value will be discarded.
The default value for this parameter is 8.
Periodic SAP Timer
If Periodic SAP Enabled is set to Yes (see above), then this Þeld speciÞes the
interval (in seconds) between the periodic IPX Service Advertising Protocol (SAP)
broadcasts from this interface. If this is set to greater than 0, the SAP Age Timer
(see below) must be three times longer than the Periodic SAP Timer. The default
value for this parameter is 60.
SAP Age Timer
If SAP Enabled is set to Yes (see above), this timer is used to delete route entries
in the server information table. The timer starts each time SAP creates or updates
an entry, or an entry is referenced for forwarding. This Þeld speciÞes the amount
of time (in seconds) that will elapse before the timer expires and the router
assumes that the entry is no longer valid (due to hardware failure, power outage,
etc.), and the entry will be deleted from the table. SAP will then send a broadcast
message indicating that the server is down. If the value for the Periodic SAP
Timer is set to greater than 0, the SAP Age Timer must be three times longer than
the Periodic SAP Timer. A value of 0 for the SAP Age Timer disables aging. The
default value for this parameter is 180.
Periodic RIP Timer
If Periodic RIP Enabled is set to Yes (see above), then this Þeld speciÞes the
interval (in seconds) between the periodic IPX Routing Information Protocol (RIP)
broadcasts from this interface. If this is set to greater than 0, the RIP Age Timer
(see below) must be three times longer than the Periodic RIP Timer. The default
value for this parameter is 60.
RIP Age Timer
If RIP Enabled is set to Yes (see above), this timer is used to delete route entries in
the routing information table. The timer starts each time an entry is created,
updated, or referenced for forwarding by RIP. This Þeld speciÞes the amount of
time (in seconds) that will elapse before the timer expires and the router assumes
that the entry is no longer valid (due to hardware failure, power outage, etc.) and
the entry will be deleted from the table. If the value for the Periodic RIP Timer is
set to greater than 0, the RIP Age Timer must be three times longer than the
Periodic RIP Timer. A value of 0 for the RIP Age Timer disables aging. The default
value for this parameter is 180.
10-8
Configuring IPX Interfaces
IPX Interface Configuration
RIP Max Size
This is the maximum RIP packet size (in bytes), including the IPX header (30
bytes) and the LAN MAC header (if transmitted on a LAN interface). The default
value for this parameter is 446.
Max VC
This parameter is only conÞgurable if you have selected X.25 as your Interface
Type. It speciÞes the maximum number of virtual circuits over which IPX trafÞc
will be transmitted in parallel. The default value for this parameter is 1.
Adding or Modifying IPX Interfaces
First, access the IPX Interface ConÞguration window (see ConÞguring IPX
Interfaces, page 10-2).
To add a new IPX interface:
1. Enter the IPX Interface Number, the IPX Interface Type, and the other
configurable values for each interface.
2. Click on
to add your new entry.
To modify an existing entry:
1. In the list box, click to select the IPX Interface you wish to modify. The
selected entry will be highlighted. (Note that you can only modify one entry at
a time.)
2. Edit the fields, as desired. If you would like to return to the original values,
click on the Refresh button.
3. Click on
to modify the selected entry.
To delete an existing entry:
1. In the list box, click to select the IPX Interface you wish to delete. The selected
entry will be highlighted. (Note that you can only delete one entry at a time.)
2. Click on
NOTE
to delete the selected entry.
After you have made system-level changes (such as conÞguring an IPX Interface), you
must apply those changes by rebooting the FRX or SmartSwitch 1800 device, or through
console management via the [F7] command.
Configuring IPX Interfaces
10-9
IPX Interface Configuration
Configuring IPX Static Routes
The routing of IPX trafÞc is handled dynamically using RIP routing tables and
SAP service advertisement tables as discussed in the previous section. However,
you can also conÞgure static routes for IPX trafÞc using the IPX Static SAP
ConÞguration window and the IPX Static Route ConÞguration window.
These two windows and their parameters are described in the following sections.
IPX Static SAP Configuration
To access the IPX Static SAP ConÞguration window:
1. Click on the
button to display the Device menu.
2. Drag down to IPX Static SAP Configuration, and release. The IPX Static
SAP Configuration window, Figure 10-3, will appear.
Figure 10-3. The IPX Static SAP ConÞguration Window
The list box at the top of the window displays the IPX static routes that have
already been conÞgured; the Þelds and buttons in the lower portion of the
window allow you to add new entries, and modify or delete existing ones.
Following is a description of the IPX Static Route parameters that you can
conÞgure:
10-10
Configuring IPX Static Routes
IPX Interface Configuration
Service Type
This Þeld is a SAP Service Type code. Some common types are:
0003 = print queue
0004 = Þle server
0005 = job server
0007 = print server
0009 = archive server
0024 = remote bridge server
Service Name
IdentiÞes a speciÞc server in the IPX network. Enter a name of 1-48 characters; the
default value of this parameter is * (asterisk), a wildcard character.
Network Address
This is an IPX network number assigned to the network containing the server
identiÞed by Service Name.
Node Address
This address identiÞes the IPX node attached to the server network.
Socket Number
The IPX socket number that identiÞes the process. For example, the SAP process
is 0452. The default value for this parameter is 0.
Intervening Networks
The number of routers that a packet must pass through to reach the server, if this
route is used. The default value for this parameter is 1.
Gateway Address
The hex value of the node address of the router that will forward a packet when
this route is used. If NovellÕs IPXWAN protocol is used on the interface (as
conÞgured in the IPX Interface ConÞguration window; see page 10-2), this Þeld is
ignored.
Interface
This is the IPX network number assigned to the interface used to send packets
that are destined for this server.
Adding or Modifying Static SAP Routes
First, access the IPX Static SAP ConÞguration window (see IPX Static SAP
ConÞguration, page 10-10).
To add a new Static SAP route:
1. Enter the Service Type, the Service Name, and the other configurable values
for each route.
2. Click on
Configuring IPX Static Routes
to add your new entry.
10-11
IPX Interface Configuration
To modify an existing entry:
1. In the list box, click to select the Static SAP Route you wish to modify. The
selected entry will be highlighted. (Note that you can only modify one entry at
a time.)
2. Edit the fields, as desired. If you would like to return to the original values,
click on the Refresh button.
3. Click on
to modify the selected entry.
To delete an existing entry:
1. In the list box, click to select the Static SAP Route you wish to delete. The
selected entry will be highlighted. (Note that you can only delete one entry at
a time.)
2. Click on
NOTE
to delete the selected entry.
After you have made system-level changes (such as conÞguring an IPX Interface), you
must apply those changes by rebooting the FRX or SmartSwitch 1800 device, or through
console management via the [F7] command.
IPX Static Route Configuration
To access the IPX Static Route ConÞguration window:
1. Click on the
button to display the Device menu.
2. Drag down to IPX Static Route Configuration, and release. The IPX Static
Route Configuration window, Figure 10-4, will appear.
10-12
Configuring IPX Static Routes
IPX Interface Configuration
Figure 10-4. The IPX Static Route ConÞguration Window
The list box at the top of the window displays the IPX static routes that have
already been conÞgured; the Þelds and buttons in the lower portion of the
window allow you to add new entries, and modify or delete existing ones.
Following is a description of the IPX Static Route parameters that you can
conÞgure:
Circuit Index
This number is the unique identiÞer of the circuit used to reach the Þrst hop in the
static route.
Network Number
Enter the IPX network number of the routeÕs destination.
Router Address
Enter the hex value of the node address of the router that will forward a packet
when this route is used. If NovellÕs IPXWAN protocol is used on the interface (as
conÞgured in the IPX Interface ConÞguration window; see page 10-2), this Þeld is
ignored.
Configuring IPX Static Routes
10-13
IPX Interface Configuration
Adding or Modifying IPX Static Routes
First, access the IPX Static Route ConÞguration window (see IPX Static Route
ConÞguration, page 10-12).
To add a new IPX Static Route:
1. Enter the Circuit Index, the Network Number, and the Router Address for
each route.
2. Click on
to add your new entry.
To modify an existing entry:
1. In the list box, click to select the static route you wish to modify. The selected
entry will be highlighted. (Note that you can only modify one entry at a time.)
2. Edit the fields, as desired. If you would like to return to the original values,
click on the Refresh button.
3. Click on
to modify the selected entry.
To delete an existing entry:
1. In the list box, click to select the static route you wish to delete. The selected
entry will be highlighted. (Note that you can only delete one entry at a time.)
2. Click on
NOTE
10-14
to delete the selected entry.
After you have made system-level changes (such as conÞguring an IPX Interface), you
must apply those changes by rebooting the FRX or SmartSwitch 1800 device, or through
console management via the [F7] command.
Configuring IPX Static Routes
Chapter 11
Bridge Configuration
About FRX and SmartSwitch 1800 Bridging support; configuring device-level bridging parameters;
configuring bridge ports on frame relay and LAN interfaces
The FRX and SmartSwitch 1800 devices support bridging of LAN trafÞc over
Frame Relay. This bridging support includes:
¥
encapsulation of Ethernet and Token Ring trafÞc (per RFC 1490) for
transmission over Frame Relay
¥
Transparent Spanning Tree (802.1d) bridging
¥
compatibility with Source Route Bridging environments
¥
translational bridging between Ethernet and Token Ring LANs
¥
bridging of IP and IPX trafÞc.
Bridging is supported on Ethernet, Token Ring, and Frame Relay interfaces.
Configuring Device-Level Bridging Parameters
If the FRX4000, FRX6000, or SmartSwitch 1800 is going to support one or more
bridge ports (interfaces), certain device-level bridging parameters must be
conÞgured to deÞne bridge operation.
Using the Bridge ConÞguration window, you can conÞgure the device-level
bridging parameters. To access the window:
1. Click on
to display the Device menu.
2. Drag down to Bridge Configuration, and release. The Bridge Configuration
window, Figure 11-1, will appear.
11-1
Bridge Configuration
Figure 11-1. Bridge ConÞguration
You can conÞgure the following bridging parameters:
Virtual LAN ID
This ID is only used in an 802.5 Source Route environment and is normally
assigned by a system administrator. It is the ID number that is inserted into the
Token Ring RIF Þeld representing the internal virtual ring for LLC2 or bridged
trafÞc.
Each Virtual LAN ID must be unique among all LAN IDs throughout the network
on which this device will operate.
Forwarding Table Size
Under the Spanning Tree concept, bridges automatically maintain forwarding
tables by exchanging messages (BPDUs) with other bridges on the network. By
using the information in the forwarding tables, bridges determine single paths for
trafÞc between endpoints (assuming there are multiple paths.)
This Þeld determines the maximum number of entries allowed in the bridgeÕs
forwarding table. The actual number may be limited by available memory. The
default value for this parameter is 65535.
Source Route Bridge ID
This ID is only used in a 802.5 Source Route environment. If the outgoing port is
conÞgured as a Source Route bridge, it is necessary for the FRX or SmartSwitch
1800 to generate the Routing Information Field (RIF) in forwarded frames. This
Bridge ID supplies the Source Route Bridge ID that will be inserted into the RIF.
11-2
Configuring Device-Level Bridging Parameters
Bridge Configuration
The default value for this parameter is 0. The Bridge ID must be 0 if the bridge
port is on an IBM Token Ring card.
Bridge Enabled
If Yes is selected, bridging is in effect, and all trafÞc types are allowed on the
bridge interface. If No is selected, only LLC2 terminated trafÞc is allowed on the
bridge interface. The default value for this parameter is Yes.
IP Enabled
If Yes is selected, IP trafÞc will be bridged. If No is selected, IP bridging is not
enabled, and IP trafÞc (assuming IP is conÞgured and loaded in the FRX or
SmartSwitch 1800) will be routed. The default value for this parameter is No.
IPX Enabled
If Yes is selected, IPX trafÞc will be bridged. If No is selected, IPX bridging is not
enabled, and IPX trafÞc (assuming IPX is conÞgured and loaded in the FRX or
SmartSwitch 1800) will be routed. The default value for this parameter is No.
Ethernet Frame Type
This selection determines the Ethernet frame type that will be used in Token Ring
to Ethernet translation. If the FRX or SmartSwitch 1800 does not know the frame
type generated by the attached Ethernet device, it will check this Þeld to
determine what Ethernet frame type to use. However, once the FRX or
SmartSwitch device has received a frame from a device over the Ethernet
interface, it will know what format to use for future frames. Select type-II for
Ethernet Type II frame type; select ieee8023 for IEEE 802.3 Ethernet frame type.
The default value for this parameter is type-II. This parameter is irrelevant on
Token Ring FRX4000 and SmartSwitch 1800 devices.
Changing Configuration Values
You can edit the values in any Þeld which provides a text box or menu button
selection; to do so:
1. To edit a text field, remove the existing value and enter the new value.
2. To edit a field with a menu button, click on the button to display a list of
options, then drag down to select the option you want.
3. Click on
NOTE
to save your changes.
After you have made system-level changes (such as conÞguring a Bridge Interface), you
must apply those changes by rebooting the FRX or SmartSwitch 1800 device, or through
console management via the [F7] command.
Configuring Device-Level Bridging Parameters
11-3
Bridge Configuration
Configuring Bridge Ports
An FRX or SmartSwitch 1800 bridge port is a LAN interface or a frame relay port
that will operate as a bridge connection to the LAN or WAN respectively. There
are two windows provided to conÞgure bridge ports:
¥
The Bridge/LLC2 Frame Relay Interface Table allows you to conÞgure a
frame relay port to operate as a bridge connection to the WAN; and
¥
The Bridge/LLC2 LAN Interface Table allows you to conÞgure a LAN
interface to operate as a bridge connection to the local LAN.
These windows and their functions are described in the following sections.
Configuring Frame Relay Bridge Ports
You can use the Bridge/LLC2 Frame Relay Interface Table to conÞgure a frame
relay port to operate as a bridge connection to the WAN. To access the table:
1. Click on
to display the Device menu.
2. Drag down to Bridge/LLC2 Frame Relay Table, and release. The
Bridge/LLC2 Frame Relay Interface Table, Figure 11-2, will appear.
Figure 11-2. Bridge/LLC2 Frame Relay Interface Table
11-4
Configuring Bridge Ports
Bridge Configuration
You can conÞgure the following bridge port parameters (except Interface
Number):
Interface Number
This is a sequential number used to identify the interface; it will be assigned
automatically.
RLP
This parameter identiÞes the RLP containing the frame relay bridge port. Enter 0
for FRX4000 and SmartSwitch 1800 devices (for RLP0); enter 0 - 7 for an FRX6000.
Port
This parameter identiÞes the physical port on the RLP containing the bridge port.
Make sure the physical frame relay port is not reserved for backup DLCIs as
determined by the Backup Use Only parameter in the Frame Relay Port
ConÞguration window (see Chapter 5, Frame Relay Status and ConÞguration).
DLCI
This parameter is a number that identiÞes a virtual connection in the frame relay
network and is usually assigned by the frame relay provider. Make sure the DLCI
you select is not part of a frame relay DLCI backup group as determined by the
Backup Group Number parameter in the Frame Relay DLCI Table. (See Chapter 5,
Frame Relay Status and ConÞguration.)
Also, make sure that the DLCI is different than the one conÞgured for the physical
port in the frame relay PVC record (see your FRX or SmartSwitch 1800 hardware
documentation for more information on conÞguring frame relay PVC
connections).
!
Do not conÞgure more than one bridge port per DLCI.
CAUTION
Priority
This Þeld prioritizes the bridge port for trafÞc within the device; the higher the
number, the higher the priority. This priority has no effect on trafÞc exiting the
device. Priorities are conÞgured on all logical interfaces that use a physical frame
relay port. The FRX or SmartSwitch 1800 processor uses these priorities to help
determine the order in which it will process protocols. The default value for this
parameter is 0.
TIP
When conÞguring priorities, be sure to consider the types of trafÞc being routed on other
connections in the node.
Configuring Bridge Ports
11-5
Bridge Configuration
Bandwidth Allocation Group
This parameter assigns the bridge port to one of 16 Bandwidth Allocation Groups
(BAG).
BAGs regulate bandwidth usage by outgoing trafÞc on the physical link and can
ensure that response time-sensitive trafÞc get access to the available frame relay
bandwidth. Up to 16 groups can be conÞgured through console management
(refer to your FRX or SmartSwitch 1800 hardware documentation for more
information).
NOTE
Bandwidth allocation groups cannot currently be conÞgured via SPMA; for more
information on conÞguring these groups, see your FRX or SmartSwitch 1800 hardware
documentation.
Format
This Þeld speciÞes the RFC 1490 encapsulation method that will be used for
bridged trafÞc. Selecting Tb 8023 will add an Ethernet header to the frame;
selecting Srb 8025 will add a Token Ring header to the frame; selecting Native
LLC2 results is no MAC address header being added to the frame. If Native LLC2
is selected, the interface can only be used for terminated LLC2 trafÞc. The default
value for this parameter is LLC2.
Session Type
This Þeld is conÞgurable only if you have selected Native LLC2 as your RFC 1490
encapsulation method in the Format Þeld (see above). For Session Type, if you
select Originated, then LLC2 connections from the conÞgured Host MAC Address
(see below) can use this interface. If you select Terminated, then connections to the
conÞgured Host MAC address can use this interface. The default value for this
parameter is Originated.
Host MAC Address
This Þeld is conÞgurable only if you have selected Native LLC2 as your RFC 1490
encapsulation method in the Format Þeld (see above). Enter the MAC address of
the LLC2 host or workstation to which the remote LAN device needs to connect.
This MAC address will match the address of the LLC2 host in the SNA/LLC2
Host Table (see Chapter 7 SNA Status and ConÞguration, for more information on
conÞguring LLC2 hosts).
LAN ID
This Þeld is conÞgurable only if you have selected Srb 8025 (Token Ring) as your
RFC 1490 encapsulation method in the Format Þeld (see above).This ID is only
used in an 802.5 Source Route environment and is normally assigned by a system
administrator. It identiÞes the ring number used by the frame relay-compliant
source route bridge at the other end of the frame relay PVC.
Each LAN ID must be unique among all LAN IDs throughout the network on
which this device will operate.
11-6
Configuring Bridge Ports
Bridge Configuration
Blocked Flag
This value will cause the port to be enabled (if No) or disabled (if Yes) when the
device is powered up or rebooted. Whichever state is selected, the port will
remain in that state until this value is changed or until an enable or disable action
is performed. The default value for this parameter is No.
Adding or Modifying Frame Relay Bridge Ports
First, access the Bridge/LLC2 Frame Relay Interface Table (see ConÞguring
Frame Relay Bridge Ports, page 11-4).
To add a new Frame Relay bridge port:
1. Enter the RLP, Port, and DLCI numbers, and the other configurable values for
each bridge port.
2. Click on
to add your new entry.
To modify an existing entry:
1. In the list box, click to select the Frame Relay Interface you wish to modify.
The selected entry will be highlighted. (Note that you can only modify one
entry at a time.)
2. Edit the fields, as desired. If you make some changes, and would like to return
to the original values, click on the Refresh button.
3. Click on
to modify the selected entry.
To delete an existing entry:
1. In the list box, click to select the Frame Relay Interface you wish to delete. The
selected entry will be highlighted. (Note that you can only delete one entry at
a time.)
2. Click on
NOTE
to delete the selected entry.
After you have made system-level changes (such as conÞguring a Bridge Interface), you
must apply those changes by rebooting the FRX or SmartSwitch 1800 device, or through
console management via the [F7] command.
Configuring LAN Bridge Ports
You can use the Bridge/LLC2 LAN Interface Table to conÞgure a LAN interface to
operate as a bridge connection to the local LAN. To access the table:
1. Click on
Configuring Bridge Ports
to display the Device menu.
11-7
Bridge Configuration
2. Drag down to Bridge/LLC2 LAN Interface Table, and release. The
Bridge/LLC2 LAN Interface Table, Figure 11-3, will appear.
Figure 11-3. Bridge/LLC2 LAN Interface Table
You can conÞgure the following bridge port parameters (except Interface
Number):
Interface Number
This is a sequential number used to identify the interface; it will be assigned
automatically.
Port
This Þeld corresponds to the LAN Card Number. Enter 0 for an FRX4000 or
SmartSwitch 1800 (for RLP0); enter 0 or 1 for an FRX6000. This number must be
identical to the number entered in the LAN Card Number Þeld (see below).
LAN Card Number
This Þeld speciÞes the LAN Card being conÞgured as a bridge port. Enter 0 for an
FRX4000 or SmartSwitch 1800 (for RLP0); enter 0 or 1 for an FRX6000. This
number must be identical to the number entered in the Port Þeld (see above).
Priority
This Þeld prioritizes the interface for trafÞc within the device; the higher the
number, the higher the priority. This priority has no effect on trafÞc exiting the
device. Priorities are conÞgured on all logical interfaces that use a physical frame
11-8
Configuring Bridge Ports
Bridge Configuration
relay port. The FRX or SmartSwitch 1800 processor uses these priorities to help
determine the order in which it will process protocols. The default value for this
parameter is 0.
TIP
When conÞguring priorities, be sure to consider the types of trafÞc being routed on other
connections in the node.
LAN Type
This Þeld speciÞes the LAN type for the LAN card you are conÞguring as a bridge
port. Select Ethernet or Token Ring.
LAN ID
This Þeld is conÞgurable only if you have selected Srb 8025 (Token Ring) as your
RFC 1490 encapsulation method in the Format Þeld (see above). This ID is only
used in an 802.5 Source Route environment and is normally assigned by a system
administrator. It identiÞes the Token Ring adapter to the network.
Each LAN ID must be unique among all LAN IDs throughout the network on
which this device will operate.
Blocked Flag
This value will cause the port to be enabled (if No) or disabled (if Yes) when the
device is powered up or rebooted. Whichever state is selected, the port will
remain in that state until this value is changed or until an enable or disable action
is performed. The default value is No.
Adding or Modifying LAN Bridge Ports
First, access the Bridge/LLC2 LAN Interface Table (see ConÞguring LAN Bridge
Ports, page 11-7).
To add a new LAN bridge port:
1. Enter the Port and LAN Card numbers, and the other configurable values for
each bridge port.
2. Click on
to add your new entry.
To modify an existing entry:
1. In the list box, click to select the LAN Interface you wish to modify. The
selected entry will be highlighted. (Note that you can only modify one entry at
a time.)
2. Edit the fields, as desired. If you make some changes, and would like to return
to the original values, click on the Refresh button.
3. Click on
Configuring Bridge Ports
to modify the selected entry.
11-9
Bridge Configuration
To delete an existing entry:
1. In the list box, click to select the LAN Interface you wish to delete. The
selected entry will be highlighted. (Note that you can only delete one entry at
a time.)
2. Click on
NOTE
11-10
to delete the selected entry.
After you have made system-level changes (such as conÞguring a Bridge Interface), you
must apply those changes by rebooting the FRX or SmartSwitch 1800 device, or through
console management via the [F7] command.
Configuring Bridge Ports
Chapter 12
SmartSwitch 1800
Voice Configuration
About SmartSwitch 1800 voice support; configuring system-level voice parameters; speed-dial
configuration; configuring voice ports and voice interfaces; viewing voice statistics
The two voice ports in the SmartSwitch 1800 provide connectivity over frame
relay for telephones, PBXs (Private Branch Exchange), fax machines, and analog
modems.
Calls are routed between voice ports and frame relay ports by internal mapping
(using a dial table) that reads the destination node number for a voice call and
associates it with a voice interface. The voice interface record includes an
associated frame relay port and DLCI over which the Call Request frame will be
sent to the destination node.
The SmartSwitch 1800 can combine voice and data frames over the same frame
relay DLCI. With the current version of Þrmware, splitting the voice and data at
the other end requires a connection to another Cabletron frame relay device (FRX
or SmartSwitch 1800). That device must be conÞgured with a PVC between the
network frame relay port and the frame relay port that will transmit only the
voice frames. (Once the data and voice frames have been separated in the
Cabletron frame relay device, each data frame will be routed based on the DLCI
conÞguration and data type.)
NOTE
At the time of this SPMA release, the SmartSwitch 1800 supports the collection of voice
port statistics, but does not allow the actual conÞguration of voice ports or voice
interfaces. Full voice support will be included in a future release of SPMA.
You can conÞgure voice ports and voice interfaces through console management. Refer to
your SmartSwitch 1800 hardware documentation for more information.
12-1
SmartSwitch 1800 Voice Configuration
Configuring System-Level Voice Parameters
Certain voice parameters apply to speciÞc voice ports or interfaces. Others are
system level, and apply to all voice calls on the node.
Using the Voice Parameters window, you can conÞgure the system-level voice
parameters. To access the window:
1. Click on
to display the Device menu.
2. Drag down to Voice System Parameters, and release. The Voice Parameters
window, Figure 12-1, will appear.
Figure 12-1. Voice Parameters
You can conÞgure the following system-level voice parameters:
Voice Node Number
This number identiÞes the SmartSwitch 1800 as the source or destination node in
call setup frames. This number must be the Þrst four digits of each long-dial
number, and is the number that must be dialed to reach a remote device. If a
speed-dial number is conÞgured for the long-dial number, the operator can enter
that speed-dial number, and the Þrmware will read the long-dial number from the
speed-dial map table.
Country Code
This code is a telephone preÞx code that identiÞes the country in which the
SmartSwitch is installed. The following table contains a list of country codes.
12-2
Configuring System-Level Voice Parameters
SmartSwitch 1800 Voice Configuration
Table 12-1. International Dialing Country Codes
Country
Code Country
Code Country
Code
Algeria
213
Indonesia
62
Portugal
351
Argentina
54
Iran
98
Qatar
974
Australia
61
Iraq
964
Romania
40
Austria
43
Ireland
353
San Marino
39
Belgium
32
Israel
972
Saudi Arabia
966
Bolivia
591
Italy
39
Scotland
44
Brazil
55
Japan
81
Senegal
221
Bulgaria
359
Jordan
962
Singapore
65
Chile
56
Kenya
254
South Africa
27
China
86
Korea
82
Spain
34
Colombia
57
Kuwait
965
Sri Lanka
94
Costa Rica
506
Libya
218
Suriname
597
Cyprus
357
Liechtenstein
41
Sweden
46
Czechoslovakia
42
Luxembourg
352
Switzerland
41
Denmark
45
Macao
853
Tahiti
689
Ecuador
593
Malaysia
60
Taiwan
886
Egypt
20
Malta
356
Tanzania
255
El Salvador
503
Mexico
52
Tasmania
61
Ethiopia
51
Monaco
33
Thailand
66
Fiji
679
Morocco
212
Tunisia
216
Finland
358
Netherlands
31
Turkey
90
France
33
Netherl. Antilles
599
Uganda
256
French Antilles
596
New Zealand
64
U.A.E.
971
Gabon
241
Nicaragua
505
United Kingdom
44
Germany
37
Nigeria
234
United States
01
Greece
30
Northern Ireland
44
Uruguay
598
Guam
671
Norway
47
Vatican City
39
Guantanamo Bay 53
Pakistan
92
Venezuela
58
Guatemala
502
Panama
507
Wales
44
Guyana
592
Paraguay
595
Yugoslavia
38
Configuring System-Level Voice Parameters
12-3
SmartSwitch 1800 Voice Configuration
Table 12-1. International Dialing Country Codes
Country
Code Country
Code Country
Code
Haiti
509
Peru
51
Zaire, Rep.
243
Honduras
504
Philippines
63
Zambia
260
Hong Kong
852
Poland
48
Zimbabwe
263
India
91
Dial Digits
This Þeld speciÞes the number of digits used for speed-dial and auto-dial
numbers. A speed-dial number is a short substitute for a longer number, and an
auto-dial number will be dialed automatically when the receiver is taken
off-hook. The default value for this parameter is 3.
Extended Dial Digits
This speciÞes the number of extended dial digits that must be entered by the user
of attached equipment as part of a dial string when Ext. Digits Source in the Voice
ConÞguration window is set to User (see ConÞguring Voice Ports, page 12-8).
Speed-dial numbers and extended digits can be output by remote voice/fax ports.
Extended digits will be forwarded to the remote end of the frame relay connection
if all of these conditions are met:
¥
Extended dial digits are conÞgured in the speed-dial map;
¥
The parameter Forwarded Digits in the Voice ConÞguration window (see
ConÞguring Voice Ports, page 12-8) is set to All or Extended;
¥
The parameter Ext. Digits Source in the Voice ConÞguration window is set to
Map.
If the Þrst two conditions are met, but Ext. Digits Source is set to User, the
operator must enter the extended dial digits to be forwarded.
Setting the number of Extended Dial Digits to a value greater than zero reduces
the number of allowable entries in the Voice Speed Dial ConÞguration window.
When the Extended Dial Digits is 0, up to 512 Speed Dial entries can be deÞned.
When Extended Dial Digits is greater than 0, only 256 entries can be deÞned. The
default value for this parameter is 0.
Ring Voltage/Frequency
This parameter speciÞes the voltage and frequency of the telephone ring circuit.
In two-wire OPX/FXS mode, the SmartSwitch 1800 provides ring voltage to the
telephone when it is called by a remote unit. The frequency of ringing voltage is
variable and is a divide by 1, 2, or 3 of the main AC line frequency. The default
value for this parameter is v80-hz-20-00.
12-4
Configuring System-Level Voice Parameters
SmartSwitch 1800 Voice Configuration
Minimum Voice Rate
This Þeld speciÞes the minimum operating rate (in bits per second) of all voice
channels when congestion occurs. The default value for this parameter is 4800
bps.
Maximum Voice Rate
This Þeld speciÞes the maximum operating digitization rate (in bits per second) of
all voice channels. The default value for this parameter is 64000 bps.
Changing Parameter Values
You can edit the values in any Þeld which provides a text box or menu button
selection; to do so:
1. To edit a text field, remove the existing value and enter the new value.
2. To edit a field with a menu button, click on the button to display a list of
options, then drag down to select the option you want.
3. Click on
NOTE
to save your changes.
After you have made system-level changes (such as conÞguring voice parameters), you
must apply those changes by rebooting the FRX or SmartSwitch 1800 device, or through
console management via the [F7] command.
Speed Dial Configuration
The Voice Speed Dial ConÞguration window contains the dial numbers (similar to
telephone numbers) that can be used to call remote devices. The table associates
each of these numbers (called long-dial numbers) with a shorter (usually)
speed-dial number that can be used to call the device, as well as any conÞgured
extended-dial digits that will be forwarded by the device.
To access the window:
1. Click on
to display the Device menu.
2. Drag down to Voice Speed Dial Configuration, and release. The Voice
Speed Dial Configuration window, Figure 12-2, will appear.
Speed Dial Configuration
12-5
SmartSwitch 1800 Voice Configuration
Figure 12-2. Voice Speed Dial ConÞguration Window
The top part of the window displays a list of conÞgured speed-dial numbers with
associated long-dial and extended-dial strings. The bottom part of the window
allows you to modify or add the following parameters:
Speed Dial Digits
This is the number of characters (1-4) conÞgured for Dial Digits in the Voice
Parameters window (see ConÞguring System-Level Voice Parameters,
page 12-2). A question-mark wildcard can be used for any single digit, and an
asterisk wildcard can be used for any number of digits.
Long Dial Map
This is a six-digit number for which the speed-dial number is a shortcut. The
number must identify its associated device as follows.
SmartSwitch 1800:
Digits 1-4 = Voice Node Number, 0001-9999, conÞgured in the Voice Parameters
window (see ConÞguring System-Level Voice Parameters, page 12-2).
Digit 5 = 0 or 1. This digit is irrelevant on the SmartSwitch 1800, so either value
can be used.
Digit 6= Channel number 4 or 5, which identiÞes the Voice Port. (Refer to
Chapter 2, Using the FRX4000, FRX6000, and SmartSwitch 1800 Hub View for
information on Voice Port numbers.)
12-6
Speed Dial Configuration
SmartSwitch 1800 Voice Configuration
Valid values for the voice concentrator vary depending on the device type; the
numbers below relate to ACT NetworksÕ SDM network access devices.
SDM:
Digits 1-2= Switch number 01-61.
Digits 3-4= Port number 00-15.
Digit 5= Slot number 1-8 if FP or DX. Slot number 1-4 if JFP.
Digit 6= Channel number 0-5 if DVC. Arbitrary (typically 1-6) if FP or JFP.
Extended Dial String
This is an extended set of digits that will be forwarded with the call if Ext. Digits
Source is set to Map in the Voice ConÞguration window (see ConÞguring Voice
Ports, page 12-8). If Ext. Digits Source is set to User, any extended digits must be
entered by the operator at the initiating device.
Calls placed to a speed-dial number will go to the device (e.g., PBX) whose full
number is associated with that speed-dial number in the Voice Speed Dial
ConÞguration window. If extended dial digits are included in the table or the call,
the call will automatically be forwarded through the remote device to the
telephone number that matches the extended digits.
Adding or Modifying Speed Dial Numbers
First, access the Voice Speed Dial ConÞguration Window (see Speed Dial
ConÞguration, page 12-5).
To add a new Speed Dial Number:
1. Enter the configurable values for each number.
2. Click on
to add your new entry.
To modify an existing entry:
1. In the list box, click to select the number you wish to modify. The selected
entry will be highlighted. (Note that you can only modify one entry at a time.)
2. Edit the fields, as desired. If you make some changes, and would like to return
to the original values, click on the Refresh button.
3. Click on
to modify the selected entry.
To delete an existing entry:
1. In the list box, click to select the number you wish to delete. The selected
entry will be highlighted. (Note that you can only delete one entry at a time.)
2. Click on
Speed Dial Configuration
to delete the selected entry.
12-7
SmartSwitch 1800 Voice Configuration
NOTE
After you have made system-level changes (such as conÞguring Voice Parameters, you
must apply those changes by rebooting the FRX or SmartSwitch 1800 device, or through
console management via the [F7] command.
Configuring Voice Ports
You can use the Voice ConÞguration window to conÞgure a voice port. To access
the window:
1. Click mouse button 3 on the voice port of interest to display the Port Menu.
2. Drag down to Voice Configuration, and release. The Voice Configuration
window, Figure 12-3, will appear.
Figure 12-3. Voice ConÞguration
You can conÞgure the following voice port parameters:
DTMF
This parameter enables, disables, or speciÞes a time span over which Dual Tone
Multi Frequency (DTMF) tones will be regenerated. (DTMF tones are the ÒbeepsÓ
usually heard when dialing a touch-tone telephone.) Enter 0 to disable DTMF: the
12-8
Configuring Voice Ports
SmartSwitch 1800 Voice Configuration
DTMF tones are passed transparently to the remote device. Enter 1 to enable
DTMF: the SmartSwitch will detect incoming tones and regenerate them as
received. Enter 2-255 to specify a number of seconds the SmartSwitch will
regenerate DTMF tones (including call setup). The default value for this
parameter is 1, enable DTMF.
TE Timer
The Timed E Timer parameter is relevant only if Interface (see below) is EM. It is
the time (in seconds) of the delay after which the EM ÒEÓ lead follows the ÒMÓ
lead. The default value for this parameter is 3.
Call Timer
This Þeld is the amount of time (in seconds) the SmartSwitch 1800 will wait for a
response to a Call Connect or a Call Clear request. When the SmartSwitch issues
the Call Connect or Call Clear request, it will set a timer to the value conÞgured
here. If that timer expires with no response from the destination, the SmartSwitch
will generate a busy tone. The default value for this parameter is 5.
Dial Timer
This is the delay (in seconds) the SmartSwitch 1800 will use to determine when
variable-length dialing is complete. (Variable-length dialing allows the user to
place a call without entering the conÞgured number of digits for the speed dial
number.)
When the operator of the attached voice/fax equipment dials a digit that is not
the conÞgured Long Dial PreÞx (see below), the SmartSwitch 1800 assumes a
speed-dial number is being dialed and activates the Dial Timer. If the timer
expires with no new digit entries, the SmartSwitch will assume dialing is
complete.
The default value for this parameter is 0. A setting of 0 means the Dial Timer will
never expire. The SmartSwitch 1800 will wait indeÞnitely for the operator to enter
the digits.
If the number of dialed digits is less than the value speciÞed for Dial Digits in the
Voice Parameters window (see ConÞguring System-Level Voice Parameters,
page 12-2), the SmartSwitch will ÒpadÓ the dialed number with leading zeros
before searching the speed-dial conÞguration map. For example, assume Dial
Digits is 4 and the user has dialed 33 when the Dial Timer expires. The speed dial
number 0033 will be used to search the speed-dial map for a deÞned destination.
Note that regardless of the Dial Timer setting, any of the following conditions
and/or conÞgurations will disable variable-length dialing:
¥
Long-call-format dialing is being used. The SmartSwitch 1800 assumes this
format is being used if the Þrst digit dialed is the character conÞgured for Long
Dial PreÞx (see below);
¥
The Num Digits Delete parameter (see below) is set to any value greater
than 0;
¥
Auto Dial (see below) is set to Enabled.
Configuring Voice Ports
12-9
SmartSwitch 1800 Voice Configuration
SLT Timeout
This is the time (in seconds) the local voice port will wait before an actual fax
transmission begins. If there is no fax tone when this timer expires, the connection
will be terminated. The default value for this parameter is 30.
Jitter
This Þeld speciÞes the amount of jitter delay (in 5-millisecond increments), which
is used to compensate for the variable arrival time of frames. Inconsistent arrival
can result in a choppy voice quality. Increasing the jitter buffer size will increase
the end-to-end delay, but will insure smoother voice quality.
Sample Delay
This Þeld speciÞes the amount of sample delay.
Level In
This speciÞes the local voice level into the voice port. This parameter adjusts the
sensitivity of the local voice channel to the signal from the attached device. The
purpose of this parameter is to match the voice channel dB level to the input
signal. A more negative setting produces a higher input gain (i.e., 7 produces the
least input gain and -22 produces the highest input gain). If the In level is reduced
(made more negative), the voice channel will be more sensitive to the input; this
will cause the voice output at the remote device to sound louder.
The default value for this parameter is 0.
Level Out
This parameter speciÞes the local voice level out of the voice port. A more positive
setting produces a higher volume (i.e., 7 produces the highest volume, -22 the
lowest). The default value for this parameter is -4.
Long Dial Prefix
This parameter speciÞes a character or number that will be required preceding
calls using the long-call format (i.e., when a speed-dial number is not used). When
the user at an attached device (e.g., telephone or fax machine) dials a long-form
number, the number must be preceded by the Long Dial PreÞx. Valid values are
the digits 0-9 and the characters * (asterisk) and # (pound sign). The default value
for this parameter is * (asterisk).
Num Digits Delete
This speciÞes the number of leading dial digits that will be deleted before a dial
string is forwarded. This parameter is primarily used to delete leading digits that
may be inserted by an attached PBX. For example, assume the user of attached
equipment dials 1234 and the attached PBX inserts the number 9 as a preÞx to the
dial string. If Num Digits Delete is set to 1, the SmartSwitch 1800 will remove the
9 before forwarding the dialed digits 1234. The default value for this parameter
is 0.
12-10
Configuring Voice Ports
SmartSwitch 1800 Voice Configuration
Forward Delay
This parameter is relevant only if Forwarded Digits (see below) is set to All or
Extended. It speciÞes the time (in 0.25 second increments) for two delays:
¥
the delay before extended digits are forwarded;
¥
the length of a pause that can be inserted in an extended dial string that is
being forwarded. Each time a comma is encountered in an extended string, the
SmartSwitch 1800 will pause for the length of time conÞgured for Forward
Delay before additional extended digits are forwarded.
The default value for this parameter is 2 (0.5 seconds).
Make Ratio
This parameter is relevant only if Forwarded Digits (see below) is set to All or
Extended and Forwarded Type (see below) is set to Pulse. It speciÞes the make
ratio of each digit pulse that is forwarded. Make periods are the times contact is
made for each digit.
Valid values are 20-80 (in increments of 2); the default value is 34.
Break Ratio
This parameter is relevant only if Forwarded Digits (see below) is set to All or
Extended and Forwarded Type (see below) is set to Pulse. It speciÞes the break
ratio of each digit pulse that is forwarded. Break periods are the times contact is
broken between digits.
Valid values are 80-20 (in increments of 2); the default value is 66.
DTMF On Duration
This parameter is relevant only if Forwarded Digits (see below) is set to All or
Extended and Forwarded Type (see below) is set to DTMF. This speciÞes the
length (in milliseconds) of a tone that will be used to produce a single DTMF
digit. The default value for this parameter is 100.
DTMF Off Duration
This parameter is relevant only if Forwarded Digits (see below) is set to All or
Extended and Forwarded Type (see below) is set to DTMF. This speciÞes the
length (in milliseconds) of silence between DTMF tones in a dial digit string. The
default value for this parameter is 100.
Auto Dial
This parameter enables or disables the auto-dial feature of the SmartSwitch 1800.
If auto-dialing is enabled, the SmartSwitch will dial the conÞgured Auto Dial
Number (see below) when the handset attached to this voice port is taken
off-hook. The default value for this parameter is Disabled. Enabling this
parameter will disable the variable length dialing feature for this channel,
regardless of the Dial Timer setting (see above).
Configuring Voice Ports
12-11
SmartSwitch 1800 Voice Configuration
Auto Dial Number
This parameter is only conÞgurable if Auto Dial (see above) is Enabled. It is a
number to which the SmartSwitch 1800 will attempt to connect when the handset
(or its equivalent) attached to this port is taken off-hook. The SmartSwitch will
automatically dial the long-form number deÞned in the Speed Dial ConÞguration
table that is associated with the speed dial number speciÞed here.
The number of digits you can enter is determined by the Dial Digits parameter
conÞgured in the Voice Parameters window (see ConÞguring System-Level
Voice Parameters, page 12-2).
Auto Poll
This parameter is only relevant if Auto Dial (see above) is Enabled. When Auto
Poll is enabled, the SmartSwitch 1800 polls the destination device with the
frequency speciÞed by Auto Poll Timer (see below). If the poll is not
acknowledged, the SmartSwitch will Òbusy outÓ the channel.
This parameter can be useful in situations where the destination is an emergency
number that must always be available. If the destination does not answer the
automatic poll, the busy-out condition will notify an attached PBX that the
emergency call should be routed to another call routing device.
The default value for this parameter is Disabled.
Auto Poll Timer
This parameter is only conÞgurable if Auto Poll (see above) is Enabled. It is the
frequency (in seconds) with which an Auto Poll will be sent. The default value for
this parameter is 10.
Speed
This speciÞes the speed of the port and is transmitted as part of a Call Setup
frame. A voice call will be established if there is enough bandwidth at each end to
provide the minimum conÞgured rate. The default value for this parameter is
8000 bps.
Interface
This parameter, in conjunction with the Telephony Type parameter (see below)
speciÞes the type of interface that will be used by the voice channel.
Telephony Interface Type
Interface
OPX (FXO)
SLT (FXS)
EM
AC 15
Loop Start
Loop Start
4W EM, 4W EM TE, 2W EM, 2W EM TE
AC 15A or AC 15C
Loop Start and OPX operating modes provide characteristics similar to those of a
central ofÞce. Loop Start and SLT operating modes provide characteristics similar
to those of a standard telephone set.
EM is an interface used for PBX tie-trunk connections. When EM is speciÞed, the
SmartSwitch 1800 acts like the trunk side of a PBX.
12-12
Configuring Voice Ports
SmartSwitch 1800 Voice Configuration
4W EM is the normal setting for a PBX EM tie-line interface that uses one pair of
wires for the incoming voice signal and another pair of wires for the outgoing
voice signal. 2W EM is for an EM tie line that uses a single pair of wires for both
the incoming and outgoing voice signal.
AC 15A or AC 15C are 4-wire signaling systems used by PBXs to communicate
with each other and other PBX-like communications equipment.
2W EM and 4W EM can be conÞgured in these modes, via the switches on the
front of the SmartSwitch:
¥
2W EM or 4W EM IS (Immediate Start), the industry standards for EM
operation;
¥
2W EM or 4W EM DD (Delay Dial), which will cause the SmartSwitch to
expect an attached PBX to raise its M-lead to request a dial register. The
SmartSwitch will respond as follows: 1) toggle the E-lead, 2) send a dial
register to the PBX, 3) return the E-lead to its original state, and 4) wait for dial
digits from the PBX (no dial tone is transmitted to the PBX).
¥
2W EM or 4W EM WS (Wink Start), which will cause the SmartSwitch to expect
an attached PBX to raise its M-lead to request a dial register. The SmartSwitch
will respond by sending a dial register to the PBX. When the PBX indicates it
is ready for dial digits (no dial tone is transmitted to the PBX), the SmartSwitch
will toggle the E-lead. When the E-lead returns to its original state, the PBX
will transmit dial digits to the SmartSwitch.
If 2W EM TE or 4W EM TE (Timed EM) is selected, you can specify a delay time
for when the E-Lead follows the M-Lead in the TE Timer parameter (see above).
The default value for this parameter is Loop Start.
Telephony Type
This parameter, in conjunction with the Interface parameter (see above) speciÞes
the type of interface that will be used by the voice channel. Refer to your
SmartSwitch 1800 hardware documentation for more information about selecting
the appropriate interface. If EM is speciÞed, you must also set Switch 2 on the
front of the SmartSwitch to select an EM type. Refer to your hardware
documentation for more information on EM Switch Settings.
The default value for this parameter is OPX.
Hunt Group
This parameter is not currently supported and must be set to None.
Suppression
This parameter speciÞes a level of suppression of background noise. For most
calls, low suppression should be sufÞcient. The higher the suppression level, the
greater the possibility that low-volume voice will be lost; therefore, suppression
levels higher than low should be used only if it can be certain that background
noise will be low or all of the voice transmitted will be sufÞciently louder than the
background noise.
Configuring Voice Ports
12-13
SmartSwitch 1800 Voice Configuration
A higher suppression level saves composite bandwidth, allowing more data
channels to operate simultaneously with voice channels. The default value for this
parameter is low.
Ext. Digits Source
This parameter is relevant if the Dial Digits parameter conÞgured in the Voice
Parameters window (see ConÞguring System-Level Voice Parameters,
page 12-2) is greater than 0. It speciÞes the source of extended digits when the
user of attached equipment dials a speed-dial number. When Map is speciÞed,
extended digits are taken from the Extended Dial String in the Speed Dial
ConÞguration Table. When User is speciÞed, extended digits are taken from the
user of attached equipment (i.e., the user must dial a speed-dial number and an
extended digit string).
If you specify User, you must set the Dial Timer (see above) to a value other than
0. The default value for this parameter is Map.
Forwarded Type
This parameter is relevant only if Forwarded Digits (see below) is set to All or
Extended. It speciÞes how the dial digits will be forwarded. The default value for
this parameter is DTMF (dual-tone).
Forwarded Digits
This parameter speciÞes which dial digits (if any) to forward (i.e., to output at the
remote voice/fax card). If None is selected, dial digits are not forwarded to the
destination device when a call is initiated on this port. If All is selected, the
speed-dial number and associated extended digits are forwarded to the
destination device. If Extended is selected, only the extended digit string is
forwarded. The source of extended digits (i.e., from the map table or dialed by the
user) is speciÞed by Ext. Digits Source (see above). The default value for this
parameter is None.
Tone Type
This parameter determines whether the multi-frequency tone will be DTMF
(dual-tone) or MF (single-tone). The default value for this parameter is DTMF.
Blocked Flag
This value will cause the port to be enabled (if No) or disabled (if Yes) when the
device is powered up or rebooted. Whichever state is selected, the port will
remain in that state until this value is changed or until an enable or disable action
is performed. The default value is No.
Link Down Busy
This parameter enables or disables automatic busy-out of channels when the link
is down. When this parameter is enabled, the system will automatically busy-out
channels when the composite link is down. When disabled, channels remain
on-hook when the link is down. If your application is connected to a PBX that can
route calls to an alternate source (e.g., an ACD) based on an Òall busyÓ condition,
enable this parameter so the PBX will recognize this condition and reroute the
12-14
Configuring Voice Ports
SmartSwitch 1800 Voice Configuration
calls while the composite link is down. This parameter affects on-hook channels
only when the link-down condition occurs. Active calls remain in progress until
they return to on-hook. The default value for this parameter is Enabled.
Fax Supported
This speciÞes whether or not faxes will be transmitted on the port. If No is
selected, all calls will be treated as voice. If Yes is selected, both voice and fax will
be transmitted. In most cases, this parameter should be enabled, to allow both
voice and fax calls to be processed. The default value for this parameter is Yes.
If a voice call experiences excessive noise while this parameter is enabled, the
SmartSwitch 1800 might interpret it as a fax call. Disabling this parameter will
cause the call to be treated as voice regardless of noise conditions.
Changing Port Configuration Values
You can edit the values in any Þeld which provides a text box or menu button
selection; to do so:
1. To edit a text field, remove the existing value and enter the new value.
2. To edit a field with a menu button, click on the button to display a list of
options, then drag down to select the option you want.
3. Click on
to save your changes.
Applying Port-level Changes
After you have made any port-level conÞguration changes, your changes will not
take effect until you have done an on-line update. To do so:
1. Click mouse button 3 on the port you have been configuring to display the Port
Menu.
2. Drag down to On-line Update and release.
Configuring Voice Interfaces
Voice ports connect the SmartSwitch 1800 to telephony equipment. Connections to
the frame relay network are made over Voice Interfaces, which are assigned to
DLCIs on physical frame relay ports.
A Voice Interface conÞguration contains node numbers that identify the local
SmartSwitch 1800 and the device at the remote end of the frame relay connection.
When a call is received, the dialing scheme in the SmartSwitch 1800 checks the
node number addressed in the call against a list maintained by the Þrmware. If
the number is that of the remote node (called the ÒpeerÓ node), the call is
forwarded out the frame relay port.
Configuring Voice Interfaces
12-15
SmartSwitch 1800 Voice Configuration
You can conÞgure a Voice Interface using the Voice Interface ConÞg window. To
access the window:
1. Click on
to display the Device menu.
2. Drag down to Voice Interface Configuration, and release. The Voice
Interface Config window, Figure 12-4, will appear.
Figure 12-4. Voice Interface ConÞg
You can conÞgure the following parameters for each Voice Interface:
Interface Number
In this Þeld enter a number 1 to 129. This is merely a sequential number used to
identify the interface.
Peer Node Type
This parameter speciÞes whether the node at the remote end of the frame relay
connection is a SmartSwitch 1800 (select Netlink) or a voice concentrator (select
ACT).
12-16
Configuring Voice Interfaces
SmartSwitch 1800 Voice Configuration
Peer Node Number
This parameter is not used if the peer node type is a SmartSwitch 1800. Enter a
number 1 to 61 to specify the node number of the remote device.
Peer Node Port
This parameter is not used if the peer node type is a SmartSwitch 1800. Enter a
number 1 to 17 to specify the voice port number on the remote device.
Local Node Number
This parameter is not used if the peer node type is a SmartSwitch 1800. Enter a
number 1 to 61 to specify the node number of the local SmartSwitch 1800. This
number must match the Voice Node Number entered in the system-level Voice
Parameters window (see ConÞguring System-Level Voice Parameters,
page 12-2). The default value for this parameter is 1.
Local Node Port
This parameter is not used if the peer node is a SmartSwitch 1800. Enter a number
1 to 17 to specify the voice port number on the local SmartSwitch 1800.
Frame Relay RLP
Enter the RLP number of the logical interface of this end of the frame relay link.
This would always be 0 for RLP0 on the SmartSwitch 1800.
Frame Relay Port
Enter the port number of the local frame relay port over which Voice will be
transmitted. This will be port numbers 0 through 3 on the SmartSwitch 1800.
Frame Relay DLCI
Enter a number 16 to 991 specifying local frame relay DLCI over which Voice will
be transmitted.
Enable Fragment
This parameter is not currently supported and must be set to No.
Adding or Modifying Voice Interfaces
First, access the Voice Interface ConÞg Window (see ConÞguring Voice
Interfaces, page 12-15).
To add a new Voice Interface:
1. Enter the configurable values for each interface.
2. Click on
to add your new entry.
To modify an existing entry:
1. In the list box, click to select the interface you wish to modify. The selected
entry will be highlighted. (Note that you can only modify one entry at a time.)
Configuring Voice Interfaces
12-17
SmartSwitch 1800 Voice Configuration
2. Edit the fields, as desired. If you make some changes, and would like to return
to the original values, click on the Refresh button.
3. Click on
to modify the selected entry.
To delete an existing entry:
1. In the list box, click to select the interface you wish to delete. The selected
entry will be highlighted. (Note that you can only delete one entry at a time.)
2. Click on
NOTE
to delete the selected entry.
After you have made system-level changes (such as conÞguring a Voice Interface), you
must apply those changes by rebooting the FRX or SmartSwitch 1800 device, or through
console management via the [F7] command.
Viewing Voice Statistics
The Voice Statistics window provides general information about voice trafÞc that
is being transmitted across the selected port.
TIP
The statistical windows display their information via the SPMA Meters application; for
more information on how to manipulate and conÞgure these meters, see the SPMA Tools
Guide.
To access the window:
1. Click mouse button 3 on the voice port of interest to display the Port Menu.
2. Drag down to Voice Stats, and release. The Voice Statistics window,
Figure 12-5, will appear.
12-18
Viewing Voice Statistics
SmartSwitch 1800 Voice Configuration
Figure 12-5. Voice Statistics
The Voice Statistics window provides the following statistical data:
Calls (Received and Transmitted)
Displays the number of calls that were received or transmitted across the selected
port, expressed as a rate (calls/second).
Call Accepts (Received and Transmitted)
Displays the number of call accepts that were received or transmitted across the
selected port, expressed as a rate (calls/second).
Clears (Received and Transmitted)
Displays the number of calls (received or transmitted) that were cleared,
expressed as a rate (clears/second).
Congestions (Received and Transmitted)
Displays the number of congestion management frames that were received or
transmitted across the selected port, expressed as a rate (frames/second).
Busy Calls
Displays the number of calls which received a busy indication, expressed as a rate
(busy calls/second).
Call Timeouts
Displays the number of calls which transmitted time-out to the network,
expressed as a rate (call time-outs/second).
Viewing Voice Statistics
12-19
SmartSwitch 1800 Voice Configuration
12-20
Viewing Voice Statistics
Appendix A
FRX4000, FRX6000, and
SmartSwitch 1800 MIB Components
FRX4000, FRX6000, and SmartSwitch 1800 management information base configuration
IETF MIB Support
In addition to its proprietary features, the FRX4000, FRX6000, and SmartSwitch
1800 currently support the following IETF MIBs:
¥
RFC 1213 MIB for Network Management of TCP/IP-based Internets: MIB-II
¥
RFC 1231 IEEE 802.5 Token Ring MIB (beginning with Þrmware version 3.3.1)
¥
RFC 1315 MIB for Frame Relay DTEs
¥
RFC 1381 and RFC 1382 for X.25 (beginning with firmware version 4.0)
¥
RFC 1398 DeÞnitions of Managed Objects for Ethernet-Like Interface Types
(beginning with Þrmware version 3.3.1)
¥
RFC 1490 Multiprotocol Interconnect over Frame Relay
¥
RFC 1493 DeÞnitions of Managed Objects for Bridges (beginning with Þrmware
version 3.3.1)
¥
RFC 1643 802.3 Ethernet Statistics (beginning with firmware version 4.0)
¥
RFC 1747 DeÞnitions of Managed Objects for SNA Data Link Control (SDLC)
¥
RFC 1748 802.5 Token Ring Statistics (beginning with firmware version 4.0)
¥
Novell IPX MIB (beginning with Þrmware version 3.3.1)
A-1
FRX4000, FRX6000, and SmartSwitch 1800 MIB Components
CSI Netlink MIB Support
In addition to the IETF standard MIBs listed above, the FRX4000, FRX6000, and
SmartSwitch 1800 support a number of proprietary features contained in the CSI
Netlink MIB. For a copy of this MIB, consult your FRX4000, FRX6000, or
SmartSwitch 1800 hardware documentation, or contact Cabletron SystemsÕ Global
Call Center.
A-2
CSI Netlink MIB Support
Index
A
Accept Reverse Charge 5-20, 6-7
Address 7-8, 7-11, 7-16
Address Table 4-6, 4-8
Admin Status 2-13
Algorithm 4-6
algorithm (subscriber table) 4-4, 4-5
alternate subscriber addresses 4-6
ansiT1 617 D 5-7
Answer Non ConÞgured 8-6
ANXD 5-21
Applying Port-level Changes 2-34, 5-8, 5-20,
6-8, 7-7, 7-15, 8-6
Auto Call 8-8
Auto Call Enabled 7-9
Auto Dial 12-11
Auto Dial Number 12-12
Auto Poll 12-12
Auto Poll Timer 12-12
B
backup DLCI 5-11
Backup Group Number 5-11
Backup Groups 5-12
Backup Protocol 5-11
Backup Use Only 5-7
BAG (Bandwidth Allocation Group) 9-5, 10-4
Bandwidth Allocation 5-7
Bandwidth Allocation Group 5-17, 7-13, 11-6
BECN (backward explicit congestion
notiÞcation) 5-23
BECN Recovery Count 5-10
binary synchronous communications
(BSC) 8-1
Blocked Flag 5-19, 6-6, 8-5, 10-5, 11-7, 11-9,
12-14
Blocked Port Flag 5-6
Break Ratio 12-11
Bridge Enabled 11-3
Bridging Parameters 11-1
bridging support 11-1
Broadcast Address 9-6, 9-10
BSCI 8-1
BSCI Subscriber Information 8-7
C
Call Info in Request Packet 8-4
call requests 4-1, 4-5
Call Timer 12-9
Call User Groups
Make Calls Outside CUG 5-19, 6-5
Rcv Calls Outside CUG 5-18, 6-5
Changes, applying 2-34
Charts and Meters 1-4
Circuit Index 10-13
Clear VC on Last Dev Down 8-6
Closed User Group 5-18, 6-4
Closed User Group Index 5-18, 6-5
Committed Burst Size (BC) 5-10
Committed Information Rate (CIR) 5-9
community name 2-1, 2-2
ConÞguring IP Interface Secondary
Addresse 9-9
ConÞguring IP Interfaces 9-2
ConÞguring IPX Interfaces 10-2
ConÞguring SNA Ports 7-2
Connection ID 8-8, 8-10
Connection Priority 4-5
Connection Without Poll 8-6
Connector Type 2-15, 6-5
Contact Status 2-7
Control Unit ID 8-10
Country Code 12-2
D
Data Mode 7-17
DCE 5-4, 5-5, 5-6, 7-5, 8-5
Default Packet Size 5-17, 6-4
Default Throughput Class 5-18, 6-4
Desired Operational State 7-17
Desired State at Startup 7-17
Destination Address 9-6
Destination Subscriber 9-6, 10-5
Index-1
Index
Device Information 2-9
Device menu 2-9
Device Unit ID 8-10
Diagnostics Enabled 10-6
Dial Digits 12-4
Dial In/Out 6-6
Dial Timer 12-9
Disable Rqst Disconnect 7-6
discard eligible (DE) 5-10, 5-22
Disconnect (DISC) 6-9
Disconnect Mode (DM) 6-9
Disconnect Timer 6-3
DLCI 5-9
DLCI Number 5-16
DLCI Priority 5-11
DTE 5-4, 5-5, 5-6, 7-5, 8-5
DTMF 12-8
DTMF Off Duration 12-11
DTMF On Duration 12-11
E
EBCDIC character set 8-4
Encapsulation Method 5-19
End-to-End ACK 8-5
Error Retransmit Count 8-4
Error Threshold 5-4
Ethernet Frame Type 11-3
Excess Burst Size (BE) 5-10
Ext. Digits Source 12-14
Extended Dial Digits 12-4
Extended Dial String 12-7
F
Fast Select 5-20, 6-7
Fax Supported 12-15
FCS Errors 2-26
FECN (forward explicit congestion
notiÞcation) 5-23
Þrmware versions 1-8, 2-8, A-1
Flow Control Negotiation 5-19, 6-7
Format 11-6
Forward Delay 12-11
Forwarded Digits 12-14
Forwarded Type 12-14
Forwarding Table Size 11-2
Frame Reject (FRMR) 6-11
frame rejects 2-27
frame relay access device 1-1
Frame Relay Backup Groups 5-12
Index-2
Frame Relay Bridge Ports 11-4
Frame Relay DLCI 12-17
frame relay operational parameters 5-2
Frame Relay Port 12-17
Frame Relay RLP 12-17
Frame Type 10-4
Frames Discarded 5-23
Frames Queued 2-26
frx 2-1
FRX Þrmware versions 1-8
FRX4000 and FRX6000, descriptions 1-1
Full Duplex 8-5
G
Gateway Address 10-11
Generate Clock 5-6, 6-6, 7-5, 8-5
Global Find MAC Address 1-4
Global TFTP 1-4
Group Poll Address 7-17
H
Health statistics
LAN Card 2-27
RLP 2-25
serial port 2-26
Help 1-7
History button 1-5
Host Index 7-19
Host MAC Address 11-6
hostname 2-2
HPAD 8-6
HSAP 7-25
I
ICMP Add Routes 9-5
IDBLK 7-12
Idle Fill Char 7-6
IDNUM 7-12
IETF MIBs, supported by FRX devices A-1
ifIndex 2-15, 2-21
ifSpeed 2-15
In Call Bar 5-20, 6-7
Inactivity Timer 6-3, 7-4
indexing (RLPs and LAN cards) 2-2
Information Transfer (INFO) 6-10
Interface Number 9-3, 10-3, 11-8, 12-16
Interface Type 10-4
Interface, Voice Channel 12-12
Index
Intervening Networks 10-11
Inverse ARP 9-8
IP address 2-8
IP Enabled 11-3
IP interface 9-2, 10-2
IP Interface Type 9-4
IP Node Defaults 9-1
IPX Enabled 11-3
IPX interface 10-1
IPX Network Address 10-2
IPX Node Defaults 10-1
IPX Static Routes 10-10
J
Jitter 12-10
L
L1 Duplex 7-6
L2 Data Mode 7-9
LAN Bridge Ports 11-7
LAN Card 9-6, 10-5
LAN card displays 2-2
LAN card indexing 2-3
LAN Card Number 11-8
LAN ID 11-6, 11-9
LAN Type 11-9
LAPB command and response frames 6-8
Least LCN 4-4
Level In 12-10
Level Out 12-10
LIC displays 2-3
LIC Type 2-18
Line Busy 4-4
Line Failed 4-4
Line Speed 5-3, 7-3, 8-3
Link Down Busy 12-14
Link Integrity Timer 5-4, 5-5
Link Layer Management 5-6
Link Station ConÞguration 7-15
Link Station Rx Statistics 7-30
Link Station Statistics 7-29
Link Station Tx Statistics 7-30
linkup 2-13
LLC2 ConÞguration 7-18
LLC2 Connection 7-9
LLC2 Host Connections 7-24
LMI 5-21
LMI rev 1 5-7
Local MAC Address 7-11
Local Node Number 12-17
Local Node Port 12-17
Local SAP Address 7-11
Local Subscriber ID 7-25, 8-8
Local Subscriber Id 7-8
Location (on Hub View front panel) 2-7
Logical DCE 5-6
Logical Port ConÞguration 5-15
logical port indices 4-5
Logical Ports 5-1, 5-15, 5-16
Logical Rejects 2-27
Long Dial Map 12-6
Long Dial PreÞx 12-10
LP 4-5
LPDA Resource Id 7-9
LPDA Support 7-5
M
Make Ratio 12-11
Max Bytes per Frame 5-3
Max Frame Size 8-2
Max Packet Size 2-15, 5-17, 6-4
Max Retransmissions 8-3
MAX Retries 7-4
Max RX PDU Size 7-16
Max Rx UnACK I-Frames 7-16
Max TX PDU Size 7-16
Max Tx UnACK I-Frames 7-16
Max VC 9-7, 10-9
Maximum Supported VCs 5-5
Maximum Transmission Unit 9-4, 10-4
Maximum UnACK Packets 5-18, 6-4
Maximum Voice Rate 12-5
Memory 2-17
menu structure 2-10
meters 2-12, 2-24, 5-2, 5-21, 6-1, 7-2, 7-26, 12-18
MIB I, II 1-4, 2-7, 2-9
MIBTree 1-4
Minimum Voice Rate 12-5
module status color codes 2-5
Modulus 7-17
Monitored Events Count 5-5
Multidrop 8-4
N
N1 Polling Count 5-4, 5-5
N2 Error Threshold 5-4
N2-Expired T1 LPDUs 7-22
N2-Max LPDUs 7-13
Index-3
Index
N3 Monitored Events Count 5-5
N3-LPDU Count 7-22
N3-Max Info LPDUs 7-13
NAK Retry Count 8-4
Name 7-16
Name (on Hub View front panel) 2-7
NetBIOS Enabled 10-6
NetBIOS Hops 10-8
Network Address 10-4, 10-11
Network Mask 9-4, 9-10
Network Number 10-13
Network Trunk Group 6-6
no LMI 5-6
No Response Retries 8-3
No Response Timer 8-3
Node Address 10-11
Node Community Name 2-2
NRZ Data Encoding 7-5
Num Digits Delete 12-10
O
On-line Update 2-34
Operation Status 2-12
Out Call Bar 5-20, 6-7
Outgoing Rate Control 5-7, 5-10
P
Packet Size 7-3
PAD Type 7-5, 8-6
Path 4-5
Peer Node Number 12-17
Peer Node Port 12-17
Peer Node Type 12-16
Periodic RIP Enabled 10-7
Periodic RIP Timer 10-8
Periodic SAP Enabled 10-6
Periodic SAP Timer 10-8
Permanent Virtual Circuits (PVCs) 4-1
physical port indices 4-5
Physical Port Interface 5-5, 7-4, 8-5
Polling Count 5-4, 5-5
Polling Intervals 2-9, 2-32
Polling VeriÞcation Timer 5-5
port display forms 2-12
Port State 2-13
port status color codes 2-5
Port Type 2-13
Port-level Changes 5-8
Prevent Local Charge 5-19, 6-7
Index-4
primary DLCI 5-11
Printer Attached 8-11
Priority 4-5, 4-7, 5-17, 7-14, 7-22, 9-5, 11-5, 11-8
priority levels 5-11
Protocol Enabled 5-14
protocol support 1-2
protocol, selected for serial port 2-13
protocols 2-18
Proxy ARP 9-8
PU ConÞguration 7-7
PU LLC2 ConÞguration 7-10
public data network (PDN) 4-3
PVC Connection 9-7, 10-7
R
rate parameters 5-7
rebooting 2-34
Receive Clock from DTE 5-6, 6-6, 7-6, 8-5
Receive Not Ready (RNR) 6-10
Redirect Busy 4-4, 4-7
redirect options 4-6, 4-8
Redirect Out-of-Order 4-4, 4-7
Reject (Rej) 6-11
reject frames 2-27
Remote Subscriber ID 7-9, 7-25, 8-8
Reply Timeout 7-16
Retransmission Period 8-3
Retries in Sequence 7-16
Retry Count 7-9, 8-8
Retry Sequence Interval 7-16
Retry Sequence Repeat Count 7-17
Retry Time 7-9
Retry Timer 8-8
RFC 1356 6-1
RFC 1490 5-1
RIM Frames 7-17
Ring Voltage/Frequency 12-4
RIP 1 Compatible 9-1
RIP Age Timer 10-8
RIP Delta Updates 9-5
RIP Enabled 10-7
RIP Full Updates 9-5
RIP Max Size 10-9
RIP Support 9-7, 9-11
RIP Version 9-1
RIP Version 2 9-1
RIP/SAP Minimum Delay 10-2
RLP displays 2-2, 2-4
RLP status 2-17
Index
RLP Thresholds 2-29
RNR Limit 7-17
Round Robin 4-4
Route Metric Hops 9-4, 9-10
Router Address 10-13
Router Name 10-2
routing path 4-5
Routing Subscriber ID 7-23
Routing Table 4-5, 4-7
routing table entry 4-5
S
SAP Age Timer 10-8
SAP Enabled 10-6
SDLC Link Station ConÞguration 7-15
SDLC Port ConÞguration 7-2
SDLC Port Statistics 7-26
SDLC PU ConÞguration 7-7
SDLC PU LLC2 ConÞguration 7-10
SDLC Status 7-26
SDM 12-7
Secondary Address 9-9
Sequence Number 9-10
serial port displays 2-3
serial port status information 2-4
Serial Port Thesholds 2-30
Serialization Enabled 10-6
Service Name 10-11
Service Type 10-11
Session Type 7-20, 11-6
Set Asynchronous Balanced Mode (SABM) 6-9
Setup Packet Window Size 5-18, 6-4
Setup Timer 6-4
Severity (traps) 3-2
SIM Frames 7-17
Single User VC 8-10
slow poll list 8-4
Slow Poll Retry Count 8-4
Slow Poll Retry Frequency 8-4
SLT Timeout 12-10
SmartSwitch 1800, description 1-1
SNA port conÞguration 7-2
SNMP traps 3-1
Socket Number 10-11
Source Address 9-6, 9-10
Source DLCI 9-7, 10-7
Source MAC Address Mask 7-23
Source Port 9-7, 10-7
Source RLP 9-7, 10-7
Source Route Bridge ID 11-2
Source Subscriber 9-6, 10-5
Speed 2-15, 6-3, 12-12
Speed Dial ConÞguration 12-5
Speed Dial Digits 12-6
spmarun 2-1
Start Synchronization Characters 8-3
State 5-11
Static Routes 10-10
Statistics
LAN Card Health 2-27
RLP Health 2-24
Serial Port Health 2-26
Statistics, Voice 12-18
Status 2-17
Subscriber ID 4-1, 4-3, 4-6, 4-8
Subscriber Table 2-9, 4-3
Suppression 12-13
SVC Idle Timer 9-7, 10-5
SVC Retry Timer 9-7, 10-5
Switched Virtual Circuits 4-1
System Contact 2-16
System Description 2-16
Systematic Redirect 4-4, 4-7
system-level changes 2-34, 5-15, 7-24, 7-26
T
T1 Link Integrity Timer 5-4, 5-5
T1-LLC2 Reply Timer 7-12
T1-Reply Timer 7-21
T2 Polling VeriÞcation Timer 5-5
T2-Rcv Ack Timer 7-13
T2-Recv Ack Timer 7-21
TE Timer 12-9
technical support 1-7
Telephony Type 12-13
Thresholds 2-29
Port statistics 2-29
RLP statistics 2-29
Throughput Class Negotiation 5-19, 6-7
Ti-Inactivity Timer 7-12, 7-22
Tone Type 12-14
TPAD 8-6
TrafÞc Group 7-19
trafÞc priorities 4-5
Trailing Pad Characters 8-3
Transmit-Receive Capabilities 7-17
Transparent Text Support 8-11
Transparent Text Supported 8-4
Index-5
Index
Transport Time 10-7
trap descriptions 3-4
traps 3-1
and integration 3-1
severity levels 3-2
Tw-LPDUs Outstanding 7-22
Tw-Max Out LPDUs 7-13
U
Universal LIC 2-18
Un-numbered Acknowledgment (UA) 6-9
Unnumbered Interface 9-8
Use EBCDIC 8-4
Used Buffers 2-26
Utilities 1-4
V
Virtual LAN ID 11-2
Voice Interfaces 12-15
Voice Node Number 12-2
Voice Parameters 12-2
Voice Ports 12-8
Voice Statistics 12-18
W
Wait Timer 5-14
WAN Enabled 10-6
Watchdog SpooÞng 10-7
wildcard characters 4-3
Index-6