Download ArcSoft 3-in-1 Mini Camera Digital Camera User Manual
Transcript
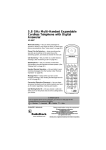
3-in-1 Mini Camera
User’s Guide
16-3868
1
GETTING STARTED
About the 3-in-1 Mini Camera
Congratulations on your purchase of the 3-in-1 Mini Camera. Your Mini Camera has been ergonomically
designed to let you quickly and easily capture quality digital images and short video clips without the trouble
and expense of buying and developing film.
With a 1.3 Mega-Pixel image sensor, you are assured of clear images that can be printed, displayed on a
web site, or sent to friends and family through e-mail. The 1.3 Mega-Pixel image sensor is capable of
capturing digital still images and streaming snapshots. Using the Picture Manager interface software, the
streaming Snapshots from your camera will automatically converted into digital video clips. You can also use
your mini camera as a PC/web camera, taking real-time images when connected to your PC with the
supplied USB cable.
The included software enables you to easily download your images and video to your PC. With Arcsoft
PhotoImpression 5 and VideoImpression 2 software you can edit your images and video with ease. For more
information on how to use Arcsoft PhotoImpression 5 and VideoImpression 2, you may visit their website at
www.Arcsoft.com .
What’s Included
Open the 3-in-1 Mini Camera package and examine the contents. Your package should contain the
following items:
•
•
•
•
•
•
3 in 1 Mini Camera
Neck Strap
USB Cable
Two Color Faceplates
Quick Start Guide
Software CD containing:
− Picture Manager (TWAIN driver)
− Arcsoft PhotoImpression5
− Arcsoft VideoImpression2
− This User’s Guide (in the CD)
− Adobe Reader 7.0
Trademark Recognition
Windows (an abbreviated term referring to the Microsoft Windows Operation System), NetMeeting, and Media Player are
registered trademarks and products of Microsoft Corporation registered in the USA and other countries. Arcsoft
PhotoImpression5 and Arcsoft VideoImpression2 are products and trademarks of Arcsoft Inc. Other corporate, product
names, or trade references are trademarks or registered trademarks of their respective companies.
2
Table of Contents
GETTING STARTED .................................................................................................................................................2
ABOUT THE 3-IN-1 MINI CAMERA .......................................................................................... 2
What’s Included ............................................................................................................ 2
CAMERA FEATURES ............................................................................................................. 4
Front View .................................................................................................................... 4
Rear View ..................................................................................................................... 4
INSTALLING A BATTERY AND CHANGING A FACEPLATE .............................................................. 5
FASTENING THE NECK STRAP ............................................................................................... 5
CAPTURING IMAGES ..............................................................................................................................................6
TURNING THE CAMERA ON AND OFF ......................................................................................
LCD INFORMATION/STATUS DISPLAY .....................................................................................
CAMERA ICONS AND DESCRIPTIONS .......................................................................................
CAPTURING DIGITAL STILL IMAGES ........................................................................................
CAPTURING STREAMING SNAPSHOTS (VIDEO CLIPS) ................................................................
DELETING IMAGES AND VIDEOS .............................................................................................
6
6
7
8
8
9
SOFTWARE INSTALLATION ..............................................................................................................................10
SYSTEM REQUIREMENTS .................................................................................................... 10
SOFTWARE OVERVIEW & FEATURES ..................................................................................... 10
Picture Manager (TWAIN) ...........................................................................................10
Arcsoft PhotoImpression5...........................................................................................10
Arcsoft VideoImpression2............................................................................................10
INSTALLING THE DIGITAL CAMERA DRIVER SOFTWARE ............................................................ 11
INSTALLING THE PHOTOIMPRESSION 5 AND VIDEOIMPRESSION 2 ............................................. 12
CONNECTING TO YOUR PC...............................................................................................................................13
CONNECTING YOUR MINI CAMERA TO YOUR PC .................................................................... 13
DOWNLOADING IMAGES AND VIDEOS TO YOUR PC ...........................................................................15
USING THE TWAINAPP TO TRANSFER IMAGES AND VIDEOS ...................................................... 15
USING PHOTOIMPRESSION 5 TO TRANSFER IMAGES ............................................................... 16
USING YOUR MINI CAMERA AS A PC/WEB CAMERA ...........................................................................17
VIEWING VIDEO CLIPS WITH WINDOWS MEDIA PLAYER .............................................................. 17
VIDEO CONFERENCING WITH NETMEETING...........................................................................................18
HOW TO USE YOUR MINI CAMERA WITH MICROSOFT NETMEETING ............................................ 18
QUICK TIPS................................................................................................................................................................19
CAPTURING IMAGES INDOORS – GENERAL TIPS ..................................................................... 19
CAPTURING IMAGES OUTDOORS – GENERAL TIPS .................................................................. 19
SPECIFICATIONS ....................................................................................................................................................20
TROUBLESHOOTING.............................................................................................................................................21
FCC DECLARATION OF CONFORMITY.................................................................................... 21
THE FCC WANTS YOU TO KNOW ......................................................................................... 22
3
Camera Features
Front View
Rear View
4
Installing a Battery and Changing a Faceplate
Your Mini Camera requires one AAA battery (not supplied) for power. For the best performance and longest
battery life, we recommend an alkaline battery. Your mini camera also comes with two additional color
faceplates for replacement.
1. Slide off the battery compartment cover.
2. If you need to replace the faceplate, insert the tip of a ballpoint pen into the hole inside the battery
compartment to push the faceplate out of the camera. Place a new faceplate over the front of the
camera then snap it into place.
Note: If you do not need to replace the faceplate for now, skip this step.
3. Insert one AAA alkaline battery, matching the polarity symbols (+ and −) marked inside.
4. Replace the battery compartment cover.
Note: If you have images stored in the camera, be sure to download them before you change the faceplate
or replace the battery to avoid losing images or video clips.
Battery Notes:
•
•
•
•
Dispose of the old battery promptly and properly.
Do not burn or bury the battery.
Use only a fresh battery of the required size and recommended type.
Battery can leak chemicals that may destroy electronic parts. If you do not plan to use the camera for
more than two weeks, remove the battery.
flashes, the camera beeps and automatically turns off. Replace the battery within 30 seconds
When
to avoid losing your images.
IMPORTANT WARNINGS:
•
Do not open the battery compartment when the camera is turned on. Doing so may result in
image loss.
•
Store your pictures before you take out batteries and be sure to download your images to your
computer. Loss of image data will occur if the battery loses power.
•
When replacing the battery, install a new one within 30 seconds to avoid losing stored images.
We recommend you download images within 24 hours.
Fastening the Neck Strap
Squeeze the two release tabs to separate the fastener from the neck strap. Thread the fastener’s small loop
through the hole on the camera, and use a clip to pick the small loop out of the hole. Then, slip the fastener
through the small loop. Pull the small loop to tighten it and then connect the fastener to the end of neck strap.
5
CAPTURING IMAGES
Turning the Camera On and Off
To turn on the camera, hold down the Power/Mode button until on displays briefly. The camera beeps once,
and then 000 appears. To turn off the camera, hold down the Power/Mode button again.
Note: Your Mini Camera automatically turns off after 60 seconds of inactivity.
LCD Information/Status Display
The following icons are used in the Information/Status LCD display to present mode and setting options.
Note: When scrolling through the modes, an icon blinks when it is selected.
6
Camera Icons and Descriptions
To select your desired setting, press the Power/Mode button to scroll through the different modes. The
icons will display in the status LCD. Press the Shutter button to select a function while it is displayed. The
camera is now ready to capture an image or streaming snapshots according to your selected preferences.
Note: If you do not press any button within five seconds, the LCD screen automatically returns to
the operational mode screen – ready to capture an image.
Icon
Description
Number of images and videos captured
HI
High Resolution mode (HI and two-stars)
1280 x 1008 pixels for still images
LO
LOW Resolution mode (LO and one-star)
640 x 480 pixels for still images
Indoor mode to capture images indoors, or in darker environments
Outdoor mode to capture images outside
Streaming Snapshot mode for capturing Video Clips
The Movie Icon with one-star indicates 320 x 240 video resolutions.
The Movie Icon and no-star indicates 160 x 120 video resolutions.
ERASE ALL - to erase ALL images and videos saved in the camera
ERASE LST - to erase the LAST image saved in the camera
Full Battery Level indicator
Low battery indicator
Displays when the camera is connected to a computer
Displays the camera’s memory size is full
7
Capturing Digital Still Images
Note: Be sure the camera has enough battery power before taking pictures. Observe the battery power
indicator and replace the battery when its power is low.
1. Hold down the Power/Mode button until on displays briefly. The camera beeps once and the function
screen displays.
Default
Setting
(No images, indoor light, full battery, highest resolution)
2. Repeatedly press the Power/Mode button until the desired resolution setting displays, and then press the
Shutter button to confirm the setting. The main screen displays.
HI and
LO and
Select the 1280 x 1008 pixel resolution for the best image quality.
Select the 640 x 480 pixel resolution for fair image quality, but you can capture
more images using the built-in memory.
3. Repeatedly press the Power/Mode button until the desired indoor or outdoor setting displays, and then
press the Shutter button to confirm the setting. The main screen displays.
Indoor: Use when inside a building or the ambient light is low.
Outdoor: Use when capturing images outdoors.
4. Look through the viewfinder and focus on the image you want to capture. Hold the camera still and press
the Shutter button to take a picture. A short beep sounds when a picture is taken. The photo number in
the photo counter increases.
Capturing Streaming Snapshots (Video Clips)
1. Hold down the Power/Mode button to turn on the camera.
2. Repeatedly press the Power/Mode button to select the desired streaming snapshot mode. Then, press
the Shutter button. The function screen displays.
3. Repeatedly press the Power/Mode button to select the desired movie resolution setting. Then, press the
Shutter button to confirm the setting. The function screen displays.
320 x 240
[No Icon]
160 x 120
4. Repeatedly press the Power/Mode button to select the indoor or outdoor setting, and then press the
Shutter button.
Indoor: Use when inside a building or when the ambient light is low.
Outdoor: Use when outdoors.
5. Look through the viewfinder and hold down the Shutter button to capture streaming snapshots. You will
hear continuous beeps as the images are recorded. When you finish, release the Shutter button. The
digit on the display counter advances.
8
Deleting Images and Videos
The Delete function allows you delete images or video clips saved in the internal memory of your mini
camera.
Repeatedly press the Power/Mode button until the desired Delete mode displays.
Delete ALL images and Videos:
To delete all images and video clips, hold down the Shutter button until you hear 2 beeps.
Delete the LAST image or video capture:
To delete the last image or video clip, hold down the Shutter button until you hear 2 beeps.
9
SOFTWARE INSTALLATION
System Requirements
Windows
•
•
•
•
•
•
Windows 98, 98SE, ME, 2000, or XP
200 MHz Pentium or better
64MB RAM
310MB available Hard Drive space
CD-ROM
USB Port
Software Overview & Features
The supplied CD includes the following software and applications to enhance your digital imaging
experience. The Picture Manager (TWAIN) software helps you download the images and video from your
digital camera to your computer. The Arcsoft PhotoImpression 5 and Arcsoft VideoImpression 2 are photo
and video editing applications.
Picture Manager (TWAIN)
The Picture Manager works with TWAIN-compliant third-party software. The Picture Manager allows you to
quickly view, edit the images (e.g., crop, rotate, flip), and save them to your computer.
Arcsoft PhotoImpression5
•
•
•
Acquire, organize, view, browse and share photos fast
Provides powerful tools for photo editing and enhancing
Create slideshows with music, calendars and greeting cards
Arcsoft VideoImpression2
•
•
•
•
Create 360° and Wide-angle panoramas in just 3 steps
Helpful Wizard simplifies project setup
Automated warping, aligning, and blending deliver great results fast
Directly output to e-mail, the Web, office documents, screen savers and printers
10
Installing the Digital Camera Driver Software
Note: (For Windows 98SE users ONLY!)
You may encounter a message during software installation due to an old version of DirectX
installed on your computer. Select “No” and continue with the installation. This will not affect
the operation of your computer.
1. Insert the DIGITAL CAMERA software CD into your CD-ROM drive. The CD runs automatically, and the
DIGITAL CAMERA installation menu displays. Click “Digital Camera Driver”.
Note: If the CD does not run automatically, click “Start”, “Run”, then type “D:\autorun.exe” in the Run
Dialog text box (where D:\ is your CD-ROM drive).
2. “Start InstallShield Wizard” displays briefly. Then, the following screen displays. Click “Install” to start the
installation.
3. The installation begins and the setup status displays.
11
4. When the installation is complete, click “Finish”.
Installing the PhotoImpression 5 and VideoImpression 2
Note: For more information about PhotoImpression 5 and VideoImpression 5, please visit
the Arcsoft Web site at www.Arcsoft.com
1. Go to the “Digital Camera” screen and click on “ArcSoft Software Suite”.
2. Follow the on-screen instructions to complete installing the ArcSoft sofware.
12
CONNECTING TO YOUR PC
Connecting Your Mini Camera to Your PC
Note: Before you connect your mini camera to your PC, you must have installed the TWAIN driver.
1. Hold down the Power/Mode button to turn off the camera.
2. Lift up the USB port cover.
3. Plug the smaller connector of the USB cable into your camera’s USB port.
4. Plug the larger connector of the USB cable to your computer’s USB port.
Note: Windows will prompt you to install hardware drivers the first time you connect your
mini camera to your PC after installing the software. Insert the supplied CD ROM into your
CD ROM drive and follow the on-screen instructions. If you subsequently connect the
camera to a different USB port on your PC, it may go through the hardware installation
routine once again.
5. Your PC now detects the camera.
The camera displays
in the LCD to indicate it is connected to your computer.
6. Follow the on-screen instructions to complete installing the hardware drivers (video and still).
7. Click “Finish”.
8. Click “Yes” to restart the computer.
13
To Windows XP users only:
When the camera is connected to your PC for the first time, the computer will recognize the new device and
display a “Found New Hardware” message. You must wait while the computer identifies your camera. If you
have already installed the software, the information window will display the name of the device connected. If
you have not installed the software, disconnect the camera from your computer and follow the directions
under “Installing the Digital Camera Driver Software”.
●
●
The Found New Hardware Wizard will begin automatically. Make sure “Install the software
automatically” is selected, and click Next.
Windows will begin to search for the necessary drivers on your system. These were installed with the
software. When your computer locates the drivers, it may display the following message:
Windows XP only:
●
Click Continue Anyway. Your camera has been thoroughly tested and will work with your system.
14
DOWNLOADING IMAGES AND VIDEOS TO YOUR PC
Using the TwainApp to Transfer Images and Videos
Note: Before you connect the camera to your PC, you must install the TWAIN driver.
1. Click Start, Program, and Mega Pixel Camera (8105 SXGA), and then TwainApp.
2. Click on “Get DSC” to browse the pictures in the camera.
3. Click on “Download” to download the pictures.
4. When you complete downloading, click on “Transfer All” and then select a path to store the pictures. You
can save pictures in either bitmap or jpg format. Saving pictures in an jpg format occupies less memory
capacities than saving pictures in a bitmap format.
15
Using PhotoImpression 5 to Transfer Images
Follow the instructions below to transfer the pictures using PhotoImpression 5.
1. Launch PhotoImpression 5 application: Start → Programs → Arcsoft Software Suite →
PhotoImpression 5
2. Select “Camera/Scanner” and then click “Mega Pixel Camera (8105 SXGA)”. Then the TwainApp will be
called out for you to transfer images and videos.
3. The Picture Manager allows you to view each individual image saved on your camera. You can use the
arrow keys to scroll to the previous or the next picture. Click on the “Transfer” button to download the
images to your computer.
Notes: 1. Turn off the camera before you remove the battery.
2. Download your images before removing the battery and faceplate.
16
USING YOUR MINI CAMERA AS A PC/WEB CAMERA
You also can use your mini camera as a PC/Web camera.
Use the supplied USB cable to connect your mini camera to your PC. The camera turns on automatically.
Then, place your mini camera on the top of your monitor or any level surface at a higher position to let the
camera lens face the computer user.
Viewing Video Clips with Windows Media Player
If your computer is equipped with Windows Media Player (Windows 2000, ME and XP), you can use the
Windows Media Player to view your video by double clicking on the video clip.
Note: If you need to install the latest version of Windows Media Player, you can download
Media Player free of charge from Microsoft Web site at:
http://www.microsoft.com/windows/windowsmedia/download/default.asp
For questions regarding Windows Media Player, please contact Microsoft Media Player help.
17
V I D E O C ONF E R E NC I NG W I T H NE T M E E T I NG
How to Use your mini camera with Microsoft NetMeeting
Your Mini Camera can be used with Microsoft NetMeeting. Follow these instructions:
1.
Connect your mini camera to your computer using the USB cable. The camera turns on
automatically.
2.
Go to Start > Programs > Accessories > Communications > NetMeeting to launch NetMeeting.
3.
When the NetMeeting screen displays, click the Tools menu, select Video and click “Send”. A
video window opens (My Video). You can start and stop sending video using the controls on this
window.
Note: For more information on using NetMeeting and to download the latest version, browse
the Microsoft Web site at http://www.microsoft.com/windows/netmeeting/
You can also use your mini camera as a video conferencing camera with popular Instant Messengers,
such as Microsoft MSN with NetMeeting, Yahoo! Messenger, and AOL Instant Messenger (AIM). For
details on how to use individual instant messaging programs, please contact the service provider directly.
18
QUI C K T I P S
Capturing Images Indoors – General Tips
•
•
•
•
•
•
•
•
•
Try to capture images in an area full of colors and patterns. If taking a picture of a person, make
sure the clothing does not have a high contrast to the background (e.g. white shirt against black
background).
Depending on the subject and the indoor conditions, it is generally better to have the light source at
an angle (e.g. 45 degrees) from the subject instead of directly in front of or directly behind the
subject.
Avoid an area where a wall is the main portion of the image.
Avoid light sources positioned directly behind or directly in front of your subject.
Normally indoor lighting is diffused. Therefore, avoid bright light sources when taking a picture. A
large variation in the lighting of a scene (e.g. shaded hallway and bright entryway) can cause
improper exposure.
Don’t shoot directly towards light or the sun.
Try to avoid any mixture of different lighting, such half sunlight and half-fluorescent light.
Images of a computer screen may include lines and artifacts.
Avoid an object in the image that could reflect light or one that is close to the person taking the
image (e.g. glass bottle, white shirt, glasses, etc.).
Capturing Images Outdoors – General Tips
•
•
•
•
•
Try to capture images in an outdoor setting full of colors and patterns.
It is better to have the subject facing the sunlight instead of having their back facing the sunlight.
Try to position your subject close to the center of the image.
Avoid taking an image on a shiny surface or reflective area in the image (e.g. glass, metal).
Do not capture images of high-contrast with both shaded and sun-lit areas together. While your mini
camera does adjust for this, it is unable to adjust for vast differences in lighting as compared to the
human eye.
19
SPECIFICATIONS
Specifications are typical; individual units might vary. Specifications are subject to change and improvement
without notice. Individual units may vary.
Image Sensor
1.3M Pixels (1280x1024) CMOS Sensor
Lens Specification
F 2.8, f = 8.79 mm (43mm Equivalent to 35mm Film)
Focusing
Fixed Focus 0.9m ~ infinity
Shutter
1/15~1/1500 sec. (Electronic Shutter) Auto Control
Viewfinder
Virtual Type: Optical, Magnification 0.32 or Higher, Coverage: 80% or
Higher
White Balance
Auto
Exposure Control
Auto
Storage
Built-in 8MB SDRAM
Storage Capacity(8MB)
2 stars: 1280 x 1008 Pixels 16 Pictures
1 star:
640 x 480 Pixels 64 Pictures
Video Clip: 320 x 240 Pixels 30 Seconds
PC Camera Mode
10~12fps @ 640 x 480; 25~30fps@320 x 240 via USB Stream to PC
Output File Format
JPEG File (Still), AVI File (Video)
Display
Black and White Status LCD
PC Interface
USB 1.1 (Mini-USB Connection Direct to PC)
Power
AAA 1.5V Alkaline Battery x 1 (Not Supplied)
Battery Life
Approximately 100 Pictures at Fine Mode﹐400 Pictures at Basic Mode
Auto Power Saving
System Auto Power Off: 60 sec.
Dimension (HWD)
2 1/16” x 2 3/16” x 7/8” (53 x 56 x 21mm)
Weight
1.18 oz (33.5 g) (Without Battery)
System Compatibility
Microsoft Windows 98/ 98SE / 2000 / ME / XP
System Requirements
200 MHz Pentium or better, 64MB RAM, 310MB Available Hard Drive
Space, USB Port & CD-Rom Drive
Bundled Software
Arcsoft PhotoImpression 5, Arcsoft VideoImpression 2, Camera Driver
Drivers
TWAIN
Certifications
FCC/CE
Accessories
Quick Start Guide, USB Cable, Neck Strap
CD-ROM including Driver and Photo Editing Software
20
TROUBLESHOOTING
Problem
Possible cause
Solution
The camera has no
power.
The battery is depleted.
Replace the battery with a new one.
The battery is inserted
incorrectly.
Check the battery’s polarity orientation.
Is the camera connected to a
computer?
The camera’s buttons do not work when the
camera connects to a PC. Disconnect the
camera.
Is the camera turned on?
The camera turns off automatically after
approximately one minute. Make sure the
camera’s power is turned on before taking an
image.
Is the camera connected to a
computer?
The camera’s buttons do not work when the
camera connects to a PC. Disconnect the
camera.
The camera won’t
capture an image.
Use the TWAIN driver utility to capture an image
while connected to a PC.
The images are
blurry.
The camera or subject was
moving when the image was
captured.
Hold the camera steadily to capture images. The
minimum focus distance is about two feet.
Objects closer than 2 feet will not be in focus.
The image is too
light.
You are facing a bright light
when taking the image.
Change the angle of the image so the bright lights
do not shine directly towards the camera lens.
FCC Declaration of Conformity
This device complies with part 15 of the FCC rules. Operation is subject to the following conditions: (1) this
device may not cause harmful interference. (2) this device must accept any interference received, including
interference that may cause undesired operation.
PRODUCT:
3-IN-1 Camera
MODEL:
16-3868
RESPONSIBLE PARTY:
RadioShack
300 RadioShack Circle
Fort Worth, TX 76102 USA
PHONE:
817-415-3200
21
The FCC Wants You to Know
This equipment has been tested and found to comply with the limits for a Class B digital device, pursuant to
Part 15 of the FCC Rules. These limits are designed to provide reasonable protection against harmful
interference in a residential installation. This equipment generates, uses and can radiate radio frequency
energy and, if not installed and used in accordance with the instructions, may cause harmful interference to
radio communications. However, there is no guarantee that interference will not occur in a particular
installation. If this equipment does cause harmful interference to radio or television reception, which can be
determined by turning the equipment off and on, the user is encouraged to try to correct the interference by
one or more of the following measures:
• Reorient or relocate the receiving antenna.
• Increase separation between the equipment and receiver.
• Connect the equipment into an outlet on a circuit different from that to which the receiver is connected.
• Consult your local RadioShack store or an experienced radio/TV technician for help.
If you cannot eliminate the interference, the FCC requires that you stop using your camera. Changes or
modifications not expressly approved by RadioShack may cause interference and void the user’s authority to
operate the equipment.
Limited 90-day Warranty
This product is warranted by RadioShack against
manufacturing defects in material and workmanship under
normal use for ninety (90) days from the date of purchase
from RadioShack company-owned stores and authorized
RadioShack franchisees and dealers. For complete warranty
details and exclusions, check with your local RadioShack
store.
300 RadioShack Circle,
Fort Worth, TX 76102
04/05
16-3868
07A05
Printed in China
22


