1
To fit another unit:
Stacking the Units Together
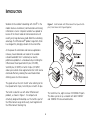
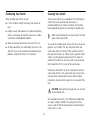
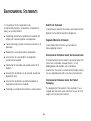
1 Rest the second unit on top of the clip and align it with
the front of the unit below.
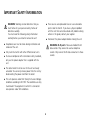
The Rubber Feet
2 Press down gently on the unit to secure it onto the clip,
The four self-adhesive rubber feet prevent your switch from
moving around on your desk. Only stick the feet to the
marked areas at each corner of the underside of your switch
if you intend to place the unit directly on top of the desk.
Do not fix the feet if you are going to use the clip.
ensuring the fastening pieces fit into the slots on the unit
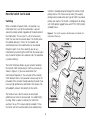
below, as shown in Figure 3 (picture 2).
Figure 3
Stacking Your Units Together
1
The Stacking Clip
Fastening
Piece
2
Fastening
Piece
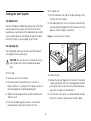
The stacking clip allows you to stack your OfficeConnect
units together neatly and securely.
CAUTION: You can stack up to a maximum of four
units. Smaller units must be stacked above larger
units.
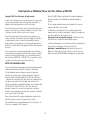
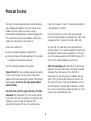
To fit the clip:
To remove the clip:
1 Place your unit on a flat surface.
1 Remove the top unit together with the clip. If you hook
2 Fit the clip across the top of the unit, as shown in
a finger around one of the the fastening pieces and then
pull it gently from out of the slot, the clip should come
away with the upper unit attached to it.
Figure 3 (picture 1), ensuring that the longer sections of
the fastening pieces are pointing downwards.
3 Align the fastening pieces over the slots found on each
2 Push the clip in the center, so it bends towards the base
side of the unit.
of the unit, and then separate once the clip is loose.
4 Push the clip down gently to secure it, ensuring the
fastening pieces snap into the slots on the unit.
11