1
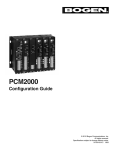
PCM2000
Configuration Guide
SYS-ID SWITCH SETTINGS CHART FOR ADDITIONAL SATELLITE SYSTEMS
Contents
Note 2 - This single-digit indicates VOX delay time in seconds, i.e., "1" = 1 second, "2" = 2 seconds, etc. Entering "0" will inhibit VOX
timer operation.
Note 3 - Entering the Feature Code without additional time data will enable feature using previously programmed time data.
Zone #’s
S1
S2
S3
S4
1-9
0
0
0
0
1
10-18
1
0
0
0
2
19-27
0
1
0
0
3
28-36
1
1
0
0
4
37-45
0
0
1
0
5
46-54
1
0
1
0
6
55-63
0
1
1
0
7
64-72
1
1
1
0
Master
Satellite
APPENDIX
Module Assembly
Align polarizing tab in slot
Align connectors
so locking ridge
faces header wall.
LOCKING
TAB
LOCKING
TAB
LOCKING
SLOT
ALIGN
CONNECTORS
SO LOCKING
RIDGE FACES
HEADER WALL
6-pin Connector
ALIGN
POLARIZING
TAB IN SLOT
SCREW
CLAMP
TAB &
SLOT
LOCKING
TAB
LOCKING
SLOT
Completed Assembly
Ribbon Cable Connector
SECTION I - APPLICATON CONFIGURATIONS....................................................................................................................................................4-33
Configuration 1. Page Port Contact Closure - 3-Zone - One-Way Paging - Single Amplifier - 25/70V AC Speakers
Setup Drawing................................................................................................................................................................................................................................4
Description ......................................................................................................................................................................................................................................5
Configuration 2. Page Port VOX Circuit - 3-Zone - One-Way Paging - Single Amplifier - 25/70V AC Speakers
Setup Drawing................................................................................................................................................................................................................................6
Description ......................................................................................................................................................................................................................................7
Configuration 3. Loop Start Trunk - 3-Zone - One-Way Paging - Single Amplifier - 25/70V AC Speakers
Setup Drawing................................................................................................................................................................................................................................8
Description ......................................................................................................................................................................................................................................9
Configuration 4. Ground Start Trunk - 3-Zone - One-Way Paging - Single Amplifier - 25/70V AC Speakers
Setup Drawing................................................................................................................................................................................................................................10
Description ......................................................................................................................................................................................................................................11
Configuration 5. Station Level/Centrex - 3-Zone - One-Way Paging - Single Amplifier - 25/70V AC Speakers
Setup Drawing................................................................................................................................................................................................................................12
Description ......................................................................................................................................................................................................................................13
Configuration 6. Extended Paging System
Setup Drawing................................................................................................................................................................................................................................14
Description ......................................................................................................................................................................................................................................15
Configuration 7. Two-Way Talk Back Paging System
Setup Drawing................................................................................................................................................................................................................................16
Description ......................................................................................................................................................................................................................................17
Configuration 8. Two-Way Talk Back Extended Paging System
Setup Drawing................................................................................................................................................................................................................................18
Description ......................................................................................................................................................................................................................................19
Configuration 9. 3-Zone - One-Way Paging - Low-Power System - Dedicated Amplifiers or Self-Amplified Speakers
Setup Drawing................................................................................................................................................................................................................................20
Description ......................................................................................................................................................................................................................................21
Configuration 10. 6 Zones - One-Way Paging - Mixed High- and Low-Power Zones - 25/70V AC or Self-Amplified Speakers
Setup Drawing................................................................................................................................................................................................................................22
Description ......................................................................................................................................................................................................................................23
Configuration 11. Microphone Override
Setup Drawing................................................................................................................................................................................................................................24
Description ......................................................................................................................................................................................................................................25
Configuration 12. DFT120 & TAMB Wiring Diagram - Loop Start Trunk, Ground Start Trunk, or Station Level
Setup Drawing................................................................................................................................................................................................................................26
Description ......................................................................................................................................................................................................................................27
Configuration 13. Emergency Voice Announcement Override
Setup Drawing................................................................................................................................................................................................................................28
Description ......................................................................................................................................................................................................................................29
Configuration 15. Single Amplifier Background Music Line-Level Signal
Setup Drawing................................................................................................................................................................................................................................32
Description ......................................................................................................................................................................................................................................32
Configuration 16. Relay Driver Output
Setup Drawing................................................................................................................................................................................................................................33
Description ......................................................................................................................................................................................................................................33
SECTION II - Programming......................................................................................................................................................................................................34-38
M
PC
M
ZP
..
..........
.... ....
.............. ..............
...................... ......
................
................
..........
.... .
..
M
PC
TIM
M
PC
U
CP
M
PC
M
TB
System Programming ................................................................................................................................................................................................34
Feature Codes and Defaults Chart ........................................................................................................................................................................35-37
SYS-ID Switch Settings Chart for Additional Satellite Systems ......................................................................................................................38
APPENDIX
Module Assembly Illustrations ................................................................................................................................................................................38
S/N
MAD
E IN
KOR
EA
54-5019-02R2 Updated
Printed in U.S.A. 0107
38
3
SECTION I: APPLICATION CONFIGURATIONS
RD B
RD C
RD A
-
RD COM
ZONE A
+
ZONE C
ZONE B
-
-
+
ZONE A
+
IN
RT
LOCAL
BGM
OUTPUT
HI PWR
LO PWR
GLOBL BGM
ZONE C
ZONE B
BOGEN
0
COM
NC
NO
RLY
TWO
RLY
ONE
COM
NC
BGM
SRC
IN
RT
OVER
RIDE
TEL
LINE
NIGHT
RING
BGM SRC
VOLUME
TONE
VOLUME
S1
S2
S3
S4
S5
S6
S7
POWER
TEL
INT
SEL
PCM
CPU
+
-
- 1.5A
GND ST
PCM PS2
+ 12VDC
NO
GND
AUX
GND
EM/SC
HPBGM
RT
IN
RT
OUT
PA
LPBGM
IN
RT
IN
RT
PA
+
12 VDC
1.5A
DATA
LINK
RUN
PROGRAM
1
S1
S2
S3
S4
POWER
SYS
ID
-
PCM
ZPM
BGM
OUT
IN
ZONE A
LPBGM
VOLUME
OFF
ON
TALKBACK
POWER
ZONE A
ZONE B
ZONE C
ZONE C
ZONE B
SETUP FOR CONFIGURATION 1: PAGE PORT CONTACT CLOSURE - 3-ZONE - ONE-WAY PAGING - SINGLE AMPLIFIER - 25/70V AC SPEAKERS
Time Trigger 6
Zone Group
Inhibit
Enable
2-Second Tone
3-Second Tone
4-Second Tone
5-Second Tone
6-Second Tone
7-Second Tone
8-Second Tone
Chime
Time Trigger 7
Zone Group
Inhibit
Enable
2-Second Tone
3-Second Tone
4-Second Tone
5-Second Tone
6-Second Tone
7-Second Tone
8-Second Tone
Chime
Time Trigger 8
Zone Group
Inhibit
Enable
2-Second Tone
3-Second Tone
4-Second Tone
5-Second Tone
6-Second Tone
7-Second Tone
8-Second Tone
Chime
Reset Default
Setup Tone (in Program
Turn On
Turn Off
*86
160
161
162
163
164
165
166
167
168
169
*87
170
171
172
173
174
175
176
177
178
179
*88
180
181
182
183
184
185
186
187
188
189
999
Mode Only)
000
Hang Up
Zone Numbers
HHMM
No Zones
Inhibit
(See Note 3 - below)
3-Second Tone
Zone Numbers
HHMM
No Zones
Inhibit
(See Note 3 - below)
3-Second Tone
Zone Numbers
HHMM
No Zones
Inhibit
(See Note 3 - below)
3-Second Tone
Notes to Feature Codes
PCM
TIM
0
1
Note 1- These 2 digits represent time in 10s of seconds, i.e., "01" = 10 seconds, "02" = 20 seconds, "03" = 30 seconds, etc. Entering "00" will
inhibit timer operation
Note 2 - This single-digit indicates VOX delay time in seconds, i.e., "1" = 1 second, "2" = 2 seconds, etc. Entering "0" will inhibit VOX timer
operation.
R
COM
CONTACT
CLOSURE
70V
BOGEN PAGING
AMPLIFIER
1 - Not used
2 - Contact Closure
3 - Dry audio (R)
4 - Dry audio (T)
5 - Contact Closure
6 - Not used
R
PBX
PAGING
PORT
S7
1
0
S6
S5
S4
S3
S2
S1
TEL
INT
SEL
T
T
Note 3 - Entering the Feature Code without additional time data will enable feature using previously programmed time data.
4
37
Clock Set
Clock Sync.
Inhibit
Enable
Time Trigger 1
Zone Group
Inhibit
Enable
2-Second Tone
3-Second Tone
4-Second Tone
5-Second Tone
6-Second Tone
7-Second Tone
8-Second Tone
Chime
Time Trigger 2
Zone Group
Inhibit
Enable
2-Second Tone
3-Second Tone
4-Second Tone
5-Second Tone
6-Second Tone
7-Second Tone
8-Second Tone
Chime
Time Trigger 3
Zone Group
Inhibit
Enable
2-Second Tone
3-Second Tone
4-Second Tone
5-Second Tone
6-Second Tone
7-Second Tone
8-Second Tone
Chime
Time Trigger 4
Zone Group
Inhibit
Enable
2-Second Tone
3-Second Tone
4-Second Tone
5-Second Tone
6-Second Tone
7-Second Tone
8-Second Tone
Time Trigger 5
Zone Group
Inhibit
Enable
2-Second Tone
3-Second Tone
4-Second Tone
5-Second Tone
6-Second Tone
7-Second Tone
8-Second Tone
Chime
060
067
068
069
HHMM
HHMM
*81
110
111
112
113
114
115
116
117
118
119
Zone Numbers
*82
120
121
122
123
124
125
126
127
128
129
Zone Numbers
*83
130
131
132
133
134
135
136
137
138
139
*84
140
141
142
143
144
145
146
147
148
*85
150
151
152
153
154
155
156
157
158
159
HHMM
00:00
(See Note 3 - p. 37)
Inhibit
No Zones
Inhibit
(See Note 3 - p. 37)
3-Second Tone
CONFIGURATION 1:
PAGE PORT CONTACT CLOSURE - 3-ZONE - ONE-WAY PAGING - SINGLE AMPLIFIER - 25/70V AC SPEAKERS
In this configuration, the PCM unit responds to a contact closure on pins 2 & 5 of the TEL LINE jack on the PCMTIM module shorting the
+5V source to its ground.When the closure is removed, the page ends. Audio is provided to the system through a separate pair of leads on
pins 3 & 4 of the TEL LINE jack on the PCMTIM module. Pins 1 & 6 are not used in this configuration.
Note:The audio pair (page port) must pass DTMF in order to select a zone.
The required setup includes PCMTIM - PCMCPU - PCMZPM - PCMPS2. Modules must be assembled, from left to right, in this order.
INSTALLATION:
STEP 1: Assembling Modules PCMTIM to PCMCPU and to PCMZPM (see Illustration on page 38)
•
•
•
•
HHMM
No Zones
Inhibit
(See Note 3 - p. 37)
3-Second Tone
•
•
Plug the 6-pin power connector from the PCMCPU module to the PCMTIM module jack (J2). Be sure that the locking ridge faces header wall. (Green wire to the top.)
Plug the 26-pin ribbon cable from the PCMCPU module to the PCMTIM module 26-pin connector (J1). Be sure to align the polarizing
tab in slot. (Pin 1 red stripe to the top.)
Place the modules together and dress the connector cables away from the sheet metal so they will not get pinched.
Push the two units together while aligning the locking tabs in the PCMTIM module to the locking slots in the PCMCPU module. Slide
the two units until the faces of both units are even.
Secure the two units together by tightening a screw into the screw clamp tab in the back of the PCMTIM.
Follow the same steps to add the PCMZPM module.
Note: Do NOT connect the PCMPS2 (power supply) at this point.
STEP 2: Connecting Paging Port/Contact Closure from the Telephone System to the PCMTIM Module
•
•
Take the page port audio pair from the telephone system and wire it to the RJ11 TEL-LINE jack to pins 3 & 4 (red and green); and the
contact closure pair to pins 2 & 5 (black and yellow).
Use a 4- or 6-pin modular cord to connect the RJ11 to the TEL-LINE input on the PCMTIM module.
STEP 3: Switch Settings
•
Zone Numbers
HHMM
No Zones
Inhibit
(See Note 3 - p. 37)
3-Second Tone
•
•
•
•
STEP 4: Testing your System
•
•
•
•
•
Zone Numbers
HHMM
No Zones
Inhibit
(See Note 3 - p. 37)
3-Second Tone
Set the TEL-INT-SEL DIP switches on the PCMTIM module for Page Port Contact Closure configuration: switches 2, 3 & 7 ON (to the
right) and switches 1, 4, 5 & 6 OFF (to the left).
Set the SYS-ID DIP switches on the PCMCPU module to the OFF position (to the left).
Set the RUN-PROGRAM switch on the PCMCPU module to the RUN mode (up).
Set the Talk Back DIP switches on the PCMZPM module to the OFF position (to the left) for all zones.
Set the OUTPUT switch on the PCMZPM module to the HI-PWR position (down).
Connect power supply PCMPS2 to the PCMCPU module to either the power jack 12V DC input or wire it to the 12V DC screw terminals observing polarity.
At this point all the power LEDs should be lit on each module.
Access the page port from the phone system and verify access tones (double beep) in handset.
At this point, the system should be functioning properly.
Disconnect Power Supply.
STEP 5: Connecting the Paging Amplifier
•
•
Locate the terminals on the PCMCPU module labeled PA IN/RT and wire to the TIP and Ring (T & R) input on the Bogen paging amplifier (either TPU-Series, GS-Series or Classic Series.)
Locate the terminals on the PCMCPU module labeled PA OUT/RT and wire to COMMON and either the 25 or 70V output on the
paging amplifier.
STEP 6: Connecting 25/70V AC Speakers
•
•
Zone Numbers
HHMM
No Zones
Inhibit
(See Note 3 - p. 37)
3-Second Tone
STEP 7: Testing your System
•
•
•
•
•
•
•
36
Locate the terminals on the PCMZPM module labeled ZONE A.These terminals have two connections marked + and -.Wire your
speakers for ZONE ONE to these terminals. Observe polarity (-) to common (+) to selected tap setting.
Follow the same procedure for the terminals labeled ZONE B for ZONE TWO, and the terminals labeled ZONE C for ZONE THREE.
Connect the power supply PCMPS2 to the PCMCPU module to either the power jack 12V DC input or wire it to the 12V DC screw
terminals, observing polarity.
Connect the Bogen amplifier to the AC power outlet (120V AC, 60Hz).
Set the volume on your Bogen amplifier to a 1/2 turn.
Access the paging from the telephone system and listen (on the handset) for the confirmation tone (double beep).
Dial 01 to access ZONE ONE and listen (on the handset and also to the speakers) for a pre-announce tone (single beep) followed by
your page (audio).
Follow the same steps for ZONES TWO (02) and THREE (03).
Set the Bogen amplifier to the desired volume level.
5
FEATURE CODES AND DEFAULTS
SETUP FOR CONFIGURATION 2: PAGE PORT VOX CIRCUIT - 3-ZONE - ONE-WAY PAGING - SINGLE AMPLIFIER - 25/70V AC SPEAKERS
RD COM
RD B
RD C
RD A
-
+
-
-
+
ZONE C
ZONE B
ZONE A
ZONE B
ZONE A
+
IN
RT
LOCAL
BGM
OUTPUT
HI PWR
LO PWR
GLOBL BGM
ZONE C
ZONE B
BOGEN
0
PCM
CPU
+
Privacy Beep
Inhibit
Enable
Pre-announce Tone
Inhibit
Beep
Chime
Confirmation Tone
Inhibit
Enable
Emergency O/R Tone
Inhibit
Enable
All-Call
Inhibit
Enable
Dialing Time-out
Inhibit
Enable
Trunk Disconnect
Inhibit
Enable
1 Amp BGM
Inhibit
Enable
Default Timer
VOX Timer
Zone Group
GND ST
NO
COM
NC
NO
RLY
TWO
RLY
ONE
COM
NC
BGM
SRC
IN
RT
OVER
RIDE
TEL
LINE
NIGHT
RING
BGM SRC
VOLUME
TONE
VOLUME
R
COM
70V
BOGEN PAGING
AMPLIFIER
1 - Not used
2 - Not used
3 - Dry audio (R)
4 - Dry audio (T)
5 - Not used
6 - Not used
R
PBX
PAGING
PORT
VOX
S7
1
Zone Group
No Tone
Follow Contact
2-Second Tone
3-Second Tone
4-Second Tone
5-Second Tone
6-Second Tone
7-Second Tone
Chime
Quad Beep
Night Ring
Zone Group
No Tone
Simulated Ring
Chime
Code Call
Zone Group
Inhibit
Pattern
Echo
1 Play
1 Repeat
2 Repeat
Additional Data
6
Default
006
007
Enable
003
004
005
Chime
001
002
Inhibit
008
009
Inhibit
010
011
Enable
012
013
Enable
014
015
Inhibit
018
019
050
051
*01
Inhibit
00-99
0-9
Zones Numbers
"
"
"
"
03 (See Note 1 - p. 37)
6 (See Note 2 - p. 37)
No Zones
*92
020
021
022
023
024
025
026
027
028
029
Zone Numbers
All-Call
*93
030
031
032
Zone Numbers
*94
040
041
042
043
044
045
Zone Numbers
*32
3-Second Tone
All-Call
Ring
All-Call
Inhibit
1 Play
0
S6
S5
S4
S3
S2
TEL
INT
SEL
T
T
PCM
TIM
0
1
S1
S2
S3
S4
S5
S6
S7
POWER
TEL
INT
SEL
EM/SC
S1
Feature Code
-
PCM PS2
- 1.5A
+ 12VDC
GND
AUX
GND
EM/SC
HPBGM
RT
RT
IN
OUT
PA
LPBGM
IN
RT
IN
RT
PA
+
12 VDC
1.5A
DATA
LINK
RUN
PROGRAM
1
S1
S2
S3
S4
POWER
SYS
ID
-
PCM
ZPM
BGM
OUT
IN
ZONE A
LPBGM
VOLUME
OFF
ON
TALKBACK
POWER
ZONE A
ZONE B
ZONE C
ZONE C
Feature
35
SECTION II - PROGRAMMING
SYSTEM PROGRAMMING
CONFIGURATION 2:
PAGE PORT VOX CIRCUIT - 3-ZONE - ONE-WAY PAGING - SINGLE AMPLIFIER - 25/70V AC SPEAKERS
System programming lets you set certain PCM options and tone features using the DTMF keys of a telephone. It also lets you program paging zone groups and signaling zone groups.
This configuration is for Page Ports without Contact Closures. A dry audio pair connected to pins 3 & 4 of the TEL LINE jack on the
PCMTIM module is used to detect audio and activate the system. Paging ends when the VOX timer or default timer times out. Pins 1, 2, 5 &
6 are not used in this configuration.
All programming is accomplished through the TEL LINE jack on the PCMTIM module regardless of the telephone interface used.
Note:The audio pair (page port) must pass DTMF in order to select a zone.
Note:To simplify initial programming, it is recommended that you use the Loop Start Trunk configuration with a single-line
2500-series telephone or your Butt Set connected to the TEL LINE input.
The required setup includes: PCMTIM - PCMCPU - PCMZPM - PCMPS2. Modules must be assembled, from left to right, in this order.
You do not need to program the system to set the zones.The system is ready from the factory to access individual zones
and All-Call.
STEP 1: Assembling Modules PCMTIM to PCMCPU and to PCMZPM
INSTALLATION:
•
To program the PCM2000 system, follow these instructions:
Follow the same procedure described previously on page 5, step 1.
Note: Do NOT connect the PCMPS2 (power supply) at this point.
STEP 2: Connecting Paging Port/VOX from the Telephone System to the PCMTIM Module
PCM
CPU
•
S1
S2
S3
S4
0
SYS
ID
1
•
Take the page port (VOX) audio pair from the telephone system and wire it to the RJ11 TEL-LINE jack in the PCMTIM module to pins
3 & 4 (red and green).
Use a 4- or 6-pin modular cord to connect the RJ11 to the TEL-LINE input on the PCMTIM module.
STEP 3: Switch Settings
POWER
RUN
•
PROGRAM
•
•
•
•
Set the TEL-INT-SEL DIP switches on the PCMTIM module for Page Port VOX configuration: switches 1 & 7 ON (to the right) and
switches 2, 3, 4, 5 & 6 OFF (to the left).
Set the SYS-ID DIP switches on the PCMCPU module to the OFF position (to the left).
Set the RUN-PROGRAM switch on the PCMCPU module to the RUN mode (up).
Set the Talk Back DIP switches on the PCMZPM module to the OFF position (to the left) for all zones.
Set the OUTPUT switch on the PCMZPM module to the HI-PWR position (down).
1. Remove the switch lock on the PCMCPU module and place the PROGRAM/RUN switch to the PROGRAM position (down).The green
LED will illuminate.
STEP 4: Testing your System
2. Access the PCM2000 system (either use a single 2500-line telephone or butt set or dial the paging access number from the telephone system).
STEP 5: Connecting the Paging Amplifier
3.You will hear 3 beep tones indicating access to the programming mode.
4. Dial the Feature Code for the option you wish to program. (See Feature Codes and Defaults list.)
Note: After you have entered a Feature Code (and any other data), you must press the [#] key to enter it into the system.
If the system accepts the code (and data), you will hear a short double beep confirming that the data has been stored in
the system.
•
•
Follow the same procedure described previously on page 5, step 4.
Follow the same procedure described previously on page 5, step 5.
STEP 6: Connecting 25/70V AC Speakers
•
Follow the same procedure described previously on page 5, step 6.
STEP 7: Testing your System
•
Follow the same procedure described previously on page 5, step 7.
Continue with the next Feature Code immediately after the confirming double beep.
If the information is not accepted, you will hear a busy tone. In this case, you should hang-up, check the code and the data, then re-access the
system and try again.
5. Once you have finished programming, you must first hang-up the programming phone and then place the Program/Run switch in the Run
position.The green LED will go out. Replace the switch lock.
Remember to press the [#] key after you enter a Feature Code.
34
7
CONFIGURATION 16:
SETUP FOR CONFIGURATION 3: LOOP START TRUNK - 3-ZONE - ONE-WAY PAGING - SINGLE AMPLIFIER - 25/70V AC SPEAKERS
PCM
ZPM
ZONE A
ZONE B
ZONE C
RELAY DRIVER OUTPUT
ZONE A
ZONE B
ZONE C
OFF ON
TALKBACK
SUPRESSION DIODES
LPBGM
VOLUME
RD COM
RD B
RD C
RD A
-
+
ZONE C
ZONE B
-
-
+
ZONE A
+
IN
RT
LOCAL
BGM
OUTPUT
HI PWR
LO PWR
GLOBL BGM
ZONE C
ZONE B
ZONE A
LPBGM
VOLUME
OFF
ON
TALKBACK
POWER
ZONE A
ZONE B
ZONE C
POWER
BGM
OUT
IN
RELAY
PCM
ZPM
BGM
OUT
IN
ZONE A
ZONE B
ZONE C
GLOBL BGM
RELAY
LO PWR
OUTPUT
HI PWR
BOGEN
0
PCM
CPU
+
RT
LOCAL
BGM
+
ZONE A
-
PCM PS2
- 1.5A
+ 12VDC
GND
AUX
GND
EM/SC
HPBGM
RT
IN
RT
OUT
PA
LPBGM
IN
RT
IN
RT
PA
+
12 VDC
1.5A
DATA
LINK
RUN
PROGRAM
IN
1
S1
S2
S3
S4
POWER
SYS
ID
-
RELAY
+
ZONE B
+
ZONE C
RD A
RD B
GND ST
NO
COM
NC
NO
RLY
TWO
RLY
ONE
COM
NC
BGM
SRC
IN
RT
OVER
RIDE
TEL
LINE
NIGHT
RING
BGM SRC
VOLUME
TONE
VOLUME
POWER
SUPPLY
12VDC
+
RD COM
-
T
R
COM
When a zone is activated, its relay driver is shorted to RD COM through an open collector transistor.These drivers can be used to activate
external relays to provide greater power capacity or to operate external equipment.The power supply for these relays must be 12V DC or
less.The total sink current per driver can not exceed 100mA.
70V
BOGEN PAGING
AMPLIFIER
1 - Not used
2 - Not used
3 - Ring (Negative)
4 - Tip (Positive)
5 - Not used
6 - Not used
R
PBX
LOOP START
TRUNK PORT
S7
1
Each PCMZPM module has three relay driver outputs - RD A, RD B, and RD C - one for each speaker zone.
0
S6
S5
S4
S3
S2
S1
TEL
INT
SEL
T
PCM
TIM
0
1
S1
S2
S3
S4
S5
S6
S7
POWER
TEL
INT
SEL
RD C
8
33
CONFIGURATION 3:
LOOP START TRUNK - 3-ZONE - ONE-WAY PAGING - SINGLE AMPLIFIER - 25/70V AC SPEAKERS
CONFIGURATION 15:
SINGLE AMPLIFIER BACKGROUND MUSIC LINE-LEVEL SIGNAL
Single amplifier BGM operation is a programmable feature that lets the PCM2000 use the paging amplifier to provide high-power BGM to the
25/70V AC speakers when the paging system is idle.
In this configuration, the PCM unit supplies a 48V talk battery and loop current detection from pins 3 & 4 of the TEL LINE jack on the
PCMTIM module to the loop start trunk in the telephone system.There are two modes of operation for loop start trunk.
INSTALLATION:
(1) When the unit detects a loop resistance between TIP and RING, it activates.When the loop opens, the page ends. Pins 1, 2, 5 & 6 are not
used in this configuration. Note: Default and VOX timers are not used in this mode.
STEP 1: Connecting Telephone System Paging Output to the PCMTIM
STEP 2: Connecting the BGM Source
(2) The unit will operate as in mode one, except it will also provide a one-second hook flash after the expiration of the VOX and/or Default
timers. Operation in this mode will enable the unit to automatically disconnect itself from the loop start trunk of the PBX.This will prevent
the paging system from being locked up indefinitely in the event a telephone is accidentally left off hook after a page has been completed.The
feature codes are 014 to inhibit and 015 to enable this feature.The default feature code is 014 (OFF).
•
The required setup includes PCMTIM - PCMCPU - PCMZPM - PCMPS2. Modules must be assembled, from left to right, in this order.
•
Refer to paging access modes described previously in Step 2 on pages 5 (paging port/contact closure), 7 (paging port/VOX), 9 (loop start
trunk), 11 (ground start trunk), or 13 (station level/Centrex).
Connect the BGM source output to the PCMTIM module terminals labeled BGM SOURCE IN/RT.
STEP 3: PCMCPU Switch Settings
INSTALLATION:
•
STEP 1: Assembling Modules PCMTIM to PCMCPU and to PCMZPM
Remove the switch lock on the PCMCPU module and place the PROGRAM/RUN switch to the PROGRAM position (down), the green
LED will illuminate.
STEP 4:Testing the System
•
Follow the same procedure described previously on page 5, step 1.
Note: Do NOT connect the PCMPS2 (power supply) at this point.
•
Access the PCM2000 system (either use a single 2500-series line telephone or butt set or dial the paging access number from the telephone system).You will hear 3 beep tones indicating access to the programming mode.
STEP 2: Connecting Loop Start Trunk from the Telephone System to the PCMTIM Module
•
Dial 019 follow by the ( # ) key.You will hear a short double beep if the programming was accepted and stored in the system.
•
Take the loop start trunk pair from the telephone system and wire it to the RJ11 TEL-LINE jack in the PCMTIM module to pins 3 and 4
(red and green).
Use a 4 or 6-pin modular cord to connect the RJ11 to the TEL-LINE input on the PCMTIM module.
STEP 5: Prepare System for Operation
•
•
STEP 3: Switch Settings
Hang up the programming phone and then place the PROGRAM/RUN switch in the RUN position.The green LED will go out. Replace
the switch lock.
Music Source
Bogen TP30D
•
•
•
•
PCM
TIM
UP
BAND
MSCAN
M1
M2
TEL
INT
SEL
1
TP30D DIGITAL TUNER
POWER
DOWN
MONO
ME
M4
M5
M6
BOGEN
•
•
•
•
•
M3
0
Set the TEL-INT-SEL DIP switches on the PCMTIM module for Loop Start Trunk configuration: switches 3, 4 & 5 ON (to the right) and
switches 1, 2, 6 & 7 OFF (to the left).
Set the SYS-ID DIP switches on the PCMCPU module to the OFF position (to the left).
Set the RUN-PROGRAM switch on the PCMCPU module to the RUN mode (up).
Set the Talk Back DIP switches on the PCMZPM module to the OFF position (to the left) for all zones.
Set the OUTPUT switch on the PCMZPM module to the HI-PWR position (down).
STEP 4: Testing your System
S1
S2
S3
S4
S5
S6
S7
POWER
•
TONE VOLUME
STEP 5: Connecting the Paging Amplifier
•
BGM SRC
VOLUME
OVER RIDE
IN
BGM
SRC
RT
Follow the same procedure described previously on page 5, step 6.
STEP 7: Testing your System
•
TEL
LINE
Follow the same procedure described previously on page 5, step 5.
STEP 6: Connecting 25/70V AC Speakers
•
NIGHT RING
Connect power supply PCMPS2 to the PCMCPU module to either the power jack 12V DC input or wire it to the 12V DC screw terminals observing polarity.
Power LEDs should be lit on each module.
Access the Loop Start Trunk from the phone system and verify access tones (double beep).
At this point, the system should be functioning properly.
Disconnect Power Supply.
•
•
•
•
•
•
Connect the power supply PCMPS2 to the PCMCPU module to either the power jack 12V DC input or wire it to the 12V DC screw
terminals observing polarity.
Connect the Bogen amplifier to the AC power outlet (120V AC 60Hz).
Set the volume on your Bogen amplifier to a 1/2 turn.
Access the Loop Start Trunk from the telephone system and listen (on the handset) for the confirmation tone (double beep).
Dial 01 to access ZONE ONE and listen (on the handset and also to the speakers) for a pre-announce tone (single beep) followed by
your page (audio)
Follow the same steps for ZONES TWO (02) and THREE (03).
Set the Bogen amplifier to the desired volume level.
NC
COM
RLY ONE
NO
NC
COM
RLY TWO
NO
GND ST
32
9
CONFIGURATION 14:
SETUP FOR CONFIGURATION 4: GROUND START TRUNK - 3-ZONE - ONE-WAY PAGING - SINGLE AMPLIFIER - 25/70V AC SPEAKERS
DTMF MICROPHONE ZONE PAGING
This section will describe the configuration for the use of a Shure microphone Model 885TT with DTMF dialing capabilities and the MODULINK fiveconductor coil-cord model ALM-1.
1111-
ZONE A
ZONE B
ZONE C
In addition to the PCM2000 system and associated amplifiers, the model numbers and components required for this configuration are:
Shure Microphone model 885TT
Shure MODULINK coil cord model ALM-1
XLR connector
680 ohms ¼-watt resistor
Paging with a DTMF Shure condenser microphone is a non-programmable feature that lets the caller use a Shure 885TT microphone to page
one-way to specific zones or all zones.
RD COM
RD B
RD C
RD A
-
+
ZONE C
ZONE B
-
-
+
ZONE A
+
IN
RT
LOCAL
BGM
OUTPUT
HI PWR
LO PWR
GLOBL BGM
ZONE C
ZONE B
SHURE 885TT MODIFICATION:
STEP 1: Disassembling the Microphone
•
•
•
PCM
ZPM
BGM
OUT
IN
ZONE A
LPBGM
VOLUME
OFF
ON
TALKBACK
POWER
ZONE A
ZONE B
ZONE C
Note:The Shure microphone model 885TT requires a modification in order to operate properly with the PCM2000 zone
paging modules.
•
Remove the cable, if attached, to the microphone using a paper clip.
Remove the four Phillips-head screws from the back of the microphone.
Hold the microphone with its back toward you and the cable connector down, and carefully separate the case back slightly from the
front.
Pivot the case back to the right taking care not to damage any internal leads or components.
STEP 2: Detaching the Case Back and Rear Printed Circuit Board
•
-
PCM PS2
BOGEN
0
PCM
CPU
+
•
- 1.5A
+ 12VDC
GND
AUX
GND
EM/SC
HPBGM
RT
IN
RT
OUT
PA
LPBGM
IN
RT
IN
RT
PA
+
12 VDC
1.5A
DATA
LINK
RUN
PROGRAM
1
S1
S2
S3
S4
POWER
SYS
ID
-
•
With the partially disassembled microphone face down on a flat surface and with the cable entry toward you, locate the multi-pin connector on the left side between the center board and the rear board.
Carefully pry the rear board away from the connector on the centerboard.You may need a small flathead screwdriver to separate the
terminal pins connected to the rear board and the connector attached to the center board.
Lift the microphone case back and the rear board away from the center board.
STEP 3: Modification
•
•
•
•
Locate pin 5 on the solder side of the J303 phone jack (cable entry) and cut the trace around pin 5, disconnecting it from ground.
Locate the black wire connected from the microphone switch to the first printed circuit board and unsolder it from the board.
Solder the black wire disconnected previously from the first P.C. board to pin 5 on the soldered side of the J303 phone jack (cable
entry).
Locate transistor Q303 on the component side and clip or unsolder the collector lead.
STEP 4: XLR Connector Setup
GND ST
NO
COM
NC
NO
RLY
TWO
RLY
ONE
COM
NC
BGM
SRC
IN
RT
OVER
RIDE
TEL
LINE
NIGHT
RING
BGM SRC
VOLUME
TONE
VOLUME
1
STEP 5: Reassembling
•
OPERATION:
R
COM
Connect the XLR connector to MIC socket.
Press and keep pressed the microphone switch.
Dial the two digits to access the zone desired or dial 00 for all-call.
Make a page.
Release the microphone switch.
Repeat procedure to page again.
70V
BOGEN PAGING
AMPLIFIER
1 - Not used
2 - Not used
3 - Ring (Negative)
4 - Tip (Positive)
5 - Not used
6 - Not used
PBX Ground
R
PBX
GROUND
START
TRUNK
S7
1
•
•
•
•
•
•
Reassemble the microphone by reversing the steps of disassembly.
0
S6
S5
S4
S3
TEL
INT
SEL
T
T
PCM
TIM
S2
S1
An XLR connector (not included) is recommended.
Solder the XLR connector to the Shure microphone coil cord MODULINK model ALM-1 as follows:
•
Solder a 680-ohm resistor across pins 1 and 2
•
Solder-shielded wire to pin 1, red and black wires to pin 2, and yellow to pin 3.
0
S1
S2
S3
S4
S5
S6
S7
POWER
TEL
INT
SEL
•
•
10
31
CONFIGURATION 4:
GROUND START TRUNK - 3-ZONE - ONE-WAY PAGING - SINGLE AMPLIFIER - 25/70V AC SPEAKERS
GND ST
COM
RLY TWO
In this configuration, the PCM unit supplies a 48V talk battery and loop current detection from pins 3 & 4 of the TEL LINE jack on the
PCMTIM module to the ground start trunk in the telephone system.There are two modes of operation for ground start trunk.
NO
NC
RLY ONE
COM
NO
NC
BGM
SRC
IN
RT
OVER RIDE
TEL
LINE
NIGHT RING
BGM SRC
VOLUME
TONE VOLUME
1
S1
S2
S3
S4
S5
S6
S7
POWER
TEL
INT
SEL
SETUP FOR CONFIGURATION 14: DTMF MICROPHONE ZONE PAGING
(1) When the ground start trunk grounds Ring, the unit responds by closing the connection to Tip, which completes the access procedure.
When the loop is opened, the page ends. Pins 1, 2, 5 & 6 are not used in this configuration. Note: Default and VOX timers are not used
in this mode.
RING (Red)
Red
TIP (Green)
PCM
TIM
0
(2) The unit will operate as in mode one, except it will also provide a one-second hook flash after the expiration of the VOX and/or Default
timers. Operation in this mode will enable the unit to automatically disconnect itself from the ground start trunk of the PBX.This will prevent the paging system from being locked up indefinitely in the event a telephone is accidentally left off hook after a page has been completed.The feature codes are 014 to inhibit and 015 to enable this feature.The default feature code is 014 (OFF).
The required setup includes PCMTIM - PCMCPU - PCMZPM - PCMPS2. Modules must be assembled, from left to right, in this order.
INSTALLATION:
STEP 1: Assembling Modules PCMTIM to PCMCPU and to PCMZPM
Green
•
Follow the same procedure described previously on page 5, step 1.
Note: Do NOT connect the PCMPS2 (power supply) at this point.
STEP 2: Connecting the Ground Start Trunk from the Telephone System to the PCMTIM Module
3
1
•
STEP 3: Switch Settings
Yellow
•
•
•
•
•
2
Red & Black
Add a 680-ohm
resistor
Shielded
Set the TEL-INT-SEL DIP switches on the PCMTIM module for Ground Start Trunk configuration: switches 2, 4 & 5 ON (to the right)
and switches 1, 3, 6 & 7 OFF (to the left).
Set the SYS-ID DIP switches on the PCMCPU module to the OFF position (to the left).
Set the RUN-PROGRAM switch on the PCMCPU module to the RUN mode (up).
Set the Talk Back DIP switches on the PCMZPM module to the OFF position (to the left) for all zones.
Set the OUTPUT switch on the PCMZPM module to the HI-PWR position (down).
3
STEP 4: Testing your System
•
1
Microphone Connections
Pin1 = Shielded
Pin 2 = Red and Black wires
Pin 3 = Yellow
Add a 680-ohm 1/4 w resistor across pins 1 and 2
2
•
•
Take the ground start trunk pair from the telephone system and wire it to the RJ11 TEL-LINE jack in the PCMTIM module to pins 3 and
4 (red and green).
Use a 4 or 6-pin modular cord to connect the RJ11 to the TEL-LINE input on the PCMTIM module.
Use a 24-gauge solid wire to connect the GND ST terminal on the PCMTIM module to the PBX ground.This is typically the AC ground
for the PBX system.
•
•
•
•
Connect power supply PCMPS2 to the PCMCPU module to either the power jack 12V DC input or wire it to the 12V DC screw terminals observing polarity.
At this point all the power LEDs should be lit on each module.
Access the Ground Start Trunk from the phone system and verify access tones (double beep).
At this point, the system should be functioning properly.
Disconnect Power Supply.
STEP 5: Connecting the Paging Amplifier
•
Follow the same procedure described previously on page 5, step 5.
STEP 6: Connecting 25/70V AC Speakers
•
Follow the same procedure described previously on page 5, step 6.
SHURE FIVE CONDUCTOR COIL
CORD MODULINK MODEL ALM1
MUST BE ORDERED SEPARATELY
•
•
•
•
•
•
•
Connect the power supply PCMPS2 to the PCMCPU module to either the power jack 12V DC input or wire it to the 12V DC screw
terminals observing polarity.
Connect the Bogen amplifier to the AC power outlet (120V AC 60Hz).
Set the volume on your Bogen amplifier to a 1/2 turn.
Access the Ground Start Trunk from the telephone system and listen (on the handset) for the confirmation tone (double beep).
Dial 01 to access ZONE ONE and listen (on the handset and also to the speakers) for a pre-announce tone (single beep) followed by
your page (audio).
Follow the same steps for ZONES TWO (02) and THREE (03).
Set the Bogen amplifier to the desired volume level.
SHURE
#
0OPER
*
WXY
9
TUV
8
PRS
7
MNO
6
JKL
5
GHI
4
DEF
ABC
2
1
3
STEP 7: Testing your System
30
11
SETUP FOR CONFIGURATION 5: STATION LEVEL/CENTREX - 3-ZONE - ONE-WAY PAGING - SINGLE AMPLIFIER - 25/70V AC SPEAKERS
CONFIGURATION 13:
EMERGENCY VOICE ANNOUNCEMENT OVERRIDE
Voice Announcement Override is a non-programmable feature that lets the caller take priority over all paging functions and make a systemwide emergency voice announcement page to all speakers. In addition to the PCM modules, this option requires a ProHold (digital announcer) and a normally open momentary switch supplied by the user.
INSTALLATION:
ZONE A
ZONE C
ZONE B
The Override feature includes a quad beep pre-announce tone which can be enabled or inhibited through programming.
STEP 1: Assembling Modules and Connecting the Amplifier
•
Refer to step 1 on pages 5 and 17.
STEP 2: Connecting the Paging Amplifier
•
Follow the same procedure described previously on page 5 or 17, step 5.
RD COM
RD B
RD C
RD A
-
+
ZONE C
ZONE B
-
+
ZONE A
-
+
IN
RT
LOCAL
BGM
OUTPUT
HI PWR
LO PWR
GLOBL BGM
ZONE C
ZONE B
•
•
•
PCM
ZPM
BGM
OUT
IN
ZONE A
LPBGM
VOLUME
OFF
ON
TALKBACK
POWER
ZONE A
ZONE B
ZONE C
STEP 3: Connecting Optional Equipment
•
•
•
•
Attach a 6-pin RJ11 modular jack to the wall next to the PCM2000 unit.
Connect the audio output from the ProHold labeled Line 600 using the supplied RCA cable to the RJ11 modular jack terminals Y (yellow) and BK (black).
Using the supplied stereo mini-plug, connect it to the TRIG input connector of the ProHold Digital Announcer. At the end of this cable,
you will see 3 bare wires labeled TIP, BARREL and RING.
Connect the TIP wire to one of the terminals on the normally open connections of the customer-supplied switch and the other switch
terminal to the RJ11 modular jack terminal BL (blue).
Connect the BARREL wire to the RJ11 modular jack terminal BL (blue). At this point you should have two wires connected to the BL
(blue) terminal.
Connect the RING wire to the RJ11 modular jack terminal W (white).
Connect a 6-pin RJ11 modular cable between the RJ11 modular jack and the Override RJ11 input on the PCMTIM module.
HPBGM
BOGEN
0
PCM
CPU
+
-
PCM PS2
- 1.5A
+ 12VDC
GND
AUX
GND
EM/SC
IN
RT
RT
OUT
PA
LPBGM
IN
RT
IN
RT
PA
+
12 VDC
1.5A
DATA
LINK
RUN
PROGRAM
•
1
S1
S2
S3
S4
POWER
SYS
ID
-
STEP 4: Switch and Control Settings
STEP 5: Testing Your System
•
GND ST
NO
COM
NC
NO
RLY
TWO
RLY
ONE
COM
NC
BGM
SRC
RT
IN
OVER
RIDE
TEL
LINE
NIGHT
RING
BGM SRC
VOLUME
Connect the power supply PCMPS2 to the PCMCPU module to either the power jack 12V DC input or wire it to the 12V DC screw
terminals, observing polarity.
Connect the Bogen amplifier to the AC power outlet (120V AC 60Hz).
Set the volume on your Bogen amplifier to a half turn.
Insert a pre-recorded normal bias audio tape into the ProHold cassette compartment.
Once the ProHold announcer has downloaded the audio and the LOAD light goes "OFF", press the normally open customer supplied
switch once and listen for the all-call announcement.
R
COM
70V
BOGEN PAGING
AMPLIFIER
1 - Not used
2 - Not used
3 - Ring (Negative)
4 - Tip (Positive)
5 - Not used
6 - Not used
R
PBX
STATION
ACCESS
CENTREX
S7
1
0
S6
S5
S4
S3
S2
S1
TEL
INT
SEL
T
T
PCM
TIM
0
1
TONE
VOLUME
POWER
TEL
INT
SEL
•
•
•
•
S1
S2
S3
S4
S5
S6
S7
Set the TEL-INT-SEL DIP switches on the PCMTIM module to match the paging output access from the telephone system based on the
type of telephone interface used. (See step 3 on page 5 if using Page Port Contact Closure; page 7 for Page Port VOX; page 9 for Loop
Start Trunk; page 11 for Ground Start Trunk; or page 13 for Station Level/Centrex.)
12
29
CONFIGURATION 5:
STATION LEVEL/CENTREX - 3-ZONE - ONE-WAY PAGING - SINGLE AMPLIFIER - 25/70V AC SPEAKERS
GND ST
RLY TWO
COM
NO
NC
RLY ONE
COM
NO
NC
BGM
SRC
IN
RT
OVER RIDE
TEL
LINE
NIGHT RING
BGM SRC
VOLUME
TONE VOLUME
In this configuration, the PCM unit responds to a 90V AC 20Hz ringing signal in pins 3 & 4 of the TEL LINE jack on the PCMTIM module and
answers after the first full ring. As soon as it answers, the default timer is started.The default timer determines the maximum length of any
page.When a paging zone is selected, the VOX timer (if enabled) is started.This VOX timer repeatedly resets as long as audio is detected on
the line. If no audio is detected within the VOX time period, the page will end. If audio continues to be detected, the default timer will control the page length. Pins 1, 2, 5 & 6 are not used in this configuration.
Note: In this configuration, the unit will also respond to CPC pulses (interruption of loop current) disconnecting the line.
The required setup includes PCMTIM -PCMCPU - PCMZPM - PCMPS2. Modules must be assembled, from left to right, in this order.
1
S1
S2
S3
S4
S5
S6
S7
POWER
TEL
INT
SEL
SETUP FOR CONFIGURATION 13: EMERGENCY VOICE ANNOUNCEMENT OVERRIDE
PCM
TIM
0
INSTALLATION:
STEP 1: Assembling Modules PCMTIM to PCMCPU and to PCMZPM
Follow the same procedure described previously on page 5, step 1.
Note: Do NOT connect the PCMPS2 (power supply) at this point.
STEP 2: Connecting the Station Level/Centrex from the Telephone System to the PCMTIM Module
•
•
Take the Station Level/Centrex pair from the telephone system and wire it to the RJ11 TEL-LINE jack in the PCMTIM module to pins 3
and 4 (red and green).
Use a 4 or 6-pin modular cord to connect the RJ11 to the TEL-LINE input on the PCMTIM module.
STEP 3: Switch Settings
Contact closure
Dry audio input to PCMTIM (from ProHold)
Not used
Dry audio input to PCMTIM (from ProHold)
Not used
BL
W
BK
RJ 11
MODULAR BOX
Contact closure
NORMALLY OPEN
CUSTOMER
SUPPLIED SWITCH
6 CONDUCTOR
MODULAR
CABLE
•
•
•
•
•
•
Set the TEL-INT-SEL DIP switches on the PCMTIM module for Station Level/Centrex configuration: switch 6 ON (to the right) and
switches 1, 2, 3, 4, 5 & 7 OFF (to the left).
Set the SYS-ID DIP switches on the PCMCPU module to the OFF position (to the left).
Set the RUN-PROGRAM switch on the PCMCPU module to the RUN mode (up).
Set the Talk Back DIP switches on the PCMZPM module to the OFF position (to the left) for all zones.
Set the OUTPUT switch on the PCMZPM module to the HI-PWR position (down).
Y
STEP 4: Testing your System
•
R
G
•
•
•
•
Connect power supply PCMPS2 to the PCMCPU module to either the power jack 12V DC input or wire it to the 12V DC screw terminals observing polarity.
At this point all the power LEDs should be lit on each module.
Access the Station Level/Centrex line from the phone system and verify access tones (double beep).
At this point, the system should be functioning properly.
Disconnect Power Supply.
•
BARREL
TIP
STEP 5: Connecting the Paging Amplifier
Follow the same procedure described previously on page 5, step 5.
STEP 6: Connecting 25/70V AC Speakers
•
Follow the same procedure described previously on page 5, step 6.
TRIG
STEP 7: Testing your System
SPKR.
ON/OFF
1 WATT
RING
VOLUME
•
•
•
•
•
PROHOLD
POWER
ON/OFF
12V
AC/DC
LINE
600
•
•
Connect the power supply PCMPS2 to the PCMCPU module to either the power jack 12V DC input or wire it to the 12V DC screw
terminals observing polarity.
Connect the Bogen amplifier to the AC power outlet (120V AC 60Hz).
Set the volume on your Bogen amplifier to a 1/2 turn.
Access the Station Level/Centrex port from the telephone system and listen (on the handset) for the confirmation tone (double beep).
Dial 01 to access zone ONE and listen (on the handset and also to the speakers) for a pre-announce tone (single beep) followed by
your page (audio).
Follow the same steps for ZONES TWO (02) and THREE (03).
Set the Bogen amplifier to the desired volume level.
28
13
CONFIGURATION 12:
DFT120 & TAMB WIRING DIAGRAM - LOOP START TRUNK, GROUND START TRUNK, OR STATION LEVEL
RD COM
RD B
RD C
RD A
-
ZONE C
ZONE B
-
+
ZONE A
-
+
+
IN
RT
LOCAL
BGM
OUTPUT
HI PWR
LO PWR
GLOBL BGM
ZONE C
OUT
BGM
IN
ZONE B
ZONE A
LPBGM
VOLUME
OFF
ON
TALKBACK
POWER
ZONE A
ZONE B
ZONE C
PCM
ZPM
In this configuration, the telephone output is connected to the Bogen Telephone Access Module model TAMB; the TAMB module is connected
to the Bogen Digital Feedback Terminator model DFT120; and the DFT120 is connected to the PCM2000 system. The TAMB module is activated by the telephone system and, at the same time, the DFT120 is activated by the TAMB’s normally open contacts. Using digital technology, the DFT120 stores the DTMF tones and the paging audio.When the TAMB closed contacts are removed from the DFT120, the DFT120
activates the PCM2000 system also using normally open contacts, and plays the page (audio). In addition to the above equipment, you will
also need a PRSASAC power supply and two RJ11 modular boxes.
INSTALLATION:
•
- 1.5A
+ 12VDC
AUX
GND
GND
HPBGM
EM/SC
RT
IN
RT
OUT
PA
LPBGM
RT
IN
IN
RT
PA
+
12 VDC
1.5A
DATA
LINK
PROGRAM
RUN
0
Refer to step 1 on pages 5 and 17.
STEP 2: Connecting the Paging Amplifier
BOGEN
1
S1
S2
S3
S4
POWER
SYS
ID
-
STEP 1: Assembling Modules and Connecting the Amplifier
PCM
CPU
SATELLITE ASSEMBLY #1
SETUP FOR CONFIGURATION 6: EXTENDED PAGING SYSTEM
•
Follow the same procedure described previously on page 5 or 17, step 5.
STEP 3: Connecting an Analog Line or Ground Start Trunk from the Telephone System to the TAMB
•
Take the Analog Line or Ground Start trunk pair from the telephone system and wire it to the TAMB terminals T & R.
STEP 4: Connecting the TAMB Module to the DFT120
RD COM
RD B
RD C
RD A
-
+
-
ZONE C
ZONE B
ZONE A
-
+
RT
+
IN
HI PWR
LOCAL
BGM
OUTPUT
GLOBL BGM
ZONE C
ZONE B
LO PWR
•
•
IN
ZONE A
LPBGM
VOLUME
•
•
RD COM
•
- 1.5A
GND
+ 12VDC
AUX
GND
EM/SC
HPBGM
RT
IN
RT
RT
OUT
PA
LPBGM
IN
RT
IN
12 VDC
1.5A
PA
+
DATA
LINK
•
•
•
•
•
T
R
COM
Connect the power supply PCMPS2 to the PCMCPU module to either the power jack 12V DC input or wire it to the 12V DC screw
terminals observing polarity.
Connect the PCMPS2, PRSASAC, and the DFT120 power supplies and the amplifier to the AC power outlet 120V AC 60Hz.
Set the volume on your Bogen amplifier to a half turn.
Adjust the DFT120 AUDIO OUT volume control to 50%. (You may need to readjust this control higher or lower later, after the test.)
Access the paging from the telephone system.The RECORD LED on the DFT120 must be lit showing that the DFT120 is already
recording.
Dial 01 to record ZONE ONE DTMF tone followed by a test page. (Notice that you will not hear audio coming from the speakers at
this point.)
Hang-up the handset.The PLAY LED on the DFT120 must light showing that the DFT120 is playing the page and you must be able to
hear the page.
If the page is too low, adjust the control for optimal operation.
Note: Unlike the previous Digital Feedback Terminator (DFT30), the DFT120 will accept a Loop Start Trunk or Page Port
directly connected to the unit.Therefore, when connecting to a Loop Start Trunk, a TAMB is not required. (See DFT120
manual for complete instructions.)
GND ST
RLY
TWO
COM
NO
NC
NO
RLY
ONE
COM
NC
RT
BGM
SRC
IN
OVER
RIDE
TEL
LINE
NIGHT
RING
BGM SRC
VOLUME
•
PCM
TIM
0
1
TONE
VOLUME
Set the switches 1, 2 & 4 to ON (to the right) and 3 & 5 to OFF (to the left) on the TAMB.
Set the switches 2, 3, & 7 to ON (to the right) and 1, 4, 5 & 6 to OFF (to the left) on the PCMTIM module for Paging Port Contact closure operation.
STEP 7: Testing Your System
•
BOGEN
0
POWER
70V
RD COM
RD B
RD C
RD A
-
+
-
ZONE C
ZONE B
ZONE A
-
+
RT
IN
+
LOCAL
BGM
OUTPUT
HI PWR
LO PWR
GLOBL BGM
ZONE C
ZONE B
OUT
ZONE A
IN
OUT
BGM
1
RUN
PROGRAM
POWER
SYS
ID
S1
S2
S3
S4
TEL
INT
SEL
S1
S2
S3
S4
S5
S6
S7
•
•
•
PCM
CPU
Attach a 6-pin RJ11 modular jack to the wall next to the PCM2000 unit.
Connect terminals 3 & 4 from the DFT120 jack labeled AUDIO OUT, to the RJ11 modular jack terminals R (red) and G (green).
Connect terminals 2 & 5 from the DFT120 jack labeled AUDIO OUT (PLAY contact) to the RJ11 modular jack terminals Y (yellow) and
BK (black).
Connect a 6-pin RJ11 modular cable between the RJ11 modular jack and the TEL LINE RJ11 input on the PCMTIM module.
STEP 6: Switch and Control Settings
BOGEN PAGING
AMPLIFIER
MASTER ASSEMBLY
RD B
RD C
RD A
-
+
-
ZONE C
ZONE B
ZONE A
-
+
RT
IN
+
LOCAL
BGM
OUTPUT
HI PWR
LO PWR
GLOBL BGM
ZONE C
ZONE B
•
•
•
IN
ZONE A
LPBGM
VOLUME
LPBGM
VOLUME
OFF
ON
TALKBACK
POWER
ZONE A
ZONE B
ZONE C
PCM
ZPM
Using a 6-pin RJ11 modular jack, connect terminals labeled PT & PR from the TAMB to the modular jack terminals R (red) and G
(green).
Connect terminals labeled N.O. & COM from the TAMB to the modular jack terminals Y (yellow) and BK (black).
Connect a 6-pin RJ11 modular cable from the RJ11 jack to the AUDIO IN jacks on the DFT120. Place the switch labeled DL/LS to the
DL (Dry Loop) position.
Connect terminals labeled +24/48 & -24/48 from the TAMB to the PRSASAC power supply. Use pins 1 & 2 labeled 24V DC / 450 mA.
Connect the DFT120 power supply (supplied with the unit) to the DFT120.
STEP 5: Connecting the DFT120 to the PCMTIM Module
BGM
PCM
ZPM
OFF
ON
TALKBACK
POWER
ZONE A
ZONE B
ZONE C
OUT
BGM
PCM
ZPM
OFF
ON
TALKBACK
POWER
ZONE A
ZONE B
ZONE C
•
14
27
SETUP FOR CONFIGURATION 12: DFT120 & TAMB WIRING DIAGRAM - LOOP START TRUNK, GROUND START TRUNK OR STATION LEVEL
CONFIGURATION 6:
EXTENDED PAGING SYSTEM
GND ST
RLY
TWO
COM
NO
NC
COM
NO
RLY
ONE
BGM
SRC
IN
RT
NC
OVER
RIDE
TEL
LINE
NIGHT
RING
BGM SRC
VOLUME
TONE
VOLUME
As described previously, the required setup for one-way basic configuration includes: PCMTIM, PCMCPU, PCMZPM, and the power supply
PCMPS2. For PCM systems with satellites (more than 9 zones), the number of modules and power supplies will increase as follows:
RJ 11
MODULAR
BOX
# PCMTIM
# PCMCPU
# PCMZPM*
# PCMPS2
1 to 9
10 to 18
19 to 27
28 to 36
37 to 45
46 to 54
55 to 63
64 to 72
73 to 81
82 to 90
91 to 99
1
1
1
1
1
1
1
1
1
1
1
1
2
3
4
5
6
7
8
9
10
11
1 to 3
4 to 6
7 to 9
10 to 12
13 to 15
16 to 18
19 to 21
22 to 24
25 to 27
28 to 30
31 to 33
1
2
3
4
5
6
7
8
9
10
11
BL
* 1 PCMZPM for every 1-3 paging zones.
R
G
INSTALLATION:
W
R
BK
# ZONES
Notice that for every 9 zones, one additional PCMCPU and one additional PCMPS2 are needed.
G
Y
Y
BK
ANALOG LINE
BL
W
24/48V DC
POWER
SUPPLY
6 CONDUCTOR
MODULAR
CABLE
PBX
PCM
TIM
0
1
S1
S2
S3
S4
S5
S6
S7
POWER
TEL
INT
SEL
This illustration shows the wiring between a master assembly and a satellite assembly in a PCM system with a satellite assembly for one-way paging.
STEP 1: Assembling Master Modules PCMTIM to PCMCPU and to PCMZPM
•
Follow the same procedure described previously on page 5, step 1.
Note: Do NOT connect the PCMPS2 (power supply) at this point.
STEP 2: Assembling Satellite Modules PCMCPU to PCMZPM (see Illustration on page 38)
•
•
STEP 3: Switch Settings
•
•
•
6
•
•
•
600
1
DFT120
Set the TEL-INT-SEL DIP switches on the PCMTIM module to match the paging output access from the telephone system based on the
type of telephone interface used. (See step 3 on page 5 if using Page Port Contact Closure; page 7 for Page Port VOX; page 9 for Loop
Start Trunk; page 11 for Ground Start Trunk; or page 13 for Station Level/Centrex.)
Set the SYS-ID DIP switches on the master PCMCPU module to the OFF position (to the left).
Set the SYS-ID DIP switches on the first satellite PCMCPU module to the following configuration: Switch 1 to the ON position (to the
right). Switches 2, 3, & 4 to the OFF position (to the left). See SYS-ID switch settings chart on page 38 for additional satellite systems.
Set the RUN-PROGRAM switch on the PCMCPU module to the RUN mode (up).
Set the TALK BACK switches on the PCMZPM modules to the OFF position (to the left) for all zones.
Set the OUTPUT switch on all the PCMZPM modules to the HI-PWR position (down).
8
VOX DELAY
Not used
Play status contact common
Audio output (-)
Audio output (+)
Play status contact
Not used
Note Switch settings:
Off - Up, On - Down
1 2 3 4 5 6 7 8 9 101112
PAGING TIME
MAX
MIN
MAX
•
Plug the 6-pin power connector from the PCMZPM module to the PCMCPU module jack (J2.) Be sure that the locking ridge faces the
header wall. (Green wire to the top).
Plug the 26-pin ribbon cable from the PCMZPM module to the PCMCPU module 26-pin connector (J1). Be sure to align the polarizing
tab in slot. (Pin 1 red stripe to the top).
The satellite systems are usually installed below the the master assembly and must be within 3 feet of each other.
Use an RCA cable to connect the PCMCPU modules from DATA LINK to DATA LINK RCA connectors. (See drawing.)
STEP 4: Testing your System
•
•
•
•
Connect one PCMPS2 power supply to each PCMCPU module either by the power jack 12V DC input or wire it to the 12V DC screw
terminals, observing polarity.
At this point all the power LEDs should be lit on each module.
Access the paging from the phone system and verify access tones (double beep).
At this point, the system should be functioning properly.
Disconnect Power Supply.
6
DL
TONE VOLUME
MAX
LS
MIN
VOLUME
•
1
STEP 5: Connecting the Paging Amplifier
MIN
12VDC 1A
•
POWER
24 VDC PWR SUPPLY
48 VDC PWR SUPPLY
CONFIRMATION TONE
PREANNOUNCE TONE
VOX DISABLE
VOX ENABLE
MODE
COMPLIES WITH PART 68, FCC RULES
FCC REGISTRATION NUMBER:
CD23CH-17705-KX-N
RINGER EQUIVALENCE: 1.2 B
1 2 3 4 5 6 7 8 9 10 11 12
IN USE PLAY RECORD
MODE
SWITCHES
-24/48
OFF
POWER SUPPLIES
ON
COM
+24/48
PR
N.O.
CONTACT CLOSURE A
-M
PT
PAGING OUTPUT
+M
EXT VOX ENABLE
S1, S2
----S4
S3
----S5
ON
OFF
----S1, S2
S3
S4
S5
-----
T
R
BGM
VOL.
BGM
IN
TELEPHONE ACCESS
MODULE
TAM B
PHONE SYSTEM
BOGEN
COMMUNICATIONS
RAMSEY, NJ
•
•
Locate the terminals on both PCMCPU modules labeled PA OUT/RT and wire them to the COMMON and 25V or 70V output on the
Bogen paging amplifier (either TPU-Series, GS-Series or Classic Series).
Locate the terminals on the PCMCPU modules labeled PA IN/RT and wire to the TIP and RING input on the Bogen paging amplifier.At
this point, the amplifier is connected in parallel to the master PCMCPU module and the satellite PCMCPU module.
STEP 6: Connecting 25/70V AC Speakers
•
Follow the same procedure described previously on page 5, step 6.
STEP 7: Testing your System
•
26
Follow the same procedure described previously on page 5, step 7.
15
CONFIGURATION 11:
SETUP FOR CONFIGURATION 7:TWO-WAY TALK BACK PAGING SYSTEM
MICROPHONE OVERRIDE
In addition to the PCM modules, setup requires a Bogen VAR1 (voice-activated relay), PRS40C (12V DC power supply) and an MBS1000 or
DDU250 (desktop microphone).
ZONE A
ZONE B
ZONE C
Microphone Override is a feature that lets the system designer take priority over all paging functions and make a system-wide page to all
speakers.
The Override feature includes a quad beep pre-announce tone which can be enabled or inhibited.
INSTALLATION:
•
•
IN
BGM
•
•
PA
RT
IN
RT
OUT
•
•
OFF
•
PCM
TBM
ON
TALKBACK
NOISE
REDUCTION
DELAY
VOLUME
PA
•
•
POWER
Follow the same procedure described previously on page 5 or 17, step 5.
STEP 3: Connecting Optional Equipment
OUT
PCM
ZPM
Refer to step 1 on pages 5 and 17.
STEP 2: Connecting the Paging Amplifier
RD COM
RD B
RD C
RD A
-
+
ZONE C
ZONE B
-
-
+
ZONE A
+
IN
RT
LOCAL
BGM
OUTPUT
HI PWR
LO PWR
GLOBL BGM
ZONE C
ZONE B
ZONE A
LPBGM
VOLUME
OFF
ON
TALKBACK
POWER
ZONE A
ZONE B
ZONE C
STEP 1: Assembling Modules and Connecting the Amplifier
•
Attach a 6-pin RJ11 modular jack to the wall next to the PCM2000 unit.
Connect the first audio output terminal from the top of the VAR1 (right screw terminals) to the RJ11 modular jack terminal Y (yellow).
Connect the second audio output terminal from the top of the VAR1 to the N.O. contact of the VAR1.
Connect the fifth screw terminal from the top of the VAR1 (see drawing) to the RJ11 modular jack terminal BK (black).
Connect the relay terminals (normally open contacts) from the VAR1 (two bottom right screw terminals) to the RJ11 modular jack terminals W (white) and BL (blue).
Connect the MBS1000 or DDU250 microphone leads to the VAR1 (left screw terminals): red to third screw, black to fifth screw, and
shield to fourth screw.
Do not use the white and green wires from the MBS1000 or DDU250 unless you want to use them instead of the normally open contacts on the VAR1.
Connect a 6-pin RJ11 modular cable between the RJ11 modular jack (previously attached to the wall next to the PCM2000) and the
Override RJ11 input on the PCMTIM module.
Connect the PRS40C power supply to the VAR1 (two top left screw terminals) observing polarity or use the mini-plug and connect it
into the mini-jack at the bottom.
STEP 4: Switch and Control Settings
- 1.5 A
+ 12VDC
GND
AUX
GND
EM/SC
RT
HPBGM
RT
IN
OUT
PA
LPBGM
IN
RT
IN
RT
PA
+
12 VDC
1.5A
DATA
LINK
PROGRAM
RUN
•
•
+
-
GND ST
NO
RLY
TWO
COM
NC
NO
COM
NC
RLY
ONE
BGM
SRC
IN
RT
OVER
RIDE
TEL
LINE
NIGHT
RING
BGM SRC
VOLUME
TONE
VOLUME
0
PCM
TIM
Set the TEL-INT-SEL DIP switches on the PCMTIM module to match the paging output access from the telephone system based on the
type of telephone interface used. (See step 3 on page 5 if using Page Port Contact Closure; page 7 for Page Port VOX; page 9 for Loop
Start Trunk; page 11 for Ground Start Trunk; or page 13 for Station Level/Centrex.)
Set the Line/MIC switch on the VAR1 to the MIC position.
Set the Mic volume control on the VAR1 at 50%.
STEP 5: Testing Your System
•
•
•
•
•
•
•
•
•
1
S1
S2
S3
S4
S5
S6
S7
POWER
TEL
INT
SEL
PCM PS2
PCM
CPU
0
BOGEN
1
S1
S2
S3
S4
POWER
SYS
ID
-
•
Connect the power supply PCMPS2 to the PCMCPU module to either the power jack 12V DC input or wire it to the 12V DC screw
terminals observing polarity.
Connect the Bogen amplifier to the AC power outlet (120V AC 60Hz).
Set the volume on your Bogen amplifier a half turn.
Access the paging from the telephone system and listen (on the handset) for the confirmation tone (double beep).
Dial 01 to access ZONE ONE and listen (on the handset and also to the speakers) for a pre-announce tone (single beep) followed by
your page (audio).
Follow the same steps for ZONES TWO (02) and THREE (03).
Access the emergency override by pressing the talk bar on the MBS1000 or sliding the DDU250 switch.
You should hear a quad beep pre-announce tone followed by your all-call/emergency page.
Adjust the VAR1 and PCM2000 controls for optimal operation.
70V
T
R
BOGEN PAGING
AMPLIFIER
COM
NOTE: You will not be able to access individual zones using the Override feature, it is for All-Call Emergency only to all
zones.
16
25
CONFIGURATION 7:
SETUP FOR CONFIGURATION 11: MICROPHONE OVERRIDE
GND ST
RLY TWO
COM
NO
NC
RLY ONE
COM
NO
NC
BGM
SRC
IN
RT
OVER RIDE
TEL
LINE
NIGHT
RING
BGM SRC
VOLUME
TONE
VOLUME
This configuration is essentially the same as the one-way paging system described previously.The main difference between the one-way configuration and this configuration is that the centralized high-power amplifier is connected to the PCMTBM module instead of the PCMCPU
module.The required setup includes: PCMTIM - PCMCPU - PCMTBM - PCMZPM - PCMPS2. Modules must be assembled, from left to right,
in this order.
Notes: Talk Back is only available in High-Power Zones with 25/70V AC speakers.The paging access output from the telephone system must support two-way communications.
0
1
S1
S2
S3
S4
S5
S6
S7
POWER
TEL
INT
SEL
TWO-WAY TALK BACK PAGING SYSTEM
PCM
TIM
INSTALLATION:
STEP 1: Assembling Modules PCMTIM to PCMCPU to PCMTBM and to PCMZPM (see Illustration on page 38)
•
•
•
•
•
Contact closure
Dry audio input to PCMTIM (from VAR1)
Not used
Not used
Dry audio input to PCMTIM (from VAR1)
BL
W
Plug the 6-pin power connector from the PCMCPU module to the PCMTIM module jack (J2.) Make sure that the locking ridge faces
header wall. (Green wire to the top).
Plug the 26-pin ribbon cable from the PCMCPU module to the PCMTIM module 26-pin connector (J1). Make sure to align the polarizing
tab in slot. (Pin 1 red stripe to the top).
Place the modules together and dress the connector cables away from the sheet metal so they will not get pinched.
Push the two units together while aligning the locking tabs in the PCMTIM module to the locking slots in the PCMCPU module. Slide
the two units until the faces of both units are even.
Secure the two units together by tightening a screw into the screw clamp tab in the back of the unit.
Follow the same steps to add the PCMTBM module and the PCMZPM modules.
Note: Do NOT connect the PCMPS2 (power supply) at this point.
STEP 2: Connecting Telephone System Paging Output to the PCMTIM
•
BK
RJ 11
MODULAR BOX
Contact closure
6 CONDUCTOR
MODULAR CABLE
•
Refer to paging access modes described previously in Step 2 on pages 5 (paging port/contact closure), 7 (paging port/VOX), 9 (loop start
trunk), 11 (ground start trunk), or 13 (station level/Centrex).
Y
STEP 3: Switch Settings
•
R
G
•
•
•
•
Set the TEL-INT-SEL DIP switches on the PCMTIM module to match the paging output access from the telephone system based on the
type of telephone interface used. (See step 3 on page 5 if using Page Port Contact Closure; page 7 for Page Port VOX; page 9 for Loop
Start Trunk; page 11 for Ground Start Trunk; or page 13 for Station Level/Centrex.)
Set the SYS-ID DIP switches on the PCMCPU to the OFF position (to the left).
Set the RUN-PROGRAM switch on the PCMCPU to the RUN mode (up).
Set the TALK BACK switches for the zones requiring two-way talk back to the ON position (right) on the PCMZPM module.
Set the OUTPUT switch on the PCMZPM module to the HI-PWR position (down).
STEP 4: Testing your System
•
BOGEN
•
•
•
•
•
Connect power supply PCMPS2 to the PCMCPU module to either the power jack 12V DC input or wire it to the 12V DC screw terminals observing polarity.
At this point all the power LEDs should be lit on each module.
Access the paging from the phone system and verify access tones (double beep) in handset.
Speak into the handset and listen.You should be able to hear the Talk Back Relay clicking back and forth inside the PCMTBM module.
(You must be near the PCM unit to hear it.)
At this point, the system should be functioning properly.
Disconnect Power Supply.
EMERGENCY
MICROPHONE
DELAY
•
•
VOL
MIC
COM
600
25V
70V
Follow the same procedure described previously on page 5, step 6.
STEP 7: Testing your System
•
•
•
•
•
•
•
24
Locate the terminals on the PCMTBM module labeled PA OUT/RT and wire to the COMMON and either 25 or 70V output on the
Bogen paging amplifier (either TPU-Series, GS-Series or Classic Series).
Locate the terminals on the PCMTBM module labeled PA IN/RT and wire to the TIP and RING input on the Bogen paging amplifier.
STEP 6: Connecting 25/70V AC Speakers
•
MIC
INPUT
-
+
SENS
VOX
RELAY
VAR1
LINE
PRS40C
MIC
AUDIO
OUTPUT
STEP 5: Connecting the Paging Amplifier
Connect the power supply PCMPS2 to the PCMCPU module to either the power jack 12V DC input or wire it to the 12V DC screw
terminals observing polarity.
Connect the Bogen amplifier to the AC power outlet (120V AC 60Hz).
Set the volume on your Bogen amplifier to a 1/2 turn.
Access the paging from the telephone system and listen (on the handset) for the confirmation tone (double beep).
Dial 01 to access ZONE ONE and listen (on the handset and also to the speakers) for a pre-announce tone (single beep). At this point
you should be able to hear audio from the location where the speaker for ZONE ONE is installed.
The volume and delay controls on the PCMTBM module control the audio back into the handset. Adjust these controls for best operation.
Set the Bogen amplifier to the desired volume level.
17
CONFIGURATION 10:
6 ZONES - ONE-WAY PAGING - MIXED HIGH- AND LOW-POWER ZONES 25/70V AC OR SELF-AMPLIFIED SPEAKERS
RD COM
RD B
RD C
-
RD A
ZONE C
ZONE B
-
+
-
+
+
IN
RT
ZONE A
LOCAL
BGM
OUTPUT
HI PWR
LO PWR
GLOBL BGM
ZONE C
ZONE B
ZONE A
LPBGM
VOLUME
High- and Low-Power Mixed System is a non-programmable feature that lets the system designer use a dedicated amplifier or self-amplified
speaker per zone and at the same time use a centralized amplifier for zones requiring less than 250 watts of power*.The PCMZPM module
to be used as a low-power module must have all three zones with dedicated amplifiers or self-amplified speakers and have its output switch
set to Low-Power.The other PCMZPM module will be used as a high-power module and its output switch must be set to High-Power. In this
example, three TPU100B amplifiers are used on the second PCMZPM low-power module.
BGM
OUT
IN
PCM
ZPM
OFF
ON
TALKBACK
POWER
ZONE A
ZONE B
ZONE C
SATELLITE ASSEMBLY #1
SETUP FOR CONFIGURATION 8:TWO-WAY TALK BACK EXTENDED PAGING SYSTEM
INSTALLATION:
- 1.5 mA
+ 12VDC
GND
AUX
GND
HPBGM
EM/SC
RT
IN
RT
PA
LPBGM
RT
OUT
IN
RT
IN
12 VDC
1.5 A
PA
+
DATA
LINK
PROGRAM
RUN
STEP 1: Assembling Modules
PCM
CPU
0
BOGEN
1
S1
S2
S3
S4
POWER
SYS
ID
-
Note: Low-Power Systems do not support two-way paging.
•
STEP 2: Connecting Telephone System Paging Output to the PCMTIM
RD COM
RD C
RD A
-
RD B
ZONE C
ZONE B
-
+
-
+
ZONE A
+
IN
RT
LOCAL
BGM
OUTPUT
HI PWR
LO PWR
GLOBL BGM
ZONE C
ZONE B
•
IN
ZONE A
LPBGM
VOLUME
RD COM
RD C
RD B
RD A
-
-
+
ZONE C
ZONE B
-
+
ZONE A
+
IN
RT
LOCAL
BGM
OUTPUT
HI PWR
LO PWR
GLOBL BGM
ZONE C
ZONE B
OUT
•
•
•
•
PA
RT
IN
RT
OUT
PA
ON
OFF
NOISE
REDUCTION
DELAY
VOLUME
TALKBACK
70V COM
R
STEP 5: Connecting 25/70V AC Speakers
•
Follow the same procedure described previously on page 5, step 6.
STEP 6: Testing Your System
•
Connect the power supply PCMPS2 to the PCMCPU module to either the power jack 12V DC input or wire it to the 12V DC screw
terminals observing polarity.
Connect the Bogen amplifiers to the AC power outlet (120 V AC 60Hz).
Set the volume on your Bogen amplifiers to a 1/2 turn.
Access the Paging from the telephone system and listen (on the handset) for the confirmation tone (double beep).
Dial 01 to access ZONE ONE and listen (on the handset and also to the speakers) for a pre-announce tone (single beep) followed by
your page (audio).
Follow the same steps for ZONES TWO (02) through SIX (06).
Set the Bogen amplifiers to the desired volume level.
- 1.5 A
RLY
TWO
COM
COM
NC
RLY
ONE
BGM
SRC
IN
RT
OVER
RIDE
TEL
LINE
NIGHT
RING
BGM SRC
VOLUME
TONE
VOLUME
PCM
TIM
0
1
S1
S2
S3
S4
S5
S6
S7
POWER
TEL
INT
SEL
PCM
CPU
0
1
BOGEN
+ 12VDC
GND ST
* Older PCM systems only have a 150W capacity.
NO
AUX
NC
GND
GND
NO
RT
EM/SC
HPBGM
RT
IN
RT
OUT
PA
LPBGM
IN
RT
IN
PA
+
12 VDC
1.5 A
DATA
LINK
PROGRAM
RUN
POWER
SYS
ID
Locate the terminals on the PCMCPU module labeled PA IN/RT and wire it to the TIP and RING (T & R) input on the amplifier.
Locate the terminals on the PCMCPU module labeled PA OUT/RT and wire it to the COMMON and either 25 or 70V AC output on
the amplifier.
Locate the terminals on the second PCMZPM module Low-Power module labeled ZONE A and connect the amplifier to the TIP and
RING terminals. Follow the same procedure for ZONE B and ZONE C.
T
•
•
•
•
•
PCM
TBM
POWER
BOGEN PAGING
AMPLIFIER
RD COM
RD C
RD B
RD A
-
-
+
ZONE C
ZONE B
-
+
ZONE A
+
IN
RT
LOCAL
BGM
OUTPUT
HI PWR
LO PWR
GLOBL BGM
ZONE C
ZONE A
OUT
BGM
IN
ZONE B
OUT
MASTER ASSEMBLY
BGM
LPBGM
VOLUME
OFF
ON
TALKBACK
POWER
ZONE A
ZONE B
ZONE C
•
•
•
•
S1
S2
S3
S4
Set the TEL-INT-SEL DIP switches on the PCMTIM module to match the paging output access from the telephone system based on the
type of telephone interface used. (See step 3 on page 5 if using Page Port Contact Closure; page 7 for Page Port VOX; page 9 for Loop
Start Trunk; page 11 for Ground Start Trunk; or page 13 for Station Level/Centrex.)
Set the SYS ID switches on the PCMCPU module to the OFF position (to the left).
Set the TALK BACK switches on the PCMZPM module to the OFF position (to the left) for all zones.
Set the LO PWR / HI PWR OUTPUT switch on the first PCMZPM High-Power module to the HI PWR OUTPUT position (down).
Set the LO PWR / HI PWR OUTPUT switch on the second PCMZPM Low-Power module to the LO PWR OUTPUT position (up).
STEP 4: Connecting Amplifiers
IN
ZONE A
LPBGM
VOLUME
OFF
ON
TALKBACK
POWER
ZONE A
ZONE B
ZONE C
PCM
ZPM
Refer to paging access modes described previously in Step 2 on pages 5 (paging port/contact closure), 7 (paging port/VOX), 9 (loop start
trunk), 11 (ground start trunk), or 13 (station level/Centrex).
STEP 3: Switch and Control Settings
BGM
PCM
ZPM
OFF
ON
TALKBACK
POWER
ZONE A
ZONE B
ZONE C
•
PCM
ZPM
Follow the same procedure described previously on page 5, step 1.
Note: Do NOT connect PCMPS2 (power supply) at this point.
18
23
CONFIGURATION 8:
SETUP FOR CONFIGURATION 10: 6 ZONES - ONE-WAY PAGING - MIXED HIGH- AND LOW-POWER ZONES 25/70V AC OR SELF-AMPLIFIED SPEAKERS
TWO-WAY TALK BACK EXTENDED PAGING SYSTEM
ZONE A
ZONE C
ZONE B
The required setup includes: PCMTIM - 2 PCMCPU - PCMTBM - 4 PCMZPM - 2 PCMPS2
ZONE A
ZONE B
ZONE C
This configuration is essentially the same as the two-way paging system described previously on page 17.The main difference is the addition
of a satellite assembly.
Note:
Talk Back is only available in High-Power Zones with 25/70V AC speakers.
The paging access output from the telephone system must support two-way communications.
INSTALLATION:
STEP 1: Assembling Master Modules PCMTIM to PCMCPU to PCMTBM and to PCMZPM
BOGEN
MODEL TPU-100B
100WATT AMPLIFIER
Note: Do NOT connect the PCMPS2 (power supply) at this point.
•
RD COM
RD C
RD B
RD A
-
+
-
ZONE C
ZONE B
ZONE A
-
+
+
IN
RT
HI PWR
LOCAL
BGM
OUTPUT
LO PWR
GLOBL BGM
ZONE C
ZONE B
ZONE A
•
•
•
BGM
OUT
IN
OFF ON
TALKBACK
POWER
LPBGM
VOLUME
•
•
ZONE A
ZONE B
ZONE C
Follow the same procedure described previously on page 15, step 2.
STEP 3: Switch Settings
•
PCM
ZPM
Follow the same procedure described previously on page 17, step 1.
STEP 2: Assembling Satellite Modules PCMCPU to PCMZPM
ALC
TEL VOLUME
BASS
MUSIC MUTE
MUSIC
VOLUME
MIC VOLUME
RING VOLUME
TREBLE
VOX SENS
PEAK LEVEL
APHEX
POWER LED
MODEL TPU-100B
100WATT AMPLIFIER
BOGEN
ALC
TEL VOLUME
MUSIC MUTE
MUSIC
VOLUME
MIC VOLUME
RING VOLUME
APHEX
BASS
VOX SENS
PEAK LEVEL
TREBLE
POWER LED
MODEL TPU-100B
BOGEN
ALC
TEL VOLUME
MUSIC MUTE
MUSIC
VOLUME
MIC VOLUME
VOX SENS
RING VOLUME
BASS
TREBLE
POWER LED
PEAK
LEVEL
APHEX
100WATT AMPLIFIER
•
Set the TEL-INT-SEL DIP switches on the PCMTIM module to match the paging output access from the telephone system based on the
type of telephone interface used. (See step 3 on page 5 if using Page Port Contact Closure; page 7 for Page Port VOX; page 9 for Loop
Start Trunk; page 11 for Ground Start Trunk; or page 13 for Station Level/Centrex.)
Set the SYS-ID DIP switches on the master PCMCPU module to the OFF position (to the left).
Set the SYS-ID DIP switches on the first satellite PCMCPU module to the following configuration: switch 1 to the ON position (to the
right), switches 2, 3, & 4 to the OFF position (to the left). See additional SYS-ID settings on page 38.
Set the RUN-PROGRAM switch on each PCMCPU to the RUN mode (up).
Set the TALK BACK switches on the PCMZPM modules to the ON position (to the right) for all zones.
Set the OUTPUT switch on each PCMZPM module to the HI-PWR position (down).
STEP 4: Testing your System
•
•
•
•
•
Connect one PCMPS2 power supply to each PCMCPU module to either the power jack 12V DC input or wire it to the 12V DC screw
terminals, observing polarity.
At this point all the power LEDs should be lit on each module.
Access the paging from the phone system and verify access tones (double beep).
At this point, the system should be functioning properly.
Disconnect Power Supply.
RD COM
RD C
RD B
RD A
-
+
-
ZONE C
ZONE B
+
ZONE A
-
+
IN
RT
HI PWR
LOCAL
BGM
OUTPUT
LO PWR
GLOBL BGM
ZONE C
ZONE B
•
•
PCM
ZPM
BGM
OUT
IN
ZONE A
LPBGM
VOLUME
OFF ON
TALKBACK
POWER
ZONE A
ZONE B
ZONE C
STEP 5: Connecting the Paging Amplifier
Locate the terminals on the PCMTBM module labeled PA OUT/RT and wire to the COMMON and either 25 or 70V output on the
Bogen paging amplifier (either TPU-Series, GS-Series or Classic Series).
Locate the terminals on the PCMTBM module labeled PA IN/RT and wire to the TIP and RING input on the Bogen paging amplifier.
STEP 6: Connecting 25/70V AC Speakers
•
Follow the same procedure described previously on page 5, step 6.
STEP 7: Testing your System
•
•
- 1.5 A
MODEL TPU-100B
BOGEN
ALC
TEL VOLUME
RING VOLUME
MUSIC MUTE
MUSIC
VOLUME
MIC VOLUME
VOX SENS
PEAK LEVEL
APHEX
BASS
POWER LED
TREBLE
0
PCM
CPU
22
100WATT AMPLIFIER
•
BOGEN
+ 12VDC
GND
AUX
GND
EM/SC
RT
HPBGM
IN
RT
OUT
PA
LPBGM
RT
IN
IN
RT
PA
+
12 VDC
1.5 A
DATA
LINK
RUN
PROGRAM
1
S1
S2
S3
S4
POWER
SYS
ID
-
•
•
•
•
Connect a PCMPS2 power supply to each PCMCPU module to either the power jack 12V DC input or wire it to the 12V DC screw
terminals observing polarity.
Connect the Bogen amplifier to the AC power outlet (120V AC 60Hz).
Set the volume on your Bogen amplifier to a 1/2 turn.
Access the paging from the telephone system and listen (on the handset) for the confirmation tone (double beep).
Dial 01 to access ZONE ONE and listen (on the handset and also to the speakers) for a pre-announce tone (single beep). At this point,
you should be able to hear audio from the location where the speaker for ZONE ONE is installed.
The volume and delay controls on the PCMTBM module, control the audio back into the handset. Adjust these controls for best operation.
Set the Bogen amplifier to the desired volume level.
19
SETUP FOR CONFIGURATION 9: 3-ZONE - ONE-WAY PAGING - LOW-POWER SYSTEM - DEDICATED AMPLIFIERS OR SELF-AMPLIFIED SPEAKERS
CONFIGURATION 9:
3-ZONE - ONE-WAY PAGING - LOW-POWER SYSTEM - DEDICATED AMPLIFIERS OR SELF-AMPLIFIED SPEAKERS
Low-Power System is a switch-selectable feature that allows the system designer to use dedicated amplifiers or self-amplified speakers on the
zone outputs.The PCMZPM module that is to be used as a low-power module will switch only low-level signals to the zone outputs for use
with dedicated amplifiers or self-amplified speakers. Note that its output switch is set to LO PWR. In this example, three TPU100B amplifiers
are used but amplified speakers can be substituted.
Note: Low-Power Systems do not support two-way paging.
INSTALLATION:
STEP 1: Assembling Modules
ZONE A
ZONE C
ZONE B
•
Follow the same procedure described previously on page 5, step 1.
Note: Do NOT connect the PCMPS2 (power supply) at this point.
STEP 2: Connecting Telephone System Paging Output to the PCMTIM
•
Refer to paging access modes described previously in Step 2 on pages 5 (paging port/contact closure), 7 (paging port/VOX), 9 (loop start
trunk), 11 (ground start trunk), or 13 (station level/Centrex).
STEP 3: Switch Settings
•
•
•
•
Set the TEL-INT-SEL DIP switches on the PCMTIM module to match the paging output access from the telephone system based on the
type of telephone interface used. (See step 3 on page 5 if using Page Port Contact Closure; page 7 for Page Port VOX; page 9 for Loop
Start Trunk; page 11 for Ground Start Trunk; or page 13 for Station Level/Centrex.)
Set the SYS-ID switches on the PCMCPU to the OFF position (to the left).
Set the TALKBACK switches on the PCMZPM to the OFF position (to the left) for all zones.
Set the LO PWR / HI PWR OUTPUT switch on the PCMZPM to the LO PWR position (up).
AMPLIFIER
BOGEN
MODEL TPU-100B
100WATT
•
•
STEP 6: Testing Your System
Follow the same procedure described previously on page 5, step 7.
RD COM
RD B
RD C
RD A
-
ZONE C
ZONE B
-
+
-
+
ZONE A
+
IN
RT
LOCAL
BGM
OUTPUT
HI PWR
LO PWR
GLOBL BGM
ZONE C
ZONE B
Locate the terminals on the amplifiers labeled COM and 25V or 70V AC and connect the speakers related to that particular zone.
BGM
OUT
IN
ZONE A
LPBGM
VOLUME
POWER
OFF ON
TALKBACK
ZONE A
ZONE B
ZONE C
Locate the terminals on the PCMZPM module labeled ZONE A and connect to the TIP and RING terminals of the amplifier(s) for
ZONE A.
Follow the same procedure for ZONE B and ZONE C.
STEP 5: Connecting Self-Amplified Speakers
ALC
TEL VOLUME
MUSIC MUTE
MUSIC VOLUME
RING VOLUME
VOX SENS
APHEX
BASS
TREBLE
PEAK LEVEL
POWER LED
MIC VOLUME
AMPLIFIER
BOGEN
MODEL TPU-100B
100WATT
ALC
TEL VOLUME
MUSIC MUTE
MUSIC VOLUME
BASS
RING VOLUME
VOX SENS
PEAK LEVEL
TREBLE
APHEX
POWER LED
MIC VOLUME
AMPLIFIER
BOGEN
100WATT
ALC
MIC VOLUME
TEL VOLUME
RING VOLUME
MUSIC MUTE
MUSIC VOLUME
TREBLE
BASS
VOX SENS
PEAK LEVEL
APHEX
•
•
PCM
ZPM
POWER LED
MODEL TPU-100B
STEP 4: Connecting the Paging Amplifiers
20
21
SETUP FOR CONFIGURATION 9: 3-ZONE - ONE-WAY PAGING - LOW-POWER SYSTEM - DEDICATED AMPLIFIERS OR SELF-AMPLIFIED SPEAKERS
CONFIGURATION 9:
3-ZONE - ONE-WAY PAGING - LOW-POWER SYSTEM - DEDICATED AMPLIFIERS OR SELF-AMPLIFIED SPEAKERS
Low-Power System is a switch-selectable feature that allows the system designer to use dedicated amplifiers or self-amplified speakers on the
zone outputs.The PCMZPM module that is to be used as a low-power module will switch only low-level signals to the zone outputs for use
with dedicated amplifiers or self-amplified speakers. Note that its output switch is set to LO PWR. In this example, three TPU100B amplifiers
are used but amplified speakers can be substituted.
Note: Low-Power Systems do not support two-way paging.
INSTALLATION:
STEP 1: Assembling Modules
ZONE A
ZONE C
ZONE B
•
Follow the same procedure described previously on page 5, step 1.
Note: Do NOT connect the PCMPS2 (power supply) at this point.
STEP 2: Connecting Telephone System Paging Output to the PCMTIM
•
Refer to paging access modes described previously in Step 2 on pages 5 (paging port/contact closure), 7 (paging port/VOX), 9 (loop start
trunk), 11 (ground start trunk), or 13 (station level/Centrex).
STEP 3: Switch Settings
•
•
•
•
Set the TEL-INT-SEL DIP switches on the PCMTIM module to match the paging output access from the telephone system based on the
type of telephone interface used. (See step 3 on page 5 if using Page Port Contact Closure; page 7 for Page Port VOX; page 9 for Loop
Start Trunk; page 11 for Ground Start Trunk; or page 13 for Station Level/Centrex.)
Set the SYS-ID switches on the PCMCPU to the OFF position (to the left).
Set the TALKBACK switches on the PCMZPM to the OFF position (to the left) for all zones.
Set the LO PWR / HI PWR OUTPUT switch on the PCMZPM to the LO PWR position (up).
AMPLIFIER
BOGEN
MODEL TPU-100B
100WATT
•
•
STEP 6: Testing Your System
Follow the same procedure described previously on page 5, step 7.
RD COM
RD B
RD C
RD A
-
ZONE C
ZONE B
-
+
-
+
ZONE A
+
IN
RT
LOCAL
BGM
OUTPUT
HI PWR
LO PWR
GLOBL BGM
ZONE C
ZONE B
Locate the terminals on the amplifiers labeled COM and 25V or 70V AC and connect the speakers related to that particular zone.
BGM
OUT
IN
ZONE A
LPBGM
VOLUME
POWER
OFF ON
TALKBACK
ZONE A
ZONE B
ZONE C
Locate the terminals on the PCMZPM module labeled ZONE A and connect to the TIP and RING terminals of the amplifier(s) for
ZONE A.
Follow the same procedure for ZONE B and ZONE C.
STEP 5: Connecting Self-Amplified Speakers
ALC
TEL VOLUME
MUSIC MUTE
MUSIC VOLUME
RING VOLUME
VOX SENS
APHEX
BASS
TREBLE
PEAK LEVEL
POWER LED
MIC VOLUME
AMPLIFIER
BOGEN
MODEL TPU-100B
100WATT
ALC
TEL VOLUME
MUSIC MUTE
MUSIC VOLUME
BASS
RING VOLUME
VOX SENS
PEAK LEVEL
TREBLE
APHEX
POWER LED
MIC VOLUME
AMPLIFIER
BOGEN
100WATT
ALC
MIC VOLUME
TEL VOLUME
RING VOLUME
MUSIC MUTE
MUSIC VOLUME
TREBLE
BASS
VOX SENS
PEAK LEVEL
APHEX
•
•
PCM
ZPM
POWER LED
MODEL TPU-100B
STEP 4: Connecting the Paging Amplifiers
20
21
CONFIGURATION 8:
SETUP FOR CONFIGURATION 10: 6 ZONES - ONE-WAY PAGING - MIXED HIGH- AND LOW-POWER ZONES 25/70V AC OR SELF-AMPLIFIED SPEAKERS
TWO-WAY TALK BACK EXTENDED PAGING SYSTEM
ZONE A
ZONE C
ZONE B
The required setup includes: PCMTIM - 2 PCMCPU - PCMTBM - 4 PCMZPM - 2 PCMPS2
ZONE A
ZONE B
ZONE C
This configuration is essentially the same as the two-way paging system described previously on page 17.The main difference is the addition
of a satellite assembly.
Note:
Talk Back is only available in High-Power Zones with 25/70V AC speakers.
The paging access output from the telephone system must support two-way communications.
INSTALLATION:
STEP 1: Assembling Master Modules PCMTIM to PCMCPU to PCMTBM and to PCMZPM
BOGEN
MODEL TPU-100B
100WATT AMPLIFIER
Note: Do NOT connect the PCMPS2 (power supply) at this point.
•
RD COM
RD C
RD B
RD A
-
+
-
ZONE C
ZONE B
ZONE A
-
+
+
IN
RT
HI PWR
LOCAL
BGM
OUTPUT
LO PWR
GLOBL BGM
ZONE C
ZONE B
ZONE A
•
•
•
BGM
OUT
IN
OFF ON
TALKBACK
POWER
LPBGM
VOLUME
•
•
ZONE A
ZONE B
ZONE C
Follow the same procedure described previously on page 15, step 2.
STEP 3: Switch Settings
•
PCM
ZPM
Follow the same procedure described previously on page 17, step 1.
STEP 2: Assembling Satellite Modules PCMCPU to PCMZPM
ALC
TEL VOLUME
BASS
MUSIC MUTE
MUSIC
VOLUME
MIC VOLUME
RING VOLUME
TREBLE
VOX SENS
PEAK LEVEL
APHEX
POWER LED
MODEL TPU-100B
100WATT AMPLIFIER
BOGEN
ALC
TEL VOLUME
MUSIC MUTE
MUSIC
VOLUME
MIC VOLUME
RING VOLUME
APHEX
BASS
VOX SENS
PEAK LEVEL
TREBLE
POWER LED
MODEL TPU-100B
BOGEN
ALC
TEL VOLUME
MUSIC MUTE
MUSIC
VOLUME
MIC VOLUME
VOX SENS
RING VOLUME
BASS
TREBLE
POWER LED
PEAK
LEVEL
APHEX
100WATT AMPLIFIER
•
Set the TEL-INT-SEL DIP switches on the PCMTIM module to match the paging output access from the telephone system based on the
type of telephone interface used. (See step 3 on page 5 if using Page Port Contact Closure; page 7 for Page Port VOX; page 9 for Loop
Start Trunk; page 11 for Ground Start Trunk; or page 13 for Station Level/Centrex.)
Set the SYS-ID DIP switches on the master PCMCPU module to the OFF position (to the left).
Set the SYS-ID DIP switches on the first satellite PCMCPU module to the following configuration: switch 1 to the ON position (to the
right), switches 2, 3, & 4 to the OFF position (to the left). See additional SYS-ID settings on page 38.
Set the RUN-PROGRAM switch on each PCMCPU to the RUN mode (up).
Set the TALK BACK switches on the PCMZPM modules to the ON position (to the right) for all zones.
Set the OUTPUT switch on each PCMZPM module to the HI-PWR position (down).
STEP 4: Testing your System
•
•
•
•
•
Connect one PCMPS2 power supply to each PCMCPU module to either the power jack 12V DC input or wire it to the 12V DC screw
terminals, observing polarity.
At this point all the power LEDs should be lit on each module.
Access the paging from the phone system and verify access tones (double beep).
At this point, the system should be functioning properly.
Disconnect Power Supply.
RD COM
RD C
RD B
RD A
-
+
-
ZONE C
ZONE B
+
ZONE A
-
+
IN
RT
HI PWR
LOCAL
BGM
OUTPUT
LO PWR
GLOBL BGM
ZONE C
ZONE B
•
•
PCM
ZPM
BGM
OUT
IN
ZONE A
LPBGM
VOLUME
OFF ON
TALKBACK
POWER
ZONE A
ZONE B
ZONE C
STEP 5: Connecting the Paging Amplifier
Locate the terminals on the PCMTBM module labeled PA OUT/RT and wire to the COMMON and either 25 or 70V output on the
Bogen paging amplifier (either TPU-Series, GS-Series or Classic Series).
Locate the terminals on the PCMTBM module labeled PA IN/RT and wire to the TIP and RING input on the Bogen paging amplifier.
STEP 6: Connecting 25/70V AC Speakers
•
Follow the same procedure described previously on page 5, step 6.
STEP 7: Testing your System
•
•
- 1.5 A
MODEL TPU-100B
BOGEN
ALC
TEL VOLUME
RING VOLUME
MUSIC MUTE
MUSIC
VOLUME
MIC VOLUME
VOX SENS
PEAK LEVEL
APHEX
BASS
POWER LED
TREBLE
0
PCM
CPU
22
100WATT AMPLIFIER
•
BOGEN
+ 12VDC
GND
AUX
GND
EM/SC
RT
HPBGM
IN
RT
OUT
PA
LPBGM
RT
IN
IN
RT
PA
+
12 VDC
1.5 A
DATA
LINK
RUN
PROGRAM
1
S1
S2
S3
S4
POWER
SYS
ID
-
•
•
•
•
Connect a PCMPS2 power supply to each PCMCPU module to either the power jack 12V DC input or wire it to the 12V DC screw
terminals observing polarity.
Connect the Bogen amplifier to the AC power outlet (120V AC 60Hz).
Set the volume on your Bogen amplifier to a 1/2 turn.
Access the paging from the telephone system and listen (on the handset) for the confirmation tone (double beep).
Dial 01 to access ZONE ONE and listen (on the handset and also to the speakers) for a pre-announce tone (single beep). At this point,
you should be able to hear audio from the location where the speaker for ZONE ONE is installed.
The volume and delay controls on the PCMTBM module, control the audio back into the handset. Adjust these controls for best operation.
Set the Bogen amplifier to the desired volume level.
19
CONFIGURATION 10:
6 ZONES - ONE-WAY PAGING - MIXED HIGH- AND LOW-POWER ZONES 25/70V AC OR SELF-AMPLIFIED SPEAKERS
RD COM
RD B
RD C
-
RD A
ZONE C
ZONE B
-
+
-
+
+
IN
RT
ZONE A
LOCAL
BGM
OUTPUT
HI PWR
LO PWR
GLOBL BGM
ZONE C
ZONE B
ZONE A
LPBGM
VOLUME
High- and Low-Power Mixed System is a non-programmable feature that lets the system designer use a dedicated amplifier or self-amplified
speaker per zone and at the same time use a centralized amplifier for zones requiring less than 250 watts of power*.The PCMZPM module
to be used as a low-power module must have all three zones with dedicated amplifiers or self-amplified speakers and have its output switch
set to Low-Power.The other PCMZPM module will be used as a high-power module and its output switch must be set to High-Power. In this
example, three TPU100B amplifiers are used on the second PCMZPM low-power module.
BGM
OUT
IN
PCM
ZPM
OFF
ON
TALKBACK
POWER
ZONE A
ZONE B
ZONE C
SATELLITE ASSEMBLY #1
SETUP FOR CONFIGURATION 8:TWO-WAY TALK BACK EXTENDED PAGING SYSTEM
INSTALLATION:
- 1.5 mA
+ 12VDC
GND
AUX
GND
HPBGM
EM/SC
RT
IN
RT
PA
LPBGM
RT
OUT
IN
RT
IN
12 VDC
1.5 A
PA
+
DATA
LINK
PROGRAM
RUN
STEP 1: Assembling Modules
PCM
CPU
0
BOGEN
1
S1
S2
S3
S4
POWER
SYS
ID
-
Note: Low-Power Systems do not support two-way paging.
•
STEP 2: Connecting Telephone System Paging Output to the PCMTIM
RD COM
RD C
RD A
-
RD B
ZONE C
ZONE B
-
+
-
+
ZONE A
+
IN
RT
LOCAL
BGM
OUTPUT
HI PWR
LO PWR
GLOBL BGM
ZONE C
ZONE B
•
IN
ZONE A
LPBGM
VOLUME
RD COM
RD C
RD B
RD A
-
-
+
ZONE C
ZONE B
-
+
ZONE A
+
IN
RT
LOCAL
BGM
OUTPUT
HI PWR
LO PWR
GLOBL BGM
ZONE C
ZONE B
OUT
•
•
•
•
PA
RT
IN
RT
OUT
PA
ON
OFF
NOISE
REDUCTION
DELAY
VOLUME
TALKBACK
70V COM
R
STEP 5: Connecting 25/70V AC Speakers
•
Follow the same procedure described previously on page 5, step 6.
STEP 6: Testing Your System
•
Connect the power supply PCMPS2 to the PCMCPU module to either the power jack 12V DC input or wire it to the 12V DC screw
terminals observing polarity.
Connect the Bogen amplifiers to the AC power outlet (120 V AC 60Hz).
Set the volume on your Bogen amplifiers to a 1/2 turn.
Access the Paging from the telephone system and listen (on the handset) for the confirmation tone (double beep).
Dial 01 to access ZONE ONE and listen (on the handset and also to the speakers) for a pre-announce tone (single beep) followed by
your page (audio).
Follow the same steps for ZONES TWO (02) through SIX (06).
Set the Bogen amplifiers to the desired volume level.
- 1.5 A
RLY
TWO
COM
COM
NC
RLY
ONE
BGM
SRC
IN
RT
OVER
RIDE
TEL
LINE
NIGHT
RING
BGM SRC
VOLUME
TONE
VOLUME
PCM
TIM
0
1
S1
S2
S3
S4
S5
S6
S7
POWER
TEL
INT
SEL
PCM
CPU
0
1
BOGEN
+ 12VDC
GND ST
* Older PCM systems only have a 150W capacity.
NO
AUX
NC
GND
GND
NO
RT
EM/SC
HPBGM
RT
IN
RT
OUT
PA
LPBGM
IN
RT
IN
PA
+
12 VDC
1.5 A
DATA
LINK
PROGRAM
RUN
POWER
SYS
ID
Locate the terminals on the PCMCPU module labeled PA IN/RT and wire it to the TIP and RING (T & R) input on the amplifier.
Locate the terminals on the PCMCPU module labeled PA OUT/RT and wire it to the COMMON and either 25 or 70V AC output on
the amplifier.
Locate the terminals on the second PCMZPM module Low-Power module labeled ZONE A and connect the amplifier to the TIP and
RING terminals. Follow the same procedure for ZONE B and ZONE C.
T
•
•
•
•
•
PCM
TBM
POWER
BOGEN PAGING
AMPLIFIER
RD COM
RD C
RD B
RD A
-
-
+
ZONE C
ZONE B
-
+
ZONE A
+
IN
RT
LOCAL
BGM
OUTPUT
HI PWR
LO PWR
GLOBL BGM
ZONE C
ZONE A
OUT
BGM
IN
ZONE B
OUT
MASTER ASSEMBLY
BGM
LPBGM
VOLUME
OFF
ON
TALKBACK
POWER
ZONE A
ZONE B
ZONE C
•
•
•
•
S1
S2
S3
S4
Set the TEL-INT-SEL DIP switches on the PCMTIM module to match the paging output access from the telephone system based on the
type of telephone interface used. (See step 3 on page 5 if using Page Port Contact Closure; page 7 for Page Port VOX; page 9 for Loop
Start Trunk; page 11 for Ground Start Trunk; or page 13 for Station Level/Centrex.)
Set the SYS ID switches on the PCMCPU module to the OFF position (to the left).
Set the TALK BACK switches on the PCMZPM module to the OFF position (to the left) for all zones.
Set the LO PWR / HI PWR OUTPUT switch on the first PCMZPM High-Power module to the HI PWR OUTPUT position (down).
Set the LO PWR / HI PWR OUTPUT switch on the second PCMZPM Low-Power module to the LO PWR OUTPUT position (up).
STEP 4: Connecting Amplifiers
IN
ZONE A
LPBGM
VOLUME
OFF
ON
TALKBACK
POWER
ZONE A
ZONE B
ZONE C
PCM
ZPM
Refer to paging access modes described previously in Step 2 on pages 5 (paging port/contact closure), 7 (paging port/VOX), 9 (loop start
trunk), 11 (ground start trunk), or 13 (station level/Centrex).
STEP 3: Switch and Control Settings
BGM
PCM
ZPM
OFF
ON
TALKBACK
POWER
ZONE A
ZONE B
ZONE C
•
PCM
ZPM
Follow the same procedure described previously on page 5, step 1.
Note: Do NOT connect PCMPS2 (power supply) at this point.
18
23
CONFIGURATION 7:
SETUP FOR CONFIGURATION 11: MICROPHONE OVERRIDE
GND ST
RLY TWO
COM
NO
NC
RLY ONE
COM
NO
NC
BGM
SRC
IN
RT
OVER RIDE
TEL
LINE
NIGHT
RING
BGM SRC
VOLUME
TONE
VOLUME
This configuration is essentially the same as the one-way paging system described previously.The main difference between the one-way configuration and this configuration is that the centralized high-power amplifier is connected to the PCMTBM module instead of the PCMCPU
module.The required setup includes: PCMTIM - PCMCPU - PCMTBM - PCMZPM - PCMPS2. Modules must be assembled, from left to right,
in this order.
Notes: Talk Back is only available in High-Power Zones with 25/70V AC speakers.The paging access output from the telephone system must support two-way communications.
0
1
S1
S2
S3
S4
S5
S6
S7
POWER
TEL
INT
SEL
TWO-WAY TALK BACK PAGING SYSTEM
PCM
TIM
INSTALLATION:
STEP 1: Assembling Modules PCMTIM to PCMCPU to PCMTBM and to PCMZPM (see Illustration on page 38)
•
•
•
•
•
Contact closure
Dry audio input to PCMTIM (from VAR1)
Not used
Not used
Dry audio input to PCMTIM (from VAR1)
BL
W
Plug the 6-pin power connector from the PCMCPU module to the PCMTIM module jack (J2.) Make sure that the locking ridge faces
header wall. (Green wire to the top).
Plug the 26-pin ribbon cable from the PCMCPU module to the PCMTIM module 26-pin connector (J1). Make sure to align the polarizing
tab in slot. (Pin 1 red stripe to the top).
Place the modules together and dress the connector cables away from the sheet metal so they will not get pinched.
Push the two units together while aligning the locking tabs in the PCMTIM module to the locking slots in the PCMCPU module. Slide
the two units until the faces of both units are even.
Secure the two units together by tightening a screw into the screw clamp tab in the back of the unit.
Follow the same steps to add the PCMTBM module and the PCMZPM modules.
Note: Do NOT connect the PCMPS2 (power supply) at this point.
STEP 2: Connecting Telephone System Paging Output to the PCMTIM
•
BK
RJ 11
MODULAR BOX
Contact closure
6 CONDUCTOR
MODULAR CABLE
•
Refer to paging access modes described previously in Step 2 on pages 5 (paging port/contact closure), 7 (paging port/VOX), 9 (loop start
trunk), 11 (ground start trunk), or 13 (station level/Centrex).
Y
STEP 3: Switch Settings
•
R
G
•
•
•
•
Set the TEL-INT-SEL DIP switches on the PCMTIM module to match the paging output access from the telephone system based on the
type of telephone interface used. (See step 3 on page 5 if using Page Port Contact Closure; page 7 for Page Port VOX; page 9 for Loop
Start Trunk; page 11 for Ground Start Trunk; or page 13 for Station Level/Centrex.)
Set the SYS-ID DIP switches on the PCMCPU to the OFF position (to the left).
Set the RUN-PROGRAM switch on the PCMCPU to the RUN mode (up).
Set the TALK BACK switches for the zones requiring two-way talk back to the ON position (right) on the PCMZPM module.
Set the OUTPUT switch on the PCMZPM module to the HI-PWR position (down).
STEP 4: Testing your System
•
BOGEN
•
•
•
•
•
Connect power supply PCMPS2 to the PCMCPU module to either the power jack 12V DC input or wire it to the 12V DC screw terminals observing polarity.
At this point all the power LEDs should be lit on each module.
Access the paging from the phone system and verify access tones (double beep) in handset.
Speak into the handset and listen.You should be able to hear the Talk Back Relay clicking back and forth inside the PCMTBM module.
(You must be near the PCM unit to hear it.)
At this point, the system should be functioning properly.
Disconnect Power Supply.
EMERGENCY
MICROPHONE
DELAY
•
•
VOL
MIC
COM
600
25V
70V
Follow the same procedure described previously on page 5, step 6.
STEP 7: Testing your System
•
•
•
•
•
•
•
24
Locate the terminals on the PCMTBM module labeled PA OUT/RT and wire to the COMMON and either 25 or 70V output on the
Bogen paging amplifier (either TPU-Series, GS-Series or Classic Series).
Locate the terminals on the PCMTBM module labeled PA IN/RT and wire to the TIP and RING input on the Bogen paging amplifier.
STEP 6: Connecting 25/70V AC Speakers
•
MIC
INPUT
-
+
SENS
VOX
RELAY
VAR1
LINE
PRS40C
MIC
AUDIO
OUTPUT
STEP 5: Connecting the Paging Amplifier
Connect the power supply PCMPS2 to the PCMCPU module to either the power jack 12V DC input or wire it to the 12V DC screw
terminals observing polarity.
Connect the Bogen amplifier to the AC power outlet (120V AC 60Hz).
Set the volume on your Bogen amplifier to a 1/2 turn.
Access the paging from the telephone system and listen (on the handset) for the confirmation tone (double beep).
Dial 01 to access ZONE ONE and listen (on the handset and also to the speakers) for a pre-announce tone (single beep). At this point
you should be able to hear audio from the location where the speaker for ZONE ONE is installed.
The volume and delay controls on the PCMTBM module control the audio back into the handset. Adjust these controls for best operation.
Set the Bogen amplifier to the desired volume level.
17
CONFIGURATION 11:
SETUP FOR CONFIGURATION 7:TWO-WAY TALK BACK PAGING SYSTEM
MICROPHONE OVERRIDE
In addition to the PCM modules, setup requires a Bogen VAR1 (voice-activated relay), PRS40C (12V DC power supply) and an MBS1000 or
DDU250 (desktop microphone).
ZONE A
ZONE B
ZONE C
Microphone Override is a feature that lets the system designer take priority over all paging functions and make a system-wide page to all
speakers.
The Override feature includes a quad beep pre-announce tone which can be enabled or inhibited.
INSTALLATION:
•
•
IN
BGM
•
•
PA
RT
IN
RT
OUT
•
•
OFF
•
PCM
TBM
ON
TALKBACK
NOISE
REDUCTION
DELAY
VOLUME
PA
•
•
POWER
Follow the same procedure described previously on page 5 or 17, step 5.
STEP 3: Connecting Optional Equipment
OUT
PCM
ZPM
Refer to step 1 on pages 5 and 17.
STEP 2: Connecting the Paging Amplifier
RD COM
RD B
RD C
RD A
-
+
ZONE C
ZONE B
-
-
+
ZONE A
+
IN
RT
LOCAL
BGM
OUTPUT
HI PWR
LO PWR
GLOBL BGM
ZONE C
ZONE B
ZONE A
LPBGM
VOLUME
OFF
ON
TALKBACK
POWER
ZONE A
ZONE B
ZONE C
STEP 1: Assembling Modules and Connecting the Amplifier
•
Attach a 6-pin RJ11 modular jack to the wall next to the PCM2000 unit.
Connect the first audio output terminal from the top of the VAR1 (right screw terminals) to the RJ11 modular jack terminal Y (yellow).
Connect the second audio output terminal from the top of the VAR1 to the N.O. contact of the VAR1.
Connect the fifth screw terminal from the top of the VAR1 (see drawing) to the RJ11 modular jack terminal BK (black).
Connect the relay terminals (normally open contacts) from the VAR1 (two bottom right screw terminals) to the RJ11 modular jack terminals W (white) and BL (blue).
Connect the MBS1000 or DDU250 microphone leads to the VAR1 (left screw terminals): red to third screw, black to fifth screw, and
shield to fourth screw.
Do not use the white and green wires from the MBS1000 or DDU250 unless you want to use them instead of the normally open contacts on the VAR1.
Connect a 6-pin RJ11 modular cable between the RJ11 modular jack (previously attached to the wall next to the PCM2000) and the
Override RJ11 input on the PCMTIM module.
Connect the PRS40C power supply to the VAR1 (two top left screw terminals) observing polarity or use the mini-plug and connect it
into the mini-jack at the bottom.
STEP 4: Switch and Control Settings
- 1.5 A
+ 12VDC
GND
AUX
GND
EM/SC
RT
HPBGM
RT
IN
OUT
PA
LPBGM
IN
RT
IN
RT
PA
+
12 VDC
1.5A
DATA
LINK
PROGRAM
RUN
•
•
+
-
GND ST
NO
RLY
TWO
COM
NC
NO
COM
NC
RLY
ONE
BGM
SRC
IN
RT
OVER
RIDE
TEL
LINE
NIGHT
RING
BGM SRC
VOLUME
TONE
VOLUME
0
PCM
TIM
Set the TEL-INT-SEL DIP switches on the PCMTIM module to match the paging output access from the telephone system based on the
type of telephone interface used. (See step 3 on page 5 if using Page Port Contact Closure; page 7 for Page Port VOX; page 9 for Loop
Start Trunk; page 11 for Ground Start Trunk; or page 13 for Station Level/Centrex.)
Set the Line/MIC switch on the VAR1 to the MIC position.
Set the Mic volume control on the VAR1 at 50%.
STEP 5: Testing Your System
•
•
•
•
•
•
•
•
•
1
S1
S2
S3
S4
S5
S6
S7
POWER
TEL
INT
SEL
PCM PS2
PCM
CPU
0
BOGEN
1
S1
S2
S3
S4
POWER
SYS
ID
-
•
Connect the power supply PCMPS2 to the PCMCPU module to either the power jack 12V DC input or wire it to the 12V DC screw
terminals observing polarity.
Connect the Bogen amplifier to the AC power outlet (120V AC 60Hz).
Set the volume on your Bogen amplifier a half turn.
Access the paging from the telephone system and listen (on the handset) for the confirmation tone (double beep).
Dial 01 to access ZONE ONE and listen (on the handset and also to the speakers) for a pre-announce tone (single beep) followed by
your page (audio).
Follow the same steps for ZONES TWO (02) and THREE (03).
Access the emergency override by pressing the talk bar on the MBS1000 or sliding the DDU250 switch.
You should hear a quad beep pre-announce tone followed by your all-call/emergency page.
Adjust the VAR1 and PCM2000 controls for optimal operation.
70V
T
R
BOGEN PAGING
AMPLIFIER
COM
NOTE: You will not be able to access individual zones using the Override feature, it is for All-Call Emergency only to all
zones.
16
25
SETUP FOR CONFIGURATION 12: DFT120 & TAMB WIRING DIAGRAM - LOOP START TRUNK, GROUND START TRUNK OR STATION LEVEL
CONFIGURATION 6:
EXTENDED PAGING SYSTEM
GND ST
RLY
TWO
COM
NO
NC
COM
NO
RLY
ONE
BGM
SRC
IN
RT
NC
OVER
RIDE
TEL
LINE
NIGHT
RING
BGM SRC
VOLUME
TONE
VOLUME
As described previously, the required setup for one-way basic configuration includes: PCMTIM, PCMCPU, PCMZPM, and the power supply
PCMPS2. For PCM systems with satellites (more than 9 zones), the number of modules and power supplies will increase as follows:
RJ 11
MODULAR
BOX
# PCMTIM
# PCMCPU
# PCMZPM*
# PCMPS2
1 to 9
10 to 18
19 to 27
28 to 36
37 to 45
46 to 54
55 to 63
64 to 72
73 to 81
82 to 90
91 to 99
1
1
1
1
1
1
1
1
1
1
1
1
2
3
4
5
6
7
8
9
10
11
1 to 3
4 to 6
7 to 9
10 to 12
13 to 15
16 to 18
19 to 21
22 to 24
25 to 27
28 to 30
31 to 33
1
2
3
4
5
6
7
8
9
10
11
BL
* 1 PCMZPM for every 1-3 paging zones.
R
G
INSTALLATION:
W
R
BK
# ZONES
Notice that for every 9 zones, one additional PCMCPU and one additional PCMPS2 are needed.
G
Y
Y
BK
ANALOG LINE
BL
W
24/48V DC
POWER
SUPPLY
6 CONDUCTOR
MODULAR
CABLE
PBX
PCM
TIM
0
1
S1
S2
S3
S4
S5
S6
S7
POWER
TEL
INT
SEL
This illustration shows the wiring between a master assembly and a satellite assembly in a PCM system with a satellite assembly for one-way paging.
STEP 1: Assembling Master Modules PCMTIM to PCMCPU and to PCMZPM
•
Follow the same procedure described previously on page 5, step 1.
Note: Do NOT connect the PCMPS2 (power supply) at this point.
STEP 2: Assembling Satellite Modules PCMCPU to PCMZPM (see Illustration on page 38)
•
•
STEP 3: Switch Settings
•
•
•
6
•
•
•
600
1
DFT120
Set the TEL-INT-SEL DIP switches on the PCMTIM module to match the paging output access from the telephone system based on the
type of telephone interface used. (See step 3 on page 5 if using Page Port Contact Closure; page 7 for Page Port VOX; page 9 for Loop
Start Trunk; page 11 for Ground Start Trunk; or page 13 for Station Level/Centrex.)
Set the SYS-ID DIP switches on the master PCMCPU module to the OFF position (to the left).
Set the SYS-ID DIP switches on the first satellite PCMCPU module to the following configuration: Switch 1 to the ON position (to the
right). Switches 2, 3, & 4 to the OFF position (to the left). See SYS-ID switch settings chart on page 38 for additional satellite systems.
Set the RUN-PROGRAM switch on the PCMCPU module to the RUN mode (up).
Set the TALK BACK switches on the PCMZPM modules to the OFF position (to the left) for all zones.
Set the OUTPUT switch on all the PCMZPM modules to the HI-PWR position (down).
8
VOX DELAY
Not used
Play status contact common
Audio output (-)
Audio output (+)
Play status contact
Not used
Note Switch settings:
Off - Up, On - Down
1 2 3 4 5 6 7 8 9 101112
PAGING TIME
MAX
MIN
MAX
•
Plug the 6-pin power connector from the PCMZPM module to the PCMCPU module jack (J2.) Be sure that the locking ridge faces the
header wall. (Green wire to the top).
Plug the 26-pin ribbon cable from the PCMZPM module to the PCMCPU module 26-pin connector (J1). Be sure to align the polarizing
tab in slot. (Pin 1 red stripe to the top).
The satellite systems are usually installed below the the master assembly and must be within 3 feet of each other.
Use an RCA cable to connect the PCMCPU modules from DATA LINK to DATA LINK RCA connectors. (See drawing.)
STEP 4: Testing your System
•
•
•
•
Connect one PCMPS2 power supply to each PCMCPU module either by the power jack 12V DC input or wire it to the 12V DC screw
terminals, observing polarity.
At this point all the power LEDs should be lit on each module.
Access the paging from the phone system and verify access tones (double beep).
At this point, the system should be functioning properly.
Disconnect Power Supply.
6
DL
TONE VOLUME
MAX
LS
MIN
VOLUME
•
1
STEP 5: Connecting the Paging Amplifier
MIN
12VDC 1A
•
POWER
24 VDC PWR SUPPLY
48 VDC PWR SUPPLY
CONFIRMATION TONE
PREANNOUNCE TONE
VOX DISABLE
VOX ENABLE
MODE
COMPLIES WITH PART 68, FCC RULES
FCC REGISTRATION NUMBER:
CD23CH-17705-KX-N
RINGER EQUIVALENCE: 1.2 B
1 2 3 4 5 6 7 8 9 10 11 12
IN USE PLAY RECORD
MODE
SWITCHES
-24/48
OFF
POWER SUPPLIES
ON
COM
+24/48
PR
N.O.
CONTACT CLOSURE A
-M
PT
PAGING OUTPUT
+M
EXT VOX ENABLE
S1, S2
----S4
S3
----S5
ON
OFF
----S1, S2
S3
S4
S5
-----
T
R
BGM
VOL.
BGM
IN
TELEPHONE ACCESS
MODULE
TAM B
PHONE SYSTEM
BOGEN
COMMUNICATIONS
RAMSEY, NJ
•
•
Locate the terminals on both PCMCPU modules labeled PA OUT/RT and wire them to the COMMON and 25V or 70V output on the
Bogen paging amplifier (either TPU-Series, GS-Series or Classic Series).
Locate the terminals on the PCMCPU modules labeled PA IN/RT and wire to the TIP and RING input on the Bogen paging amplifier.At
this point, the amplifier is connected in parallel to the master PCMCPU module and the satellite PCMCPU module.
STEP 6: Connecting 25/70V AC Speakers
•
Follow the same procedure described previously on page 5, step 6.
STEP 7: Testing your System
•
26
Follow the same procedure described previously on page 5, step 7.
15
CONFIGURATION 12:
DFT120 & TAMB WIRING DIAGRAM - LOOP START TRUNK, GROUND START TRUNK, OR STATION LEVEL
RD COM
RD B
RD C
RD A
-
ZONE C
ZONE B
-
+
ZONE A
-
+
+
IN
RT
LOCAL
BGM
OUTPUT
HI PWR
LO PWR
GLOBL BGM
ZONE C
OUT
BGM
IN
ZONE B
ZONE A
LPBGM
VOLUME
OFF
ON
TALKBACK
POWER
ZONE A
ZONE B
ZONE C
PCM
ZPM
In this configuration, the telephone output is connected to the Bogen Telephone Access Module model TAMB; the TAMB module is connected
to the Bogen Digital Feedback Terminator model DFT120; and the DFT120 is connected to the PCM2000 system. The TAMB module is activated by the telephone system and, at the same time, the DFT120 is activated by the TAMB’s normally open contacts. Using digital technology, the DFT120 stores the DTMF tones and the paging audio.When the TAMB closed contacts are removed from the DFT120, the DFT120
activates the PCM2000 system also using normally open contacts, and plays the page (audio). In addition to the above equipment, you will
also need a PRSASAC power supply and two RJ11 modular boxes.
INSTALLATION:
•
- 1.5A
+ 12VDC
AUX
GND
GND
HPBGM
EM/SC
RT
IN
RT
OUT
PA
LPBGM
RT
IN
IN
RT
PA
+
12 VDC
1.5A
DATA
LINK
PROGRAM
RUN
0
Refer to step 1 on pages 5 and 17.
STEP 2: Connecting the Paging Amplifier
BOGEN
1
S1
S2
S3
S4
POWER
SYS
ID
-
STEP 1: Assembling Modules and Connecting the Amplifier
PCM
CPU
SATELLITE ASSEMBLY #1
SETUP FOR CONFIGURATION 6: EXTENDED PAGING SYSTEM
•
Follow the same procedure described previously on page 5 or 17, step 5.
STEP 3: Connecting an Analog Line or Ground Start Trunk from the Telephone System to the TAMB
•
Take the Analog Line or Ground Start trunk pair from the telephone system and wire it to the TAMB terminals T & R.
STEP 4: Connecting the TAMB Module to the DFT120
RD COM
RD B
RD C
RD A
-
+
-
ZONE C
ZONE B
ZONE A
-
+
RT
+
IN
HI PWR
LOCAL
BGM
OUTPUT
GLOBL BGM
ZONE C
ZONE B
LO PWR
•
•
IN
ZONE A
LPBGM
VOLUME
•
•
RD COM
•
- 1.5A
GND
+ 12VDC
AUX
GND
EM/SC
HPBGM
RT
IN
RT
RT
OUT
PA
LPBGM
IN
RT
IN
12 VDC
1.5A
PA
+
DATA
LINK
•
•
•
•
•
T
R
COM
Connect the power supply PCMPS2 to the PCMCPU module to either the power jack 12V DC input or wire it to the 12V DC screw
terminals observing polarity.
Connect the PCMPS2, PRSASAC, and the DFT120 power supplies and the amplifier to the AC power outlet 120V AC 60Hz.
Set the volume on your Bogen amplifier to a half turn.
Adjust the DFT120 AUDIO OUT volume control to 50%. (You may need to readjust this control higher or lower later, after the test.)
Access the paging from the telephone system.The RECORD LED on the DFT120 must be lit showing that the DFT120 is already
recording.
Dial 01 to record ZONE ONE DTMF tone followed by a test page. (Notice that you will not hear audio coming from the speakers at
this point.)
Hang-up the handset.The PLAY LED on the DFT120 must light showing that the DFT120 is playing the page and you must be able to
hear the page.
If the page is too low, adjust the control for optimal operation.
Note: Unlike the previous Digital Feedback Terminator (DFT30), the DFT120 will accept a Loop Start Trunk or Page Port
directly connected to the unit.Therefore, when connecting to a Loop Start Trunk, a TAMB is not required. (See DFT120
manual for complete instructions.)
GND ST
RLY
TWO
COM
NO
NC
NO
RLY
ONE
COM
NC
RT
BGM
SRC
IN
OVER
RIDE
TEL
LINE
NIGHT
RING
BGM SRC
VOLUME
•
PCM
TIM
0
1
TONE
VOLUME
Set the switches 1, 2 & 4 to ON (to the right) and 3 & 5 to OFF (to the left) on the TAMB.
Set the switches 2, 3, & 7 to ON (to the right) and 1, 4, 5 & 6 to OFF (to the left) on the PCMTIM module for Paging Port Contact closure operation.
STEP 7: Testing Your System
•
BOGEN
0
POWER
70V
RD COM
RD B
RD C
RD A
-
+
-
ZONE C
ZONE B
ZONE A
-
+
RT
IN
+
LOCAL
BGM
OUTPUT
HI PWR
LO PWR
GLOBL BGM
ZONE C
ZONE B
OUT
ZONE A
IN
OUT
BGM
1
RUN
PROGRAM
POWER
SYS
ID
S1
S2
S3
S4
TEL
INT
SEL
S1
S2
S3
S4
S5
S6
S7
•
•
•
PCM
CPU
Attach a 6-pin RJ11 modular jack to the wall next to the PCM2000 unit.
Connect terminals 3 & 4 from the DFT120 jack labeled AUDIO OUT, to the RJ11 modular jack terminals R (red) and G (green).
Connect terminals 2 & 5 from the DFT120 jack labeled AUDIO OUT (PLAY contact) to the RJ11 modular jack terminals Y (yellow) and
BK (black).
Connect a 6-pin RJ11 modular cable between the RJ11 modular jack and the TEL LINE RJ11 input on the PCMTIM module.
STEP 6: Switch and Control Settings
BOGEN PAGING
AMPLIFIER
MASTER ASSEMBLY
RD B
RD C
RD A
-
+
-
ZONE C
ZONE B
ZONE A
-
+
RT
IN
+
LOCAL
BGM
OUTPUT
HI PWR
LO PWR
GLOBL BGM
ZONE C
ZONE B
•
•
•
IN
ZONE A
LPBGM
VOLUME
LPBGM
VOLUME
OFF
ON
TALKBACK
POWER
ZONE A
ZONE B
ZONE C
PCM
ZPM
Using a 6-pin RJ11 modular jack, connect terminals labeled PT & PR from the TAMB to the modular jack terminals R (red) and G
(green).
Connect terminals labeled N.O. & COM from the TAMB to the modular jack terminals Y (yellow) and BK (black).
Connect a 6-pin RJ11 modular cable from the RJ11 jack to the AUDIO IN jacks on the DFT120. Place the switch labeled DL/LS to the
DL (Dry Loop) position.
Connect terminals labeled +24/48 & -24/48 from the TAMB to the PRSASAC power supply. Use pins 1 & 2 labeled 24V DC / 450 mA.
Connect the DFT120 power supply (supplied with the unit) to the DFT120.
STEP 5: Connecting the DFT120 to the PCMTIM Module
BGM
PCM
ZPM
OFF
ON
TALKBACK
POWER
ZONE A
ZONE B
ZONE C
OUT
BGM
PCM
ZPM
OFF
ON
TALKBACK
POWER
ZONE A
ZONE B
ZONE C
•
14
27
CONFIGURATION 5:
STATION LEVEL/CENTREX - 3-ZONE - ONE-WAY PAGING - SINGLE AMPLIFIER - 25/70V AC SPEAKERS
GND ST
RLY TWO
COM
NO
NC
RLY ONE
COM
NO
NC
BGM
SRC
IN
RT
OVER RIDE
TEL
LINE
NIGHT RING
BGM SRC
VOLUME
TONE VOLUME
In this configuration, the PCM unit responds to a 90V AC 20Hz ringing signal in pins 3 & 4 of the TEL LINE jack on the PCMTIM module and
answers after the first full ring. As soon as it answers, the default timer is started.The default timer determines the maximum length of any
page.When a paging zone is selected, the VOX timer (if enabled) is started.This VOX timer repeatedly resets as long as audio is detected on
the line. If no audio is detected within the VOX time period, the page will end. If audio continues to be detected, the default timer will control the page length. Pins 1, 2, 5 & 6 are not used in this configuration.
Note: In this configuration, the unit will also respond to CPC pulses (interruption of loop current) disconnecting the line.
The required setup includes PCMTIM -PCMCPU - PCMZPM - PCMPS2. Modules must be assembled, from left to right, in this order.
1
S1
S2
S3
S4
S5
S6
S7
POWER
TEL
INT
SEL
SETUP FOR CONFIGURATION 13: EMERGENCY VOICE ANNOUNCEMENT OVERRIDE
PCM
TIM
0
INSTALLATION:
STEP 1: Assembling Modules PCMTIM to PCMCPU and to PCMZPM
Follow the same procedure described previously on page 5, step 1.
Note: Do NOT connect the PCMPS2 (power supply) at this point.
STEP 2: Connecting the Station Level/Centrex from the Telephone System to the PCMTIM Module
•
•
Take the Station Level/Centrex pair from the telephone system and wire it to the RJ11 TEL-LINE jack in the PCMTIM module to pins 3
and 4 (red and green).
Use a 4 or 6-pin modular cord to connect the RJ11 to the TEL-LINE input on the PCMTIM module.
STEP 3: Switch Settings
Contact closure
Dry audio input to PCMTIM (from ProHold)
Not used
Dry audio input to PCMTIM (from ProHold)
Not used
BL
W
BK
RJ 11
MODULAR BOX
Contact closure
NORMALLY OPEN
CUSTOMER
SUPPLIED SWITCH
6 CONDUCTOR
MODULAR
CABLE
•
•
•
•
•
•
Set the TEL-INT-SEL DIP switches on the PCMTIM module for Station Level/Centrex configuration: switch 6 ON (to the right) and
switches 1, 2, 3, 4, 5 & 7 OFF (to the left).
Set the SYS-ID DIP switches on the PCMCPU module to the OFF position (to the left).
Set the RUN-PROGRAM switch on the PCMCPU module to the RUN mode (up).
Set the Talk Back DIP switches on the PCMZPM module to the OFF position (to the left) for all zones.
Set the OUTPUT switch on the PCMZPM module to the HI-PWR position (down).
Y
STEP 4: Testing your System
•
R
G
•
•
•
•
Connect power supply PCMPS2 to the PCMCPU module to either the power jack 12V DC input or wire it to the 12V DC screw terminals observing polarity.
At this point all the power LEDs should be lit on each module.
Access the Station Level/Centrex line from the phone system and verify access tones (double beep).
At this point, the system should be functioning properly.
Disconnect Power Supply.
•
BARREL
TIP
STEP 5: Connecting the Paging Amplifier
Follow the same procedure described previously on page 5, step 5.
STEP 6: Connecting 25/70V AC Speakers
•
Follow the same procedure described previously on page 5, step 6.
TRIG
STEP 7: Testing your System
SPKR.
ON/OFF
1 WATT
RING
VOLUME
•
•
•
•
•
PROHOLD
POWER
ON/OFF
12V
AC/DC
LINE
600
•
•
Connect the power supply PCMPS2 to the PCMCPU module to either the power jack 12V DC input or wire it to the 12V DC screw
terminals observing polarity.
Connect the Bogen amplifier to the AC power outlet (120V AC 60Hz).
Set the volume on your Bogen amplifier to a 1/2 turn.
Access the Station Level/Centrex port from the telephone system and listen (on the handset) for the confirmation tone (double beep).
Dial 01 to access zone ONE and listen (on the handset and also to the speakers) for a pre-announce tone (single beep) followed by
your page (audio).
Follow the same steps for ZONES TWO (02) and THREE (03).
Set the Bogen amplifier to the desired volume level.
28
13
SETUP FOR CONFIGURATION 5: STATION LEVEL/CENTREX - 3-ZONE - ONE-WAY PAGING - SINGLE AMPLIFIER - 25/70V AC SPEAKERS
CONFIGURATION 13:
EMERGENCY VOICE ANNOUNCEMENT OVERRIDE
Voice Announcement Override is a non-programmable feature that lets the caller take priority over all paging functions and make a systemwide emergency voice announcement page to all speakers. In addition to the PCM modules, this option requires a ProHold (digital announcer) and a normally open momentary switch supplied by the user.
INSTALLATION:
ZONE A
ZONE C
ZONE B
The Override feature includes a quad beep pre-announce tone which can be enabled or inhibited through programming.
STEP 1: Assembling Modules and Connecting the Amplifier
•
Refer to step 1 on pages 5 and 17.
STEP 2: Connecting the Paging Amplifier
•
Follow the same procedure described previously on page 5 or 17, step 5.
RD COM
RD B
RD C
RD A
-
+
ZONE C
ZONE B
-
+
ZONE A
-
+
IN
RT
LOCAL
BGM
OUTPUT
HI PWR
LO PWR
GLOBL BGM
ZONE C
ZONE B
•
•
•
PCM
ZPM
BGM
OUT
IN
ZONE A
LPBGM
VOLUME
OFF
ON
TALKBACK
POWER
ZONE A
ZONE B
ZONE C
STEP 3: Connecting Optional Equipment
•
•
•
•
Attach a 6-pin RJ11 modular jack to the wall next to the PCM2000 unit.
Connect the audio output from the ProHold labeled Line 600 using the supplied RCA cable to the RJ11 modular jack terminals Y (yellow) and BK (black).
Using the supplied stereo mini-plug, connect it to the TRIG input connector of the ProHold Digital Announcer. At the end of this cable,
you will see 3 bare wires labeled TIP, BARREL and RING.
Connect the TIP wire to one of the terminals on the normally open connections of the customer-supplied switch and the other switch
terminal to the RJ11 modular jack terminal BL (blue).
Connect the BARREL wire to the RJ11 modular jack terminal BL (blue). At this point you should have two wires connected to the BL
(blue) terminal.
Connect the RING wire to the RJ11 modular jack terminal W (white).
Connect a 6-pin RJ11 modular cable between the RJ11 modular jack and the Override RJ11 input on the PCMTIM module.
HPBGM
BOGEN
0
PCM
CPU
+
-
PCM PS2
- 1.5A
+ 12VDC
GND
AUX
GND
EM/SC
IN
RT
RT
OUT
PA
LPBGM
IN
RT
IN
RT
PA
+
12 VDC
1.5A
DATA
LINK
RUN
PROGRAM
•
1
S1
S2
S3
S4
POWER
SYS
ID
-
STEP 4: Switch and Control Settings
STEP 5: Testing Your System
•
GND ST
NO
COM
NC
NO
RLY
TWO
RLY
ONE
COM
NC
BGM
SRC
RT
IN
OVER
RIDE
TEL
LINE
NIGHT
RING
BGM SRC
VOLUME
Connect the power supply PCMPS2 to the PCMCPU module to either the power jack 12V DC input or wire it to the 12V DC screw
terminals, observing polarity.
Connect the Bogen amplifier to the AC power outlet (120V AC 60Hz).
Set the volume on your Bogen amplifier to a half turn.
Insert a pre-recorded normal bias audio tape into the ProHold cassette compartment.
Once the ProHold announcer has downloaded the audio and the LOAD light goes "OFF", press the normally open customer supplied
switch once and listen for the all-call announcement.
R
COM
70V
BOGEN PAGING
AMPLIFIER
1 - Not used
2 - Not used
3 - Ring (Negative)
4 - Tip (Positive)
5 - Not used
6 - Not used
R
PBX
STATION
ACCESS
CENTREX
S7
1
0
S6
S5
S4
S3
S2
S1
TEL
INT
SEL
T
T
PCM
TIM
0
1
TONE
VOLUME
POWER
TEL
INT
SEL
•
•
•
•
S1
S2
S3
S4
S5
S6
S7
Set the TEL-INT-SEL DIP switches on the PCMTIM module to match the paging output access from the telephone system based on the
type of telephone interface used. (See step 3 on page 5 if using Page Port Contact Closure; page 7 for Page Port VOX; page 9 for Loop
Start Trunk; page 11 for Ground Start Trunk; or page 13 for Station Level/Centrex.)
12
29
0
GND ST
COM
RLY TWO
In this configuration, the PCM unit supplies a 48V talk battery and loop current detection from pins 3 & 4 of the TEL LINE jack on the
PCMTIM module to the ground start trunk in the telephone system. There are two modes of operation for ground start trunk.
NO
NC
RLY ONE
COM
NO
NC
BGM
SRC
IN
RT
OVER RIDE
TEL
LINE
NIGHT RING
BGM SRC
VOLUME
TONE VOLUME
CONFIGURATION 4:
GROUND START TRUNK - 3-ZONE - ONE-WAY PAGING - SINGLE AMPLIFIER - 25/70V AC SPEAKERS
1
S1
S2
S3
S4
S5
S6
S7
POWER
TEL
INT
SEL
SETUP FOR CONFIGURATION 14: DTMF MICROPHONE ZONE PAGING
(1) When the ground start trunk grounds Ring, the unit responds by closing the connection to Tip, which completes the access procedure.
When the loop is opened, the page ends. Pins 1, 2, 5 & 6 are not used in this configuration. Note: Default and VOX timers are not used
in this mode.
RING (Red)
Red
TIP (Green)
PCM
TIM
(2) The unit will operate as in mode one, except it will also provide a one-second hook flash after the expiration of the VOX and/or Default
timers. Operation in this mode will enable the unit to automatically disconnect itself from the ground start trunk of the PBX. This will prevent the paging system from being locked up indefinitely in the event a telephone is accidentally left off hook after a page has been completed. The feature codes are 014 to inhibit and 015 to enable this feature. The default feature code is 014 (OFF).
The required setup includes PCMTIM - PCMCPU - PCMZPM - PCMPS2. Modules must be assembled, from left to right, in this order.
INSTALLATION:
STEP 1: Assembling Modules PCMTIM to PCMCPU and to PCMZPM
Green
•
Follow the same procedure described previously on page 5, step 1.
Note: Do NOT connect the PCMPS2 (power supply) at this point.
STEP 2: Connecting the Ground Start Trunk from the Telephone System to the PCMTIM Module
3
1
•
2
•
•
STEP 3: Switch Settings
Yellow
•
•
•
•
•
2
Red & Black
Add a 680-ohm
resistor
Shielded
Set the TEL-INT-SEL DIP switches on the PCMTIM module for Ground Start Trunk configuration: switches 2, 4 & 5 ON (to the right)
and switches 1, 3, 6 & 7 OFF (to the left).
Set the SYS-ID DIP switches on the PCMCPU module to the OFF position (to the left).
Set the RUN-PROGRAM switch on the PCMCPU module to the RUN mode (up).
Set the Talk Back DIP switches on the PCMZPM module to the OFF position (to the left) for all zones.
Set the OUTPUT switch on the PCMZPM module to the HI-PWR position (down).
3
STEP 4: Testing your System
•
1
Microphone Connections
Pin1 = Shielded
Pin 2 = Red and Black wires
Pin 3 = Yellow
Add a 680-ohm 1/4 w resistor across pins 1 and 2
THIS PAGE INTENTIONALLY LEFT BLANK
Take the ground start trunk pair from the telephone system and wire it to the RJ11 TEL-LINE jack in the PCMTIM module to pins 3 and
4 (red and green).
Use a 4 or 6-pin modular cord to connect the RJ11 to the TEL-LINE input on the PCMTIM module.
Use a 24-gauge solid wire to connect the GND ST terminal on the PCMTIM module to the PBX ground. This is typically the AC ground
for the PBX system.
•
•
•
•
Connect power supply PCMPS2 to the PCMCPU module to either the power jack 12V DC input or wire it to the 12V DC screw terminals observing polarity.
At this point all the power LEDs should be lit on each module.
Access the Ground Start Trunk from the phone system and verify access tones (double beep).
At this point, the system should be functioning properly.
Disconnect Power Supply.
STEP 5: Connecting the Paging Amplifier
•
Follow the same procedure described previously on page 5, step 5.
STEP 6: Connecting 25/70V AC Speakers
•
Follow the same procedure described previously on page 5, step 6.
SHURE FIVE CONDUCTOR COIL
CORD MODULINK MODEL ALM1
MUST BE ORDERED SEPARATELY
•
•
•
•
•
•
•
Connect the power supply PCMPS2 to the PCMCPU module to either the power jack 12V DC input or wire it to the 12V DC screw
terminals observing polarity.
Connect the Bogen amplifier to the AC power outlet (120V AC 60Hz).
Set the volume on your Bogen amplifier to a 1/2 turn.
Access the Ground Start Trunk from the telephone system and listen (on the handset) for the confirmation tone (double beep).
Dial 01 to access ZONE ONE and listen (on the handset and also to the speakers) for a pre-announce tone (single beep) followed by
your page (audio).
Follow the same steps for ZONES TWO (02) and THREE (03).
Set the Bogen amplifier to the desired volume level.
SHURE
#
0OPER
*
WXY
9
TUV
8
PRS
7
MNO
6
JKL
5
GHI
4
DEF
ABC
2
1
3
STEP 7: Testing your System
30
11
CONFIGURATION 14:
SETUP FOR CONFIGURATION 4: GROUND START TRUNK - 3-ZONE - ONE-WAY PAGING - SINGLE AMPLIFIER - 25/70V AC SPEAKERS
DTMF MICROPHONE ZONE PAGING
This section will describe the configuration for the use of a Shure microphone Model 885TT with DTMF dialing capabilities and the MODULINK fiveconductor coil-cord model ALM-1.
1111-
ZONE A
ZONE B
ZONE C
In addition to the PCM2000 system and associated amplifiers, the model numbers and components required for this configuration are:
Shure Microphone model 885TT
Shure MODULINK coil cord model ALM-1
XLR connector
680 ohms ¼-watt resistor
Paging with a DTMF Shure condenser microphone is a non-programmable feature that lets the caller use a Shure 885TT microphone to page
one-way to specific zones or all zones.
RD COM
RD B
RD C
RD A
-
+
ZONE C
ZONE B
-
-
+
ZONE A
+
IN
RT
LOCAL
BGM
OUTPUT
HI PWR
LO PWR
GLOBL BGM
ZONE C
ZONE B
SHURE 885TT MODIFICATION:
STEP 1: Disassembling the Microphone
•
•
•
PCM
ZPM
BGM
OUT
IN
ZONE A
LPBGM
VOLUME
OFF
ON
TALKBACK
POWER
ZONE A
ZONE B
ZONE C
Note: The Shure microphone model 885TT requires a modification in order to operate properly with the PCM2000 zone
paging modules.
•
Remove the cable, if attached, to the microphone using a paper clip.
Remove the four Phillips-head screws from the back of the microphone.
Hold the microphone with its back toward you and the cable connector down, and carefully separate the case back slightly from the
front.
Pivot the case back to the
right taking care not to damTHIS PAGE INTENTIONALLY LEFT BLANK
age any internal leads or components.
PCM
CPU
+
•
-
0
BOGEN
PCM PS2
- 1.5A
+ 12VDC
GND
AUX
GND
EM/SC
HPBGM
RT
IN
RT
OUT
PA
LPBGM
IN
RT
IN
RT
PA
+
12 VDC
1.5A
DATA
LINK
RUN
PROGRAM
•
1
S1
S2
S3
S4
POWER
SYS
ID
-
STEP 2: Detaching the Case Back and Rear Printed Circuit Board
•
STEP 3: Modification
•
•
•
•
•
GND ST
NO
COM
NC
NO
RLY
TWO
RLY
ONE
COM
NC
BGM
SRC
IN
RT
OVER
RIDE
TEL
LINE
NIGHT
RING
BGM SRC
VOLUME
Locate pin 5 on the solder side of the J303 phone jack (cable entry) and cut the trace around pin 5, disconnecting it from ground.
Locate the black wire connected from the microphone switch to the first printed circuit board and unsolder it from the board.
Solder the black wire disconnected previously from the first P.C. board to pin 5 on the soldered side of the J303 phone jack (cable
entry).
Locate transistor Q303 on the component side and clip or unsolder the collector lead.
STEP 4: XLR Connector Setup
PCM
TIM
0
1
TONE
VOLUME
POWER
TEL
INT
SEL
•
S1
S2
S3
S4
S5
S6
S7
With the partially disassembled microphone face down on a flat surface and with the cable entry toward you, locate the multi-pin connector on the left side between the center board and the rear board.
Carefully pry the rear board away from the connector on the centerboard. You may need a small flathead screwdriver to separate the
terminal pins connected to the rear board and the connector attached to the center board.
Lift the microphone case back and the rear board away from the center board.
An XLR connector (not included) is recommended.
Solder the XLR connector to the Shure microphone coil cord MODULINK model ALM-1 as follows:
•
Solder a 680-ohm resistor across pins 1 and 2
•
Solder-shielded wire to pin 1, red and black wires to pin 2, and yellow to pin 3.
STEP 5: Reassembling
•
Reassemble the microphone by reversing the steps of disassembly.
R
COM
Connect the XLR connector to MIC socket.
Press and keep pressed the microphone switch.
Dial the two digits to access the zone desired or dial 00 for all-call.
70V
BOGEN PAGING
AMPLIFIER
1 - Not used
2 - Not used
3 - Ring (Negative)
4 - Tip (Positive)
5 - Not used
6 - Not used
PBX Ground
R
PBX
GROUND
START
TRUNK
S7
1
•
•
•
0
S6
S5
S4
S3
S2
S1
TEL
INT
SEL
T
T
OPERATION:
10
31
CONFIGURATION 3:
LOOP START TRUNK - 3-ZONE - ONE-WAY PAGING - SINGLE AMPLIFIER - 25/70V AC SPEAKERS
CONFIGURATION 15:
SINGLE AMPLIFIER BACKGROUND MUSIC LINE-LEVEL SIGNAL
Single amplifier BGM operation is a programmable feature that lets the PCM2000 use the paging amplifier to provide high-power BGM to the
25/70V AC speakers when the paging system is idle.
In this configuration, the PCM unit supplies a 48V talk battery and loop current detection from pins 3 & 4 of the TEL LINE jack on the
PCMTIM module to the loop start trunk in the telephone system.There are two modes of operation for loop start trunk.
INSTALLATION:
(1) When the unit detects a loop resistance between TIP and RING, it activates.When the loop opens, the page ends. Pins 1, 2, 5 & 6 are not
used in this configuration. Note: Default and VOX timers are not used in this mode.
STEP 1: Connecting Telephone System Paging Output to the PCMTIM
STEP 2: Connecting the BGM Source
(2) The unit will operate as in mode one, except it will also provide a one-second hook flash after the expiration of the VOX and/or Default
timers. Operation in this mode will enable the unit to automatically disconnect itself from the loop start trunk of the PBX.This will prevent
the paging system from being locked up indefinitely in the event a telephone is accidentally left off hook after a page has been completed.The
feature codes are 014 to inhibit and 015 to enable this feature.The default feature code is 014 (OFF).
•
The required setup includes PCMTIM - PCMCPU - PCMZPM - PCMPS2. Modules must be assembled, from left to right, in this order.
•
Refer to paging access modes described previously in Step 2 on pages 5 (paging port/contact closure), 7 (paging port/VOX), 9 (loop start
trunk), 11 (ground start trunk), or 13 (station level/Centrex).
Connect the BGM source output to the PCMTIM module terminals labeled BGM SOURCE IN/RT.
STEP 3: PCMCPU Switch Settings
INSTALLATION:
•
STEP 1: Assembling Modules PCMTIM to PCMCPU and to PCMZPM
Remove the switch lock on the PCMCPU module and place the PROGRAM/RUN switch to the PROGRAM position (down), the green
LED will illuminate.
STEP 4:Testing the System
•
Follow the same procedure described previously on page 5, step 1.
Note: Do NOT connect the PCMPS2 (power supply) at this point.
•
Access the PCM2000 system (either use a single 2500-series line telephone or butt set or dial the paging access number from the telephone system).You will hear 3 beep tones indicating access to the programming mode.
STEP 2: Connecting Loop Start Trunk from the Telephone System to the PCMTIM Module
•
Dial 019 follow by the ( # ) key.You will hear a short double beep if the programming was accepted and stored in the system.
•
Take the loop start trunk pair from the telephone system and wire it to the RJ11 TEL-LINE jack in the PCMTIM module to pins 3 and 4
(red and green).
Use a 4 or 6-pin modular cord to connect the RJ11 to the TEL-LINE input on the PCMTIM module.
STEP 5: Prepare System for Operation
•
•
STEP 3: Switch Settings
Hang up the programming phone and then place the PROGRAM/RUN switch in the RUN position.The green LED will go out. Replace
the switch lock.
Music Source
Bogen TP30D
•
•
•
•
PCM
TIM
UP
BAND
MSCAN
M1
M2
TEL
INT
SEL
1
TP30D DIGITAL TUNER
POWER
DOWN
MONO
ME
M4
M5
M6
BOGEN
•
•
•
•
•
M3
0
Set the TEL-INT-SEL DIP switches on the PCMTIM module for Loop Start Trunk configuration: switches 3, 4 & 5 ON (to the right) and
switches 1, 2, 6 & 7 OFF (to the left).
Set the SYS-ID DIP switches on the PCMCPU module to the OFF position (to the left).
Set the RUN-PROGRAM switch on the PCMCPU module to the RUN mode (up).
Set the Talk Back DIP switches on the PCMZPM module to the OFF position (to the left) for all zones.
Set the OUTPUT switch on the PCMZPM module to the HI-PWR position (down).
STEP 4: Testing your System
S1
S2
S3
S4
S5
S6
S7
POWER
•
TONE VOLUME
STEP 5: Connecting the Paging Amplifier
•
BGM SRC
VOLUME
OVER RIDE
IN
BGM
SRC
RT
Follow the same procedure described previously on page 5, step 6.
STEP 7: Testing your System
•
TEL
LINE
Follow the same procedure described previously on page 5, step 5.
STEP 6: Connecting 25/70V AC Speakers
•
NIGHT RING
Connect power supply PCMPS2 to the PCMCPU module to either the power jack 12V DC input or wire it to the 12V DC screw terminals observing polarity.
Power LEDs should be lit on each module.
Access the Loop Start Trunk from the phone system and verify access tones (double beep).
At this point, the system should be functioning properly.
Disconnect Power Supply.
•
•
•
•
•
•
Connect the power supply PCMPS2 to the PCMCPU module to either the power jack 12V DC input or wire it to the 12V DC screw
terminals observing polarity.
Connect the Bogen amplifier to the AC power outlet (120V AC 60Hz).
Set the volume on your Bogen amplifier to a 1/2 turn.
Access the Loop Start Trunk from the telephone system and listen (on the handset) for the confirmation tone (double beep).
Dial 01 to access ZONE ONE and listen (on the handset and also to the speakers) for a pre-announce tone (single beep) followed by
your page (audio)
Follow the same steps for ZONES TWO (02) and THREE (03).
Set the Bogen amplifier to the desired volume level.
NC
COM
RLY ONE
NO
NC
COM
RLY TWO
NO
GND ST
32
9
CONFIGURATION 16:
SETUP FOR CONFIGURATION 3: LOOP START TRUNK - 3-ZONE - ONE-WAY PAGING - SINGLE AMPLIFIER - 25/70V AC SPEAKERS
PCM
ZPM
ZONE A
ZONE B
ZONE C
RELAY DRIVER OUTPUT
ZONE A
ZONE B
ZONE C
OFF ON
TALKBACK
SUPRESSION DIODES
LPBGM
VOLUME
RD COM
RD B
RD C
RD A
-
+
ZONE C
ZONE B
-
-
+
ZONE A
+
IN
RT
LOCAL
BGM
OUTPUT
HI PWR
LO PWR
GLOBL BGM
ZONE C
ZONE B
ZONE A
LPBGM
VOLUME
OFF
ON
TALKBACK
POWER
ZONE A
ZONE B
ZONE C
POWER
BGM
OUT
IN
RELAY
PCM
ZPM
BGM
OUT
IN
ZONE A
ZONE B
ZONE C
GLOBL BGM
RELAY
LO PWR
OUTPUT
HI PWR
BOGEN
0
PCM
CPU
+
RT
LOCAL
BGM
+
ZONE A
-
PCM PS2
- 1.5A
+ 12VDC
GND
AUX
GND
EM/SC
HPBGM
RT
IN
RT
OUT
PA
LPBGM
IN
RT
IN
RT
PA
+
12 VDC
1.5A
DATA
LINK
RUN
PROGRAM
IN
1
S1
S2
S3
S4
POWER
SYS
ID
-
RELAY
+
ZONE B
+
ZONE C
RD A
RD B
GND ST
NO
COM
NC
NO
RLY
TWO
RLY
ONE
COM
NC
BGM
SRC
IN
RT
OVER
RIDE
TEL
LINE
NIGHT
RING
BGM SRC
VOLUME
TONE
VOLUME
POWER
SUPPLY
12VDC
+
RD COM
-
T
R
COM
When a zone is activated, its relay driver is shorted to RD COM through an open collector transistor.These drivers can be used to activate
external relays to provide greater power capacity or to operate external equipment.The power supply for these relays must be 12V DC or
less.The total sink current per driver can not exceed 100mA.
70V
BOGEN PAGING
AMPLIFIER
1 - Not used
2 - Not used
3 - Ring (Negative)
4 - Tip (Positive)
5 - Not used
6 - Not used
R
PBX
LOOP START
TRUNK PORT
S7
1
Each PCMZPM module has three relay driver outputs - RD A, RD B, and RD C - one for each speaker zone.
0
S6
S5
S4
S3
S2
S1
TEL
INT
SEL
T
PCM
TIM
0
1
S1
S2
S3
S4
S5
S6
S7
POWER
TEL
INT
SEL
RD C
8
33
SECTION II - PROGRAMMING
SYSTEM PROGRAMMING
CONFIGURATION 2:
PAGE PORT VOX CIRCUIT - 3-ZONE - ONE-WAY PAGING - SINGLE AMPLIFIER - 25/70V AC SPEAKERS
System programming lets you set certain PCM options and tone features using the DTMF keys of a telephone. It also lets you program paging zone groups and signaling zone groups.
This configuration is for Page Ports without Contact Closures. A dry audio pair connected to pins 3 & 4 of the TEL LINE jack on the
PCMTIM module is used to detect audio and activate the system. Paging ends when the VOX timer or default timer times out. Pins 1, 2, 5 &
6 are not used in this configuration.
All programming is accomplished through the TEL LINE jack on the PCMTIM module regardless of the telephone interface used.
Note:The audio pair (page port) must pass DTMF in order to select a zone.
Note:To simplify initial programming, it is recommended that you use the Loop Start Trunk configuration with a single-line
2500-series telephone or your Butt Set connected to the TEL LINE input.
The required setup includes: PCMTIM - PCMCPU - PCMZPM - PCMPS2. Modules must be assembled, from left to right, in this order.
You do not need to program the system to set the zones.The system is ready from the factory to access individual zones
and All-Call.
STEP 1: Assembling Modules PCMTIM to PCMCPU and to PCMZPM
INSTALLATION:
•
To program the PCM2000 system, follow these instructions:
Follow the same procedure described previously on page 5, step 1.
Note: Do NOT connect the PCMPS2 (power supply) at this point.
STEP 2: Connecting Paging Port/VOX from the Telephone System to the PCMTIM Module
PCM
CPU
•
S1
S2
S3
S4
0
SYS
ID
1
•
Take the page port (VOX) audio pair from the telephone system and wire it to the RJ11 TEL-LINE jack in the PCMTIM module to pins
3 & 4 (red and green).
Use a 4- or 6-pin modular cord to connect the RJ11 to the TEL-LINE input on the PCMTIM module.
STEP 3: Switch Settings
POWER
RUN
•
PROGRAM
•
•
•
•
Set the TEL-INT-SEL DIP switches on the PCMTIM module for Page Port VOX configuration: switches 1 & 7 ON (to the right) and
switches 2, 3, 4, 5 & 6 OFF (to the left).
Set the SYS-ID DIP switches on the PCMCPU module to the OFF position (to the left).
Set the RUN-PROGRAM switch on the PCMCPU module to the RUN mode (up).
Set the Talk Back DIP switches on the PCMZPM module to the OFF position (to the left) for all zones.
Set the OUTPUT switch on the PCMZPM module to the HI-PWR position (down).
1. Remove the switch lock on the PCMCPU module and place the PROGRAM/RUN switch to the PROGRAM position (down).The green
LED will illuminate.
STEP 4: Testing your System
2. Access the PCM2000 system (either use a single 2500-line telephone or butt set or dial the paging access number from the telephone system).
STEP 5: Connecting the Paging Amplifier
3.You will hear 3 beep tones indicating access to the programming mode.
4. Dial the Feature Code for the option you wish to program. (See Feature Codes and Defaults list.)
Note: After you have entered a Feature Code (and any other data), you must press the [#] key to enter it into the system.
If the system accepts the code (and data), you will hear a short double beep confirming that the data has been stored in
the system.
•
•
Follow the same procedure described previously on page 5, step 4.
Follow the same procedure described previously on page 5, step 5.
STEP 6: Connecting 25/70V AC Speakers
•
Follow the same procedure described previously on page 5, step 6.
STEP 7: Testing your System
•
Follow the same procedure described previously on page 5, step 7.
Continue with the next Feature Code immediately after the confirming double beep.
If the information is not accepted, you will hear a busy tone. In this case, you should hang-up, check the code and the data, then re-access the
system and try again.
5. Once you have finished programming, you must first hang-up the programming phone and then place the Program/Run switch in the Run
position.The green LED will go out. Replace the switch lock.
Remember to press the [#] key after you enter a Feature Code.
34
7
FEATURE CODES AND DEFAULTS
SETUP FOR CONFIGURATION 2: PAGE PORT VOX CIRCUIT - 3-ZONE - ONE-WAY PAGING - SINGLE AMPLIFIER - 25/70V AC SPEAKERS
RD COM
RD B
RD C
RD A
-
+
-
-
+
ZONE C
ZONE B
ZONE A
ZONE B
ZONE A
+
IN
RT
LOCAL
BGM
OUTPUT
HI PWR
LO PWR
GLOBL BGM
ZONE C
ZONE B
BOGEN
0
PCM
CPU
+
Privacy Beep
Inhibit
Enable
Pre-announce Tone
Inhibit
Beep
Chime
Confirmation Tone
Inhibit
Enable
Emergency O/R Tone
Inhibit
Enable
All-Call
Inhibit
Enable
Dialing Time-out
Inhibit
Enable
Trunk Disconnect
Inhibit
Enable
1 Amp BGM
Inhibit
Enable
Default Timer
VOX Timer
Zone Group
GND ST
NO
COM
NC
NO
RLY
TWO
RLY
ONE
COM
NC
BGM
SRC
IN
RT
OVER
RIDE
TEL
LINE
NIGHT
RING
BGM SRC
VOLUME
TONE
VOLUME
R
COM
70V
BOGEN PAGING
AMPLIFIER
1 - Not used
2 - Not used
3 - Dry audio (R)
4 - Dry audio (T)
5 - Not used
6 - Not used
R
PBX
PAGING
PORT
VOX
S7
1
Zone Group
No Tone
Follow Contact
2-Second Tone
3-Second Tone
4-Second Tone
5-Second Tone
6-Second Tone
7-Second Tone
Chime
Quad Beep
Night Ring
Zone Group
No Tone
Simulated Ring
Chime
Code Call
Zone Group
Inhibit
Pattern
Echo
1 Play
1 Repeat
2 Repeat
Additional Data
6
Default
006
007
Enable
003
004
005
Chime
001
002
Inhibit
008
009
Inhibit
010
011
Enable
012
013
Enable
014
015
Inhibit
018
019
050
051
*01
Inhibit
00-99
0-9
Zones Numbers
"
"
"
"
03 (See Note 1 - p. 37)
6 (See Note 2 - p. 37)
No Zones
*92
020
021
022
023
024
025
026
027
028
029
Zone Numbers
All-Call
*93
030
031
032
Zone Numbers
*94
040
041
042
043
044
045
Zone Numbers
*32
3-Second Tone
All-Call
Ring
All-Call
Inhibit
1 Play
0
S6
S5
S4
S3
S2
TEL
INT
SEL
T
T
PCM
TIM
0
1
S1
S2
S3
S4
S5
S6
S7
POWER
TEL
INT
SEL
EM/SC
S1
Feature Code
-
PCM PS2
- 1.5A
+ 12VDC
GND
AUX
GND
EM/SC
HPBGM
RT
RT
IN
OUT
PA
LPBGM
IN
RT
IN
RT
PA
+
12 VDC
1.5A
DATA
LINK
RUN
PROGRAM
1
S1
S2
S3
S4
POWER
SYS
ID
-
PCM
ZPM
BGM
OUT
IN
ZONE A
LPBGM
VOLUME
OFF
ON
TALKBACK
POWER
ZONE A
ZONE B
ZONE C
ZONE C
Feature
35
Clock Set
Clock Sync.
Inhibit
Enable
Time Trigger 1
Zone Group
Inhibit
Enable
2-Second Tone
3-Second Tone
4-Second Tone
5-Second Tone
6-Second Tone
7-Second Tone
8-Second Tone
Chime
Time Trigger 2
Zone Group
Inhibit
Enable
2-Second Tone
3-Second Tone
4-Second Tone
5-Second Tone
6-Second Tone
7-Second Tone
8-Second Tone
Chime
Time Trigger 3
Zone Group
Inhibit
Enable
2-Second Tone
3-Second Tone
4-Second Tone
5-Second Tone
6-Second Tone
7-Second Tone
8-Second Tone
Chime
Time Trigger 4
Zone Group
Inhibit
Enable
2-Second Tone
3-Second Tone
4-Second Tone
5-Second Tone
6-Second Tone
7-Second Tone
8-Second Tone
Time Trigger 5
Zone Group
Inhibit
Enable
2-Second Tone
3-Second Tone
4-Second Tone
5-Second Tone
6-Second Tone
7-Second Tone
8-Second Tone
Chime
060
067
068
069
HHMM
HHMM
*81
110
111
112
113
114
115
116
117
118
119
Zone Numbers
*82
120
121
122
123
124
125
126
127
128
129
Zone Numbers
*83
130
131
132
133
134
135
136
137
138
139
*84
140
141
142
143
144
145
146
147
148
*85
150
151
152
153
154
155
156
157
158
159
HHMM
00:00
(See Note 3 - p. 37)
Inhibit
No Zones
Inhibit
(See Note 3 - p. 37)
3-Second Tone
CONFIGURATION 1:
PAGE PORT CONTACT CLOSURE - 3-ZONE - ONE-WAY PAGING - SINGLE AMPLIFIER - 25/70V AC SPEAKERS
In this configuration, the PCM unit responds to a contact closure on pins 2 & 5 of the TEL LINE jack on the PCMTIM module shorting the
+5V source to its ground.When the closure is removed, the page ends. Audio is provided to the system through a separate pair of leads on
pins 3 & 4 of the TEL LINE jack on the PCMTIM module. Pins 1 & 6 are not used in this configuration.
Note:The audio pair (page port) must pass DTMF in order to select a zone.
The required setup includes PCMTIM - PCMCPU - PCMZPM - PCMPS2. Modules must be assembled, from left to right, in this order.
INSTALLATION:
STEP 1: Assembling Modules PCMTIM to PCMCPU and to PCMZPM (see Illustration on page 38)
•
•
•
•
HHMM
No Zones
Inhibit
(See Note 3 - p. 37)
3-Second Tone
•
•
Plug the 6-pin power connector from the PCMCPU module to the PCMTIM module jack (J2). Be sure that the locking ridge faces header wall. (Green wire to the top.)
Plug the 26-pin ribbon cable from the PCMCPU module to the PCMTIM module 26-pin connector (J1). Be sure to align the polarizing
tab in slot. (Pin 1 red stripe to the top.)
Place the modules together and dress the connector cables away from the sheet metal so they will not get pinched.
Push the two units together while aligning the locking tabs in the PCMTIM module to the locking slots in the PCMCPU module. Slide
the two units until the faces of both units are even.
Secure the two units together by tightening a screw into the screw clamp tab in the back of the PCMTIM.
Follow the same steps to add the PCMZPM module.
Note: Do NOT connect the PCMPS2 (power supply) at this point.
STEP 2: Connecting Paging Port/Contact Closure from the Telephone System to the PCMTIM Module
•
•
Take the page port audio pair from the telephone system and wire it to the RJ11 TEL-LINE jack to pins 3 & 4 (red and green); and the
contact closure pair to pins 2 & 5 (black and yellow).
Use a 4- or 6-pin modular cord to connect the RJ11 to the TEL-LINE input on the PCMTIM module.
STEP 3: Switch Settings
•
Zone Numbers
HHMM
No Zones
Inhibit
(See Note 3 - p. 37)
3-Second Tone
•
•
•
•
STEP 4: Testing your System
•
•
•
•
•
Zone Numbers
HHMM
No Zones
Inhibit
(See Note 3 - p. 37)
3-Second Tone
Set the TEL-INT-SEL DIP switches on the PCMTIM module for Page Port Contact Closure configuration: switches 2, 3 & 7 ON (to the
right) and switches 1, 4, 5 & 6 OFF (to the left).
Set the SYS-ID DIP switches on the PCMCPU module to the OFF position (to the left).
Set the RUN-PROGRAM switch on the PCMCPU module to the RUN mode (up).
Set the Talk Back DIP switches on the PCMZPM module to the OFF position (to the left) for all zones.
Set the OUTPUT switch on the PCMZPM module to the HI-PWR position (down).
Connect power supply PCMPS2 to the PCMCPU module to either the power jack 12V DC input or wire it to the 12V DC screw terminals observing polarity.
At this point all the power LEDs should be lit on each module.
Access the page port from the phone system and verify access tones (double beep) in handset.
At this point, the system should be functioning properly.
Disconnect Power Supply.
STEP 5: Connecting the Paging Amplifier
•
•
Locate the terminals on the PCMCPU module labeled PA IN/RT and wire to the TIP and Ring (T & R) input on the Bogen paging amplifier (either TPU-Series, GS-Series or Classic Series.)
Locate the terminals on the PCMCPU module labeled PA OUT/RT and wire to COMMON and either the 25 or 70V output on the
paging amplifier.
STEP 6: Connecting 25/70V AC Speakers
•
•
Zone Numbers
HHMM
No Zones
Inhibit
(See Note 3 - p. 37)
3-Second Tone
STEP 7: Testing your System
•
•
•
•
•
•
•
36
Locate the terminals on the PCMZPM module labeled ZONE A.These terminals have two connections marked + and -.Wire your
speakers for ZONE ONE to these terminals. Observe polarity (-) to common (+) to selected tap setting.
Follow the same procedure for the terminals labeled ZONE B for ZONE TWO, and the terminals labeled ZONE C for ZONE THREE.
Connect the power supply PCMPS2 to the PCMCPU module to either the power jack 12V DC input or wire it to the 12V DC screw
terminals, observing polarity.
Connect the Bogen amplifier to the AC power outlet (120V AC, 60Hz).
Set the volume on your Bogen amplifier to a 1/2 turn.
Access the paging from the telephone system and listen (on the handset) for the confirmation tone (double beep).
Dial 01 to access ZONE ONE and listen (on the handset and also to the speakers) for a pre-announce tone (single beep) followed by
your page (audio).
Follow the same steps for ZONES TWO (02) and THREE (03).
Set the Bogen amplifier to the desired volume level.
5
SECTION I: APPLICATION CONFIGURATIONS
RD B
RD C
RD A
-
RD COM
ZONE A
+
ZONE C
ZONE B
-
-
+
ZONE A
+
IN
RT
LOCAL
BGM
OUTPUT
HI PWR
LO PWR
GLOBL BGM
ZONE C
ZONE B
BOGEN
0
COM
NC
NO
RLY
TWO
RLY
ONE
COM
NC
BGM
SRC
IN
RT
OVER
RIDE
TEL
LINE
NIGHT
RING
BGM SRC
VOLUME
TONE
VOLUME
S1
S2
S3
S4
S5
S6
S7
POWER
TEL
INT
SEL
PCM
CPU
+
-
- 1.5A
GND ST
PCM PS2
+ 12VDC
NO
GND
AUX
GND
EM/SC
HPBGM
RT
IN
RT
OUT
PA
LPBGM
IN
RT
IN
RT
PA
+
12 VDC
1.5A
DATA
LINK
RUN
PROGRAM
1
S1
S2
S3
S4
POWER
SYS
ID
-
PCM
ZPM
BGM
OUT
IN
ZONE A
LPBGM
VOLUME
OFF
ON
TALKBACK
POWER
ZONE A
ZONE B
ZONE C
ZONE C
ZONE B
SETUP FOR CONFIGURATION 1: PAGE PORT CONTACT CLOSURE - 3-ZONE - ONE-WAY PAGING - SINGLE AMPLIFIER - 25/70V AC SPEAKERS
Time Trigger 6
Zone Group
Inhibit
Enable
2-Second Tone
3-Second Tone
4-Second Tone
5-Second Tone
6-Second Tone
7-Second Tone
8-Second Tone
Chime
Time Trigger 7
Zone Group
Inhibit
Enable
2-Second Tone
3-Second Tone
4-Second Tone
5-Second Tone
6-Second Tone
7-Second Tone
8-Second Tone
Chime
Time Trigger 8
Zone Group
Inhibit
Enable
2-Second Tone
3-Second Tone
4-Second Tone
5-Second Tone
6-Second Tone
7-Second Tone
8-Second Tone
Chime
Reset Default
Setup Tone (in Program
Turn On
Turn Off
*86
160
161
162
163
164
165
166
167
168
169
*87
170
171
172
173
174
175
176
177
178
179
*88
180
181
182
183
184
185
186
187
188
189
999
Mode Only)
000
Hang Up
Zone Numbers
HHMM
No Zones
Inhibit
(See Note 3 - below)
3-Second Tone
Zone Numbers
HHMM
No Zones
Inhibit
(See Note 3 - below)
3-Second Tone
Zone Numbers
HHMM
No Zones
Inhibit
(See Note 3 - below)
3-Second Tone
Notes to Feature Codes
PCM
TIM
0
1
Note 1- These 2 digits represent time in 10s of seconds, i.e., "01" = 10 seconds, "02" = 20 seconds, "03" = 30 seconds, etc. Entering "00" will
inhibit timer operation
Note 2 - This single-digit indicates VOX delay time in seconds, i.e., "1" = 1 second, "2" = 2 seconds, etc. Entering "0" will inhibit VOX timer
operation.
R
COM
CONTACT
CLOSURE
70V
BOGEN PAGING
AMPLIFIER
1 - Not used
2 - Contact Closure
3 - Dry audio (R)
4 - Dry audio (T)
5 - Contact Closure
6 - Not used
R
PBX
PAGING
PORT
S7
1
0
S6
S5
S4
S3
S2
S1
TEL
INT
SEL
T
T
Note 3 - Entering the Feature Code without additional time data will enable feature using previously programmed time data.
4
37
Contents
SYS-ID SWITCH SETTINGS CHART FOR ADDITIONAL SATELLITE SYSTEMS
Zone #’s
S1
S2
S3
S4
1-9
0
0
0
0
1
10-18
1
0
0
0
2
19-27
0
1
0
0
3
28-36
1
1
0
0
4
37-45
0
0
1
0
5
46-54
1
0
1
0
6
55-63
0
1
1
0
7
64-72
1
1
1
0
8
73-81
0
0
0
1
9
82-90
1
0
0
1
10
91-99
0
1
0
1
Master
SECTION I - APPLICATON CONFIGURATIONS....................................................................................................................................................4-33
Satellite
APPENDIX
Module Assembly
Align polarizing tab in slot
Align connectors
so locking ridge
faces header wall.
LOCKING
TAB
LOCKING
TAB
LOCKING
SLOT
ALIGN
CONNECTORS
SO LOCKING
RIDGE FACES
HEADER WALL
6-pin Connector
ALIGN
POLARIZING
TAB IN SLOT
SCREW
CLAMP
TAB &
SLOT
LOCKING
TAB
LOCKING
SLOT
Completed Assembly
M
PC
M
ZP
..
..........
..
...... ..............
.................. ..........
.................... ..
................
..............
.... ...
....
M
PC
TIM
M
PC
U
CP
M
PC
M
TB
Ribbon Cable Connector
Configuration 1. Page Port Contact Closure - 3-Zone - One-Way Paging - Single Amplifier - 25/70V AC Speakers
Setup Drawing................................................................................................................................................................................................................................4
Description ......................................................................................................................................................................................................................................5
Configuration 2. Page Port VOX Circuit - 3-Zone - One-Way Paging - Single Amplifier - 25/70V AC Speakers
Setup Drawing................................................................................................................................................................................................................................6
Description ......................................................................................................................................................................................................................................7
Configuration 3. Loop Start Trunk - 3-Zone - One-Way Paging - Single Amplifier - 25/70V AC Speakers
Setup Drawing................................................................................................................................................................................................................................8
Description ......................................................................................................................................................................................................................................9
Configuration 4. Ground Start Trunk - 3-Zone - One-Way Paging - Single Amplifier - 25/70V AC Speakers
Setup Drawing................................................................................................................................................................................................................................10
Description ......................................................................................................................................................................................................................................11
Configuration 5. Station Level/Centrex - 3-Zone - One-Way Paging - Single Amplifier - 25/70V AC Speakers
Setup Drawing................................................................................................................................................................................................................................12
Description ......................................................................................................................................................................................................................................13
Configuration 6. Extended Paging System
Setup Drawing................................................................................................................................................................................................................................14
Description ......................................................................................................................................................................................................................................15
Configuration 7.Two-Way Talk Back Paging System
Setup Drawing................................................................................................................................................................................................................................16
Description ......................................................................................................................................................................................................................................17
Configuration 8.Two-Way Talk Back Extended Paging System
Setup Drawing................................................................................................................................................................................................................................18
Description ......................................................................................................................................................................................................................................19
Configuration 9. 3-Zone - One-Way Paging - Low-Power System - Dedicated Amplifiers or Self-Amplified Speakers
Setup Drawing................................................................................................................................................................................................................................20
Description ......................................................................................................................................................................................................................................21
Configuration 10. 6 Zones - One-Way Paging - Mixed High- and Low-Power Zones - 25/70V AC or Self-Amplified Speakers
Setup Drawing................................................................................................................................................................................................................................22
Description ......................................................................................................................................................................................................................................23
Configuration 11. Microphone Override
Setup Drawing................................................................................................................................................................................................................................24
Description ......................................................................................................................................................................................................................................25
Configuration 12. DFT120 & TAMB Wiring Diagram - Loop Start Trunk, Ground Start Trunk, or Station Level
Setup Drawing................................................................................................................................................................................................................................26
Description ......................................................................................................................................................................................................................................27
Configuration 13. Emergency Voice Announcement Override
Setup Drawing................................................................................................................................................................................................................................28
Description ......................................................................................................................................................................................................................................29
Configuration 14. DTMF Microphone Zone Paging
Setup Drawing................................................................................................................................................................................................................................30
Description ......................................................................................................................................................................................................................................31
Configuration 15. Single Amplifier Background Music Line-Level Signal
Setup Drawing................................................................................................................................................................................................................................32
Description ......................................................................................................................................................................................................................................32
Configuration 16. Relay Driver Output
Setup Drawing................................................................................................................................................................................................................................33
Description ......................................................................................................................................................................................................................................33
SECTION II - Programming......................................................................................................................................................................................................34-38
System Programming ................................................................................................................................................................................................34
Feature Codes and Defaults Chart ........................................................................................................................................................................35-37
SYS-ID Switch Settings Chart for Additional Satellite Systems ......................................................................................................................38
APPENDIX
Module Assembly Illustrations ................................................................................................................................................................................38
S/N
MAD
E IN
KOR
EA
54-5019-02R2
Printed in U.S.A. 0107
38
3
NOTES
PCM2000
Configuration Guide
50 Spring Street, Ramsey, NJ 07446 U.S.A.
Tel. 201-934-8500 / Fax 201-934-9832/ www.bogen.com