1
INSTRUCTION BOOK
MODEL
915
WHITE
S
/
//
POLARIZED PLUG CAUTION
polarized plug (one blade is wider
oduee the 115k of electric shock, this appliance has a
way. If the plug does not fit fully
he other). This plug will fit in a polarized outlet only one
act a qualified electrician to install the
in the outlet, reverse the plug. If it still does not fit, cont
mer outlet. Do not change the plug in any way.
SEWING MACHINE
Record in space provided below the Serial No.
and Model No. of this appliance,
The Serial No. is located Rear of arm.
The Model No. is located Rear of arm.
Serial No.
Model No. 915
Retain these numbers for future reference.
e
Foot Control Model 4C-316B for use with sewing machin
Model 915
This sewing machine is for “Household Use’.
//‘
IMPORTANT SAFETY INSTRUCTIONS
When usinc an electrical appliance, basic safety precautions should always
be followed, including the following:
Road 3fl nstructions before using (this appliance).
DANGER
To reduce the risk of electric shock
—
An azliance snould never be left unattended when plugged in. Always unplug
this appliance from the electric outlet immediately
after using one beto:e cleaning.
WARNING
—
—
To reduce the risk of burns, fire, electric shock, or injury to persons:
1. Do nct allow to he used as a toy. Close attention is necessary when this applian
ce is used by or near children.
2. Use iCis anoliance only for its intended use as described in this manua
l. Use only attachments recommended by the
manufacturer as contained in this manual.
3. Never operaie this appliance if it has a damaged cord or plug, if it is not working
properly, if it has been dropped or damaged, or
cropped info water. Return the appliance to the nearest authorized deaier or
service center for examination, repair, electrical or
mechanical adjustment.
Never operate the appliance with any air openings blocked. Keep ventilation
openings of the sewing machine and foot controller
free from the accumulation of lint, dust, and loose cloth.
5. Never drop or insert any object into any opening.
6. On not use outdoors.
7. Do not operafe where aerosol (spray) products are being used or where oxygen
is being administered.
8. To disconnect, turn all controls to the ott (‘0”) position, then remove plug from
outlet.
9. Do not unplug by pulling on cord. To unplug, grasp the plug, not the cord.
,
DANGER
1. Always unplug before relamping. Replace the bulb with same type rated 15
watts.
2. Do not reach for an appliance that has fallen into water. Unplug immediately.
3. Do not place or store appliance where it can fall or be pulled into a tub or sink.
Do not place or drop into water or other liquid.
/
I
f\7
A N NG
ine needle.
. Special care is required around the sewing mach
Keep fingers away from ai moving parts
k.
. The wrong plate can cause the needle to brea
2. Always use proper needle plate
3. Do not use bent needles.
may deflect the needle causing it to break.
ging
ho no pull a push fabric while stitching. it
needle area, such as threading needle, chan
off (‘0’) when making any adjustments in the
huitch ho svnp macbJrie
er foot, etc.
needle, theading bobbin, or changing press
g, or when making any other user
rical outlet when removing covers, lubricatin
elect
the
from
ine
mach
ng
sewi
6. Always unplug
uction manual.
servicing adjustments mentioned in the instr
ked.
or couch where the air openings may be bloc
1 Never operate on a soft surface such as a bed
SAVE THESE INSTRUCTIONS
/
/
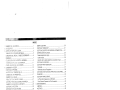
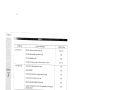
CONTENTS
NAMEOFPARTS
2. ACCESSORIES
I BEFORE SEWING
DETACHABLE EXTENSION TABLE
CONNECTING FOOT CONTROL AND POWER CORD
BOBBIN WINDING
NSERTING BOBBiN
THREADING UPPER THREAD
BRINGING UP BOBBIN THREAD
4. STARTING TO SEW
TEST SEWING
ADJUSTING THREAD TENSION
CHANGING PRESSER FOOT
CHANGING NEEDLE
FABRIC, THREAD AND NEEDLE TABLE
STITCH SELECTION DIAL
TURNING A SQUARE CORNER
REVERSE SEWING
THICK FABRIC SEWING
EXTRA PRESSER FOOT LIFTER
5. SELECTING THE STITCH
STRAIGHT SEWING
ZIGZAG SEWING
Thread Tenson For Zigzag Stitch
BLIND HEM STITCH
1
3
5
5
6
7
9
11
12
13
13
16
17
18
20
22
23
23
25
26
27
27
27
28
28
ii
1’
F
OVERCASTING
OVERLOOKING
STRETCH STITCHING
MAKING BUTTONHOLES
Determine Length
Cutting Buttonholes
Buttonhole Density
ZIPPER SEWING
MENDING
Patching
Mending a Rip
APPLIQUÉ
SMOCKING
FREE HAND EMBROIDERY
Darning Plate
Removing Presser Foot Holder
6. MAINTENANCE
CLEANING
OILING
7. TROUBLE CHART
BOBBIN THREAD TENSION ADJUSTMENT
CLEANING SHUTTLE CASE
CHANGING LIGHT BULB
30
31
31
32
32
35
35
36
37
37
38
38
40
41
43
43
44
44
45
46
50
52
53
!NSTRUCCIONES IMPORTANTES DE SEGURIDAD
Cuando utHice un aparato eléctrico, se deben respetar siempre certas precauciones básicas de seguridad, incuyendo las siguientes:
tods
ELGRO
instrucciones antes de utWzarlo (este aparto).
.i
-
Para reducr el riesgo de descargas electricas
Nunca se debe dejar desatendido un aparato que esté enchufado a a corriente eléctrica. Desenchufe siempre este aparato de Ia
:oma eiécthca immediatarnonte después de su utilizaciOn y antes de limpiarlo.
J
ir’
—
—
Para reducEr el riesgo de quemaduras, incendos, descargas
eléctricas, o lesiones personales:
1. No Dermita cue sea utilizado como un juguete. Cuando este aparato es utilizado par, o cerca de. niños. es necesario prestar
oscecial aenciOn.
2. Utilice este ecarato solo para el usa al que so a destina,tal coma se describe en este manual. Utilice ünicamente los
accesorios recommendados par el fabricante que so incluyen en este manual.
.3. No utilice nunca ese aarato si el cable o el enchufe están dañados, si no funciona correctamente, Si so ha dejado caer o ha
sufrido aigün dana, a si ha sido sumergido en agua. Devuelva el aparato al conceSionario autorizado más cercano para que
sea examinado. reparado a ajustado mecánica o eléctricamente.
No utiiice ounce apararo silos orificios de ventilacián están bloqueados. Mantenga los oritcios ae ventilacián de a máquina
de coser y del pedal control sin acumulaciones de hilo, polvo y fragmentos de tela.
5. Nunca deje caer a introduzca ningün objeto en ninguna abertura.
No a utilice al aire libre.
7. No utilice nunca este aparato en lugares donde se estén utilizando productos en aerosol (spray) o donde se eSté administrando oxigeno.
3. Para disconectario, apague todos los controles (posiciOn “0”) y deSpuéS desconecte el enchufe de Ia toma de corriente.
9. No desencoufe ci aparato firando del cable. Para desenchufar, tire del enchufe, no del cable.
.
;•“1 ‘i:••
1. Desenchufe siempre el aparato antes de cambiar Ia bombilla. Reemplace Ia bombilla con una del mismo tipo, homologada para 15 watt.
2. No intente cager un aparato que haya caido al agua. Desenchüfelo immediatamente.
3. No coioque a guarde el aparato en un lugar donde pueda caerse o ser empujado dentro de una bañera o lavabo. No ponga o
deje gotear agea u atro liquido sobre el aparato.
\DVERTENCIA
atención en las proximidades de Ia aguja.
1. Manrenga Ins dedos alejados de as piezas en movimiento. Se debe prestar especial
de Ia aguja.
ruptura
Ia
causer
puede
incorrecta
2. Utilice siempre una placa de aguja adecuada. Una placa
2. No
utilice
aauias dobiadas.
4. No dre de a tela o a empuje mientras cosa a mãquina. Puede desviar a aguja y romperla.
ejemplo, cuando enhebre Ie aguja, cuando
5. Apague (‘0) Ia máquina de coser cuando haga ajustes en el area de Ia aguja, por
pedal.
etc.
ameie a aouia. cuanoo coloque a bobina o cuando cambie el
retire as cubiertas, lubrique el aparato. a cuando realice
•DeserchLe sempce a mãquina de coser de Ia toma eléctrica cuando
cualquier otro ajuste mencionado en el manual de intrucciones.
los orificios de ventilaciOn pueden
7. No utilice nunca el aparato sobre una superficie blanda, tal como una cama a un sofa, donde
.
cuedar blcaueados.
/
7/
/
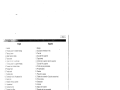
INDtCE
1. NOMBREDELJSPARTES.1
3
2. ACCESORIOS
5
3. ANTES CE EMPEZAR A COSER
5
TABLERO DR EXTENSION RETIRABLE
6
CONEXION DEL PEDAL Y CABLE DE CORRIENTE
7
BOBINADO
9
COLOCACION DEL CARRETE EN LABOBINA
11
iHEpANIV:NTn DEL HILO SUPERIOR
12
COMO LEJANTAR EL HlLD INFERIOR
13
4. COMENZAR A COSER
13
COSTURA DE PRUEBA
16
AJUSTE DR LA TENSION DEL HILO
17
CAMBIC DEL PIE PRENSATELA
18
CAMBIO DE LA AGUJP’
21
AASLA DR ELAS. HILOS Y AGUJAS
22
CONTROL PARA SELEOCIONAR LA PUNTADA
23
OAMBIO DE D131EOCICN DR PESIUNTE
23
COSTURA EN REVERSA
25
COSTURA EN TELAS GRUESAS
DOBLE ACCION DEL ELEVADOR DEL PIE PRENSATELA 26
27
SCQGER LA PUNTADA
27
COSTURA RECTA
27
COSTURA EN ZIG-ZAG
28
TensiOn del Hilo para Castura Zig-Zag
28
COSTURA INVISIBLE Y DOBLADILLO
I/
/
I
SOBRECOSTURA
COSTURA”OVERLOCK”
COSTURA ELASTICA DR DlSEtJOS AUTCMATICOS
CONFECCION DE OJALES
DeterminaciOn del Largo
Carte del Ojal
Equilibro de los lados derechio y izquierdo del ojal
COSTURA DE CIERRES
OOSTURA PARA REMENDAR
Parchado
Remiendo de una Rasgadura
COSTURA DE APLICACION (PARCHES DE ADORNO)
FRUNCIDO
COSTURA PARA BORDAR
La Placa de Ia Aguja para el Bordado
Para Guitar el Soporte del Pie Prensatela
6. MANTENIMIENTO
LIMPIEZA
ACEITADO
7. TABLA DE PROBLEMAS
AJUSTE DR TENSION DE LA BOBINA
LIMPIEZA DE LA CAJA DEL CANGREJO
CAMBIO DEL F000
30
31
31
32
32
35
35
36
37
37
38
38
40
41
43
43
44
44
45
48
50
52
53
RTES
MBRE DE LAS PA
NO
S!
RT
PA
OF
E
NAM
13
14
1
2
3
15
16
D
6
18
ii
7
19
20
9
10
22
.4
ii
12
/
I
1
r
Español
English
2.
3.
4.
5.
3.
a
12.
‘.5.
b.
17.
8.
Th.
20.
21.
22.
23.
1.
2.
3.
4.
5.
6.
7.
8.
9.
10.
11.
12.
13.
14.
15.
16.
17.
18.
19.
20.
21.
22.
23.
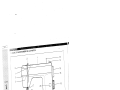
Handle
Thread guide for bobbin winding
Take-up lever
Upper tension plate
Face cover
Jraer Thread tension dial
Threac cuide ie noper threading
Presser loor. hoder screw
Presser foot
Feed teeth
Needle plate
Extension ahle (Accessory box)
Spool n
f3cbbin wIncflng spindle
Handwneei
Declutch knob
Presser foot lifter
Stitch selection dial
Socket
Switch
Free arm
Reverse sewing ever
Stitch picture
/
/
I
/
I
/
Manija
Gula para enhebrar el hilo
Tira hilo
Gula del hilo superior
Tapa frontal
Control de a tensiOn del hilo superior
Gula del hilo superior
Tornillo del pie prensatela
Pie prensatela
Dientes
Placade Ia aguja
Tablero de extensiOn (Caja de accesorios)
Porta carrete
Devanador
Volante
Seguro del volante
Elevador del pie prensatela
Control para seleccionar Ia puntada
Enchufe
Interruptor
Brazo libre
Palanca para coser en reversa
Pintura de puntadas
Page2
C)
U)
0
0
Cl)
m
C)
C)
Ci)
m
:j:
0
U)
rn
Page4
English
Español
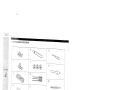
1. Zigzag sewing foot (on machine)
2
1. Pie de costura zig-zag (en Ia maquina)
2. Pie para cose cierres
Zipper foot
Buttonnce fcot
Buttonhole cutter
0. Needle plate screw driver
J. OiLr
Bobbins (C
8. Standard needles (3 pcs., #14)
0 Ball point
needle (1 pc.)
0. Darning olate
Screw dnver ii pc., srnaH)
Extta spool pin For twin needle sewing)
Twin neecie
14. Blind hem foot
fl
3. Pie para ojal
4. Cortador para el ojal
5. Llave para desatornillar a placa de Ia aguja
6. Aceitera
A
7. Carretes (3 pzas)
8. Agujas normales (3 pzas)
9. Aguja de punta redonda (1 pza)
10. Placa de a aguja para el bordado
11. Desarmadores (1 pza, pequeno)
12. Porta carretel extra (para costura con dos hilos)
13. Aguja doble *
14. Pie de costura invisible +
Optional accessones not included.
± Accesorios opcionales no están incluidos.
I
1’
/1
J
Pag5
--z
—
M
3. 3EFQflE SEWING
The machine is equipped with
a detachable extension table,
which provides a flat surface
for standard sewing.
-
U n
3. ANTES DE EMPEZAR
La máquina se presenta en
forma plana para hacer más
fácil su labor en Ia costura
normal.
uRyCHABLE EXTENSION
TA3LE
TABLERO DE EXTENSION
RETIRAGLE
By removing the table
(accessory box), the machine
converts to a tree-arm
machine.
Quitar esta parte (conteniendo
accesorios) y Ia máquina se
puede usar con el brazo libre.
Tne tree-arm is convenient to
sew Cr embroider, trousers,
sleeves, cuffs of T-shirts or
blouses.
Reverse above steps to
attach the extension table.
El brazo libre es recomendable
para coser o bordar pantalones,
mangas, punos de camisas o
biusas.
Colocar nuevamente Ia caja
de accesorios.
I
LZ
Page6
Español
Accessories may be stored
inside of the extension bed.
CONNECTING FOOT
CONTROL AND POWER
CORD
Connect the foot control ©
and the power cord ©.
Before plugging in the
machine, check the voltage
and make sure it is same as
e
what is indicated on the plat
e.
hin
mac
the
of
k
on the bac
The machine will not operate
is
until the power/light switch
turned on.
Ihe same switch controls
both the power and the light.
Note:
Always turn the power off and
unplug the machine when not
in use, servicing/cleaning, or
changing needles or lamps.
Para abrir Ia tapa de a caja
a
de accesorios, colocarl
a.
como se indic
CONEXION DEL PEDAL Y
CABLE DE CORRIENTE
Conectar el pedal C y el
o
cable de corriente siguiend
los pasos ©.
Antes de conectar Ia clavija
de Ia máquina, asegurarse de
quo el voitaje de Ia máquina
a
sea igual que el de so tom
te
rien
cor
de
( el voltaje estã escrito
te
sobre una placa en Ia par
posterior de Ia maquina.)
Accioneelbotóndelamáquina,
para el funcionamiento del
pedal y del foco.
OFF Apagado
ON Encendido
-
-
II
/
1’
/
ON
I
o
OFF
(0
(DO
D UT
D)CD
c3
Cl)
CDQ.
oD)
0
CD
CD
UT y
0
gcr
CD
CD
0
CDP)U)
3
—
000
o U)
U)
U)
UT
0
UT
:3
U)
C
0
0
CD
Co
CD
(I)
UT
0
UT
0
CD
C)
CD
CDg
H
•
0
0
Y CD
CD
(o
(0
1)
—
—
•
(1)
—
Ui
0
C
zr
U)
0
U)
D
U)
-
(DQO
o><D0
—
Z
—
—
a
CD
0
Z
0
W
2
oaE
0(I)
:3
3
cDCD
CD
D.-CD
C0:Q-
Qz--o U) CD
° CI)
0
i
Page8
t1ish
Fold the handle and Insert the
scool pin.
‘action
Put a spool of thread on the
spool pin.
Draw the thread from the
spool pin to the thread guide
and then to the pretension
disc. Failow the order
and
as illustrated.
Wind the thread clockwise
around the bobbin several
times.
Push the bobbin onto the
spindle.
Turn the declutch knob in the
handwheel to the bobbin
winding position ( § ).
Note: Do not switch the deciutch
knob while sewing.
EspañoI
Levantar el porta carrete
hacia arriba.
Colocar un hilo en el porta
carretes.
Pasar el hilo del porta
carrete como se muestra en
el dibujo. (pasos (D y
Enredar el hilo varias©)veces
airededor del carrete en
dirección a las manecillas del
reioj.
Colocar el carrete sobre el eje.
Mover el botán que se
encuentra en el volante hacia
el dibujo ( § indicando el
carrete).
Nota: No togue nunca el
botán de desembrague
automático al coser.
(uede ser peligroso)
./1
/
.1
/
I
3
100
Espanol
Push the bobbin in the
direction of arrow ®.
Press down the foot control to
wind the bobbin. The bobbin
winding will stop when the
bobbin is fully wound .
Release the foot control and
push the bobbin to the left as
shown © to remove the
hohoin.
Mover el carrete come se
indica en Ia flecha ®.
Presionar ci pedal para
devanar. Cuando el carrete
está como se ndica en Ia
figura ©, pare Ia máquina y
mueva el carrete hacia a
izquierda como se indica en
Ia figura © para desprenderlo.
Note: Watch the bobbin
carefully to wind the
correctvolumeof thread.
Take the bobbin off the
spindle and cut the thread.
Turn the declutch knob in the
handwh eel to the sewing
poshion 3).
Nota: Al devanar cuide que el
volumen del hilo no
exceda Ia capacidad
delcarrete.
Quitar el carrete del eje y
cortar el hilo.
Mover el botOn del volante en
dirección a a aguja. ( ¶
N
F
\\
INSERTING BOBBIN
Place the bobbin in its case
with the thread running in the
direction of arrow (clockwise).
COLOCACION DEL
CARRETE EN LA BOBINA
Colocar el carrete dentro de
Ia bobina con ci hilo en
dirección a a flecha.
/
I
I
‘1
PagelO
Guide the thread into the slot
© of the bobbin case.
Guiar el hilo por Ia ranura
de a caja porta bobina.
Pulling the thread to the left,
and bring it under the tension
sprina then to the delivery slot
Extraer el hilo hacia Ia
izquierda, conducirlo hacia
abajo del resorte de tension y
luego pasarlo por a ranura
.
.
II
J,
Raise the needle to its highest
position.
Leave about 10 cm (4) of extra
thread from the boboin case.
Hold the latch and push the
bobbin case into the shuttle as
illustrated.
Release the latch when the
bobbin case is fully inserted.
Note:
Press firmly when inserting the
bobbin case and be sure that
it is locked in its place.
Levantar Ia aguja a su
posiciOn más alta.
Dejar en el extremo del hilo
unos 10 cm fuera de Ia
bobina.
Tomar el seguro de a bobina
y empujarla hacia adentro de
ta cápsula, como se indica.
Soltar el seguro cuando ta
bobina este comptetamente
dentro del canillero.
I
*
j
ge1i
THREADING UPPER
THREAD
Raise the presser foot.
Raise the takeup lever to its
nighest position by turning the
handwheel toward you.
Thread the machine in the
order as illustrated.
Pass the thread through the
guide (.
Section
Guide the thread through
either side of the tension disc
Hook the thread under the
guide
as shown.
ENHEBRAMIENTO DE
L
HILO SUPERIOR
Levantar el elevador
del pie
prensatela.
Levantar el tira hilo
posician más alta gir a su
ando el
volante hacia Ud.
Para enhebrar seguir
los
pasosdelDal
Pasar el hilo a través
de Ia
guia J.
.
Guiar el hilo hacia el
frente y
pasarlo por cualquier
unidad
de Ia gula ©.
Enhebrar el hilo en Ia
gula j
y Ilevar el hilo hacia arr
iba
para insertarlo en el res
orte.
,
/
Ill
I
Thread the take-up ever .
Pass the thread through the
needle guide
(use one on
the left), then through the
needle eye
from front to
back.
Leave about 15 cm (6’ of
extra thread and place it
under the presser foot.
Enhebrar el hilo en Ia gui
a 4D.
Pasar el hilo a través
de Ia
gula
(usar zquierda),
Enhebrar en Ia ag
uja de
adelante hacia atrás
Dejar aproximadam
ente 15
cm de hilo extra.
‘.
/
/
I
/
//
/
3
Page12
F3RNGING UP BOBBIN
THREAD
Hold the end of the upper
thread with your left hand as
liustrated.
Turn the handwheel slowly
toward you until the needle
moves down and up again to
its highest position.
or
Pull the upper thread slowly
and the bobbin thread will
come in a loop.
CóMO LEVANTAR EL HILO
INFERIOR
Sostener el extremo del hilo
superior con a mano izquierda.
Girar el volante lentamente
hacia Ud. hasta que a aguja
baje y suba otra vez.
Tirar del hilo superior
lentamente y el hilo inferior se
alzará en forma de presilla.
tr
Pull both upper and bobbin
threads together about 15 cm
6) and nlace them under the
presser foot.
Tirar de ambos hilos 15 cm
aproximadamente y ponerlos
juntos debajo del pie
prensatela hacia el ado
izquierdo.
\-
/I
I
I
/
ii
tri
4. STARTING TO SEW
TEST SEWiNG
By completing all the steps on
page 5 through 12, you hav
e
become familiar with the
machine. Using the accessories
provided, you are now read
y
to start sewing.
Section
The mcre you press the foo
t
control, the faster the
machine will sew.
4. COMENZAR A COSER
COSTURA DE PRUEBA
Ahora Ud. ha terminado
os
primeros pasos (de a pãgina
5 a Ia 12). El manejo de su
máquina y accesorios le son
familiares a Ud. Está todo
en
orden para comenzar a coser
con su nueva máquina
A mayor presión del pedal,
mayor serã Ia velocidad con
que Ia máquina coserá.
f-i
Straight stitch
la’e sure the machine is
set as illustrated.
2. Set the stitch selection dial
,
3. Set the upper thread
tension dial to 5.
4. Place the fabric under
the
prdcser toot
Comenzaremos a probar Ia
costura recta.
1. Asegürese de que
su
maquina este comp!etamente
como aparece indicado.
2. Oonpaasleccionar
a
3. Control de Ia tensiOn del
hilo superior al No 5.
4 Colocar Ia tela debajo
del
pie prerisatela.
/
-
J
-
/fl
S
rTl
LzJ
Pagel4
u-
5. By turning the handwheel
toward you, bring the takeup ever to its highest
position.
+ The fabric should be
placed under the presser
foot with the bulk of the
fabric to the left of the
needle. Leave enough
seam allowance on the
right edge of the fabric.
5. Colocar Ia palanca en Ia
posiciOn mãs alta.
La tela debe quedar
colocada debajo del pie
prensatela con Ia mayor
parte sabre Ia izquierda de
Ia aguja. Y colocar el
borde del ado derecho de
a! tela con el apropiado
espacio para I a costura.
6. Lowerthepresserfoot.
7. Press the foot control
lightly and start sewing by
cuiding the fabric with your
hands as it is fed. Never
push or pull the fabric.
e more you press h e
toat control, the faster the
macnine will sew.
8. Gently remove the fabrc
to the leit when the sewing
is finished.
6. Bajar el elevador del pie
prensatela.
7. Presionarelpedalfgeramentey
comenzar a easer guiando a
tela con Ia mano mientras
vanza esta. Nijnc Se oebe
i onear a e puar a e a.
A mayor presión del pedal.
mayor sara a velocidad con
que a maquina coserã.
8. Llevar a tela hacia el lade
izquierdo cuando se haya
terminado de coser.
± Always finish sewing each
seam with the needle at its
h ghest oosition
+ Leave at least 15 cm (6’)
of extra thread behind the
needle so that it will not be
drawn out of the eye of the
needle when starting the
next stitch.
9. Cut threads with thread
cutter behind the presser bar.
± Siempre terminar cada
costura con Ia aguja en
posicion mas alta
+ Dejar aproximadamente
15 cm del hilo extra hacia
atrás para que no se
desprenda el hilo de Ia
aguja.
9. Cortelos hilos con a! corta
cadcneta qua está detras
de Ia barrapata.
.
-
.
I
S
‘-
Lj
‘N.
——
.—-
—n
‘_—
S
‘..-
.
/
/
/S
I
1
-
-
/
--
-
S.
I
>,
/
/
V
.
—S
S
Reverse sewing
10. Begin by sewing forward.
Then, push the reverse
sewing ever down to sew
backward.
This is reverse sewing.
11. Release the lever to return
to forward sewing.
Reverse sewing is often
sed for reinforcement
and to tie off stitching at
the beginning and the end
of the seam (back stitching).
Vamos a probar Ia costura
en reversa.
10. Al principio, coser hacia
adelante.
Después, empujar Ia
palanca que está sobre Ia
derecha hasta abajo,
como se indica en a
figura.
Esta es a costura en
reversa.
11. Soltar Ia palanca e iniciar
Ia costura hacia adelante.
La costura en reversa es
muchas veces para
reforzar Ia costura en las
orillas de a tela.
2iqzaq sewing
2. Set the stitch selection
dial to (
).
13. Repeat previous steps 4-9.
This is zigzag sewing.
Vamos a probar Ia costura
en zig-zag.
12. Colocar el Control para
seleccionar Ia puntada a
..cJoi
(
).
L
92
(fl
_
13.Seguir los pasos arriba
del 4 al 9.
LJ
j
I
\___________________
Page
EgIish
ADJUSTING THREAD
TENSION
After you sew a few stitches,
oneck it both upper and
bocbin thread tensions are
balanced and sturdy enough
to lock both threads in the
middle as shown in figure ®.
ii the upper tension is too
‘ght. the uoper thread lies
straight along the top surface
of the fabric .
If the lower tension is too
tight, the bobbin thread lies
straight along the bottom
surface of the fabric ©.
Make an adjustment by
:urrnng the tension dial in the
direction of arrow,
Always check the balance
of upper and lower
tensions by test sewing
using same fabric, needle,
thread and stitch pattern
you plan to use (See page
20).
a
Tdj
Espanol
AJUSTE DE LA TENSION
DEL HILO
® Para Ia costura correcta,
Ia tensiOn de ambos hues
es igual y tendrá que
juntar ambos hilos en el
centro.
5 Si Ia tensiOn del hilo
muy
estd
superior
ajustada. el hilo supericr
quedard recto a io large
de Ia superficie superior
de a fda.
© Si a tensiOn del hilo
superior está muy suelta,
el hilo inferior quedard
recto a lo largo de Ia
superficie inferior de Ia
tela.
Es recomendable ensayar
antes en un pedazo de Ia
tela; ci molde de Ia
costura, Ia tensiOn de los
hilos (superior ó inferior),
a aguja, y el hilo.
(Consultar Ia Tabla de
Telas, Hilos y Agujas en Ia
página 21.)
/
0
X JL_LL
.©
s
©
><
7__
CHANGING PRESSER
FOOT
Raise the presser foot
lifter
.
Set the needle in its highes
t
position by turning the
handwheel toward you
©.
Tit
CAMBIO DEL PIE
PRENSATELA
Levantar ci elevador del
pie
prensatela 0.
Colocar a aguja en
a
posición mãs alta, girando
ci
volante hacia Ud. E.
L
o:
Section
Push the presser foot
hoider lever toward you
and the presser foot will
come ott.
7..
Position the desired
presser foot on the needle
plate by aligning the
groove of the foot holder
and the pin of the presser
foot.
Lower the presser foot
lifter so that the holder
catches the pin of the
presser foot.
©
Oprimir a palanca del
soporte del pie prensatela
hacia Ud. y ci pie se sol
tará.
t Poner un pie pre
nsatela
con el poste justamente
debajo de a hendidura del
soporte.
Bajar ci elevador del pie
prensatela y ci soporte
detendrá
ci
pie
inmediatament.
a
b
\‘
4,
I
‘if/i
Page 18
R1J1iN
Sccion
CHANGING NEEDLE
CAMBIO DE LA AGUJA
Set he needle in its highest
cosition by turning the
handwheel toward you.
Loosen the needle clamp
screw and take out the
needle.
Colocar Ia aguja en Ia
posicián más alta girando el
volante hacia Ud.
Aflojar el tornillo de presián
de Ia aguja y quitarla
With the flat side away from
you, insert a new needle into
the crocve of the needle bar.
Push the needle into the
ciamo until it reaches the
stopper ©, then tighten the
needle clamp screw tightly.
Con a parte plana hacia
atrás, inserte ia nueva aguja
dentro de Ia cavidad.
Empujar Ia aguja hacia arriba
hasta el lope figuro © y
apriete el tornillo de presiOn
firmemente.
ii!
Always use good quality
needles with sharp point.
Using defective or worn
needles not only causes
stitch skipping, breakage of
neecles or snapping of
thread: it also can damage
the shuttle and the needle
plate.
Note: Always use needle
:‘jpe 15x1/705
x Straight shaft
y Sharp point
Usar siempre agujas bien
derechas, con buena punta.
Usar agujas detectuosas o
gastadas no solamente causa
que se omitan puntadas,
rotura de agujas o que se
corra el hilo; también pueden
dañarse el cangrejo y Ia placa
de Ia aguja.
Nota: Usar siempre agujas
tipo 15 x 1.
Leyenda:
x Agujaderecha
y Punta aguda
,1
x
y
L
Page2O
T1ri
FABRIC, THREAD AND NEEDLE TABLE
NEEDLE
THREAD
European
Cotton
FABRIC
VERY SHoER. Lace.
S4EER: Blouse, Crepe
.vwn, Organdy, Taffeta
GTWEiGHT,%repe.
MEDIUM: Wool. Silk. Linen.
Velveteen, Cotton, Faille,
Terrycioth
HEAVY: Denim, Duck, Sailcloth
EXTRA HEAVY: Upholstery,
erizeOttOflCoveTeuropea
Polyester, Silk,
O5
Cotton
Nylon
—
Point
Style
US. Se
15x1
Regular
70
60
Silk. Nylon
65-70
9
50-70
60
Silk, Nylon
65-70
9
Regular
30
50
Silk
75-80
11
Regular
30
50
Silk
80-90
1 1 -14
Regular
30
Heavy Duty
C.C.Poly
100
16
Regular
120
19
Regular
9
Ball
Point
Ball
Point
—
30
Heavy Duty
C.C.Poly
50-70
60
Silk, Nylon
MEDIUM-WEIGHT: Jersey,
Dounle Knit
30
50
Silk. Nylon
C. Poly
70-80
9-10
HEAVY-WEIGHT: Double knit
30
50
Silk, Nylon
CCPoly
80-90
11-14
FAKE-FURS, VELOURS
30
Heavy Duty
C.CPoly
90-100
14-16
30
50
C,C.PoIy
90
14
Wedge
VINYLS
LIGHT-TO-MEDIUM-WEIGHT
30
50
C.C.PoIy
90-100
14-16
Wedge
30
Heavy Duty
C.C.PoIy
100-110
16-18
Wedge
HEAVY LEATHER
100-110
16-18
Regular
65-80
9-11
Regular
[KNITS]
LIGHT-WEIGHT: Tricot
[LEATHER]
DECORATlVE TOUCHES]
TOP STITCHING
Silk twist
MACHINE EMBROIDERY
Size 50-70
/
/
I
I
BalI
Point
REMARKS
es
one or two
points
TAB LA DE TELAS. HILOS
AGUJAS
TELAS
HILOS
AlaodOni
MUY UGERAS: Encae,
Section
AGUJAS
Algodón
mercerized
Algoaon
PoHester
Soda, Nylon
Medida
americana
15x1
Tipo do
Puntada
—
70
UGcRAS. repe. sf0,
organdi, afeUn
60
Soda, Nylon
9
50-70
Normal
LIVANAS: Oepé, lana,
Draco, ercopelo
60
Seda, Nylon
9
Normal
30
Seda
11
Normal
Soda
1 1-14
Normal
Poliester
16
Normal
Poliester
19
Normal
MEDIANAS: Lana. seda,
pana. ilno, Faya,
tela 00 lola
PESADAS: Drill, loneta, lona
SDAS: Tapiceria
.
50
30
50
30
Extrafuorte
30
Extrafuode
rTJEJICCSI
LIVIANAS: Tricot
MEDIANAS: Jersey,
Calado decie
PESADAS. Caiado doble
IMITACION PIEL. VELOUR
50-70
60
Soda, Nylon
9
30
Red
s
Soda. Nylon
Poliester
9-10
Red
50
Soda Nnon
H14
Red
Extrafuerte
Poliester
14-16
Red
30
30
[CUERO]
j TELAS VINILICAS
TELAS ‘/INILICAS
LIVIANAS 0 MEDIANAS
CUERO GRUESO
[DECORADOS MATELASSE
]
6CR DADO Y MACU INA
I
30
50
Polleater
14
30
50
Poliester
14-16
30
Cone
Extrafuerte
Poliester
16-18
Cone
16-18
Normal
9-11
Normal
Soda retorcida
Medida 50 70
-
I
I.
OBSERVA
ClONES
doe puntos
Page 22
English
STITCH SELECTION DIAL
The desired stitch will be
obtained by turning the stitch
oeiection dial, and it can be
turned either to the right or to
the left.
Note: When turning the stitch
selection dial, make
SLP he needle is in its
highest position.
ectBD fl
i
t
T
l
The stitches are shown as
below:
i4
Suffonhole stitch
5
Straight stitch 2mm
left position
S
Straight stitch 3mm
center posibon
7
Straight stitch 3.2mm
center position
3
Straight stitch 5mm
center position
9
Zigzag 1mm
I0
Zigzag 2mm
11
Zigzag 2.5mm
12
Blind stitch
13
Mending stitch
14
Casing stitch
15
Stretch blind hem
16
Overcast stitch
17
Straight stretch stitch
18
Flatlock
19
Stretch overlock
20
Honeycomb stitch
21
Overlock stitch
EspanoI
1
CONTROL PARA
SELECCIONAR LA
PtJNTADA
Girar el control de izquierda a
derecha para seleccionar a
puntada que Ud. desee.
Nota:
Siempre asegSrese de que Ia
aguja so encuentre en su
posición más alta cuando se
maniobre este control.
Las puntadas se indican
coma sigue:
1-4
Ojai
5-8
Costura recta
(4 largos de a puntada)
9-il
Costura zig-zag
(3 anchos de Ia puntada
zig-zag)
12
Costura invisible
13
Costura para remendar
14
Puntadadeunión
15
Puntada overlock
elástica
16
Costura overlock
17
Puntadaondas
18
Costura elástica
overlock
19
Fruncido
20
Costura elástica recta
21
Costura elástica
sobre las orillas
I
1’
2
11
12-
—
4
]
13
14
D
15
6
16
G
7
III
17
In
I
8
T
:
18
9
19
10
20
11
21
TURNING A SQUARE
CORNER
CAMBIO DE DIRECCIÔN DE
PESPUNTE
To pivit at a square corner 1 .5
Parar Ia máquina en el punto
de rotación con Ia aguja en el
tejido. Subir Ia palanca del
pie prensatelas y girar el
tejido en el sentido deseado.
Bajar Ia palanca del pie
prensatelas y volver a coser
en a nueva direccián.
cm (5/8’) from the fabric
•
..
edge, stop stitching with the
needle np in the fabnc when
reachmg the end of the
needle plate as shown.
Raise the presser foot and
turn [ha tacrc. New stitch line
aicn nh 5/8 seam guide
on the sice of the needle
plate. Lower the presser foot
and begin stitching in a new
direction.
REVERSE SEWING
(Starting to sew)
Place the tabrc under the
presser foot anout 1 cm (0.4’)
in from the edge.
Lower the presser foot.
(Reverse sewing)
To reinforce the seam, push
the reverse sewing button
and sew backward to the
edge of the fabric.
COSTURA EN REVERSA
(Empezar a coser)
Colocar Ia tela debajo del pie
prensatela aproxirnadamente
a 1 cm de Ia orilla.
Bajar el elevador del pie
prensatela.
(Costura en reversa)
Para reforzar Ia costura coser
en sentido contrario de Ia
orilla de Ia tela accionando a
palanca para coser en
reversa.
1”
Page24
T1ITm
Release the reverse sewing
button and start sewing
forward. Be sure to guide the
‘abric with your hands and
never pull the fabric.
Soltar a palanca e iniciar Ia
costura hacia adelante
girando Ia tela con a mano
segün se vaya avanzando.
Nunca se debe tironear a
Sew a few reverse stitches
for reinforcement at the end
of the seam.
Coser con puntadas en
reversa para reforzar el final
de una costura.
I
.
Raise the presser foot and
remove the fabric to the left
when sewing is finished.
I
(
—J
-
7 f \
Llevar a tela hacia el ado
izquierdo cuando se haya
teminado de coser.
I
7
I
/
I
I
\
>N;L
\
THICK FABRIC SEWiNG
(Particularly denim)
ar thck fabric sewing, it is
mporant to sew slowly and
use the proper needle size
and type A sharp needle
size 15/100) works best for
o en m
Oentlv guide the fabric as you
sew.
Key:
x Direction of the needle
y Direction of the fabric
,1I
Improper maneuvering of
thick fanric may cause
deflection and possibly
breatcage of the needle..
Key:
x Direction of the needle
y Crectlon of the fabric
COSTURA EN TELAS
GRUESAS
(Dril de algodón en particular)
Para coser as telas gruesas,
Io que importa es que se
as instrucciones
sigan
cuidadosamente.
Asegurarse de colocar Ia tela
verticalmente. La aguja debe
estar perpendicular a a
costura para que Ia aguja
penetre a tela apropiadamente.
(ver figura No. I)
Leyenda:
x DirecciOn aguja
y DirecciOn tela
La mala colocacián causará
que se doble y posiblemente
se rompa Ia aguja.
Para coser las telas muy
gruesas, coser suavemente
manteniendo a tela en Ia
mano.
La rotura de Ia aguja no es
problema mecánico, sino mal
use.
Leyenda:
x DirecciOn aguja
y DirecciOn tela
/
0
xl
(
z,*xly
F
English
EXTRA PRESSER FOOT
LlFTEF
For more height to place very
thick fabrics under the presser
foot. firmly raise the presser
toot lifter up as far as it will
00
Page 26
:1
Espanol
DOBLE ACCION DEL
ELEVADOR DEL PIE
PRENSATELA
Para tener mayor espacio
entre el pie y a tela, cuando
se usan materiales muy
gruesos Ilevar hacia arriba el
elevador del pie ranto como
se pueda.
Section
4
/
1
/
/
*
5. SELECTING THE
STITCH
5. ESCOGER LA
PUNTADA
You may select the desired
Girar el selector para escoger
Ia puntada que se requiere.
stitch
by turning the stitch
Asegurarse que Ia aguja
seiection dial.
siempre
Before turning the stitch
esté
selection dial, make sure
its highest
ne needle is
posición
in
más
en
su
alta
al
operar el selector.
position.
3CtO n
STRMGHT SEWING
COSTURA RECTA
Set the machine as shown.
There are 4 different straight
Preparar Ia máquina como se
indica. 4 diferentes longitudes
en Ia costura rectay se pueden
stitch
lenaths
as
available
——
escoger come se indica.
snown below:
LAR000E
2
2
3.2
5
No 5
No.6
No.7
No.8
im
mm
mm
mm
Ltt
Center
Center
Center
GZAG SEWING
Set the machine as shown.
To prevent seam ends from
unrveiing, set tie macme
for straight stitch and sew in
reverse at the beginning and
the end of the seam.
There are 3 different zigzag
widths available as shown.
..
.
0= E
)I_JJ
1TA0Al
Lenoth
2
2
3.2
5
No 5
No.6
No.7
No.8
mm
mm
mm
mm
zquierda
Centro
Centro
Centro
COSTURA EN ZIG.ZAG
Preparar Ia máquina coma
L
-
-
__-
se
indica.
Para evitar que en Ia
terminacián de Ia Costura se
deshile, preparar Ia máquina
para la puntada recta y coser
en reversa al prmncipio y a!
f44i$de Ia costura.
3 diferentes modelos de a
Costura en zig-zag e pueden
escoger Coma SC indica.
//
I
,—
9
.
LJt
J
10
Page 28
[itch
Stitch
Width
Length
No.9
2mm
3.5mm
1mm
2mm
No.10
5mm
2.5mm
No.11
No.10
No.11
Thread Tension For Zigzag
Stitch
Beautiful zigzag stitching
requires less upper tension
than straight stitching.
Loosen the upper tension
slightly.
Section
LASELEGCN
Zigzag
Selector
Key:
x Wrong side
y Right side
BLIND HEM STITCH
Set the machine as shown.
Attach optional blind hem
foot.
i
A,
ELANCHO
EL LARGO
oELzmG Po
.
3.5mm
2mm
5 mm
2.5 mm
I
TensiOn del Hilo para
Costura Zig-Zag
Para una mejor apariencia de
Ia puntada en zig-zag se
requiere menor tension
superior que a que se usa en
Ia puntada recta. Aflojar Ia
tensiOn superior ligeramente.
Leyenda:
x Revés
y Derecho
COSTURA INVISIBLE Y
DOBLADILLO
Preparar Ia máquina como se
indica.
.
Ii
4
/
I
r’EngIish
Fold the fabric as shown and
place it under the presser
cot.
For a neater finish, it is
preferable to baste or press
the hem beforehand.
Key:
x Wrong side
y Right side
Espafiol
Plegar Ia tela como se indica
y colocar debajo del pie
prensatela.
Para un meor acabado es
preferible hilvanar o planchar
el dobladillo previamente.
Leyenda:
x Revés
y Derecho
35rnm(O.2
Secd on
Sew carefully, so that straight
stitches are made on the hem
edge, and zigzag stitches
pierce only one or two
threads of the fold.
®
Correct seam.
Needle is catching the
edge of the fold too much.
© Needle is not catching the
edge of the fold at all.
Key:
x Wrong side
y Right side
Coser cuidadosamente para
que las puntadas estén
hechas sobre Ia orilla del
pliegue, y las puntadas
tomen
desplazadas
solamente uno o dos hilos del
dobladillo.
-.—
©
©
Costura correcta.
La aguja está tomando
demasiado Ia orilla del
dobladillo.
© La aguja no está tomando
Ia orilla del dobladillo.
X
Leyenda:
x Revés
y Derecho
Y
©
I
.
.
—
—
I
Page 3O
Espanol
English
Sectior
OVERCASTING
SOBREHILADO
For light-weight fabric:
Set the machine as shown.
Overcasting prevents the
edge of the fabric from fraying
and produces a clean finish.
Para materiales ligeros:
Preparar a máquina como se
indica.
El sobrehilado evita que as
orillas de Ia tela se deshilen y
crea una mejor apariencia en
el acabado.
Place the seam allowance
under the presser toot with
the edge of the seam in line
witn the side of the presser
foot as illustrated.
L_J
Coser cuidadosamente para
que todas las puntadas estén
niveladas con Ia orilla de Ia
tela.
-
-
Stitch along the edge.
I________________________________________
For heavy-weight, elastic or
Para telas gruesas y
fine fabric:
Set the machine as shown.
elásticas:
Preparar Ia máquina como se
Sew in the same way as
above.
indica.
Coser de Ia misma forma,
como en las inalcaclones
anteriores
i/I
.1’-
—h
/Th
I
/
—j
,
flfl
L_J
_______
PaaeJl
EngIish
*1
OVERLOCKING
Overlocking stitches make it
possible to sew and overcast
the seams at the same time.
Set the machine as shown.
Section
Put two pieces of the fabric
with right sides together and
sew.
To prevent the edges from
fraying, make sure that right
side stitches drop outside the
edge of the fabric when you
sew.
in some cases, overlocking
stitches may be used for
overcasting.
STRETCH STITCHING
The following stitches shown
may be used with stretch and
knit fabrics. These special
stitches are built in the
machine for your quick
selection.
EspañoI’
COSTURA “OVERLOCK”
Las puntadas en overtock
hacen posible coser y
reforzar Ia costura at mismo
tiempo.
Preparar Ia máquina como se
indica.
Poner dos telas juntas, con el
derecho de las mismas cara
a cara y coser.
Para evitar que se deshiten
las oriltas, coser de modo que
el lado derecho de las
puntadas caiga fuera del
borde de las telas.
En algunos casos Ia puntada
en overlock puede usarse
para reforzar Ia costura.
COSTURA ELASTICA DE
DISENOS AUTOMATICOS
Estas puntadas especiales
son de uso práctico en telas
elásticas y tejidos, y vienen
integradas en Ia mãquina.
/
7
__________
_________
Page 32
English
17 Straight stretch stitch
18 Fiatlock
21 Overlock stitch
Español
l7Puntadaondas
18 Costura elástica overlock
21 Costura elástica sobre las
orillas
MAKING BU1TONHOLES
CONFECCION DE OJALES
Set the machine as shown.
Preparar Ia máquina como se
indica
Determine Length
Measure the diameter and
thickness of the button and
add 0.3cm (1/8’) for bar tacks.
Mark buttonhole size on the
fabric.
JVhen using soft or elastic
fabric, it is recommended to
place interfacing between
the fabrics and/or stabilizer
underneath
Determinación del Largo
Marcar el largo del ojal en a
tela agregandole 0.3 cm para
los remates.
* Para tejidos elásticos,
ponga una pieza de papel
donde viene el ojal.
/
/
17
II
II
III
III
TI’
II’
III
II’
18
21
m
Key:
L. Length of buttonhole
d Diameter
t Thickness
rn Marking
Leyenda:
L Longitud del ojal
d Diametro
t
Espesor
m Marca
!O.3cm (1/8’)
I
L
00
d
ttAttach the buttonhole foot.
Push the sliding part © of the
buttonhole foot completely
toward the back.
Place the fabric under the
presser foot, so that marking of
the outtonhole passes through
the center of the presser foot.
of the foot
Direction line
indicates the beginning of the
marking. Place thread ends
under the foot.
Bar tacking:
Set the stitch selection dial to
I ( ) and sew 5-6 stitches.
Colocar el pie presatela para
ojales.
Desplazar compietamente
hacia atrás a parte deslizable
del pie ©. Poner ci material
que
debaio del pie de modo al
de
que
del
oial
ca
mar
Ia
centro del pie. La linea
indica el inicio de Ia marca.
El hilo sobrante colocarlo
debajo del pie, hacia a
zquierda o hacia atras.
TF
I
._-
i
m
—
—
Remate inferior:
Colocar el selector de
diseños en 1 () coser de
5 a 6 puntadas.
I
•:
fl
1j
/,
/
I
1
I
Page 34
llt—
ec on
Lt1
Left side:
Turn the stitch selection dial to
2 ( 9j).
Sew the left side from front to
back until it reaches the end
of the buttonhole marking.
Remember the line on the
buttonhole foot, so all
buttonholes are the same
lengths.
Lade izquierdo:
Cambiar el selector a 2 ( [).
Coser el ado izquierdo del
ojal de adelante hacia atrás
hasta Ilegar a Ia marca del
final.
Bar tacking:
Change the stitch to 3
and sew 56 stitches.
Remate superior:
Cambiar el selector a 3
y coser de 5 a 6 puntadas.
()
Lade derecho:
Cambiar el selector a 4 (]) y
coser el lado derecho del ojal
hasta que alcance el remate
inferior.
Right side:
Change the stitch to 4 ( ])
and sew the right side until it
reaches the first bar tack.
•
ii
.!
I
/
1
•
2
[
j
‘
3
Cutting Buttonholes
Place a pin through the bar
lacks to prevent over-cutting.
Out the buttonhole along the
center with a buttonhole
cutter.
tioi.
Corte del olal
Poner un alfiler en uno de os
extremos del ojal para evitar
cortar de mds.
=4’
__)
/_
I
,A’
Buttonhole Density
Occasionally, the left and the
right side of the buttonhole
columns may need to be
adjusted for specialty fabrics.
In such case, adjust the stitch
density by turning the
adjusting dial located on the
back at the machine.
Equilibro de los lados
derechio y izquierdo del
olal
Los puntos de los ados
derecho y izquierdo no se
pueden equilibrar sobre
tejidos diferentes. En este
caso, ajustar el equilibro
girando el control de ajuste
para ojales.
If the right side of the
buttonhcie is too dense, turn
the dial all htl to the left.
If the left side of the
buttonhole is too dense, turn
the dial ijgfttl to the right.
Si el lado derecho del ojal
esta demasiao cerca del ado
izquierdo, girar el cintrol
hasta a izquierda como esta
sefialado.
Si el ado izquierdo del oji
esta demasiado cerca del
ado derecho, girar el control
hasta Ia derecha como esta
sefialado.
/
I
/
_________
—.________
I
I
EZE>
I
Page 36
Z PPER SEWING
the monine as shown.
zioper foot. zipper
Si usnc
be :ewn easily.
COSTURA DE CIERRES
Preparar Ia mãquina como se
indica.
Al usar el pie prensatela
dela
cti
Snap the zipper foot on to the
right side of the needle.
ew the right side of the
:Doer by guiding the fabric
carefuily. so that the teeth on
the rgnr se of he zipper are
c ie :c the Ieh eage of the
Poner el pie para a costura
de cierres a a derecha de a
aguja.
Coser el ado derecho del
cierre y cuidar que tos dientes
del cierre queden paraleios a!
borde izquierdo del pie.
-
I
IO
Move the zipper foot to the
lett side at the needle.
Sew ihe ieft side of the zipper
in the same way.
Pasar el pie para cierres a!
lado izquierdo de Ia aguja.
Coser eI lado izquierdo del
cierre de a misma forma.
j
I
I
CD
Cl)
0
:3
0
CD
-
<
CD
0
a -cD c21D 0
CD )
;O
(0
CD
CD
_D
0
CD
;•ofl
CD
(t)D)
<
C)D)
0)
(D_
C/)D)
•
(/)0
94-t3(1
CDCDØD)
CDCD3
—0—
<O(D
0)CD
0
(D’<
)-Ei0
-‘
CD
ciDO
CDCD
C)
C)
CD
0
-‘
OCDCD
CD
NCD
°-o CD -, D 0
CD a
‘
0 = —
CD — CD C a 9) D
-
3
Z3CD
D -o
CD
— CD —
(I) (C)
C) 0 CD
CD
0
-Cfl
—,
o Ct) H
—. Z3
:3
c
(0 0
0 CD
P)0
E-
Ci) (J
CD CD CD
Wo5—
Cn<D
croCD t3
C))
CD
a0
D
CD
CD
0
E.
-o
-,
0t5
CDCD
0
rn
-
C)
p
0
:3
CD
CD
C))
C))
:3-
CD
C)
>
Cfl
xo
mo
—OZ
(1/
•
cI
LI
_______
a
I
Mending a Rip
Set the machine in the same
way as for patching.
First, sew the edges of the
tear together. Then sew two
more rows of stitching on
either side.
A piece of fabric may be
to
underneath
ciaced
w’ntorce tOe np.
Remiendo de una Rasgadura
Preparar Ia máquina de ia
misma forma como en ci
parchado.
Primero coser las orillas de Ia
rasgadura abarcando ambos
lados. Después coser más de
dos veces en cada ado,
cerca de a costura anterior.
Un pedazo de tela puede ser
colocada debajo, para
reforzar Ia costura en a
rasgadura.
APPLIQUE
set the machine as shown.
COSTURA DE APLICACIóN
(PARCHESDEADORNO)
Preparar a máquina como se
/
1’
1,
p
Page38
1
1FI
ection
Draw a design on a material
be used as an appliqué
ana cut it out. Place the
appliqué on the base fabric
with a stabilizer underneath
and baste in place or use
fusbie web or spray.
Dibujar ci diseño sobre ci
material que Se va a utilizar
como parche de adorno y
recortarlo.
Colocar el parche de adorno
sobre ci materiale hiivanarlo.
Sew along the outer edge
using any of three preset
zigzag stitchs (stitch selection
dial No.9, 10, or 11),
depending on the shape and
size ci appliqué and type of
fhe base fabric.
Coser airededor del molde
con puntada en zig-zag,
ajustando el argo, y el ancho
de Ia puntada con el nümero
del control selector de
puntada 1 6, 1 7, o 18 de
acuerdo con Ia forma y
tamaño del parche y el tipo
que sirve como
ta1
6
:
IC: change direction at
corners or :o sew very small
circles, stop the machine,
positioning the needle slightly
away from the edge of the
appliqué, iift the presser foot
and turn the fabric. Lower the
presser foot and continue
sewing.
Para cambiar Ia direcciOn en
las esquinas 0 para coser en
circulos muy pequeños, parar
Ia máquina, colocar Ia aguja
en Ia punta de Ia orilla del
parche, levantar ci pie
prensatela y girar ci material.
Después bajar ci pie
prensatela y continuar a
costura.
a
/
/
i
Page4O
SMOCKiNG
Set the machine as shown.
FRUNCIDO
Preparar Ia máquina como se
ndica.
1
_
-
Ii
IL
LJ
echon
5
To gather fabric, reduce the
upper thread tension and sew
two lines of very loose
straight stitches. ]ie a knot at
each thread end.
Gather the fabric toward the
knots on the opposite end
wre e holding bobbin threads.
Para fruncir Ia tela, coser dos
costuras rectas con el argo
de puntada 5, y con Ia
tensiOn superior muy suelta.
Haceralgunos nudos alfinal.
Juntar Ia tela racia los nudos
mientras sostiene los extremos de los hilos inferiores.
Sew smocking stitches on the
gatherec area between two
lines of straight stitches.
Take out the straight stitches
when you are done sewing.
Coser el fruncido sobre Ia
parte recogida en medio de
las dos costuras rectas.
Sacar los hilos utilizados para
juntar a tela después de
terminar.
,-
i
.
I
—
I
N
\\
‘
.——‘-. -
.-O-
.- ,-
-
!
I
\
z—
‘
1•
-
>
ni
s
.
oton
FREE HAND EMBROIDERY
COSTURA PARA BORDAR
Set the machine as shown.
Remove the presser foot.
Unscrew the presser foot
holder screw and remove the
presser foot holder. Place the
darning plate on the needle
plate over the feed teeth.
To keec from seeing bobbin
thread pullea up to the right/top
side, reduce the upper thread
tension slightly.
For a beautiful embroidery
finish. it is important to use
correct needles and thread.
Use embroidery thread for the
upper thread and thinner thread
ci the same kind and color for
the bobbin thread.
Trace your design on fabric and
center it in the embroidery
hoop. Make sure the fabric is
taut.
Preparar Ia máquina como se
indica. Quitar el pie prensatela y
ci soporte con el tornillo.
Para evitar que se tire ci hilo
inferior reducir Ia tensiOn del hilo
superior.
Para hacer un buen bordado es
importante usar las agujas e hilos
apropiados.
Usar hho de seda en a parte
superior, y en a parte inferior
(carrete) uno mOs delgado del
mismo color.
Trazar el diseOo sobre ci material
y centrarlo en ci bastidor.
Debe asegurarse que ci material
esté estirado.
1
Needle
No. 9
-
Hilo
Aguja
L
i
No. 9
No.11
No.14
F
10080
6050
Thread
12O- 100
/
Page42
EngIish
Dtii.
I
Espanol
Bring up the bobbin thread by
Jrning the handwheel toward
you wnile holding the upper
threaa lightly.
Lower the presser foot.
While holding onto the thread
ends. sew two or three
stitcoes, then clip excess
forced ends.
Bajar aguja y volver a subir.
tirando Ud. ci hilo superior
saldrá ci inferior, para
comenzar a bordar.
Bajar ía paianca del pie
prensatela.
Dar de 2 a 3 puntadas de
preferencia con el volante
(para hacer un nude) y cedar
hilo sobrante.
Start sewing along the outer
edge of the design with satin
stuch.
Continue on sewing while
guiding the hoop with your
fands.
To finish filling, sew several
straight stitches.
Place a stabilizer underneath
the fabric when embroidering.
Comenzar a coser ci
contorno del diseño con ía
puntada satin. Continuar
cosiendo y guiando ci
bastidor con Ia mano.
Al terminar de coser, dar
varias puntadas con ci
volante (nudo).
Colocar una hoja de panel
debajo de ía tela cuando ésta
sea muy delgada.
L
P
e43
Darning Plate
There are times you want to
control the feeding of the
abric, such as button sewing
and embroidery. Raise the
needle to its highest position
one raise the presser foot.
P’ace the darning plate over
the needle plate aligning two
pins of the darning plate with
ides ol the needle plate.
Now you must control and
move the fabric.
La placa de Ia Aguja para el
Bordado
A veces Ud. podrá mover
libremente a tela.
Colocar Ia aguja en su
posiciOn más alta y levantar
el
elevador
del
pie
prensatela.
Poner Ia placa para el
bordado sobre Ia placa de a
aguja, alineando dos espigas
de Ia placa del bordado a las
cavidades en Ia placa de Ia
aguja.
Ya Ud.
mismo puede
determinar el movirniento de
Ia tela.
Removing Presser Foot
Holder
Rercve the presser foot
holder by loosening the holder
screw with a screwdriver.
Para Quitar el Soporte del
Pie Prensatela
Aflojar el tornillo correspondi
ente.
Section
II
/
Page44
6. MAiNTENANCE
ne
Olean and oil your machi
regularly.
for a
A machine which is used
be
to
ds
nee
day
a
rs
hou
few
a
e
onc
ed
oil
cleaned and
month.
:mporrant:
the
Always disconnect
er
pow
the
from
ne
machi
the
supply before carrying out
maintenance.
6. MANTENMiENTO
to
Para un funcionamien
na
qui
má
su
adecuado
de
requiere regularmente
Una
o.
itad
ace
impieza y
máquina que se usa durante
esta
pocas horas al dIa nec
vez
una
se
itar
ace
y
se
par
lim
al mes.
Importante:
Ia
Desconectar Ia clavija de
el
e
erl
hac
maquina para
.
nto
mie
manteni
SecUcrn
.AMNG
the
Remove the presser foot,
e.
plat
dle
nee
the
and
dle
nee
on
Brusn ott all dust and lint
ning
clea
a
h
wit
h
teet
feed
the
brush.
ches
Turn the shuttle lat
ted.
stra
outward as illu
LIMPIEZA
a
Quitar el pie prensatela y
aguja.
Quitar Ia placa de Ia aguja.
el
Limpiar con el cepillo todo
los
de
s
usa
pel
y
vo
pol
dientes.
ia
Girar los seguros hac
afuera.
a
/
/
I
I.
I
I
I
3
3
Zr0
CD C))
0
U) 0
o.
CD
0
3
CI)
0
CD
3°
C))
U)
r’V C
0
U)
CDr’ C))
O
CDC))
8ci—
8
CD
CD
ci
CD CDCD C)) U) CD
CD’ CD
Q-CD CD 0 2 t)
-D
CD
DD
c
3
CD
>3
C
0
Zr5DCD
(D=CD0
-‘
CD
0
C
3
D
D
)
Q CD
Zr
CD
C
Zr
CD
8=
00
0
CD
9.
CD
-
=
C
(/)‘<
D)
—.
j> 3 (1) C
V
C) CD <
CD co Cr’ CD
D)
< 0 D C
CD
Zr CD
CD
ç
0
C)
m
C))
Zr CD
CD ci
CD
CD
CD
U
Zr
S
C)
CD
—
CD
CD
-
OC))
0 C)) V
C))
C)) C))
-,
DC))
CD
0
(ftCD
0
C
C))
C)) 0
CD
<
1=
D
C)) CD =
CD
< CD
0
V
8000
;::CD
C))-’
CD CD
CT U)
—
Zr
Zr
CC CD CD
U)
CD
DCD’O
Page46
7. TROUBLE CHART
PROBABLE CAUSE
CORRECTION
Thread not wound evenly on the bobbin or not drawn up correctly
P.8, R12, P.16
PROBLEM
Breaking bobbin
thread
Bobbin thread tension too tight
Lint stuck in the bobbin case and inside the tension spring
Skipping stitches
C
Ct3fl
Irregular stitches
L
Noisy machine
Remove lint and dust
with a cleaning brush
Needle not fully inserted
P.18
Needle bent
P.18
Size or type of needle and thread not suitable for the fabric
P.20
Incorrect upper threading
P.11
Too much oil on the machine
P.45
Incorrect size of needle for the fabric
P.20
Upper thread tension too loose
P.16
Incorrect bobbin tension
Fabric not fed correctly
P.50. 51
P.50, 51
Stitch selection dial not set correctly
P.22
Lint stuck on the feed teeth
P.44
Check for thread in the shuttle, as the slightest amount of
thread in the shuttle may cause noise or binding. Use cotton
swab to clean.
P.44
P.52
I
/
/
PaTfl
PROBABLE CAUSE
PROBLEM
Fabric puckers
Upper or bobbin thread tension too tight
Sectftn
7
R16, P.51
Stitch too long for the fabric
P.22
Thread too thick
P.20
Incorrect threading of upper and/or bobbin thread
Breaking needle
CORRECTION
P.9, P.11
Needle not correctly inserted
P.18
Needle bent
P. 18
Needle clamp screw too loose
P.18
Upper thread tension too tight
P.16
Needle too fine for the fabric
P.20
Dials have been changed while the needle was down in the
fabric
P.22
-i !f trouble(s) cannot be corrected, please call toll free 1-800-331-3164.
Do not attempt to correct fault(s) on your own.
iii
Page 48
7. TAB LA DE PROBLEMAS
CAUSA PROBABLE
PROBLEMA
Se rompe el hilo interior
Hilo del carrete disparejo a no conducido hacia arriba
correctamente.
Demasiada tension en el hilo interior.
Pelusa acumulada en a bobina y en el resorte de tensiOn.
OmisiOn de puntadas
Costuras irregulares
Hace ruido
P.8, P.12, P.16
P.50. 51
Quitar pelusa con
cepillo.
ColocaciOn inadecuadadelaaguja.
P.18
Aguja dobiada.
P.18
Hilo o aguja inadecuados para a tela.
P.21
Enhebrado incorrecto del hilo superior.
P.11
Demasiado aceite en Ia cápsula.
P.45
Medida de aguja no correcta para Ia tela utilizada.
P.21
TensiOn del hilo superior demasiado baja.
P.16
TensiOn incorrecta del hilo inferior.
La lela no se mueve
CORRECCION
P.50, 51
El selector de diseño no accionado correctamente.
P.22
Altura incorrecta o pelusas en los dientes
P.44
Pelusa a hilo atorados en a cápsula.
P.44, P.52
Pace
I
PROBLEMA
La tela se arruga
CAUSA PROBABLE
Tensián superior o inferior rnuy alta.
Sectkrn
I
i
P.16, P.51
Puntada demasiada larga para Ia tela.
P.22
Hilo demasiado grueso.
P.20
Enhebrado incorrecto de os hilos superior o inferior.
So rompe a aguja
CORRECCION
P.9. P.11
ColocaciOn inadecuada de Ia aguja.
P18
Agujadoblada.
P.18
El tornillo de presión de Ta aguja está muy flojo.
P.18
TensiOn del hilo superior muy alta.
P.16
Aguja demasiada delgada para Ta tela.
P.21
Cambiar el modelo o el ancho de Ta puntada con Ta aguja en
posiciOn inferior.
P.22
Si aün los problemas continüan, por favor, llama a 1 -800-331 -3164.
No tratar de corregir eI fallo Ud. mismo.
I
I
/
/
Page 50
F3OBBIN THREAD TENSION
.DJUSTMENT
AJUSTE DE TENSION DE
LA BOBINA
if the machine skips or loops
stitches, it may require a
:ension adjustment.
To check the bobbin thread
tension, follow these steps:
Pusn the latches of the
snunle race cover outward
as snown in figure
‘T Remove the shuttle cover
as shown in figure ©.
© Remove the shuttle as
shown in figure ©.
Suspend the bobbin, the
bobbin case and the shuttle.
When pulling the thread
gently, all of them should
siide down with a slight
resistance as shown in
figure ©. If not, the bobbin
case tension is too tight. If
they siide down too easily,
the bobbin case tension is
too loose.
See the following page for
the adjustment of the bobbin
case.
Once the bobbin case
correctly
is
tension
adjusted, the upper tension
can be easily adjusted as
shown on page 16.
x Shuttle
y Bobbin tension screw:
use a small screworiver
to tighten/loosen.
Si Ia máquina pierde puntos o
hace nudos por el roves en Ia
costura no es problema de Ia
máquina, sino de Ia tension.
Para verificar Ia tension de a
bobina, se debe tomar ésta y
el canillero como se indica en
el dibujo, si ia tension es
correcta se desplazarán
lentamente.
Después ajustar Ia tensiOn
superior con os nUmero 4, 5.
o 6.
(D Girar los seguros hacia
afuera.
© Quitar a tapa del caniilero.
© Quitar el canillero.
x Canillero
y Carrete y bobina
El canillero y Ia bobina se
desplazarOn lentamente.
.
S
x/y
I!
/
lEE
For the tension adjustment,
turn the screw using a small
screwdriver.
K.
Right to tighten
y Lett to loosen
,
‘7
Replace the shuttle back in its
place.
It may be easier if you lay
the machine on its back.
shuttle cover back
Para ajustar Ia tensián,
utilizar el desarmador y
apretar o aflojar el tornillo
segun sea necesario.
Apretar: Para hacer a tension
más alta del hilo inferior.
Aflojar: Para hacer a tensiOn
baja del hilo inferior.
Leyerida:
x TensiOn inferior más alta
y TensiOn inferior baja
Poner el canillero.
Para facilitar a operaciOn,
poner a máquina en a
trasera.
Poner a tapa del canillero.
I
//
X
Y
Page 52
‘
•
ard.
Push the latches inw
SecUon
7
Girar
dentro.
E CASE
CLEANING SHUTTL
tween the
Tncead stuck be
uttle case
snuttle and the sh
en rapid
dd
su
may cause
ing of
running or sudden stopp
.
ne machine
u may
In such case, yo
s:
low
fol
proceed as
t and
Lift the presser foo
se.
ca
in
bb
bo
the
e
remov
®
s
he
tc
la
Push the
e the
ov
rem
d
an
ard
outw
d the
s-iuttle cover an
le.
snutt
and the
Clean the shuttle
n put
the
d
an
se
ca
le
shutt
.
ce
pla
them back in
OS
seguros hacia
I4
JA DEL
LIMPIEZA DE LA CA
JO
CANGRE
Ia caja del
El hilo atorado en
ã una
ar
us
ca
,
canillero
quina.
má
pequeno fallo en su r como
de
ce
pro
so
En este ca
uida.
se describe en seg
riba ci
Lievar hacia ar
quitar a
y
pie
eievador del
bobina.
guros del
© Girar los se
®. y
canillero hacia afuera lero.
nil
ca
ci
y
a
quitar a tap
iero y caja,
© Limpiar ci canil ar.
arm
a
voiviéndolos
d
//
/
/
a
53
CHANGING LIGHT BULB
Unplug the machine.
as
Lcsen the screw
shown and remove the face
Dover as shown.
by
bulb
the
Remove
unscrewing t counterclockwise.
Install a new bulb by screwing
DIcckwse.
CAMBIO DEL FOCO
Desconectar Ia máquina.
Aflojar ci tornillo como se
indica. y abrir Ia cuhierta.
Qurtar el foco girãndolo en
al
contrario
sentido
movimiento de las manecillas
del reloj.
Poner un nuevo foco
atornllándolo.
Always use 11 OV 15W bulb.
Section
7
/
/