1
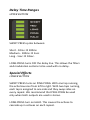
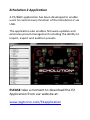
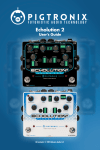
Pigtronix Tm Echolution 2 / Echolution 2 Deluxe User’s Guide All contents © Absara Audio LLC 2014 Table of Contents Introduction……………………………….…..………3 Jacks………………………….…………………...………4 Footswitches.. …………...………………….……...5 Knobs…………………………………….……...….……6 Presets………………………………….….….…..…….6 E2R Remote Switch………………………….…..…8 Touch Switches…………………………..............8 Filters…………………………………….….….10 Multi-Taps………………………………...….11 Delay Line i/o…………………………….….12 Delay Line Special Functions………….12 LFO Waveforms…………………………....13 Expression Control……………………..…14 Delay Time Ranges……………………..…15 Special Effects…………………………….…15 Factory Presets List…………………………………16 MIDI………………………………………………….……19 MIDI CC MAP………………………………………….20 Echolution 2 Application…………………………21 Credits…………………………………………….………22 Warranty…………………………………………………23 Pigtronix Echolution 2 represents a unique marriage of analog tone shaping and DSP processing designed to deliver the ultimate delay pedal experience. Echolution 2 achieves the ambient richness of the finest tape echo units by using 100% analog ClassA, discrete transistor limiters as well as non-linear tape emulator stages and filters to massage the audio coming through the delay line. Fully capable of handling instrument and line level sound sources, the Echolution 2 delivers low-noise, high-headroom delay processing with any amp, mixer or DAW rig. Echolution 2 uses a 24-bit, variable clock, multi-tap delay line where both the read and write heads are simultaneously modulated by a multi-waveform LFO. Changing the delay time results in the smooth pitch bending of an analog delay system but with a Pigtronix twist that allows drastic delay time changes to create musically related octave intervals. The resulting echoes are then processed through an array of filters and special effects, which can be manipulated via assignable expression pedal routing as well as envelope control for each knob. Every feature and algorithm on the E2 can be run simultaneously, in any combination, and all functions of the Echolution 2 are MIDI controllable. Accessing and navigating the vast palette of sounds available within the Echolution 2 is easy. Since the pedal is completely programmable, any sound that has been designed using the Echolution 2 or Echolution 2 Deluxe pedal can be saved to the unit itself and exported for sharing with friends and other musicians. A dedicated PC/MAC application handles preset management as well as firmware upgrades and also provides Echolution 2 users with real time access to the sounds and advanced editing functionality of the Echolution 2 Deluxe. Please take a moment to download this application from: www.pigtronix.com/E2application. Jacks Power - 18VDC (2.1mm neg. tip) 100mA or higher is required. Input 1 - Connect instrument here Input 2 - Connect instrument here Note: When only one of the two audio inputs is connected, that single input will be processed in stereo. Output 1 - Connect amplifier, mixer, DAW here Output 2 - Connect amplifier, mixer, DAW here MIDI IN - Accepts MIDI preset change, MIDI CC inputs (see MIDI map) for all functions as well as MIDI beat clock to set the delay time. When a MIDI signal is present, the red MIDI LED in the upper left corner will illuminate. EXP - TRS expression pedal goes here. Use a lowimpedance foot controller. (Wiper = tip, Toe = ring, Heel = Sleeve.) REMOTE - E2R or compatible TRS momentary remote switch goes here. Jump = tip, Freeze = ring, Common = Sleeve MIDI OUT - Sends out MIDI beat clock that is exactly 4x the value of the current delay time setting. Footswitches Tap Tempo (Preset) - Tap on this switch to set the delay time. When a new delay time is set by the Tap Tempo switch, it will override the manual delay time knob. A LONG PRESS of the Tap Tempo switch enters PRESET SELECT mode. Once you have entered the PRESET SELECT mode, the green preset digit will blink. A SHORT PRESS on the tap tempo switch will move up one preset and a LONG PRESS will move down one preset. Once the desired preset is queued, pressing the ENGAGE foot switch will activate it. During the preset select process, the previously chosen preset remains active. The newly selected preset is not actually loaded until you press the Engage footswitch. Engage - Turns the effect on and off. The engage footswitch is also used to load presets once you have entered PRESET SELECT mode. When the Engage switch is used to load a preset, the bypass status of the effect will not change. Factory Reset Holding down both footswitches during power up will result in a factory reset, restoring all 60 original Echolution 2 presets. WARNING: Performing a factory reset will erase all custom preset data stored to the Echolution 2. Knobs REPEATS - Sets the amount of feedback in the delay line. TIME - Sets the delay time within the current delay time range setting. When the time knob is turned, it takes over from the tap tempo within the delay time range as set by the last tap tempo value. MIX - Sets the audio output level of the delay line. SPEED - Sets the LFO speed. DEPTH - Sets the amount of LFO modulation that is fed to the delay line. Presets The PRESET knob is a rotary push button encoder that facilitates saving and loading of presets. A complete list of all 60 default presets can be found at the end of this manual. On power up, the unit will load preset 0 in Bank 0. Turning the preset encoder clockwise scrolls through preset numbers 1-9 in Bank 0. Going beyond preset 9 in Bank 0 takes you into preset 0-9 of Bank 1 and so forth. The current Bank is indicated by the upper right light bar, where no lights indicates Bank 0, one light indicates Bank 1, two lights indicates Bank 2 etc… Preset Loading To Load a preset, turn the preset knob to select the desired number, the digit will flash. When you have arrived at the desired destination, push down the preset knob to load that preset. Preset Saving To Save a preset you have created, push and HOLD the preset knob for 1 second, until the digit begins flashing. Turn the preset knob to select the preset number where you want to save the sound and then push down and HOLD the preset knob for 1 second to finalize the save. The decimal point will illuminate to indicate that preset is present in any given number/bank. When changes have been made but not saved, the decimal point will flash. If you want to keep your changes, simply follow the save process explained above without changing the selected bank. Preset Copy To Copy a preset from one bank to another simply initiate the save process as explained above and save to any slot you wish. Preset Select using the on-board Footswitches Hold TAP TEMPO to enter PRESET SELECT mode. The preset digit will begin blinking. A SHORT PRESS on the Tap Tempo switch moves up one preset. A LONG PRESS moves down one preset. Pressing ENGAGE activates the chosen preset. When pressing the ENGAGE switch to activate a new preset, the BYPASS status will not change. E2R Remote Switch Preset Load using the optional E2R Remote Switch SHORT PRESS on the left footswitch of the E2R will instantly load preset 1 in the current bank. SHORT PRESS on the left footswitch again will instantly load preset 2 in the current bank. LONG PRESS on the left footswitch moves up one bank (indicated by upper right light bar). SHORT PRESS on the right footswitch of the E2R will instantly load preset 3 in the current bank. SHORT PRESS on the right footswitch again will instantly load preset 4 in the current bank. LONG PRESS on the right footswitch moves down bank (indicated by upper right light bar). JUMP and FREEZE using the optional E2R Remote Switch The Echolution 2 remote switch port can be set up to work in two different ways. When it is shipped from the factory, the Echolution 2 is programmed so that the Remote instantly switches between the top four presets in each bank as detailed above, regardless of the ENGAGE status. To enable the JUMP and FREEZE functions of the Remote, power up the Echolution 2 pedal while holding the TAP TEMPO footswitch. When JUMP and FREEZE are enabled, the E2R remote will only allow you to switch between presets instantly while the Echolution 2 is bypassed. Once the JUMP and FREEZE remote functions are enabled, the Echolution 2 will remember this preference after it is powered down. To disable JUMP and FREEZE and restore the preference for instant preset access, simply power up the Echolution 2 while holding the TAP TEMPO switch. Touch Switches The only difference between the Echolution and Echolution 2 Deluxe is the presence of 8 touch switches and 30 LEDs on the deluxe model. The features controlled by the touch switches found on the Echolution 2 Deluxe can be accessed using the standard model of the Echolution 2 via the PC/MAC Application. Filter SHORT PRESS cycles between: LP (Low Pass Filter) TAPE (Analog Tape emulator) COMB (All Pass Comb Filter) SWEEP (Resonant Sweep) LP + SWEEP TAPE + SWEEP COMB + SWEEP NO FILTER When SWEEP is active, the filters are swept at a rate determined by the LFO SPEED knob. Try using the LFO SYNC to TAP function for some incredible synchronized delay / filter effects. LONG PRESS turns on the CRUSH filter. This is a proprietary bitcrusher/destruction filter that smashes the audio in the delay line according to how loud the input signal is. Multi-Taps SHORT PRESS cycles through all available options: 1 - delay output matches the tap tempo / delay time ¾ - delay output is ¾ of the tap tempo / delay time value ⅔ - delay output is ⅔ of the tap tempo / delay time value ½ - delay output is ½ of the tap tempo / delay time value PHI - delay output is 0.382 of the tap tempo / delay time value... this signature feature creates rhythmic echo patterns based on the mathematics of the Golden Ratio. LONG PRESS ‘locks’ the currently selected tap option and adds a second tap. The locked tap remains at the previously chosen value and the second tap will now move with each SHORT PRESS, cycling through the available remaining options. When two taps are active a LONG PRESS gets rid of the second tap and ‘unlocks’ the first tap. Delay Line i/o UPPER BUTTON SHORT PRESS cycles between: TRAILS - old echos “spill over” after bypass for smooth transitions. LISTEN - echo material is recorded (although not heard) while in bypass. NORMAL- normal bypass (no LEDs lit up). LONG PRESS turns on DRY KILL - this cuts out the analog clean signal from the mix. DRY KILL is useful for special effects or when using a parallel effects loop on an amp or when adding delay to a full mix. Delay Line Special Functions LOWER BUTTON SHORT PRESS turns on REVERSE LONG PRESS turns on DUCK LFO Waveforms SHORT PRESS cycles between: Triangle Square Ramp Random (Sample & Hold) Super Triangle Super Square Super Ramp Super Random The “Super” version of each waveform has 4 additional LFOs superimposed onto the original LFO waveform. LONG PRESS turns on LFO SYNC - this synchronizes the LFO to the Delay Time as set by the delay time knob, tap tempo or MIDI beat clock. When LFO Sync is turned on, the LFO SPEED knob determines the LFO Speed to Delay Time ratio with minimum being 1:4 and maximum being 4:1 for six possible values (1:4, 1:3, 1:2, 2:1, 3:1, 4:1) Expression Control SHORT PRESS cycles between EXP control of: R - Delay Repeats T - Delay Time M - Delay Mix S - LFO speed D - LFO depth LONG PRESS turns on ENV MAP to EXP - this sums the internal envelope follower with the current expression pedal or on-board knob value for the chosen parameter, allowing touch sensitive control over every knob. When using the ENV MAP to EXP function, the position of the expression pedal or onboard knob will be summed with the envelope voltage. Delay Time Ranges UPPER BUTTON SHORT PRESS cycles between: Short - 10ms 100ms Medium - 100ms 1sec Long - 1sec 10sec. LONG PRESS turns OFF the delay line. This allows the filters and modulation sections to be used with no delay. Special Effects LOWER BUTTON SHORT PRESS turns on PING PONG. With one tap running, the echo bounces from left to right. With two taps running, each tap is assigned to one side and they swap sides on every repeat. We recommend that PING PONG be used only when both outputs are used in stereo. LONG PRESS turn on HALO. This causes the echoes to cascade up in octaves on each repeat. Factory Presets List BANK #0 - Echolution 2 Core Sounds 0) Echolution 2 Basic 1) Tape Slap 2) Dotted Eigth Mod 3) Golden Stereo Wash 4) Sample and Hold 5) Halo Sync 6) Angels 7) DUB WARS 8) hey you... DUCK 9) tape REVERSE BANK #1 - Echolution 2 Signature Sounds 10) Dark Mod Delay 11) Tape Warble 12) Comb Filter 13) Sync Sweep Filter 14) LP Sweep Sync 15) Stereo Tape Sweep 16) Comb Saw Sweep 17) 4 Lou (Reed) 18) Loveless Heart 19) Stereo Strobe BANK #2 - Classic Delays 20) Memory Mod Delay 21) PCM42 Sq. Mod 22) Space Echo 23) 2290 Duck Pong 24) DL4 Sweep 25) SDD3000 26) Big Green Analogue 27) Echoplex 28) Shimmer 29) Crystal BANK #3 - Modulation Effects 30) Super LFO Chorus 31) DynaFlanger 32) Doubler 33) Dimension Chorus 34) Vibrato 35) Flanger 36) ResoFlange 37) Sweeper Mod 38) Envelope Rotary Chirp 39) Halo Chorus Sweep BANK #4 - Special Effects 40) LP Halo 41) Stereo Halo Sweep 42) Swell 43) Pure Crush 44) DynaCrush 45) Acid Head 46) LFO Low Pass 47) Phaser 48) Feedback Synth 49) ResoSynth BANK #5 - Multi-Tap Rhythms 50) 1 + 3/4 51) 1 +2/3 52) 1 + PHI 53) 3/4 + 2/3 54) 3/4 + 1/2 55) 1/2 + PHI 56) 1 + 1/2 PONG 57) 1 + 3/4 PONG 58) 1/2 + PHI PONG 59) 1 + PHI PONG MIDI Every function of the Echolution 2 can be controlled via MIDI. Setting the E2 MIDI Channel: 1. Power up the E2 while holding the LFO button down. 2. Once the E2 has booted up, release the button. 3. Make your MIDI controller send a valid CC command to the E2 (see table below), on the desired MIDI Channel. 4. The E2 will pick the MIDI Channel of the first valid command it receives, and store this for future use. There is no need to repeat this procedure unless a different MIDI Channel is desired. Supported MIDI commands: To load a particular preset, simply send a program change command with the desired preset number. The E2 will load that number plus one as the preset. This is because many MIDI controllers send “PROGRAM CHANGE x-1” when you select program x. ie. The foot controller will send “PROGRAM CHANGE 00” when you select the footswitch corresponding to preset 1. If you want preset 00, send 127 as the program. MIDI CC Map Knobs: 4 - Exp pedal input 12 - Repeats Knob 13 - Time Knob 14 - Mix Knob 15 - LFO Speed Knob 16 - Modulation Depth Knob Buttons: 17 - Time Button 18 - SFX Button 19 - Taps Button 20 - Filter Button 21 - Bypass Button 22 - Ducking Button 23 - Listen Button 24 - LFO Mod Button 25 - Tap Tempo Footswitch 27 - Engage Footswitch 28 - Preset Save 29 - Jump Footswitch / Preset 1/2 30 - Freeze Footswitch / Preset 3/4 The Preset Save Command can be used to save a preset, after using other midi commands to change parameters. Buttons can be controlled in two ways, to allow automated patches and also real time manual control. Button Patch Control Set the button value to “1” for a SHORT PRESS. Set the button value to “2” for a LONG PRESS This allows commands to be sent quickly to the E2 without worrying about timing, which makes automated control easy. Manual Button Control via MIDI This is convenient for manual control of the E2 through something like a foot controller, but would be very inconvenient for automated control. Set the button to “127” to indicate that the button should change state from “unpressed” to “pressed”. Set the button to “0” to indicate that the button should change state from “pressed” to “unpressed”. The time between the above two messages decides if the press is a long or short press. This means that the controlling button on the MIDI controller behaves exactly as the equivalent button would on the E2 front panel. Manual and Patch controls can be mixed as necessary. Echolution 2 Application A PC/MAC application has been developed to enable users to control every function of the Echolution 2 via USB. The application also enables firmware updates and extensive preset management including the ablility to import, export and audition presets. PLEASE take a moment to download the E2 Application from our website at: www.pigtronix.com/E2application Credits: The Pigtronix design team spent 3 years designing the Echolution 2. The release of this flagship pedal marks the 10-year anniversary of the founding of Pigtronix. I believe it is the best pedal we have ever created. We would like to thank the following people for their help along the way: Ray Heasman, Howard Davis, Ben Artes, Steve Turnidge, Sean Eisenheim and Daniel Fisher as well as Lisa Rickmers, Megan Leary, the Bethke and Koltai families, Aaron Reed, Dan Pavone, Kevin Griffin, Sean Fitzsimons, Brett Perdie, Thomas Elliot, Bruce Zinky and B-Dawg. Ray Heasman, Ben Artes, Howard “Mick” Davis, Steve Turnidge and David Koltai designed the Pigtronix Echolution 2 during 2010 – 2013 in Port Jefferson, NY and Seattle, WA. We hope you enjoy your new Echolution 2 pedal! As always, we welcome your input, and value customer feedback. Since this device is firmware updateable, we may be able to implement changes that address concerns or new features you may have in mind. Contact us at (631) 331-PIGS (7447) or email: [email protected] Please check our website, www.pigtronix.com for the latest information on new Pigtronix gear. All the best, Dave Koltai & Brian Bethke Pigtronix Pigtronix Limited Warranty: Your Pigtronix effect pedal comes with a 1-year limited warranty on parts and workmanship. During the warranty period we will repair or replace, at our option, defective parts or pedals free of charge, and return them to the owner. Warranty service does not include damaged, modified, or misused pedals and such pedals will be subject to a standard repair charge. What you must do: First, contact us directly via email and describe the problem to us. If the problem cannot be resolved we will have you send the pedal directly to us for servicing. How to contact us for warranty service: Email: [email protected] Phone: 631-331-PIGS (7447) Warranty Limitations: This warranty does not cover defects resulting from improper or unreasonable use, accident, unauthorized tampering or modifications. To validate your 1-year, limited warranty, please register your Echolution 2, within 30 days of purchase, on the web at: www.pigtronix.com/warranty