1
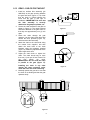
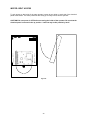
1.5.2 FRONT – POST MOUNT
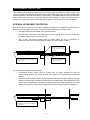
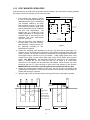
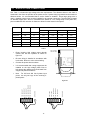
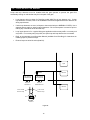
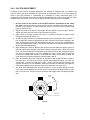
1. Secure the chain brackets to each end of the gate so
that the brackets are level with the bottom chain
idlers in the operator housing. Brackets should be
attached to the inside of the frame so that the chain
bolts, when attached, do not protrude beyond the
frame of the gate.
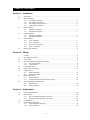
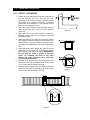
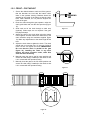
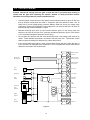
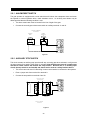
2. Route the chain through the gate operator: under the
chain guide idlers and over the drive sprocket (Figure
15).
3. Slide each end of the chain through a chain stop
(optional). Chain stops are not required if the gate
has physical stops.
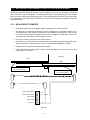
4. Attach the chain to the chain bolts using the master
links supplied, and then attach the chain bolts to the
chain brackets using the hardware supplied (figure
13). Make any adjustments to the chain length at this
time.
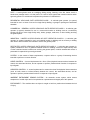
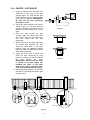
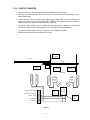
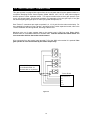
5. Adjust the chain bolts to tighten the chain. The chain
should sag no more than one (1) inch per 10 feet of
travel. Do not over tighten the chain. IMPORTANT!!
Be sure that the chain is parallel to the gate
(figure 14). Installing the chain in any other
manner will cause excessive noise, chain idler
wear and chain stretching.
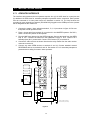
6. Manually open the gate to the full open position and
secure the chain stop (if installed) to the chain so that
it is in contact with the operator housing.
7. Manually close the gate to the full closed position and
secure the chain stop (if installed) to the chain so that
it is in contact with the operator housing.
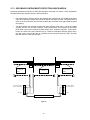
Figure 13
Figure 14
Figure 15
8