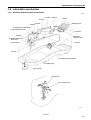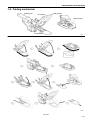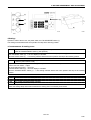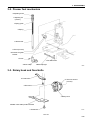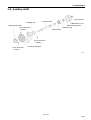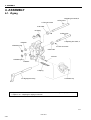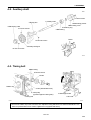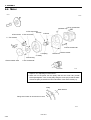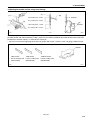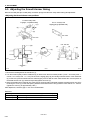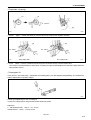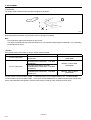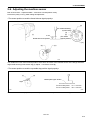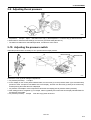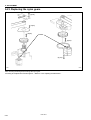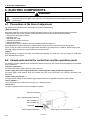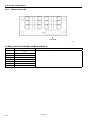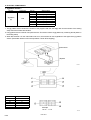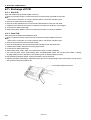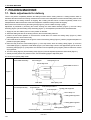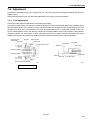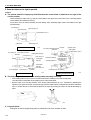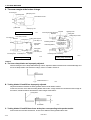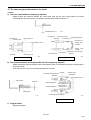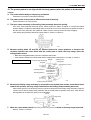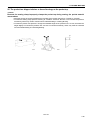
1
BAS-7610, 761
SERVICE MANUAL
Please read this manual before making any adjustments.
AUTOMATIC POCKET SETTER <JEANS>
This service manual is intended for BAS-7610, BAS-761; be sure to read the BAS-7610, BAS-761 instruction manual
before this manual.
Carefully read the “SAFETY INSTRUCTIONS” below and the whole of this manual to understand this product before you
start maintenance.
As a result of research and improvements regarding this product, some details of this manual may not be the same as
those for the product you purchased.
If you have any questions regarding this product, please contact a Brother dealer.
SAFETY INSTRUCTIONS
1. Safety indications and their meanings
This service manual and the indications and symbols that are used on the machine itself are provided in order to ensure
safe operation of this machine and to prevent accidents and injury to yourself or other people.
The meanings of these indications and symbols are given below.
Indications
DANGER
The instructions which follow this term indicate situations where failure to follow the
instructions will almost certainly result in death or severe injury.
C AU T I O N
The instructions which follow this term indicate situations where failure to follow the
instructions could cause injury when using the machine or physical damage to
equipment and surroundings.
Symbols
........................................This symbol (
) indicates something that you should be careful of. The
picture inside the triangle indicates the nature of the caution that must be
taken.
(For example, the symbol at left means “beware of injury”.)
........................................This symbol (
) indicates something that you must not do.
........................................This symbol (
) indicates something that you must do. The picture
inside the circle indicates the nature of the thing that must be done.
(For example, the symbol at left means “you must make the ground
connection”.)
BAS-7610
i
2. Notes on safety
DANGER
Wait at least 5 minutes after turning off the power switch and disconnecting the power cord from the wall outlet
before opening the face plate of the control box. Touching areas where high voltages are present can result in
severe injury.
CAUTION
Environmental requirements
Use the sewing machine in an area which is free
from sources of strong electrical noise such as
high-frequency welders.
Sources of strong electrical noise may cause
problems with correct operation.
Any fluctuations in the power supply voltage
should be within
10% of the rated voltage for
the machine.
Voltage fluctuations which are greater than this
may cause problems with correct operation.
The power supply capacity should be greater than
the requirements for the sewing machine’s
electrical consumption.
Insufficient power supply capacity may cause
problems with correct operation.
The pneumatic delivery capability should be
greater than the requirements for the sewing
machine’s total air consumption.
Insufficient pneumatic delivery capability may
cause problems with correct operation.
The ambient temperature should be within the
range of 5 to 35 during use.
Temperatures which are lower or higher than this
may cause problems with correct operation.
The relative humidity should be within the range of
45 % to 85 % during use, and no dew formation
should occur in any devices.
Excessively dry or humid environments and dew
formation may cause problems with correct
operation.
Avoid exposure to direct sunlight during use.
Exposure to direct sunlight may cause problems
with correct operation.
In the event of an electrical storm, turn off the
power and disconnect the power cord from the
wall outlet.
Lightning may cause problems with correct
operation.
Installation
Machine installation should only be carried out by
a qualified technician.
Contact your Brother dealer or a qualified electrician
for any electrical work that may need to be done.
The sewing machine weighs more than 400 kg.
The installation should be carried out by two or
more people.
Do not connect the power cord until installation is
complete, otherwise the machine may operate if
the start is pressed by mistake, which could result
in injury.
Have two people present to hold the machine
head with both their hands when tilting it back or
returning it to its original position.
Be sure to connect the ground. If the ground
connection is not secure, you run a high risk of
receiving a serious electric shock, and problems
with correct operation may also occur.
BAS-7610
ii
Be sure to wear protective goggles and gloves
when handling the lubricating oil and grease, so
that no oil gets into your eyes or onto your skin,
otherwise inflammation can result.
Furthermore, do not drink the oil under any
circumstances, as they can cause vomiting and
diarrhea.
Keep the oil out of the reach of children.
Avoid setting up the sewing machine near sources
of strong electrical noise such as high-frequency
welding equipment.
If this precaution is not taken, incorrect machine
operation may result.
CAUTION
Sewing
This sewing machine should only be used by
operators who have received the necessary
training in safe use beforehand.
Attach all safety devices before using the sewing
machine. If the machine is used without these
devices attached, injury may result.
The sewing machine should not be used for any
applications other than sewing.
Do not touch any of the moving parts or press any
objects against the machine while sewing, as this
may result in personal injury or damage to the
machine.
Be sure to wear protective goggles when using the
machine.
If goggles are not worn, there is the danger that if
a needle breaks, parts of the broken needle may
enter your eyes and injury may result.
Turn off the power switch at the following times,
otherwise the machine may operate if the treadle is
depressed by mistake, which could result in injury.
When replacing the needle
When not using the machine and when leaving
the machine unattended
If an error occurs in machine operation, or if abnormal
noises or smells are noticed, immediately turn off the
power switch. Then contact your nearest Brother
dealer or a qualified technician.
If the machine develops a problem, contact your
nearest Brother dealer or a qualified technician.
Cleaning
Turn off the power switch before carrying out
cleaning, otherwise the machine may operate if
the treadle is depressed by mistake, which could
result in injury.
Be sure to wear protective goggles and gloves
when handling the lubricating oil and grease, so
that no oil gets into your eyes or onto your skin,
otherwise inflammation can result.
Furthermore, do not drink the oil under any
circumstances, as they can cause vomiting and
diarrhea.
Keep the oil out of the reach of children.
Maintenance and inspection
Disassembly, assembly, maintenance and inspection
of the sewing machine should only be carried out by a
qualified technician.
If the power switch and air need to be left on when
carrying out some adjustment, be extremely
careful to observe all safety precautions.
Ask your Brother dealer or a qualified electrician to
carry out any maintenance and inspection of the
electrical system.
Have two people present to hold the machine
head with both their hands when tilting it back or
returning it to its original position.
Turn off the power switch and disconnect the
power cord from the wall outlet at the following
times, otherwise the machine may operate if the
treadle is depressed by mistake, which could
result in injury.
When carrying out inspection, adjustment and
maintenance
When replacing consumable parts such as the
rotary hook and knife
Disconnect the air hoses from the air supply and
wait for the needle on the pressure gauge to drop
to “0” before carrying out inspection, adjustment
and repair of any parts which use pneumatic
equipment.
Use only the proper replacement parts as
specified by Brother.
If any safety devices have been removed, be
absolutely sure to re-install them to their original
positions and check that they operate correctly
before using the machine.
Any problems in machine operation which result
from unauthorized modifications to the machine
will not be covered by the warranty.
BAS-7610
iii
3. Warning labels
The following warning labels appear on the sewing machine.
Please follow the instructions on the labels at all times when using the machine. If the labels have been removed or
are difficult to read, please contact your nearest Brother dealer.
1
Direction of operation
3
Safety devices: Thread take-up cover,
Guard bar, Belt cover, etc.
2
1
Thread take-up cover
1
Guard bar
3
2
Guard bar
1855S
BAS-7610
iv
INDEX
1. MECHANICAL DESCRIPTIONS
.........................................................................................1-01
1-1. Upper shaft and needle bar mechanism ..................................................................................................1-01
1-2. Lower shaft and rotary hook mechanism .................................................................................................1-01
1-3. Needle zigzag mechanism .......................................................................................................................1-02
1-3-1. Zigzag generation mechanism ..........................................................................................................1-03
1-3-2. Standard sewing and bar tacking......................................................................................................1-03
1-4. Lubrication mechanism ............................................................................................................................1-04
1-4-1. Needle bar and thread take-up lubrication........................................................................................1-04
1-4-2. Rotary hook and gear lubrication ......................................................................................................1-05
1-5. Thread trimmer .........................................................................................................................................1-06
1-6. Presser bar lifter .......................................................................................................................................1-08
1-7. Stacker .....................................................................................................................................................1-08
1-8. Feed guide mechanism ............................................................................................................................1-09
1-9. Folding mechanism ..................................................................................................................................1-10
1-10. Rise-and-fall equipment of slide plate.....................................................................................................1-11
1-11. Bobbin winder mechanism ......................................................................................................................1-12
1-12. Suction (Vacuum) mechanism ................................................................................................................1-12
2. BEFORE DISASSEMBLY AND ADJUSTMENT.........................................................2-01
2-1. Basic operation.........................................................................................................................................2-01
2-2. Disassembling and assembling for transfer through narrow doors..........................................................2-03
3. DISASSEMBLY................................................................................................................................3-01
3-1. Cover ........................................................................................................................................................3-01
3-2. Presser foot mechanism...........................................................................................................................3-02
3-3. Rotary hook and fixed knife......................................................................................................................3-02
3-4. Movable knife and thread trimmer............................................................................................................3-03
3-5. Needle bar ................................................................................................................................................3-03
3-6. Motor ........................................................................................................................................................3-03
3-7. Timing belt ................................................................................................................................................3-03
3-8. Auxiliary shaft ...........................................................................................................................................3-03
3-9. Zigzag.......................................................................................................................................................3-03
4. ASSEMBLY ........................................................................................................................................4-01
4-1. Zigzag.......................................................................................................................................................4-01
4-2. Auxiliary shaft ...........................................................................................................................................4-02
4-3. Timing belt ................................................................................................................................................4-02
4-4. Motor ........................................................................................................................................................4-03
4-5. Needle bar ................................................................................................................................................4-04
4-6. Movable knife and thread trimmer............................................................................................................4-05
4-7. Rotary hook and fixed knife......................................................................................................................4-06
4-8. Presser foot mechanism...........................................................................................................................4-06
4-9. Cover ........................................................................................................................................................4-07
5. ADJUSTMENT .................................................................................................................................5-01
5-1. Adjusting the zigzag movement ...............................................................................................................5-02
5-2. Adjusting the needle bar height and, the needle and the rotary hook timing .......................................................5-05
5-3. Adjusting the thread trimmer timing..........................................................................................................5-07
5-4. Tension release ........................................................................................................................................5-09
5-5. Thread tension..........................................................................................................................................5-09
5-6. Adjusting the machine sensor ..................................................................................................................5-12
5-7. Adjusting the work clamp height...............................................................................................................5-13
5-8. Adjusting the rotary hook lubrication amount ..........................................................................................5-13
5-9. Adjusting the air pressure........................................................................................................................5-14
5-10. Adjusting the pressure switch .................................................................................................................5-14
5-11. Adjusting speed of the pneumatic mechanism .......................................................................................5-15
5-11-1. Folding clamp ...................................................................................................................................5-16
5-11-2. Inner clamp.......................................................................................................................................5-16
5-11-3. Center blade.....................................................................................................................................5-16
5-11-4. Sewing clamp ...................................................................................................................................5-17
5-11-5. Folding base (10 mm-stroke) ...........................................................................................................5-17
5-11-6. Folding base (1.5 mm-stroke) ..........................................................................................................5-17
5-11-7. Label attachment device (Option) ....................................................................................................5-18
5-11-8. Suction (Vacuum) cylinder................................................................................................................5-18
5-11-9. Stacker wiper....................................................................................................................................5-19
5-11-10. Stacker bar inside...........................................................................................................................5-19
5-11-11. Stacker bar outside.........................................................................................................................5-19
5-11-12. Stacker roller ..................................................................................................................................5-20
5-12. Adjusting the folding clamp .....................................................................................................................5-20
5-13. Adjusting the inner clamp........................................................................................................................5-21
5-14. Adjusting the center blade support .........................................................................................................5-21
5-15. Replacing and adjusting the bearings for center blade supporter ..........................................................5-22
5-16. Adjusting the folding base height............................................................................................................5-23
5-17. Adjusting the stacker wiper .....................................................................................................................5-23
5-18. Adjusting the stacker table and the outside stacker bar .........................................................................5-24
5-19. Checking the movement of the stacker ..................................................................................................5-24
5-20. Adjusting the label attachment device (option) .......................................................................................5-24
5-21. Adjusting the work clamp pressure.........................................................................................................5-25
5-22. Adjusting the belt tension........................................................................................................................5-26
5-23. Replacing the nylon gears ......................................................................................................................5-27
5-24. Adjusting the AC servo motor backlash..................................................................................................5-28
5-25. Checking and adjusting the home position .............................................................................................5-28
5-26. Adjusting the bobbin winder....................................................................................................................5-30
5-27. Adjusting the cylinder sensors ................................................................................................................5-30
5-28. Adjusting the rise-and-fall equipment .....................................................................................................5-32
5-29. Upper thread breakage sensor. ..............................................................................................................5-32
5-30. Adjusting the upper thread breakage detector........................................................................................5-33
5-30-1. How to insert the fiber ......................................................................................................................5-33
5-30-2. Setting of MODE ..............................................................................................................................5-33
5-30-3. Setting of sensitivity .........................................................................................................................5-34
6. ELECTRIC COMPONENTS.....................................................................................................6-01
6-1. Precautions at the time of adjustment......................................................................................................6-01
6-2. Components inside the control box and the operation panel...................................................................6-01
6-3. Power supply ............................................................................................................................................6-03
6-3-1. Fuse ..................................................................................................................................................6-03
6-3-2. Circuit protector of bobbin winder motor ...........................................................................................6-04
6-3-3. Breaker of suction (vacuum) device..................................................................................................6-04
6-3-4. Conversion of power supply voltage .................................................................................................6-05
6-4. PROM.......................................................................................................................................................6-06
6-5. Connector .................................................................................................................................................6-07
6-5-1. Main PCB ..........................................................................................................................................6-07
6-5-2. Power supply PCB ............................................................................................................................6-17
6-5-3. Operation panel PCB ........................................................................................................................6-18
6-5-4. Programmer PCB ..............................................................................................................................6-20
6-5-5. Pattern sensor PCB ..........................................................................................................................6-21
6-6. Sensor ......................................................................................................................................................6-22
6-6-1. Sensor location..................................................................................................................................6-22
6-6-2. Function of sensor.............................................................................................................................6-23
6-7. Harness ....................................................................................................................................................6-29
6-7-1. Harness connecting table..................................................................................................................6-29
6-7-2. Harness connecting pin number table ..............................................................................................6-31
6-8. Servo amplifier..........................................................................................................................................6-41
6-8-1. Names of major parts........................................................................................................................6-41
6-8-2. Abnormalities and a measure ...........................................................................................................6-43
6-8-3. Exchange the servo amplifier............................................................................................................6-44
6-9. DIP switches.............................................................................................................................................6-45
6-10. Error code ...............................................................................................................................................6-47
6-11. Exchange of PCB....................................................................................................................................6-51
6-11-1.Main PCB ..........................................................................................................................................6-51
6-11-2.Panel PCB.........................................................................................................................................6-51
6-12. Control circuit block diagram ..................................................................................................................6-53
7. FOLDING MACHINE ....................................................................................................................7-01
7-1. Basic adjustments for delivery..................................................................................................................7-01
7-2. Valve .........................................................................................................................................................7-03
7-3. Operation order and connection of folding machine ................................................................................7-04
7-4. Adjustment................................................................................................................................................7-06
7-4-1. Fine adjustments ...............................................................................................................................7-06
7-4-2. Characteristic troubles of three corner pocket model .......................................................................7-07
7-4-3. Characteristic troubles of two corner pocket model ..........................................................................7-39
1. MECHANICAL DESCRIPTIONS
1. MECHANICAL DESCRIPTIONS
Operate in the order of the numbers in the illustration.
The “A”, “B” and other alphabets with the numbers indicate different sequences of operation which can occur at the same
time.
1-1. Upper shaft and needle bar mechanism
2.Upper shaft
3.Thread take-up crank
4.Thread take-up
1.Motor
5.Needle bar crank
6.Thread take-up crank rod
7.Needle bar clamp
8.Needle bar
1557S
1-2. Lower shaft and rotary hook mechanism
2.Upper shaft
3.Timing pulley
1.Motor
8.Pinion
4.Timing belt
9.Rotary hook shaft
10.Rotary hook
5.Timing pulley
6.Lower shaft
7.Spiral gear
1558S
BAS-7610
1-01
1. MECHANICAL DESCRIPTIONS
1-3. Needle zigzag mechanism
6.Zigzag cam
5.Sub shaft
1.Pulley
2.Upper shaft
4.Sub shaft gear
1559S
3.Speed reduction gear
8.Zigzag adjusting link
6.Zigzag cam
7.Zigzag adjusting fork
9.Zigzag adjusting lever R
10.Zigzag adjusting lever F assy
11.Needle bar bracket slide block
12.Needle bar support
1560S
BAS-7610
1-02
1. MECHANICAL DESCRIPTIONS
1-3-1. Zigzag generation mechanism
8.Zigzag adjusting link
8
7
7.Zigzag adjusting fork
9
9.Zigzag adjusting lever R
1562S
1561S
1-3-2. Standard sewing and bar tacking
C
Standard sewing
Zigzag adjusting lever R (9) : Not swing
8.Zigzag adjusting link
C’
8
7.Zigzag adjusting fork
9.Zigzag adjusting lever R
7
9
14.Zigzag connecting
shaft
13.Zigzag cylinder
1564S
Bar tacking
Zigzag adjusting lever R (9) : Swing
1563S
8
Standard sewing (Non zigzag) - Zigzag cylinder : Push
Bar tacking (Zigzag) - Zigzag cylinder
: Pull
7
9
1565S
BAS-7610
1-03
1. MECHANICAL DESCRIPTIONS
1-4. Lubrication mechanism
1-4-1. Needle bar and thread take-up lubrication
1566S
1.Oil tank
B2.Wick
B3.Felt
A2.Wick
C3.Wick
A3.Wick
B6.Zigzag cam
C4.Zigzag lever shaft bush F
A4.Needle bar bracket
B4.Wick
A5.Wick
B5.Speed
reduction gear
A6.Needle bar bracket
slide block
A9.Wick
A7.Needle bar
A8.Felt
A11.Sewing machine holder
A10.Spiral gear
A12.Poly oiler
D3.Flat wick
D4.Thread take-up
1853S
BAS-7610
1-04
1. MECHANICAL DESCRIPTIONS
1-4-2. Rotary hook and gear lubrication
A3.Rotary hook shaft bearing
A5.Rotary hook
A4.Felt
C5.Tube
C4.Valve (Speed controller)
B3.Pinion
B2.Wick
1.Oil tank
A3.Rotary hook
shaft bearing
A4.Felt
A5.Rotary hook
C5.Tube
A2.tube
C4.Valve (Speed controller)
1567S
BAS-7610
1-05
1. MECHANICAL DESCRIPTIONS
1-5. Thread trimmer
5.Forked shaft
1.Thread trimmer solenoid
2.Thread trimmer cam lever assy
7.Movable knife
Rotary hook shaft
3.Roller shaft
4.Thread trimmer cam
9.Lower thread finger
8.Fixed knife
1568S
6.Thread trimmer rod
Relation between the thread trimmer cam and roller shaft
1569S
Thread trimmer clutch
Thread trimmer safety device
If the movable knife (7) does not completely retract, the pin of the
thread trimmer cam lever assy (2) and the thread trimmer clutch
automatically move the movable knife (7) to a position where it will
not be struck by the needle.
1570S
BAS-7610
1-06
1. MECHANICAL DESCRIPTIONS
<Explanation of the upper and lower thread trimming>
Lower thread
Movable knife
Upper thread
Fixed knife
Lower thread finger
1571S
This point the needle thread take-up is raised
slightly above its lowest position.
1572S
When the movable knife is spreading the needle thread, the tension
release relieves the needle thread tension to prevent excessive
tension and to enable the needle thread to be extended smoothly.
The length of thread forming the loop made by the movable knife
determines the length of thread remaining from the needle tip and
bobbin when thread trimming is complete, and affects stitch
formation at the beginning of the next sewing procedure.
1573S
1574S
BAS-7610
1-07
The needle thread take-up approaches
the top of its stroke.
1. MECHANICAL DESCRIPTIONS
1-6. Presser bar lifter
2.Lever
1.Presser bar lifter cylinder
3.Rocking connector shaft
5.Presser bar lifter connector
4.Presser bar lifter arm
7.Presser bar guide bracket
8.Presser bar
6.Knee lifter lifting lever
9.Presser foot
1575S
1-7. Stacker
Roller
Wiper
Inner clamp bar
Outer clamp bar
1576S
BAS-7610
1-08
1. MECHANICAL DESCRIPTIONS
1-8. Feed guide mechanism
<X direction>
6.Clamp arm
4.Timing belt
3.Pulley
5.Feed bracket
2.Gear
1.Motor
7.Work clamp
1577S
<Y direction>
6.Machine head
3.Pulley
2.Gear
5.Machine head holder
1.Motor
4.Timing belt
1578S
BAS-7610
1-09
1. MECHANICAL DESCRIPTIONS
1-9. Folding mechanism
Folding base
Inner clamp
Folding clamp
Sewing clamp
Center blade
1648S
1649S
BAS-7610
1-10
1. MECHANICAL DESCRIPTIONS
1-10. Rise-and-fall equipment of slide plate
1650S
1651S
BAS-7610
1-11
1. MECHANICAL DESCRIPTIONS
1-11. Bobbin winder mechanism
1.Bobbin presser plate
5.Stopper
2.Bobbin winder claw
6.Switch
3.Spring plate
7.Motor
4.Bobbin winder lever
1652S
1-12. Suction (Vacuum) mechanism
2.Vacuum plate
3.Vacuum base
1.Cylinder
1653S
1654S
BAS-7610
1-12
2. BEFORE DISASSEMBLY AND ADJUSTMENT
2. BEFORE DISASSEMBLY AND ADJUSTMENT
DANGER
Wait at least 5 minutes after turning off the power switch and disconnecting the power cord from the wall outlet
before opening the face plate of the control box. Touching areas where high voltages are present can result in
severe injury.
CAUTION
Ask your Brother dealer or a qualified electrician to
carry out any maintenance and inspection of the
electrical system.
Hold the machine head with both hands when
tilting it back or returning it to its original position.
Furthermore, after tilting back the machine head,
do not push the face plate side or the pulley side
from above, as this could cause the machine head
to topple over, which may result in personal injury
or damage to the machine.
Turn off the power switch and disconnect the
power cord from the wall outlet at the following
times, otherwise the machine may operate if the
start switch is pressed by mistake, which could
result in injury.
• When carrying out inspection, adjustment and
maintenance
• When replacing consumable parts such as the
rotary hook and knife.
Be sure to wear protective goggles and gloves
when handling the lubricating oil and grease, so
that they do not get into your eyes or onto your
skin, otherwise inflammation can result.
Furthermore, do not drink the oil or eat the grease
under any circumstances, as they can cause
vomiting and diarrhoea.
Keep the oil out of the reach of children.
Disconnect the air hoses from the air supply and
wait for the needle on the pressure gauge to drop
to “0” before carrying out inspection, adjustment
and repair of any parts which use the pneumatic
equipment.
If any safety devices have been removed, be
absolutely sure to re-install them to their original
positions and check that they operate correctly
before using the machine.
Maintenance and inspection of the sewing
machine should only be carried out by a qualified
technician.
If the power switch and air need to be left on when
carrying out some adjustment, be extremely
careful to observe all safety precautions.
2-1. Basic operation
<Tilt and return machine head>
(4)
(4)
Notch
(1) (12 pcs)
(3)
Bellows rail
(2)
1405S
1406S
(Pulley side)
1712S
Disassemble each part in order of the numbers.
Adjust the position of the machine head so that it is aligned with the notch in the bellows rail.
If you wish to keep the machine head in the raised position, insert the head support lever securely into the hinge lever
support shaft.
Always check that the head support lever and the hinge lever support shaft are meshed.
Pull the machine head down toward you gently, remove the head support lever from the hinge lever support shaft, and
then gently lower the machine head.
BAS-7610
2-01
2. BEFORE DISASSEMBLY AND ADJUSTMENT
(1)
(2)
(3)
(4)
(5)
1585S
1656S
1584S
<Starting>
Operate in order of the air cock, the power switch, the FOLDER RESET switch (1).
The sewing machine detects the home position and stop at the stand-by position.
<Countermeasure of starting error>
E-510
The needle bar is in positions other than an upper needle position at the time of a start.
(After the FOLDER RESET switch (1) was pushed.)
Needle bar → Needle highest position (The position which a WARNING lamp stops blinking.)
Push the RESET switch (4). → An error display is canceled.
Push the START switch (3). → The sewing machine detects the home position and stop at the stand-by position.
E-820
Air is not supplied. Air lock switch (5) is OFF.
(After the power switch is ON.)
Air pressure is weak. → Air pressure is strengthened. (Refer to instruction manual.)
The air cock has closed. → Open
Air chuck switch (5) is OFF. → Turn ON
Push the RESET switch (4) → An error display is canceled.
Push the FOLDER RESET switch (1). → The sewing machine detects the home position and stop at the stand-by
position.
E-830
E-840
E-850
E-860
The X-right over travel sensor operated.
The X-left over travel sensor operated.
The Y-upper over travel sensor operated.
The Y-lower over travel sensor operated.
(After the power switch is ON.)
Turn OFF the power switch.
Return the sewing clamp and machine head into the sewing area. Turn ON the power switch.
BAS-7610
2-02
2. BEFORE DISASSEMBLY AND ADJUSTMENT
2-2. Disassembling and assembling for transfer through narrow doors
Machine dimensions
Depth : 1,432 mm (except stacker guard)
Width : 2,148 mm
Height : 1,240 mm (except spool stand)
By removing each unit, it is possible to make a depth size small.
Remove stacker
: 1,265 mm
Remove stacker roller : 1,161 mm
Remove folding base :
878 mm
1,432 mm
1,265 mm
1,161 mm
(283 mm)
878 mm
1657S
<Chips of removing air tubes>
Mark air tubes to prevent misconnection.
<Removing stacker>
(3) (4 pcs)
(1) (3 pcs)
BAS-7610
2-03
(2) (4 pcs)
1658S
2. BEFORE DISASSEMBLY AND ADJUSTMENT
<Removing stacker roller>
1659S
<Removing folding base>
* Carry this out only at the last and final operation.
Carry out the operation carefully and correctly with two personnel or more.
Work is done by removing a rear cover and a side cover.
Note
Never loosen two socket bolts of two positioning pins on the right and left sides during this operation, or
reproducibility will be lost.
Positioning pin
1660S
BAS-7610
2-04
3. DISASSEMBLY
3. DISASSEMBLY
DANGER
Wait at least 5 minutes after turning off the power switch and disconnecting the power cord from the wall outlet
before opening the face plate of the control box. Touching areas where high voltages are present can result in
severe injury.
CAUTION
Ask your Brother dealer or a qualified electrician to
carry out any maintenance and inspection of the
electrical system.
Hold the machine head with both hands when
tilting it back or returning it to its original position.
Furthermore, after tilting back the machine head,
do not push the face plate side or the pulley side
from above, as this could cause the machine head
to topple over, which may result in personal injury
or damage to the machine.
Turn off the power switch and disconnect the
power cord from the wall outlet at the following
times, otherwise the machine may operate if the
start switch is pressed by mistake, which could
result in injury.
• When carrying out inspection, adjustment and
maintenance
• When replacing consumable parts such as the
rotary hook and knife.
Be sure to wear protective goggles and gloves
when handling the lubricating oil and grease, so
that they do not get into your eyes or onto your
skin, otherwise inflammation can result.
Furthermore, do not drink the oil or eat the grease
under any circumstances, as they can cause
vomiting and diarrhoea.
Keep the oil out of the reach of children.
Disconnect the air hoses from the air supply and
wait for the needle on the pressure gauge to drop
to “0” before carrying out inspection, adjustment
and repair of any parts which use the pneumatic
equipment.
If any safety devices have been removed, be
absolutely sure to re-install them to their original
positions and check that they operate correctly
before using the machine.
Maintenance and inspection of the sewing
machine should only be carried out by a qualified
technician.
If the power switch and air need to be left on when
carrying out some adjustment, be extremely
careful to observe all safety precautions.
3-1. Cover
1661S
BAS-7610
3-01
3. DISASSEMBLY
3-2. Presser foot mechanism
6.Adjusting screw
5.Adjusting nut
(Loosen)
7.Spring guide
8.Spring
11.Presser bar
9.Screw (Loosen)
10.Presser bar guide
bracket
1.Screw
3.Two flat screws
2.Work clamp
4.Bottom plunger
1662S
3-3. Rotary hook and fixed knife
6.Fixed knife
3.Three set screws
(Loosen)
5.Flat screw
4.Rotary hook
2.Bobbin case holder position bracket
1663S
1.Socket bolt
BAS-7610
3-02
3. DISASSEMBLY
3-4. Movable knife and thread trimmer
1664S
2.Two flat screws
3.Movable knife
1.Thread trimmer rod (It moves in the direction of an arrow.)
12.Retaining ring
21.Thread trimmer
lever spring
Collar
8.(Remove)
22.Forked shaft
18.Cushion
2.Thread finger
17.Washer
13.Thread trimmer cam lever shaft
1.Socket bolt
14.Collar
19.Screw
(Loosen)
16.Thread trimmer cam lever
11.Set screw (Loosen)
15.Thread trimmer
cam lever spring
7.Washer
6.Movable
knife 20.Thread trimmer
3.Shoulder
holder
lever
screw
5.Thrust
4.Retaining washer
ring
10.Thread trimmer solenoid
9.Two screws
1665S
<Removing thread trimmer solenoid>
When disconnecting the solenoid cords, remember where they are attached.
6 (2 pcs)
4 (2 pcs)
8 9 1011 7
5
2 3
BAS-7610
3-03
1
1412S
3. DISASSEMBLY
3-5. Needle bar
1666S
8.Needle bar bracket
5.Two rubber caps
6.Two set screws
(Loosen)
9.Washer
7.Support shaft
1.Screw
(Loosen)
2.Needle bar
4.Needle bar bracket guide
3.Two Set screws
(Loosen)
11.Rubber cap
12.Set screw (Loosen)
13.Rubber cap
14.Two set screws
(Loosen)
16.Washer
15.Thread take-up lever set
10.Slide block
17.Washer
1667S
BAS-7610
3-04
3. DISASSEMBLY
3-6. Motor
3.Rubber cap
7.Two set screws (Loosen)
15.Four socket bolts
9.Screw (Loosen)
4.Screw (Loosen)
11.Two set screws
1. * Two screws (Loosen)
2. ** Two sensors
5.Three socket bolts
10.Coupling
6.Motor bracket
Not remove
12.Sensor dog
8.Pulley
1668S
14.Sensor holder collar 13.Two socket bolts
* Mark installing position of the two sensors, before loosen these screws.
** Mark so that distinction of a sensor may stick, before remove these
sensors.
3-7. Timing belt
3.Ball bearing
1.Two set screws (Loosen)
2.Collar
Rubber cap
4.Nut (left handed screw)
5.Idler pulley
(It can move aside.)
7.Head support stud
8.Timing belt
6.Oil cover
1416S
1414S
BAS-7610
3-05
3. DISASSEMBLY
3-8. Auxiliary shaft
1.Three screws
12.Zigzag cam
9. Auxiliary shaft
2.Ball bearing cover
10.Ball bearing collar
3.Ball bearing presser
4.Retaining ring
7.Two set screws
(Loosen)
5.Ball bearing
8.Two set screws
(Loosen)
6.Two set screws
(Loosen)
11.Auxiliary shaft gear
1669S
BAS-7610
3-06
3. DISASSEMBLY
3-9. Zigzag
13.Two set screws
(Loosen)
12.Set screw 17.Adjusting arm shaft, B
(Loosen)
16.Set collar
4.Spring
6.Set screw (Loosen)
15.Washer
11.Adjusting arm shaft, A
14.Retaining ring
7.Two set screws (Loosen)
10.Set collar
2.Screw (Loosen)
8.Retaining ring
9.Washer
5.Spring
1.Rubber cap
3.Zigzag lever assy, F
1670S
BAS-7610
3-07
3. DISASSEMBLY
BAS-7610
3-08
4. ASSEMBLY
4. ASSEMBLY
4-1. Zigzag
1.Adjusting arm shaft, B
15.Set screw
9.*Two set screws
2.Set collar
12.Spring
16.Set screw
5.Adjusting arm shaft, A
3.Washer
4.Retaining ring
10.*Two set screws
6.Set collar
14.Screw
8.Retaining ring
7.Washer
11.Spring
17.Rubber cap
13.**Zigzag lever assy,
* Tighten the arm fastens in a washer and a set collar so that there is no longitudinal play in the arm.
** Adjust on “5-1. Adjusting the zigzag movement”.
1670S
BAS-7610
4-01
4. ASSEMBLY
4-2. Auxiliary shaft
1669S
9.Three screws
1. Auxiliary shaft
2.Zigzag cam
8.Ball bearing presser
7.Ball bearing cover
6.Retaining ring
5.Ball bearing
4.Ball bearing collar
11.Two set screws
10.Two set screws
Center
3.Auxiliary shaft gear
12.Two set screws
1673S
4-3. Timing belt
6.Ball bearing
8.Two set screws
7.Collar
Rubber cap
3.*Nut (left handed screw)
2. Idler pulley
(It pushes against a timing belt.)
1.Timing belt
4.Head support stud
5.Oil cover
1416S
1414S
* Remove the rubber cap on the front of the arm. Adjust the timing belt tension so that the belt deflects 7 mm
when it is pressed with a force of 9.8 N. Tighten the nut (3) (left hand screw).
BAS-7610
4-02
4. ASSEMBLY
4-4. Motor
1672S
1668S
13.Four socket bolts
15.Rubber cap
6.Two screws
10.Two set screws
8.Screw
4.Two set screws
14.Screw
5. * Two sensors
12.Three socket bolts
7.Coupling
9.**Pulley
11.Motor bracket
Not remove
3.Sensor dog
1.Sensor holder collar
2.Two socket bolts
5 mm
1671S
* Adjust on “5-6. Adjusting machine sensor”.
** When turn on the power, turn the pulley until the error mark U51 (needle
lowered) disappears. Then, fix the pulley using the screw (10) so that the index
mark of the pulley is between the two index marks of the motor bracket (11).
Pulley
Motor bracket
Range out of which an error does not come
1852S
BAS-7610
4-03
4. ASSEMBLY
4-5. Needle bar
1667S
7.Rubber cap
6.Set screw
5.Rubber cap
2.Washer
4.Two set screws
3.Thread take-up lever set
Thread take-up support shaft
1.Washer
8.Slide block
* Thread take-up support shaft is noticed about oil supply and attachment.
It may burn and adhere depending on the case.
13.Two rubber caps
12.Two set screws
10.Needle bar bracket
9.Washer
11.Support shaft
17.Screw
14.*Needle bar
15.Needle bar bracket guide
1666S
16.Two Set screws
* Adjust on “5-2. Adjusting the needle bar height and, the needle and the rotary hook timing”.
BAS-7610
4-04
4. ASSEMBLY
4-6. Movable knife and thread trimmer
6.Retaining ring
1.Forked shaft
9.Cushion
22.Thread finger
3.Thread trimmer lever spring
2. Collar
16.(Hang)
8.Washer
7.Thread trimmer cam lever shaft
10.*Thread trimmer cam lever
23.Socket bolt
13.Set screw
12.Collar
11.Thread trimmer cam lever spring
5.Screw
4.*Thread trimmer lever
17.Washer
18.Movable knife holder
19.Thrust washer
20.Retaining ring
21.Shoulder screw
14.Thread trimmer solenoid
15.Two screws
* Adjust on “5-3. Adjusting the thread trimmer timing”.
1665S
2.Two flat screws
3.Movable knife
1.Thread trimmer rod
(It moves in the direction of an arrow.)
1664S
6 (2 pcs)
4 (2 pcs)
4 3 2 1 5
7
10 9
11
<Installing thread trimmer solenoid>
BAS-7610
4-05
1412S
4. ASSEMBLY
4-7. Rotary hook and fixed knife
2.Three set screws
3.Fixed knife
4.Flat screw
1.*Rotary hook
5.Bobbin case holder position bracket
1663S
6.Socket bolt
* Adjust on “5-2. Adjusting the needle bar height and, the needle and the rotary hook timing”.
4-8. Presser foot mechanism
6.Adjusting screw
37 mm
5.Adjusting nut
4.Spring guide
3.Spring
2.*Presser bar
7.Screw
1.Presser bar guide bracket
9.Screw
11.Two flat screws
8.Work clamp
10.Bottom plunger
1662S
* Adjust on “5-7. Adjusting the presser foot height”.
BAS-7610
4-06
4. ASSEMBLY
4-9. Cover
1661S
BAS-7610
4-07
4. ASSEMBLY
BAS-7610
4-08
5. ADJUSTMENT
5. ADJUSTMENT
DANGER
Wait at least 5 minutes after turning off the power switch and disconnecting the power cord from the wall outlet
before opening the face plate of the control box. Touching areas where high voltages are present can result in
severe injury.
CAUTION
Ask your Brother dealer or a qualified electrician to
carry out any maintenance and inspection of the
electrical system.
Hold the machine head with both hands when
tilting it back or returning it to its original position.
Furthermore, after tilting back the machine head,
do not push the face plate side or the pulley side
from above, as this could cause the machine head
to topple over, which may result in personal injury
or damage to the machine.
Turn off the power switch and disconnect the
power cord from the wall outlet at the following
times, otherwise the machine may operate if the
start switch is pressed by mistake, which could
result in injury.
• When carrying out inspection, adjustment and
maintenance
• When replacing consumable parts such as the
rotary hook and knife.
Be sure to wear protective goggles and gloves
when handling the lubricating oil and grease, so
that they do not get into your eyes or onto your
skin, otherwise inflammation can result.
Furthermore, do not drink the oil or eat the grease
under any circumstances, as they can cause
vomiting and diarrhoea.
Keep the oil out of the reach of children.
Maintenance and inspection of the sewing
machine should only be carried out by a qualified
technician.
Disconnect the air hoses from the air supply and
wait for the needle on the pressure gauge to drop
to “0” before carrying out inspection, adjustment
and repair of any parts which use the pneumatic
equipment.
If the power switch and air need to be left on when
carrying out some adjustment, be extremely
careful to observe all safety precautions.
BAS-7610
5-01
If any safety devices have been removed, be
absolutely sure to re-install them to their original
positions and check that they operate correctly
before using the machine.
5. ADJUSTMENT
If the power switch is turned on, take sufficient safety measures, such as to make E-800 (emergency stop) come on in
the manual mode.
5-1. Adjusting the zigzag movement
Remove the top cover, the rear cover, the slide plate (the needle plate), the bottom plunger and the work clamp while
making this adjustment.
(5)
(6)
B : 9.2 mm
(1)
(7)
(2)
(3)
A : 34.4 mm
(4)
(S24987001)
1308S
1307S
1309S
(Approximately 10 mm)
(Approximately 10 mm)
(7)
(5)
(4)
(3)
Reference
1674S
1. When the air pressure is applied and the zigzag connecting shaft (2) is pushed out by the zigzag cylinder (1). (No
zigzag movement)
2. Dimension A : The surface where the rear cover will be attached --- The surface of the adjust arm (3) / Adjust by →
The bar tacking adjust screw (4)
3. Dimension B : The surface where the rear cover will be attached --- The circumference of the stud screw (6) for the
zigzag adjust arm (5) / Adjust by → The zigzag adjust screw (7)
* Optional gauge : The zigzag gauge plate assembly (Code S24987001)
BAS-7610
5-02
5. ADJUSTMENT
1311S
1310S
(13)
Needle
(9)
(8)
(14)
(12)
A
(10)
(11)
Index mark
1675S
Lowest position
(13)
(12)
1312S
A
B Index mark
To front
A
B
To rear
Index mark
(7)
(5)
1313S
4. Attach the zigzag gauge (8) (accessory) to the bed. Using the two flat screws.
5. Attach a needle. (thin needle equivalent to #9-11)
6. The needle is aligned with needle hole A of the zigzag gauge (8). Adjust → Loosen the screw (11), move the needle
bar bracket (10) in the direction of the arrow
7. The needle : Lowest position → Turn the pulley
Align the index marks of the zigzag adjust fork (12) and the zigzag cam (13). Adjust → Loosen the two screws (14)
8. The needle does not move sideways. Adjust → Turn the zigzag adjust screw (7) for the zigzag adjust arm (5)
If the needle moves to the front (toward the carved mark), turn the zigzag adjust screw (7) clockwise. (when seen from
the end)
If the needle moves toward the rear, turn the zigzag adjust screw (7) counterclockwise. (when seen from the end)
BAS-7610
5-03
5. ADJUSTMENT
(16)
(8)
(15)
B
(17)
1314S
1315S
9. The zigzag cylinder (1) pulls in the zigzag connecting shaft (2). (Zigzag ON)
10. Install the rear cover.
11. Turn the pulley to lower the needle bar. Needle hole B of the zigzag gauge (8) is aligned with the needle. Adjust →
Turn the zigzag dial (15)
12. When needle hole B is aligned with the needle, align the positioning pin (16) with scale “3” of the zigzag dial (15).
Adjust → Loosen the screw (17).
* At the time of shipment, the scale position may have shifted for a while. (It is because sewing finish was adjusted.)
13. Remove the zigzag gauge (8). Attach the needle to be used.
14. Set the zigzag dial (15) to the maximum, and make sure that the needle does not strike the fixed knife during zigzag
sewing.
15. There is no reciprocating movement.
BAS-7610
5-04
5. ADJUSTMENT
5-2. Adjusting the needle bar height and, the needle and the rotary hook timing
Remove the slide plate (the needle plate), the bottom plunger and the work clamp while making this adjustment.
<Adjusting the needle bar height>
(1)
(2)
(4)
(3)
(1)
1316S
1317S
Turn the pulley to set the needle bar (1) to its lowest position. Put the side “1” of the gauge (2) at the end edge of the
needle bar (1). Adjust → Remove the rubber cap (3), Loose the screw (4)
<Adjusting the rotary hook>
This adjustment is performed in order to prevent the damage to inner rotary hook with a needle. (The rotary hook life is
influenced.)
Perform this adjustment, when needle is exchanged. (Since special rotary hook is used, be sure to use the exclusive
needle.)
Remove the bobbin case holder position bracket while making this adjustment.
Needle
Needle receptacle part
Needle receptacle part
1676S
1677S
Inner rotary hook is rotated so that the needle receptacle part may turn down.
<Timing of the needle and the rotary hook> of the following clause is performed.
The needle receptacle part is returned upwards.
Turn the machine pulley to move the needle bar its lowest position.
It checks that the needle has not hit the needle receptacle part.
When hitting, it reattaches so that the needle may meet the needle receptacle.
BAS-7610
5-05
1678S
5. ADJUSTMENT
<Adjusting the needle and the rotary hook timing>
(7)
(1)
(6)
0 - 0.05 mm
X2.4 rotary hook : 2.4 mm
(5)
X1.7 rotary hook : 1.8 mm
(8)
3 places
X2.4 rotary hook : 1.2 mm
X1.7 rotary hook : 1.8 mm
1319S
1318S
1320S
Turn the pulley to raise the needle bar (1) from its lowest position. Adjust the rotary hook so that the side “2” of the gauge
(5) and the lower end of the needle bar (1) align. At this time, the clearance between the needle and the rotary hook point
should be 0 to 0.05 mm. Adjust → Loosen the two screws (8)
* If there is a recess at the right edge of the bed, use gauge “With recess” ; if there is none, use gauge “Without recess”.
Recess
“With recess”
For X2.4 rotary hook
(S54742-000)
“With recess”
For X1.7 rotary hook
(S52232-000)
“Without recess”
For X2.4 rotary hook
(S51288-000)
1321S
1322S
BAS-7610
5-06
5. ADJUSTMENT
5-3. Adjusting the thread trimmer timing
Remove the slide plate (the needle plate), the bottom plunger and the work clamp while making this adjustment.
<Adjusting the thread trimmer cam position>
1323S
1324S
For X2.4 rotary hook
Tr-gauge, 2.4 (S55275-000)
(1)
For X1.7 rotary hook
Zigzag gauge (S24983-000)
(2)
(3)
22. 4 mm
25.7 mm
(5)
(5)
0.6 - 0.8 mm
(4)
(6)
(5)
(4)
(4)
(7)
A
1325S
1326S
1327S
1. Remove the thread guide of the needle bar (1).
2. Turn the machine pulley until the needle bar (2) is raised A mm above its lowest position. (A mm : X2.4 rotary hook →
8.0 mm, X1.7 rotary hook → 7.1 mm) The end of the zigzag gauge (3) should align with the bottom of the needle bar
(2). At this time, press the thread trimmer solenoid (6) by hand so that the roller shaft contacts the concave portion of
the thread trimmer cam (5), and then temporarily tighten the screw (7).
3. When the thread trimmer solenoid (6) is returned to its original position (released), adjust the thread trimmer cam (5) by
loosening the screw (7) so that the spacing between the thread trimmer cam (5) and the roller shaft is 0.6 - 0.8 mm.
(Tighten the screw (7) to approximately 4 Nm.)
After adjustment, check the gap A = 0.5 mm in the illustration.
Reference
Timing of the thread trimmer cam to the thread take-up (needle bar height)
Delay
Thread trailing amount becomes long.
Early
Thread trailing amount becomes short.
BAS-7610
5-07
5. ADJUSTMENT
<Adjusting the movable knife, fixed knife position>
(9)
(8)
(9)
(8)
(11)
(10)
(12)
(9)
(8)
1328S
1330S
1329S
4. The fixed knife (8) and the movable knife (9) must overlap when the slide block of the thread trimmer cam (5) is lifted to
the top of the roller (4) the thread trimmer cam lever. To increase the overlap, loosen the screw (10) to move the thread
trimmer lever (11) in the direction of the arrow.
* Set the lower thread finger (12) under the movable knife (9).
<Adjusting the fixed knife pressure>
If the fixed knife (8) pressure is not adjusted properly, the knife will not trim the thread completely.
(13)
(8)
1331S
5. Adjust → Turn the screw (13)
<The method of sharpening the fixed knife>
1408S
BAS-7610
5-08
5. ADJUSTMENT
5-4. Tension release
(4)
X1.7 rotary hook
(3)
(1)
(2)
1332S
Make sure that the tension disks (2) are open and there is no resistance in the needle thread when the cylinder (1)
operates (after the presser foot is raised by pressing the presser foot switch on the operation panel).
1. Adjust → Loosen the four screws (3), the position of the claw (4)
2. Make sure that the tension disks (2) are close and there is resistance in the needle thread when the cylinder (1)
returns.
5-5. Thread tension
(2)
1333S
(1)
(4)
Tension A
0.3 - 0.4 N
30 - 40mm
Tension B1 : 0.6 - 0.7 N
(The sum total with tension A)
Stitches when upper thread tension is too low
X2.4 rotary hook
Tension B2 : 0.6 - 0.8 N
(The sum total with tension A)
1336S
Stitches when upper thread tension is too high
X2.4 rotary hook
(4)
Correct stitches
1335S
(3)
Tension C1 : 1.5 - 1.8 N
(The sum total with tension B1)
X1.7 rotary hook
Tension C2 : 1.8 - 2.2 N
(The sum total with tension B2)
1334S
X1.7 rotary hook
1337S
1. When the thread take-up lever is in the highest position after thread trimming, thread length is 30 - 40 mm. Adjust →
Turn the tension screw (2) The tension B are in the illustration.
2. Lower the presser foot. The tension A, C are in illustration. Adjust → Turn the tension control dials (1), (3)
3. Lower thread tension to 0.4 - 0.6 N Adjust → Turn the tension regulating screw (4)
* As a result of performing the above-mentioned adjustment, when the amount of thread remainder does not become
proper, check " 5-3. Adjusting the thread trimmer timing "
* The sewing conditions given in the thread tension may need to be changed depending on the article being sewn.
BAS-7610
5-09
5. ADJUSTMENT
<Thread take - up spring>
(1)
(1)
5 - 10 mm
(2)
1338S
1339S
1. Stroke : Adjust → Loosen set-screw (2), Turn the whole unit of the tension regulator assembly
(3)
(3)
0.4 - 0.6 N
1340S
0.4 - 0.6 N
X2.4 rotary hook
X1.7 rotary hook
1341S
2. Force : Adjust → Insert a screwdriver tip into the groove of tension stud (3), Turn the tension stud
(The tension in the thread take-up spring when it is pulling the upper thread straight to the side at the point where the
spring starts to move.)
<Thread guide, R>
In the case of “ X2.4 rotary hook “ specification, the thread guide, R can also adjust thread tightening. (It is because the
width of adjustment of a position is large.)
1679S
It will be good tightening if a size A is enlarged.
If a size A is enlarged when using inelastic thread, thread may break.
Reference
T - 105 (twisted) thread : Size A → 12 - 19 mm
Inelastic thread : Size A → 10 mm or less
BAS-7610
5-10
5. ADJUSTMENT
<Fixed knife>
The surface state of the fixed knife may influence tightening of thread.
1680S
When polishing the fixed knife, only the portion shown in the figure is polished.
Note
Do not polish the edge of the fixed knife by any means.
The edge of the fixed knife is ground with reference to <The method of sharpening the fixed knife> of “5-3. Adjusting
the thread trimmer timing”.
<Needle>
Since special rotary hook is used, be sure to use the exclusive needle.
Rotary hook
S45663ROTARY HOOK ASSY, 2.4 W/BOX
For X2.4 rotary hook
(SA1624301)
For X1.7 rotary hook
Inner rotary hook chromium coat type
S24903ROTARY HOOK ASSY, 1.7 W/BOX
(SA1625201)
Inner rotary hook titanium coat type
S40854ROTARY HOOK ASSY, 1.7 W/BOX
(SA1626101)
Inner rotary hook chromium coat type
S34823ROTARY HOOK ASSY, 1.7 W/BOX
(SA1627101)
Needle
NEEDLE, SERV7-NiT
(S51810022)
NEEDLE, 1955-01 MR5
(S24705005)
NEEDLE, 1955-01 MR4.5
(S24705045)
It is thinner than a recommendation needle. → It becomes easy to occur “skipped stitches” and “thread breakage”.
It is thicker than a recommendation needle. → Do not use it. If the needle touch the needle receptacle part of inner rotary
hook in the needle bar lowest position, it becomes the cause by which the rotary hook life becomes short.
5-11
BAS-7610
5. ADJUSTMENT
5-6. Adjusting the machine sensor
Both of the sensors -- adjustment width -- it becomes a central position mostly.
Remove the pulley cover (1) while making this adjustment.
<The sensor position to send the thread trimmer signal properly>
1342S
1343S
(4)
(For needle threading,
synchronizing)
(2)
(1)
(5)
(For needle
highest position)
3 mm
Needle bar lowest position
(3)
(6)
(2)
1344S
The needle rises 3 mm from its lowest position. At this time, the center of the machine sensor on the left (2) should be
aligned with the slit (4) of the sensor dog (3). Adjust → Loosen the screw (6)
<The sensor position to send the up needle stop position signal properly>
(7)
High
(5)
Low
Needle plate upper surface
For X2.4 rotary hook : 17.4 - 18.4 mm
For X1.7 rotary hook : 15.5 - 16.5 mm
1346S
1345S
When the needle is at its top position, it should stop in the illustration. Adjust → Loosen the screw (7)
BAS-7610
5-12
5. ADJUSTMENT
5-7. Adjusting the work clamp height
Rubber cap
A
Work clamp down
Work clamp up
X2.4 rotary hook
3.5 mm
16.5 mm
X1.7 rotary hook
2 mm
14.5 mm
Screw
A
Needle plate
1681S
5-8. Adjusting the rotary hook lubrication amount
1348S
1349S
Race
(1)
1682S
The amount of oil : In the illustration (Sewing speed 4250 rpm, 7 second) ---Factory setting
Adjust → Turn the screw (1)
1. Use machine head operation check : Mode change → Turn the power OFF, DIP switch A - 8 ON, Turn the power ON
2. Select sewing speed : 500 rpm – 9 steps - 4250 rpm Change → ∆∇ switch
3. Start → Start switch Stop → Emergency stop switch
* Oil checks having come out of the race part of rotary hook.
5-13
BAS-7610
5. ADJUSTMENT
5-9. Adjusting the air pressure
(1)
(3)
Open
(2)
Shut
1350S
1. Air pressure : 0.5 Mpa Adjust → Pull and turn the cap (1), After adjustment → Push the cap (1) down and lock it.
2. When water is collected in the bottle (2), turn the cock (3) to drain water (direction O).
* The water in a bottle will be automatically drained, if it collects to some extent.
5-10. Adjusting the pressure switch
Adjust the pressure switch accurately so as to operate with 0.34 Mpa pressure.
(2)
Becomes high
(3)
Becomes low
(1)
(4)
1351S
1352S
Remove the cover (2) while making this adjustment.
1. Air pressure (decrease) : 0.34 Mpa
2. If error display on the control panel indicates E820, turn the screw (4) on the pressure switch (3) to decrease setup
pressure to 0.98 - 2.0 Mpa for cancellation of the error display ; and then turn the screw (4) slowly in the reverse way
and stop turning the instant the error is displayed.
* Air pressure of 0.40 Mpa or more is required to cancel this error display (due to pressure switch hysteresis)
3. After setting pressure at regulator (1) to 0.5 Mpa, reduce it gradually and confirm that error display indicates E820 for
the first time at 0.34 Mpa.
4. Air pressure (increase) : 0.5 Mpa Push the cap (1) down and lock it.
BAS-7610
5-14
5. ADJUSTMENT
5-11. Adjusting speed of the pneumatic mechanism
<The valves location of the folding machine>
Cover
1353S
1354S
Remove the cover while making this adjustment.
1
2
3
4
5
Folding clamp
Inner clamp
Center blade
Sewing clamp
Folding base (10 mm-stroke)
6
7
8
9
Folding base (1.5 mm-stroke)
Label attachment device (Option)
Suction (Vacuum)
Slide plate elevator
<The valves location of the folding machine>
Only X1.7 rotary hook
1355S
19
20
21
22
23
Stacker wiper
Stacker bar inside
Stacker bar outside
Roller
Rotary hook blow
24
25
26
27
28
1356S
Needle blow
Presser foot
Zigzag
Main tension (X1.7 rotary hook)
2 step tension
<Adjusting the pneumatic mechanism>
Connector
Speed controller
Manual button
Air cushion
1359S
1357S
Speed controller
Open
(Fast)
Throttle
(Slow)
5-15
Throttle
(Slow)
Loosen
Fix
Fix
1358S
Open
(Fast)
Throttle (Stronger)
Loosen
1360S
BAS-7610
Fix
Open (Weaker)
Loosen
1361S
5. ADJUSTMENT
5-11-1. Folding clamp
Activate air compression. Turn on the power.
Attach the folding clamp and lock it. Attach the multi-connector.
Detach the connectors on valve 1B and valve 1A while making this adjustment.
Valve
1B side
1A side
Action by manual button
Raise
Descend
Two cylinders
End side, Rod side
Setting of the speed
controller
Turn the screw all the way
but tighten lightly. Next,
loosen the screw 3 turns.
Fix the screw with the nut.
Setting of the air cushion
Turn the screw all the way but tighten lightly.
Next, loosen the screw 1.5 turns. Fix the
screw with the nut.
Multi-connector
Raising speed
Descending speed
1362S
Setting of the speed controller
Make the operating speed as fast as possible
without operating jostling of the folding clamp.
1363S
5-11-2. Inner clamp
Activate air compression. Turn on the power.
Attach the lightest inner clamp you have and lock it.
Detach the connectors on valve 2B and valve 2A while making this adjustment.
Valve
2B side
2A side
Action by manual button
Raise
Descend
Cylinder
End side
Rod side
1365S
Setting of the speed controller
Turn the screw all the way but
tighten lightly. Next, loosen the
screw 3 turns. Fix the screw
with the nut.
Air cushion
Turn the screw all the way but tighten lightly.
Next, loosen the screw 1 turn. Fix the screw with
the nut.
Turn the screw all the way but tighten lightly.
Next, loosen the screw 1.5 turns. Fix the screw
with the nut.
1364S
Setting of the speed controller
Make the operating speed as fast
as possible without operating
jostling of the inner clamp.
Full open → Fine adjustment
5-11-3. Center blade
Activate air compression. Turn on the power.
Attach the Center blade and lock it.
Detach the connectors on valve 3B and valve 3A while making this adjustment.
Valve
3B side
Action by manual button
Move toward you
Move away from you
3A side
Cylinder
End side, Rod side
Setting of the speed controller
Turn the screw all the way but
tighten lightly. Next, loosen the
screw 3 turns. Fix the screw with
the nut.
Setting of the air cushion
Turn the screw all the way but tighten lightly.
Next, loosen the screw 1.5 turns. Fix the screw
with the nut.
BAS-7610
1366S
5-16
5. ADJUSTMENT
5-11-4. Sewing clamp
Activate air compression. Turn on the power.
Attach the Folding clamp and lock them.
Detach the connectors on valve 4B and valve 4A while making this adjustment.
Action by
Setting of the speed controller
manual button
4B side Raise
Turn the screw all the way but tighten lightly.
Next, loosen the screw 3 turns. Fix the screw with the
nut. If the ascending speed is too fast, the sewing clamp
may be severely jolted and may interfere with the
operation of the folding machine. If the ascending speed
is too slow, the error number E970 may appear.
4A side Descend
Turn the screw all the way but tighten lightly.
Next, loosen the screw 3 turns. Fix the screw with the
nut. It adjusts so that accuracy of folding cloth may not
be affected. If the descending speed is too high, the
pocket cloth will swell. If it is too low, the cloth will
mismatch on being carried by the center blade.
Valve
1367S
5-11-5. Folding base (10 mm-stroke)
Activate air compression. Turn off the power.
Attach the folding clamp, the inner clamp and the center blade and lock it.
Valve
5
Action by manual button
Move up and down
Setting of the speed controller
For ascending (Manual button Adjust the base speed to allow movement at
side), For descending
the highest possible speed without vibration
at either end.
The vibration will cause mismatching of cloth.
Slow speed will hamper folding.
10 mm
1.5 mm
1368S
5-11-6. Folding base (1.5 mm-stroke)
Activate air compression. Turn off the power.
Attach the folding clamp, the inner clamp and the center blade and lock it.
Valve
6
5-17
Action by manual button
Move up and down
Setting of the speed controller
For ascending (Manual button Adjust the base speed to allow movement at
side), For descending
the highest possible speed without vibration at
either end.
BAS-7610
5. ADJUSTMENT
5-11-7. Label attachment device (Option)
Before the speed adjustment, set the speed controllers to the minimum to prevent the set screws from being loosened by
the shock.
Activate air compression. Turn on the power.
Valve
7
Action by manual button
Turn
For inserting
For return
(Manual button side)
Setting of the speed controller
When inserting the label, reduce the speed of the label
attachment device to the extent that the machine still
functions smoothly. If the speed is too high, vibration
may cause miss positioning of the label.
Open (Full)
Setting of the speed controller (Rotary cylinder)
Set the return speed to slow ; if the speed is too high, labels may
shift due to the vibration. If an abnormal sound occurs when the
cylinder reaches its ends, the set screws may become loose.
1369S
5-11-8. Suction (Vacuum) cylinder
Activate air compression. Turn on the power.
Valve
8
Action by manual button
Suction (Vacuum),
ON OFF
Suction (Vacuum) ON
(Manual button side)
Suction (Vacuum) OFF
Setting of the speed controller
Adjust the speed to allow return at high speed
without any jolting at either end.
1371S
1370S
BAS-7610
5-18
5. ADJUSTMENT
5-11-9. Stacker wiper
Activate air compression. Turn off the power.
Valve
19
Action by manual button
Wiper---Move
Cylinder
Rod side
End side
1365S
Setting of the speed controller
Move toward you Make the operating speed as fast as possible without
(Manual button side) operating jostling of the stacker wiper.
Move away from you
Setting of the air cushion
Turn the screw all the way but tighten lightly. Next,
loosen the screw 1.5 turns. Fix the screw with the
nut.
Turn the screw all the way but tighten lightly. Next,
loosen the screw 1.5 turns. Fix the screw with the
nut.
1372S
5-11-10.Stacker bar inside
Activate air compression. Turn off the power.
Valve
20
Action by manual button
Bar---Move
Setting of the speed controller
Move toward you Adjust the speed to follow the stacker bar without jolting.
(Manual button side)
Move away from you Adjust low enough so as not to interfere with the cloth to be
sewn next.
Cylinder
Setting of air cushion
End side, Turn the screw all the way but tighten lightly.
Rod side
Next, loosen the screw 1.5 turns. Fix the screw
with the nut.
1373S
5-11-11. Stacker bar outside
Activate air compression. Turn off the power.
Valve
21
Action by manual button
Bar---Move
Setting of the speed controller
Move toward you Make the operating speed as fast as possible without
(Manual button side) operating jostling of the stacker bar.
Move away from you Adjust the bar speed to allow movement at a highest
possible speed where no abnormal sounds.
Cylinder
Setting of air cushion
End side, Turn the screw all the way but tighten lightly. Next,
Rod side
loosen the screw 1.5 turns. Fix the screw with the nut.
1374S
5-19
BAS-7610
5. ADJUSTMENT
5-11-12. Stacker roller
Activate air compression. Turn off the power.
Valve Action by manual button
22
Up and down
For ascending
(Manual button side),
For descending
Setting of the speed controller
Make the operating speed as fast as possible without
operating jostling of the stacker roller.
1375S
5-12. Adjusting the folding clamp
This adjustment may possibly spoil the compatibility of different models. Be sure to adjust the tucking blades on the
folding machine in advance.
Activate air compression. Turn on the power.
(5)
(6) (9) (7) (3) (10) (8) (2)
(4) (6)
(1)
1376S
1. Set the step mode. (Press the [FOLDING MODE] switch.) Lower the folding clamp. (Press the [STEP] switch.)
2. The arm R (2) and the arm L (3) : Same angle against the shaft (4), Not move sideways against the folding base
support (5) Adjust → Loosen the six set screws (6)
3. If the height of folding clamp is lower than the center blade when the clamp is down, the outer dimension of the pocket
will be larger or the pocket will swell. If it is higher than the center blade, the clamp will touch the blade and the tacking
blade will not be able to move.
Loosen the two rod nuts (7), (8) and adjust the height of the folding clamp (1) by giving same amount of turns on the
right and left rods (9), (10). Since the size of the rods (9), (10) are M10, P1.25, each turn will move them 1.25 mm.
* Be sure to confirm folding group features with AUTO mode (Change mode → Press [FOLDING MODE] switch).
BAS-7610
5-20
5. ADJUSTMENT
5-13. Adjusting the inner clamp
Compatibility of different models may be lost through this adjustment.
Activate air compression. Turn on the power.
(3)
(2)
(5) (4)
(3)
(2)
(1)
1377S
1378S
1. Set the step mode. (Press the [FOLDING MODE] switch.) Lower the inner clamp (1). (Press the [STEP] switch.)
2. Secure the inner clamp lever (2) as its longitudinal direction is accurately positioned by the two collars (3).
3. If the inner clamp is too high, the pocket cloth on the center blade cannot be clamped properly when the inner clamp
comes down. If it is too low, the height is not convenient for the operator when the clamp goes up and the air cushion
for the cylinder will not work when it comes down. Adjust → Loosen the nut (4), Turn the rod (5)
Since the size of the rod is M8 and P1.25, each turn will give 1.25 mm of movement.
* Be sure to select AUTO mode to confirm folding mechanism features. (Press the [FOLDING MODE] switch.)
5-14. Adjusting the center blade support
Activate air compression. Turn off the power.
(4)
Hole
(5)
(2)
(3)
Center blade
(2)
(1)
(3)
(1)
1379S
1380S
The center blade support (1) : Smooth, The each bearing of the center blade : Revolve under finger pressure
Adjust → Loose the two bolts (3), Lightly turn the two eccentric shaft on the left counterclockwise with a screw driver
through a hole in the folding base (4).
* Do not loosen the rod nut (5). (For adjustment in factory)
BAS-7610
5-21
5. ADJUSTMENT
5-15. Replacing and adjusting the bearings for center blade supporter
Activate air compression. Turn off the power.
(11)
Mark
A
(8)
(5)
(9)
(6)
(10)
(7)
(8)
Mark
(9)
(3)
(10)
(4)
(1)
(2)
(3)
1422S
1423S
1. Disconnect the four air tubes (1).
* Mark the air tubes (1) and union-Y4 (2) to prevent misconnection.
2. Pull the center blade supporter (3) toward you, loosen the nut (4), and remove the center blade supporter (3) by
turning the rod end (5).
* Mark the rod end (5) position as illustrated above for reproducibility of the center blade supporter (3) installation.
Deviation in installed position will greatly influence folding effect.
3. Remove the nut (6) on the bearing to be replaced. Replace the bearing (7) with a new one, and secure it using the nut
(6).
4. Loosen the bolts (10), and replace the roller shafts (8), (9) if necessary.
* The coaxial roller shaft (8) is on the right and the eccentric roller shaft (9) is on the left.
* No adjustment is required when replacing the coaxial roller shaft (8) only.
* The following adjustment is required when replacing the eccentric roller shaft (9).
5. Secure the bolt (10) on the coaxial roller shaft (8) on the right. Move the bearing (7) inward by turning the eccentric
roller shaft (9), and temporarily tighten the bolt (10).
6. Place the center blade supporter (3) on the rails (11). Adjust the bearing (7) by turning the eccentric roller shaft (9) with
the screwdriver to allow smooth movement without play on the rail (11) walls.
* Adjust the eccentric roller (9) by turning it counter clockwise when viewed from the top. Secure the bolt (10).
7. Check for smooth movement of the center blade supporter (3) and rotation of each bearing (7) even under finger
pressure.
If the bearing (7) slips on the rail, re-adjust the eccentric roller shaft (9).
BAS-7610
5-22
5. ADJUSTMENT
5-16. Adjusting the folding base height
Activate air compression. Turn off the power.
(1)
(5)
(4)
(1)
(2)
(3)
(7)
(6)
1381S
1382S
Height of the folding base (1) : Some resistance can be felt when the front cloth is clamped at the lowest point of the
folding base. Adjust → Loosen the two screws (3) and two set screws (4), Turn the two adjusting screws (5) clockwise
(when viewed from upper side) to increase the clearance between the center blade (2) and the needle plate (6), Turn
them counterclockwise to decrease the clearance, Give exactly the same amount of turn on right and left
* Be sure to balance the height on right and left, otherwise the cylinder (7) for the folding base may fail to move.
* While turning the adjusting screw (5) counterclockwise, forcibly press against the folding base to reduce the gap
between the adjusting screw (5) tip and the adjust shaft end.
5-17. Adjusting the stacker wiper
Activate air compression. Turn off the power.
(1)
(7)
(6)
(2)
(5)
(3)
(4)
1372S
The stacker wiper (1) : Do not touch the front cover when it returns after operation, If the wiper position is too close to
the operator, the front cloth ready to be sewn may be caught.
1. Adjust (Height, Angle of front and rear) → Loosen the bolt (2)
2. Adjust (Angle at the stand-by position) → Loosen the nut (3), Turn the rod (4)
* Tighten the rod nut (3) at the rod end for 5 mm deep or more. If it is not in adjustable range, loosen the four bolts (6),
and adjust by vertically the moving base (7) which enables a large amount of adjustment.
BAS-7610
5-23
5. ADJUSTMENT
5-18. Adjusting the stacker table and the outside stacker bar
Release air compression. Turn off the power.
Stacker table
Stacker bar
For adjust the height (4 pcs)
For adjust the position of presser
For adjust the right and left (2 pcs)
For adjust the height and the position of end
1383S
1374S
Adjust the outside stacker bar at the same time.
Height of the outside stacker bar : As high as the middle of the stacker table
Angle of the outside stacker bar : Point end of the outside stacker bar a little inward
5-19. Checking the movement of the stacker
1. Turn on the DIP switch A-8.
2. Turn on the power.
It will be in a "sewing machine rotation check" state.
3. Press the [STACKER] switch.
4. Choice the amount of rotations of the stacker roller by the key ∆∇. (Nine stages to 0 to 400 mm)
5. Step on the foot switch, then a series of the stacker operation is performed.
5-20. Adjusting the label attachment device (option)
For adjust the position of the label (2 pcs)
Adjust the amount the label sticks out
1369S
Pneumatic adjustment → Refer to “5-11-7. Label attachment device (Option)”.
BAS-7610
5-24
5. ADJUSTMENT
5-21. Adjusting the work clamp pressure
1384S
1367S
Activate air compression. Turn off the power.
Remove the either rear cover while making this adjustment.
<Pressure adjustment (when sewing clamp is lowered)>
0.15 - 0.20 MPa
Stronger
Weaker
Lock
1387S
1388S
Pressure will change greatly by turning the cap only a little. Be sure to press the manual buttons A, B of the valve No.4
alternatively to check for pressure.
* This pressure greatly influences folding.
<Pressure adjustment (when sewing clamp is raised)> Pressure gauge is necessary.
0.34 - 0.39 MPa
Loosen
Weaker
Fix
Stronger
1389S
Port 4B
1390S
Pressure will change greatly by turning the cap only a little. Be sure to press the manual buttons A, B of the valve No.4
alternatively to check for pressure.
* If the pressure is too high, the device vibrates greatly when the sewing clamp is raised. This may result in the
interference with the folding machine gauge. If the pressure is too low, the sewing clamp sensor activates and “E970”
is displayed.
BAS-7610
5-25
5. ADJUSTMENT
5-22. Adjusting the belt tension
1384S
1391S
16.8 ± 0.5 mm
(1)
43.6 N
(42.1 - 45.1 N)
1392S
Weaker
Stronger
(2)
(3)
6.2 ± 0.5 mm
39.7 N
(38.2 - 41.2 N)
(1)
(2)
(3)
Stronger
Weaker
1393S
Remove the rear covers (X-direction) and the needle plates (Y-direction) while making this adjustment.
The belt tension : Refer to the illustration. Adjust → Loose the two screws (1) and two nuts (2), Turn the bolt (3)
* Insufficient belt tension results in inaccurate needle entrance ; excessive belt tension shortens belt use life.
BAS-7610
5-26
5. ADJUSTMENT
5-23. Replacing the nylon gears
(4 pcs)
(4 pcs)
(8 pcs)
Grease
(8 pcs)
(5 pcs)
1421S
1420S
After removing the timing belt, exchange the nylon gear .
Loosening and adjustment of the timing belt → Refer to “5-22. Adjusting the belt tension”.
BAS-7610
5-27
5. ADJUSTMENT
5-24. Adjusting the AC servo motor backlash
Release air compression. Turn off the power.
Less than 98N
11 mm
Less than 49N
1395S
1394S
Remove the needle plates, the rear covers and the right side cover while making this adjustment.
The load (Power OFF) : Refer to the illustration. Adjust → Loosen the four bolts of the AC servo motor
5-25. Checking and adjusting the home position
* Compared with the BAS-750/751, Y home position is located 5 mm closer toward you. BAS-760 is the same position.
720.07 mm
1396S
Home
position
hole
Home
position
hole
Needle center
Stand-by position
271.60 mm
Home position
Theoretical value
448.47 mm
It is displayed as
272.80 mm.
1397S
Remove the rear covers and the right side cover while making this adjustment.
1. Turn off the power. Install and lock the sewing clamp. Attach the programmer.
Retractable-type sewing clamp → Remove parts : ex.--- Refer to the illustration. (Presser of the machine touch the
parts of the sewing clamp.)
2. Turn on the power. Press the reset switch of the sewing clamp. The sewing clamp will move left and then right, and
stop at the stand-by position. (Checking of the home position) Spread the cloth under the sewing clamp.
3. Press “P” to obtain programming state.
4. Use the direction keys to locate the needle in the center of the home position hole of the sewing clamp. The
programmer display should show X-direction=271.60 mm, Y-direction=0 mm.
* When the display does not suit, the following page “Adjusting the location of X (Y) home position sensor” is adjusted.
BAS-7610
5-28
5. ADJUSTMENT
1398S
Dog
X (+) over travel sensor
<Right>
X home position sensor
1 mm
X (-) over travel sensor
<Left>
1 mm
Y home position sensor
Dog
Y (+) over travel sensor
<Upper>
1 mm
1 mm
Y (-) over travel sensor
<Lower>
1399S
<Adjusting the location of X (Y) home position sensor>
5. Adjust → Position of the X, Y home position sensor, Loosen the screw, Move the home position sensor
* If the control panel indicates error code E510, press the reset switch, move the needle bar to the highest position
(flashing light will go off) and press the green START switch.
6. After adjustment, raise the needle to its upper point, and press [R]. The sewing clamp will move to stand-by position.
7. Press “P” again to release the programming state. Programmer display will go off.
8. Turn off the power. Repeat procedures 2.-7. to adjust the home position.
* Each sensor : Detect the dog → LED go out Adjust → Gap of the sensor and the dog is 1 mm.
BAS-7610
5-29
5. ADJUSTMENT
5-26. Adjusting the bobbin winder
(6)
(7)
(1)
(5)
(4)
(3)
(2)
1400S
1401S
<Positioning the bobbin winder claw>
1. Move the bobbin holder arm (1) in direction of the bobbin winder shaft (2) to a position just before finishing bobbin
thread winding.
2. Tighten the two screws (3) so that the spring plate (4) will be positioned on a stepped part of the bobbin winder claw
(5).
<Positioning the bobbin holder arm>
Loosen the screw (6), and adjust the bobbin holder arm (7) by turning it to set proper thread amount.
5-27. Adjusting the cylinder sensors
Release air pressure and turn on the power. Remove all folding mechanism parts.
1403S
23 mm
(1) (2) (6) (1) (2) (6)
(2)
For folding clamp,
inner clamp
(4)
(2)
(3)
(3)
For center blade
(5)
(2)
35 mm
1402S
1404S
1. Adjust → Loosen the screw (1), Move the sensor (2)
2. Manually operate the folding group support arm (3), the inner clamp lever (4), and the center blade supporter (5). Then
adjust them so each LED of sensors (6) will come on for the first time when it is about 5 mm before stroke end of each
cylinder.
* Although each LED of sensors (6) comes on within the range of 10 mm before stroke end of each cylinder, adjust the
sensors so that each of LED lights, as much as possible, in the middle of this range.
BAS-7610
5-30
5. ADJUSTMENT
(1)
(2)
LED
(3)
1347S
<Presser foot>
Approximately 24 mm
1683S
Adjust the sensor (1) in the middle of the indicator on the sensor (1) lights within a certain range. When the power is ON
and the presser foot is up, the indicator on the cylinder sensor lights within a certain range when slowly raising the sensor
(1) along the cylinder (2) from bottom to top.
44 mm
1684S
1685S
<Folding base>
10 mm
1686S
<Zigzag>
1687S
25 mm
1688S
5-31
<Work clamp>
BAS-7610
1689S
5. ADJUSTMENT
5-28. Adjusting the rise-and-fall equipment
When the tucking blade and the center blade evacuate and cloth shifts, spring pressure of rise-and-fall equipment is
checked.
1690S
Coil spring
1691S
1692S
Adjust the spring pressure of rise-and-fall equipment by the number of coil springs.
The coil spring can be increased to four pieces. (Two pieces are equipped at the time of shipment. Two pieces are
appended as accessories.)
5-29. Upper thread breakage sensor.
If possible, it brings close so that thread may not be contacted.
1693S
BAS-7610
5-32
5. ADJUSTMENT
5-30. Adjusting the upper thread breakage detector
5-30-1. How to insert the fiber
Fiber lock lever
1695S
Fiber
The fiber is inserted till the place at which it stops.
(Detection distance will become short if it fixes on the way.)
Light receive part
Light projection part (Single line)
Light projection part
1696S
Light receive part (Plural line)
If a fiber makes light projection and light receive side reverse, detection accuracy will fall.
5-30-2. Setting of MODE
Stable display light (Green)
Volume indicator (Orange)
Volume indicator (Green)
Jog switch
1694S
MODE selection switch
While making adjustment, the mode selection switch is changed to the "MODE" side. (The volume indicator under setup
blinks.)
It will be set up if the jog switch is pushed, and the display of the volume indicator changes.
The jog switch is turned to + or -, and the contents are changed.
After a setting end and the mode selection switch is changed to the "RUN" side.
Setting item
Volume indicator
Contents of selection
Output operation
1697S
Frequency of light projection
1698S
Timer operation
1699S
BAS-7610
5-33
D-ON
(When light does not enter : ON)
FR1
(Frequency of light projection 1)
NON
(With no timer)
5. ADJUSTMENT
5-30-3. Setting of sensitivity
It adjusts, after performing thread through to usual.
Operation
Procedure
Volume indicator
1
The mode selection switch is changed to the "SET" side.
1700S
1701S
1703S
1704S
1705S
2
If the jog switch is pushed when thread is on a sensor line, "3" of the volume
indicator and "6" will blink. If the jog switch is detached within 3 seconds, "4" of
the volume indicator and "5" will blink and the quantity containing light in case
there is thread will be read. (If The mode selection switch is changed to the
"RUN" side while "4" of the volume indicator and "5" are blinking, the quantity
containing light will not be updated.)
1706S
1704S
1708S
3
Thread is removed from a sensor line and the jog switch is pushed.
1709S
There is a work.
Much
Quantity containing light
Sensitivity level display
100 grades → lighting
10 grades → blink
Grade of 1 → nothing
Example → 720-729
Sensitivity level
4
Little
There is no work.
Stable display light lights up and a sensitivity level is set up. A sensitivity level is
set up in the middle of quantity containing light the time of there being thread,
and in case there is nothing.
1710S
1711S
5
The mode selection switch is changed to the "RUN" side.
BAS-7610
5-34
6. ELECTRIC COMPONENTS
6. ELECTRIC COMPONENTS
DANGER
Wait at least 5 minutes after turning off the power switch and disconnecting the power cord from the wall outlet
before opening the face plate of the control box. Touching areas where high voltages are present can result in
severe injury.
6-1. Precautions at the time of adjustment
Pay attention to the following when opening the control box for maintenance.
[ Electric shock ]
Some large capacitors may have a high voltage remaining in them for up to 5 minutes after the power is turned off.
To prevent electric shock, wait at least 5 minutes after the power is turned off before doing the following:
• Opening and closing the control box
• Replacing fuses
• Replacing each PCB
• Separating and joining connectors
• Measuring resistance
• Doing anything with a possibility of touching something inside the control box
Some adjustments require measuring the voltage while the power is turned on with the control box kept open.
In such a case, be careful not to touch any place other than that for the measurement. In addition, always keep in mind
that a high voltage remains for 5 minutes after the power is turned off.
[ Injury ]
When separating or rejoining connectors, and measuring something, be careful not to cut your fingers on metal parts
such as heatsinks and covers.
6-2. Components inside the control box and the operation panel
The following are brief explanations of components inside the control box. See control circuit block diagram for the details
of the connections.
< Control circuit board >
The main circuit board is fixed to the front of the control box.
< Power supply unit (Power supply transformer 2, switching power supply and power supply PCB ) >
The power supply circuit board is fixed at the bottom front part of the control box. Four fuses are attached in this
equipment.
< Power supply transformer 1 >
It changes into the voltage for which power supply equipment and servo amplifier need power supply voltage.
< Servo amplifier >
This is equipment which controls a servo motors (X, Y, Sewing machine).
< Noise filter >
The power supply line noise of AC servo amplifier is reduced.
Control circuit board
Servo amplifier (Sewing machine)
Servo amplifier (Y)
Servo amplifier (X)
Noise filter
1763S
Power supply unit (Transformer 2)
Power supply transformer 1
BAS-7610
6-01
6. ELECTRIC COMPONENTS
<Operation panel>
The panel PCB is fixed to the inside of the operation panel. It is a PCB which controls the switch of a panel, and the
display to a LCD (liquid crystal display).
Inverter
LCD
LCD contrast adjustment volume
PROM
Panel PCB
1764S
<Programmer>
The programmer PCB is fixed to the inside of the programmer. It is a PCB which controls the switch of a programmer,
and the display to a LCD (liquid crystal display).
Inverter
LCD
LCD contrast adjustment volume
PROM
Programmer PCB
1765S
BAS-7610
6-02
6. ELECTRIC COMPONENTS
6-3. Power supply
6-3-1.
Fuse
Note
When replacing a fuse, be sure to use the specified ones listed below.
1766S
No.
F1
F2
F3
F4
Part name
Fuse C
(2A-125V)
Fuse B
(5A-125V)
↑
↑
Part code
152566000
152565000
↑
↑
Manufacturer
SATO
F7161 2A
SATO
F7161 5A
↑
↑
BAS-7610
6-03
When a fuse has blown
The bobbin winder does not turn.
The air valve does not operate.
The over travel sensor LED is not lit.
The stacker roller does not turn.
The light marker lamp is not lit.
6. ELECTRIC COMPONENTS
6-3-2.
Circuit protector of bobbin winder motor
When winding thread on successive bobbins and with strong tension or the motor does not rotate for the thread has got
tangled on the bobbin winder motor shaft, the protector will project to cut off the current to the circuit.
After a while (about 30 seconds), depress the protector. Thread winding can be performed. Check the bobbin winder so
that its tension is proper.
Protector
1767S
6-3-3.
Breaker of suction (vacuum) device
When excessive load joins suction device, the breaker of suction device operates. The breaker is returned after removing
causes of load, such as cleaning of the filter of suction device.
1768S
BAS-7610
6-04
6. ELECTRIC COMPONENTS
6-3-4.
Conversion of power supply voltage
White
Red
Breaker
(A type changes with voltage.)
1769S
Breaker F10A
(S21504000)
Breaker F5A
(S21181000)
1770S
BAS-7610
6-05
6. ELECTRIC COMPONENTS
6-4. PROM
Kind
Main
Folding clamp
Operation panel
Programmer
Function
Control of a sewing machine
Read and write of data
Programming
Control of a folding clamp
Communication with a panel
Control of a panel
Control of a programmer
The place attached
Main PCB
MN-*
Name
Main PCB
FL-*
PL-*
PG-*
* = version No. (A, B, ....)
The version of PROM can be checked also on an operation panel. Press a [TEST] switch when the power supply switch
is turned ON.
PROM
MN-E
Version
FL-C
PL-M-C
PG-F
Panel PROM
PL-M - *
PL-J - *
Panel PCB
Programmer PCB
: English / Spanish / French / Turkish
: English / Japanese
BAS-7610
6-06
6. ELECTRIC COMPONENTS
6-5. Connector
6-5-1.
Main PCB
The figure is a part code S51862 - PCB.
1771S
No.
Connection
No.
Connection
P1
Machine sensor
P17
Foot switch
P2
Stacker motor
P18
Start switch
P3
Thread trimmer solenoid
P19
Clamp-in sensor
P4
Power supply PCB
P20
Home position, over travel sensor
P5
Folding clamp valve
P21
2 row sensor
P6
Machine valve
P22
Jig pattern sensor
P7
Floppy disk drive (data)
P23
Work clamp cylinder sensor
P8
Floppy disk drive (power supply)
P24
Not use (For BAS - 370E series)
P9
Programmer
P25*
Expansion bus control signal output
P10
Operation panel
P26*
Main CPU expansion input
P11
Servo amplifier (machine)
P27*
Main CPU expansion output
P12
Servo amplifier (Y)
P28*
Folding clamp CPU expansion input
P13
Servo amplifier (X)
P29*
Folding clamp CPU expansion output
P14
Air switch
P30
Not use (For BAS - 370E series)
P15
Folding clamp cylinder sensor
P31*
Expansion solenoid output
P16
Switch box
P32*
Expansion pulse motor output
* As for the part code S46658 - PCB, connector No. differs as follows.
P25→P24, P26→P25, P27→P26, P28→P27, P29→P28, P31→P29, P32→P30
P1 [HEAD-SENS] (JAPAN SOLDERLESS TERMINAL B15B-XH-A)
Pin No.
1
2
3
4
5
6
7
8
9
10
11
12
13
14
15
Signal name
+12V
Thread breakage input
±0V
+5V
Needle up sensor input
Probable symptoms due to poor contact
“E - 520” appears without thread breakage.
+5V
Synchronizing sensor input
Machine does not trim thread. Feed mechanism does not move.
Timing of thread trimming is abnormal.
“E - 540” appears.
“E - 560” appears.
+5V
Presser foot sensor input
±0V
+5V
Zigzag sensor input
±0V
“E - 550” appears. Machine does not stop in needle up position.
“E - 580” appears.
BAS-7610
6-07
6. ELECTRIC COMPONENTS
P2 [STACKER-MOTOR] (JAPAN SOLDERLESS TERMINAL B6P-SHF-1AA)
Pin No.
1
2
3
4
5
6
Signal name
Probable symptoms due to poor contact
Stacker roller does not rotate.
Pulse motor output
+36V
P3 [TRIM] (MOLEX 5273-02A)
Pin No.
1
2
Signal name
+24V
Thread trimmer solenoid
Probable symptoms due to poor contact
Defective thread trimming
P4 [POWER] (MOLEX 5566-10A)
Pin No.
1
2
3
4
5
6
7
8
9
10
Signal name
+5V
±0V
+12V
±0V
-12V
+24V
±0V
+36V
Probable symptoms due to poor contact
Power supply lamp of the operation panel does not light.
Thread breakage sensor lamp does not light.
Back light of the operation panel does not light.
Air valve does not operate.
Over travel sensor lamp does not light.
Stacker roller does not rotate.
±0V
BAS-7610
6-08
6. ELECTRIC COMPONENTS
P5 [VALVE (FL)] (JAE PS-30PE-D4T1-LP1)
Pin No.
A1
B1
A2
B2
A3
B3
A4
B4
A5
B5
A6
B6
A7
B7
A9
A8
B8
B9
A10
B10
A11
B11
A12
B12
A14
A13
B13
B14
A15
B15
Signal name
Folding clamp valve A output
Inner clamp valve A output
Center blade valve A output
Clamp valve A output
+24V
+24V
Folding clamp valve B output
Inner clamp valve B output
Center blade valve B output
Clamp valve B output
Folding base 10 valve output
Folding base 1.5 valve output
Label valve output
Suction (Vacuum) valve output
Slide plate elevator valve output
+24V
+24V
Tucking blade 1 valve output
Tucking blade 2 valve output
Tucking blade 3 valve output
Tucking blade 4 valve output
Stacker wiper valve output
Stacker inside bar valve output
Stacker outside bar valve
output
Stacker roller valve output
+24V
+24V
Valve output (spare)
Valve output (spare)
Valve output (spare)
Probable symptoms due to poor contact
Each cylinder of the folding clamp does not operate.
“E-900”, “E-901”, “E-902” appears.
Folding base does not operate.
Label can not set.
Suction (Vacuum) device does not operate.
Slide plate elevator does not operate.
“E-903” appears.
Tucking blade does not operate.
Cylinder of the stacker does not operate correctly.
Not use
BAS-7610
6-09
6. ELECTRIC COMPONENTS
P6 [VALVE (MN) ] (JAE PS-16PE-D4T1-LP1)
Pin No.
A1
B1
A2
B2
A3
B3
A4
B4
A6
B6
A8
A5
B5
A7
B7
B8
Signal name
Thread wiper valve output
Needle cooler output
Presser foot valve output
Zigzag valve output
+24V
+24V
Thread tension release valve
output
2 step thread tension release
valve output
2 row changer 1 valve output
2 row changer 2 valve output
+24V
Valve output (spare)
Valve output (spare)
Valve output (spare)
Valve output (spare)
+24V
Probable symptoms due to poor contact
Thread wiper does not operate.
Needle cooler does not operate.
Presser foot does not operate.
Zigzag does not operate.
Thread tension release does not operate.
2 step thread tension release does not operate.
2 row changer does not operate.
Not use
P7 [FDD] (3 M 3431-6002SCFL)
Pin No.
1 - 34
Signal name
FDD control signal
Probable symptoms due to poor contact
Floppy disk drive does not operate.
Read and write of the floppy disk drive is abnormal.
“E-700”, “E-701” appears.
P8 [FDD-POWER] (MOLEX 5045-02A)
Pin No.
1
Signal name
+5V
2
±0V
Probable symptoms due to poor contact
Floppy disk drive does not operate.
Access lamp does not light.
“E-700”, “E-701” appears.
P9 [PROGRAMMER] (JAPAN SOLDERLESS TERMINAL B10B-XH-A)
Pin No.
1
2
3
4
5
6
7
8
9
10
Signal name
±0V
Send data
Send control
Receive data
Receive control
+12V
-12V
Probable symptoms due to poor contact
Programmer does not operate.
Switch does not operate.
Indication of LCD is abnormal.
+5V
BAS-7610
6-10
6. ELECTRIC COMPONENTS
P10 [PANEL] (JAPAN SOLDERLESS TERMINAL B12B-XH-A)
Pin No.
1
2
3
4
5
6
7
8
9
10
11
12
Signal name
±0V
Receive data
Receive control
Send data
Send control
Error lamp
Probable symptoms due to poor contact
Power lamp of the operation panel does not light.
Back light of the operation panel does not light.
Operation panel does not operate.
Switch does not operate.
Indication of LCD is abnormal.
+12V
-12V
+5V
P11 [Z-SRV] (JAE PS-20PE-D4T1-LP1)
Pin No.
A1-A10
B1-B10
Signal name
Probable symptoms due to poor contact
Servo amplifier control signal Machine motor does not rotate.
(machine motor)
“E-890” appears.
P12 [Y-SRV] (JAE PS-20PE-D4T1-LP1)
Pin No.
A1-A10
B1-B10
Signal name
Probable symptoms due to poor contact
Servo amplifier control signal Y feed motor does not rotate.
(Y feed motor)
“E-880” appears.
P13 [X-SRV] (JAE PS-20PE-D4T1-LP1)
Pin No.
A1-A10
B1-B10
Signal name
Probable symptoms due to poor contact
Servo amplifier control signal X feed motor does not rotate.
(X feed motor)
“E-870” appears.
P14 [AIRSW] (JAPAN SOLDERLESS TERMINAL B3P-SHF-1AA)
Pin No.
1
2
3
Signal name
(+5V)
Air pressure sensor input
Probable symptoms due to poor contact
“E-820, E-821” appears.
±0V
BAS-7610
6-11
6. ELECTRIC COMPONENTS
P15 [FL-SENS] (JAPAN SOLDERLESS TERMINAL B12P-SHF-1AA)
Pin No.
1
2
3
4
5
6
7
8
9
10
11
12
Signal name
Probable symptoms due to poor contact
+5V
Folding clamp sensor input
“E-900” appears.
±0V
+5V
Inner clamp sensor input
“E-901” appears.
±0V
+5V
Center blade sensor input
“E-902” appears.
±0V
+5V
Folding base sensor input
“E-903” appears.
±0V
P16 [EM/START] (MOLEX 5045-09A)
Pin No.
1
2
3
4
5
6
7
8
9
Signal name
Probable symptoms due to poor contact
EMERGENCY STOP switch
NC
“E-810” appears.
±0V
EMERGENCY STOP switch
NO
RESET switch
Reset of an error cannot be performed.
±0V
Re-start switch
Re-start switch does not operate.
±0V
FOLDER RESET switch
FOLDER RESET switch does not operate.
±0V
P17 [FOOT-SW] (MOLEX 5045-04A)
Pin No.
1
2
3
4
Signal name
Foot switch 1
±0V
(Foot switch 2)
Probable symptoms due to poor contact
Suction (Vacuum) device does not operate.
(±0V)
P18 [START-SW] (JAPAN SOLDERLESS TERMINAL B4P-SHF-1AA)
Pin No.
1
2
3
4
Signal name
Start switch 1
±0V
Start switch 2
Probable symptoms due to poor contact
Folding clamp does not operate.
±0V
BAS-7610
6-12
6. ELECTRIC COMPONENTS
P19 [CLAMP-IN] (JAPAN SOLDERLESS TERMINAL B6B-PH-K-S)
Pin No.
1
2
3
4
5
6
Signal name
+24V
CLAMP-IN sensor 1
±0V
+24V
CLAMP-IN sensor 2
Probable symptoms due to poor contact
Center blade does not operate.
Folding clamp does not operate.
“E-960” appears.
±0V
P20 [ORG/OVR] (JAPAN SOLDERLESS TERMINAL B18P-SHF-1AA)
Pin No.
1
2
3
4
5
6
7
8
9
10
11
12
13
14
15
16
17
18
Signal name
Probable symptoms due to poor contact
+24V
+X over-travel input
“E-830” appears.
±0V
+24V
-X over-travel input
“E-840” appears.
±0V
+24V
+Y over-travel input
“E-850” appears.
±0V
+24V
-Y over-travel input
“E-860” appears.
±0V
+24V
X home position input
“E-910” appears.
±0V
+24V
Y home position input
“E-920” appears.
±0V
P21 [2ROW-SENS] (MOLEX 5045-13A)
Pin No.
1
2
3
4
5
6
7
8
9
10
11
12
13
Signal name
+5V
+24V
2 row sensor input 1
Probable symptoms due to poor contact
Not use
±0V
+24V
2 row sensor input 2
±0V
+24V
2 row sensor input 3
“E-570” appears.
±0V
+24V
2 row sensor input 4
±0V
BAS-7610
6-13
6. ELECTRIC COMPONENTS
P22 [JIG-PATTERN] (JAPAN SOLDERLESS TERMINAL B8P-SHF-1AA)
Pin No.
1
2
3
4
5
6
7
8
Signal name
+12V
Pattern sensor input 1
Pattern sensor input 2
Pattern sensor input 3
Pattern sensor input 4
Pattern sensor input 5
Pattern sensor input 6
Probable symptoms due to poor contact
“E-530”, “E-535”, “E-536” appears.
±0V
P23 [CLAMP] (MOLEX 5045-03A)
Pin No.
1
2
3
Signal name
+5V
Clamp sensor input
Probable symptoms due to poor contact
“E-970” appears.
±0V
P24 [ZIGSET] (JAPAN SOLDERLESS TERMINAL B3B-PH-K-S)
Pin No.
1
2
3
Signal name
+5V
NC
Probable symptoms due to poor contact
Not use
(It cannot be used by BAS - 761, 7610.)
±0V
P25 (P24) [EXT] (JAPAN SOLDERLESS TERMINAL B26B-PHDSS)
Pin No.
1 - 26
Signal name
Probable symptoms due to poor contact
Expansion bus control signal Not use
output
(It does not use by BAS-761, 7610.)
BAS-7610
6-14
6. ELECTRIC COMPONENTS
P26 (P25) [MN-OP-IN] (JAPAN SOLDERLESS TERMINAL B16B-PHDSS)
Pin No.
1
2
3
4
5
6
7
8
9
10
11
12
13
14
15
16
Signal name
+5V
+24V
Expansion sensor input 1
Probable symptoms due to poor contact
±0V
+5V
+24V
Expansion sensor input 2
±0V
+5V
+24V
Expansion sensor input 3
For automatic bobbin changer (option).
±0V
+5V
+24V
Expansion sensor input 4
±0V
P27 (P26) [MN-OPT-OUT] (MOLEX 5045-06A)
Pin No.
1
2
3
4
5
6
Signal name
Expansion valve output 1
Expansion valve output 2
Expansion valve output 3
Expansion valve output 4
+24V
+24V
Probable symptoms due to poor contact
For automatic bobbin changer (option).
P28 (P27) [FL-OPT-IN] (JAPAN SOLDERLESS TERMINAL B12B-PHDSS)
Pin No.
1
2
3
4
5
6
7
8
9
10
11
12
Signal name
Probable symptoms due to poor contact
+5V
+24V
Expansion sensor input 5
±0V
+5V
+24V
Expansion sensor input 6
Not use
(It does not use by BAS-761, 7610.)
±0V
+5V
+24V
Expansion sensor input 7
±0V
BAS-7610
6-15
6. ELECTRIC COMPONENTS
P29 (P28) [FL-OPT-OUT] (MOLEX 5045-05A)
Pin No.
1
2
3
4
5
Signal name
Expansion valve output 5
Expansion valve output 6
Expansion valve output 7
Expansion valve output 8
+24V
Probable symptoms due to poor contact
Not use
(It does not use by BAS - 761, 7610.)
P30 [PRESS] (JAPAN SOLDERLESS TERMINAL B9B-XH-A)
Pin No.
1
2
3
4
5
6
7
8
9
Signal name
Probable symptoms due to poor contact
+24V
NC
±0V
+24V
NC
Not use
(It does not use by BAS-761, 7610.)
±0V
+24V
NC
±0V
P31 (P29) [MAGNET] (JAPAN SOLDERLESS TERMINAL B2B-XH-A)
Pin No.
1
2
Signal name
+24V
Expansion solenoid output
Probable symptoms due to poor contact
Not use
(It does not use by BAS-761, 7610.)
P32 (P30) [EXPM] (JAPAN SOLDERLESS TERMINAL B4B- XH-A)
Pin No.
1
2
3
4
Signal name
Expansion pulse motor output
Probable symptoms due to poor contact
For automatic bobbin changer (option).
BAS-7610
6-16
6. ELECTRIC COMPONENTS
6-5-2.
Power supply PCB
Main PCB
Transformer 2
Motor for the bobbin winder
Light marker
1772S
P1 [MAIN] (MOLEX 5277- 04A)
Pin No.
1
2
3
4
Signal name
±0V
+24V
±0V
+36V
Probable symptoms due to poor contact
The air valve does not operate.
The over travel sensor lamp is not lit.
The stacker roller does not turn.
P2 [THREAD MOTOR] (MOLEX 5277-02A)
Pin No.
1
2
Signal name
+24V
Probable symptoms due to poor contact
The motor of the bobbin winder does not turn.
±0V
P3 [LIGHT MARKER] (MOLEX 5566-02A)
Pin No.
1
2
Signal name
AC4.5V
AC4.5V
Probable symptoms due to poor contact
The light marker is not lit.
P4 [AC-IN] (MOLEX 5277 - 06A)
Pin No.
1
2
3
Signal name
AC26V
AC26V
AC18V
4
AC18V
5
6
AC4.5V
AC4.5V
Probable symptoms due to poor contact
The stacker roller does not turn.
The air valve does not operate.
The motor of the bobbin winder does not turn.
The over travel sensor lamp is not lit.
The light marker is not lit.
BAS-7610
6-17
6. ELECTRIC COMPONENTS
6-5-3.
Operation panel PCB
Inverter
LCD
Main PCB
RS-232C
1773S
P1 [LCD] (JAPAN SOLDERLESS TERMINAL 19FE-ST)
Pin No.
Signal name
1 - 19
LCD control
Probable symptoms due to poor contact
LCD does not indicate.
P2 [MAIN] (JAPAN SOLDERLESS TERMINAL B12B-XH-A)
Pin No.
1
2
3
4
5
6
7
8
9
10
11
12
Signal name
±0V
Sending data
Sending control
Reception data
Reception control
Error lamp
Probable symptoms due to poor contact
The power lamp of the operating panel is not lit.
Back light of the operating panel is not lit.
The operating panel does not operate.
The switch of the operating panel does not operate.
Indication of the operating panel is abnormal.
+12V
-12V
+5V
P3 [INVERTER] (JAPAN SOLDERLESS TERMINAL B2B-EH)
Pin No.
1
2
Signal name
±0V
+12V
Probable symptoms due to poor contact
Back light of the LCD is not lit.
BAS-7610
6-18
6. ELECTRIC COMPONENTS
P4 [RS-232C] (FUJITSU FCN-675J009-L/C#QD)
Pin No.
1
2
3
4
5
6
7
8
9
Signal name
DCD
TXD
RXD
DSR
SG
DTR
CTS
RTS
R1
Probable symptoms due to poor contact
Not use
BAS-7610
6-19
6. ELECTRIC COMPONENTS
6-5-4.
Programmer PCB
Inverter
LCD
Main PCB
FG
1774S
P1 [LCD] (JAPAN SOLDERLESS TERMINAL 19FE-ST)
Pin No.
1-19
Signal name
LCD control
Probable symptoms due to poor contact
LCD does not indicate.
P2 [MAIN] (MOLEX 5268-12A)
Pin No.
1
2
3
4
5
6
7
8
9
10
11
12
Signal name
±0V
Reception data
Reception control
Sending data
Sending control
+11V
-11V
+5V
+5V
CTS
RTS
Probable symptoms due to poor contact
The programmer does not operate.
The switch of the programmer does not operate.
Indication of the programmer is abnormal.
Back light of the LCD does not lit.
P3 [INVERTER] (JAPAN SOLDERLESS TERMINAL B3B-PH)
Pin No.
1
2
3
Signal name
CFL ON / OFF
Probable symptoms due to poor contact
Back light of the LCD is not lit.
±0V
+12V
P4 [FG] (JAPAN SOLDERLESS TERMINAL B2B-PH)
Pin No.
1
2
Signal name
FG
FG
Probable symptoms due to poor contact
It may incorrect-operate by the noise.
BAS-7610
6-20
6. ELECTRIC COMPONENTS
6-5-5.
Pattern sensor PCB
Main PCB
1775S
P1 [MAIN] (JAPAN SOLDERLESS TERMINAL B8B-XH-A)
Pin No.
1
2
3
4
5
6
7
8
Signal name
+24V
Pattern sensor input 1
Pattern sensor input 2
Pattern sensor input 3
Pattern sensor input 4
Pattern sensor input 5
Pattern sensor input 6
Probable symptoms due to poor contact
“E-530”, “E-535”, “E-536” appears.
±0V
BAS-7610
6-21
6.ELECTRIC COMPONENTS
6-6. Sensor
6-6-1.
Sensor location
1776S
1777S
No.
1
2
3
4
Sensor name
Over travel sensor (-X)
X home position sensor
Over travel sensor (+X)
Over travel sensor (+Y)
Type
A
A
A
A
No.
12
13
14
15
5
Y home position sensor
A
16
6
Over travel sensor (-Y)
A
17
7
Clamp in
8
Jig pattern sensor
9
Cylinder sensor (presser foot)
10
Cylinder sensor (inner clamp)
11
Cylinder sensor (folding clamp)
Type – A : Proximity sensor
Type – B : Optical sensor (slit)
Type – C : Cylinder sensor (proximity)
Type – D : Optical sensor (reflect)
A
B
C
C
C
18
19
20
21
22
BAS-7610
Sensor name
Cylinder sensor (folding base)
Cylinder sensor (center blade)
Machine sensor (needle up)
Machine sensor (synchronizing)
Amplifier unit (needle thread breakage
detector)
Fiber unit (needle thread breakage
detector)
Cylinder sensor (clamp)
Cylinder sensor (zigzag)
Air pressure sensor (switch)
2 row sensor (side)
2 row sensor (bottom)
Type
C
C
B
B
D
D
C
C
C
C
6-22
6. ELECTRIC COMPONENTS
6-6-2. Function of sensor
< Home position sensor (X, Y) >
Sensor
Connecto
r
X
(2)
P20
Sensor
Connecto
r
Y
(5)
P20
Pin
No.
13
14
15
Pin
No.
16
17
18
Signal name
+24V
X home position
±0V
Signal name
+24V
Y home position
±0V
State in case sensor LED is ON
Sewing clamp is in home position.
State in case sensor LED is ON
Machine head is in home position.
The error No. at
fault
E-840
The error No. at
fault
E-830
This sensor is for home positioning of the clamp (X directions) and the machine head (the direction of Y).
When the home position sensor does not work but a machine overruns, the over travel sensors detects overrun.
Refer to <Adjusting the location of X (Y) home position sensor> in “5-25. Checking and adjusting the home position”,
when you adjust the position of the sensor.
1778S
Movement of the sewing clamp and the machine (detect the home position)
1. The sewing clamp moves to the left along the X-axis, the sewing machine moves upward along the Y-axis. The
sewing clamp and the sewing machine stop where the home position sensors of both axes are turned ON.
2. The sewing clamp and the sewing machine move backward for about 15 mm from the stop positions. Then they move
again at low speed until the home position sensors are turned ON.
3. After the home position is located, the sewing machine does not move, and the sewing clamp moves to the standby
position (450 mm to the right) and stops.
4. When the folding machine is in the manual mode (MAN), and the sewing clamp moves to the folding machine and
then clamps the center blade, the centers of the center blade and the sewing clamp should be aligned.
* When the power is turned on and the error code “E-510” appears, reset and move the needle bar its highest position.
* The error codes “E-830”, “E-840”, “E-850” and “E-860” appears, the folding clamp and the inner clamp of the folding
machine are not completely raised or the cylinder sensor does not operate. Check the sensors’ operation.
6-23
BAS-7610
6.ELECTRIC COMPONENTS
< Over travel sensor (X+, X-, Y+, Y-) >
Sensor
Connector
X+
(3)
P20
Sensor
Connector
X(1)
P20
Sensor
Connector
Y+
(4)
P20
Sensor
Connector
Y(6)
P20
Pin
No.
1
2
3
Pin
No.
4
5
6
Pin
No.
7
8
9
Pin
No.
10
11
12
Signal name
+24V
X over travel right
±0V
Signal name
+24V
X over travel left
±0V
Signal name
+24V
Y over travel up
±0V
Signal name
+24V
Y over travel
down
±0V
State in case sensor LED is ON
Sewing clamp is in normal position.
State in case sensor LED is ON
Sewing clamp is in normal position.
State in case sensor LED is ON
Machine head is in normal position.
State in case sensor LED is ON
Machine head is in normal position.
The error No. at
fault
E-830
The error No. at
fault
E-840
The error No. at
fault
E-850
The error No. at
fault
E-860
1. The over travel sensor controls the movable area of the X-axis and the Y-axis.
2. The feed overruns while feeding and the sensor turns ON (LED turns OFF). The servo amplifier turns OFF
automatically and the motor stops.
3. If breakage occurs at the over travel sensors, or if the connectors are not connected properly, the fail safe function
displays an alarm, such as “E-830”, “E-840”, “E-850” or “E-860” even if the feed does not overrun.
Refer to <Adjusting the location of X (Y) home position sensor> in “5-25. Checking and adjusting the home position”,
when you adjust the position of the sensor.
BAS-7610
6-24
6. ELECTRIC COMPONENTS
< Jig pattern sensor >
Sensor
Connector
Jig pattern
(8)
P22
Pin No.
1
2
3
4
5
6
7
8
Signal name
+ 12V
Pattern 1 (Weight X4)
Pattern 2 (Weight X2)
Pattern 3 (Weight X1)
Pattern 4 (Weight X32)
Pattern 5 (Weight X16)
Pattern 6 (Weight X8)
±0V
1. The jig pattern sensor checks if the number of the program read from the floppy disk and the number of the sewing
clamp set to the machine are identical.
2. The jig pattern sensor consists of six photo sensors. This sensor checks 64 jig patterns by combining the slit plates on
the sewing clamp.
3. When DIP switch B-1 on the main PCB is set to on, the machine can sew regardless of the signal of the jig pattern
sensor. (Set the DIP switch to off in usual operation. It is set off for shipping.)
Photo sensor
Slit plate
1779S
1780S
Sensor No.
J1
J2
J3
J4
J5
J6
6-25
Weight of the code
32
16
8
4
2
1
Example
16 + 2 + 1 = 19
BAS-7610
1781S
6.ELECTRIC COMPONENTS
< Cylinder sensor >
Sensor
Connector
Folding clamp
(11)
P15
Sensor
Connector
Inner
clamp
(10)
P15
Sensor
Connector
Center blade
(13)
P15
Sensor
Connector
Folding base
(12)
P15
Sensor
Connector
Work clamp
(18)
P23
Sensor
Connector
2 row
(21)
(22)
Pin
No.
1
2
3
Pin
No.
4
5
6
Pin
No.
7
8
9
Pin
No.
10
11
12
Pin
No.
1
2
3
Pin
No.
1
2
3
P21
4
5
6
7
Sensor
Connector
Pressure foot
(9)
P1
Sensor
Connector
Zigzag
(19)
P1
Pin
No.
10
11
12
Pin
No.
13
14
15
Signal name
+5V
Folding clamp
±0V
Signal name
+5V
Inner clamp
±0V
Signal name
+5V
Center blade
±0V
Signal name
+5V
Folding base
±0V
Signal name
+5V
Work clamp
±0V
State in case sensor LED is ON
Folding clamp is in an upper position.
State in case sensor LED is ON
Inner clamp is in an upper position.
State in case sensor LED is ON
Inner clamp is in an back position.
State in case sensor LED is ON
Folding base is in an upper position.
State in case sensor LED is ON
Work clamp is in an upper position.
The error No. at
fault
E-900
The error No. at
fault
E-901
The error No. at
fault
E-902
The error No. at
fault
E-903
The error No. at
fault
E-970
Signal name
State in case sensor LED is ON
+5V
--2 row exchange
(bottom)
±0V
+24V
2 row exchange
(side)
±0V
The error No. at
fault
Upper sewing clamp is in the position
which sews an inner side.
E-570
Signal name
State in case sensor LED is ON
The error No. at
fault
+5V
Pressure foot
±0V
Signal name
+5V
Zigzag
±0V
Pressure foot is in an upper position.
State in case sensor LED is ON
Zigzag is not carried out.
E-560
The error No. at
fault
E-580
The cylinder sensor detects the positions of the each cylinder rod.
If cylinder sensors (10), (11) are not turned ON within a certain time when the power is turned on and when the folding
machine is reset, the control software decides to display an error “E-900”, “E-901”, “E-902” or “E-903”.
If cylinder sensor (13) is not turned ON while the center blade receding, the home position is not located. And after folding
has been completed and the center blade recedes, the sewing clamp does not move to the sewing machine.
If cylinder sensor (9) of the presser foot is not turned ON when the presser foot ascends, the home position is not located.
And the sewing clamp does not move to the sewing machine to sew as described in above. An error code, “E-560” will be
displayed at this time.
Refer to “5-27. Adjusting the cylinder sensors”, when you adjust the position of the sensor.
BAS-7610
6-26
6. ELECTRIC COMPONENTS
< Sewing machine sensor >
Needle up sensor
Pin
Signal name
The error No. at fault
No.
4
+5V
Needle up
P1
E-510 – 513, E-550
5
Needle up
(14)
6
K
The needle up sensor sends a signal when the needle bar approaches its highest position.
This signal stops the needle at its up position.
When sewing is completed or when the sensor does not operate, the error code “E-550” will be displayed, and the
machine will stop.
Sensor
Connector
Synchronizing sensor
Pin
Signal name
The error No. at fault
No.
7
+5V
Synchronizing
P1
E-540
8
Synchronizing
(15)
9
K
The synchronizing sensor sends a synchronizing signal for the machine motor and the feeder.
This signal decides the timing of operating the thread trimmer solenoid.
When the sensor does not operate, the error code “E-540” will be displayed, and the machine will stop.
Sensor
Connector
Needle thread breakage detector
Sensor
Connector
Pin
No.
1
Signal name
State in case sensor LED is ON
The error No. at
fault
+24V
Needle thread
Needle thread
breakage detector
2
P1
Thread is on center line at the tip of a fiber.
breakage
(16)
(17)
3
±0V
The needle thread breakage detector consists of the fiber unit and the amplifier unit.
The detector sends the signal when the needle thread breaks.
This signal displays an error “E-520” and stops the machine.
The needle thread breakage function can be ignored by controlling the needle thread monitor switch.
E-520
< Clamp-in sensor >
Pin
The error No. at
Signal name
State in case sensor LED is ON
No.
fault
1
+24V
2
Clamp-in 1
3
±0V
Clamp-in
P19
Work clamp is in an stand-by position.
E-960
(7)
4
+24V
5
Clamp-in 2
6
±0V
The two clamp-in sensors will be detected that the folding clamp is on standby (under the condition that positioning is
completed).
When the clamp-in sensor detect that positioning is not completed, the center blade does not move forward.
The folding clamp move to sewing machine, but the center blade does not move forward, the two clamp-in sensors will
check the clamp motion to move it to the standby position, and their LEDs will light.
Sensor
6-27
Connector
BAS-7610
6.ELECTRIC COMPONENTS
< Air pressure sensor (switch) >
Sensor
Connector
Air pressure
(20)
P14
Pin
No.
Signal name
2
Air pressure
3
±0V
The error No. at fault
E-820
BAS-7610
6-28
6. ELECTRIC COMPONENTS
6-7. Harness
Refer to “6-12. Control circuit block diagram” together.
6-7-1.
Harness connecting table
1
2
Harness
Power supply harness A
Breaker NF1 harness
Outlet
Breaker
3
NF1-T1 harness
Noise filter PCB
4
T1-T2 harness
Transformer 1
5
T2-P PCB harness
Transformer 2
6
T1-NF2 harness
Transformer 1
7
Main power supply harness
Switching power supply
CN2
Main PCB P4
Power supply PCB P1
8
Servo power harness X
Noise filter
9
Servo power harness Y
Noise filter
10
Servo power harness Z
Noise filter
11
Bobbin winder harness
Power supply PCB P2
12
13
14
Maker harness
T1 protector harness
Protector motor harness
Power supply PCB P3
Transformer 1
Circuit protector
15
Motor power harness X
X axis servo amplifier
UVW
16
Motor power harness Y
Y axis servo amplifier
UVW
17
Motor power harness Z
Z axis servo amplifier
UVW
18
Encoder harness X
X axis servo amplifier
CN2
19
Encoder harness Y
Y axis servo amplifier
CN2
20
Encoder harness Z
Z axis servo amplifier
CN2
21
Servo harness X
Main PCB P13
22
Servo harness Y
Main PCB P12
23
Servo harness Z
Main PCB P11
24
FDD power harness
Main PCB P8
6-29
Connection
Breaker
Noise filter PCB
Symptom of poor contact or disconnect
A sewing machine is not turned on.
(A operating panel does not
display.
LED of servo amplifier does not
Transformer 1
display.
A light marker does not light up.)
Transformer 2
A operating panel does not
Switching
power display.
A light marker does not light up.
supply CN1
A light marker does not light up.
Power supply PCB Solenoid valve does not operate.
P4
Pulse motor for stacker roller
does not rotate.
LED of servo amplifier does not
Noise filter
display.
A operating panel does not
display.
servo X axis servo amplifier does not
display.
Power ON --- “E-870”
Y
axis
servo Y axis servo amplifier does not
display.
amplifier
Power ON --- “E-880”
Z
axis
servo Z (machine) axis servo amplifier
does not display.
amplifier
Power ON --- “E-890”
Bobbin
winding Bobbin winding motor does not
rotate.
motor
Light marker
Light marker does not light.
Circuit protector
Motor for vacuum does not rotate.
Blower motor
Sewing clamp does not operate.
X axis servo motor Panel --- “E-870”
Servo AMP. --- “AL.52”
Machine head does not move.
Y axis servo motor Panel --- “E-880”
Servo AMP. --- “AL.52”
Machine motor does not rotate.
Z axis servo motor Panel --- “E-870”
Servo AMP. --- “AL.52”
Sewing clamp does not operate.
X axis servo motor Panel --- “E-870”
Servo AMP. --- “AL.16”
Machine head does not move.
Y axis servo motor Panel --- “E-880”
Servo AMP. --- “AL.16”
Machine motor does not rotate.
Z axis servo motor Panel --- “E-890”
Servo AMP. --- “AL.16”
X
axis
servo Sewing clamp does not operate.
amplifier CN1A, 1B Panel --- “E-870”
Servo AMP. --- “AL.E6”
Y
axis
servo Machine head does not move.
amplifier CN1A, 1B Panel --- “E-880”
Servo AMP. --- “AL.E6”
Z
axis
servo Machine motor does not rotate.
amplifier CN1A, 1B Panel --- “E-890”
Servo AMP. --- “AL.E6”
A floppy disk cannot be
accessed.
Floppy disk drive
Panel --- “E-700”, ”E-701”
X
axis
amplifier
BAS-7610
6.ELECTRIC COMPONENTS
25
FDD harness
Main PCB P7
Floppy disk drive
26
27
Air switch harness
Foot switch harness
Main PCB P14
Main PCB P17
Air switch
Foot switch
28
Panel harness
Main PCB P10
Panel PCB P2
29
Panel inverter harness
Panel PCB P2
Inverter PCB CN1
30
Programmer harness
Main PCB P9
Programmer
31
Switch box harness
Main PCB P16
Switch box
32
Hand switch harness
Main PCB P18
Hand switch
Main PCB P1
Synchronizing
/
Needle up / presser
foot / Needle thread
breakage detector
Main PCB P3
Thread
solenoid
trimmer
Main PCB P23
Sewing
sensor
cylinder
Machine sensor harness A
33
Machine sensor harness B
34
35
Thread trimmer harness
Sewing clamp harness
Sewing
harness
clamp
cylinder
A floppy disk cannot be
accessed.
Panel --- “E-700”, ”E-701”
Panel --- “E820”
Folding clamp does not operate.
LCD, LED of operation panel
does not indicate.
LCD back light does not light.
LCD back light does not light.
It cannot switch to program
mode.
FOLDER RESET / START /
REST switch does not operate.
Panel --- E-810
Folding clamp does not operate
(Folding clamp auto mode).
When XY feed operate --- “E-510
– 513
When presser foot operate --- “E560”
When sewing --- “540”
Needle thread breakage Incorrect
detection
Thread trimmer solenoid does not
operate.
Panel --- “E-970”
36
Jig pattern harness
Main PCB P22
Jig pattern PCB
37
2 row sensor harness A
2 row sensor harness B
Sensor D-H7A1 assy
Sensor D-A96 assy
The pattern of a clamp cannot be
recognized.
(It is always recognized as No.
63.)
Main PCB P21
2 row
sensor
When sewing --- “E-570”
38
Folding clamp sensor
Main PCB P15
39
Main valve harness
Main PCB P6
40
41
42
clamp
valve
Folding
Main PCB P5
harness
Area sensor harness
Area sensor X
Main PCB P20
Area sensor Y
Clamp-in harness
Main PCB P19
Clamp-in sensor
switching
Folding
clamp When folding clamp operate --“E-900 – 903”
sensor
Valve 14, 15, 23 Cylinder does not operate.
28
Valve 1- 13, 19 - 22
Cylinder does not operate.
XY feed sensor
When power ON --- “E-830”, “E840”, “E-850”, “E-860”
When detecting home position --“E-840”, “E-850”, “E-910”, “E-920”
Clamp in sensor
When X feeding --- “E-960”
BAS-7610
6-30
6. ELECTRIC COMPONENTS
6-7-2.
Harness connecting pin number table
1. Power supply harness A (S23868)
Terminal side
Black
White
Red
Green/yellow
Breaker side
Black
White
Green/yellow
Voltage (AC)
200V, 220V, 380V, 400V, 415V
E (Ground)
2. Breaker-NF1 harness (S46608)
Breaker side
Black
White
Noise filter
Black
White
Voltage (AC)
200V, 220V, 380V, 400V, 415V
3. NF1-T1 harness (S46707)
Noise filter
(For Transformer 1)
1
3
Transformer 1
Voltage (AC)
P0
Primary voltage
P0V
200V, 220V, 380V, 400V, 415V
4. T1-T2 harness (S46605)
Transformer 1
Transformer 2
6
5
7
4
6
5
-
Switching power
supply CN1
3
5
Voltage (AC)
100V
120V
5. T2-P PCB harness (S46607)
Transformer 2
12
11
14
13
16
15
Power supply PCB P4
1
2
3
4
5
6
Voltage (AC)
26V
18V
4.5V
6. T1-NF2 harness (S46609)
Transformer 1
1
8
6-31
Noise filter
IN
IN
Voltage (AC)
220V
BAS-7610
6.ELECTRIC COMPONENTS
7. Main power supply harness (S46612)
Switching power supply
CN2
5
7
1
2
3
-
Power supply PCB P1
Power supply PCB P4
Signal/Voltage (DC)
2
1
4
3
1
2
3
4
5
6
7
8
9
+5V
±0V
+12V
±0V
-12V
+24V
±0V
+36V
±0V
8. Servo power supply harness X (S46622)
Noise filter
OUT
OUT
X axis servo amplifier
L1, L11
L2, L21
Voltage (AC)
220V
9. Servo power supply harness Y (S46623)
Noise filter
OUT
OUT
Y axis servo amplifier
L1, L11
L2, L21
Voltage (AC)
220V
10.Servo power supply harness Z (S46624)
Noise filter
OUT
OUT
Z axis (machine) servo amplifier
L1, L11
L2, L21
Voltage (AC)
220V
11.Bobbin winder harness (S46592)
Power supply PCB P2
1
2
Bobbin winder-motor
1
2
Voltage (DC)
+24V
±0V
Light marker
1 (x3)
2 (x3)
Voltage (AC)
12.Maker harness (S46680)
Power supply PCB P3
1
2
4.5V
13.T1-Protector harness (S46638)
14.Protector-motor harness (S46639)
T1-Protector harness
Transforme
Circuit
r1
protector
1
IN
2
IN
-
Protector-motor harness
Circuit
Relay
protector
OUT
1
OUT
2
3
BAS-7610
Blower motor
1
2
3
Voltage (AC)
100V
-
6-32
6. ELECTRIC COMPONENTS
15.Motor power supply harness X (S46630)
16.Motor power supply harness Y (S46631)
17.Motor power supply harness Z (S46632)
Servo amplifier
U
V
W
E
Servo motor
1
2
3
4
Signal
U
V
W
E
Servo motor
7
8
1
2
4
5
3
8
9
Signal
P5
LG
MR
MR R
MD
MD R
BT
LG
Shield
18.Encoder harness X (S46633)
19.Encoder harness Y (S46634)
20.Encoder harness Z (S46635)
Servo amplifier CN2
19, 20
11, 12
7
17
6
16
9
1
Plate
21.Servo harness X (S46625)
22.Servo harness Y (S46626)
Main PCB P13, 12
A2
A10
B4
B5
A6
B6
A7
B7
A9
B9
A8
B8
B1
B2
B3
A4
A5
B10
A3
-
6-33
Servo amplifier
CN1A
CN1B
8
10
19
18
13
3
12
2
6
16
7
17
Plate
16
15
14
17
1
20
5
19
CN1B 3 and 13
3
13
Connect →
Plate
BAS-7610
Signal
CR
SG
RD
INP
PG
PP
NG
NP
LA
LAR
LB
LBR
Shield
LSP
EMG
RES
LSN
ALM
SG
SON
ZSP
Shield
6.ELECTRIC COMPONENTS
23.Servo harness Z (S46627)
Main PCB P11
A2
A10
B4
B5
A6
B6
A7
B7
A9
B9
A8
B8
B1
B2
B3
A4
A5
B10
A3
-
Servo amplifier
CN1A
CN1B
8
1
19
18
13
3
12
2
6
16
7
17
Plate
1
15
14
10
18
20
5
19
CN1B 3 and 13
3
13
Connect →
Plate
Signal
CR
LG
RD
INP
PG
PP
NG
NP
LA
LAR
LB
LBR
Shield
LG
EMG
RES
SG
ALM
SG
SON
ZSP
Shield
24.FDD power supply harness (S46641)
Main PCB P8
1
2
3
4
FDD
1
2
-
Voltage (DC)
+5V
±0V
-
Air switch
1
2
Voltage (DC)
AIR
±0V
25.FDD harness (S46708)
Main PCB P7
1
2
:
:
33
34
FDD
1
2
:
:
33
34
26.Air switch harness (S46655)
Main PCB P14
1
2
3
BAS-7610
6-34
6. ELECTRIC COMPONENTS
27.Foot switch harness (S46653),
Foot switch plate L1 assy (S46265)
Foot switch harness
Main PCB P17
Relay
1
1
2
2
3
4
5
6
7
7
8
8
9
-
Foot switch plate L1 assy
Relay
Foot switch
7
N.O
Switch
8
COM
-
Signal
FOOT SW
±0V
-
28.Panel harness (S46693)
Main PCB P10
1
2
3
4
5
6
7
8
9
10
11
12
Panel PCB P2
1
2
3
4
5
6
7
8
9
10
11
12
Signal/ Voltage (DC)
±0V
±0V
RXD
DSR
TXD
DTR
EMLED
+12V
+12V
-12V
+5V
+5V
Inverter PCB CN1
1
2
Voltage (DC)
±0V
+12V
Programmer relay
1
2
3
4
5
6
7
8
9
10
11
12
13
Signal/ Voltage (DC)
±0V
±0V
TXD
DTR
RXD
DSR
+12V
-12V
+5V
+5V
-
29.Panel inverter harness (S40455)
Panel PCB P2
1
2
30.Programmer harness (S46642)
Main PCB P9
1
2
3
4
5
6
7
8
9
10
-
6-35
BAS-7610
6.ELECTRIC COMPONENTS
31.Switch box harness (S46699)
Main PCB P16
1
2
3
4
5
6
7
8
9
-
Switch
EMERGENCY STOP
RESET
START
FOLDER RESET
-
Signal
N.C
COM (X2)
N.O
N.O
COM
N.O
COM
N.O
COM
Shield
32.Hand switch harness (S46654)
Main PCB P18
6
7
8
9
Switch
Signal
N.O (X2)
COM (X2)
N.O (X2)
COM (X2)
Left switch (x2)
Right switch (x2)
33.Machine sensor harness A (S46644)
Machine sensor harness B (S46645)
Machine sensor
harness A
Machine sensor harness B
Main PCB P1
Relay
Relay
1
2
3
4
5
6
7
8
9
10
11
12
13
14
15
1
2
3
4
5
6
7
8
9
10
11
12
13
14
15
1
2
3
4
5
6
7
8
9
10
11
12
13
14
15
Thread
breakage
1
2
3
-
Needle up
3
1
2
-
Synchroni
zing
3
1
2
-
Presser
foot
(Brown)
(Black)
(Blue)
-
Zigzag
(Brown)
(Black)
(Blue)
Signal/ Voltage
(DC)
+24V
THBRK
±0V
+5V
NUP
K
+5V
SYNC
K
+5V
FOOT
±0V
+5V
ZIGZAG
±0V
34.Thread trimmer harness (S46593)
Main PCB P1
1
2
Thread trimmer solenoid
1
2
Signal/ Voltage (DC)
+24V
THCUT
35.Work clamp cylinder harness (S46584)
Main PCB P23
1
2
3
Sensor
(Brown)
(Black)
(Blue)
Signal/ Voltage (DC)
+5V
CLAMP
±0V
BAS-7610
6-36
6. ELECTRIC COMPONENTS
36.Jig pattern harness (S46588)
Main PCB P22
1
2
3
4
5
6
7
8
Pattern PCB
1
2
3
4
5
6
7
8
Signal
+12V
JP1
JP2
JP3
JP4
JP5
JP5
±0V
37.2-row sensor harness A (S46589)
2-row sensor harness B (S46702)
Sensor D-A96 assy (S38181)
Sensor D-7A1 assy (S38182)
2-row sensor harness A
2-row sensor harness B
2-row sensor
Main PCB P1
Relay
Relay
Relay
D-A96
D-7A1
1
2
3
4
5
6
7
1
2
3
4
5
6
7
1
2
3
4
5
6
7
1
2
3
4
5
6
7
1
2
3
-
1
2
3
Signal/ Voltage
(DC)
+5V
+24V
BOTTOM
±0V
+24V
SIDE
±0V
38.Folding clamp sensor (S46591)
Main PCB P15
1
2
3
4
5
6
7
8
9
10
11
12
6-37
Sensor
(Brown)
(Black)
(Blue)
(Brown)
(Black)
(Blue)
(Brown)
(Black)
(Blue)
(Brown)
(Black)
(Blue)
Folding clamp
Inner clamp
Center blade
Folding base
BAS-7610
Signal/ Voltage (DC)
+5V
OUT-CLAMP
±0V
+5V
IN-CLAMP
±0V
+5V
C-BLADE
±0V
+5V
FLD-BASE
±0V
6.ELECTRIC COMPONENTS
39.Main valve harness (S46656)
Main PCB P6
A1
A3
B1
A3
A2
A3
B2
A3
A4
B3
B4
B3
A6
A8
B6
A8
SMC
23
24
25
26
27
28
14
15
A
C
A
C
A
C
A
C
A
C
A
C
A
C
A
C
Signal/ Voltage (DC)
Thread wiper
+24V
Needle cooler
+24V
Presser foot
+24V
Zigzag
+24V
Thread tension release
+24V
2 step thread tension release
+24V
2-row changer 1
+24V
2-row changer 2
+24V
BAS-7610
6-38
6. ELECTRIC COMPONENTS
40.Folding clamp valve harness (S46657)
Main PCB P5
A1
A3
B1
B3
A2
A3
B2
B3
A4
A3
B4
B3
A5
A3
B5
B3
A6
A8
B6
A8
A7
A8
B7
A8
A9
A8
B9
B8
A10
B8
B10
B8
A11
B8
B11
A13
A12
A13
B12
A13
A14
A13
6-39
SMC
1A
1B
2A
2B
3A
3B
4A
4B
5
6
7
8
9
10
11
12
13
19
20
21
22
Signal/ Voltage (DC)
Folding clamp A
+24V
Folding clamp B
+24V
Inner clamp A
+24V
Inner clamp B
+24V
Center blade A
+24V
Center blade B
+24V
Sewing clamp A
+24V
Sewing clamp B
+24V
Folding base 10
+24V
Folding base 1.5
+24V
Label
+24V
Vacuum (Suction)
+24V
Rise-and-fall
+24V
Tucking blade 1
+24V
Tucking blade 2
+24V
Tucking blade 3
+24V
Tucking blade 4
+24V
Stacker wiper
+24V
Stacker bar inside
+24V
Stacker bar outside
+24V
Stacker roller
+24V
A
C
A
C
A
C
A
C
A
C
A
C
A
C
A
C
A
C
A
C
A
C
A
C
A
C
A
C
A
C
A
C
A
C
A
C
A
C
A
C
A
C
BAS-7610
6.ELECTRIC COMPONENTS
41.Area sensor harness (S46650)
Area sensor X (S46648)
Area sensor Y (S46649)
Area sensor harness
Main PCB P20 Relay A
Relay B
1
1
2
2
3
3
4
4
5
5
6
6
7
1
8
2
9
3
10
4
11
5
12
6
13
7
14
8
15
9
16
7
17
8
18
9
Area sensor X
Relay
Sensor
1
X+ (Brown)
2
X+ (Black)
3
X+ (Blue)
4
X- (Brown)
5
X- (Black)
6
X- (Blue)
7
XO (Brown)
8
XO (Black)
9
XO (Blue)
-
Area sensor Y
Relay
Sensor
1
Y+ (Brown)
2
Y+ (Black)
3
Y+ (Blue)
4
Y- (Brown)
5
Y- (Black)
6
Y- (Blue)
7
YO (Brown)
8
YO (Black)
9
YO (Blue)
Signal/ Voltage
(DC)
+24V
X over travel left
±0V
+24V
X over travel right
±0V
+24V
Y over travel up
±0V
+24V
Y over travel down
±0V
+24V
X home position
±0V
+24V
Y home position
±0V
42.Clamp in harness (S46652)
Clamp in sensor (S46651)
Clamp in harness
Main PCB P19
Relay
1
1
2
2
3
3
4
4
5
5
6
6
Clamp in sensor
Relay
Sensor
1
C1 (Brown)
2
C1 (Black)
3
C1 (Blue)
4
C2 (Brown)
5
C2 (Black)
6
C2 (Blue)
BAS-7610
Signal/ Voltage
(DC)
+24V
Clamp in 1
±0V
+24V
Clamp in 2
±0V
6-40
6. ELECTRIC COMPONENTS
6-8. Servo amplifier
6-8-1. Names of major parts
< Servo amplifier >
1782S
1
2
3
4
1783S
No.
1
2
3
4
6-41
Name, Use
Battery holder
The battery for position data preservation is contained absolutely.
It does not use by BAS-761, 7610.
Connector for battery (CON1)
The battery for position data preservation is connected absolutely.
It does not use by BAS-761, 7610.
Display
The state of servo and alarm No. are displayed by the 4-figure 7 segment LED.
Operation part
Operate state display, diagnosis, alarm, parameter setting.
MODE : The mode is changed.
UP, DOWN : The display and data in each mode are changed.
SET : The data of a parameter is set up.
BAS-7610
6.ELECTRIC COMPONENTS
5
6
10
7
8
9
11
12
13
No.
5
6
7
8
9
10
11
12
13
1784S
Name, Use
Input and output signal connector (CN1A)
A signal of main PCB is connected.
Input and output signal connector (CN1B)
A signal of main PCB is connected.
Usually, it is not used.
The connector for communication
It connects with PC or an analog monitor is outputted.
Rated plate
Charge lamp
The light is switched on when the electric charge exists in the main circuit.
* Under lighting -- an electric wire -- tying -- supporting -- etc. -- do not carry out
Detection dexterous connector
Servo motor encoder connector
The main circuit terminal (TE1)
An input power supply and a servo motor are connected.
Control circuit terminal (TE2)
A control circuit power supply is connected.
Protection grounding (PE) terminal
It is a grounding terminal.
< Servo motor >
Power supply cable
Encoder cable
Encoder
1785S
BAS-7610
6-42
6. ELECTRIC COMPONENTS
6-8-2.
Abnormalities and a measure
If abnormalities occur on servo amplifier or a motor (E-870, 880, 890), “AL. **” will be displayed on the display part of
servo amplifier. The meaning of an error code and the list of check items are as follows.
< Servo amplifier error code >
Error code
The contents of an error
AL. 10
Voltage is insufficient.
AL. 12
AL. 13
AL. 15
Memory problem 1
Clock problem
Memory problem 2
AL. 16
Encoder problem 1
AL. 17
PCB problem 2
AL. 19
Memory problem 3
AL. 20
Encoder problem 2
AL. 24
Motor output earth-fault
AL. 25
The absolute position was
disappeared.
AL. 30
Regeneration problem
AL. 31
Over speed
AL. 32
Over current
AL. 33
Over-voltage
AL. 35
Instruction pulse problem
AL. 37
Parameter problem
The main circuit element
overheating
AL. 45
6-43
AL. 46
Servo motor overheating
AL. 50
AL. 51
Over-load
AL. 52
An error is too large.
8.8.8.8
AL. E6
Watcher
Emergency stop
Check and measure
1.Power supply voltage is low. (The voltage between L1 - L2 is less
than 160V.)
2.There was an instant power failure.
3.Power supply ON was carried out immediately after the power
supply OFF.
Even if it removes connectors CN1A, CN1B and CN2, and carries
out power supply ON, alarm comes out. → Exchange the servo
amplifier.
1.The connector CN2 does not connect.
2.Malfunction of the encoder harness.
3.Failure of encoder. → Exchange the servo motor.
Even if it removes connectors CN1A, CN1B and CN2, and carries
out power supply ON, alarm comes out. → Exchange the servo
amplifier.
1.The encoder harness of the motor side does not connect.
2.Malfunction of the encoder harness.
1.The power supply input line L1 or L2, and the servo motor output
line U, V or W touch
2.The power supply input line L1 or L2, or the servo motor output
line U, V or W deteriorated. → Exchange their line of the servo
motor.
Drop voltage of the capacitor in a encoder. → Exchange the servo
motor.
1.Continuation operation of the power supply voltage is carried out
in the high state. (The voltage between L1 - L2 is more than
253V.)
2.The permission regeneration electric power was exceeded.
3.Turn the power OFF, and wait five minutes.
1.Failure of encoder. → Exchange the servo motor.
2.Problem of servo amplifier parameter. → Exchange the servo
amplifier.
1.Output line of servo motor U, V or W touch or earth-faulted.
2.Even if it removes connectors CN1A, CN1B and CN2, and carries
out power supply ON, alarm comes out. → Exchange the servo
amplifier.
3.The over-current detection circuit incorrect-operated by the outer
noise.
1.Power supply voltage is high. (The voltage between L1 - L2 is less
than 260V.)
2.Failure of built-in regeneration resistor. → Exchange the servo
amplifier.
1.Malfunction of servo harness.
2.The noise mixed in the instruction pulse.
3.Failure of main PCB.
Exchange the servo amplifier.
Exchange the servo amplifier.
1.The circumference temperature of a servo motor is over 40
degrees.
2.Problem in attachment of a servo motor.
3.The heat protector of a servo motor broke down. → Exchange the
servo motor.
1.The feeding unit collided with the obstacle.
2.The connection mistake of a servo motor output line U, V, W.
3.Failure of encoder. → Exchange the servo motor.
1.Harness does not connect, or connection mistake of harness.
2.The torque by the shortage of power supply voltage is insufficient.
3.The feeding unit collided with the obstacle.
4.Failure of encoder. → Exchange the servo motor.
Exchange the servo amplifier.
Poor connection of harness, or disconnection
BAS-7610
6.ELECTRIC COMPONENTS
6-8-3. Exchange the servo amplifier
Note
Servo amplifier does not operate, if the parameter is not set up.
When you exchange servo amplifier, check that the parameter is set as servo amplifier. As for the servo amplifier with
which the parameter is set up, the seal is stuck on the lower part of the side.
Although the servo amplifier X and Y are the same form, each parameter setup differs. It cannot be used being able
to change.
1904S
Remove connector CN1A, 1B (servo harness), and CN2 (encoder harness).
Open the cover of servo amplifier and remove the terminal U, V and W, and the ground (E) (motor power harness).
Remove the terminal L1, L2 (servo power harness).
Remove the green connector D. (The line L11 and L21 does not remove.)
Exchange the servo amplifier.
Remove the green connector F from new servo amplifier.
Each harness is attached like origin. A terminal and a connector attach a position to prevent mistakes.
Note that form is [ connector CN1A, 1B (servo harness), and CN2 (encoder harness) ] the same.
BAS-7610
6-44
6. ELECTRIC COMPONENTS
6-9. DIP switches
Note
Always turn off the power supply before changing any of the DIP switch settings.
The function of the DIP switches are subject to changes without notification.
If DIP switches B-1 to B-6 are ON, be sure to check the cylinder movement and data version thoroughly. In some
cases a peculiar error may be displayed.
< DIP switch positions >
DIP switch A
DIP switch B
DIP switch C
DIP switch D
DIP switch E
1786S
1787S
< Functions of operation panel DIP switches >
DIP switch A
No.
1
2
3
4
5
6
7
8
Motion when set to ON
In automatic, pattern matching and label attachment modes, the work clamp stops momentarily before feeding to
the home position.
Low feeding speed (Machine head → Folder)
Low feeding speed (Folder → Machine head)
Not available (Should be set to OFF)
Not available (Should be set to OFF)
Not available (Should be set to OFF)
After the power is turned on, three pockets are sewn at 3,000 rpm. (The measure against a cold district)
Machine head operation check, stacker operation check
< Functions of DIP switches on main circuit board >
DIP switch B
No.
1
2
3
4
5
6
7
8
6-45
Motion when set to ON
Mismatches between folder numbers and program numbers are ignored
Clamp vertical sensor is ignored
Needle racking cylinder sensor is ignored
Double cylinder sensor is ignored
24V/36V power supply voltage check is ignored
Single and double clamp data check is ignored
Not available (Should be set to OFF)
Not available (Should be set to OFF)
BAS-7610
6.ELECTRIC COMPONENTS
DIP switch C
No.
1
2
3
4
5
6
7
8
Motion when set to ON
7 stitches counted before upper thread breakage is detected
OFF : 3 stitches counted before upper thread breakage is detected
After sewing, the work clamp and machine head return to the previous standby position, even if folding has been
completed.
Movement to the feed destination occurs immediately when the program data requires it.
After sewing, the timer starts 0.2 seconds after the work clamp is raised.
Not available (Should be set to OFF)
Not available (Should be set to OFF)
Not available (Should be set to OFF)
Not available (Should be set to OFF)
DIP switch D
No.
1
2
3
4
5
6
7
8
Motion when set to ON
The gauge standby position is always forward.
When OFF : The gauge standby position is at the back.
Continuous label attachment mode
When OFF : Alternate label attachment mode
Folder operates at low speed
Folder procedure changes
Folding is released when base 1.5 is raised
Not available (Should be set to OFF)
Not available (Should be set to OFF)
Not available (Should be set to OFF)
DIP switch E
No.
1
2
3
4
5
6
7
8
Motion when set to ON
Not available (Should be set to OFF)
Not available (Should be set to OFF)
Not available (Should be set to OFF)
Not available (Should be set to OFF)
Not available (Should be set to OFF)
Not available (Should be set to OFF)
Not available (Should be set to OFF)
Not available (Should be set to OFF)
BAS-7610
6-46
6. ELECTRIC COMPONENTS
6-10. Error code
When there is the possibility that harness is faulty, check connections and pin omissions, etc. with reference to "6-7-2.
Harness connecting pin number table”.
It is possible for it to be made not to indicate by setup of a DIP switch by error provisionally depending on the contents of
an error. However, set up after checking the safety of operation of a sewing machine in that case. Moreover, be sure to
remove the factor of abnormalities immediately and return a setup.
Error
code
E-500
E-501
E-502
E-503
E-504
E-505
E-510
E-511
E-512
E-513
E-520
E-530
E-535
6-47
Contents
Disposal / factor / check
• Primary side input voltage is high.
24V • The secondary side connection mistake of the power supply unit
transformer 2
• Evasion by DIP switch B-5 ON is possible.
• The fuse F2 on a power supply board has run out.
• Primary side input voltage is low.
The abnormalities in 24V
• The secondary side connection mistake of the power supply unit
system voltage (descent)
transformer 2
• Evasion by DIP switch B-5 ON is possible.
The abnormalities in 36V • Primary side input voltage is high.
system voltage (rise)
• Evasion by DIP switch B-5 ON is possible.
• The fuse F3 on a power supply board has run out.
• Primary side input voltage is low.
The abnormalities in 36V
• The secondary side connection mistake of the power supply unit
system voltage (descent)
transformer 2
• Evasion by DIP switch B-5 ON is possible.
The abnormalities in primary • Primary side input voltage is high.
side voltage (rise)
• The primary side connection mistake of a transformer 1
• Primary side input voltage is low.
The abnormalities in primary
• The primary side connection mistake of a transformer 1
side voltage (descent)
• The fuses F2 and F3 on a power supply board have run out.
The abnormalities in
system voltage (rise)
The needle bar is in positions • Turn the machine pulley to move the needle bar to its upper needle
position.
other than an upper needle
position. (WARNING)
• Malfunction of machine sensor (needle up)
<Correct detection>
• Upper thread has broken.
<Incorrect detection (Upper thread has not broken.)>
• Poor adjustment of upper thread detector.
Upper
thread
breakage
• Poor adjustment or dirt of an optical fiber tip position.
(WARNING)
• Malfunction of upper thread detector
• Malfunction of machine sensor harness A or B.
• There are few stitch numbers before upper thread breakage is detected.
→DIP switch C-1 turn ON.
<Correct detection>
• A number is made in match.
* Turn ON DIP switch B-1 and carry out error disregard.
(A data check is surely carried out.)
Sewing clamp and sewing
<Incorrect detection (Recognition of an actual jig pattern and a jig pattern
program number do not match.
sensor is different.)>
• Malfunction of jig pattern PCB.
• Dirt is in photo sensors on jig pattern PCB.
• Malfunction of jig pattern harness.
Retractable are for double (0 to
• The check of data (Input the double switching command.)
31) but data does not contain a
* Turn ON DIP switch B-6 and carry out error disregard.
double switching command.
(A data check and sewing clamp are surely carried out.)
(Model No. 0 - 31)
BAS-7610
6.ELECTRIC COMPONENTS
E-536
E-540
E-550
E-560
E-570
E-580
E-600
E-700
E-701
E-710
E-711
E-720
E-730
E-740
E-750
Model numbers are for single
• The check of data (Delete the double switching command.)
(32 - 63) but data does not
* Turn ON DIP switch B-6 and carry out error disregard.
contain a single switching
(A data check and sewing clamp are surely carried out.)
command. (Model No. 32 - 63)
<When a motor rotates>
Machine head synchronization • Malfunction of machine sensor (synchronizing).
sensor error or machine head • Malfunction of machine sensor harness.
motor error
<When a motor does not rotate>
• Malfunction of machine motor or its servo amplifier.
• Malfunction of machine sensor ( “needle up” or “synchronizing” ).
• Malfunction of machine sensor harness A or B.
• Old servo harness Z is used. (Phenomenon : A sewing machine does
not carry out reverse needle up after the thread trimming. And it rotates
Needle up stop error
and stops only 2 or 3 times at a low speed.)
• Poor adjustment of sensor dog.
• Poor adjustment of thread trimmer cam.
• Upper shaft of the sewing machine is heavy.
• Malfunction of machine motor.
<Presser foot operates>
• Poor connection of machine sensor harness A.
• Malfunction or poor connection of presser foot sensor of machine
Malfunction of presser foot
sensor harness B.
cylinder or sensor
<Presser foot does not operate>
• Malfunction of solenoid valve No.25.
• Poor connection of main valve harness No.25.
<2 row change operates>
• Poor connection of 2 row sensor harness A or B.
• Malfunction or poor connection of two cylinder sensors (D-A96 or D7A1).
2 row sensor error
• Evasion by DIP switch B-4 ON is possible.
<2 row change does not operate>
• Malfunction of solenoid valve No.14 or 15.
• Poor connection of main valve harness No.14 or 15.
• Mechanical poor adjustment of a clamp
<Zigzag operates>
• Poor connection of machine sensor harness A.
• Malfunction or poor connection of zigzag sensor of machine sensor
Malfunction of zigzag cylinder
harness B.
or sensor
<Zigzag does not operate>
• Malfunction of solenoid valve No.26.
• Poor connection of main valve harness No.26.
No sewing data
• Read data.
Read error of floppy disk
• Malfunction of the floppy disk.
• Disconnection or poor connection of FDD harness or FDD power supply
Write error of floppy disk
harness.
• Failure of FDD.
No sewing data for number
• Check the floppy disk or specified number.
specified.
Data writing carried out with no
(Omission)
sewing data
No disk in FDD.
(Omission)
Floppy disk is write-protected.
• Check the write protector of the floppy disk.
Insufficient free space on floppy
• Check the floppy disk.
disk
• The floppy disk is protected.
Floppy
disk
cannot
be
• Malfunction of the floppy disk.
formatted.
• Failure of FDD.
BAS-7610
6-48
6. ELECTRIC COMPONENTS
E-780
E-781
E-800
E-801
E-802
E-803
E-810
E-820
E-821
E-830
E-840
E-850
E-860
E-870
E-880
E-890
E-891
E-900
E-901
E-902
6-49
Sewing data exceeds sewing
area
No end code in sewing data
EMERGENCY STOP button
pressed.
EMERGENCY STOP button
pressed during sewing.
(Omission)
(Omission)
(Omission)
(Omission)
EMERGENCY STOP button
• Reset is impossible. Turn the power OFF.
pressed during programming.
EMERGENCY STOP button
(Omission)
pressed during programming.
• Disconnection of switch box harness.
EMERGENCY STOP button is
• Poor connection of EMERGENCY STOP switch.
not connected.
• Poor connecting point of EMERGENCY STOP switch.
• Air pressure is low.
No air, or air chuck is turned
• The poor setting of an air pressure switch (0.35 Mpa)
OFF
• Malfunction of the mechanical valve
No air, or air chuck is turned
• Reset is impossible. Turn the power OFF.
OFF
X right over travel switch
• The sewing clamp is in the position of over travel.
activated
• Disconnection or poor connection of area sensor harness or area sensor X.
X left over travel switch
• Poor adjustment of the position of sensor.
activated
Y up over travel switch
• The sewing clamp is in the position of over travel.
activated
• Disconnection or poor connection of area sensor harness or area sensor Y.
Y down over travel switch
• Poor adjustment of the position of sensor.
activated
<Check the error indicator of the servo amplifier.>
X motor problem
• Primary side input voltage is high or low.
Y motor problem
the load by the defect of low temperature or malfunction of the
mechanism.
• Continuation high-speed rotation at the time of high temperature
Machine head motor (Z)
(especially machine head (Z) motor)
problem
• Disconnection or poor connection of servo harness, encoder harness,
servo power harness or servo motor power harness
• Malfunction of the servo motor (encoder) or the servo amplifier.
Machine head motor (Z)
• Disconnection or poor connection of encoder harness Z.
problem
• Disconnection or poor connection of servo harness Z.
(The XY direction position gap
• Malfunction of the main PCB.
at the time of sewing)
<Cylinder operates>
• Disconnection or poor connection of the folding clamp sensor.
Malfunction of folding clamp • Poor adjustment of the folding clamp sensor.
cylinder or sensor
<Cylinder does not operate>
• Malfunction of solenoid valve No.1A or 1B.
• Poor connection of folding clamp valve harness No.1A or 1B.
<Cylinder operates>
• Disconnection or poor connection of the folding clamp sensor.
Malfunction of inner clamp • Poor adjustment of the folding clamp sensor.
cylinder or sensor
<Cylinder does not operate>
• Malfunction of solenoid valve No.2A or 2B.
• Poor connection of folding clamp valve harness No.2A or 2B.
<Cylinder operates>
• Disconnection or poor connection of the folding clamp sensor.
Malfunction of center blade • Poor adjustment of the folding clamp sensor.
cylinder or sensor
<Cylinder does not operate>
• Malfunction of solenoid valve No.3A or 3B.
• Poor connection of folding clamp valve harness No.3A or 3B.
BAS-7610
6.ELECTRIC COMPONENTS
E-903
E-910
E-920
E-960
E-970
<Cylinder operates>
• Disconnection or poor connection of the folding clamp sensor.
Malfunction of folding base • Poor adjustment of the folding clamp sensor.
cylinder or sensor
<Cylinder does not operate>
• Malfunction of solenoid valve No.5 or 6.
• Poor connection of folding clamp valve harness No.5 or 6.
X axis positioning error
• Slack of a feed timing belt
• The backlash of a feeding gear is large.
• Disconnection or poor connection of the area sensor harness or the
Y axis positioning error
area home position sensor.
• Poor adjustment of the sensor position
The abnormalities in clamp in • Disconnection or poor connection of the clamp in sensor
sensor
• Poor adjustment of the sensor dog.
<Cylinder operates>
• Disconnection or poor connection of the work clamp sensor.
• Poor adjustment of the work clamp sensor.
Malfunction of work clamp
• Evasion by DIP switch B-2 ON is possible.
cylinder or sensor
<Cylinder does not operate>
• Malfunction of solenoid valve No.4A or 4B.
• Poor connection of folding clamp valve harness No.4A or 4B.
BAS-7610
6-50
6. ELECTRIC COMPONENTS
6-11. Exchange of PCB
6-11-1. Main PCB
After main PCB exchange should initialize a memory.
1. All the connectors that open a control box and are connected to the main PCB are removed.
Note
When remove connectors, do not pull a harness portion. The harness may disconnect.
2. Remove the main PCB from six supports.
3. Remove the two PROMs from the removed main PCB and attach in the new main PCB.
4. Install the main PCB to the six supports. It attaches so that the main PCB may not be sagged.
5. Connectors are attached like origin.
6. While holding down “RESET” switch, turn ON the power switch. A memory is initialized.
6-11-2. Panel PCB
After panel PCB exchange should initialize a panel.
1. All the connectors that open a panel and are connected to the panel PCB are removed.
Note
When remove connectors, do not pull a harness portion. The harness may disconnect.
2. Remove eight screws and remove the panel PCB.
3. Remove the PROM from the removed panel PCB and attach in the new panel PCB.
4. Install the panel PCB to the panel cover using eight screws.
5. Connectors are attached like origin.
6. While holding down “STEP” switch, turn ON the power switch. A panel is initialized.
7. Turn OFF the power switch. While holding down “FOLDER MODE” switch, turn ON the power switch. A display
language setting screen is displayed on the operating panel. A display language is set up.
8. After positioning operation finishes, a setup of the date or time is performed.
9. Adjusting the liquid crystal display. Adjustment opens the cover of the panel right and is performed by turning volume
with a previous thin plus screwdriver etc.
LCD contrast adjustment volume
1903S
6-51
BAS-7610
6.ELECTRIC COMPONENTS
BAS-7610
6-52
6. ELECTRIC COMPONENTS
6-12. Control circuit block diagram
1860S
6-53
BAS-7610
6.ELECTRIC COMPONENTS
1861S
BAS-7610
6-54
6. ELECTRIC COMPONENTS
1862S
6-55
BAS-7610
6.ELECTRIC COMPONENTS
1863S
BAS-7610
6-56
7. FOLDING MACHINE
7. FOLDING MACHINE
7-1. Basic adjustments for delivery
There is not perfect compatibility between the folding machine and the sewing machine. A folding machine which is
ordered at the same time as the sewing machine does not have to be readjusted much because the folding machine has
been adjusted to the sewing machine at shipping. But a folding machine which is ordered separately needs to be
readjusted when delivered because it has been adjusted to a different sewing machine at shipping.
Never loosen the screws securing the sewing clamp (Figure 3), which is attached using a gauge.
Adjustment is performed by loosening the screws securing the center blade assembly (Figure 1), the inner clamp
assembly (Figure 2) and the folding clamp assembly (Figure 4). The adjustment procedures are described below.
1. Supply air, then turn ON the power. A home position is detected.
2. Attach the folding machine to the sewing machine, then lock the folding machine.
3. Perform the test mode operation to check that the needle does not contact the sewing clamp (Figure 3). While
performing the test, never sew the body.
4. If the needle does not descend into the groove center of the sewing clamp (Figure 3), shift the programmed pattern in
parallel or reprogram partially.
5. Place the body under the center blade (Figure 1). In the step mode, when the sewing clamp (Figure 3) covers the
center blade (Figure 1), adjust the center blade (Figure 1) so that its edge comes to the approximate groove-center of
the sewing clamp (Figure 3). (The position of X directions can be adjusted by the program.) Refer to instruction manual
of programmer.
6. The inner clamp (Figure 2) and the folding clamp (Figure 4) must be adjusted against the center blade (Figure 1).
7. Actually sew the pockets. If a problem occurs, see the following pages to adjust the parts.
Ex. Three corner (home plate) model
Center blade assembly
Plate spring R 0.8
Connecting pin
Connecting block
Center blade 3-corner J
Figure 1
Plate spring L 0.8
Bolt 4X20
Inner clamp assembly
Connecting pin
1789S
Inner clamp 3-corner J
Bolt 5X25
Inner clamp U 1
Folding plate supporter
Inner clamp U 3
Folding plate supporter
Figure 2
Folding plate supporter
Connecting block
Inner clamp U 2
BAS-7610
7-01
Inner clamp U 3
Folding plate supporter
1790S
7. FOLDING MACHINE
Sewing clamp assembly
(Retractable type)
Bolt 4X35
Sewing clamp L 3-corner J
Connecting block
1793S
Figure 3
Sewing clamp assembly
Bolt 4X10
Sewing clamp 3-corner J
Connecting block
Folding clamp assembly
Bolt 4X8
Connecting block SR assembly
Bolt 5X25
1791S
Adjusting screw
Setting plate
Folding clamp 3-corner J
Figure 4
Tucking blade R-3J
Tucking blade RD-3J
Tucking blade LD-3J
Chamfering blade LJ Tucking blade L-3J
Chamfering blade RJ
Connecting block SL assembly
1792S
BAS-7610
7-02
7. FOLDING MACHINE
7-2. Valve
1354S
1
2
3
4
5
Folding clamp
Inner clamp
Center blade
Sewing clamp
Folding base (10 mm-stroke)
6
7
8
9
Folding base (1.5 mm-stroke)
Label attachment device (Option)
Suction (Vacuum)
Slide plate elevator
1788S
1387S
10
11
12
Folder 1
Folder 2
Folder 3
13
14
15
Folder 4
Retractable type sewing clamp
Retractable type sewing clamp
Only X1.7 rotary hook
1356S
19
20
21
22
23
Stacker wiper
Stacker bar inside
Stacker bar outside
Roller
Rotary hook blow
24
25
26
27
28
BAS-7610
7-03
Needle blow
Presser foot
Zigzag
Main tension (X1.7 rotary hook)
2 step tension
7. FOLDING MACHINE
7-3. Operation order and connection of folding machine
The multi connectors and valves (page 7-03) connections are as follows.
The valve operation order : Valves 10 → 13 turn ON in turn, and they turn OFF in order 10 → 11 → 13 → 12.
Speed controller
1363S
Multi connector No.
1
2
3
4
5
6
8
9
10
11
12
Valve No. and Port
10-B
10-A
11-B
11-A
Speed controller
Speed controller
Speed controller
12-B
12-A
13-B
13-A
Multi connector No.
1
2
3
4
5
6
8
9
10
11
12
Cylinder No. and Port
(1)B, (6)B
(1)A, (6)A
(4)B
(4)A
Speed controller
Speed controller
Speed controller
(3)B
(3)A
(2)B, (5)B
(2)A, (5)A
Multi connector No.
1
2
3
4
5
6
8
9
10
11
12
Cylinder No. and Port
(1)B, (5)B
(1)A, (5)A
Cap
Cap
Speed controller
Speed controller
Speed controller
(3)B
(3)A
(2)B, (4)B
(2)A, (4)A
Three corner (home plate) model
(1)
(6)
(2)
(5)
(3)
(4)
1794S
Two corner (square) model
(1)
(5)
(2)
(4)
(3)
1795S
BAS-7610
7-04
7. FOLDING MACHINE
Four corner model
(1)
(7)
(2)
(6)
(5)
(3)
(4)
1796S
Multi connector No.
1
2
3
4
5
6
8
9
10
11
12
Cylinder No. and Port
(1)B, (7)B
(1)A, (7)A
(2)B, (4)B, (6)B
(2)A, (4)A, (6)A
Speed controller
Speed controller
Speed controller
(3)B, (5)B
(3)A, (5)A
Cap
Cap
Multi connector No.
1
2
3
4
5
6
8
9
10
11
12
Cylinder No. and Port
(1)B, (7)B
(1)A, (7)A
(2)B, (4)B, (6)B
(2)A, (4)A, (6)A
Speed controller
Speed controller
Speed controller
(3)B, (5)B
(3)A, (5)A
Cap
Cap
Multi connector No.
1
2
3
4
5
6
8
9
10
11
12
Cylinder No. and Port
(1)B, (5)B, (8)B
(1)A, (5)A, (8)A
(2)B, (4)B, (7)B
(2)A, (4)A, (7)A
Speed controller
Speed controller
Speed controller
(3)B, (6)B
(3)A, (6)A
Cap
Cap
Multi connector No.
1
2
3
4
5
6
Cylinder No. and Port
(1)A
(1)B
(2)A
(2)B
Blanking plate
Blanking plate
Round corner model
(7)
(1)
(6)
(2)
(5)
(3)
(4)
1797S
Ship bottom (two arcs and point) model
(8)
(1)
(7)
(2)
(6)
(3)
(4)
(5)
1798S
Retractable type sewing clamp
(1)
(2)
1799S
BAS-7610
7-05
7. FOLDING MACHINE
7-4. Adjustment
Problems are described on page 7-07. During actual use, some of the problems may happen simultaneously. Solve the
biggest one first.
Reprogramming must be done only when folder adjustment is not enough to solve the problems.
7-4-1. Fine adjustments
The function which allows fine adjustment of the folding clamp height
The purpose of this function is to reduce the clearance between the body and the tucking blades when the folding clamp
falls to its lowest position. If the clearance is large, the pocket outline may enlarge when the tucking blades move in the
direction of the arrow. Also, if the clearance is too small, the tucking blades come in contact with the body. In this case,
when the tucking blades move in the direction of the arrow, the tucking blades hook the body and the pocket material is
improperly folded in the flap margins. R and L chamfering blades do not operate smoothly. Adjust the height of the
adjusting screw and set the clearance as small as possible, while preventing the above-mentioned problems.
Connecting block
SR assembly
Bolt 5X25
Bolt 4X8
Adjusting screw
Setting plate
Folding clamp 3-corner J
Tucking blade
Folding plate
Inner clamp
Tucking blade R-3J
Tucking blade RD-3J
Tucking blade LD-3J
Chamfering blade LJ
Tucking blade L-3J
Chamfering blade RJ
Needle plate
Clearance
Body cloth
Connecting block SL assembly
1792S
Center blade
Inner clamp blade
1800S
Folding clamp assembly
BAS-7610
7-06
7. FOLDING MACHINE
7-4-2. Characteristic troubles of three corner pocket model
1.Seam deviates down 2.Seam deviates up in 3.The seam margin at 4.Seam deviates to 5.Seam deviates to
in parallel.
parallel (reverse case the pocket top is
the left in parallel.
the right in parallel.
to 1).
different.
1801S
6.Partial seam deviates
in parallel.
1806S
1803S
1802S
1808S
1807S
11.The folded line at 12.The seam margin 13.The pocket outline
is curved.
at the bottom is too
the bottom corner
small.
is round.
1811S
1805S
1804S
7.The stitch at the bottom 8.The seam margin at 9.The seam margin at 10.The seam margin is
too small at the
corner is not aligned the bottom is large.
one side of the
corners on both
with the center line of
bottom is large.
sides.
the folded pocket.
1812S
1813S
1809S
14.The pocket
opening is wide.
1814S
1810S
15.The pocket
opening is not
tucked in.
1815S
16.The flap margin at 17.Material protrudes 18.The pocket pattern is 19.The pocket pattern is 20.The needle location
not aligned with the
not aligned with the
from the pocket
the pocket opening
at the corners is
body pattern (when the
body pattern (when
opening.
is out of the pocket.
improper.
pattern is horizontal).
the pattern is vertical).
1816S
1817S
1818S
1819S
1820S
21.The pocket top is 22.The seam margin 23.The pocket has 24.The stitch pitch is 25.The pocket has
skipped stitches or
narrow.
is large.
skipped stitches at
uneven at the
thread breakage at
the sewing start.
corners.
the pocket top.
1821S
26.The seam margin
is large. (Heavy
materials)
1826S
1822S
1823S
27.The distance between
the inner row and the
outer row stitches is
irregular.
1827S
BAS-7610
7-07
1824S
1825S
7. FOLDING MACHINE
1. Seam deviates down in parallel.
<Cause>
A. The pocket material is improperly folded because the center blade is positioned above the correct
position.
After loosening the eight bolts (1), shift the center blade forward in the loose holes of the connecting blocks
(center blade) then fasten the bolts (1).
At this time, the inner clamp assembly and the folding clamp assembly may both need to be shifted forward at
the same time.
Connecting pin
Connecting block
Connecting pin
Plate spring R 0.8
Inner clamp 3-corner J
Bolt 5X25
Folding plate supporter
Inner clamp U 1
Inner clamp U 3
Center blade 3-corner J
Folding plate
supporter
(1) Bolt 4X20
Plate spring L 0.8
Center blade assembly
Connecting block
1789S
Connecting block SR assembly
Bolt 5X25
Inner clamp U 2
Folding plate
supporter
Inner clamp assembly
Bolt 4X8
Folding plate
supporter
Inner clamp U 3
1790S
Adjusting screw
Setting plate
Folding clamp 3-corner J
Chamfering blade RJ
Chamfering blade LJ
Tucking blade R-3J
Tucking blade RD-3J
Tucking blade LD-3J
Tucking blade L-3J
Connecting block SL assembly
1792S
Folding clamp assembly
BAS-7610
7-08
7. FOLDING MACHINE
B. The pocket material or body strays when the center blade retracts from the pocket.
B-1. The center blade has burrs.
B-2. When the power is turned OFF, the clearance between the center blade bottom surface and the needle
plate top surface is not correct. A small clearance moves the pocket material and the body
simultaneously; a large one causes only the pocket material to stray backward.
Loosen the right and left bolts and the set screw, then adjust the center blade height by rotating the adjust
screws. One turn raises or lowers the inner clamp lever by 1 mm, and raises or lowers the center blade by 2 mm.
When the center blade is at its lowest position and lightly presses the body, make sure that some resistance can
be felt in the front of the center blade.
The detailed adjustment procedures are described on “5-12. Adjusting the folding clamp”.
Rod nut
Adjust screw
Set screw
Bolt
1828S
B-3. The sewing clamp assembly lightly presses the folded pocket, or descends slowly.
Remove valve cover. Set the pressure of the sewing clamp assembly to 0.15 - 0.20 MPa by adjusting the
regulator in the figure on the left; excessively high pressure may make the material stray while the material is
sewn or carried. Be sure to check that the pressure is proper by pressing the valves 4A and 4B alternately by
hand.
When the sewing clamp assembly descends slowly, adjust the speed control of the valve 4A. If the assembly
descends too early, the pocket material may be improperly folded in the flap margins.
1387S
1388S
B-4. The sponge attached underneath the sewing clamp assembly near the operator is improperly stuck.
C. Plate spring R and L in the center blade assembly and the inner clamp blades in the inner clamp
assembly are improperly attached.
D. Program defect
Reprogram to shift the programmed pattern in parallel when the seam deviation is small.
BAS-7610
7-09
7. FOLDING MACHINE
2. Seam deviates up in parallel (reverse case to 1).
<Cause>
A. The pocket material is improperly folded because the center blade is positioned above the correct
position.
After loosening the eight bolts (1), shift the center blade backward in the loose holes of the connecting blocks
(center blade), then fasten the bolts (1).
At this time, the inner clamp assembly and the folding clamp assembly may need to be shifted backward
simultaneously.
Connecting pin
Connecting block
Plate spring R 0.8
Center blade 3-corner J
(1) Bolt 4X20
Plate spring L 0.8
1789S
Center blade assembly
Connecting pin
Inner clamp 3-corner J
Bolt 5X25
Inner clamp U 1
Connecting block SR assembly
Bolt 5X25
Bolt 4X8
Folding plate supporter
Adjusting screw
Setting plate
Folding clamp 3-corner J
Inner clamp U 3
Folding plate
supporter
Chamfering blade RJ
Chamfering blade LJ
Connecting block
Inner clamp U 2
Folding plate
supporter
Folding plate
supporter
Inner clamp U 3
1790S
Inner clamp assembly
Tucking blade R-3J
Tucking blade RD-3J
Tucking blade LD-3J
Tucking blade L-3J
Connecting block SL assembly
1792S
Folding clamp assembly
B. Plate spring R and L in the center blade and the inner clamp blades in the inner clamp assembly
are improperly attached.
C. Program defect.
Reprogram to shift the programmed pattern in parallel when the seam deviation is small.
BAS-7610
7-10
7. FOLDING MACHINE
3. The seam margin at the pocket top is different.
<Cause>
A. The pocket material is improperly set.
Set the pocket material correctly up to plate spring R and L.
Center blade 3-corner J
Plate spring R0.8
Pocket material
Plate spring L0.8
1829S
B. Plate spring R and L are improperly adjusted.
Adjust the plate spring positions by loosening their two screws (1). At this time, the plate spring must be centered
in the grooves of the center blade.
(1)
1829S
C. The pressure of plate spring R and L are too high.
Bend the plate spring upward to decrease the spring pressure.
7-11
BAS-7610
7. FOLDING MACHINE
4. Seam deviates to the left in parallel.
<Cause>
A. The pocket material is improperly folded because the center blade is attached to the right of the
correct position.
After loosening the eight bolts (1), shift the center blade to the left in the loose holes of the connecting blocks
(center blade), then fasten the bolts (1). At this time, the inner clamp assembly and the folding clamp assembly
might need to be shifted to the left simultaneously.
Connecting pin
Connecting block
Plate spring R 0.8
Center blade 3-corner J
(1) Bolt 4X20
Plate spring L 0.8
Center blade assembly
1789S
Connecting block SR assembly
Bolt 5X25
Connecting pin
Inner clamp 3-corner J
Bolt 5X25
Connecting block
Inner clamp U 1
Inner clamp U 2
Adjusting screw
Setting plate
Folding clamp 3-corner J
Folding plate supporter
Folding plate
supporter
Inner clamp assembly
Bolt 4X8
Inner clamp U 3
Chamfering blade RJ
Folding plate
supporter
Chamfering blade LJ
Tucking blade R-3J
Tucking blade RD-3J
Tucking blade LD-3J
Tucking blade L-3J
Folding plate
supporter
Inner clamp U 3
Connecting block SL assembly
1790S
Folding clamp assembly
1792S
B. Program defect
Reprogram to shift the programmed pattern in parallel when the seam deviation is small.
BAS-7610
7-12
7. FOLDING MACHINE
5. Seam deviates to the right in parallel.
<Cause>
A. The pocket material is improperly folded because the center blade is attached to the right of the
correct position.
After loosening the eight bolts (1), shift the center blade to the right in the loose holes of the connecting blocks
(center blade), then fasten the bolts (1).
At this time, the inner clamp assembly and the folding clamp assembly might need to be shifted to the right
simultaneously.
Connecting pin
Connecting block
Plate spring R 0.8
Center blade 3-corner J
(1) Bolt 4X20
Plate spring L 0.8
Center blade assembly
Connecting pin
1789S
Connecting block SR assembly
Bolt 5X25
Bolt 4X8
Adjusting screw
Setting plate
Folding clamp 3-corner J
Inner clamp 3-corner J
Bolt 5X25
Inner clamp U 1
Folding plate supporter
Inner clamp U 3
Folding plate
supporter
Connecting block
Inner clamp U 2
Folding plate
supporter
Tucking blade R-3J
Tucking blade RD-3J
Tucking blade LD-3J
Chamfering blade LJ
Tucking blade L-3J
Chamfering blade RJ
Folding plate
supporter
Inner clamp U 3
Connecting block SL assembly
1790S
Inner clamp assembly
Folding clamp assembly
1792S
B. The body strays to the left while the sewing clamp assembly is moving.
If the needle plate has burrs, remove the burrs and buff the needle groove of the needle plate.
Level the steps on both sides of the needle groove of the needle plate.
• Remove valve cover. Set the pressure of the sewing clamp assembly to 0.15 - 0.20 MPa by adjusting the
regulator in the figure on the left; excessively high pressure might make the material stray while the material is
sewn or carried. Be sure to check that the pressure is proper by pressing the valves 4A and 4B alternately by
hand.
•
1387S
1388S
C. Program defect
Reprogram to shift the programmed pattern in parallel when the seam deviation is small.
7-13
BAS-7610
7. FOLDING MACHINE
6. Partial seam deviates in parallel.
<Cause>
A. The inner clamp blades are improperly positioned.
The seam margin is large.
This happens when the clearance between the center blade edge and the inner clamp blades is too small or
too large, or when the inner clamp blades strike the center blade. Adjust the clearance width to the pocket
material thickness + α, as shown in the figure on the left.
• The seam margin is small.
Increase the clearance between the center blade edge and the inner clamp blades.
•
Material thickness + α
Connecting pin
Connecting block
Connecting pin
Plate spring R 0.8
1830S
Inner clamp 3-corner J
Bolt 5x25
Inner clamp U 1
Folding plate supporter
Inner clamp U 3
Center blade 3-corner J
(1) Bolt 4X20
Plate spring L 0.8
Center blade assembly
Folding plate
supporter
Connecting block
1789S
Inner clamp U 2
Folding plate
supporter
Folding plate
supporter
Inner clamp U 3
1790S
Inner clamp assembly
B. The clearance between tucking blades R, L, RD and LD of the folding clamp assembly and the
center blade.
The seam margin is large.
Reduce the clearance between the tucking blades and the center blade.
At this time, be sure not to move the tucking blades back and forth or side to side.
• The seam margin is small.
Enlarge the clearance between the tucking blades and the center blade.
At this time, be sure not to move the tucking blades back and forth or side to side.
•
Connecting block SR assembly
Bolt 5X25
Bolt 4X8
Adjusting screw
Setting plate
Folding clamp 3-corner J
Tucking blade
Chamfering blade RJ
Clearance
Chamfering blade LJ
Tucking blade R-3J
Tucking blade RD-3J
Tucking blade LD-3J
Tucking blade L-3J
Center blade
Connecting block SL assembly
1831S
Folding clamp assembly
BAS-7610
1792S
7-14
7. FOLDING MACHINE
C. Tucking blades R, L, RD and LD have burrs.
Remove the burrs and buff the tucking blades.
D. Because tucking blades R, L, RD and LD are attached below the correct position, the pocket
material strays with the body when the tucking blades retract.
Raise and reattach the tucking blades. Be sure not to move the tucking blades back and forth or side to side.
Connecting block SR assembly
Bolt 5X25
Bolt 4X8
Adjusting screw
Setting plate
Folding clamp 3-corner J
Chamfering blade RJ
Chamfering blade LJ
Tucking blade R-3J
Tucking blade RD-3J
Tucking blade LD-3J
Tucking blade L-3J
Connecting block SL assembly
Folding clamp assembly
1792S
E. Because the clearance between the center blade and the needle plate is small, the pocket material
strays with the body when tucking blades R, L, RD and LD retract.
Refer to “Trouble 14. Cause D”.
F. Program defect
Reprogram partially.
7-15
BAS-7610
7. FOLDING MACHINE
7. The stitch at the bottom corner is not aligned with the center line of the folded pocket.
<Cause>
A. The left edge of tucking blade RD is off to the left.
Set the clearance between the center blade top and tucking blade RD left edge to 0.5 - 1 mm, as shown in the
figure on the left.
Connecting block SR assembly
Bolt 5X25
Adjusting screw
Bolt 4X8
Setting plate
Folding clamp 3-corner J
Chamfering blade RJ
Tucking blade RD
Chamfering blade LJ
0.5 - 1
Tucking blade R-3J
Tucking blade RD-3J
Tucking blade LD-3J
Tucking blade L-3J
0.5 - 1
0.5 - 1
Connecting block SL assembly
1832S
1792S
Folding clamp assembly
B. The right edge of tucking blade LD has burrs.
Remove the burrs and buff tucking blade LD.
C. The inner clamp blades are improperly adjusted.
Loosen the screws of the inner clamp blades, then adjust the two inner clamp blades, as shown in the figure on
the left.
Connecting pin
Inner clamp 3-corner J
Bolt 5x25
Inner clamp U 1
Folding plate supporter
Inner clamp U 3
Folding plate
supporter
Connecting block
1833S
Inner clamp U 2
Folding plate
Folding plate
supporter
Inner clamp U 3
supporter
Inner clamp assembly
1790S
D. Program defect
Reprogram partially.
BAS-7610
7-16
7. FOLDING MACHINE
8. The seam margin at the bottom is large.
Connecting pin
Connecting block
Plate spring R 0.8
Center blade 3-corner J
(1) Bolt 4X20
Plate spring L 0.8
Connecting pin
Inner clamp 3-corner J
Bolt 5x25
Connecting block
Inner clamp U 1
Inner clamp U 2
Connecting block SR assembly
Bolt 5X25
1789S
Center blade assembly
Bolt 4X8
Adjusting screw
Setting plate
Folding clamp 3-corner J
Folding plate supporter
Folding plate
supporter
Inner clamp U 3
Chamfering blade RJ
Folding plate
supporter
Chamfering blade LJ
Tucking blade R-3J
Tucking blade RD-3J
Tucking blade LD-3J
Tucking blade L-3J
Folding plate
supporter
Inner clamp U 3
Connecting block SL assembly
1790S
Inner clamp assembly
Folding clamp assembly
1792S
<Cause>
A. The inner clamp blades are improperly adjusted.
After loosening the inner clamp blade attaching screws, adjust the clearance between the center blade edge and
the inner clamp blades. If the clearance is large, refer to “Trouble 6. Cause A”.
Material thickness + α
1830S
B. Tucking blades LD and RD are improperly adjusted.
Adjust the clearance between the tucking blades and the center bottom surface.
At this time, be sure not to slide the tucking blades side to side. A large clearance increases the seam margin at
the bottom, a small clearance decreases the seam margin at the bottom.
Tucking blade
Clearance
Center blade
1831S
C. Tucking blades LD and RD have burrs at the place corresponding to the pocket trouble.
Remove the burrs and buff. At this time, be sure not to slide the tucking blades side to side.
7-17
BAS-7610
7. FOLDING MACHINE
D. There is no clearance between tucking blades LD and RD.
Adjust the clearance so that it is about the same thickness as a piece of pocket material.
E. Program defect
Reprogram partially
BAS-7610
7-18
7. FOLDING MACHINE
9. The seam margin at one side of the bottom is large.
<Cause>
A. The inner clamp blades are improperly adjusted.
Refer to “Trouble 6. Cause A”.
B. Tucking blades LD or RD has burrs at the place corresponding to the pocket trouble.
Remove the burrs and buff the tucking blades. At this time, be sure not slide the tucking blade side to side.
C. The clearance between tucking blade LD and the center blade is improperly adjusted.
Because a large clearance increases the seam margin, loosen the two screws to reduce the clearance.
At this time, be sure not to slide tucking blade LD side to side.
Connecting block SR assembly
Bolt 5X25
Bolt 4X8
Adjusting screw
Setting plate
Folding clamp 3-corner J
Tucking blade
Clearance
Chamfering blade RJ
Chamfering blade LJ
Tucking blade R-3J
Tucking blade RD-3J
Tucking blade LD-3J
Tucking blade L-3J
Center blade
Connecting block SL assembly
1831S
Folding clamp assembly
D. Program defect
Reprogram partially.
7-19
BAS-7610
1792S
7. FOLDING MACHINE
10.The seam margin is too small at the corners on both sides.
<Cause>
A. The inner clamp blades are improperly adjusted.
Refer to “Trouble 6. Cause A”.
B. Tucking blades LD and RD are improperly adjusted.
Shift tucking blade LD slightly to the left to increase the seam margin on the left side. Shift tucking blade RD
slightly to the right.
Tucking blade LD
Tucking blade LD
0.5 - 1
0.5 - 1
0.5 - 1
1832S
C. The clearance between tucking blades R and L and the center blade is improperly adjusted.
Refer to “Trouble 6. Cause B”.
D. Program defect
Reprogram partially.
BAS-7610
7-20
7. FOLDING MACHINE
11. The folded lone at the bottom corner is round.
<Cause>
A. Tucking blades LD and RD are improperly adjusted.
If this is caused by tucking blade RD being off to the left, refer to “Trouble 7. Cause A”.
Connecting block SR assembly
Bolt 5X25
Bolt 4X8
Adjusting screw
Setting plate
Folding clamp 3-corner J
Tucking blade LD
Tucking blade LD
Chamfering blade RJ
0.5 - 1
0.5 - 1
Chamfering blade LJ
Tucking blade R-3J
Tucking blade RD-3J
Tucking blade LD-3J
Tucking blade L-3J
0.5 - 1
Connecting block SL assembly
1832S
1792S
Folding clamp assembly
B. There is no clearance between tucking blade LD and RD.
Adjust the clearance so that it is about the same thickness as a piece of pocket material.
C. The clearance between tucking blades LD and RD and the center blade is improperly adjusted.
The pocket material is chafed because the clearance between the tucking blades and the center blade might not
be large enough. Adjust the clearances between each of them to the pocket material thickness + α.
Connecting pin
Connecting block
Plate spring R 0.8
Tucking blade
Center blade 3-corner J
Clearance
Center blade
Bolt 4X20
1831S
Center blade assembly
D. The center blade corner is broken.
The broken center blade may need to be replaced.
7-21
Plate spring L 0.8
BAS-7610
1789S
7. FOLDING MACHINE
12. The seam margin at the bottom is too small.
<Cause>
A. The inner clamp blades are improperly adjusted.
Slightly enlarge the clearance between the center blade edge and the inner clamp blades at the place
corresponding to the pocket trouble. The clearance should be the material thickness + α.
Material thickness + α
Connecting pin
Connecting pin
Connecting block
1830S
Inner clamp 3-corner J
Bolt 5X25
Plate spring R 0.8
Inner clamp U 1
Folding plate supporter
Inner clamp U 3
Center blade 3-corner J
Folding plate
supporter
Folding plate
supporter
Connecting block
Bolt 4X20
Inner clamp U 2
Folding plate
supporter
Inner clamp U 3
Plate spring L 0.8
Center blade assembly
1790S
1789S
Inner clamp assembly
B. The clearance between tucking blade RD and LD is improperly adjusted.
Slightly enlarge the clearance between these tucking blades and the center blade at the place corresponding to
the pocket trouble.
At the time, be sure not to move the tucking blades back and forth.
Connecting block SR assembly
Bolt 5X25
Bolt 4X8
Adjusting screw
Setting plate
Folding clamp 3-corner J
Tucking blade
Clearance
Chamfering blade RJ
Chamfering blade LJ
Tucking blade R-3J
Tucking blade RD-3J
Tucking blade LD-3J
Tucking blade L-3J
Center blade
1831S
Connecting block SL assembly
1792S
Folding clamp assembly
C. Program defect
Reprogram partially.
BAS-7610
7-22
7. FOLDING MACHINE
13. The pocket outline is curved.
<Cause>
A. The flap margin is small.
Make the flap margin at least 8 mm.
B. The tucking blades have burrs.
Remove the burrs and buff the tucking blades.
C. The clearance between the tucking blades of the folding clamp assembly and the center blade is
improperly adjusted.
Reduce the clearance. At this time, be sure not to move the tucking blades back and forth or side to side.
Tucking blade
Clearance
1831S
Center blade
Bolt 4X8
Connecting block SR assembly
Bolt 5X25
Connecting pin
Connecting block
Setting plate
Folding clamp 3-corner J
Plate spring R 0.8
Center blade 3-corner J
Chamfering blade RJ
Chamfering blade LJ
Bolt 4X20
Adjusting screw
Plate spring L 0.8
Tucking blade R-3J
Tucking blade RD-3J
Tucking blade LD-3J
Tucking blade L-3J
Connecting block SL assembly
1792S
1789S
Center blade assembly
Folding clamp assembly
D. The inner clamp blades are improperly positioned.
This happens when the clearance between the center blade edge and the inner clamp blades is too small or too
large, or when the inner clamp blades strike the center blade. Set the clearance width to the pocket material
thickness + α, as shown in the figure on the left.
Connecting pin
Inner clamp 3-corner J
Bolt 5X25
Inner clamp U 1
Folding plate supporter
Inner clamp U 3
Folding plate
supporter
Folding
Material thickness + α
Connecting block
supporter
Inner clamp U 3
1790S
1830S
7-23
Folding plate
Inner clamp U 2
supporter
plate
Inner clamp assembly
BAS-7610
7. FOLDING MACHINE
E. When the inner clamp assembly descends quickly, or excessively high pressure is applied to the
pocket, or the material is fine, the outline is curved because the air is pressed out to the side of
the pocket.
To adjust the inner clamp descending speed, remove the valve cover, then rotate clockwise the speed controller
of the valve 4A. The too slow speed results in “Trouble 1”. To decrease the pressure, refer to “Trouble 1. Cause
B-3”.
Connecting pin
Inner clamp 3-corner J
Bolt 5X25
Inner clamp U 1
Folding plate supporter
Inner clamp U 3
Folding plate
supporter
Folding
Connecting block
Inner clamp U 2
Folding plate
supporter
plate
supporter
Inner clamp U 3
1790S
Inner clamp assembly
1354S
F. When the center blade is at its lowest position, the folded part of the pocket gradually returns to
its original position while waiting because of the large clearance between the center blade and the
needle plate.
Loosen the bolts on both sides and the set screw, then adjust the center blade height by rotating the adjust
screws. One rotation raises or lowers the inner clamp lever by 1 mm, and raises or lowers the center blade by
approximately 2 mm. When the center blade is at its lowest position and lightly presses the body, make sure that
there is some tension in front of the center blade.
The detailed adjustment procedures are described on “5-12. Adjusting the folding clamp”.
Connecting pin
Connecting block
Rod nut
Plate spring R 0.8
Center blade 3-corner J
Adjust screw
Set screw
Bolt 4X20
Bolt
Plate spring L 0.8
Center blade assembly
1828S
1789S
G. Program defect
If the trouble is not solved by the adjustments above, reprogram partially.
BAS-7610
7-24
7. FOLDING MACHINE
14. The pocket opening is wide.
<Cause>
A. When the chamfering blades are attached below the correct position, the body and the pocket
stray when the chamfering blades retract.
Move upward and reattach the chamfering blades.
At this time, set the clearance between these chamfering blades and tucking blade L to about the material
thickness.
Adjusting screw
Bolt 4X8
Connecting block SR assembly
Bolt 5X25
Setting plate
Folding clamp 3-corner J
Tucking blade R-3J
Tucking blade RD-3J
Tucking blade LD-3J
Tucking blade L-3J
Chamfering blade RJ
Chamfering blade LJ
Connecting block SL assembly
1792S
Folding clamp assembly
B. When the chamfering blades are attached above the correct position, the body does not stray but
the pocket strays.
Slightly lower the chamfering blades and the pocket opening part of tucking blade L. Be sure not to lower them
too much, which results in “Cause A”.
C. Tucking blade L has burrs.
Remove the burrs and buff the tucking blade.
D. The clearance between the center blade and the needle plate is small.
Loosen the bolts on both sides and the set screw, then adjust the center blade height by rotating the adjust
screw. One turn raises or lowers the inner clamp lever by 1.25 mm, and raises or lowers the center blade by
approximately 2 mm. When the center blade is at its lowest position and lightly presses the body, make sure that
some resistance can be felt in the front of the center blade.
The detailed adjustment procedures are described on “5-12. Adjusting the folding clamp”.
Rod nut
Adjust screw
Set screw
Bolt
1828S
E. The inner blades are improperly adjusted.
This is caused by the clearance between the center blade edge and the inner clamp blade being too large or too
small, or when the inner clamp blades strike the center blade. Set the clearance width to the pocket material
thickness + α, as shown in the figure on the left.
Material thickness + α
F. Program defect
Reprogram partially.
7-25
BAS-7610
1830S
7. FOLDING MACHINE
15. The pocket opening is not tucked in.
<Cause>
A. The flap margin is small.
Make the flap margin at least 15 mm.
B. Tucking blade L and R are improperly attached.
Slide the tucking blades forward. If this adjustment is not enough to solve the trouble, enlarge the chamfered
parts of the tucking blades by machining. At this time, remove the burrs and buff the blades.
C. Because the chamfering blades are improperly positioned, the pocket material is pressed out
when the chamfering blades go to the pocket material.
Shift the chamfering blades or the whole chamfering mechanism backward. Check that the chamfering blades
go under the pocket material.
Connecting block SR assembly
Bolt 5X25
Bolt 4X8
Adjusting screw
Setting plate
Folding clamp 3-corner J
Chamfering blade RJ
Chamfering blade LJ
Tucking blade R-3J
Tucking blade RD-3J
Tucking blade LD-3J
Tucking blade L-3J
Connecting block SL assembly
1792S
Folding clamp assembly
BAS-7610
7-26
7. FOLDING MACHINE
16. The flap margin at the pocket opening is out of the pocket.
<Cause>
A. The flap margin is large.
Set the pocket material onto the center blade so that the flap margin is even at every point. The proper length of
the flap margin is 12-15 mm. When the flap margin is larger than usual, reduce it or refer to “Cause B” below.
Center blade 3-corner J
Plate spring R0.8
Pocket material
Plate spring L0.8
1829S
B. The front-back positions of tucking blade L and R are improperly adjusted.
Shift the tucking blades backward.
Connecting block SR assembly
Bolt 5X25
Bolt 4X8
Adjusting screw
Setting plate
Folding clamp 3-corner J
Chamfering blade RJ
Chamfering blade LJ
Tucking blade R-3J
Tucking blade RD-3J
Tucking blade LD-3J
Tucking blade L-3J
Connecting block SL assembly
Folding clamp assembly
7-27
BAS-7610
1792S
7. FOLDING MACHINE
17. Material protrudes from the pocket opening.
<Cause>
A. Tucking blade L and R are improperly positioned.
Slide the tucking blades forward. If this adjustment is not enough to solve the problem, enlarge the chamfered
parts of the tucking blades by machining.
At this time, remove the burrs and buff the blades. If you slide the blades forward too much, the same problems
as described in “16. The flap margin at the pocket opening is out of the pocket.” will occur.
Connecting block SR assembly
Bolt 5X25
Bolt 4X8
Adjusting screw
Setting plate
Folding clamp 3-corner J
Chamfering blade RJ
Chamfering blade LJ
Tucking blade R-3J
Tucking blade RD-3J
Tucking blade LD-3J
Tucking blade L-3J
Connecting block SL assembly
1792S
Folding clamp assembly
BAS-7610
7-28
7. FOLDING MACHINE
18. The pocket pattern is not aligned with the body pattern (when the pattern is vertical).
<Cause>
A. The pocket and the body are improperly positioned.
Position them correctly in mode pattern matching.
B. The pattern pitch of the pocket is different from that of the body.
Check both pitches on a level surface.
C. The inner clamp assembly or the sewing clamp assembly descends quickly.
If the inner clamp assembly descends quickly: Check whether the pattern is aligned or not when the folded
pocket is waiting. To adjust the descending speed, remove valve cover, then slowly press the speed controller of
the valve 2A. At the same time, the cylinder air cushion near the rod may need to be loosened slightly.
If the sewing clamp assembly descends quickly: Refer to “Trouble 13. Cause E”.
1354S
D. Because the chamfering blades or tucking blades are attached below the correct position or
because the clearance between the center blade and the needle plate is small, the body strays
when the chamfering blades or tucking blades retract.
Refer to “Trouble 14. Cause A, B, C”.
Connecting block SR assembly
Bolt 5X25
Bolt 4X8
Adjusting screw
Setting plate
Folding clamp 3-corner J
Chamfering blade RJ
Chamfering blade LJ
Tucking blade R-3J
Tucking blade RD-3J
Tucking blade LD-3J
Tucking blade L-3J
Connecting block SL assembly
1792S
Folding clamp assembly
E. The body is caught by the needle plate long groove and strayed to the left during sewing.
•
•
•
If the sewing clamp pressure is high: Refer to “Trouble 5. Cause B”.
If the presser foot pressure is high: Adjust the presser foot height to approximately 37 mm.
Remove the burrs in the groove and buff it. If one side of the groove is higher than the other side, remove the
needle plate then make the two sides level.
37
1834S
7-29
BAS-7610
7. FOLDING MACHINE
19. The pocket pattern is not aligned with the body pattern (when the pattern is horizontal).
<Cause>
A. The pocket and the body are improperly positioned.
Position them correctly in mode pattern matching.
B. The pattern pitch of the pocket is different from that of the body.
Check both pitches on a level surface.
C. The inner clamp assembly or the sewing clamp assembly descends quickly.
If the inner clamp assembly descends quickly: Check whether the pattern is aligned or not when the folded
pocket is waiting. To adjust the descending speed, remove valve cover, then slowly press the speed controller of
the valve 2A. At the same time, the cylinder air cushion near the rod may need to be loosened slightly.
If the sewing clamp assembly descends quickly: Refer to “Trouble 13. Cause E”.
1354S
D. Because tucking blade LD and RD are attached below the correct positions or because the
clearance between the center blade and the needle plate is small, the body strays when the
tucking blades retract.
•
Raise the tucking blades taking care not to shift them side to side.
• If the clearance between the center blade and the needle plate is small: Refer to “Trouble 14. Cause C”.
Folding clamp assembly
Connecting block SR assembly
Bolt 5X25
Adjusting screw
Bolt 4X8
Setting plate
Folding clamp 3-corner J
Chamfering blade RJ
Chamfering blade LJ
Tucking blade R-3J
Tucking blade RD-3J
Tucking blade LD-3J
Tucking blade L-3J
1792S
Connecting block SL assembly
E. Because the folding clamp assembly is not parallel to the needle plate and the center blade leans
towards the operator, the body strays forward when the folding clamp assembly descends.
After loosening the two nuts at the top of the two cylinder rods which drive the folding clamp assembly, rotate the
cylinder rods so that the folding clamp assembly and the needle plate are parallel. At this time, check that the
tucking blades do not strike such parts as the center blade.
Rod nut
Adjust screw
Set screw
Bolt
1828S
F. When the center blade retracts from the pocket, the pocket material or the body strays backward.
Refer to “Trouble 1. Cause B”.
BAS-7610
7-30
7. FOLDING MACHINE
20.The needle location at the corners is improper.
<Cause>
The inertia of the X-Y movement mechanism results in improper needle location, which is different
from the programmed points. (Note: The machine motor rotating speed may vary the needle location
at each corner.)
To prevent uneven stitching at the corners, the machine can make stitching at the corners at low speed.
Refer to the instruction manual for programmer.
Reprogram to change the needle location 2-3 stitches before the corner in the program. Changing the needle
location for only 1 stitch makes the stitch vary in pitch.
BAS-7610
7-31
7. FOLDING MACHINE
21. The pocket top is narrow.
<Cause>
A. The inner clamp blades are improperly positioned.
Increase the clearance between the center blade edge and the inner clamp blades at the pocket top.
B. When the top edge of the pocket material is not clamped by the sewing clamp assembly, it strays
and is sewn.
Affix the sponge to the inside of all the pocket edge of the sewing clamp while holding the pocket material with
the sponge. If the needle strikes the sponge, thread breakage and stitch skipping may be caused.
1835S
C. Program defect
Reprogram to change the value to slightly inside the pocket top edge.
Note: The last way to widen the pocket top is to stick an auxiliary plate (such as a tape) on the top edge of the
pocket’s center blade. Avoid this method if possible because its durability is short.
Connecting pin
Connecting block
Connecting pin
Plate spring R 0.8
Inner clamp 3-corner J
Bolt 5X25
Folding plate supporter
Inner clamp U 1
Inner clamp U 3
Folding plate
supporter
Folding
Bolt 4X20
Connecting block
Plate spring L 0.8
Inner clamp U 2
Folding plate
supporter
1789S
1790S
Inner clamp assembly
Center blade assembly
Bolt 4X35
plate
supporter
Inner clamp U 3
Under clamp 3-corner j
Connecting block
Sewing clamp assembly
1793S
BAS-7610
7-32
7. FOLDING MACHINE
22. The seam margin is large.
<Cause>
A. Because the forward part of the center blade is curved up, the clearance between the needle plate
and the center blade is large only at the forward part.
Remove the center blade. Distort the center blade to level.
B. The inner clamp blades are improperly attached.
Refer to “Trouble 6. Cause A”.
C. Because the center blade assembly is attached too far forward, the pocket material is improperly
folded.
After loosening the eight bolts (1), shift the center blade backward in the loose holes of the connecting blocks
(center blade), then fasten the bolts (1).
At this time, the inner clamp assembly and the folding clamp assembly might need to be shifted backward
simultaneously.
In this case, loosen the four screws (2) and the two plate springs are taken out to the front.
(Only the part which shifted the whole center blade to the back)
Connecting pin
Connecting block Plate spring R 0.8
Center blade 3-corner J
Bolt 4X20
Plate spring L 0.8
1789S
Center blade assembly
D. The tucking blades have burrs.
Remove the burrs and buff the tucking blades.
E. Program defect
Reprogram partially.
Connecting block SR assembly
Bolt 5X25
Connecting pin
Inner clamp 3-corner J
Bolt 5X25
Inner clamp U 1
Bolt 4X8
Adjusting screw
Setting plate
Folding clamp 3-corner J
Folding plate supporter
Inner clamp U 3
Chamfering blade RJ
Folding plate
supporter
Chamfering blade LJ
Tucking blade R-3J
Tucking blade RD-3J
Tucking blade LD-3J
Tucking blade L-3J
Folding plate
supporter
Inner clamp U 3
Connecting block Inner clamp U 2 Folding plate
supporter
Connecting block SL assembly
1790S
Inner clamp assembly
Folding clamp assembly
BAS-7610
7-33
1792S
7. FOLDING MACHINE
23. The pocket has skipped stitches at the sewing start.
<Cause>
A. The needle thread coming out of the needle is short.
•
Lengthen the thread in pretension.
• Check the opening amount between the tension discs.
• Perform reverse stitching 2-3 stitches after reprogramming.
• Adjust the thread blower so that it correctly blows the thread end.
B. The sewing clamp improperly presses the body and pocket materials.
Refer to “Trouble 21. Cause B”.
Bolt 4X35
Under clamp 3-corner j
Connecting block
1793S
Sewing clamp assembly
BAS-7610
7-34
7. FOLDING MACHINE
24. The stitch pitch is uneven at the corners.
<Cause>
The inertia of the X-Y movement mechanism results in improper needle location, which is different
from the programmed points.
(Note: The machine motor rotating speed may vary the needle location at each corner.)
To prevent uneven stitching at the corners, the machine can make stitching at the corners at low speed.
Refer to the instruction manual for programmer.
Find the proper needle location at the corners by reprogramming and sewing several times. The machine motor
rotating speed may vary the best points to be programmed.
BAS-7610
7-35
7. FOLDING MACHINE
25. The pocket has skipped stitches or thread breakage at the pocket top.
<Cause>
Because the sewing clamp improperly clamps the pocket top during sewing, the pocket material
moves about.
•
Move the sponge as close as possible to the top edge of the pocket, then refer to “Trouble 21. Cause B”.
Increase the sewing clamp pressure referring to “Trouble 5. Cause B”. Be sure not to increase the pressure
excessively, which may result in vertical uneven material feeding or vertical gathering.
• Increase the presser foot pressure. Though the standard height of the presser foot is 37 mm, decrease the
height slightly to increase the pressure. Be sure not to increase excessively, which may result in horizontal
uneven material feeding or horizontal gathering.
•
37
1388S
1387S
1834S
BAS-7610
7-36
7. FOLDING MACHINE
26. The seam margin is large. (Heavy material)
<Cause>
When the material is relatively thick, the shape of the sewn pocket is large
Refer to “Trouble 6.”. If the adjustment in “Trouble 6.” is not enough to solve this trouble, the center blade needs
to be replaced by a smaller one. The standard center blade is 1.4 mm smaller on both sides than an actual
pocket shape. When several sizes of center blades (for example, the 1.8 mm smaller one on both sides or the
2.2 mm smaller one on both sides) are available besides the standard one, almost all heavy material can be
managed.
Connecting pin
Connecting block Plate spring R 0.8
Center blade 3-corner J
Bolt 4X20
Plate spring L 0.8
Center blade assembly
BAS-7610
7-37
1789S
7. FOLDING MACHINE
27. The distance between the inner row stitches and the outer row stitches is irregular.
<Cause>
The inertia of the X-Y movement mechanism results in needle location different to the programmed
points.
Refer to the instruction manual for programmer.
BAS-7610
7-38
7. FOLDING MACHINE
7-4-3. Characteristic troubles of two corner pocket model
1.The tucked margins at
the bottom protrude
on both sides.
2.The flap margins at
the bottom on both
sides are not tucked
in.
1836S
1837S
7.The bottom seam is
6.The bottom corners
zigzag chain stitch.
rise and the seam
margins near the
bottom on both sides
are small.
1841S
3.The tucked flap
margins at the
bottom protrude
below.
1838S
8.The corners are
round.
1842S
1843S
BAS-7610
7-39
4.The base is curved.
5.The tucking blades
do not operate
smoothly.
1839S
1840S
7. FOLDING MACHINE
1. The tucked margins at the bottom protrude on both sides.
<Cause>
A. The flap margin is too large.
Set the pocket material onto the center blade so that the flap margin is even at each point. The proper length of
the flap margin is 12-15 mm. If the flap margin is larger than it should be, reduce it.
Plate spring R
Plate Spring L
Center blade
Pocket material
1844S
B. Tucking blade RD or LD is improperly positioned.
Shift the tucking blade forward, then adjust it so that its edge is aligned with the center blade corner when the
cylinder driving the tucking blade works. (The alignment does not have to be perfect.) At this time, check that the
tucking blades come into the clearance between the D and the RDD or LDD tucking blades.
Tucking blade RD
Center blade
1845S
Connecting block SR assembly
Bolt 4X8
Setting plate
Bolt 5X25
Tucking blade RD
Tucking blade RDD square J
Tucking blade D
Tucking blade D square J
Chamfering blade RJ
Chamfering blade LJ
1 mm
Tucking blade
R square J
Tucking blade
L square J
Tucking blade RDD or LDD
Tucking blade LDD square J
Connecting block SL assembly
Folding clamp assembly
Tucking blade RD
1847S
Tucking blade RD
1846S
BAS-7610
7-40
7. FOLDING MACHINE
2. The flap margins at the bottom on both sides are not tucked in.
<Cause>
A. The flap margin on both sides are too small.
Adjust the flap margin to 12-15 mm.
B. Tucking blade RD or LD is improperly positioned.
Shift the tucking blade backward, then adjust it so that its edge is aligned with the center blade corner when the
cylinder driving the tucking blade works. (The alignment does not have to be perfect.) At this time, check that the
tucking blades come into the clearance between the D and the RDD or LDD tucking blades.
Tucking blade RD
Center blade
1845S
C. The height between tucking blade RD or LD and tucking blades D and RDD or LDD is improperly
adjusted.
If tucking blade RD or LD is attached above tucking blade D or below tucking blade RDD or LDD, reattach
tucking blade RD or LD, as shown in the figure on the left.
Connecting block SR assembly
Bolt 4X8
Setting plate
Bolt 5X25
Tucking blade RD
Tucking blade D
Tucking blade RDD square J
1 mm
Tucking blade D square J
Chamfering blade RJ
Chamfering blade LJ
Tucking blade RDD or LDD
Tucking blade
R square J
Tucking blade
L square J
Tucking blade RD
1847S
Tucking blade LDD square J
Connecting block SL assembly
Tucking blade RD
1846S
Folding clamp assembly
BAS-7610
7-41
7. FOLDING MACHINE
3. The tucked flap margins at the bottom protrude below.
<Cause>
A. Tucking blade RD or LD is improperly positioned.
Refer to “Trouble 2. Cause B”.
Connecting pin
Connecting block
Bolt 4X20
Plate spring R 0.8
Center blade
Plate spring L 0.8
1848S
Center blade assembly
B. Because the clearance between tucking blade D and RDD or LDD is too small, the pocket material
strays when they retract.
As shown in the figure on the left, adjust the clearance between tucking blade D and RDD or LDD to
approximately 1-2 mm and also adjust these tucking blade height so that tucking blade RD and LD come into the
center of the clearance.
Tucking blade D
1 - 2 mm
Tucking blade RDD or LDD
Tucking blade RD
1847S
C. Because tucking blade RDD or LDD is attached below the correct position, the body strays when
the tucking blade retracts.
Raise the tucking blade and reattach it. At this time, adjust the clearance between tucking blade RDD or LDD
and tucking blade D to approximately 1 mm.
Tucking blade D
Center blade
1 - 2 mm
Tucking blade RDD or LDD
1849S
BAS-7610
7-42
7. FOLDING MACHINE
4. The base is curved.
First, refer to “Trouble 13.” of pentagon pocket.
The cause described below is characteristic of square pockets.
<Cause>
Because tucking blade RDD or LDD is attached below the correct position, the pocket material strays
with the body when the tucking blade retracts.
Raise the tucking blade and reattach it. Adjust the clearance between tucking blade RDD or LDD and tucking
blade D to approximately 1-2 mm. At this time, make sure not to raise tucking blade D too much, which may
cause it to hit the center blade, or cause the pocket material to stray when the tucking blade retracts.
BAS-7610
7-43
7. FOLDING MACHINE
5. The tucking blades do not operate smoothly.
<Cause>
Because tucking blade RDD or LDD is attached below the correct position, tucking blades RDD or
LDD and D do not retract smoothly.
Adjust the clearance between these two tucking blades to approximately 1-2 mm. Then, holding the clearance
width between tucking blades RD and LD, raise all of the tucking blades and reattach them. At this time, be sure
not to shift them side to side. If they cannot be raised, attach a sponge (1 mm) onto the folding clamp assembly
at the bottom surface near the operator.
Connecting block SR assembly
Bolt 4X8
Setting plate
Bolt 5X25
Tucking blade RD
Tucking blade RDD square J
Tucking blade D square J
Chamfering blade RJ
Chamfering blade LJ
Tucking blade
R square J
Tucking blade
L square J
Tucking blade LDD square J
Tucking blade RD
Connecting block SL assembly
1846S
Folding clamp assembly
BAS-7610
7-44
7. FOLDING MACHINE
6. The bottom corners rise and the seam margins near the bottom on both sides are small.
<Cause>
A. When the crease of the flap margin is aligned with the needle location, the pocket is sewn
improperly and the seam margin is small.
Shift tucking blades RD and LD forward and reattach to reduce the amount of margin to be tucked in.
B. The inner clamp blades are improperly attached.
Slightly increase the clearance between the inner clamp blades and the center blade.
C. The clearance between tucking blades RD and LD of the folding clamp assembly and the center
blade is improperly adjusted.
Increase the clearance. At this time, be sure not to move the tucking blades back and forth.
D. Program defect
Reprogram partially.
Connecting pin
Connecting block
Plate spring R 0.8
Connecting pin
Folding plate supporter
Bolt 5X25
Inner clamp square J
Inner clamp U1 square J
Inner clamp U3
square J
Bolt 4X20
Plate spring L 0.8
Folding plate supporter
Center blade
Inner clamp U2 square J
Connecting block
1848S
1850S
Inner clamp assembly
Center blade assembly
Bolt 4 X 35
Sewing clamp square J
Connecting block SR assembly
Bolt 4X8
Setting plate
Bolt 5X25
Tucking blade RD
Tucking blade RDD square J
Tucking blade D square J
Chamfering blade RJ
Chamfering blade LJ
Tucking blade
R square J
Tucking blade
L square J
Tucking blade LDD square J
Connecting block
Connecting block SL assembly
1851S
1846S
Folding clamp assembly
Sewing clamp assembly
BAS-7610
7-45
Tucking blade RD
7. FOLDING MACHINE
7. The bottom seam is zigzag chain stitch.
<Cause>
The seam sewn from left to right almost aligns with the border line between the hitch stitch and
perfect stitch. This problem happens when both of these stitches appear.
Because this is a basic property in a sewing machine, there is no fundamental measure for it. When adjusting,
rotate the needle approximately 5-10 degree clockwise, looking from the bottom. Be sure not to rotate it more,
which may result in the needle’s striking the rotating hook.
BAS-7610
7-46
7. FOLDING MACHINE
8. The corners are round.
<Cause>
Tucking blade RD and LD are positioned backward from their correct position.
Shift the tucking blades forward, then adjust them so that their edges are aligned with the center blade corners
when the cylinders driving the tucking blades work. (The alignment does not have to be perfect.) At this time,
check that these tucking blades come into the clearance between tucking blades D and DD.
Connecting block SR assembly
Bolt 4X8
Setting plate
Bolt 5X25
Tucking blade RD
Tucking blade RDD square J
Tucking blade D square J
Chamfering blade RJ
Chamfering blade LJ
Tucking blade
R square J
Tucking blade
L square J
Tucking blade LDD square J
Tucking blade RD
Connecting block SL assembly
1846S
Folding clamp assembly
BAS-7610
7-47
7. FOLDING MACHINE
BAS-7610
7-48
SERVICE MANUAL
15-1, Naeshiro-cho, Mizuho-ku, Nagoya 467-8561, Japan. Phone: 81-52-824-2177
Printed in Japan
151-761
I2110825
2002.12. H (1)