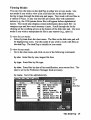
1
PERSONAL COMPUTER
GEOS
User's Manual
Developed by Berkeley Softworks
TM
GEOS deskTop 1.5
User's Manual
2150 Shattuck Avenue
Berkeley, CA 94704
Important: Read This Notice Before
Using This Software
BY READING THIS NOTICE AND USING THE ENCLOSED
SOmWARE, YOU AGREE TO BE BOUND BY ALL THE TERMS
AND CONDITIONS OF THIS LICENSE AGREEMENT. IF YOU DO
NOT ACCEPT OR AGREE TO THESE TERMS, YOU MAY,
WITHIN FIFTEEN (15) DAYS, RETURN THIS ENTIRE PACKAGE,
TOGETHER WITH PROOF OF PURCHASE, TO THE PERSON
FROM WHOM YOU ACQUIRED IT OR TO BERKELEY SOFTWORKS, INC. FOR A FULL REFUND.
Software License Agreement
BERKELEY SOFTWORKS, INC. grants you a non-exclusive license to
use this copy of the program and accompanying materials according to the
following terms:
License
You may:
a. use the program on only one computer at a time;
b.
make copies of the program in machine-readable form solely as
necessary for your personal use, provided that you reproduce all
proprietary notices on the copy; and
c.
transfer this license to another, together with all documentation and
copies of the software, but only if: (i) the transferee agrees in writing to
be bound by this software license agreement and (ii) you notify
BERKELEY SOFTWORKS, INC. of the transfer, together with the
transferee's name and address, and provide to BERKELEY SOFTWORKS, INC. the written and signed agreement of the transferee to be
bound by this license which reads: "I have read the BERKELEY
SOFTWORKS, INC.Software License Agreement and agree to be
bound by the terms thereof."
You may not:
a. use the program in a network or a multi-user system;
b. modify, translate, reverse engineer, decompile, disassemble, create
derivative works based on, make copies of the documentation, or copy
(except as necessary for your personal use) the program or the accompanying materials;
c. rent, transfer or grant any rights in the program or accompanying
materials in any form to any person, except as specifically permitted in
this agreement, without the prior written consent of BERKELEY
SOFTWORKS, INC., which, if given, is subject to transferee's consent
to the terms and conditions of this license, or
d. remove any proprietary notices, labels, or marks on the program and
accompanying materials.
This license is not a sale. Title and copyrights to the program, accompanying materials and any copy made by you, remain with BERKELEY SOFTWORKS, INC.
Termination
Unauthorized copying of the program (alone or merged with other software)
or the accompanying materials, or failure to comply with the above reshictions, will result in automatic termination of this license and will make
available to BERKELEY SOFTWORKS, INC. other legal remedies. Upon
termination, you will destroy or return to BERKELEY SOFTWORKS,
INC. the program, accompanying materials, and any copies.
Limited Warranty and Disclaimer
BERKELEY SOFTWORKS, INC. has no control over your use of the
software, nor can BERKELEY SOFTWORKS, INC., anticipate every
potential or possible use. Therefore, BERKELEY SOFTWORKS, INC.
does not and cannot warrant the performance or result that may be obtained
by its use, nor do we warrant that the operation of the program will be
uninterrupted or error-free. Therefore, BERKELEY SOFIWORKS, INC.
provides a limited warranty to you as follows:
BERKELEY SOFTWORKS, INC. warrants that the software will perform
substantially in accordance with the specifications set forth in the documentation provided with the software and that the diskettes on which the
program is furnished are free from defects in materials and workmanship
under normal use for a period of ninety (90) days from the date of delivery
to you, as evidenced by a copy of your receipt.
BERKELEY SOFTWORKS, INC.'S entire liability and your exclusive
remedy as to software performance and the diskettes (which is subject to
your returning the diskettes to BERKELEY SOFTWORKS, INC. or an
authorized dealer with a copy of your receipt) will be the replacement of the
diskettes or, if BERKELEY SOFTWORKS, INC. or the dealer is unable to
deliver a replacement diskette, the refund of the purchase price and terminatior! of this agreement. THE DURATION OF ANY IMPLIED WARRANTIES ON THE DISKE'ITES, INCLUDING THE IMPLIED WARRANTIES OF MERCHANTABILITY AND FITNESS FOR A PARTICULAR
PURPOSE, IS LIMITED TO THE SAME NINETY (90) DAY PERIOD
AS THE FOREGOING EXPRESS WARRANTY.
THE PROGRAM AND ACCOMPANYING MATERIALS ARE PROVIDED WITHOUT WARRANTY OF ANY KIND, EITHER EXPRESS
OR IMPLIED, OR STATUTORY, INCLUDING (BUTNOT LIMITED
TO) THE IMPLIED WARRANTIES OF MERCHANTABII,ITY AND
FITNESS FOR A PARTICULAR PURPOSE.
SOME STATES DO NOT ALLOW THE EXCLUSION OF IMPLIED
WARRANTIES SO THE ABOVE EXCLUSIONS MAY NOT APPLY TO
YOU. THIS WARRANTY GIVES YOU SPECIFIC LEGAL RIGHTS.
YOU MAY ALSO HAVE OTHER RIGHTS WHICH VARY FROM
STATE TO STATE.
Limitation of Liability
IN NO EVENT WILL BERKELEY SOFTWORKS, INC. BE LIABLE
FOR ANY DAMAGES, INCLUDING LOSS OF DATA, LOST PROFITS,
COST OF COVER OR OTHER SPECIAL, INCIDENTAL, CONSEQUENTIAL OR INDIRECT DAMAGES ARISING FROM THE USE OF
THE PROGRAM OR ACCOMPANYING MATERIALS, HOWEVER
CAUSED AND ON ANY THEORY OF LIABILITY. THIS LIMITATION WILL APPLY EVEN IF BERKELEY SOFTWORKS, INC. OR AN
AUTHORIZED DEALER HAS BEEN ADVISED OF THE POSSIBILITY
OF SUCH DAMAGE. YOU ACKNOWLEDGE THAT THE LICENSE
FEE REFLECTS THIS ALLOCATION OF RISK. SOME STATES DO
NOT ALLOW THE LIMITATION OR EXCLUSION OF LIABILITY
FOR INCIDENTAL OR CONSEQUENTIAL DAMAGES, SO THE
ABOVE LIMITATION MAY NOT APPLY TO YOU.
General
This Agreement will be governed by the laws of the State of California.
This Agreement is the entire agreement between us and supersedes any
other communications with respect to the program and accompanying
materials.
If any provision of this Agreement is held unenforceable, the remainder of
this Agreement shall continue in full force and effect.
If you have any questions, please contact us, in writing, at the following
address:
BERKELEY SOFTWORKS, INC.
Customer Service
2 150 Shattuck Avenue
Berkeley, CA 94704
If you wish to return defective disks for replacement under this warranty,
send the defective disks and a copy of your purchase receipt to the address
above.
Sign and Mail the Registration Card Today
Return of the Registration Card is required to receive notices of new
versions or enhancements.
Copyright Information
GEOS 1.5 deskTop software design by Brian Dougherty, Doug Fults, Dave
Durran, Tony Requist, and Chris Hawley.
GEOS DEMO program by Rob Siegel.
GEOS deskTop 15 User'sManual by Pahicia Huey, O Copyright Berkeley
Softworks, Inc. 1988.
Printed 6/88
Commodore 64 @ is a registered trademark and Commodore 128 is a
trademark of Commodore Electronics, Ltd.
geoCalc, geoCalc 128, geospell, FontPack 1, FontPack Plus, International
FontPack, geoDex, geoMerge, geoWrite Workshop, geoWrite Workshop
128, geolaser, geoPubLaser, Text Grabber, Text Grabber 128, geoFile,
geoFile 128, Graphics Grabber, geoPaint, geowrite, diskTurbo, GEOS,
GEOS 128, deskTop, DeskPack Plus, DeskPack 1, Icon Editor, geoPublish,
geoprogrammer are trademarks of Berkeley Softworks, Inc.
Drawing on page 66 from DiskArt by Those Designers. Mouse drawing on
page 50 adapted from design by Peter and Paul Hughes.
Customer Support
If you need to contact Commodore's Customer Support Division, you can
do so by phone or letter.
Call:
Customer Service: (215) 436-4200.
Hours are Monday through Thursday, 9:00A.M. to 5 0 0 P.M., and Friday,
9:00 A.M. through 4:00 P.M., Eastern Standard Time.
Or write:
Commodore Busicess Machines, Inc.
attn: Customer Support
1200 Wilson Drive
West Chester, PA 19380
Table of Contents
l
Welcome to GEOS
2
4
6
Getting Started
Running the Demonstration Program
Exiting GEOS
2
Learning GEOS
8
Common Features and How They Work
3
The deskTop
16
18
29
33
39
41
42
The deskTop Screen
File Management
Disk Management
Using More than One Disk Drive
Using Non-GEOS Disks
GEOS and BASIC
Quick Reference
4
Desk Accessories
46
49
54
56
The Calculator
The Preference Manager
The Alarm Clock
The Note Pad
Those Extra Files
60
65
69
72
Printer Files
The Photo Manager
The Text Manager
The Font Files
Reference
73
81
85
Glossary
Product Listing
Index
Welcome
to GEOS
This special package is designed to introduce you to GEOS, the Graphic
Environment Operating System produced by Berkeley Softworks. The
contents of this package are the following:
The GEOS DESKTOP program disk This disk contains a demonstration program that will introduce you to the latest GEOS products. It
also contains a number of files you will need if you purchase any of our
products.
This program guide This guide will get you started using the GEOS
program disk. If you do not own GEOS products, use Chapters 1 and 2
to learn how to open the GEOS DESKTOP program disk, run the
demonstration program, and learn the basics of using a graphically
oriented operating system. Chapter 3 explains how to use files and
disks. Chapter 4 describes how to use the Calculator, Preference
Manager, Alarm Clock, and Note Pad desk accessories. Chapter 5
refers to the files on the flip side of the program disk. With the
exception of the CONFIGURE and DISK COPY programs, you cannot
use the files on the GEOS ADDT'L side of the the disk; however, you
will need these files if you decide to purchase any GEOS products. If
you come across any unfamiliar terms in this guide, refer to the
Glossary on page 73.
Welcome to GEOS
1
Getting Started
Use the procedure in this section to start up your GEOS DESKTOP disk.
Once you have booted GEOS, you can run the demonstration program to
learn more about the GEOS environment.
To start up GEOS:
1: Set up your Commodore, disk drive, and input device as explained in
their instruction manuals. Turn on the monitor and disk drive. (Do not
turn on the keyboard yet)
2: Carefully insert the GEOS disk into the disk drive. Make sure the
GEOS DESKTOP side of the disk is up. Close the disk drive door.
3: 128 users: Hold down the key. (This key is located on the lower
left side of the keyboard.) While continuing to hold down t h e m key,
turn on the keyboard.
64 users: Turn on the keyboard.
4: When the COMMODORE 64 BASIC V2 screen appears, there will be
a flashing cursor under the word READY. Type exactly as follows:
LOAD"GEOSV,8,1and press the
key. The following
screen will appear on the monitor:
m]
2
Welcome to GEOS
5: This is the deskTop, which is the fist screen that appears when you
boot GEOS. The deskTop enables you to work with files and disks in
general, and to load programs. It works much like the main menu of
many programs used on the Commodore.
If You Do Not Have A Joystick
If you do not have a joystick, you can use either a mouse, Koala Pad, or
Inkwell light pen for GEOS. Before you can use one of these devices, you
need to program GEOS to recognize it. (The procedure for doing so is
simple.) Refer to "Installing an Input Device" on page 23.
Welcome to GEOS
3
Running the Demonstration Program
After you have loaded GEOS and have your input device working, you will
be ready to run the GEOS demonstration program. (You will also get a
quick lesson in using an input device, if you don't already know how.)
Once you begin the GEOS demonstration program, it will continue until it
completes its performance, then return you to the deskTop afterwards. You
can interrupt the program at any time.
Ifyou wish to:
Do the following:
Move to the next dialog box
Stop a screen
Continue after stopping
Exit to deskTop
Press the spacebar
Hold down
and press
Hold down
and press
Hold down
and press
To open the demonstration program:
1: Use the input device to move the pointer on the screen. For example, if
you have a joystick, move its handle in the direction you want the
pointer to go.
2: Move the pointer so that it is positioned over the GEOS DEMO file
icon.
3: When the pointer is positioned over the icon, press the input device
button. (If you are using a mouse, press the left button.) This is called
"clicking." The GEOS DEMO file icon will appear in reverse video.
4
Welcome to GEOS
Look for the GEOS DEMO
Here it has been highlighted.
4: Now move the pointer to the row of commands at the top left corner of
the screen and locate the file command.
I qcos f fild view j disk i special 1
h
5: When the pointer is positioned over file, click.
Another list of commands will appear, and the
pointer will move to the open option:
6: Make sure the pointer is positioned over open
and click again. The GEOS DEMO program
will open. Enjoy!
.........
Click
(ennme
..........................
inf o
..........................
Welcome to GEOS
5
Exiting GEOS
Never turn off your computer until you have properly closed a program, or
damage to your files may occur. Use the following procedures to exit
GEOS. You can turn off your computer entirely, or you can exit to BASIC
mode from the deskTop, if desired.
Ifyou wish to turn off the computer:
1: Exit the current program and return to the deskTop.
2: Position the pointer over the close icon in the
upper right corner of the disk note pad and click.
The file icons on the disk note pad will disappear
and the disk drive icon representing the disk
drive containing the program disk will appear
with a question mark inside.
Click here
to close the
disk.
3: Remove the program disk from the disk drive and store the program
disk in a safe place.
4: Turn off the computer, disk drive, and monitor switches.
If you wish to return to BASIC mode:
1: Exit the current program and return to the deskTop.
2: Go to the command menu and click on the special menu item.
3: Clicking on special will display two items: BASIC and RESET.
Click on BASIC. You will be returned to the original 64 BASIC mode.
NOTE If you wish to return to GEOS at this point, you can do so by
pressing the1 key.
4: Remove the program disk from the disk drive and store the program
disk in a safe place.
6
Welcome to GEOS
Learning
GEOS
*
Once you begin using a graphically oriented operating system such as
GEOS, you will be amazed at the ease and speed with which you can use
icons, pulldown menus, and the keyboard to enter commands, move from
one application to another, and manage files and disks. In this section, you
will learn about using an input device with GEOS, selecting files in a
variety of ways, using dialog boxes, moving files around the screen, using
icons, and working with disk drives. Once you have read this section, you
will know the basics of how to use the many GEOS products Berkeley
Softworks provides.
Learning GEOS
7
Common Features and How They Work
Using an Input Device
To move around GEOS, you need to use an input device, which is a special
device you hook up to your computer. As you discovered when you first
opened the GEOS program, the input device enables you to move the
pointer around the screen and select certain items. A pointer is a small
arrow that indicates your location on the screen.
GEOS supports four input devices: the joystick, mouse, Koala Pad, and
Inkwell light pen. If you are using a joystick, GEOS will automatically
select it as the default input device when you boot up. If you are using a
mouse, Koala Pad, or Inkwell light pen, you easily can activate it as the
default input device by using the command menu. (The procedure for doing
so is explained under "Installing an Input Device" on page 23.)
If you are unfamiliar with using an input device, it is easy to learn how.
Once you have connected the input device to your Commodore and installed it to GEOS, you can begin to learn right away. As you move the
mouse, joystick handle, Koala Pad, and Inkwell light pen in a direction, note
that the pointer on the screen moves in the same direction as you move the
input device.
Clicking and Menus
Now that you know how to move the pointer around the screen, you will
need to know how to use the input device in other ways to work with
GEOS. At the top left corner of the screen is a row of commands called a
command menu. Move the pointer so that it is positioned over the disk
command menu item.
I qeos i file j view i diski special I
Now press the input device button. This is
called clicking. See what you get?
Dialog Boxes
If you wish to select one of the menu
options, move the pointer to the menu option
you need and click again. Suppose you wish
8
Learning GEOS
open C=O
............................
close C=C
............................
rename
.......................
............................
validate
............................
format
to rename the current disk. Click on the rename option. A dialog box will
appear, asking you to enter the disk's new name:
To rename the disk, press IINST/DELI to backspace over the current name,
and type in a new name. To exit, move the pointer to Cancel and click. (If
you had wanted to change the disk's name, you would need to have pressed
).1The dialog box will disappear and you will be returned to the
deskTop.
Some dialog boxes (such as the one above) will ask you to enter information. Other dialog boxes will display special messages. All you have to do
to enter information is type what is needed on the keyboard. The small
blinking vertical bar, called a cursor or text cursor, indicates where the
text you type will appear.
Double-clicking
Accessories, applications, and application documents, can be opened
without having to use the command menu. For example, move the pointer
to the note pad file icon. Click twice on the icon in rapid succession. This
is called double-clicking. The Note Pad will open on the screen. To return
to the deskTop, click on the rectangular close icon at the upper right corner
of the Note Pad..
Keyboard Shortcuts
keyboard
Sometimes you can start a procedure without
having to use the input device at all. Instead y u
can use the keyboard itself. To use a keyboard
Learning GEOS
9
command, hold down the
key, and while keeping it held down, press the
key needed to carry out the command. For example, if you wish to open
(activate) the current disk, hold down It]and press B Keyboard commands can be found listed in the menus along with the menu option.
Ghost Icons
If you wish to move a file icon around the screen or to another disk, you can
do so easily. Click on the file icon once so that it appears in reverse video,
pause, then click on it again. An outline of the file icon will become
attached to the pointer. The outline is the file's ghost icon. Move the ghost
icon around the screen, and click to deposit it on the desired place, whether
the location is another spot on the disk note pad, the border area, another
disk drive icon, the waste basket, or the printer icon. (Most of these icons
are described below.) You also can move file icons to other disk note pad
pages, or you can copy them to another disk.
Here is the original tile icon highlighted.
m
Here is the same tile icon's ghost icon.
Other Icons
There are a number of other icons on the deskTop screen. If you wish to
view the next deskTop note pad page, click on the dog-eared corner at the
lower left corner of the disk note pad page:
Click here to go to the next page.
Click here to go to the previous page.
There are other ways of moving to the next disk note pad page; these are
covered in Chapter 3, "The deskTop."
If you wish to delete a file, you can drop its ghost icon into the waste basket
at the lower right corner of the screen. If you wish to print an application
document, you can do so by dropping its ghost icon onto the printer icon
located in the lower right corner of the deskTop.
printer icon
10 Learning GEOS
waste basket icon
If you wish to close the disk, click on the close icon at the top right corner
of the screen:
close icon
Windows
Once you open a GEOS application (which must be purchased separately),
the document you are working with will be displayed in a large rectangular
region called a window. Windows are typically used to separate different
functional areas on the screen. A window is a view port of an area larger
than can be displayed on the screen.
geopaint's Drawing Wndow
For example, geoPaint provides a Drawing Window of an 8 112 by 11 inch
document. This window only shows a portion of the document at a time.
You can work with the rest by scrolling or moving the window to different
parts of the document. You can view an entire document page by using a
preview command, if desired. Similarly, geoWrite provides a Writing
Window, also with a preview command.
WYSZWYG
The first time you open a GEOS application such as geoWrite or geoPaint
(which must be purchased separately), you will discover the concept of
WYSIWYG -What You See Is What You Get; the appearance of the text
and images on the screen appears as the final printout will appear. Therefore, when you are creating text, you can vary the size, style, and fonts
(typefaces) of the text and see the results right away.
Learning GEOS
11
LEFT.
C E N T E R O R I G H T 0 F U L L 0 +JUSTlFlCRTlDN
L I N E 5PRCING-b i B 1 x 0 2 0
Lalif or nia California ~~~~Ywcsi?
ClOlkRIl
California
WYSlWYG and fonts in a geo Write Writing Window
Fonts
Berkeley Softworks offers a range of fonts from which you can choose.
Font files, which appear on the deskTop, can be copied to your customized
work disks. Once you open an application, the first six fonts that appear on
the deskTop will be displayed as menu options in the application's font
menu.
Disk Drives and the RAM Expansion Unit
GEOS is designed to read the contents of your disk from a disk drive,
which is a special device you hook up to your computer. Disk drives vary
in the type of disks they accept, how much storage they allow, and the speed
with which they operate programs.
This GEOS program uses the 1541 and 1571 Commodore disk drives, as
well as the RAM Expansion Unit (REU).These disk drives are described
fully in Chapter 3, "The deskTopV. The types of disks you can use with
GEOS are 5 114 inch floppies. The 1541 disk drive accepts single sided
disks with 165K;the 1571 disk drive accepts both single sided and double
sided disks (331K). Other GEOS products support the 1581 disk drive.
The REU does not physically accept disks; to use it you need to copy the
contents of a disk drive to it. When finished working with files on the REU,
copy them back to their original work disks. Once you turn off the computer, the contents of the REU are lost. However, the advantages of using
an REU are that it enables you to run programs much faster than with an
12 Learning GEOS
ordinary disk drive and that it expands memory. The 1764 REU supports
256K and the 1750 REU supports 512K.
You can operate GEOS using one disk drive or two. If you are using an
REU, GEOS will treat it as Drive B. Adding or changing disk drives is
easily done by using the Configure program.
Switching Disk Drives
On the deskTop, the disk drives and REU are
represented by icons located on the right side
of the screen. The disk drive icon at the top of
the screen represents Drive A; the one below it
is Drive B (which also can represent an REU).
You can switch disk drives simply by clicking
on the disk drive icon you need.
Drive A
Drive B
Many GEOS applications will read a file in another disk drive. For example, you could place the geoSpell spell-checkingprogram on a disk in
Drive A and a group of geoWrite documents on a disk in the other disk
drive. When you open geoSpell in Drive A, it will display a dialog box
listing documents you can spell-check on the current disk. This dialog box
will also enable you to gain access to a list of documents in Drive B.
If you add or change a disk drive, you can use the CONFIGURE program
on the deskTop to enable GEOS to recognize it. (This file is located on the
GEOS ADDT'L side of the program disk.) Afterwards, every time you boot
GEOS, the new disk drive will be recognized.
Learning GEOS
13
The
deskTop
This chapter describes the features of the GEOS deskTop. Use this section
to learn more about the deskTop's functions: how to manage files and
disks, and how to use more than one disk drive. You will also learn how to
run non-GEOS programs (such as BASIC and Assembly Language programs) from the GEOS deskTop.
At the end of this chapter is a Quick Reference to all the commands
contained in the deskTop menus.
Unfamiliar terms are defined in the Glossary on page 73.
The deskTop 15
The deskTop Screen
The deskTop, which is the first screen that appears after you boot GEOS,
enables you to gain access to and work with your files. It also allows you to
make decisions regarding disks, such as copying or renaming them. This
chapter describes how to use the deskTop to work with files and disks.
The deskTop appears as follows:
command menu
title bar
/
/
I
l
close
icon
file
icon
[81
CEOS DEMO
calculator
net* pad
p t r l r t t n t e mpr
/
bother
printer icon
waste ba;ket icon
The command menu lies along the top of the deskTop. Selecting each
item in the command menu will cause another menu of commands to
appear. To select a menu or a menu item, point to it and click.
Along the upper right side of the deskTop are the disk icons, which indicate
the disks that are currently in the disk drives. The disk drive containing the
currently active or open disk is black. You can have up to two disk icons,
each representing a disk drive or RAM Expansion Unit.
The disk note pad is the large white area in the middle of the screen. It
contains information about the currently open disk. The disk's name
appears in the title bar (in the above example, the name of the disk is
GEOS DESKTOP. A close icon is displayed at the far right; click on it to
close (de-activate) the disk. The number of files, how much disk space is
16 The deskTop
used and how much is available are listed below the title bar. The disk note
pad page displays the icons of the files located on the currently open disk.
There may be up to eight file icons on each page of the disk note pad. The
icon's appearance indicates the file's type,such as application or document.
The name of the file is written below the icon. Once you click on a file
icon, it will become dighlighted (i.e., it will appear in reverse video, just as
the currently open disk drive). You need to highlight a file before you can
move it around, open it, or work with it by using the command menu. Use
the pointer to highlight a file icon.
The area just below the disk note pad is the border, which is used to
temporarily deposit file icons you are moving or copying. You can have up
to eight file icons at a time in the border area.
The printer icon appears in the lower right corner of the deskTop. The
printer icon represents the default printer; below it is the name of the
currently selected printer.
The waste basket, whose icon also appears in the lower right corner of the
deskTop, provides a way for you to delete files from the deskTop.
Moving to Another Disk Note Pad Page
You can have as many as 18 pages on the disk note pad, depending on the
number of files on the disk. There are two ways to flip through the pages:
For the first nine pages, enter the page number (1-9) from the keyboard.
For all pages, click on the dog-eared (turned over) corner at the lower
left corner of the disk note pad to move to another page:
Click here to go to h e next page.
Click here to go to h e previous page.
The deskTop 17
File Management
File Functions
You can perform a number of actions with files on the deskTop. You can
alter the viewing mode of the disk note pad files, select a file, move and
copy files, open a file, change a file's write protect status, rename a file,
duplicate a fde, rearrange files on a disk note pad page, delete a file, make a
file a default file, and print a document. With the deskTop V1.5,you need
to work with one file at a time.
Types of Files
Each GEOS disk comes with an assortment of files which enable you to
move around GEOS and use its many features. Depending on the GEOS
product you have, you will use some or all of the following:
System frles: basic operating files necessary for the use of GEOS.
System files enable you to boot and run GEOS, use the deskTop, and
transfer infornation from one file to another.
Program files: application files, such as geowrite, a sophisticated
word processing program and geoPaint, a popular color graphics
program. Desk accessory utility programs and Assembly Language
and BASIC programs also fall into this category.
Data files: documents created with GEOS (and non-GEOS) applications. Font files, which enable you to use a variety of typefaces in your
documents, are also data files. In this manual, application data files are
referred to as documents.
Interface drivers: programs that enable you to use a specific input
device (such as a joystick or mouse) and printer.
Non-GEOS files: programs and data files that have not been converted
to GEOS format.
To see the full range of GEOS products, refer to the Berkeley Softworks
GEOS Product Catalog that accompanies this package.
18 The deskTop
Viewing Modes
You can view the items on the deskTop in either text or icon mode. Use
text mode if you wish to view a list of all the files on the disk without
having to page through the disk note pad pages. Text mode will sort files in
a variety of ways. In any way the files are sorted, files with numbered
names (e.g., the 1526 printer driver file) will appear before alphabetical
names. Text mode also displays certain information about each file: its
category type and how much memory it uses. Scroll through the list by
clicking on the scrolling arrows at the bottom of the disk note pad. Use icon
mode if you wish to manipulate the file in any manner (e.g., open it).
To view by icon mode:
Select by icon from the view menu. The files on the disk note pad will
be displayed as icons. Use this mode if you wish to work with files on
the deskTop. The deskTop is initially in icon mode.
To view by text mode:
Go to the view menu and click on one of the following commands:
by size. Sorts files by size, largest file fist.
by type. Sorts files by file type.
by date. Sorts files by date of last modification, most recent first. The
date is set by the Preference Manager desk accessory.
by name. Sorts files alphabetically.
The deskTop 19
Selecting a File
You need to select a file with the input device before you can work with it.
To select a file, you need to be in icon mode.
To select afile:
Simply point to the file icon and click. The file icon will become
highlighted (i.e., white lettering on a black background).
To deselect afile:
Click anywhere outside the file icon.
Opening a File
You can open documents from within an application, or you can use the
deskTop to open the file (as long as a copy of the application is on that
disk). Remember that you need to be in icon mode to open a file.
To open afilefrom the deskTop, use one of the following methods:
Double-click on the file icon.
Click once on the file icon so that it is highlighted, then select open
from the file menu.
The types of files you can open from the deskTop are application programs,
documents you have created, or desk accessories. You can open BASIC or
Assembly Language programs and their data files. If you attempt to open
another file type, such as a font file, a dialog box will inform you that the
file cannot be opened from the deskTop.
File Info and Write Protect Status
The info option in the file menu displays certain information about the
selected file icon on the currently open disk. It also enables you to enter a
brief note regarding the purpose of a file and to determine whether a file can
be deleted by changing its write protect status.
To select info:
1: Click on the file icon you need so that it is highlghted.
2:
Select info from the file menu.
20 The deskTop
A dialog box will display the disk name, file type, file class, version,
file structure, file size, most recent file modification date, and file
author. It also will enable you to add a brief note and change the write
protect status of the file.
Write Protect Box
To add a brief note to afile's info dialog box:
Simply start typing. Press
1to backspace. To move to
another location, move the pointer anywhere in the text and click.
To change the file's write protect status:
Click on the Write Protect box once. If the box is black, the file
cannot be deleted. If the box is white, the file can be deleted.
To close the info dialog box:
Click on the close icon in the upper right corner of the info dialog box.
You will be returned to the deskTop.
Renaming a File
You can rename (or alter the current name of) a file by using the rename
menu item. Before you can rename a file, you need to be in icon mode.
To rename a file:
1: Click on file you wish to rename.
2: Select rename from the frle menu.
The deskTop 21
3: A dialog box will ask you to "Please enter new filename." Press
1(
to backspace over as much of the name as needed, enter a
new name, and press.1Use no more than 15 characters. File
names can contain spaces, punctuation, and be in upper or lowercase, if
desired.
To cancel and leave the name unchanged:
Select Cancel or press (RETURN]without changing the file name.
Duplicating a File
Note that the name of the duplicated file cannot be the same as the original
or any other file on that disk. Before you can duplicate a file, you need to
be in icon mode.
To duplicate a file:
1 : Click on the file you wish to duplicate.
2: Select duplicate from the file menu.
3: A dialog box will ask you to "Please enter a new filename." Press
The
to backspace, enter a new name, then press
new filename should have no more than 15 characters.
m.
NOTE The new file will be the same as the old file, except for the
name.
Moving a File
You can move file icons around the disk note pad and to other disk note pad
pages. If you wish to move a file to another disk you will simply copy it to
that disk, not actually remove it fiom the original disk.
To move afile:
1: Click on the file icon so that it is highlighted, pause, then click on it
again. An outline called a ghost icon will become attached to the
pointer. You can move the ghost icon around the deskTop.
2: To deposit the file icon, move
its ghost to its destination and
click again.
22 The deskTop
mm
original file icon
highlighted
-
the same file
~c;k
ghost
NOTE In this manner, you can delete a file by depositing it into the
waste basket, print a document by depositing it on top of the printer
icon, or, if you have more than one disk drive, copy a file by depositing
its ghost icon onto the disk drive containing the destination disk. You
also can move file icons to another disk note pad page (see 'Rearranging File Icons," page 25).
Default Files
Some files automatically are used in place of others. For example, the first
time you booted GEOS, the joystick was selected as your input device.
This is because the joystick file icon was placed ahead of the other input
device files (mouse, Koala Pad, and Inkwell light pen) on your disk.
GEOS is equipped to handle a wide variety of printers and input devices.
However, because you can use only one such device at a time, you will need
to configure GEOS to use the device. The procedure for doing so is simple;
all you need to do is use the select input or select printer option in the
geos menu. (The procedure for changing a printer device is covered in
Chapter 5, 'Those Extra Files.")
Installing an Input Device
The first time you boot GEOS, the joystick will be active as your input
device. If you wish to use a mouse, Koala Pad, or Inkwell light pen, you
will need to use the following procedure to activate it for use with GEOS.
Once you have activated an input device, it will remain active (i.e., the
default file) until you change its default status again.
To select an input device as the default input device:
1: Hold down the
key, and while keeping it held down, press the letter
m.
2: A message box (called a dialog box) will appear on the screen. The
dialog box will display the four input device types on the disk. You
need to select one.
The deskTop 23
3: To select your particular input device, press the(]
below the
To move:
keys (located
mkey) to move the pointer on the screen:
Press:
Move the pointer so that it is positioned over the name of the input
device you have hooked up to your Commodore. For example, if you
have a mouse, move the pointer so that it is positioned over COMM
1351.
4: When you have the pointer positioned over the input device name you
need, press the
key. The name you select will appear in
reverse video (i.e., white lettering on a black background).
m
5: Now use the CRSR keys to move the pointer so that it is positioned
The dialog box
over the small box that says OK. Press. -1
will disappear and you will be returned to the deskTop.
6: You now can use your input device to move the pointer around the
screen. You will notice that the input device file icon you selected will
have moved ahead of the other input device file icon on the disk note
pad.
24 The deskTop
Rearranging File Icons
You can move a file from one page to another of the disk note pad, if
desired. Files are listed in a menu or dialog box in the same order they
appear on the disk note pad. If you have certain files you wish to appear
early in a menu or a dialog box (e.g., fonts or file names), you can do so by
rearranging them so that they appear at the beginning of the disk note pad.
If you have special files you use frequently, you will find it quicker to gain
access to them if you store them on the first page of the disk note pad.
To move a file icon to another disk note pad page:
1: Open the disk containing the files you need so that the disk note pad is
displayed.
NOTE To open a disk, hold down the
key and press
,or click
on its disk drive icon.
2: Flip through the pages of the disk note pad until you find the file icon
you need.
NOTE To flip through the pages, either click on the dog-ear corner of
the disk note pad or press the appropriate page number (1-9).
3: When you find the file you need, click on it once, pause, then click on
it again so that you bring up its ghost icon.
4: Drag the file's ghost icon to
the border and click to deposit
it there.
file
NOTE You can move up to
eight file icons to the border.
icon
on
border
5: Go to the destination disk note pad page, either by clicking on the dogear or, for pages 1-9, entering a page number.
6: Now drag the ghost file icon (using the method described above) you
deposited onto the border up to the disk note pad page.
7: Select an empty place and click to deposit the file icon there.
The deskTop 25
2: Insert the destination disk into the other disk drive. Make sure it has
been opened (its name will appear below the disk drive icon).
3: Click on the file you wish to copy so that its ghost icon appears.
4: Drag the file's ghost icon to the other disk drive icon and click to
deposit the ghost on top of the destination disk drive icon. The file will
be copied to that disk.
NOTE You can copy a file from Drive A to Drive B and vice versa.
Printing a File
You can print an application document from the deskTop or within its
application. If you are printing a geowrite document, a dialog box will
enable you to set a variety of parameters regarding the document (e.g., page
range). If you are printing a geopaint document, it will be printed right
away. Note that before you can print a file, you first must activate the
correct printer driver file. This procedure is covered in Chapter 5, 'Those
Extra Files."
There are two ways to print a document from the deskTop:
To print using the command menu:
Click once on the document file icon so that it is highlighted, then
select print from the file menu.
To print using the printer icon:
1: Click on the document file icon so that its ghost icon appears.
2: Drag the ghost icon to the printer icon and click to deposit it on top of
the printer icon.
Deleting a File
You can delete a file using the waste basket. Note that
the procedure for deleting files on a master disk is slightly
different from a regular file deletion. (This is to prevent
accidental damage to your master disks.) In either case,
once you have deleted a file, it is permanently deleted.
Drop it in the
waste basket.
The deskTop 27
If you try to delete a file that is write protected, a dialog box will inform
you that the file cannot be deleted. To change its write protect status so that
you can delete the file, refer to "File Info and Write protect Status," page
20.
To delete a file from a work disk:
Drag the file's ghost icon to the waste basket and click to deposit it
inside the waste basket.
To delete ajile from a master disk:
1: Drag the file's ghost icon to the border and click to deposit it there.
2: Now drag the file icon to the waste basket and click to deposit it inside
the waste basket.
28 The deskTop
Disk Management
The disks you use in GEOS fall into three general categories: boot (or
system), application, and work disks. (Boot and application disks also are
referred to as master disks.) The boot disk is used to start up GEOS. The
application disk contains the GEOS programs you use, such as geoWrite or
geopaint. A work disk, described briefly in Chapter 2, "Learning GEOS,"
is reserved for everyday use and its contents are determined by you. It can
contain copies of the application, documents, and related frles (such as desk
accessories or font files).
Opening a Disk
There are three ways to open a disk:
Select open from the disk menu.
Hold down the
key and press 101.
Click on one of the disk drive icons at the right side of the screen.
IMPORTANT When a disk is open, do not remove it from the disk
drive unless a dialog box prompts you, or until you have properly
closed the disk (as described below). Otherwise, damage to the files on
the open disk may occur.
Closing a Disk
Before removing a disk from a disk drive, always close the disk by using
one of the following methods:
Select close from the fde menu.
Hold down the 161 key and press
.
Click on the close icon at the upper right corner of the disk note pad.
The deskTop 29
Renaming a Disk
You can use spaces and punctuation in the names of your disks, if desired.
You can have up to 16 characters in a disk name.
To rename the currently open disk:
1: Select rename from the disk menu.
2: A dialog box will ask you to "lease enter new disk name." Backspace
over the current name as much as you need, type in a new name, and
press.1NOTE Do not give disks the same name, since this may cause C O ~ ~ U -
sion.
Copying a Disk
The methods for copying a disk vary, depending on whether you have one
disk drive or two. Note that the RAM Expansion Unit is treated as a disk
drive. The source disk is the disk whose contents you wish to copy; the
destination disk is the disk onto which you wish to copy those contents.
NOTE You cannot copy a boot disk.
To copy a disk using one disk drive:
1: Insert the source disk into the disk drive and close the disk drive door.
2: Open the source disk, either by clicking on its disk drive icon on the
deskTop or by holding down
and pressing the letter 0.
3: Open the DISK COPY utility program,
either by doubleclicking on its icon or
highlighting its icon and selecting open
from the file menu.
1
DISK COPV
Look for
his file icon
on the deskTop.
NOTE The DISK COPY utility program is located on the GEOS
ADDTL side of the program disk.
4:
The screen will turn blue and a message will instruct you to insert the
disk to be copied into the disk drive. Insert the source disk and press
. -1
30 The deskTop
5: Next, you will be instructed to insert the destination disk into the disk
drive. After you have done so, press.1NOTE If the destination disk is unformatted, the DISK COPY pro-
gram will format it first before continuing with the copy procedure.
6: Continue to follow the instructions on the screen until the disk copy
procedure is complete. It should take about three swaps of the disk.
When it is finished, you will have the option of copying another disk or
returning to the deskTop. Press to copy another disk or to return
to the deskTop.
7: Use the rename command from the disk menu to rename the destination disk.
IMPORTANT To avoid confusion, never give two disks the same
name.
To copy a disk using two disk drives or one disk drive and a RAM Expansion Unit:
1: Open the source disk by inserting it into a disk drive and clicking on
that disk drive's icon.
2: Select copy from the disk menu. A dialog box will prompt you to
insert the destination disk into the other disk drive.
3: Insert the destination disk into the other disk drive and click OK.
NOTE If "the other disk drive" is a RAM Expansion Unit, this
procedure will copy the current disk contents to the REU. If you have
an REU, just click OK.
4: The message "Replace the contents of (destination disk name) with the
contents of (source disk name)?" will appear. Click YES to continue.
After a few moments, the contents of the source disk will be copied
onto the destination disk.
NOTE You can copy a disk in Drive A to Drive B and vice versa.
The deskTop 31
Validating a Disk
Use the validate command to check for possible errors on the currently
open disk. If the damage is minor, the validate command will repair it.
Validate will not change the file contents of the disk. After validating a
disk, GEOS will reopen it.
IMPORTANT Never validate a GEOS disk from BASIC. Only use the
GEOS validate command when in the GEOS environment.
To validate a disk:
1: Open the disk you wish to validate.
2: Select validate from the diqk menu.
Formatting a Disk
Before a blank disk can be used to store files, it must be formatted. If the
disk contains files, formatting will erase the files.
Toformat a disk:
1 : Select format from the disk menu.
2: A dialog box will ask you to "Put disk to format in drive # and enter a
name for it." If you have one disk drive, remove the current disk and
insert the disk to be formatted; if you have more than one disk drive,
insert the disk to be formatted into Drive B.
3: Enter a name for the disk and press.I-[
Resetting a Disk
Use this command if you wish to initialize the deskTop and reopen the
currently active disk. Use this command after disk errors, or if you accidentally swap disks without following the proper open and close procedures.
To reset a disk:
Select RESET from the special menu.
32 The deskTop
Using More than One Disk Drive
The disk note pad displays the contents of one disk drive at a time; the
command menu acts on the currently selected disk drive. You can set up
your Commodore to use two disk drives. As mentioned earlier, the RAM
Expansion Unit acts as an extra disk drive.
Available Disk Drive Types
The 1541 Disk Drive
Memory: 165K.
Disk Type: Single-sided 5 114 inch.
The 1571 Disk Drive
Memory: 331K.
Disk Type: Single- and double-sided 5 114 inch.
The 1581 Disk Drive
Memory: 790K
Disk Type: Double-sided 3 112 inch.
NOTE The 1581 disk drive (which is not supported by the 1.5 deskTop) operates faster than the 1541 or 1571 disk drives; however, it is
not as fast as a RAM Expansion Unit.
The RAM Expansion Unit
Memory: 165K or 331K. See 'The RAM Expansion Unit (REU),"
below, for a more detailed explanation.
The RAM Expansion Unit (REU)
Perhaps the greatest single performance improvement you can make to your
Commodore when using GEOS is to purchase the Commodore RAM
Expansion Unit. This device adds RAM storage to your Commodore and
acts as a disk drive. A 1764REU will add 256K and a 1750REU will yield
512K additional RAM. By copying applications, desk accessories, and
documents to the REU, and using them on the REU, you will notice an
immense performance improvement in the speed with which applications
load and run. When you have completed a document, be sure to copy the
documents you altered back onto the disk in the actual 1541/1571/1581disk
drive. Once you turn off the computer, any files stored on the REU will not
be saved.
The deskTop 33
As mentioned before, the REU acts a disk drive, except that you cannot
physically insert a disk into it. If the REU is supports 256K, you need to
configure it as a 1541 disk drive, which uses 165K. If the REU supports
512K, you either can configure it as a 1541 disk drive (at 165K) or a 1571
disk drive (at 330K). The rest of the memory is used by GEOS to speed up
the programs you are currently using.
Adding or Changing a Disk Drive
Before you can use any of the previously mentioned disk drives with
GEOS, you need to configure (i.e., format) each disk drive to the GEOS environment. To do so, use the CONFIGURE program, which is located on
the GEOS ADDT'L side of the program disk.
Before You Use the CONFIGURE Program
In order to use the CONFIGURE program, you will need to copy it to the
GEOS DESKTOP side of the program disk (i.e., it needs to be on the boot
disk in order to enable GEOS to recognize the configurations you set). If
there is not enough room on the GEOS DESKTOP side, copy the DEMO
file to a work disk. Once you have copied the DEMO file to a work disk,
go to the GEOS DESKTOP side of the program disk and delete the DEMO
program. If necessary, refer to "Copying a File to Another Disk," page 26.
The following procedures describe how to change the configuration for
Drive A, how to add or change the configuration for Drive B, and how to
configure a RAM Expansion Unit as a disk drive.
To change Drive A :
1: Make sure the CONFIGURE program has been copied to the GEOS
DESKTOP side of the program disk.
NOTE If necessary, refer to "Copying a File to Another Disk," page
26.
2: Open the CONFIGURE program by
double-clicking on its file icon.
Look for
this file icon
C ~ N F ~ G I J R E on the deskTop.
NOTE An alternative is to highlight the CONFIGURE file icon and
select open from the file menu.
34 The deskTop
3: Once you open the CONFIGURE program, the following screen will
appear:
RAM expansion: 512K
DMA for 'MoueDato'
RAM Reboot
The CONFIGURE program's main dialog box
In the above example, the currently active disk drive for Drive A is a
1571 disk drive. Note that its box is shadowed.
4:
Go to the Drive A dialog box and click on the No Drive option. A
dialog box will say "If desired, you may now turn OFF and/or unplug
drive A." If Drive A contains your boot disk, remove the boot disk
from that drive, then turn off andor unplug Drive A. Click OK.
5: You will be returned to the main CONFIGURE screen. The Drive A
box will now list a series of disk drive types.
6: Click on the type of disk drive you plan to use as Drive A. A dialog
box will instruct you to "Plug in & turn ON new drive." Connect the
cables to the new disk drive according to the instructions in that disk
drive's installation manual. If the previous disk drive contained your
boot disk, insert the boot disk into the disk drive.
7: Once the new disk drive is set up, click OK. You will be returned to
the main CONFIGURE screen. The disk drive you selected will be
listed below the No Drive option.
8: Select save configuration from the file menu to install the change.
The deskTop 35
9: To exit the CONFIGURE program, select quit from the file menu.
To add a disk drive or change Drive B:
1 : Make sure the CONFIGURE program has been copied to the GEOS
DESKTOP side of the program disk.
NOTE If necessary, refer to "Copying a File to Another Disk," page
26.
2: Open the CONFIGURE program by double-clicking on its file icon.
NOTE An alternative is to highlight the CONFIGURE file icon and
select open from the file menu.
3: Once you open the
CONFIGURE program, a
screen with three dialog
boxes - for Drives A and
B and the RAM Expansion Unit -will appear.
Go to the Drive B dialog
box and click on No
Drive.
4:
Use the Drive B dialog box.
Once you have clicked on
No Drive, the Drive B
dialog box will display a list of disk drive options. Click on the disk
drive option you wish to configure as Drive B.
5: Once you select a disk drive type, a dialog box will ask you to "Plug in
& turn ON new drive." Hook up the new disk drive according to the
instructions found in its installation manual.
6: Once you have hooked up and turned on the new disk drive, click OK.
You will be returned to the main CONFIGURE screen, and the disk
drive you selected bill be listed under the No Drive option.
NOTE If you configured Drive A as a R A M Expansion Unit, a
"shadowed" disk drive option will appear in the Drive B dialog box.
Select this option. A shadowed disk drive will use some of the R A M
36 The deskTop
Expansion Unit's memory to speed up the performance of any GEOS
disk in that disk drive.
7: Select save configuration from the file menu to install the change.
8: To exit the CONFIGURE program, select quit from the file menu.
To co$gure a RAM Expansion Unit as a disk drive:
1: Before you boot GEOS, hook up the RAM Expansion Unit to your
Commodore according to the instructions in the REU's installation
guide.
2: Boot GEOS. Make sure you have copied the CONFIGURE program
to the GEOS DESKTOP side of the program disk.
NOTE If necessary, refer to "Copying a File to Another Disk," page
26.
3: Open the CONFIGURE program by double-clicking on its file icon.
NOTE An alternative is to highlight the CONFIGURE file icon and
select open from the fde menu.
4: Once you open the CONFIGURE program, a screen with three dialog
boxes - for Drives A and B and the RAM Expansion Unit -will
appear. You can configure a RAM Expansion Unit as either Drive A or
Drive B. Go to either the dialog box representing the disk drive you
wish to configure for the REU and click on No Drive.
5: The disk drive's dialog box will display a list of disk drive types. If
you hooked up a 1764 REU, click on the RAM 1541 option. If you
hooked up a RAM 1750, click on either the RAM 1541 or RAM 1571
option.
6: Once you select a RAM disk drive type, you will be returned to the
main CONFIGURE screen. The REU type you selected will be listed
below the No Drive option of the disk drive dialog box you used.
7: In the RAM Expansion Unit dialog box, make sure that the DMA for
"MoveData" and RAM Reboot options are selected (their option
The deskTop 37
boxes will be filled in). DMA for "MoveData" will enable GEOS to
swap large amounts of data in the REU,thereby speeding up GEOS
considerably when used in conjunctions with an REU. RAM Reboot
will enable you to reboot without losing the contents of the REU.
Check the REU dialog box before you exit. The options should be selected.
IIMA for 'MoveData'
RAM Reboot
8: Select save configuration from the file menu to install the change.
9: To return to the deskTop, select quit from the file menu.
38 The deskTop
represented by a C=64 icon with the file's name below. You can
rename, copy, and delete these files as if they were standard GEOS
files.
Running a Non-GEOS Program on GEOS
Once you attempt to open a non-GEOS program on GEOS, GEOS will
determine the type of program and if possible, run it. If you cannot open a
non-GEOS file in GEOS, boot the system disk from which the document
was created, then open the file.
To run a non-GEOS program on GEOS:
1: Double-click on the program file icon. Use the program as it is
normally used.
2: When finished, reboot GEOS so that you can return to the deskTop.
NOTE If you have a RAM Expansion Unit, you can reboot so that its
contents will not be lost. Exit to BASIC (by selecting BASIC from the
special menu) and type LOADWRBOOT",8,1. The GEOS deskTop
will appear.
If the disk you have inserted is normally run using the LOAD"*",8,1
command, double-click on the upper left corner icon of the disk note pad to
open that file. (The LOAD9'*",8,1 command will tell your Commodore to
open the first file it finds on the disk.)
40 Tlle deskTop
GEOS and BASIC
If you are a BASIC programmer, you can enter and use the BASIC environment directly from the GEOS deskTop.
To enter BASIC from the deskTop:
Select BASIC from the special menu. You will enter the Commodore
BASIC interpreter.
Using the BASIC Interpreter from the deskTop
Once you have entered the Commodore BASIC interpreter, your Commodore will run much as before except that the default NMI vector will be
replaced with a vector to some reboot code for the deskTop in the $C000
memory space. This will allow the deskTop to be rebooted by inserting the
originid GEOS boot disk into the disk drive and pressing the1 key on the keyboard.
Running BASIC Programs from the deskTop
Any BASIC program can be loaded and run from the deskTop. If the
program is smaller than 26K, the GEOS diskTurbo software will fast-load
the program into memory and automatically execute a RUN command. If
the program is larger than 26K. it will be loaded by the normal Commodore
DOS routines and a RUN command will be executed.
To run a BASIC program from the deskTop:
Double-click on the program's file icon on the disk note pad page.
Returning to the deskTop
If the programs you have run while in the BASIC interpreter do not disturb
the memory space between $C000 and $C080 (hex address values), and the
NMI vector has not been changed, then you can reboot the deskTop.
To reboot from BASIC:
1: Place the original GEOS boot disk into Drive A.
2: Press the1 -
key.
To reboot from BASIC without losing the contents of an REU:
Type LOAD"RBOOT",8,1.
The deskTop 41
Quick Reference: deskTop Menus
geos
geos info: displays copyright notice and authors of GEOS.
deskTop info: displays copyright notice and authors of the deskTop.
select printer: moves a selected printer driver to the default position
until the next time you boot GEOS.
select input
): moves a selected input device (mouse, joystick,
Inkwell light pen, or Koala Pad) to the default position until the next
time you boot GEOS.
calculator: a desk accessory for quick calculations.
alarm clock: a desk accessory that lets you set the time and an alarm.
note pad: a desk accessory that lets you jot notes to yourself.
preference mgr: a desk accessory for determining the input driver
speed and color, screen background and foreground colors, file icon
colors, and system time and date.
text manager: a desk accessory for storing portions of text for use in
other documents. (On this disk, the Text Manager is located on the
GEOS ADDT'L side.)
photo manager: a desk accessory for storing graphic images for use in
other documents. (On this disk, the Photo Manager is located on the
GEOS ADDT'L side.)
(lm
file
open: loads and executes the currently selected file on the deskTop.
duplicate: creates a duplicate copy of the selected file.
rename: renames the selected file.
info: displays information about the selected file; also lets you change
a file's write protect status.
print: prints the selected application document.
vie W
by icon: displays files in icon mode.
by size: displays files sorted by size, largest file fist.
by type: displays files groups by type.
by date: displays files in order of last modification, most recent file
modification first.
by name: displays files in alphabetical order.
42 The deskTop
Desk
Accessories
GEOS offers a range of desk accessories, which are small programs you can
use from within an application or on the deskTop. When you select a desk
accessory from the geos menu, it will pop up over the current application or
the deskTop; when you exit the desk accessory, it will disappear from the
screen and you will be returned to the previous program. The desk accessories available on this disk are the Calculator, the Preference Manager, the
Alarm Clock, the Note Pad, the Photo Manager, and the Text Manager. The
Calculator,Preference Manager, Alarm Clock, and Note Pad, which you
can use right away, are located on the GEOS DESKTOP side of the
program disk.
Note that you cannot use the Photo Manager and Text Manager desk
accessories with this disk. These desk accessories are used with other
GEOS applications, such as geoWrite and geoPaint. The Photo Manager
and Text Manager are located on the GEOS ADDT'L side of the program
disk.
Desk accessories can be copied to work disks and arranged so that they
appear in any order you wish in the geos menu.
Desk Accessories 45
The Calculator
The Calculator desk accessory gives you the ability to do quick
arithmetic while running any GEOS application or while you are
on the deskTop. It operates in the same fashion as a typical fourfunction calculator.
Entering the Calculator
To enter the Calculator, use one of the following methods:
Select calculator from the geos menu.
Go to page 1 of the GEOS DESKTOP disk note pad and double-click
on calculator file icon.
Once you open the Calculator, it will appear as follows:
The Calculator will appear over an application as well as the deskTop.
46 Desk Accessories
Entering Values
To enter values and execute functions, either use the pointer and click on
the Calculator keys, or use the top row of numbers on your keyboard. The
keys you need to use are as follows:
Add:
Subtract:
Divide:
Multiply:
Decimal:
Exponential:
~qual:
Clear:
Clear Entry:
Close:
Calculator Key
Keyboard Key
+
m
-E
X
E
C
CE
I
El
El
IINST/DELI
pwilIQI
Numbers in Scientific Notation
In addition to supporting the basic arithmetic functions of addition, subtraction, multiplication, and division, the Calculator supports handling numbers
in scientific notation. To enter very large (or very small) numbers, use
scientific notation. Type the mantissa (the decimal part of a logarithm),
then E, then the power of 10. For example, to calculate the equation 3.2 X
10" + 2.1 X 10⁵,you would input the following:
1: Type: 3.2Ell
2: Click on the division key: +
3: Type: 2.1E-5
4: Click on the equal sign: =
The correct answer, 1.5238E+16, is displayed in the calculation window.
Note that the maximum exponent that may be displayed or used in a
calculation is 10"' or 10" (E-37or E37).
Desk Accessories 47
Exiting the Calculator
Click on the close icon (the black key in the
upper right corner of the Calculator) or press
-1
on the keyboard.
48 Desk Accessories
Click here
to exit.
The Preference Manager
The Preference Manager desk accessory enables you to set a
variety of parameters regarding the color of the screen or
prrtrrrn<r rngr
pointer, the speed and shape of the pointer, the date, and the
time. As shown below, the Preference Manager is divided into several
functional areas.
Entering the Preference Manager
To enter the Preference Manager, use one of thefollowing methods:
Select preference mgr from the geos menu.
Go to page 1 of the GEOS DESKTOP disk note pad and double-click
on the preference rngr file icon.
Once you open the Preference Manager, it will appear as follows:
The Preference Manager will appear over an application as well as the
deskTop.
By changing the settings displayed in these areas, you can customize the
way GEOS works to your own particular preferences.
Desk Accessories 49
Setting the Pointer Movement Characteristics
-
0-
The three bars in the upper left corner control the
speed of the pointer. MIN VELOCITY and MAX
VELOCITY set the minimum and maximum speed
the pointer will achieve. ACCELERATION
controls how quickly the pointer will achieve
maximum velocity.
Click on the knob.
To determine the pointer's movement:
1: Point to the knob in one of the three bars and click.
2: Drag the knob to a new location. Moving it to the left will slow the
pointer down; moving it to the right will speed it up.
3: Click again to set the knob in place.
4: Go to the list of options at the right and click on the CHANGE box.
NOTE Refer to "Using, Saving, and Recalling Your Changes," page
52, for how to save the changes temporarily, until the next time you
boot GEOS, or permanently.
m!?
Changing the Pointer's Shape
ACTUAL
Click in the EDlTBox.
The two boxes in the lower left corner, entitled
ACTUAL and EDIT, display a bitmapped image
of the pointer. The pointer is composed of small
dots called pixels.
To change the pointer's shape:
1: Position the pointer over the bitmapped image of the pointer in the
larger EDIT box. It will assume the shape of a small line.
2: Click to create new pixels. If you click on an existing pixel, you will
delete it. Change the shape of the pointer by clicking on the pixels that
make up its image.
3: Go to the list of options at the right and click
on the CHANGE box.
50 Desk Accessories
A pointer
becomes
a mouse.
NOTE Refer to "Using, Saving, and Recalling Your Changes," page
52, for a variety of options for saving or recalling changes to the Preferences Manager.
Changing the Pointer's Color
You can change the pointer to any of 15 different
colors.
,El MOUSE
Click here.
To change the pointer's color:
1: Click on the MOUSE box in the list of options in the middle of the
page to cycle through the available colors for the pointer.
2: Go to the list of options at the right and click on the CHANGE box.
NOTE Refer to "Using, Saving, and Recalling Your Changes," page
52, for a variety of options for saving or recalling changes to the Preferences Manager.
Changing the Border, Background, and Foreground Colors
Changing the colors displayed in the border,
BORDER
B.GROUND
background, and foreground is as easy as
F.CROUND
changing the color of the pointer. You have 16
Use
these
options.
colors from which to choose. The background
color may be any of these colors except the current foreground and pointer
colors.
To change the colors of the border, background, and foreground:
1: Click on the BORDER, B.GROUND, and F-GROUND boxes in the
list of options in the middle of the page to cycle through the selection
of colors.
2: Go to the list of options at the right and click on the CHANGE box.
NOTE Refer to "Using, Saving, and Recalling Your Changes," page
52, for how to save the changes temporarily, until the next time you
boot GEOS, or permanently.
Desk Accessories 51
Changing the Date or Time
For accurate dateltime stamping of your
data files, you will need to set the date
and time whenever you boot GEOS and
before you start working with the
applications.
\01:13:25 WM
[
b5/26/88
1 TIME SET
1 DATE SET
Look for these boxes.
To set the date or time:
1: Click on the DATE SET or TIME SET box.
2: Type in the new date or time. (The time will freeze after you press the
first key on the keyboard.) Press the space bar to bypass correct
entries. (Note that the cursor will bypass the colons and slashes.)
3: When you are satisfied with the date or time, press1 -
.
NOTE Moving the pointer outside the DATE SET or TIME SET
boxes will cause the values to revert to their original settings.
NOTE Refer to "Using, Saving, and Recalling Your Changes," below,
for a variety of options for saving or recalling changes to the Preferences Manager.
0 EXIT
Using, Saving, and Recalling Your
Changes
list of options at the right of the Preferences
''50; :8CHANGE .The
M a ~ g edialog
r
box enable you to save the changes
these
boxes.
0DEFAULT you make in a variety of ways.
To install the change temporarily:
Click on the CHANGE box. If you exit the Preferences Manager
dialog box at this point, the changes you made will remain in effect
while you use the application. However, the default parameters will be
reset upon quitting the application and returning to the deskTop.
To install the change permanently on a work disk:
1: Click on the CHANGE box.
2: Click on the SAVE box. The new settings will appear as a Preferences
file on the disk and will be loaded each time you open that disk.
52 Desk Accessories
3: To return to the previous application, click on the EXIT box.
After making additional changes, to recall the last "saved changes:
1: Click on the LOAD box. This will load the Preferences file into the
Preference Manager. The controls then will display the new settings.
2: Click CHANGE to activate the new settings.
To recall the default settings:
Click on the DEFAULT box. This will eliminate all changes you have
ever made and load the standard GEOS colors, shapes, and settings.
To e i t the Preference Manager:
Click on the EXIT box to return to the previous application. Selecting
EXIT without first selecting LOAD, SAVE, CHANGE, or DEFAULT will cancel any changes you have made to the Preferences
Manager in that editing session.
Desk Accessories 53
The Alarm Clock
The Alarm Clock desk accessory can be called up to display
the current time (if it has already been set), set the correct
dldtm clock
time, or set an alarm time. Once set, the clock and alann are
active no matter where you are working in GEOS. Setting the alarm will
cause a tone to sound at the specified time.
., .
Entering the Alarm Clock
To enter the Alarm Clock, use one of the following methodr:
Select alarm clock from the geos menu.
Go to page 2 of the GEOS DESKTOP disk note pad and double-click
on the alarm clock file icon.
Once you open the Alarm Clock, it will appear as follows:
The Alarm Clock will appear over an application as well as the deskTop.
For each of the three buttons used, there is a corresponding key:
for
ode,1 for SET, a n d l m
for close. In the above illustration, the Alarm Clock is set at Clock Mode.
54 Desk Accessories
The Note Pad
With the Note Pad desk accessory you can jot down short notes
while you are using any GEOS application. Your notes will
note pad
automatically be saved to a Notes file on the deskTop. Any text
that was saved in the Notes file will be displayed each time you use the
Note Pad. You can store up to 127 pages of notes, with 253 characters on
each page.
NOTE The term "Note Pad" should not be confused with the "disk note
pad" (the area of the deskTop containing files on the currently open disk).
Entering the Note Pad
To enter the Note Pad, use one of the following methods:
Select note pad from the geos menu.
Go to page 1 of the GEOS DESKTOP disk note pad and double-click
on note pad file icon.
NOTE You cannot enter the Note Pad by trying to open the Notes data
file.
Once you open the Note Pad, it will appear as follows:
The Note Pad will appear over an application as well as the deskTop.
56 Desk Accessories
Adding Notes
When the Note Pad appears, begin to type a note. Insert characters by
clicking the pointer at the desired insertion point; delete characters by
key or the left or
positioning the cursor and pressing the1(
right
key.
Moving to Another Page
To move to another note pad page, click on the dog-ear that appears in the
lower left corner of the Note Pad.
Click here to go to the previous page.
Click here to go to the next page.
Deleting the Note Pad Contents
1: Exit the current application or desk accessory and return to the deskTop.
2: Look for the file icon entitled Notes (not note pad). The Notes file is a
data file that was created when you entered a note into the Note Pad.
3: Delete the Notes file icon from the deskTop by dragging the Notes file
The
ghost icon to the waste basket and clicking to deposit it
inside. This will remove the existing notes and give
icon
you a fiesh Note Pad with which to work.
Notes
Exiting the Note Pad
Click on the close icon at the upper right corner
of the Note Pad.
Click here to exit.
Once you have exited the Note Pad, you will be returned to the previous
application or the deskTop.
Desk Accessories 57
Those
Extra Piles
Some of the files included on this program disk can be used only if you
have purchased GEOS applications and will be necessary for them to run
properly. Do not delete these files. They are located on the flip side of the
GEOS DESKTOP disk, which is entitled GEOS ADDT'L. The files on
page 1 of the disk note pad consist of three font files and the Text Manager
and Photo Manager desk accessories. Pages 2-5 contain a number of
printer drivers, which are special files that enable you to print GEOS
documents using your printer.
If you have not yet purchased a GEOS compatible application, you may
skip this chapter.
Those Extra Files 59
Printer Files
GEOS supports over 70 different printers. Each one
requires its own printer file called a printer driver. This
program disk comes equipped with a number of printer
drivers.
If you purchase any of the GEOS compatible applications, you will need to
use the procedures described in this section to set up your printer so that you
can print GEOS documents. This section describes how to find the printer
driver you need and how to configure GEOS so that you can use your
printer.
Activating Your Printer
Once you have activated your printer driver it will remain the default printer
driver until the next time you change it (even if you reboot GEOS). If you
have more than one printer, you can switch printer drivers as often as you
need.
To make a printer driver the default printer driver:
1: Refer to the Printer Drivers chart on page 61 to find the name of the
printer driver you need.
2: Once you have found printer driver you need, copy it from the GEOS
ADDT'L disk onto your GEOS boot disk.
NOTE If necessary, refer to "Copying a File to Another Disk," page 26.
3: Open the GEOS boot disk so that its deskTop is displayed.
NOTE To open a disk, either click on its disk drive icon or hold down
the
4:
key and press
a.
Choose select printer from the geos menu.
5: A dialog box listing the printer drivers on that disk will appear. Find
the name of the printer driver you copied onto that disk, click on it,
then click OK. You will be returned to the deskTop.
60 Those Extra Files
6: Close the boot disk and remove it from the disk drive.
NOTE To close a disk, either click on its close icon or hold down the
key and press B
7: Now copy the same printer driver to the GEOS application disk.
8: Insert the application disk into the disk drive and open it so that the
deskTop is displayed.
9: Follow Steps 4-5 to make the printer driver you copied to the application disk the default printer driver.
'
10: Close the application disk and remove it from the disk drive.
Prinler Drivers
To find the printer driver you need, refer to the chart below. For example, if
you own an Apple 2 Scribe, you will need to look for the Scribe driver file
on the disk. Once you have found the printer driver file you need, copy it to
the boot and application disks of the GEOS applications you purchase. If
needed, refer to "Copying a File to Another Disk" on page 26. Once you
have copied it to these disks, use the procedure under "Activating Your
Printer" on page 60 to make it the default printer.
Your Printer
Interface
Printer Driver
Apple 2 Scribe
Apple ImageWriter
Apple ImageWriter II
Blue Chip M120
BMC BX-80
Cal-Abco Legend 800
Cal-Abco Legend 808
Cannon PW-1080A
Cannon PW-1156A
Citizen 120-D
C.Itoh 8510
C.Itoh 8510A
C.Itoh Riteman C+ NLQ
RS-232 Serial
RS-232 Serial
RS-232 Serial
Centronics Parallel
Centronics Parallel
Centronics Parallel
Centronics Parallel
Centronics Parallel
Centronics Parallel
Commodore Serial Bus
Centronics Parallel
Centronics Parallel
Commodore Serial Bus
Scribe
ImageWriter
ImageWriter I1
BlueChip M120
BlueChip M120
BlueChip M120
Epson MX-80
Epson FX-80
Epson FX-80
MPS 1200
C.Itoh 8510
C.Itoh 8510A
Riteman C+
Those Extra Files 61
Your Printer
Interface
Printer Driver
Commodore 1525
Commodore 1526
Commodore MPS-801
Commodore MPS-802
Commodore MPS-803
Commodore MPS-1000
Commodore MPS- 1000
Commodore MPS-1200
Epson FX 80/80+/85/100/
100+/185
Epson EX-800
Epson FX- 1851286
Epson JX-80
Epson LQ-800/1000/1500
Epson LX-80
Epson MX-801100
Ergo Systems Hush 80CD
Hewlett Packard Lasej e t
Hewlett Packard Lasejet+
IBM 5152+
Mannesmann Talley
Spirit 80
NEC 8023
NEC PC Printer (Epson LQ
Series)
Okidata Microline 92/93
Okidata Okimate 10
Okidata Okimate 20
Okidata 120
Okidata Oki 120
Olivetti PR-2300
Panasonic KX-P 1090
Panasonic KX-P109111092
Seikosha SP-1000A
Seikosha SP-1000VC
Star Delta
Star Gemini I1
Star Gemini 10x
Star Gemini 10x
Commodore Serial Bus
Commodore Serial Bus
Commodore Serial Bus
Commodore Serial Bus
Commodore Serial Bus
Commodore Serial Bus
Centronics Parallel
Commodore Serial Bus
MPS-801
1526
MPS-801
1526
MPS-1000
MPS-1000
IBM 5 152+
MPS-1200
Centronics Parallel
Centronics Parallel
Centronics Parallel
Centronics Parallel
Centronics Parallel
Centronics Parallel
Centronics Parallel
Commodore Serial Bus
RS-232 Serial
RS-232 Serial
Centronics Parallel
Epson FX-80
Epson FX-80
Epson FX-80
Epson JX-80
Star NB-15
Epson FX-80
Epson MX-80
MPS-1000
HP Laserjet
HP Laserjet
IBM 5152+
Centronics Parallel
Centronics Parallel
Blue Chip M120
C.Itoh 8510
Centronics Parallel
Centronics Parallel
Commodore Serial Bus
Commodore Serial Bus
Commodore Serial Bus
Commodore Serial Bus
Centronics Parallel
Centronics Parallel
Centronics Parallel
Centronics Parallel
Commodore Serial Bus
Centronics Parallel
Commodore Serial Bus
Centronics Parallel
Centronics Parallel
Star NB-15
Oki ML-92/93
Okimate 10
Okirnate 20
Oki 120
Oki 120 NLQ
Olivetti PR-2300
Epson MX-80
Epson FX-80
Epson FX-80
Comm Compat.
Gemini 10x
Comm Compat.
Gemini 10x
Epson MX-80
62 Those Extra Files
Your Printer
Interface
Printer Driver
Star Micronics NL- 10 (with
Commodore interface)
Commodore Serial Bus
Star NL-10
(Corn)
Star Micronics NL-10 (with
Centronics Parage1
interface)
Star Micronics NX-10
Star Micronics NX-1OC
Star SG-10115
Star Radix
Toshiba PA7253
Centronics Parallel
Centronics Parallel
Commodore Serial Bus
Centronics Parallel
Centronics Parallel
Centronics Parallel
Star NX-10
Star NX-l0
Star NX-1OC
Star SG-10115
Gemini 10x
C.Itoh 8510
Interface
The interface you use depends on the type of printer you have. After you
have connected the interface card to your Commodore and printer cable as
explained in the interface card's instruction manual, note the following:
The printer is always addressed as device #4 on the serial bus, so set the
interface card or printer to device #4.
Turn off any auto line-feed settings on the printer and the interface
card.
If the interface card that you are using has a transparent mode and you
cannot get your printer to work with the specific printer setting, use the
transparent mode.
Tested cards are: Centronics Parallel, Commodore Serial Bus, Cardco
Card?+G, Cardco Super G, DSI PP1 Printer Interface, G-Whiz, Jameco
E-232 CM, Microgr&ix MW-302, Micrografix MW-350, Omnitronix
Deluxe RS232 Interface, Telesys Turboprint GT, Xetec Graphics
Printer Interface, Xetec Super Graphix, Xetec Super Graphix Jr.
If Your Printer Is Not Listed
If you don't find your particular printer listed, don't despair-most printers
are compatible with one of the printers listed and can use the same setup. If
your printer does not work, please call Berkeley Softworks for help. The
Customer Service phone number is (415) 644-0890. We may have tested
your printer by then and will be able to help get you up and running.
Those Extra Files 63
As new printers become available, Berkeley Softworks will write new
printer drivers to support these devices. These drivers will be made
available to registered GEOS users for the cost of the disk plus shipping and
handling. They will also be available for downloading on Q-Link Telecommunications Service.
64 Those Extra Files
The Photo Manager
Once you purchase a GEOS application, use the Photo
Manager to store and handle graphic images created with
geoPaint. Graphic images are stored in special files called
photo albums. Each photo album may contain up to 127 pages of graphic
images. For example, one photo album may contain charts and graphs for a
business proposal; another album may contain illustrations for your upcoming novel.
The Photo Manager enables you to select graphics from any of the photo
albums and insert them into other GEOS applications, such as geowrite.
Photo Scraps and Photo Albums
There is a distinct relationship between the "photo files." Whenever you
cut or copy a picture (graphic image), it is placed into a photo scrap file,
which is a temporary storage file. Photo albums are a means of saving the
image you placed in the photo scrap and turning it into a permanent file.
The Photo Manager allows you to cut and paste images to and from a photo
album. A photo album may contain many separate pages. When you need
to place an image from a photo album into a document, copy the photo
album contents into a photo scrap and paste the photo scrap contents into
the document.
Remember that the photo scrap is a temporary file; each time you copy an
image into it, that image replaces the current contents of the photo scrap.
The Photo Album Screen
Once inside the photo album, use the two items in the command menu, file
and edit (located at the top of the album screen) to work with the images
you copied or moved into the album. To exit to the previous application,
click on the close icon at the top right of the album screen.
At the lower left corner of the album screen is the window indicator, which
consists of two black rectangles: the large rectangle represents the entire
size of the image; the smaller rectangle represents the photo album screen.
To view another part of an image that is too large to fit in the window, click
in the larger rectangle where you would like its top left corner to lie.
Those Extra Files 65
Creating a Photo Album or Opening an Existing One
1: Open the Photo Manager by using one of the following methods:
Select photo manager from the geos menu in either an application
or the deskTop.
From the deskTop, double-click on the Photo Manager file icon.
2: When the dialog box appears, select Create new photo album, Open
existing photo album, or Quit.
3: To create a new album, select Create new photo album, enter a name,
To open an existing album, select Open existing
and press
photo album, click on its name, then click on Open. If there are more
than five names on the list, click on the scrolling arrows at the bottom
of the dialog box until you find the album you want.
m.
NOTE The album name dialog box will display only the first
15
albums names on the disk. If you have more than 15 albums and wish
to display a different set of names, you will need to move, delete, or
rearrange the file icons on the deskTop. If necessary, refer to "Rearranging File Icons," page 25.
A photo album could appear as follows:
Use this command menu.
close
icon
window
indicator
A photo album will appear over an application as well as the deskTop.
66 Those Extra Files
Placing an Image into a Photo Album
1: In geoPaint, selekt the Edit Box icon and define the region that
contains the image to be placed in the photo album.
2: Select cut (to move) or copy from the edit menu. The image will be
placed in a photo scrap.
3: Select photo manager from the geos menu. (You need not be in the
document in which you originally created the photo scrap.)
4: Select an option: Create new photo album, Open existing photo
album, or Quit.
5: Enter a name for a new photo album and press,1existing album and click Open.
or select an
6: When the album appears, note that it has its own command menu: file
and edit. Select edit, then select paste. The image that you placed in
the photo scrap will be copied into the album.
NOTE You can use the above commands to move or copy images in
the existing photo album to another photo album. For example, create
a photo album, insert an image into it, cut or copy it, then select close
from the file menu to exit that album. Next, create or open another
album, and insert the cut or copied image of the first photo album into
it.
Remember that only a copy of the photo scrap has been pasted into the
album. If you wish, you may use the same scrap in another album.
If the Image is Too Big for the Photo Album Screen
Scroll the image by clicking on
This outline repesents the
the window indicator below
photo album window.
the album's dog-ear corner.
Click once to pick up the
This outline represents the
entire drawing.
window icon, then click again
to deposit it over the new window location.
5
Those Extra Files 67
Exiting a Photo Album
Use one of the following methods:
Select close from the frle menu if you wish to open another album or
create a new one.
Select quit from the file menu or click on the
close icon to return to the previous application or
the deskTop.
68 Those Extra Files
Click here to exit.
The Text Manager
Jpi
Once you purchase a GEOS application, you will find the
Text Manager useful for storing blocks of text permanently.
text manager
As the Photo Manager manages graphic images, the Text
Manager handles text stored in special files called text albums on the disk.
Each text album may contain up to 127 pages of text collected from your
geopaint or geoWrite documents. Typically, text albums are organized by
the type of text they contain. For example, you may have one text album
that contains headers and footers for a business proposal; another album
may contain poetry samples for an English term paper.
The Text Manager enables you to select text from any of the text albums
and use them in other GEOS applications.
Text Scraps and Text Albums
There is a distinct relationship between the "text files." Whenever you cut
or copy text, it is placed into a text scrap file, which is a temporary storage
file. Text albums are a means of saving the text you placed in the text scrap
and turning it into a permanent file (i.e., a text album). The Text Manager
enables you to cut and paste scraps to and from a text album. The Text
Manager works much like the glossary feature found in other word processing programs. When you need to place text from a text album into a
document, copy the text album contents into a text scrap.
The Text Album Screen
Once inside the text album, use the two items in the command menu, file
and edit (located at the top of the album screen), to work with your text. To
exit quickly to the previous application, click on the close icon at the top
right of the screen album.
If the text is larger than the text album window, use the scrolling arrows at
the bottom of the screen to view another area of the text. To move to the
next page, click on the dog-eared corner at the lower left of the page; to
move to the previous page, click on the page area just below the dog-eared
corner.
Those Extra Files 69
Creating a Text Album or Opening an Existing One
1: Open the Text Manager by using one of the following methods:
Select text manager from the geos menu.
From the deskTop, double-click on the Text Manager file icon.
2: When the dialog box appears, select Create new text album, Open
existing text album, or Quit.
3: To create a new album, Select Create new text album, enter a name,
and press.1To open an existing album, select Open existing
text album, click on its name, then click Open. If there are more than
five names on the list, click on the scrolling arrows at the bottom of the
dialog box until you find the album you want.
NOTE The album name dialog box will display only the first 15
albums names on the disk. If you have more than 15 albums and wish
to display a different set of names, you will need to move, delete, or
rearrange the file icons on the deskTop. If necessary, refer to "Rearranging File Icons," page 25.
A text album could appear as follows:
Use this command menu.
close
icon
scrolling
arrows
A text album will appear over an application as well as the deskTop.
70 Those Extra Files
Placing Text into a Text Album
1: First you must create a text scrap: in geowrite, highlight the text that
you want to cut or copy.
2: Select cut (to move) or copy from the edit menu.
3: Select text manager from the geos menu. (You need not be in the
document in which you originally created the text scrap.)
4:
Select an option: Create new text album, Open existing text album,
or Quit.
5: Enter a name for a new text album and press, -1
existing album and click Open.
or select an
6: When the album appears, note that it has its own command menu
containing the items file and edit. Select edit, then select paste. The
text you placed in the text scrap will be copied into the album.
NOTE You can use the above commands to move or copy text in the
existing text album to another text album. For example, create a text
album, insert an image into it, cut or copy the image, then click on the
close icon to exit that album. Next, create or open another new album,
and insert the cut or copied image of the first text album into it.
Remember that only a copy of the text scrap has been pasted into the
album. If you wish, you may use the same scrap in another album.
If the Text is Too Long for the Text Album Screen
Scroll the text by clicking on the scrolling arrows below the dog-ear.
Exiting a Text Album
Use one of the following methods:
Select close from the file menu if you wish to open another album or
create a new one.
Select quit from the file menu or click on the close
icon to return to the previous application or to the
deskTop.
Click here
to exit.
Those Extra Files 71
The Font Files
The three font files on the disk are California, Dwinelle, and Roma
This is an example of California.
T h is an example o f Roma.
Berkeley Softworks offers a wide range of fonts from which to choose. Not
only can you use a variety of typefaces and styles, but you can use GEOS
fonts to create special characters as well, such as astrological symbols or
dinosaurs. You even can create your own fonts using the geoFont application.
The size of each font is measured in points. There are 72 points to an inch.
The actual height of characters printed using GEOS depends on the resolution of your printer.
For any given font and point size, you also can change the type style used to
print your text. Available styles are plain, bold, italic,onntninne, underline,
superscript a
nd subscript'
If you look closely at the spacing between the individual letters printed by
most typewriters, you will notice that the letters are printed with a fixed
spacing. If you look at a professionally printed page you will notice that
the spacing depends on the shape of the letter. For example, W is wider than
i. This is called proportional spaced printing, which is what GEOS uses
for all text to enable you to create professional looking documents.
One of many
fonts
Berkeley Softworks offers over 50 different font files,
each with a number of point sizes. Once font files are
placed on a work disk, the first six or so (depending on
Calitornia
the application) will appear in the font menu of the
application documents on that disk. You can rearrange font files on a work
disk so that the fonts you need most will appear in the font menu.
72 Those Extra Files
Glossary
Alarm Clock
A desk accessory that enables you to set the time
and an alarm.
album files
Files containing permanently stored text or
graphics. Albums are handled by the Text
Manager and Photo Manager desk accessories.
application
A program that operates in GEOS. geoWrite and
geoPaint are examples of GEOS applications.
backup copy
A copy of an application or work disk. You can
create a backup by using the DISK COPY
program if you have one disk drive or the disk
copy menu item if you have two disk drives.
boot
Turning on the computer and opening GEOS.
BOOT DISK
The master disk that enables you to start up
GEOS.
border
The area on the deskTop just below the disk note
pad. Use the border to deposit file icons temporarily when you are moving them to another disk
note pad page or, if you have a one disk drive
system, to copy them to another disk.
The Commodore key, which appears on the
keyboard. It is used to carry out certain keyGlossary 73
key, hold it
board commands. To use the
down, and while continuing to hold it down,
press the key you need to carry out the command. Keyboard commands are located in the
command menu after the items that apply. See
also keyboard shortcut.
Calculator
A desk accessory that enables you to perform
quick mathematical calculations from the
deskTop or within an application.
clicking
Pressing the input device button to cause the
pointer on the screen to select a menu item or an
icon. It is also used to position a cursor in a
geoWrite document. See also double-clicking.
close
To deactivate or exit a file or disk.
close icon
A rectangular shaped icon that enables you to
deactivate the currently open disk or desk
accessory.
command menu
The horizontal list of options that appears across
the top left portion of the screen.
CONFIGURE file
A deskTop program that enables you to add or
change disk drives for use with GEOS.
cursor
A blinking vertical line indicating the position of
the next typed character.
data file
A document you create by way of a GEOS
application.
default
Any file that is automatically selected by GEOS
when you attempt to use it. The first printer and
input device files on the disk are default files. I f
necessary, you can change the default status of a
file.
74 Glossary
desk accessory
A small utility program you can use from within
an application or the deskTop.
deskTop
The first screen that appears when you boot
GEOS. It enables you to work with the GEOS
system. Use the deskTop to work with files and
disks.
destination disk
The disk onto which you copy files from another
disk. See also source disk.
dialog box
A special box that pops up on the screen to
convey information to or query the user.
DISK COPY
A deskTop program that speeds up the disk
copying procedure for users who have a one disk
drive system.
disk drive
The hardware component used to contain the
disks you use with GEOS.
disk drive icon
An icon that represents a disk drive. It appears
on the deskTop. The currently open disk drive
appears in reverse video.
disk menu
A menu item listing options for disk management.
disk note pad
On the deskTop, the large rectangular area
containing files of the currently open disk.
dog-ear
The icon at the lower left comer of the disk note
pad. It resembles a turned up comer of a page.
Clicking on the turned up edge will display the
next disk note pad page; clicking on the area just
below it will display the previous page.
double-clicking
Pressing the input device button twice in rapid
succession, usually to open a data file or an
application. Double-clicking is the same as
Glossary 75
clicking once on a file icon, then selecting open
from the file menu.
file
A collection of information on the disk, including applications or data files.
file menu
A menu option listing options for file management.
font
The typeface used when you create text. The
text on this page is Times Roman. See also type
style.
geos menu
A menu item listing desk accessories on the
currently active disk and copyright information
on the current application.
ghost icon
On the deskTop, an outline of an icon that
appears after you click on it once, pause, then
click on it again (but not double-click) to move a
file to another place.
icon
A picture representing an operation, option, or a
file. Icons appear in the deskTop, in dialog
boxes, and in applications. Clicking on an icon
will instruct GEOS to perform some action.
icon mode
On the deskTop, the viewing mode that displays
files on the disk note pad as pictures. You need
to be in this mode in order to work with the files.
Inkwell light pen
See input device.
input device
The device that lets you move a pointer on the
screen. Available input devices are the mouse,
joystick, Koala Pad, and Inkwell light pen. To
use an input device, move the device or its
handle in the direction where you wish the
pointer to move. Press the input device button to
make a selection. See also clicking and doubleclicking.
76 Glossary
interface drivers
Programs that enable you to set up your Commodore to use a specific printer or input device with
GEOS. To install a printer or input device, you
need to make it the default file. With each major
product, Berkeley Softworks includes a range of
interface drivers from which you can choose.
joystick
See input device.
Koala Pad
See input device.
keyboard shortcut
Using the keyboard to perform an action on the
screen without using an input device. See also
(Crl.
master disk
An original disk that comes with a GEOS
package.
menu
A list of options enabling you to enter a variety
of commands. See also command menu.
mouse
See input device.
Note Pad
A desk accessory that enables you to write
memos to yourself.
open
To activate a data file or disk. See also clicking
and double-clicking.
photo scrap
A file used to store temporarily graphic images
you select from geoPaint for use in another
document, even if that document was created
with a different GEOS application. See also
Photo Manager.
Photo Manager
A desk accessory that enables you to store
permanently graphics created with geoPaint for
use in g d a i n t and other GEOS applications.
To use the Photo Manager, copy the graphic into
Glossary 77
a photo scrap, then into a photo album for
permanent storage.
point size
A measurement for type. One point equals 1/72
of an inch.
pointer
The small arrow that indicates your position on
the screen. It is used to select menu items and
icons, to select and move regions, and to
determine the placement of a cursor.
Preference Mgr
A desk accessory that enables you to change the
screen and pointer colors, the shape and speed of
the pointer, the date, and the time.
printer icon
On the deskTop, the icon shaped like a small
printer at the lower right corner of the screen
next to the waste basket. It represents the current
printer and is used to print files from the deskTop.
proportional spacing
The ability to adjust the spacing between letters
of text.
RAM Expansion
Unit (REU)
A special device you hook up to your Commodore to increase memory. The REU acts as a
disk drive; however, when you turn off the
computer its file contents are lost. The advantage of an REU is that it greatly increases
memory and operates GEOS many times faster
than normal.
RESTORE key
A Commodore key that enables you to return to
GEOS from a non-GEOS environment (such as
PrintMaster or BASIC).
scrap
See photo scrap or text scrap.
scrolling arrows
The arrow icons that appear at the bottom of a
dialog box that contains more names than can be
displayed in the dialog box at one time. Clicking
78 Glossary
on a scrolling arrow enables you to move
through the list of names in the dialog box.
scrolling
The ability to move through a list of names in a
dialog box or to move a Drawing or Writing
window to another location.
source disk
The disk containing the files you wish to copy to
another disk. See also destination disk.
special menu
Menu item listing options for entering BASIC
and re-initializing the deskTop.
system file
Special files necessary for the operation of
GEOS. The DESKTOP 1.5 is a system file.
text cursor
See cursor.
text mode
On the deskTop, the viewing mode that displays
files in the disk note pad in text form, as opposed
to icon form.
text scrap
A file used to store temporarily text you select
from geoWrite for use in another document, even
if that document was created with a different
GEOS application. See also Text Manager.
typeface
Seefont.
type style
The appearance of a font (i.e., typeface) on a
printed page. Depending on the GEOS application you are using, you can display text in plain,
bold, italic, outnilrne, underline, ,-'p,
and
styles.
validate
On the deskTop, the command that searches for
possible bad sections on the currently active
disk.
view
The deskTop menu item that lists the viewing
modes for the disk note pad contents.
Glossary 79
waste basket
On the deskTop, the icon shaped like a waste
basket next to the printer icon at the lower right
corner of the screen. It is used to delete a file.
work disk
A blank, formatted disk onto which you copy a
combination of files, depending on the project
you have in mind. For example, a work disk can
contain geoWrite, geoWrite data files, font files,
and desk accessories.
write protection
The condition determining whether a file can be
deleted. You can change a file's write protect
status by using the info option in the file menu.
window
The large rectangular region displaying a portion
of the data file in an application such as geoWrite or geoPaint. You can view and work with
other data file sections by scrolling or moving
the window.
80 Glossary
GEOS
Product
Listing
FI
Products from Berkeley Softworks are as follows:
GEOS-
Features the deskTop interface which enables
user to perform file and disk procedures (e.g.,
copying), the geoPa.int color graphics program,
the geoWrite word processing program, a variety
of desk accessories, fonts, printer and input
drivers, diskTurbo, and support for the RAM
1764 Expansion Unit. For use with Commodore
6 4 . 6 4 ~and 128 (in 64 mode).
Spreadsheet program that supports full use of
28,000 data cells, advanced mathematical
functions, automatic recalculation of data and
formulas, adjustable cell width and alignment,
ability to view two parts of a spreadsheet at once,
and print using a full range of options. For use
with Commodore 64, @c, and 128 (in 64 mode).
Features the geoFile database program and
geoMerge. Enables user to design custom forms,
perform sophisticated search and sort operations,
integrate graphics, print labels, and select from a
full range of printing options. For use with
Commodore 64, 64c, and 128 (in 64 mode).
The deskTop 81
geoprogrammer
Features geoAssembler, geolinker, and geoDebugger. Enables user to create full scale GEOS
applications. Includes over 400 pages of
documentation, files with complete listings of
GEOS equates and macros, and commented
source code for three sample GEOS applications.
For use with Commodore 64, @c, and 128 (in 64
mode).
Features the geoSpell spell-checkingprogram for
use with all versions of geoWrite documents.
Enables user to find and correct misspelled
words, and create and edit personal dictionaries.
Also features geoFont, which enables user to
alter the appearance of an existing font or create
a new font. For use with Commodore 64, @c,
and 128 (in 64 mode).
geoWrite Workshop
Features geoWrite 2.1 which enables user to
create documents using headers, footers, a
variety of justification and line spacing options,
and to perform search and replace operations.
Also features geoMerge, geolaser, and Text
Grabber. For use with Commodore 64, 64c, and
128 (in 64 mode).
A full-featured deskTop publishing program that
enables user to import geoWrite documents and
geoPaint graphics, create and change text and
graphics on the screen, create custom layouts,
and use a wide range of tools to create a newsletter. Includes Text Grabber for word processing
file conversion. Supports Apple Laserwriter and
all GEOS supported printers. Automatically
converts earlier geoWrite files to the 2.1 version.
For use with Commodore 64,64c, and 128 (in 64
mode).
GEOS 128
82 The deskTop
Features the deskTop interface which enables
user to perform file and disk procedures (e.g.,
copying), the geoPa.int color graphics program,
the geoWrite word processing program, a variety
of desk accessories, printer and input drivers,
additional memory, numeric keypad use, 2 MHz
processing speed, additional peripheral support,
80-column resolution, diskTurbo, and support for
the RAM 1764 and 1750 Expansion Units. For
use with Commodore 128.
geoWrite Workshop
128
Features geoWrite 2.1, which enables
user to create documents using headers, footers,
a variety of justification and line spacing options,
and to perform search and replace operations.
Also features geoMerge, geolaser, and Text
Grabber. Also features 80-column resolution,
additional memory capability, 2 MHz processing, numeric keypad use, and additional peripheral support. For use with Commodore 128.
DeskPack Plus
Features Graphics Grabber, Icon Editor, geoDex,
geoMerge, and the Calendar and Black Jack desk
accessories. For Commodore 128 users,
DeskPack Plus features 80-column resolution,
improved deskTop, new printer and input
drivers, and upgrades to printing performance.
For use with both Commodore 64 and 128.
FontPack Plus
Features 53 different font files for use with both
64 and 128 lines of Berkeley Softworks products. Font files range from varied type faces to
special characters, such as dinosaurs and
astrological symbols.
geoCalc 128
Spreadsheet program that supports full use of its
28,000 data cells, advanced mathematical
functions, automatic recalculation of data and
formulas, adjustable cell width and alignment,
ability to view two parts of a spreadsheet at once,
and print using a full range of options. Also
supports 80-column resolution, additional
memory, 2 MHz processing, numeric keypad
The deskTop 83
use, and additional peripheral support. For use
with Commodore 64, MC,and 128.
Features the geoFile database program and
geoMerge. Enables user to design custom forms,
perform sophisticated search and sort operations,
integrate graphics, print labels, and select from a
full range of printing options. Also supports 80column resolution, additional memory, 2 MHz
processing, numeric keypad use, and peripheral
support. For use with Commodore 64,64c, and
128;
84 The deskTop
Index
A
Alarm Clock 54
clock time 55
setting alarm 55
B
BASIC
Interpreter 4 1
programs 4 1
with GEOS 41
booting GEOS 2
border 17
C
Calculator 46
clicking 8
close icon
deskTop 16
closing
disks 29
colors
background 5 1
border 5 1
foreground 5 1
pointer 50
command menu 16
commands
how to select 8
Commodore key 9
Configure 1.5 program 34
copying
disks 30
files 26
D
date 52
default files 23
deleting
files 27
master disk files 28
demonstration program 4
desk accessories
Alann Clock 54
Calculator 46
how to use 45
Note Pad 56
Photo Manager 65
Preference Mgr 49
Text Manager 69
deskTop 15
menu summary 42
screen description 16
deskTop icons 10
dialog boxes 8
disk drives
adding 34
changing 34
definition 12
how they operate 13
R A M Expansion Unit 33
types 33
types with GEOS 12
using more than one 33
disk note pad
description 16
pages 17
disks
closing 29
copying 30
formatting 32
management 29
non-GEOS 39
opening 29
renaming 30
resetting 32
Index 85
types with GEOS 29
validating 32
double-clicking 9
E
types 8
keyboard shortcuts
definition 9
how to use 9
learning GEOS 7
exiting GEOS 6
F
file icons 17
files
copying 26
deleting 27
deselecting 20
duplicating 22
functions 18
how to move 10
info command 20
moving 22
opening 20
printing 27
rearranging 25
renaming 21
selecting 20
types 18
viewing modes 19
write protect status 20
font files 72
formatting disks 32
G
GEOS DEMO file 4
ghost icon (see also files, moving)
ghost icons 10
glossary 73
I
input device
how to use 8
86 Index
menus
deskTop summary 42
how to select 8
moving
file icons 22
moving files 10
non-GEOS disks 39
using deskTop with 39
non-GEOS programs 40
Note Pad 56
opening
disks 29
files from deskTop 20
photo albums
creating 66
definition 65
exiting 68
if image is too big 67
opening 66
placing image into 67
screen description 65
Photo Manager (see also photo
albums)
procedure 65
photo scraps 65
pointer
color 50
shape 50
speed 50
Preference Manager 49
printer icon
description 17
printing files with 23
printers
default procedure 60
using with GEOS 60
product listing 8 1
proportional spaced printing 72
text sctaps 69
time 52
v
validate command 32
view menu 19
waste basket
deleting files with 28
description 17
R
RAM Expansion Unit 33
renaming
disks 30
files 21
RESET command 32
REU (see RAM Expansion Unit)
select printer command 60
selecting
disk drive (see opening disks)
file 20
special menu 32,41
text albums
creating 70
definition 69
exiting 7 1
if text is too long 7 1
opening 70
placing text into 71
screen description 69
scrolling text 69
Text Manager (see also text albums)
procedure 69
Index, 87
Copyright O 1986, 1988 by Berkeley Softworks. All rights resewed.
Commodore is a registered trademark of Commodore Electronics Limited.
Commodore 6 4 c is a trademark of Commodore Electronics Limited.
GEOS and deskTop 1.5 are trademarks of Berkeley Softworks.
Berkeley Softworks
Berkeley, CA
Commodore Business Machines, Inc.
1200 Wilson Drive
West Chester, PA 19380
PIN: 363061-01
Commodore Business Machines, Limited
3470 Pharmacy Avenue
Agincourt, Ontario M1W3G3
41A175-001