1
GEQS1282,
User's Manual Addendum
Berkeley Softworks
2150 Shattuck Ave.
Berkeley, CA 94704
Copyright Information
GEOS 128 2.0 software design by Jim DeFrisco, Brian Dougherty, Dave
Durran, Gia Ferry, Doug Fults, Chris Hawley, Clayton Jung, Tony Requist,
Steve Scholl, and Cheng Tan.
GEOS 128 2.0 User's Manual Addendum by Patricia Huey, © Copyright
Berkeley Softworks, Inc. 1988.
Printed 11/88
Commodore 64 ® is a registered trademark and Commodore 128 is a
trademark of Commodore Electronics, Ltd.
GEOS 128 2.0, GEOS 2.0, geoChart, geoCalc, geoCalc 128, geoSpell,
FontPackl, FontPack Plus, International FontPack, geoDex, geoMerge,
geoWrite Workshop, geoWrite Workshop 128, geoLaser, geoPubLaser,
Text Grabber, Text Grabber 128, geoFile, geoFile 128, Graphics Grabber,
geoPaint, geoWrite, diskTurbo, GEOS, GEOS 128, deskTop, DeskPack
Plus, DeskPackl, Icon Editor, geoPublish, geoProgrammer are trademarks
of Berkeley Softworks, Inc.
PrintMaster™ is a trademark of Kyocera Unison, Inc. Inkwell Light Pen™,
Koala Pad™, and Apple LaserWriter™, Fleet System 4™, PaperClip™, and
Word Writer™ are trademarkes of others.
Drawings on pages 56,57, and 58 from DiskArt by Those Designers.
Welcome to GEOS 128 2.0
If you are a Commodore 128 owner, use this manual addendum along with
the GEOS 2.0 User's Manual. The GEOS 2.0 User's Manual describes
how to use GEOS 2.0 for the Commodore 64. Many of the features
described in that manual still apply to GEOS 128 2.0. However, there are a
number of differences between GEOS 2.0 and GEOS 128 2.0. These
differences are described in this manual addendum.
This manual addendum is divided into 12 chapters:
1:
Getting Started will guide you through the process of installing GEOS
128 2.0. This chapter also describes the basic hardware and software
you need to use GEOS 128 2.0, how to boot GEOS 128 2.0, how to set
up your printer, standard files to place on work disks, how to exit
GEOS 128 2.0, and how to enter a non-GEOS program from the
deskTop.
2:
Learning GEOS 128 2.0 describes how column modes operate and the
keyboard keys needed to use GEOS 128 2.0. This chapter also includes
a tutorial for users who are upgrading from GEOS 1.2,1.3, and 128. If
you are upgrading from GEOS 2.0, you do not need to use the tutorial.
3:
The GEOS 128 2.0 deskTop describes the expanded use of text mode
for the disk note pad. This chapter also explains the new keyboard
shortcuts you can use to select command menu options and perform file
and disk operations. Information regarding the RAM Expansion Unit,
the CONFIGURE 2.0 file and rebooting to a non-GEOS program from
the deskTop are also included in this chapter.
4:
geoPaint describes how to set up work disks for geoPaint and how
geoPaint is affected by the 1581 disk drive and by column modes. This
chapter also describes how to use the geoPaint Drawing Window, erase
colors in an area, and hide or display the Toolbox.
5:
geoWrite 2.1 describes how to set up work disks for geoWrite 2.1 and
how geoWrite 2.1 is affected by the 1581 disk drive and column
modes. This chapter also describes the geoWrite 2.1 Writing Window,
the BSW 128 font, and the NLQ mode for printing a document
6:
geoSpell describes how to set up work disks for geoSpell and how
geoSpell is affected by column modes. This chapter also describes an
additional method for searching for dictionary words.
7:
geoMerge describes how to set up work disks for geoMerge and how
geoMerge is affected by column modes.
8:
geoLaser describes how to set up work disks for geoLaser and how
geoLaser is affected by column modes. This chapter also contains a
note on the LaserWriter 2.1 printer driver and how column modes affect
the screen during the printing process.
9:
Text Grabber describes how to set up work disks for Text Grabber and
how Text Grabber is affected by column modes. This chapter also lists
the word processor format files that accompany Text Grabber.
10: Paint Drivers describes how to set up work disks for the Paint Drivers
application and how this application is affected by column modes. This
chapter also describes how to create the paint drivers, select a paint
driver as a default file, and create a document with the Paint Drivers
application.
11: Desk Accessories contains special notes on using the Calculator,
Preference Manager, Alarm Clock, Note Pad, and Pad Color Manager
desk accesories with GEOS 128 2.0.
12: Appendices contains additional glossary terms, an updated menu
listing for the deskTop, geoPaint, geoWrite 2.1, and a listing of the
contents of each disk in your GEOS 128 2.0 package.
Suggested Order ofReading
Before you try to use GEOS 128 2.0, we suggest you use this manual
addendum along with your GEOS 2.0 User's Manual. Read these chapters
in the following order:
Ch. 1, "Getting Started"
of this manual addenum explains what
equipment you need in order to use
GEOS 128 2.0. This chapter also
describes how to install and make
backup copies of your master disks.
Note that geoWrite 2.1, geoSpell, and
geoMerge must be installed before you
can use them or make work disks.
"Getting Started" will also guide you
through setting up your printer and
input device. In addition, "Getting
Started" explains in detail the advantage
of making work disks.
Ch. 2, "Learning GEOS 128 2.0"
of this manual addendum describes how
column modes and the keyboard are
used with GEOS 128 2.0. If you are
upgrading from GEOS 1.2,1.3, or 128,
use the tutorial in this chapter to get
some hands-on experience with the
deskTop and geoPaint
Ch. 2, "Learning GEOS"
of the GEOS 2.0 User's Manual
discusses learning the programs. Read
the section entitled "Common Features
and How They Work" (pages 30-36) if
you wish to review standard features
found in GEOS.
Once you have completed the above chapters, you will be ready to use the
applications described in this manual and the GEOS 2.0 User's Manual.
You may also wish to try out the GEOS demonstration programs, which are
provided on the GEOS Demos Disk and whose instructions are in Appendix
E: GEOS Demos in the GEOS 2.0 User's Manual.
Table of Contents
1
Getting Started
1
What You Need to Run GEOS 128 2.0 2
Required Equipment 2
Optional Equipment 2
Installing GEOS 128 2.0 3
Make Copies of Your Master Disks
12
Method 1: Disk Copying to a 1541,1571, or
RAM Expansion Unit
12
Method 2: Disk Copying to a 1581 Disk Drive
14
Once You Have Made the Backups and a
TUTORIAL Disk
16
Setting Up Your Printer
17
Printer Drivers
17
Activating Your Printer Driver 22
Booting GEOS 128 2.0 23
Exiting GEOS 128 2.0 25
Entering a Non-GEOS Program 26
Work Disks
27
Before You Create a Work Disk 27
Why You Need Work Disks 27
Work Disks and the 1581 Disk Drive
29
Work Disks and the RAM Expansion Unit (REU) 29
2
Learning GEOS 128 2.0 30
Column Modes
30
Expanded Use of the Keyboard 32
The Tutorial
34
3
The GEOS 128 2.0 deskTop
47
Moving to Another Disk Note Pad Page in Text Mode 48
The deskTop Command Menu
File Viewing Modes
48
48
Selecting a File in Text Mode Using the Keyboard 49
Selecting a Group of Files
49
Viewing the First File in a Selection Sequence
Moving Files
Copying a File to Another Disk
50
Copying a Disk Using One Disk Drive
Activating Drive C
51
52
The RAM Expansion Unit
52
The CONFIGURE 2.0 File
52
Returning to the deskTop from BASIC Mode
Keyboard Shortcuts
4
49
50
geoPaint
52
53
54
geoPaint and Work Disks
54
If You Have a LaserWriter or LaserWriter Plus
geoPaint Documents and the 1581 Disk Drive
Using 40-or 80-Column Mode
The geoPaint Screen
55
55
55
56
Erasing Colors in an Area 57
The Toolbox Display 58
5
geoWrite2.1
60
geoWrite 2.1 and Work Disks
60
If You Have a LaserWriter or LaserWriter Plus
geoWrite Documents and the 1581 Disk Drive
Using 80-Column Mode 62
The geoWrite Screen
62
The Writing Window and Its Dimensions
63
61
61
(geoWrite 2.1, continued)
The BSW 128 Font 63
Using NLQ Mode when Printing a Document 63
6
geoSpell
64
geoSpell and Work Disks
64
Using 80-Column Mode 65
Searching for a Word in a Dictionary 65
7
geoMerge
66
geoMerge and Work Disks
66
Using 40-or 80-Column Mode 67
8
geoLaser
68
geoLaser and Work Disks
68
Using 40-or 80-Column Mode 69
Column Modes and Printing 70
9
Text Grabber
71
Text Grabber and Work Disks 71
Using 40-or 80-Column Mode 72
Word Processor Format Files
10
73
Paint Drivers 74
Paint Drivers and Work Disks
74
Using 40-or 80-Column Mode 75
Creating the Paint Drivers 76
Selecting a Paint Driver 77
Creating a Paint Drivers Document 77
11
Desk Accessories
79
Desk Accessories and Column Modes 79
The Calculator 80
The Appearance of the Calculator 80
The Numeric Keypad 80
Exiting the Calculator
80
The Preference Manager 81
Column Modes and Color 81
Changing the Time and Date
The Alarm Clock
82
Setting the Clock Time
Setting the Alarm 82
The Note Pad
81
82
83
80-Column Mode 83
Moving to Another Page
83
The Pad Color Manager 83
Entering the Pad Color Manager from 80-Column
Mode
12
83
Appendices 85
Appendix A: Additional Glossary Terms
Appendix B: Menus 89
Appendix D: Disk Contents
Appendix F: Error Messages
Index
104
94
96
86
Getting Started
This chapter will guide you step by step through the procedures for getting
started with GEOS 128 2.0. You will perform the following three proce
dures only once, when you first open GEOS 128 2.0:
•
Install GEOS 128 2.0 to your Commodore computer.
Create backup copies of your master disks.
Set up your printer for use with GEOS 128 2.0.
This chapter also covers how to boot (i.e., start up) GEOS 128 2.0 every
time you plan to use it, and how to exit GEOS 128 2.0 when you are
finished. Also covered is general advice on making work disks.
Unfamiliar terms are defined in the glossaries (Appendix A) in this manual
addendum and the GEOS 2.0 User's Manual. Error messages are explained
in Appendix F: Error Messages of this manual addendum.
X*Xtt-XvX*X*X*X-XXv
Getting Started
What You Need to Run GEOS 128 2.0
Required Equipment
•
a Commodore 128 or 128D computer.
•
a compatible monitor or TV. The best monitor to use is a Commodore
1702,1802,1902, or 1902A monitor. Televisions can be used, but the
resolution is sharper with a Commodore monitor. Note that television
sets only support 40-column mode, not 80-column mode. If you use a
television set as a monitor, you cannot use geoWrite 2.1. or geoSpell,
since these applications only operate in 80-column mode.
•
a mouse or joystick input device (the Koala Pad and Inkwell light pen
are not compatible with GEOS 128 2.0).
one 5 1/4 inch disk drive.
this GEOS 128 2.0 package, which contains three program diskettes,
the GEOS 2.0 User's Manual, and this manual addendum.
•
blank 5 1/4 inch diskettes (for backup and work disks).
Optional Equipment
•
a 1750 or 1764 RAM Expansion Unit (REU). With an REU the operat
ing speed of GEOS 128 2.0 is greatly increased. In addition, more disk
space is available for the program you are currently using.
•
additional disk drives (1541,1571, or 1581). You can install two disk
drives and a RAM Expansion Unit (1750 or 1764) for use with GEOS
128 2.0.
•
a GEOS 128 2.0-supported printer. A list of supported printers is found
on page 18 of this chapter.
Chapter 1
Installing GEOS 128 2.0
Installing GEOS 128 2.0 means preparing its applications for everyday use.
You will have to install GEOS 128 2.0 only once. Installing GEOS 128 2.0
and its applications takes about IS minutes.
The following general steps summarize what you need to do to install
GEOS 128 2.0. The actual procedure begins on the next page.
1.
First, set up your Commodore according to the instructions found in its
installation manual.
2.
Next, open GEOS 128 2.0 and follow the directions on the screen. If
you own other GEOS applications for the Commodore 128 or 128D,
you will be able to key them to this boot disk. This will let you use
your existing applications and work disks with GEOS 128 2.0. For ex
ample, if you own geoCalc 128, you will be able to use it after booting
on the new GEOS 128 2.0 System boot disk. (You will also be able to
take advantage of the upgraded deskTop whenever you open your
geoCalc 128 work disks.)
3.
If you are using a mouse, activate it as the default input device. If you
are using a joystick, GEOS 128 2.0 will automatically activate it for
you.
4.
Finally, install three of the applications to key them to your System and
Backup System disks. These applications are geoWrite 2.1, geoMerge,
and geoSpell.
Once you have installed GEOS 128 2.0, you need to make backup copies of
the disks in your GEOS 128 2.0 package. If you are upgrading from GEOS
1.2,1.3, or 128, you will need to make an additional copy of the Applica
tions disk for the tutorial (which is covered in Chapter 2, "Learning GEOS
128 2.0"). If you are upgrading from GEOS 2.0, you can bypass the
tutorial, so you do not need to make an extra copy of the Applications disk.
Once you have created backup copies, you can set up your printer to print
your documents.
Getting Started
Step 1: Boot GEOS128 2.0
The methods for booting GEOS 128 2.0 depend on whether you are using a
Parallel Printer Interface (PPI) and if you want to boot in 40-column or 80column mode. If you are not using a PPI, GEOS 128 2.0 will autoboot. If
you are using a PPI, you will need to enter a special booting command to
start GEOS 128 2.0.
Ifyou are not using a Parallel Printer Interface:
1:
Set up your Commodore, disk drives, monitor, and input device
according to the directions in their installation manuals. If you have a
RAM Expansion Unit, carefully insert it into the proper slot of your
Commodore, as explained in its installation guide.
2:
Turn on the monitor and disk drive switches. (Do not turn on the
computer yet.)
NOTE Never boot GEOS 128 2.0 with more than one disk drive on.
3:
Press the 1RGB1 button (or composite switch) on your monitor. If your
monitor has an IRGBI button, make sure the IRGBI button is in, i.e., in
CVBS mode. If you have a composite switch, make sure it is set at
COMP mode.
NOTE This will open GEOS 128 2.0 in 40-column mode. If you wish
to open GEOS 128 2.0 in 80-column mode, make sure the IRGBI button
is out (i.e., in RGB mode). If you have a composite switch, make sure
it is set at RGB mode.
4:
Press the 140/80 DISPLAYl button on your keyboard so that this button
is out (i.e., in 40-column mode).
NOTE As with Step 3, pressing the 140/80 DISPLAYl button will open
GEOS 128 2.0 in 40-column mode. If you wish to open GEOS 128 2.0
in 80-column mode, make sure the 140/80 DISPLAYl button is in (i.e., in
80-column mode).
5:
Insert the System disk (label side up) into the disk drive and close the
disk drive door.
Chapter 1
6:
Turn on the computer. GEOS 128 2.0 will boot, and a message box
(called a "dialog box") saying "Please insert disk: Backup System"
will appear. Go to Step 2: Install GEOS 128 2.0.
Ifyou are using a Parallel Printer Interface:
1:
Set up your Commodore, disk drives, monitor, and input device
according to the directions found in their installation manuals. If you
have a RAM Expansion Unit, carefully insert it into the proper slot of
your Commodore, as explained in its installation guide.
2:
Press the IRGB1 button (or composite switch) on your monitor. If your
monitor has an IRGB1 button, make sure the IRGB1 button is in, i.e., in
CVBS mode. If you have a composite switch, make sure it is in COMP
mode.
NOTE This will open GEOS 128 2.0 in 40-column mode. If you wish
to open GEOS 128 2.0 in 80-column mode, make sure the [RGBI button
is in RGB mode (i.e., out). If you have a composite switch, make sure
it is in RGB mode.
1 so that this button
3:
is out (i.e., in 40-column mode).
GEOS 128 2.0 in 40-column mode. If you wish to open GEOS 128 2.0
80-column mode).
4:
Turn on the monitor, disk drive, and computer switches. The Commo
dore BASIC V7.0 screen will appear.
NOTE Never boot GEOS 128 2.0 with more than one disk drive on.
4:
Insert the System disk into the disk drive and close the disk drive door.
6:
Under READY, a blinking cursor will appear. Type
OPEN4A25:PRINT#4:CLOSE#4:LOAD"GEOS",8,1. Press
IRETURNl. GEOS 128 2.0 will boot, and a message box (called a
"dialog box") saying "Please insert disk: Backup System" will appear.
Go to Step 2: Install GEOS 128 2.0.
x*x*x*x*x*x*
Getting Started
:•:■:•:•:•:•:•:«:•:•:•:•:•:•:«:•:•:«:«:•:■:•:•:•:•:■
X*X-X*X-X-X*X*X*X
Step 2: Install GEOS128 2.0
1:
After you complete Step 1: Boot GEOS 128 2.0, a dialog box will ask
you to "Please insert disk: Backup System." Remove the System disk
from the disk drive and insert the Backup System disk, which is located
on Side A of Disk 2. Close the disk drive door and press IRETURNI to
continue.
2:
Another dialog box will ask if you wish to key the GEOS 128 2.0 boot
disk (i.e., the System disk) to a previously installed GEOS application.
If you own DeskPack Plus, geoWrite Workshop 128, geoCalc 128, or
other GEOS 128 applications for the Commodore 128, answer YES by
moving the pointer to YES. If this is the first GEOS 128 product you
own, move the pointer to NO.
IMPORTANT Be careful when using this step! If you answer NO you
will never be able to key your previous GEOS 128 application disks to
the GEOS 128 2.0 System and Backup System disks. Once you
complete this step, you cannot reverse your answer.
To move the pointer, use I
1 below the IRETURNI
key:
To move:
Left
Hold down ISH1FTI while pressing thelCRSRfe key
Down
Press the ICRSRIT4 key
Up
3:
Do the following:
Hold down ISHIFTl while pressing theICRSRlTl key
When you have positioned the pointer over YES or NO, press
IRETURNI. If you selected YES, go to Step 4. If you selected NO, go
to Step 5.
4:
A dialog box will ask you to "Please insert any original disk on which
an application was installed to your old boot disk: DeskPack Plus,
geoWrite Workshop 128, geoCalc 128, geoFile 128, etc." This step
will enable you to key your new boot disk with the older applications
you own. Remove the Backup System disk from the disk drive and
insert one of your original GEOS 128 application disks that applies to
this procedure. Close the disk drive door and press IRETURNI.
Chapter 1
««<<<^
NOTE You only need to insert one of the application disks, not all
GEOS 128 application disks.
5:
The next dialog box will ask you to insert the System disk. Remove
the current disk from the disk drive and insert the System disk. Press
1 RETURN 1 to continue.
6:
Another dialog box will ask for the Backup System disk. Remove the
System disk from the disk drive and insert the Backup System disk.
Press I RETURN I to continue.
7:
The next dialog box will ask for the System disk. Remove the Backup
System disk and insert the System disk. Close the disk drive door and
press [RETURN I. In a moment the System deskTop will appear:
The System deskTop in 40-column mode
Step 3: Activate Your Mouse
If you own a joystick, it will already have been activated and you can begin
to use GEOS 128 2.0 right away. If so, you can skip this step and go to
Step 4: Install Your Applications. If the pointer at the upper left corner of
the screen will not move, use the procedure below to install your mouse.
To install an input device:
1:
Hold down the IS key and while holding it down, press the letter (not
number) \T\. Make sure the I CAPS LOCKl key is not down.
Getting Started
2:
The Select Input Device dialog box will appear. This dialog box lists
the available input devices on your System disk: 128 JOYSTICK, 128
COMM1351 (a), and 128 COMM1351.
By using the 1CRSR1 keys, move the pointer so that it is positioned
over 128 COMM 1351 (a) or 128 COMM 1351. The 1351 (a) driver
will let you move the pointer across the screen at a faster rate than the
1351 driver.
3:
When the pointer is positioned over the input device you want, press
[RETURN I. The name you selected will appear in reverse video (i.e.,
white on black).
4:
Now use the 1 CRSR I keys to move the pointer to the OK icon. Once
you have done so, press IRETURNI.
The input device you selected will become active and you will be able
to move the pointer around the screen. The next time you boot GEOS
128 2.0, the input device you selected will remain the active input
device.
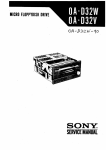
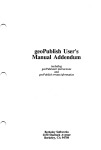
Step 4: Install Your Applications
The applications you need to install to your System disk are geoWrite 128,
geoMerge, and geoSpell 128. You cannot use these applications until you
have installed them.
CEOWRITE 12$
CEOMERCE
CEOSPELL 12*
To install your applications:
1:
Close the System disk by moving the pointer
to the close icon located at the upper right
corner of the disk note pad.
2:
cfck ^ *
close the disk.
When the pointer is positioned over the close icon, press the input
device button. (This is called clicking.) Once you have clicked on the
close icon, you will have "closed" the disk. The screen will appear as
follows:
8
Chapter 1
Closed System deskTop
3:
Remove the System disk from the disk drive and
insert the disk entitled Applications. Close the
Click here
t0 °Pen f/7e disk-
disk drive door and click on the disk drive icon
representing the disk drive into which you
inserted the Applications disk (e.g., DRIVE A).
4:
The Applications disk will open:
Move the pointer to the file icon entitled GEOWRITE 128 and click
twice in rapid succession. (This is called double-clicking.) The screen
will go blank momentarily and then a dialog box will tell you that
geoWrite is installed. Click OK or press iRETURNl.
Getting Started
%vvwXv*x*x-x-x*x-x*XvXwXwXwX-x<^
5:
A dialog box will ask you to insert a disk containing the file DESKTOP
V2.0 or higher. Remove the Applications disk from the disk drive and
insert your System disk. Click OK. The System deskTop will appear.
NOTE This dialog box will appear whenever you exit an application
on a disk that does not contain the 128 DESKTOP 2.0 file. If you copy
this file to your application work disks, you can exit an application
directly to the deskTop. The procedure for copying a file to another
disk is found in Chapter 3, "The GEOS deskTop" in the GEOS 2.0
User's Manual.
6:
7:
Close the System disk by clicking on its close
icon, which is located at the upper right corner of
click here
the disk note pad.
to close the disk.
Remove the System disk from the disk drive and insert the Write
Utilities disk.
8:
Click on the closed disk drive icon representing
the disk drive containing the Write Utilities disk.
The Write Utilities disk will open:
Click
here to
open a
disk.
Look for the GEOMERGE file icon.
9:
Double-click on the GEOMERGE file icon. When the geoMerge
installation dialog box appears, click OK or press [RETURN I.
10
Chapter 1
10: You will be asked to insert a disk containing the 128 DESKTOP 2.0
file. Remove the Write Utilities disk from the disk drive and insert the
System disk. Click OK to display the System deskTop.
11: Now repeat the installation procedure for the geoSpell application;
a:
Close the System disk by clicking on its close icon,
b:
Remove the System disk from the disk drive.
c:
Insert the geoSpell disk into the disk drive and click on the disk
drive icon to open the geoSpell disk.
d:
Double-click on the GEOSPELL 128
application icon.
Double-click on this
_=,
fj|ltf|
file icon.
GEOSPELL 12«
e:
A dialog box will let you know that
geoSpell has been installed. Click OK or press [RETURN I.
f:
When the deskTop V2.0 dialog box appears, remove the geoSpell
disk from the disk drive and insert the System disk. Click OK to
display the System deskTop.
Once You Have Installed GEOS128 2.0
You have now installed GEOS 128 2.0 and its applications. Next you will
need to make copies of the disks in your GEOS 128 2.0 package. Go to
"Make Copies of Your Master Disks," on the next page.
^^
Getting Started
11
Make Copies of Your Master Disks
You have already been provided with a backup copy of the GEOS 128 2.0
KERNAL (this system file, which boots GEOS 128 2.0, is located on the
System disk). After installing your applications, you should make copies of
all of the files on the GEOS 128 2.0 disks. If you are upgrading from
GEOS 1.2,1.3, or 128, you will need to make two copies of the Applica
tions disk; one of these copies will be used as a TUTORIAL disk.
IMPORTANT You cannot copy the System or Backup System disk in its
entirety. You can, however, copy certain files from these disks: the 128
DESKTOP 2.0,128 CONFIGURE 2.0, PAINT DRIVERS, 128 RBOOT,
the desk accessories, and the printer drivers. If necessary, refer to the
following sections in the GEOS 2.0 User's Manual: "Selecting a File,"
page 58, "Selecting a Group of Files," page 59, and "Copying a File to
Another Disk," page 66.
Depending on your disk drive set-up, you may need to configure your disk
drives so that they can be recognized by GEOS 128 2.0. If necessary, refer
to "Adding or Changing a Disk Drive" on page 78 of the GEOS 2.0 User's
Manual.
Use one of the following methods to create backup disks. If you have a
1541,1571, and/or a RAM Expansion Unit, use Method 1. If your second
disk drive is a 1581, go to Method 2: Disk Copying to a 1581 Disk Drive
(page 14 of this manual addendum).
Method 1: Disk Copying to a 1541,1571, or RAM Expansion
Unit
The disk copy command can be used if you have one disk drive, one disk
drive and a RAM Expansion Unit, or two disk drives. The disk drives must
be for 5 1/4 inch disks, i.e., a 1541 or a 1571. The disk copy command will
automatically give you the option of formatting an unformatted disk.
The following procedures describe how to copy using one or two disk
drives, and how to copy using one disk drive and a RAM Expansion Unit.
In these instructions, the source disk is the original disk and the destination
disk is the disk which will be the backup.
12
Chapter 1
Ifyou have one or two 5 1/4 inch disk drives:
Before you try to copy to another disk drive, always make sure that both
drives have been activated, i.e., their correct disk names appear below each
disk drive icon. You can activate the disk drives by selecting RESET from
the options menu or pressing IS HO. This will enable GEOS 128 2.0 to
recognize the disk in each disk drive.
1:
Insert the source disk into a disk drive.
2:
Open the source disk by clicking on its disk drive icon.
3:
Select copy from the disk menu (or press ffEll"Kl).
4:
A dialog box will ask you to "Please insert destination disk in drive: #."
If you have one disk drive, remove the current disk from the disk
drive and insert the destination disk. Click OK to continue.
•
If you have two disk drives, insert the destination disk into the
drive indicated in the dialog box (e.g., Drive B if the dialog box
specifies Drive B). Click OK to continue.
5:
If the disk you inserted is unformatted, a dialog box will ask you to
insert a disk to format in a designated disk drive. You will be asked to
enter a name for the disk. Type in a name and press [RETURN 1.
NOTE If you are using a 1571 disk drive and have placed a doublesided disk into the disk drive, a dialog box will give you the option of
formatting both sides of the disk. If you click YES, the disk will be
formatted to support 33 IK memory. If you click NO, the disk will be
formatted to support 165K memory.
6:
The next dialog box will ask you "Replace the contents of (destination
disk name) with the contents of (source disk name)?" Click YES to
continue.
•
If you have one disk drive, you will be asked to insert the source
disk into the disk drive. Remove the destination disk from the disk
drive and insert the source disk. Click OK. Continue to follow the
directions on the screen, swapping disks in and out of the disk
Getting Started
13
drive and clicking OK, until the disk is copied. The procedure
should take about three disk exchanges, depending on the number
of files on the source disk.
•
If you have two disk drives, the source disk will be copied to the
destination disk.
Ifyou have one 5 1/4 inch disk drive and a RAM Expansion
Unit(REU):
If you have a RAM Expansion Unit, you can copy the files from the source
disk to the REU drive, then copy the REU's contents to a destination disk.
Before you try to copy to another disk drive, always make sure that both
disk drives have been activated, i.e., their correct disk names appear below
each disk drive icon. You can activate the disk drives by selecting RESET
from the options menu or pressing O[Rj This will enable GEOS 128 2.0
to recognize the disk in each disk drive.
To copy a disk to an REU, use the copy command from the disk menu. If
the message "Disk copy can't be done between these formats" appears, use
the following procedure:
1:
Open the source disk by clicking on its disk drive icon.
2:
Select copy from the disk menu (or press [<Kll~Ki).
3:
A dialog box will ask you "Replace the contents of RAM # with
contents of (source disk name)?" Click YES to continue. The source
disk will be copied to the RWU drive.
4:
After the source disk has been copied to the REU, remove the source
disk from the disk drive and insert the destination disk.
5:
6:
Activate the destination disk by clicking on its disk drive icon or
pressing [frifFTl.
Go to the RAM drive and use Steps 3-4 to copy the contents of the
RAM to the destination disk.
Method 2: Disk Copying to a 1581 Disk Drive
If your second disk drive is a 1581 you cannot use the disk copy command
to copy a 5 1/4 inch disk to a 3 1/2 inch disk. If your 3 1/2 inch disks are
14
Chapter 1
*x:*x-x-w^^
*x*x*:*:tt*x*:*:tt*:*x*x^
not formatted, you will need to format them first before copying files. The
following procedures describe how to format a 3 1/2 inch disk, then how to
copy files to the disk after you have formatted it.
You will only need to format one 3 1/2 inch disk to backup all of your
master disks. If you plan to use the tutorial, backup an extra disk and entitle
it TUTORIAL.
To format a 3112 inch disk:
1:
Open the current disk to its deskTop.
2:
Insert the 3 1/2 inch disk into the 1581 disk drive and click on that disk
drive's icon.
3:
A dialog box will appear and let you know that the disk is unformatted.
4:
Click OK. An "inactive" screen will appear.
Drive B
is
inactive.
5:
Select format from the disk menu (or press IS E).
6:
A dialog box will ask you to "Put disk to format in drive # and enter a
name for it." Enter the name GEOSBAKS, and press [RETURN I. The
disk will be formatted.
7:
If you are using the tutorial, repeat Steps 5 and 6 to format a second
disk entitled TUTORIAL.
Getting Started
15
To copyfiles from the master disk to the 3 1/2 inch disk:
In the following instructions, the source disk is the original master disk and
the destination disk is the disk which will be the backup.
1:
Insert the source disk into the disk drive.
2:
Open the source disk by clicking on its disk drive icon.
3:
Insert the destination disk into Drive B.
4:
Select RESET from the options menu (or press IS \E\). This will
enable GEOS 128 2.0 to recognize the disk in the other disk drive.
Once you have selected RESET, the name of that disk will appear
below its disk drive icon.
5:
Select all pages from the select menu (or press O S3). All of the file
icons will become highlighted.
6:
Click on one of the file icons. You will bring up the multi-file ghost
icon, which represents all of the selected file icons on the disk.
7:
Move the multi-file icon to the destination disk drive icon and click to
deposit it there. The files on the source disk will be copied to the
destination disk.
Once You Have Made the Backups and a TUTORIAL Disk
Once you have made backups of your master disks and a TUTORIAL, place
a write protect tab on each original application disk and the Backup System
disk. Store these disks in a safe place and use the copies when you create
work disks.
Now you are ready to set up your printer so that you can print documents
produced with GEOS 128 2.0 applications. See "Setting Up Your Printer,"
on the next page.
16
Chapter 1
*:^^
:«««w
Setting Up Your Printer
GEOS supports over 70 different printers. Each one requires its own printer
file called a printer driver. The printer driver file you need is found on the
System or Write Utilities disk.
To set up a printer you need to do the following:
1.
Connect your printer to your Commodore as explained in the printer's
instruction manual.
2:
Find the printer driver you need by referring to the Printer Drivers
Chart beginning on page 18.
3:
Activate your printer driver so that it is the default printer driver. This
procedure is described under "Activating Your Printer Driver" on page
22 of this manual addendum.
Printer Drivers
To find the printer driver you need, refer to the chart that begins on the next
page. For example, if you own an Apple Scribe printer, you will need to
look for the Scribe printer driver on your System disk. (The Backup System
disk contains a second copy of the System Disk's printer drivers.) You will
also need to make sure your printer interface is an RS-232. Once you have
found the printer driver file you need, use the procedure under "Activating
Your Printer Driver" on page 22.
You will note that some of the drivers are listed as "DS" or "QS." A "DS"
(double-strike) printer driver will cause the printer to print graphics and
graphics text twice as dark as regular (single-strike) printing. "QS" will
cause graphics and graphics text to be printed in quadruple-strike. Drivers
listed as RED will reduce the page by a certain percentage. The C.Itoh
RED driver will reduce the page by 50%. The Epson RED driver will
reduce the page by 66%. The DS, QS, and RED drivers are located on the
Write Utilities disk.
W
Getting Started
17
^
Your Printer
Interface
Driver
DPI
Apple ImageWriter
RS-232 Serial
ImageWriter
80
RS-232 Serial
RS-232 Serial
ImageWriter DS
ImageWriter QS
80
80
RS-232
RS-232
RS-232
RS-232
ImageWriter II
80
ImWrtr II DS
80
ImWrtr II QS
80
LaserWriter 2.1
75
Apple ImageWriter II
Apple LaserWriter/Laser
Serial
Serial
Serial
Serial
Writer Plus
Apple Scribe
Blue Chip M120
Cent. Parallel
Scribe
BluechipM120
80
80
RS-232 Serial
BMC BX-80
Cent. Parallel
BluechipM120
80
Cal-Abco Legend 800
Cent. Parallel
BluechipM120
80
Cal-Abco Legend 808
Cannon PW-1080A/1156A
Cent. Parallel
Epson MX-80
60
Cent. Parallel
Cent. Parallel
Cent. Parallel
Cent. Parallel
Cent. Parallel
Cent. Parallel
Cent. Parallel
Cent. Parallel
Cent. Parallel
Cent. Parallel
Cent. Parallel
Cent. Parallel
Comm Serial Bus
Comm Serial Bus
Comm Serial Bus
Comm Serial Bus
Comm Serial Bus
Comm Serial Bus
Comm Serial Bus
Cent. Parallel
Cent. Parallel
Cent. Parallel
Comm Serial Bus
Comm Serial Bus
Comm Serial Bus
Cent. Parallel
Epson FX-80
80
Epson FX-80 DS
Epson FX-80 QS
80
80
Citizen 120-D
C.ltoh 8510
C.ltoh 8510A
C.ltoh Riteman C+ NLQ
Commodore 1525
Commodore 1526
Commodore MPS-801
Commodore MPS-802
Commodore MPS-803
Commodore MPS-1000
Commodore MPS-1000
(in IBM mode with
interface card)
Commodore MPS-1200
Daisywheel types
(or character only printers)
18
Chapter 1
Epson RED
120
MPS-1200
80
MPS-1200 DS
80
MPS-1200 QS
80
C.ltoh 8510
80
C.ltoh 8510 DS
C.ltoh 8510 QS
C.ltoh 8510 RED
80
80
160
C.ltoh 8510 A
80
Riteman C+
60
MPS-801
60
1526
80
MPS-801
60
1526
80
MPS-803
60
MPS-1000
60
IBM 5152+
80
IBM 5152+DS
80
IBM 5152+QS
80
MPS-1200
80
MPS-1200 DS
80
MPS-1200 QS
80
ASCII only
N/A
^
Epson EX-800
Cent. Parallel
Epson MX-80/100
Cent. Parallel
Cent. Parallel
Ergo Systems Hush 80CD
Hewlett Packard LaserJet/
Comm Serial Bus
RS-232 Serial
StarNX-10
StarNX-10DS
StarNX-10QS
Epson RED
Epson FX-80
Epson FX-80 DS
Epson FX-80 QS
Epson RED
StarNX-10
StarNX-10DS
StarNX-10QS
Epson RED
Epson JX-80
Epson RED
Epson LQ 1500
StarNB-15
Epson LX-80
StarNX-10DS
StarNX-10QS
Epson RED
Epson MX-80
Epson RED
MPS-1000
LaserJet SER.
Cent. Parallel
LaserJet PAR.
Cent. Parallel
IBM 5152+
80
IBM 5152+DS
IBM 5152+QS
Blue Chip M120
C.ltoh8510
80
80
80
80
C.ltoh8510DS
C.ltoh8510QS
C.ltohRED
Epson LQ-1500
Oki ML 92/93
80
80
160
80
72
Okimate 10
60
Cent.
Cent.
Cent.
Epson FX-80/80+/100/100+ Cent.
Cent.
Cent.
Cent.
Epson FX-85/185/286
Cent.
Cent.
Parallel
Parallel
Parallel
Parallel
Parallel
Parallel
Parallel
Parallel
Parallel
Cent. Parallel
Cent. Parallel
Epson JX-80
Cent. Parallel
Cent. Parallel
Epson LQ-800/1000/1500
Epson LX-80/86/800
Cent. Parallel
Cent. Parallel
Cent. Parallel
Cent. Parallel
Cent. Parallel
Cent. Parallel
LaserJet*
IBM 5152+
Cent.
Cent.
Mannesman Talley Spirit 80 Cent.
NEC 8023
Cent.
NEC PC Printer/P6/P7
Okidata Microline 92/93
Okidata Okimate 10
Okidata Okimate 20
Okidata 120
Olivetti PR-2300
Panasonic KX-P1090
Parallel
Parallel
Parallel
Parallel
Cent. Parallel
Cent. Parallel
Cent. Parallel
Cent. Parallel
Cent. Parallel
Comm Serial Bus
Comm Serial Bus
Comm Serial Bus
Comm Serial Bus
Cent. Parallel
Cent. Parallel
Cent. Parallel
80
80
80
120
80
80
80
120
80
80
80
120
80
120
80
90
80
80
80
120
60
120
60
75
75
Okimate 20
80
Oki120NLQ
Oki 120
60
60
Olivetti PR2300
Epson LX-80
Epson RED
80
80
120
Getting Started
19
Interface
Your Printer
Driver
DPI
StarNX-10
80
Cent. Parallel
StarNX-10DS
80
Cent. Parallel
Cent. Parallel
StarNX-10QS
80
Epson RED
120
SeikoshaSP-1000A
Cent. Parallel
Epson FX-80
80
Epson FX-80 DS
80
Epson FX-80 QS
80
Epson RED
120
SeikoshaSP-1000VC
Star Delta/Gemini 10x/
Cent. Parallel
Cent. Parallel
Cent. Parallel
Comm Serial Bus
Cent. Parallel
Comm Compat
Gemini 10x
60
80
Cent. Parallel
Gemini DS
80
Cent. Parallel
Gemini QS
Comm Compat
Star NL-10 (com)
80
60
80
Cent. Parallel
Cent. Parallel
StarNX-10
80
StarNX-10DS
80
Cent. Parallel
StarNX-10QS
80
Cent. Parallel
Comm Serial Bus
Cent. Parallel
Cent. Parallel
Comm Serial Bus
Cent. Parallel
Cent. Parallel
Cent. Parallel
Cent. Parallel
Cent. Parallel
Cent. Parallel
Cent. Parallel
Cent. Parallel
Epson RED
120
StarNX-10C
60
Panasonic KX-P1080/1091/ Cent. Parallel
1092
Radix
Comm Serial Bus
Comm Serial Bus
Star Gemini II
Star Micronics NL-10 (with
Commodore interface)
Star Micronics NL-10 (with
Cent. Parallel
lnterface)/NX-10
Star Micronics NX-10C
StarNB-15
Star NX-1000C Rainbow
StarSG-10/15
Toshiba PA7253
Toshiba P351SX
Epson LQ-1500
80
StarNB-15
NX-1000 Rainbow
90
80
StarSG-10/15
80
Gemini DS
80
Gemini QS
80
C.ltoh8510
80
C.ltoh8510 DS
C.ltoh8510 QS
80
80
C.ltohRED
Toshiba P351SX
160
80
Color Resolution
Most of the printer drivers listed above print in black and white only.
Printers that support color are as follows:
Printer Driver
Color Resolution
Epson JX-80
15 colors
ImageWriter II
15 colors
NX-1000 Rainbow
15 colors
20
Chapter 1
•x*:*:*:*:*:-:*:*:
■:•:•:•:•:•:•:•:•:•:•»:•:•:•:•:•:•:•:•:♦»!
v:*:-:-:*x*Hw
Okimate 10
8 colors
Okimate 20
8 colors
Scribe
8 colors
Printer Interfaces
The interface you use depends on the type of printer you have. After you
have connected the interface card to your Commodore and printer cable as
explained in the interface card's instruction manual, note the following:
The printer is always addressed as device #4 on the serial bus, so set the
interface card or printer to device #4.
•
Turn off any auto line-feed settings on the printer and the interface
card.
•
If the interface card that you are using has a transparent mode and you
cannot get your printer to work with the specific printer setting, use the
transparent mode.
•
Tested cards are: Centronics Parallel, Commodore Serial Bus, Cardco
Card?+G, Cardco Super G, DSIPPI Printer Interface, G-Whiz, Jameco
JE-232 CM, Micrografix MW-302, Micrografix MW-350, Omnitronix
Deluxe RS232 Interface, Telesys Turboprint GT, Xetec Graphics
Printer Interface, Xetec Super Graphix, Xetec Super Graphix Jr.
// Your Printer Is Not Listed
If you don't find your particular printer listed, don't despair—most printers
are compatible with one of the printers listed and can use the same setup.
As new printers become available, Berkeley Softworks will write new
printer drivers to support these devices. These drivers will be made
available to registered GEOS 128 2.0 users for the cost of the disk plus
shipping and handling. They will also be available for downloading from
the Q-Link Telecommunications Service.
Getting Started
21
Activating Your Printer Driver
Use the following procedure to activate your printer driver. Once you have
done this procedure, the printer driver you select will remain the default
printer driver, even if you reboot You can use this procedure to change the
printer driver as often as you need.
To activate your printer driver:
1:
Open the System disk so that the deskTop appears.
2:
Choose select printer from the geos menu.
3:
A dialog box listing the printer drivers on the System disk will appear.
Click on the printer driver you need so that its name is highlighted, then
click OK. You will be returned to the deskTop and the driver name
you selected will be the default printer driver.
NOTE To scroll through the names in the dialog box, click on the
scrolling arrows located just below the list of names.
22
Chapter 1
^^
Booting GEOS 128 2.0
This section describes how to boot GEOS 128 2.0 on a regular basis (i.e.,
after you have installed GEOS 128 2.0). Note the following:
GEOS 128 2.0 will autoboot in most cases. If you have a Parallel
Printer Interface (PPI), you will need to enter a command in BASIC
mode to boot GEOS 128 2.0.
You have the option of booting in either 40- or 80-column mode. After
you boot, you can switch column modes if needed.
The following procedures describe how to autoboot (i.e., for users who do
not own a Parallel Printer Interface (PPI)) and how to boot using a PPI. In
either case, you have the option of booting in 40- or 80-column mode.
Ifyou are not using a Parallel Printer Interface (PPI):
1:
Turn on the monitor and disk drive switches. (Do not turn on the
computer yet.)
NOTE Never boot GEOS 128 2.0 with more than one disk drive on.
2:
Press the [RGBI button (or composite switch) on your monitor. If your
monitor has an IRGBI button, make sure the iRGBl button is out, i.e., in
RGB mode. If you have a composite switch, make sure it is in RGB
mode.
NOTE This will open GEOS 128 2.0 in 80-column mode. If you wish
to open GEOS 128 2.0 in 40-column mode, make sure the I RGB I button
is in (i.e., in CVBS mode). If you have a composite switch, make sure
it is in COMP mode.
3:
Press the 140/80 DISPLAY I button on your keyboard so that this button
is depressed (i.e., in 80-column mode).
NOTE As with Step 2, pressing the 140/80 DISPLAY I button will open
GEOS 128 2.0 in 80-column mode. If you wish to open GEOS 128 2.0
in 40-column mode, make sure the 140/80 DISPLAY 1 button is out (i.e.,
in 40-column mode).
Getting Started
23
ttw
4:
Insert the System disk (label side up) into the disk drive and close the
disk drive door.
5:
Turn on the computer. The System deskTop will appear in a moment.
Ifyou are using a Parallel Printer Interface:
1:
Press the 1RGB1 button (or composite switch) on your monitor. If your
monitor has an 1RGB1 button, make sure the 1RGB1 button is out, i.e., in
RGB mode. If you have a composite switch, make sure it is in RGB
mode.
NOTE This will open GEOS 128 2.0 in 80-column mode. If you wish
to open GEOS 128 2.0 in 40-column mode, make sure the 1RGBI button
is in (i.e., in CVBS mode). If you have a composite switch, make sure
itisinCOMPmode.
2:
Press the 140/80 DISPLAY I button on your keyboard so that this button
is depressed (i.e., in 80-column mode).
NOTE As with Step 1, pressing the 140/80 DISPLAY 1 button will open
GEOS 128 2.0 in 80-column mode. If you wish to open GEOS 128 2.0
in 40-column mode, make sure the 140/80 DISPLAY! button is out (i.e.,
in 40-column mode).
3:
Turn on the monitor, disk drive, and computer switches. The Commo
dore BASIC screen will appear.
NOTE Never boot GEOS 128 2.0 with more than one disk drive on.
4:
Insert the System disk into the disk drive and close the disk drive door.
5:
Under READY, a blinking cursor will appear. Type
OPEN4,4,25:PRINT#4:CLOSE#4:LOAD"GEOS",8,1. Press
I RETURN I. The System deskTop will appear in a moment.
24
Chapter 1
Exiting GEOS 128 2.0
Never turn off your computer until you have properly closed a program, or
damage to your files may occur. Use the following procedure to exit GEOS
128 2.0. If you wish to use a non-GEOS program, see "Entering a NonGEOS Program" on the next page.
To exit GEOS and turn off the computer:
1:
Exit the current application and return to the deskTop.
2:
Position the pointer over the close icon and click (or press [frifcl ).
The file icons on the disk note pad will disappear and the disk drive
icon representing the disk drive containing die program disk will
appear with a question mark inside.
3:
Remove the disk from the disk drive and store the disk in a safe place.
4:
Turn off the computer, disk drive, and monitor switches.
Getting Started
25
<ctt*x-x-xvxxx:*:x:*::*^^
Entering a Non-GEOS Program
You can exit GEOS 128 2.0 directly to a non-GEOS program (e.g., PrintMaster). If the program has an autoboot feature, use the procedure below.
If the program requires that you enter BASIC mode first, use the second
procedure.
If the non-GEOS program has an autobootfeature:
1:
Exit the current application and return to the deskTop.
2:
Remove the GEOS disk from the disk drive and insert the startup disk
for the non-GEOS program into the disk drive.
3:
Select BOOT from the options menu. The non-GEOS program's
startup disk will boot.
Ifyou wish to return to BASIC mode:
1:
Exit the current application and return to the deskTop.
2:
Remove the GEOS disk from the disk drive and insert the startup disk
for the non-GEOS program into the disk drive.
3:
Select BASIC from the options menu. The Commodore BASIC V7.0
mode will appear.
4:
Enter the non-GEOS program's boot command. The non-GEOS
program's startup disk will boot.
26
Chapter 1
Work Disks
Once you have installed GEOS 128 2.0, created backup disks, and activated
your printer driver file, you will be ready to use GEOS 128 2.0 applications.
The easiest way to use these applications is to create work disks, which are
the disks you use on a day to day basis. The kind of work disk you prepare
depends on the project you are working on, how much space you have on
your disks, and your disk drive set-up.
Before You Create a Work Disk
Before you create a work disk, make sure you have completed the following
procedures, which are explained earlier in this chapter.
•
You have installed GEOS 128 2.0 and its applications.
•
You have created backup disks of your master disks.
Why You Need Work Disks
The disks that come with the GEOS 128 2.0 package are master disks.
Aside from booting, they should not be used for everyday use. Instead, you
should copy the applications, fonts, desk accessories, and other files you
need for a particular type of project onto a work disk. You will find that
using work disks is convenient in that you can tailor them to your own
needs, depending on the equipment you have and the type of work you plan
to do. Best of all, you will have more space on your disks.
Suggestions for creating work disks are described in each application
chapter in this manual addendum. In general, it is best to set up work disks
as follows:
Ifyou have one disk drive:
Copy the application, supporting files (e.g., fonts, desk accessories),
and documents to one disk. If you have room, add the 128 DESKTOP
2.0 file.
Getting Started
27
Ifyou have one disk drive and a RAM Expansion Unit (REU):
Copy the application, supporting files (e.g., fonts, desk accessories),
and 128 DESKTOP 2.0 file to the RAM Expansion Unit. Applications
operate much faster if they are copied to an REU.
HINT It is suggested that you store this set of files on a separate work
disk, just as if you were going to use a second disk drive. In this
manner, when you need to copy the files to the REU, you can simply
do a disk copy procedure, rather than copying individual files from
different disks.
•
Use the disk drive for the disk containing your documents.
Ifyou have two disk drives:
•
Copy the application, supporting files (e.g., fonts, desk accessories),
and the 128 DESKTOP 2.0 file to one disk.
Store the documents on another disk.
Why You Need the 128 DESKTOP 2.0 File
Ideally, a copy of the 128 DESKTOP 2.0 file should be kept on any work
disk that contains an application. If not, when you exit a document, a
message will instruct you to insert a disk containing any version of the
DESKTOP that is higher than version 2.0. If this happens, you will need to
remove the current disk and insert a disk containing the 128 DESKTOP 2.0
(i.e, the System disk). If you wish to avoid this procedure, simply copy the
128 DESKTOP 2.0 file to your application work disks; when you exit a
document, you will be returned directly to the deskTop.
Do not copy the 128 DESKTOP 2.0 file to earlier versions of GEOS System
disks, since the 128 DESKTOP 2.0 file is incompatible with the earlier
versions of the GEOS KERNAL file. (The GEOS KERNAL file cannot be
copied to another disk.)
The 128 DESKTOP 2.0 file is located on the System and Backup System
disks.
Printer Drivers
You do not need to copy the current printer driver to your application work
disks.
28
Chapter 1
k^
The CONFIGURE File
For users who have upgraded from GEOS 2.0: If you own two different
disk drive types (e.g., a 1541 and a 1571), but do not own a RAM Expan
sion Unit, you do not need to copy the CONFIGURE 2.0 file to work disks
that contain a copy of the DESKTOP 2.0 file.
Work Disks and the 1581 Disk Drive
The 1581 disk drive is large enough for you to copy all of your applications
and related files onto one 3 1/2 inch disk drive. The easiest method for
preparing work disks for use with a 1581 disk drive is to copy all of your
GEOS 128 2.0 master disk files onto one 3 1/2 inch disk, and keep your
documents on other disks.
Work Disks and the RAM Expansion Unit (REU)
If you have a RAM Expansion Unit, you will find that GEOS 128 2.0 will
operate much faster than with an ordinary disk drive.
It is highly recommended that you purchase a RAM Expansion Unit Not
only will it speed up the performance of GEOS 128 2.0, it can speed up the
performance of the disk drives as well. In addition to the increased speed, a
RAM Expansion Unit will add more memory.
Getting Started
29
Learning
GEOS 128 2.0
This chapter contains the following sections:
Column Modes
■
Expanded Use of the Keyboard
•
The Tutorial
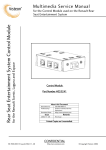
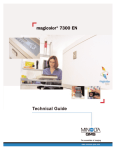
Column Modes
GEOS 128 2.0 displays the screen's resolution in one of two column modes:
80-column mode or 40-column mode. In 80-column mode, the pixels that
compose the screen's image are compressed to allow a wider view of the
currently displayed screen. For example, in geoPaint you can use 80column mode to work with the entire width of the currently displayed
document. In 40-column mode, the screen is not as compressed; therefore,
some fonts in 40-column mode are easier to read than in 80-column mode.
It is easier to see detail in 40-column mode. In addition, color is only
available in 40-column mode.
30
Chapter 2
«
Here is how the deskTop appears in 80-column mode:
159 Kbytes used
GEOPAWT
photo manager
onu
111 Kbytes free
Art-Poodes
ifon
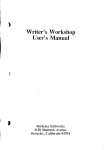
Here is the same deskTop in 40-column mode:
eos i file I view ; disk i selecUjpoqe j options Mm 88/22/88 61:12 PM
RftM 1571
es,
o selected
i59 Kbutes u
12$ DESKTOP
CEOPftlNT
Dwindle
Roma
Uniutr*itv
1
You can boot GEOS 128 2.0 in either mode, and once GEOS 128 2.0 is
running you can switch column modes if desired. (The procedure for
switching column modes is described under "Switching Column Modes,"
below.) Most of the applications in your GEOS 128 2.0 package run in
either mode, except for geoWrite 2.1 and geoSpell, which only run under
80-column mode. Depending on the application, you can switch column
modes while the application is running. Special instructions regarding the
use of column modes are found at the beginning of each chapter describing
applications in this manual addendum. However, you can switch column
modes at any time when the deskTop is displayed.
:*>:*>:'^
Learning GEOS 128 2.0
31
Switching Column Modes
Switching column modes is easy: simply select switch 40/80 from the geos
menu. When the screen goes dark, press the [RGBI button (or composite
switch) on your monitor. In a moment, the screen will redraw in the new
column mode.
The RGB Button or Composite Switch
The location of the IRGB1 button or composite switch depends on the type
of monitor you are using. On most Commodore monitors, the [RGB| button
or composite switch is located below the monitor, next to the power switch.
On some monitors, the [RGBI button or composite switch is located at the
rear of the monitor. Refer to your monitor's instruction manual for the
exact location of the 1RGB1 button or composite switch.
The 140/80 DISPLAY!
Note that the 140/80 DISPLAY I key on your keyboard is only used when
you boot GEOS 128 2.0. You do not need to press this button when you
switch column modes, even if the button is set for the other column mode.
If You Have a Television Set Monitor
If you are using a television set as a monitor, you can only use 40-column
mode. Remember that geoWrite 2.1 and geoSpell only operate in 80-
column mode, so you cannot use these two applications with a television set
monitor.
Expanded Use of the Keyboard
On your keyboard, you can now use the following keys with GEOS 128 2.0:
Key:
Action:
numeric keypad
to enter values.
1TAB1
to move to the next tab stop.
[CAPS LOCKI
to use upper case letters.
51 GE H 0
at the top of the keyboard. As with the ICRSR1 keys,
use these direction keys to move the pointer in small
increments around the screen.
32
Chapter 2
*:*K*:***>:*K*ttK*^^^^
140/80 DISPLAY!
to boot GEOS 128 2.0 in either 40- or 80-column
mode. You only need to use this key when you are
booting.
I CONTROL 1
to be used in conjunction with some keyboard
shortcuts for the deskTop.
I RESET I button
to be used in place of the I RESTORE 1 key when
rebooting GEOS 128 2.0.
to switch column modes.
switch
Learning GKOS 128 2.0
33
The Tutorial
Use this tutorial if you are new to GEOS, or if you are upgrading from
GEOS 1.2,1.3, or 128. If you are upgrading from GEOS 2.0, you can
bypass the tutorial, since you will be already familiar with most of its
features.
Once you have completed this tutorial, you will know how to select a group
of file icons on the deskTop, create a work disk for geoPaint, open a
geoPaint document, use some of the drawing tools, use the bitmap scaling
feature, and exit.
The disks you will need for this tutorial are the GEOS 128 2.0 System disk
and the TUTORIAL disk you created when you were making backups of
your GEOS 128 2.0 disks in Chapter 1. The TUTORIAL disk is an
additional copy of the Applications disk.
Step 1: Boot GEOS 128 2.0
For this tutorial, boot GEOS 128 2.0 in 40-column mode. The instructions
for booting GEOS 128 2.0 are described under "Booting GEOS 128 2.0" on
page 23 of this manual addendum. Remember that if you own a Parallel
Printer Interface (PPI), the booting procedure is slightly different from the
regular booting procedure.
Step 2: Insert the TUTORIAL Disk
Never use an original application disk to create a document! Instead, use
the TUTORIAL disk you created earlier when you were making backup
disks.
34
Chapter 2
1:
Close the System disk by holding down the IS key and pressing
Depending on your disk drive set-up, here is how the screen will
appear:
NOTE You just performed the keyboard shortcut for closing the
currently active disk. Another way of closing the disk is to select close
from the disk menu.
2:
Remove the System disk from the disk drive and insert the TUTORIAL
disk into the disk drive. Close the disk drive door.
3:
Activate the TUTORIAL disk by holding down the IS key and
pressing \o\. The TUTORIAL disk note pad will appear as follows:
TUTORIAL
11 files,
8 selected
CEOWPITE 12$
142 Kbytes used
24 Kbytes free
CEOPAINT
Learning GEOS 128 2.0
35
vXvX-Xv*XvX\vX%\vX^
Step 3: Now Remove Some Files
You will now begin to make a work disk for geoPaint using the TUTO
RIAL disk. Follow these instructions:
1:
You're not going to use all of the files you see on the TUTORIAL disk,
so now you can delete some of them from the disk. The files you need
to delete are located on pages 1,2 and 3 of the disk note pad.
2:
You won't need the GEOWRITE 128 file icon for this tutorial. Posi
tion the pointer over the GEOWRITE 128 file icon and click once. The
file icon will become highlighted.
3:
Here is the
highlighted file
Now click again on the GEO
WRITE 128 file icon. An outline
icon.
2.1
Here is its
ghost icon.
called a "ghost icon" will appear.
It will be attached to the pointer.
4:
Move the pointer to the waste basket icon at the lower right corner of
the screen and click. The GEOWRITE 128 file icon will be deposited
inside and the name GEOWRITE 128 will appear below the waste
basket.
5:
But no! You might need the geoWrite application! (Actually, you
won't for this tutorial.) To retrieve the GEOWRITE 128 file icon, click
on the waste basket The screen will be redrawn and the GEOWRITE
128 file icon will be restored to its original position on the disk note
pad.
6:
Now go to page 2 by pressing \2\ on the keyboard. The disk note pad
will display the Photo Manager, Calcula
ill
photo manager
tor, and Note Pad desk accessories. You
calculator
won't need the Photo Manager or the
Calculator file icons. You will delete
them from the disk.
7:
Move the pointer to the Photo Manager file icon and click. The Photo
Manager file icon will become high
lighted. Next, hold down the E key and
niTH-li'iT'liT-C-.ca ■Einnnfln
click on the Calculator file icon. It too
will become highlighted, along with the
Photo Manager file icon.
36
Chapter 2
-:*XW^
X*X*X-X'X-X*X-X*X-X-X
:*x*x^
IMPORTANT Make sure you have not clicked on the note pad file,
since you will need it for the tutorial.
8:
Now go to page 3 of the disk note pad by pressing [3]. This page
contains a number of font files, which enable you to change the
typeface used in a geoPaint document. Normally, you would include
fonts on a geoPaint work disk, since they are handy to have. However,
for this tutorial, we're going to delete them. The next multi-file
selection feature entails using a selection frame. Position the pointer
at the upper left of the California font file. Hold down the [S key and
click. Release the [§ key and move the pointer diagonally across the
screen. As you move the pointer, the selection frame will appear.
i
I
j
Font
California
Font
[
Uniutrrity
|Font
Corg
Font
Font
Dwin«ll«
Roma
;
|Font
Commodore
When all of the font files are encompassed in the selection frame, click
again. The font files will become highlighted.
USHifM
9:
Now move the pointer to one of the highlighted file icons and click
once. An outline with the words Multi File will appear and become
attached to the pointer. It's called the multi-file ghost icon. This is
how you can move a group of file icons around the screen. This multi
file ghost icon represents all the file icons on the current page and the
files you selected on page 2.
10: You're going to remove all of the files you just selected on the TUTO
RIAL disk. Move the pointer, which should still have the multi-file
select icon attached to it, to the waste basket at the lower right corner of
the screen.
x*x*x*x*x-x*x
x-x*x*x*x*x*x*x*x*x
Learning GEOS 128 2.0
37
11: Position the multi-file ghost icon over the waste basket and click. A
dialog box will ask you if you wish to delete the selected files. If you
change your mind, you can click on the Cancel icon. But since you
wish to delete these files, press I RETURN 1 or click on the OK icon.
The files will be deleted.
You have just created a work disk. The contents of a work disk depend
entirely on your needs, disk space, and disk drive set-up.
Step 4: OpengeoPaint
Now you are ready to be introduced to geoPaint, the GEOS 128 2.0 graph
ics program.
1:
Go to page 1 of the TUTORIAL work disk note pad by pressing Q].
The GEOWRITE 128 and GEOPAINT files will be displayed.
2:
Move the pointer to the GEOPAINT file icon
and click twice in rapid succession. By "doubleclicking" you can open a file quickly.
Double-click
here.
CEOPAINT
NOTE Another way to open a file is to click once on its icon so that it
is highlighted, then select open from the file menu (or press [§ \Z\).
3:
The following dialog box will appear:
Please Select Option:
[Create| new document
Open I existing document
to deskTop
4:
You are going to create a new document. Move the pointer to the
Create icon and click once.
5:
Another dialog box will appear. This one will ask you to enter a name
for the document you plan to create. Enter any name you wish, so long
38
Chapter 2
»:•:•:•:•:•:•:•:•:•:•:*:•:•:•:•:•:
as it does not exceed 16 characters. Press IRETURNI afterwards. The
new document will open.
NOTE If you are using more than one disk drive, a Drive icon will
appear in the dialog box. This will give you the option of having the
document created on a disk in another disk drive. However, for this
tutorial, do not create the document in another disk drive. Create the
document in the current disk drive, which contains the TUTORIAL
disk.
Step 6: Create a Drawing
The first time you open geoPaint, the following screen will appear:
qeos I file j edit j options j fonts | i
As with the deskTop, a command menu will appear at the top left corner of
the screen. Clicking on one of its menu options will display a list of more
options.
In the middle of the screen is a large rectangular Drawing Window, in
which you will create your drawing. The left side of the screen is reserved
for the Toolbox, which contains drawing tools. When you first open a
geoPaint document, the Toolbox is not visible. You can, however, control
the display of the Toolbox. For this tutorial, you will create a simple
drawing, just to get familiar with geoPaint. Then you will try out the
Bitmap Scaling feature.
>:*:*x*:*:*:*:*:*H*»:
Learning GEOS 128 2.0
39
1:
Activate the Toolbox display by
clicking on the Toolbox icon, which re-
sembles a monkey wrench, at the top of
Click on the
the screen. The Toolbox will appear on
the left side of the screen.
hide the
Toolbox.
2:
Go to the Toolbox and look for the tool that
resembles a hollow circle. This is the Hollow
3:
Ellipse tool. Click on the Hollow Ellipse tool
jhe //o//oiy
to select it
Ellipse tool
The Hollow Ellipse tool will become highlighted. Move
the pointer to the Drawing Window: you will discover that
the pointer will assume the shape of a small cross-hair.
4:
Click once to activate the Hollow Ellipse tool.
5:
Move the pointer across the Drawing Window. An ellipse will be
drawn across the Window.
6:
Make the ellipse any size you want by moving the mouse or joystick.
When it is a size you like, click to set the ellipse in place and to
deactivate the Hollow Ellipse tool.
40
Chapter 2
^
XXvX-X*X*X*XX
x*x-x*x*x*x-x-x*x*
7:
Next, go to the Current Pattern Indicator,
which appears just below the Toolbox.
Click on the Current Pattern Indicator.
8:
■
Click on
the Current
Pattern Indicator.
To the right of the Current Pattern Indicator a selection of 32 patterns
will appear. Click on a pattern you like. Once you have done so, the
pattern selections will disappear. The pattern you selected will appear
in the Current Pattern Indicator.
Now select a pattern.
8:
Now that you have selected a pattern, go to the Toolbox again and look
for the Faucet tool. The Faucet will fill an
enclosed image or the background with a pattern
or color. Click on the Faucet.
r^
SJ Nextf click on
the Faucet
10: You are now ready to fill the ellipse with the pattern you selected.
Move the pointer to the ellipse and position the cross-hair within its
boundaries.
11: Now click. The ellipse will become filled with the pattern you se
lected.
tt^^
Learning GEOS 128 2.0
41
«w
Step 6: Use the Bitmap Scaling Feature
A feature that has been added to geoPaint is the Bitmap Scaling feature.
With Bitmap Scaling, you can copy an image into a photo scrap, use a
dialog box to change its appearance, then paste the altered image back into
the document. For this part of the tutorial, you will experiment with the
Bitmap Scaling feature.
1:
In order to use the Bitmap Scaling feature, you
i.—.■ Click on the
Ml Edit Box tool.
will need to create a photo scrap. Move the
pointer to the Edit Box tool and click on it to select it.
2:
Move the pointer to the Drawing Window; the pointer will assume the
shape of a cross-hair.
3:
Position the pointer at the upper left of the ellipse you drew earlier, and
click.
4:
Now move the pointer diagonally across the ellipse. A dotted line
(called an editing region) will appear. When the ellipse is contained
within the editing region, click again. The editing region will be set in
place.
Draujinq
mi
m
PSffim
Mt
Sftnr
1
#
i
Q»
»^
•
ft
nr
*g
M...IIU
5:
42
Now go to the command menu and select copy from the edit menu. A
copy of the ellipse will be placed into a photo scrap.
Chapter 2
«
x-x*x-x-x-x-x*:-x*x-xvx-x
*X^
6:
Next, select the Edit Box tool again, and use Steps 2-4 to open another
editing region, right over the current ellipse. However, make this
editing region a different shape from the one created earlier.
mi
i
J"lL
KM
|1^
A#8$
»»3"
<3SSfti
7:
f
§5
V
V
Now you are ready to use the Bitmap Scaling feature. Select paste
from the edit menu. The following dialog box will appear:
Centered in region
Scaled to fit
Stretched & Scaled to fit
Pattern
D Smoothed
□ Transparent
I Cancel |
8:
There are a number of ways you can alter the appearance of the photo
scrap. For example:
a:
Click on the Stretched & Scaled to fit option to resize the photo
scrap's proportions to fit an editing region.
b:
Click on the arrows in the Pattern box to scroll through a selection
of 32 patterns. If desired, select a pattern other than the one
originally displayed.
Learning GEOS 128 2.0
43
^
c:
Click on the Transparent option to superimpose the photo scrap
onto the background image.
9:
Once you have clicked on these options, click OK. You will be
returned to the Drawing Window, and the ellipse you pasted into the
second editing region will be very different from its original appear
ance:
Step 8: Use a Desk Accessory
Back when you deleted most of the files from the TUTORIAL work disk,
you deleted a number of programs called desk accessories. A desk acces
sory is a small program you can use from within an application document
such as geoPaint. The desk accessory you are going to use now is the Note
Pad.
1:
Go to the command menu and select note pad from the geos menu.
2:
The Note Pad will appear on the screen on top of your geoPaint
drawing. You won't be able to altere your drawing now; it will be
inactive as long as the Note Pad remains on the screen. Here is how the
Note Pad appears:
44
Chapter 2
3:
Type a note into the Note Pad: to do so, simply start typing.
4:
Now exit the Note Pad. Move the pointer to the close icon and click.
The Note Pad will disappear and you will be returned to your drawing.
Step 9: Now Exit geoPaint
When you leave the geoPaint application, you have the option of going to
the following places:
•
you can create and enter a new geoPaint document.
•
you can enter an existing geoPaint document.
•
you can return directly to the deskTop.
For this tutorial, you will go back to the deskTop.
1:
Go to the command menu and select quit from the file menu. Exiting a
document will save its contents to disk.
2:
A dialog box will ask you to "Please insert a disk with the 128 DESK
TOP V2.0 or higher." Remove the TUTORIAL disk from the disk
drive and insert either your System disk or the Backup System disk.
Both of these disks contain the DESKTOP file.
3:
Click OK. The System disk deskTop (or the Backup System disk
deskTop) will appear.
x*x-x*x*x*x*xx:*x*
Learning GEOS 128 2.0
45
^^
An Easier Way to Exit Documents
It is not necessary to use Steps 2 and 3 of the above procedure each time
you exit a document. The dialog box in Step 2 appeared because your
TUTORIAL disk does not contain a copy of the 128 DESKTOP 2.0 file. If
you have room, copy the 128 DESKTOP 2.0 file to your work disks. This
way, when you exit a document you will be returned directly to the deskTop
of that disk.
Congratulations! You have just completed the GEOS 128 2.0 tutorial.
Now you are ready to use GEOS 128 2.0.
46
Chapter 2
The GEOS
128 2.0 deskTop
This chapter contains the following sections:
Moving to Another Disk Note Pad Page in Text Mode
The deskTop Command Menu
File Viewing Modes
Selecting a File in Text Mode Using the Keyboard
Selecting a Group of Files
Viewing the First File in a Selection Sequence
Moving Files
Copying a File to Another Disk
Copying a Disk Using One Disk Drive
Activating Drive C
The RAM Expansion Unit
The CONFIGURE 2.0 File
Returning to the deskTop from BASIC Mode
Keyboard Shortcuts
X*X*X-X-X*X*XvX-X*XvX
The GEOS 128 2.0 deskTop
47
:wxx-x:^^
Moving to Another Disk Note Pad Page in Text Mode
Use the following method to scroll through a list of file names in text mode.
To scroll the list offile names in text mode, use one of
the following methods:
Press the up or down 1CRSR1 keys or the [E EG
Click on the up or down arrows at the bottom of the disk note pad.
The deskTop Command Menu
The deskTop command menu has two new features. One feature is that
inactive menu options are displayed in italics. Another improvement is that
you can use the keyboard to pull down a menu and select an option.
To use the cursor keys to select a command menu item:
1:
Press the right or left ICRSR1 key. (You can also use the direction keys
at the top of the keyboard.) The pointer will go to the command menu.
2:
Press the 1CRSR1 or direction key until it is positioned over the menu
item you need. Press I RETURN I. The menu options will display.
To use the cursor keys to select a pull-down menu option:
1:
Press the up or down ICRSRI or direction key. The pointer will move
along the menu options.
2:
When you position the pointer over the menu option you need, press
IRETURNi.
File Viewing Modes
You can perform the following operations in both text mode as well as icon
mode:
selecting a file or a group of files.
opening a file.
using the file info command on a file or a group of files.
renaming a file or a group of files.
duplicating a file or a group of files.
moving/copying a file or a group of files.
printing a document file.
deleting a file.
48
Chapter 3
xvx-xtt^
Selecting a File in Text Mode Using the Keyboard
Use the following procedure to select a file in text mode.
To select a file on the disk notepad using the keyboard:
Each file on the disk note pad has a number assigned to it. In text mode, the
numbering begins at the top of the disk note pad and continues downward.
For example, the top file is 1, the file below it is 2, and so on.
•
To select file 1, hold down S and press \T\. An arrow will appear
next to the file's name.
Selecting a Group ofFiles
In addition to the group file selection procedures described in the GEOS 2.0
User's Manual, use the following procedure to select more than one file
icon in the disk note pad. This procedure applies to icon mode only.
In icon mode, to select more than one file icon using a selec-
tionframe:
1:
Position the pointer outside the first file icon.
2:
Hold down the [fr] key and click. Release the E key.
3:
Drag the pointer across the disk note pad. A rectangle will appear.
I ifcq
! 12$ DESKTOP
4:
rea
niii
CEOPAINT
Dh*t4 mon
i
i
After you have encompassed the file icons you want to select, click
again. The file icons within the selection frame will become high
lighted.
Viewing the First File in a Selection Sequence
If on a different disk note pad page, to view the firstfile name
orfile icon in a selection sequence:
Hold down O and press \G\. The disk note pad page containing the
first file you selected will appear.
«*:w
The GEOS 128 2.0 deskTop
49
Moving Files
Use the following procedures to move files between the disk note pad and
the border.
To movefiles in either icon or text mode to the border:
1:
Select the files you wish to move.
2:
Use one of the following methods to move the files to the border:
■
Press ICONTROLlFDi.
•
Click on one of the selected files to bring up the multi-file ghost
icon. It will become attached to the pointer. Deposit the files onto
the border.
To movefiles in either icon or text mode from the border to the
disk note pad:
1:
Select the files you wish to move.
2:
Use one of the following methods to move the files to the disk note
pad:
•
Press 1 CONTROL] HJ1.
Click on one of the selected files to bring up the multi-file ghost
icon. It will become attached to the pointer. Deposit the files onto
the disk note pad.
Copying a File to Another Disk
If you have a second disk drive or a RAM Expansion Unit, GEOS 128 2.0
will enable you to use the keyboard as well as the input device to copy files
(in either text or icon mode) to a destination drive.
To copy files to another disk in the other disk drive:
1:
Select the files you wish to copy.
2:
Use one of the following methods to copy the files:
o
50
Press 1 CONTROLl [A] to copy files from Drive B to Drive A.
dh£iDt6r 3
<«*wx%««*x*wx««*x-x*^
X-X-X'Xtt<tttt«tttt«*X*XttW*X'X*X'X'X-XW^^^^^
•
Press 1 CONTROL 1 \B\ to copy files from Drive A to Drive B.
•
Drag the file's ghost icon (or the multi-file select ghost icon) to the
disk icon representing the destination disk, then click. The files
will be copied to that disk.
Copying a Disk Using One Disk Drive
If you have one disk drive, you can copy a disk by using the disk copy
menu option. The DISK COPY program is no longer needed to copy a disk
if you have a one disk drive system.
If you try to copy a disk to an unformatted disk, the disk copy command
will give you the option of formatting the disk.
You cannot copy the System or Backup System disk. You can, however,
copy certain files from those disks: the 128 DESKTOP 2.0,128 CONFIG
URE 2.0, PAINT DRIVERS, 128 RBOOT, the desk accessories, and the
printer drivers. When selecting files to copy to another disk, you can select
more than one file at a time. To select more than one file at a time, refer to
"Selecting a Group of Files" on page 59 of the GEOS 2.0 User's Manual.
See also "Copying a File to Another Disk" on page 66 of the GEOS 2.0
User's Manual.
To copy a disk using one disk drive:
1:
Insert the source disk into the disk drive.
2:
Open the source disk by clicking on its disk drive icon.
3:
Select copy from the disk menu (or press [fr1l~Kl).
4:
A dialog box will ask you to "Please insert destination disk in drive:
A." Remove the current disk from the disk drive and insert the
destination disk. Click OK to continue.
5:
The next dialog box will ask you "Replace the contents of (destination
disk name) with the contents of (source disk name)?" Click YES to
continue.
6:
Next, you will be asked insert the source disk into the disk drive.
Remove the destination disk and insert the source disk. Click OK.
The GEOS 128 2.0 deskTop
51
7:
Continue to follow the directions in the dialog boxes on the screen,
swapping disks in and out of the disk drive and clicking OK, until the
disk is copied. The procedure should take about three disk exchanges.
Activating Drive C
Use the following additional keyboard shortcut to activate Drive C.
To activate Drive C so that it is in the Drive A position:
Press
To activate Drive C so that it is in the Drive B position:
The RAM Expansion Unit
There are two types of RAM Expansion Units you can use with GEOS 128
2.0: the 1750 and the 1764. The 1750 RAM Expansion Unit supports up to
512K memory. The 1764 RAM Expansion Unit only supports 256K
memory, unless you add a chip to it.
The CONFIGURE 2.0 File
If you own two disk drive types (e.g., a 1541 and a 1571) but do not own a
RAM Expansion Unit, you do not need to copy the CONFIGURE 2.0 file to
work disks containing the DESKTOP 2.0 file.
Returning to the deskTopfrom BASIC Mode
If the programs you have run while in the BASIC interpreter do not disturb
the memory space between $C000 and $C080 (hex address values), and the
NMI vector has not been changed, then you can reboot the deskTop.
Rebooting in the following manner will not delete an REU's contents.
To rebootfrom BASIC:
1:
Place the System disk into Drive A.
NOTE If the 128 DESKTOP 2.0 file is on the REU, you need not
insert the System disk into Drive A.
2:
Press the 1RESET1 button, which is located next to the Commodore
128's power switch. On the Commodore 128D, the 1RESET1 button is
located on the right side of the computer.
52
Chapter 3
Keyboard Shortcuts
Many of the following keyboard shortcuts are summarized in the dialog box
that appears after you select shortcuts from the options menu. Keyboard
shortcuts for command menu options are included in the menu listing found
in Appendix B: Menus, on page 89 of this addendum manual and on pages
289-294 of the GEOS 2.0 User's Manual.
Action:
Shortcut:
Disk Drives:
activating Drive A
activating Drive B
swapping Drive A with Drive C
swapping Drive B with Drive C
Files:
copying selected files to Drive B
ICONTROLirBl
copying selected files to Drive A
moving selected files to border
moving selected border files to page
viewing 1st file icon in selection queue
Disk Note Pad Pages:
moving to next disk note pad page
moving to pages 1-9
:ttor[
number keys QQ-I
moving to page 10
[0] (zero key)
moving to previous disk note pad page
moving to pages 11-18
Use numeric keypad if desired.
Command Menu:
moving pointer to command menu
I ±5 or |SHIFT|[CRSRi ±5
or @
moving pointer across command menu
RSRI ±? or ISHIFTlfCRSRl ±?
or F»1 or PH
position pointer, then press
I RETURN I
moving down pull-down menu
moving up pull-down menu
selecting menu option
ISHIFTIICRSRI Tl or HI
position pointer, then press
I RETURN 1
Operations:
Cancelling operation after it has started
IRUN/STOPI
The GEOS 128 2.0 deskTop
53
geoPaint
This chapter contains the following sections:
geoPaint and Work Disks
If You Have a LaserWriter or LaserWriter Plus
geoPaint Documents and the 1581 Disk Drive
Using 40- or 80-Column Mode
The geoPaint Screen
Erasing Colors in an Area
The Toolbox Display
geoPaint and Work Disks
The following instructions describe how to create geoPaint work disks, de
pending on your project needs and disk drive set-up.
The locations of files you may need are as follows:
54
Files:
Disk:
geoPaint, photo
mgr, non-LW fonts
Applications
LW fonts, geoLaser
Write Utilities
128 DESKTOP 2.0
System, Backup System
Chapter 4
^
See Appendix D: Disk Contents (page 94) of this manual addendum for a
complete listing of the files on your disks and where these files are located.
If you wish to add special fonts, note that geoPaint does not support the use
ofmegafonts.
Ifyou have one disk drive:
•
Copy geoPaint, your geoPaint documents, desk accessories, fonts, and
text or photo albums and scraps to the same disk. If you have room,
add the 128 DESKTOP 2.0 file.
Ifyou have one disk drive and a RAM Expansion Unit (REU):
•
CoPy geoPaint, font files, desk accessories, text or photo albums and
scraps, and the 128 DESKTOP 2.0 file to the REU.
Use the disk drive for the disk containing the documents.
Ifyou have more than one disk drive:
•
Copy geoPaint, desk accessories, fonts, and text or photo albums and
scraps to one disk. If you have room, add the 128 DESKTOP 2.0 file.
Create and store your geoPaint documents on another disk.
If You Have a LaserWriter or LaserWriter Plus
If you have a LaserWriter or a LaserWriter Plus, you cannot use geoLaser to
print your documents. Print the document by using the print file menu
option. Make sure that the default printer driver on your System disk is
LaserWriter 2.1.
geoPaint Documents and the 1581 Disk Drive
Disregard the section entitled "geoPaint Documents and the 1581 Disk
Drive," which appears on page 91 of the GEOS 2.0 User's Manual The
feature described in this section does not apply to GEOS 128 2.0.
Using 40- or 80-Column Mode
You can use geoPaint in either 40- or 80-column mode. In addition, you
can switch column modes at any time. Note that color is available only in
40-column mode. 80-column mode, however, will enable you to work with
the full width of a document. Switching column modes will de-activate the
:w
geoPaint
55
«CvXvX-X-X-X*XW
Toolbox. (You can activate the Toolbox again by clicking on the Toolbox
icon.)
To switch column modes:
1:
On the deskTop, select switch 40/80 from the geos menu.
2:
When the screen goes dark, press the IRGB1 button or the composite
switch on your monitor as follows:
To go to 40-columnmode:
•
Press the I RGB I button so that it is in CVBS mode.
•
Press the composite switch so that it is in COMP mode.
To go to 80-column mode:
•
Press the [RGB! button so that it is in RGB mode.
Press the composite switch so that it is in RGB mode.
The geoPaint Screen
In 80-column mode, the geoPaint screen appears as follows:
command menu
Toolbox icon
I
Page Map
Toolbox
Note Drawing Window
size in Page Map.
56
Chapter 4
title bar
Status Box
In 40-column mode, the geoPaint appears as follows. Note that because
color is available in this mode, the Color tool appears in the Toolbox.
qeos I file j edit j options j fonts |
The Color tool only appears
in 40-column mode.
Note Drawing Window size in
Page Map.
The Toolbox Icon
As you can see in both column mode versions of the geoPaint screen, the
Toolbox icon appears at the top of the Drawing Window. This icon
controls the display of the Toolbox. The procedure for using the Toolbox
icon is described under 'The Toolbox Display" on page 58 of this manual
addendum.
Erasing Colors in an Area
Use the following procedure to erase colors from a section of the Drawing
Window. You can erase (not deactivate) colors from the Drawing Window
by using the following procedure. This procedure will retain colors
elsewhere in the document Remember that you must be in 40-column
mode to use colors.
To erase colors:
1:
Position the Drawing Window so that the area whose colors you wish
to erase is displayed.
2:
Select color off from the options menu.
3:
Click on the Edit Box tool. If you wish to select a specific area within
the Drawing Window, use the pointer to open an editing region. If you
geoPaint
57
x-x-x-xxx-xx-xx-xx-xx-x-:
X-X-X-X-XvX-XvXvXvX-X
wish to select the entire Drawing Window, double-click on the Edit
Box tool.
4:
Select cut from the edit menu. The area you selected will disappear
and be placed in a photo scrap.
5:
Select color on from the options menu.
6:
Select the Edit Box tool again. If you wish to select a specific area
within the Drawing Window, use the pointer to open an editing region.
If you wish to select the entire Drawing Window, double-click on the
Edit Box tool.
7:
Select paste from the edit menu.
8:
The Bitmap Scaling dialog box will appear. Click OK. The photo
scrap will be pasted in the editing region you opened. Its colors will
have been erased.
The Toolbox Display
Whenever you open a geoPaint document, the Toolbox will initially be
invisible:
Toolbox icon
You can control the display of the Toolbox by clicking on the Toolbox icon
at the top of the screen. This feature is particularly handy if you wish to
work with the widest possible screen. When the Toolbox is invisible, the
most recently selected tool will still be active.
58
Chapter 4
♦x*x*x*x*x*x
:*x*x*x*x*x*x*>:
To use a wider Drawing Window:
1:
Go to the Toolbox and select the tool you plan to use next.
2:
Deactivate the Toolbox by clicking on the Toolbox icon at the top of
the screen.
3:
Use the tool you most recently selected: it will still be active.
geoPaint
59
#:w^
Using 80-Column Mode
geoWrite 2.1 operates in 80-column mode only. If you open geoWrite 2.1
while in 40-column mode, a dialog box will enable you to switch to 80column mode. If this happens, click Yes (to switch column modes). When
the screen goes dark, press the 1RGB1 button (or composite switch) under
the monitor.
To switch column modes:
1:
On the deskTop, select switch 40/80 from the geos menu.
2:
When the screen goes dark, press the [
ton or the composite
switch on your monitor as follows:
•
IRGB1 button: to RGB mode.
•
Composite switch: to RGB mode.
The geoWrite 2.1 Screen
The geoWrite 2.1 screen appears as follows:
page indicator
command menu
geos i file j etit j options j poge I font | stqle
.... II,... i
tt
i
13,
WLEFT CENTERD RIGHTD FULLD 4-JU5TIFICHT1PN
LINE SPHCINE + !■ IXD 2u
ruler
And the text aoes here. Note how wide the screen is.
Writing
Window
As you can see, the ruler spans to eight inches. In the page indicator, you
will note that the rectangle representing the Writing Window has the same
width as the the page indicator itself.
62
Chapter 5
x*x*x*x*x-x*x*x«x
The Writing Window and Its Dimensions
Because geoWrite 2.1 operates only in 80-column mode, the Writing
Window automatically displays the entire width of the document. There is
no side-flipping of the Writing Window. The ruler at the top of the Writing
Window begins at 0.2 inches and spans to 8.2 inches. When you first open
a geoWrite 2.1 document, you will note that the options menu does not
contain a make full page wide option.
The document dimensions described here are based on a print resolution of
80 dots per inch. If your printer has a different resolution, the dimensions
will be slightly different.
The BSW128 Font
An additional font listed in geoWrite 2.1's font menu is the BSW 128 font.
Like the BSW font, the BSW 128 font is internal (i.e., it won't appear as a
file icon on the disk note pad). The text used in the illustration of the
Writing Window on page 62 was created with the BSW 128 font.
Using NLQ Mode when Printing a Document
When using NLQ mode to print a document, note the following:
•
NLQ (near letter quality) does not produce different fonts, but does
produce the same formatting that appears on the screen. NLQ uses the
printer in its near letter quality mode. To use this mode, all text must
be in the Commodore 10 font and in plain style. Graphics cannot be
printed in this mode. If your text is not in the Commodore 10 font,
choose select page from the options menu, then select the Commodore
10 font from the font menu. Be sure to perform this operation for each
page of your document, including headers and footers.
A few printers have different page lengths for NLQ printing than for
graphics (high quality) printing. Select NLQ spacing from the page
menu to cause NLQ page length to be used. You always should select
NLQ spacing so that geoWrite 2.1 can display the correct number of
lines on the screen.
^
geoWrite
63
geoSpell
This chapter contains the following sections:
•
geoSpell and Work Disks
•
Using 80-Column Mode
Searching for a Work in a Dictionary
geoSpell and Work Disks
The following instructions describe how to create geoSpell work disks, de
pending on your project needs and disk drive set-up.
The locations of files you may need are as follows:
Files:
Disk:
geoSpell, geoDictionary
geoSpell
128 DESKTOP 2.0
System, Backup System
See Appendix D: Disk Contents (page 94) of this manual addendum for a
complete listing of the files on your disks and where these files are located.
Ifyou have one disk drive:
Copy geoSpell, the geoDictionary, personal dictionaries, and geoWrite
documents to one disk. If you have room, add the 128 DESKTOP 2.0
file.
64
Chapter 6
Ifyou have one disk drive and a RAM Expansion Unit (REU):
Copy geoSpell, the geoDictionary, personal dictionaries, and the 128
DESKTOP 2.0 file to the REU.
Use the disk drive for the disk containing the geoWrite documents.
Ifyou have more than one disk drive:
•
Copy geoSpell, the geoDictionary, and the 128 DESKTOP 2.0 file to
one disk.
Copy the personal dictionaries and geoWrite documents to another
disk.
Using 80-Column Mode
geoSpell operates in 80-column mode only. If you open geoSpell while in
40-column mode, a dialog box will ask if you wish to switch to 80-column
mode. If this happens, click Yes (to switch column modes). When the
screen goes dark, press the IRGB1 button (or composite switch) under the
monitor.
To switch column modes before you open geoSpell:
1:
Select switch 40/80 from the geos menu.
2:
When the screen goes dark, press the iRGBl button or the composite
switch on your monitor as follows:
•
I RGB I button: to RGB mode.
Composite switch: to RGB mode.
Searching for a Word in a Dictionary
Use the following method to search for a word in a dictionary, in addition to
the methods described on pages 195-196 of the GEOS 2.0 User's Manual:
Scroll through the list of words in the Dictionary Box by clicking on
the up or down arrows, which are located above the Find button. The
keyboard shortcut is to press the ICRSR1 up or ICRSRI down keys.
You can also use the [T] or QQ keys at the top of your keyboard.
^^
geoSpell
65
geoMerge
This chapter contains the following section:
•
geoMerge and Work Disks
Using 40- or 80-Column Mode
geoMerge and Work Disks
The following instructions describe how to create geoMerge work disks,
depending on your project needs and disk drive set-up.
The locations of files you may need are as follows:
Files:
Disk:
geoMerge, LW fonts
Write Utilities
geoLaser
non-LW fonts
Applications
128 DESKTOP 2.0
System, Backup System
See Appendix D: Disk Contents (page 94) of this manual addendum for a
complete listing of the files on your disks and where these files are located.
66
Chapter 7
Ifyou have one disk drive:
•
Place geoMerge, the documents to be merged, and the fonts on the
same disk. If desired, add geoWrite (for editing documents) and the
128 DESKTOP 2.0 file.
Ifyou have one disk drive and a RAM Expansion Unit (REU):
Copy geoMerge, the fonts used in the documents, and the 128 DESK
TOP 2.0 file to the REU. If desired, add geoWrite if you wish to edit
the documents.
•
Use the disk drive for the disk containing the documents to be merged.
Ifyou have more than one disk drive:
•
Place geoMerge and the fonts on one disk. If desired, add geoWrite
(for editing documents) and the 128 DESKTOP 2.0 file.
Place the documents to be merged on another disk.
Using 40- or 80-Column Mode
You can use geoMerge in either 40- or 80-column mode. If you wish to
switch to a different column mode, do so before you open geoMerge. You
cannot switch column modes when geoMerge is in use.
To switch column modes:
1:
On the deskTop, select switch 40/80 from the geos menu.
2:
When the screen goes dark, press the IRGB1 button or the composite
switch on your monitor as follows:
To go to 40-column mode:
•
Press the [RGB] button so that it is in CVBS mode.
•
Press the composite switch so that it is in COMP mode.
To go to 80-column mode:
•
•
Press the I RGB I button so that it is in RGB mode.
Press the composite switch so that it is in RGB mode.
^
geoMerge
67
geoLaser
This chapter contains the following sections:
•
geoLaser and Work Disks
Using 40- or 80-Column Mode
Column Modes and Printing
geoLaser and Work Disks
The following instructions describe how to create geoLaser work disks,
depending on your project needs and disk drive set-up.
The locations of files you may need are as follows:
Files:
Disk:
geoLaser, LW fonts
Write Utilities
non-LW fonts
128 DESKTOP 2.0
Applications
System, Backup System
See Appendix D: Disk Contents (page 94) of this manual addendum for a
complete listing of the files on your disks and where these files are located.
68
Chapter 8
Ifyou have one disk drive:
Copy geoLaser, the font files, and the documents to one disk. If you
have room, add the 128 DESKTOP 2.0 file.
Ifyou have one disk drive and a RAM Expansion Unit (REU):
•
Copy geoLaser, the font files, and the 128 DESKTOP 2.0 file to the
REU.
•
Use the disk drive for the disk containing the documents.
Ifyou have more than one disk drive:
•
Copy geoLaser, the font files, and the 128 DESKTOP 2.0 file to one
disk.
Copy the documents to another disk.
Using 40- or 80-Column Mode
You can use geoLaser in either 40- or 80-column mode. If you wish to
switch to a different column mode, do so before you open geoLaser. You
cannot switch column modes when geoLaser is in use.
To switch column modes:
1:
On the deskTop, select switch 40/80 from the geos menu.
2:
When the screen goes dark, press the 1RGB1 button or the composite
switch on your monitor as follows:
To go to 40-columnmode:
•
Press the I RGB I button so that it is in CVBS mode.
Press the composite switch so that it is in COMP mode.
To go to 80-column mode:
•
Press the 1RGB1 button so that it is in RGB mode.
Press the composite switch so that it is in RGB mode.
geoLaser
69
Column Modes and Printing
Under Step 5 of the procedure for using geoLaser (see page 230 of the
GEOS 2.0 User's Manual), note the following:
If you have selected the 9600 baud rate and if you are using 40-column
mode, the screen will go blank during the printer initialization and printing
process. If you wish to cancel the printing, press the input device button
(but do not move the input device). If you are using 80-column mode, the
screen will display the message "Initializing Printer." Another dialog box
will say "Printing...". If necessary, you can cancel by clicking on the
Cancel button in the dialog box below the "Printing" message.
When printing large files while using 40-column mode, the screen will
occasionally change colors. This lets you know that the LaserWriter is
reading data from geoLaser. After the file has been printed, the Select File
dialog box will reappear.
70
Chapter 8
Text Grabber
This chapter contains the following sections:
•
Text Grabber and Work Disks
•
Using 40- or 80-Column Mode
Word Processor Format Files
Text Grabber and Work Disks
The following instructions describe how to create Text Grabber work disks,
depending on your project needs and disk drive set-up.
The locations of files you may need are as follows:
Files:
Disk:
Text Grabber,
Write Utilities
Fleet System 4,
C128 Generic I,
C128 Generic II,
PaperClip II, &
WordWriter 128
word processor files
128 DESKTOP 2.0
System, Backup System
Text Grabber
71
See Appendix D: Disk Contents (page 94) of this manual addendum for a
complete listing of the files on your disks and where these files are located.
If the word processor format file you need is not listed on the disk above,
copy the two C128 Generic word processor files to your work disks
instead. A C128 Generic file will read in all the characters from the
document, ignoring non-printable characters. After the document has been
converted, you can reformat it in geoWrite 2.1.
Ifyou have one disk drive:
Copy Text Grabber and the word processor format files you need onto
a disk. If you have room, add the 128 DESKTOP 2.0 file. You also
can copy the non-GEOS word processing data files to the disk, though
this is not required.
Ifyou have one disk drive and a RAM Expansion Unit (REU):
Copy Text Grabber, the word processor format files you need, and the
128 DESKTOP 2.0 file to the REU. Create the converted documents
on the REU. When you are finished converting files, be sure to copy
the converted documents to a work disk for safekeeping.
Use the disk drive for the disk containing the non-GEOS files you wish
to convert.
Ifyou have more than one disk drive:
•
Copy Text Grabber, the word processor format files you need, and the
128 DESKTOP 2.0 file onto one disk.
•
Use the second disk drive for the disk containing the non-GEOS word
processing data files.
Using 40- or 80-Column Mode
You can use Text Grabber in either 40- or 80-column mode. If you wish to
switch to a different column mode, do so before you open Text Grabber.
You cannot switch column modes when Text Grabber is in use.
To switch column modes:
1:
72
On the deskTop, select switch 40/80 from the geos menu.
Chapter 9
2:
When the screen goes dark, press the RGB button or the composite
switch on your monitor as follows:
I
I
To go to 40-column mode:
•
Press the RGB button so that it is in CVBS mode.
Press the fcompfrsite switch so that it is in COMP mode.
To go to 80-column mode:
•
Press the RGB button so that it is in RGB mode.
•
Press the fcomp6site switch so that it is in RGB mode.
Word Processor Format Files
The word processor format files that accompany Text Grabber are as
follows:
Heet System 4
C128 Generic I
C128 Generic II
PaperClip II
WordWriter 128
The Heet System 4, PaperClip II, and WordWriter 128 format files will
save the original document's formatting commands as well as the text The
C128 Generic I and II format files will save the document's text but not its
formatting commands.
»:•»»:•»:•:•>:•:•:•»:♦:•:•>:•:•»:
Text Grabber
73
Paint Drivers
This chapter contains the following sections:
•
Paint Drivers and Work Disks
Using 40- or 80-Column Mode
Creating the Paint Drivers
Selecting a Paint Driver
Creating a Paint Drivers Document
Paint Drivers and Work Disks
The following instructions describe how to create Paint Drivers work disks,
depending on your project needs and disk drive set-up.
The locations of files you may need are as follows:
Files:
Disk:
Paint Drivers,
System, Backup System
128 DESKTOP 2.0,
printer driver
LW Fonts, text mgr
Write Utilities
geoPaint, geoWrite
Applications
non-LW fonts, photo mgr
74
Chapter 10
»»»»»h««m*»m« •:*x*x-x*x*x-x-x<*xttCv*x<w^
See Appendix D: Disk Contents (page 94) of this manual addendum for a
complete listing of the files on your disks and where these files are located.
IMPORTANT You do not need to copy the Paint Drivers application itself
to your work disks. On the System or Backup System disk, you can use the
Paint Drivers application to create the two paint drivers, Paint OVERLAY
and Paint PAGES. The procedure for creating the paint drivers is on page
76 of this manual addendum. After you have created these two drivers,
copy them to your Paint Drivers work disk. You only need the drivers
themselves to convert the geoWrite documents, not the actual Paint Drivers
application.
Ifyou have one disk drive:
•
Copy the paint drivers, the fonts used to create the geoWrite file, and
the geoWrite documents to one disk. If you have room, add the 128
DESKTOP 2.0 file, any additional fonts, and the geoPaint and/or
geoWrite applications.
Ifyou have one disk drive and a RAM Expansion Unit (REU):
•
Copy the paint drivers, the fonts used to create the geoWrite file, and
the DESKTOP 2.0 file to the REU. Create the Paint Drivers documents
in the REU. Afterwards, copy the Paint Drivers documents to a work
disk for safekeeping. If you have room, add any additional fonts and
the geoPaint and/or geoWrite applications.
•
Use the disk drive for the disk containing the geoWrite documents.
Ifyou have more than one disk drive:
Copy the paint drivers, the fonts used to create the geoWrite file, and
the DESKTOP 2.0 file to one disk. If desired, add any additional fonts
and the geoPaint and/or geoWrite applications.
•
Create and store the geoWrite documents on another disk.
Using 40- or 80-Column Mode
If you wish to switch to a different column mode, do so before you open the
Paint Drivers application, or after the conversion process is completed. You
cannot switch column modes when the Paint Drivers application is in use.
Paint Drivers
75
*:*tt*xtt<<*:*xtt*x*:*Xw:*>:*:-:ttw
To switch column modes:
1:
On the deskTop, select switch 40/80 from the geos menu.
2:
When the screen goes dark, press the 1RGB1 button or the composite
switch on your monitor as follows:
To go to 40-column mode:
•
•
Press the IRGBI button so that it is in CVBS mode.
Press the composite switch so that it is in COMP mode.
To go to 80-columnmode:
•
Press the 1RGB1 button so that it is in RGB mode.
•
Press the composite switch so that it is in RGB mode.
Creating the Paint Drivers
Use the following procedure to create the paint drivers from the Paint
Drivers application. After you have created the drivers, you can use them
as often as you need for future document conversions so long as your
regular printer driver (e.g., Comm. Compat.) does not change. If your
regular printer driver does change, recreate the paint drivers by using the
procedure below.
To create the drivers:
1:
Open the System or Backup System disk to its deskTop.
2:
Go to page 2 of the disk note pad and open the Paint Drivers applica
tion by double-clicking on its file icon.
NOTE An alternative is to click once on its file icon so that it is
highlighted, then select open from the file menu (or press [frilTI).
3:
A dialog box will ask you to "Choose real printer driver type." This
refers to the printer driver you normally use to print GEOS documents
(e.g., the Comm.Compat. printer driver). Click on the appropriate
printer driver.
4:
Select OK. You will be returned to the deskTop. The Paint OVER
LAY and the Paint PAGES printer drivers will appear in the first
available file icon slots.
76
Chapter 10
NOTE The Paint OVERLAY and Paint PAGES printer drivers will be
compatible with the printer driver you selected in Step 2.
5:
Copy the Paint OVERLAY and Paint PAGES printer drivers to your
Paint Drivers work disk.
Selecting a Paint Driver
Before you can use the drivers to convert a geoWrite document, you will
need to select one of the drivers as the default driver. This procedure is the
same as selecting any printer driver as the default driver.
To select a paint driver as the default driver:
1:
Choose select printer from the geos menu. The Select Printer dialog
box will list your normal printer driver along with the Paint OVERLAY
and Paint PAGES drivers. Click on either Paint OVERLAY or Paint
PAGES:
•
Paint OVERLAY is used if you wish to create a document with
columns: it will overlay a range of pages in the geoWrite docu
ment into one geoPaint document called OVERLAY.
Paint PAGES will create a geoPaint document for each individual
page of the geoWrite document If you have a four page geoWrite
document, four separate geoPaint documents will be created and
named for each page ("PAGE 1," PAGE 2," etc.).
2:
Click OK. You will be returned to the deskTop and the printer driver
you selected in Step 1 will have moved to the default printer position.
Creating a Paint Drivers Document
Once you have created the paint drivers and selected one as the default
printer, you will be ready to convert a geoWrite document into a geoPaint
version. Note that the Paint Drivers application will convert a copy, not the
original, of a geoWrite document.
To convert a geoWrite document into geoPaint:
1:
Make sure the paint driver you need has been selected as the default
driver. On the deskTop, the default printer driver's name will appear
below the printer icon in the lower left corner of the screen.
77
•:*:*:*>::-x*xwww^^
NOTE See "Selecting a Paint Driver," above, to select a driver as the
default driver.
2:
Click on the geoWrite document file icon so that it is highlighted, then
select print from the file menu (or press [0*117*1 ).
NOTE Because one of the Paint Drivers is the default printer driver
and not your regular printer driver, the geoWrite document will not be
sent to an actual printer to be printed. The geoWrite document will be
converted to a geoPaint document (or a series of geoPaint documents if
you are using Paint PAGES).
3:
The Print Options dialog box will appear. If you selected Paint PAGES
in Step 3 when you were setting up the Paint Drivers, click OK and go
to the next step. If you selected Paint OVERLAY, you may wish to
overlay a specific range of pages in the document If so, enter the page
numbers in the From Page and To Page boxes. Click OK after you
have made your selections.
4:
When you return to the deskTop, a geoPaint document (or series of
geoPaint documents) will appear as geoPaint file icons. If you plan to
do future conversions on the current disk, it is advisable to rename the
converted files (i.e., any files named OVERLAY, PAGE 1, PAGE 2,
etc.), or the current files will be overwritten by the next set of converted
files.
NOTE You may wish to reselect your regular printer driver at this
point to return to normal printing.
78
Chapter 10
wx*x*:^^
Desk Accessories
This chapter contains the following sections:
•
Desk Accessories and Column Modes
The Calculator
The Preference Manager
•
The Alarm Clock
•
The Note Pad
•
The Pad Color Manager
Desk Accessories and Column Modes
You can use most desk accessories in either 40- or 80-column mode:
Desk Accessory:
Column Mode:
Calculator
either column mode.
Preference Manager
either column mode. However,
changing the shape of the mouse or
changing a feature's color can only be
done in 40-column mode.
Alarm Clock
either column mode.
Note Pad
either column mode.
Pad Color Manager
40-column mode only.
Photo Manager
either column mode.
Text Manager
either column mode.
X-X-X-X*X*X*X
Desk Accessories
79
If you wish to switch to a different column mode, do so before you open the
desk accessory. You cannot switch column modes when a desk accessory is
in use.
To switch column modes:
1:
On the deskTop, select switch 40/80 from the geos menu.
2:
When the screen goes dark, press the [
] button or the composite
switch on your monitor as follows:
To go to 40-column mode:
•
Press the I RGB I button so that it is in CVBS mode.
•
Press the composite switch so that it is in COMP mode.
To go to 80-columnmode:
•
•
Press the I RGB I button so that it is in RGB mode.
Press the composite switch so that it is in RGB mode.
The Calculator
This section describes the appearance of the 128 Calculator, how to use the
numeric keypad with the Calculator, and how to exit the Calculator. This
desk accessory operates in either 40- or 80-column mode.
The Appearance of the Calculator
The Calculator appears as follows:
As you can see, the OFF button has
replaced the close button of earlier
OFF button
versions of the Calculator.
The Numeric Keypad
When entering values, use the numeric
keypad as well as the number keys
along the top of the keyboard. On the
numeric keypad, the \±\ and Q keys
can be used to add and subtract values.
Exiting the Calculator
•
80
Click the OFF button or press
Chapter 11
Click here
to exit.
The Preference Manager
This section describes how to use column modes and change the time and
date with the Preference Manager. This desk accessory operates in either
40- or 80-column mode.
Column Modes and Color
If you have your Commodore set in 80-column mode, you will not be able
to change colors or the shape of the mouse. If you wish to work with color
or change the shape of the mouse, switch to 40-column mode before
opening the Preference Manager. The instructions for changing column
modes are under "Switching Column Modes" on page 32 of this manual ad
dendum.
Changing the Time and Date
Use the following procedures to set the time and date in the Preference
Manager.
To set the time or date:
1:
Move the pointer to the
TIME SET or DATE SET
|| 81:2469 QM
TIME SET
|| 0^/20/88
DATE SET
box.
2:
Press the spacebar to move the cursor to the first digit you wish to
change.
3:
Type in the new time or date. As you type, the cursor will bypass the
colons and slashes. If you wish to change the letter A or P in the
TIME SET box, press the spacebar to move to that letter.
NOTE The time will freeze after you press the first key on your
keyboard. Use either the numeric keypad or the top row of numbers on
the keyboard to enter the new values.
4:
When you are satisfied with the date or time, press I RETURN I.
NOTE
Moving the pointer outside the TIME SET or DATE SET box
before pressing IRETURNI will cause the values to revert to their
original settings.
Desk Accessories
81
NOTE Refer to "Using, Saving, and Recalling Your Changes" on page
260 of the GEOS 2.0 User's Manual for a variety of options for saving
or recalling changes to the Preference Manager.
The Alarm Clock
This section describes how to set the clock and alarm time in the Alarm
Clock. This desk accessory operates in either 40- or 80-column mode.
Setting the Clock Time
1:
Switch to Clock Mode: press \m\ or
click on the Mode icon until a clock
clock mode
face appears.
2:
Press the spacebar to move the cursor to the first digit you wish to
change. (The cursor will initially be positioned over A or P.)
3:
Type in the new time. As you type, the cursor will skip the colons and
the letter M. Press the spacebar to bypass correct entries.
NOTE Use either the numeric keypad or the top row of numbers on
your keyboard to enter digits.
4:
When finished, press [RETURNI or click on SET.
Setting the Alarm
1:
Switch to Alarm Mode: press [M] or
click on the Mode icon until a bell
alarm mode
appears.
2:
Press the spacebar to move the cursor to the first digit you wish to
change. (The cursor will initially be positioned over A or P.)
3:
Type in the new time. As you type, the cursor will skip the colons and
the letter M. Press the spacebar to bypass correct entries.
NOTE Use either the numeric keypad or the top row of numbers on
your keyboard to enter digits.
82
Chapter 11
^^
^
4:
When finished, press [RETURN I or
click on SET. The new bell displayed
next to the close icon will signify that
77,0 alarm is set
you have set an alarm.
NOTE The bell will disappear after the alarm has sounded and you
have exited the Alarm Clock.
The Note Pad
This section describes how 80-column mode affects the appearance of the
Note Pad, and using the keyboard to move to another Note Pad page. This
desk accessory operates in either 40- or 80-column mode.
80-Column Mode
In 80-column mode, the Note Pad page appears larger than in 40-column
mode. However, the maximum number of characters you can enter on a
page in 80-column mode is still 250.
Moving to Another Page
Three methods for moving to another Note Pad page are listed under
"Moving to Another Page" on page 265 of the GEOS 2.0 User's Manual.
The first method suggests that to move to pages 1-9 you can hold down the
E key and press the number of the page you want. This method only
works if the destination page contains text. If the destination page does not
contain text, click on the dog-ear corner, as explained on page 265 in the
GEOS 2.0 User's Manual.
The Pad Color Manager
The Pad Color Manager operates in 40-column mode only, since its function
is to designate color for file icons and the disk note pad. However, you can
open the Pad Color Manager while in 80-column mode by using the
procedure below.
Entering the Pad Color Managerfrom 80-Column Mode
1:
Open the Pad Color Manager using one of the following methods:
•
X*X-XvX*X*X*X
From an application or the deskTop, select pad color mgr from
the geos menu.
Desfe Accessories
83
From the deskTop, double-click on the Pad Color Manager file.
•
From the deskTop, click once on the Pad Color Manager file to
select it, then select open from the file menu (or press ffrlfzi).
2:
A dialog box will let you know that the Pad Color Manager operates in
40-column mode only. Click YES (to switch column modes).
3:
When the screen turns dark, press the |RGB| button or composite
switch on your monitor as follows:
84
•
I RGB I button: toCVBSmode.
•
Composite switch: toCOMPmode.
Chapter 11
Appendices
This section contains the following appendices:
A: Additional Glossary Terms describes additional terms specific to
GEOS 128 2.0.
B: Menus summarizes the command menu options in the deskTop,
geoPaint, and geoWrite 2.1.
•
D: Disk Contents lists the contents of each disk in your GEOS 128 2.0
package.
F: Error Messages explains error messages you may encounter while
using GEOS 128 2.0.
:•:•:•:•:•:•:•:•:•:•:•:•:•:•:•:•:•:♦:•:•:•:
:•:•>:•:•:•:•:♦:•:•:•:•:•:•:•:•:•:•:•:•:•:•:
Appendices
85
*:*:«^
Appendix A
Additional Glossary Terms
Additional glossary terms are as follows:
140/80 DISPLAY!
A keyboard button used along with the RGB
button to boot GEOS 128 2.0 in either 40- or
80-column mode. You only need to use this
button when you are booting. Once GEOS
128 2.0 is running, you do not need to press
this button to switch column modes.
application work disk
A work disk containing an application file. An
application work disk is used when you have
more than one disk drive. This type of work
disk contains all of the files you need for a
work disk except for the document files, which
can be stored on another disk. Use one disk
drive for the application work disk and the
other disk drive for the work disk containing
your documents. If you have a one-disk drive
system, your work disk would contain the
application, any supporting files (such as desk
accessories or the DESKTOP 2.0 file), and
documents.
column mode
The resolution of the screen. Depending on
the type of monitor you are using, GEOS 128
2.0 offers two column mode options: 40column and 80-column. In 80-column mode,
the pixels that compose the screen's image are
compressed to enable a wider view of the
screen. For example, geoWrite 2.1, which
only operates in 80-column mode in GEOS
128 2.0, displays the entire width of the
Writing Window; hence there is no need for
the Writing Window to side-flip, as in the 40column version of geoWrite 2.1. 40-column
86
Chapter 12
mode does not enable a wider view of the
screen, but it does let you use color.
In most instances, you can switch column
modes depending on your needs and the
application you are using. For example, in
geoPaint, you can use 40-column mode to add
color or work with a smaller Drawing Win
dow. (A smaller Drawing Window displays
images in greater detail.) To view and work
with the entire width (but not depth) of the
document, you can use 80-column mode.
If you are using a television set as a monitor,
you can only use 40-column mode. See also
RGB button.
composite switch
On a monitor, a switch used to select a column
mode in GEOS 128 2.0. See RGB button.
The button on your monitor that enables you to
switch column modes. The location of this
button depends on the type of monitor you are
using. On most Commodore monitors, the
1RGB1 button is located below the screen, next
to the power switch. The equivalent button in
the Commodore 1902 and 1084 monitors is the
composite switch, which is also located below
the screen. The [RGBI button or composite
switch is located at the rear of some monitors.
To use the 1RGB1 button or composite switch
to change column modes, select switch 40/80
from the geos menu. When the screen goes
dark, press the IRGB1 button or composite
switch. When the |RGB| button is "out" (i.e.,
in 1RGB1 mode) you can use 80-column mode.
When the I RGB I button is "in" (i.e., in CVBS
mode), you can use 40-column mode. If your
monitor has a composite switch, push the
Appendices
87
switch to the right (to RGB mode) if you wish
to use 80-column mode. To use 40-column
mode, push the composite switch to the left (to
COMP mode).
88
ChdDtCF 12
^
Appendix B
Menus
Menu options in the deskTop, geoPaint, and geoWrite 2.1 are as follows:
deskTop
geos
switch 40/80 Changes between 40- and 80-column modes.
geos info Displays copyright information and authors of GEOS.
deskTop info Displays copyright notice and authors of deskTop.
select printer: moves a selected printer driver to the default
position.
select input (HB CD) Moves a selected input device (mouse or
joystick) to the default position.
calculator A desk accessory for quick calculations.
note pad A desk accessory for creating memos.
photo mgr
text mgr
A desk accessory for managing photo albums.
A desk accessory for managing text albums.
preference mgr
A desk accessory for determining the input
driver speed and color, screen background and foreground colors,
and system time and date.
pad color mgr A desk accessory for determining the color of the
disk note pad components (file icons, foreground, and back
ground).
file
open flS \T\ ) Loads the currently selected file on the deskTop.
duplicate ([§ 05]) Creates a duplicate copy of the selected files.
rename ([SIM] ) Renames the selected files.
info (IS[Q] ) Displays information about the selected files; also
lets you change a file's write protect status.
print ([S E) Prints the selected application file.
delete ([S ED) Deletes the selected files.
undo delete (IS ED) Retrieves a file from the waste basket.
view
by icon
Displays files in icon mode.
Appendices
89
by size Displays files sorted by size, largest file first.
by type Displays files groups by category (e.g, application, desk
accessory, or font file).
by date
Displays files in order of last modification, most recent
file modification first
by name
Displays files in alphabetical order.
disk
open (E [p]) Opens disk in current disk drive and displays disk
files in disk note pad.
close ([§ [C]) Closes currently open disk.
rename ([§ [R]) Renames currently open disk.
copy (E El) Copies contents of currently open disk to another
disk.
validate (® [V]) Checks currently open disk for damage and
makes minor repairs.
erase (US [H) Erases contents of currently open disk without
formatting.
format ([SE) Formats disk in any disk drive. Formatting will
erase the contents of that disk.
select
all pages ([§ |W)) Selects all file icons on every page of the disk
note pad.
page files ([§ [X])
Selects all file icons on the current note pad
page.
border files ([g H) Selects all file icons on the border.
page
append (|g [§]) Adds a disk note pad page after the current
page.
delete ([§ [T]) Deletes current note pad page.
options
set clock Lets you change the date and time of the deskTop clock.
RESET ([S E) Re-reads the deskTop. Enables GEOS 128 2.0
to recognize disks in disk drives.
BASIC Enables you to enter BASIC mode.
shortcuts Displays listing of deskTop keyboard shortcuts not
listed in a menu. Click to exit dialog box.
90
Chapter 12
BOOT Enables you to reboot GEOS or a non-GEOS program
from the deskTop.
geoPaint
geos
geoPaint info Displays copyright and author information. Click
to exit dialog box.
switch 40/80 Changes between 40- and 80-column modes.
Lists desk accessories on application work disk.
file
close Closes document and enables you to create or open another
geoPaint document, or return to the deskTop.
update Saves changes to disk.
preview Displays entire document page in black and white.
recover Erases all changes from last time document was saved to
disk.
rename Enables you to rename document.
print Prints document.
quit Closes document and returns you to deskTop.
edit
cut Removes an area within an Edit Box or Text mode region and
places that area in a photo or text scrap.
copy Copies an area within an Edit Box or Text mode region into
a photo or text scrap.
paste Copies the contents of a scrap into an Edit Box or Text
mode region.
options
pixel edit Enables you to magnify portion of Drawing Window
for detailed drawing. (Not displayed when Pixel Edit Mode is
active.)
normal edit Returns you from pixel edit mode to entire Drawing
Window screen. (Not displayed when Normal Edit Mode is
active.)
change brush Displays 32 brush types in Status Box so that you
can change a brush shape.
draw grid lines Draws grid lines in Drawing Window.
^
Appendices
91
erase grid lines Erases grid lines from Drawing Window.
color on/off Enters/exits color mode. (Not displayed in 80column mode.)
fonts
Lists fonts currently on disk. Automatically displays BSW font,
but does not include BSW 128 font.
geoWrite 2.1
geos
geoWrite info Displays copyright and author information. Click
to exit dialog box.
Lists desk accessories on application work disk.
file
close Closes document and enables you to create or open another
geoWrite document, or return to the deskTop.
update Saves changes to disk.
preview Displays entire document page.
recover Erases all changes from last time document was saved to
disk.
rename Enables you to rename document.
print Prints document; displays dialog box with printing options.
quit Closes document and returns you to deskTop.
edit
cut (gg \X\) Removes selected portion of document and places
the area into a scrap.
copy (IS [6] ) Copies selected portion of document into a scrap.
paste Pastes scrap into document at insertion point. Options: text
scrap contents.
options
search ([fr] [S]) Opens search/replace operation.
find next ([S (ED) Finds and highlights next instance of item
entered in Search For dialog box.
change, then find (IS C3) Changes Search For entry to Replace
With entry.
92
Chapter 12
hide/show pictures Hides/displays all pictures in document.
Hidden pictures are covered with a grey box.
open/close header (IS El) Opens/closes header screen.
open/close footer (|<K]\¥\) Opens/closes footer screen.
select page (IS [V]) Highlights current document page.
page
previous page ([SB) Moves to previous page.
next page ([S H) Moves to next page.
goto page (IS [G]) Displays dialog box asking for desired desti
nation page number.
page break (SB IE) Inserts a page break at location of text
cursor.
set first page Enables you to determine the first page number of a
document
title page Sets the first page of a document as a title page (i.e., no
page number will be set for that page).
NLQ spacing Produces the same formatting as that on the screen.
For use wtih NLQ printers only.
font
Lists the first eight fonts currently on the application work disk.
Automatically displays BSW and BSW128 fonts. (The BSW 128
font only appears in geoWrite 2.1.)
style
plain text (IS E) Sets text in Plain type style.
bold ([S OS) Sets text in boldface.
ite/fc(|S[D) Sets text in italics.
©unftHnnne (|S \Q\) Sets text in outline.
underline ([g\U\) Sets text with underline.
superscript ([S \E\) Sets text ^ superscript.
subscript ([S Ell) Sets text in subscript.
Appendices
93
:»x*:*h*x«':w
Appendix D
Disk Contents
Diskl
System Disk
No. of Files: 50
KBytes Used: 161
KBytes Free: 4
Page 1
GEOS, GEOS BOOT, GEOS KERNAL, 128 DESKTOP 2.0,
128 CONFIGURE 2.0, default input device, default printer.
(System files)
Page 2
preference mgr, pad color mgr, and alarm clock desk accesso
ries, PAINT DRIVERS application, 128 RBOOT system file.
Pages 3+
Printer drivers and input devices. (Not all printer drivers are on
this disk. The DS, QS, and RED printer drivers are on the Write
Utilities disk.)
DEMO Disk
No. of Files: 6
KBytes Used: 162
KBytes Free: 3
Page 1
GEOS DEMO programs.
Disk 2
Backup System Disk
Same as System Disk contents.
94
Chapter 12
*:*x^^
Applications Disk
No. of Files: 11
Kbytes used: 142
Kbytes free: 24
Page 1
GEOWRITE 128, GEOPAINT.
Page 2
photo manager, calculator, note pad desk accessories.
Page 3
California, Cory, Dwinelle, Roma, University, Commodore
fonts.
Disk 3
Write Utilities
No. of Files: 31
Kbytes used: 131
Kbytes free: 35
Page 1
GEOMERGE, TEXT GRABBER, GEOLASER, applications,
text manager desk accessory.
Page 2
Page 3
FleetSystem 4, PaperClip II, WordWriter 128, C128 Generic I,
C128 Generic II.
LWJtoma, LW_Cal, LW_Greek, LWJBarrows LaserWriter
fonts.
Pages 4+
DS (double-strike), QS (quadruple-strike), and RED (reduction)
printer drivers.
geoSpell
No. of Files: 2
Kbytes used: 126
Kbytes free: 39
Page 1
GEOSPELL 128 application, GeoDictionary.
Appendices
95
:<<<<<<<<<<<<<<<<<<<<<*>:•:•:•:•:•:
Appendix F
Error Messages
A field contains more than 254 characters and will be truncated.
•
You tried to enter more than 254 characters in a field. The excess
characters will not appear in the document
A label contains more than 20 characters and will be ignored.
•
You tried to enter a label name that is too big.
A label contains non-alphanumeric characters. The characters will be
ignored.
You tried to enter a label name that contains non-alphanumeric
characters (e.g., #,!, or ?).
Can't add that word to the dictionary.
Check to make sure that the first two characters in the word are letters,
and that there are no spaces in the word.
Cannot add any more pages to this file.
In geoWrite 2.1, you have reached the maximum number of pages a
document can have.
Cannot install (application name) to this disk.
•
You tried to install the application on a work disk. You can only install
a GEOS application from its original application disk. Close the
current disk and install the application from its original application
disk. After you have installed the application, copy its file to your
work disks.
Cannot install (application name) on a write protected disk.
•
The disk on which you tried to install the application has write protect
tabs on it. Remove the disk from the disk drive and carefully remove
its write protect tabs. Try installing the application again.
Cannot run desk accessory while in header or footer.
In geoWrite 2.1, exit the header or footer, then try using the desk
accessory.
96
Chapter 12
k*:«*h«««*:*:*h*:*:««*x^^^^^^
Can't delete a page with write-protected files.
You tried to delete a disk note pad page containing write-protected
files. You can change the write protect status of a file you wish to
delete by using the file info command.
NOTE Refer to "File Info and Write Protect Status," page 61 of the
GEOS 2.0 User's Manual
Can't proceed if application is on a different disk.
You tried to open an application data file when the application file is
not on a disk in any disk drive or the REU. Click OK to return to the
deskTop. If you are using a one-drive system, copy the data file onto a
work disk containing the correct application file. If you have more than
one disk drive, insert a disk containing the correct application file into a
disk drive. Try opening the data file again.
Can't search for that word.
Check to make sure that the first two characters in the word are letters,
and that there are no spaces in the word.
Commands in the form document cannot exceed 255 characters in
length.
An «IF» statement is too long.
Disk copy can't be done between these formats.
•
You used the disk copy command to copy the contents of one disk to
another between different disk drive formats. Try copying all of the
files on the disk instead.
NOTE Refer to "To copy if the disk and disk drive formats are
different," page 73, under "Copying a Disk Using More than One Disk
Drive" in the GEOS 2.0 User's Manual
ELSE found without an IF.
ELSE is missing from an «IF» statement.
ENDIF found without an IF.
ENDIF is missing from an «IF» statement.
Expected a field label.
A label name is missing from the merge label file.
Appendices
97
Expected a start quote.
•
The opening quote in an «IR» statement is missing.
Expected an end quote.
The ending quote in an «IF» statement is missing.
Expected an ENDIF.
The ENDIF from an «IR» statement may be missing. If not, it is
separated from the «DF» statement by a page break. Remember that
the components of an «IR» statement must be on the same page.
Expected an ending ».
•
The ending »in an «IF» statement is missing.
Expected an \"="\".
•
A sign is missing from an «IR» command.
File must be opened by geoWrite before printing.
The printer page length has changed, and geoWrite must reformat the
document for the new page length.
Label to match is too long.
•
The label in an «IR» statement is too long.
Label is not in merge file.
geoMerge cannot find the label in the merge file.
No boot sector on this disk.
You tried to select BOOT from the options menu and the deskTop
cannot find the boot disk in the disk drive. Insert the correct boot disk
into the disk drive. Try selecting BOOT from the options menu again.
No multiple file operation for this feature.
You tried to open or print more than one file at a time.
No printer driver is selected. Use select printer on the deskTop to
choose a printer.
•
The incorrect printer driver is selected.
NOTE See "Setting Up Your Printer," page 17 of this manual adden
dum, for how to select the correct printer driver for your printer.
98
Chapter 12
*^^
No scrap file on disk.
The application work disk does not contain a text or photo scrap.
Not enough fields were found. One or more fields will be left blank.
The number of data fields in the merge data file is smaller than the
number of labels in the merge form document. After the merge is
complete, you may wish to check your merge data file and merge form
document for inconsistencies.
Not enough fields were found. One or more labels will be left blank.
•
In the merge data file, one of the records contained fewer fields than
there are labels. Some of the labels in the document file may not be
replaced by new text. After the merge is complete, you may wish to
check your merge data file and merge form document for inconsisten
cies.
Not enough free space on disk for desk accessory.
Desk accessories require at least 10K bytes of memory on the current
work disk. If you wish to use the desk accessory, you will need to
delete files to make room.
Operation canceled due to disk error: missing or unformatted disk.
Make sure the disk drive contains the disk you wish to open.
•
If the disk drive contains an unformatted disk, then format the disk if
desired. Refer to "Formatting a Disk," page 75, of the GEOS 2.0
User* s Manual.
•
If the disk drive contains a formatted disk, then you may have improp
erly inserted the disk into the disk drive. Click OK. After the screen
redraws, re-insert the disk, then try opening the disk again.
Page too long.
•
In geoSpell, you tried to spell-check a document that contains a page
that is too long. Exit geoSpell, open the document you tried to spellcheck, and insert page breaks where possible.
Please insert a disk with deskTop V(#) or higher.
•
You tried to exit a document when there is no 128 DESKTOP 2.0 file
on the work disk. Remove the current disk from the disk drive and
insert the System disk, which contains the DESKTOP file. Click OK.
Appendices
99
You will be returned to the System deskTop. If you wish to avoid this
procedure in the future, copy the DESKTOP file to your application
work disks.
Please reboot your system using the same GEOS disk that was first
used to run geoMerge.
Reboot your System with the same System disk you used to install
geoMerge.
Printer is inaccessible.
On your System disk, the incorrect printer driver has been selected as
the default printer driver.
NOTE See "Setting Up Your Printer," page 17 of this manual adden
dum, for how to select the correct printer driver for your printer.
Your printer is not correctly hooked up to your Commodore.
Sorry, font too large.
The font you are using is too large for the document. Try using a
smaller font
Text after label ignored.
•
The command started with a label but had other characters after the
label. geoMerge will interpret the command as a label and ignore the
rest
The driver is on the border and it won't be set as the default.
You tried to select a printer or input driver file as the default when the
file is on the border. Click OK to return to the deskTop. Move the
driver file onto the disk note pad page, then try selecting it as the
default driver again.
The file (name) must first be deleted from the disk.
You tried to move two or more border files onto the disk note pad at the
same time. The files have one or all of the following characteristics:
they have the same name; one of the files is not from the current disk;
the files not belonging to the current disk were selected first.
100
Chapter 12
The file (name) is write protected and can't be deleted.
•
You tried to delete a file that is write protected. On the System
deskTop, you can use the file info command to change the file's write
protect status so that the file can be deleted.
NOTE If necessary, refer to "File Info and Write Protect Status," page
61 of the GEOS 2.0 User's Manual.
The merge data file cannot have more than 25 fields.
You tried add more than 25 fields to a merge data file.
The operation requested may not be performed on a file from another
disk.
You tried to duplicate, rename, print, or delete a file from another disk.
Open the disk containing the file, then try the operation again.
The operation requested may not be performed on a GEOS boot/
master disk.
•
You tried to delete a file from a boot or master disk using the regular
file delete method (i.e., dropping its ghost icon in the waste basket). To
delete a file from a boot or master disk, first deposit its ghost icon onto
the border, then move the ghost icon into the waste basket. Note that
the GEOS, GEOS BOOT, GEOS KERNAL, and 128 DESKTOP 2.0
files cannot be deleted.
•
You tried to copy a file to a boot or master disk that already contains a
file with the same name. If you wish to copy a file to a boot or master
disk, try deleting the boot or master disk file first. Note that the GEOS,
GEOS BOOT, GEOS KERNAL, and 128 DESKTOP 2.0 files cannot
be deleted.
The operation requested may not be performed on a System Boot file.
•
You tried to rename, duplicate, or move a System boot file.
The operation requested may not be performed on a System File.
•
You tried to rename or duplicate a System file (e.g., the 128 DESKTOP
2.0 file).
The Replace All buffer is full.
•
You tried to perform a Replace All operation on more than 100
instances of the word or phrase you wish to replace. Try replacing each
Appendices
101
item individually, by selecting Replace Word and Do in the Options
Box.
There are too many pages in this file. Text at the end is being lost.
•
In geoWrite 2.1, the document has grown too large because you have
run out of disk space. If you wish to add more pages to the document,
exit and delete files from the disk to make room for the document.
There is insufficient memory to load the data for this record.
The combined size for the data in this record is too large for geoMerge.
This file is write protected.
•
You tried to delete or update a file that has been write protected. You
can change the write protect status of a file by using the file info
command.
NOTE Refer to "File Info and Write Protect Status," page 61 of the
GEOS 2.0 User's Manual
This file must be opened by geoWrite before it can be printed.
The file must be opened by geoWrite so that it can be reformatted for
the current printer. Open the file and try printing again.
This program runs in 40 column mode only. Switch modes?
•
While in 80-column mode, you tried to open a program that only runs
in 40-column mode. If you wish to use the program, click YES. When
the screen goes dark, press the RGB button or composite switch on
your monitor. The program will open. If you wish to cancel, click NO.
This program runs in 80 column mode only. Switch modes?
While in 40-column mode, you tried to open a program that only runs
in 80-column mode. If you wish to use the program, click YES. When
the screen goes dark, press the RGB button or composite switch on
your monitor. The program will open. If you wish to cancel, click NO.
Too many fields were found. One or more fields will be ignored.
•
The number of labels in the merge form document is smaller than the
number of data fields in the merge data file. After the merge is
complete, you may wish to check your merge data file and merge form
document for inconsistencies.
102
Chapter 12
Unexpected edge of page.
•
You inserted a page break in the middle of a command. Delete the
page break and re-insert the page break before or after the command.
NOTE If necessary, refer to "Deleting a Page Break," page 155, of the
GEOS 2.0 User's Manual
Appendices
103
■:•:•:•:•:•:•:•:•:•:♦:•:•:•:•:•:•:•:•:>:•:•:•:•:•:•:•:•:•:•:
exiting 80
Index
numeric keypad 80
column modes
description 30, 86
140/80 DISPLAYlkev3Z 86
desk accessories 79
geoLaser 69
geoMerge 67
A
geoPaint 55
Alarm Clock 82
geoSpell 65
column modes 79
geoWrite 62
setting alarm 82
illustrated 31
setting time 82
Paint Drivers 75
appendices
switching 32
additional glossary terms 86
television sets 32
disk contents 94
error messages 96
menu listing 89
application work disk 86
applications
geoLaser 68
geoMerge 66
Text Grabber 72
command menu
keyboard shortcut summary 53
composite switch 32, 87
CONFIGURE 2.0 file 29,52
copy (disk) command 13,14,51
geoPaint 54
geoSpell 64
D
geoWrite2.160
desk accessories
installing 8
Alarm Clock 82
Paint Drivers 74
Calculator 80
Text Grabber 71
column mode summary 79
Note Pad 83
Pad Color Manager 83
B
backup disks 12
Preference Manager 81
BASIC 52
switching column modes 80
BASIC command 26
BASIC mode, entering 26
bitmap scaling 42
deskTop
description 47
menu listing 89
BOOT command 26
DESKTOP 2.0 file 28
booting
deskTop command menu 48
GEOS128 2.023
in installing 4
rebooting from BASIC 52
BSW 128 font 63
scrolling through list 65
disk contents 94
DISK COPY program 51
disk drives 2
C
1581 55, 61
Calculator 80
appearance 80
column modes 79
X04
Dictionary Box
Index
keyboard shortcut summary 53
disk note pad
keyboard shortcut summary 53
<<*»»»»>»>»>>>>k*k-x<x#x«:'X«x«>>>»>x»x<«<*x«*x<««wx«««<««*x^
optional equipment 2
text mode 48
geoSpell
disks
copying to unformatted disk 51
column modes 65
copying with 1 disk drive 51
searching for dictionary word 65
double-sided disks 13
television set warning 2
Drive C, activating 52
work disks 64
DS (double-strike) 17
geoWrite 2.1
column modes 62
document dimensions 63
E
menu listing 92
error messages 96
NLQmode63
exiting GEOS 128 2.0 25
screen appearance 62
television set warning 2
F
work disks 60
files
copying to another disk 50
glossary terms 86
keyboard shortcut summary 53
moving to border 50
moving to disk note pad 50
selecting in a group 49
viewing first in selection queue 49
fonts
Inkwell light pen 2
input device 2
activating 7
installing applications 8
installing GEOS 128 2.0 3
BSW 128 63
italic menu options 48
G
K
geoLaser
column modes 69
column modes and printing 70
keyboard shortcuts,deskTop 53
Koala Pad 2
work disks 68
column modes 67
M
megafonts 55, 61
work disks 66
menu listing 89
geoMerge
multi-file select 49
geoPaint 54
column modes 56
erasing colors 57
menu listing 91
N
near letter quality mode (See NLQ mode)
screen appearance 56
NLQmode63
Toolbox display 58
non-GEOS programs, entering 26
Toolbox icon 57
Note Pad 83
work disks 54
GEOS 128 2.0
appearance in 80-column mode 83
column modes 79
booting 23
moving to another page 83
equipment needed 2
exiting 25
installing 3
X*X*X-XvX*X*X*X*X\*X
Index
«X-X-X-X'X*X*X-X«W^^
Pad Color Manager 83
select printer command 22
column modes 79
selection frame 37,49
opening in 80-column mode 83
shortcuts command 53
Paint Drivers
column modes 75
creating 76
television set monitors 2,32
creating document 77
Text Grabber
selecting paint driver as default 77
column modes 72
work disks 74
word processor format files 73
Parallel Printer Interface (PPI) 23
Photo Manager
work disks 71
Text Manager
column modes 79
Preference Manager 81
column modes 79
text mode
changing date 81
features 48
changing time 81
scrolling pages on deskTop 48
column modes 79
column modes and color 81
printer drivers
selecting files 49
Toolbox icon 57
tutorial 34
activating as default 22
DS (double-strike) 17
if not listed 21
interface instructions 21
viewing modes
file operations 48
listing 18
procedure for selecting 17
QS (quadruple-strike) 17
RED (reduction) 17
work disks 28
printers
color resolution 20
W
work disks
DESKTOP file 28
general theory of 27
geoLaser 68
geoMerge 66
geoPaint 54
QS (quadruple-strike) 17
geoSpell 64
geoWrite2.160
Paint Drivers 74
R
Text Grabber 71
RAM Expansion Unit 2
1750 52
1764 52
disk copying 14
work disks 29
rebooting 52
RED (reduction) 17
[RGBl button 32, 87
106
Index
withREU29
11-0201-0128