1
FULL T-1 CONFIGURATION USING PPP
2.3.1
WPIM-T1 Physical Configuration
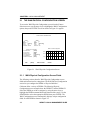
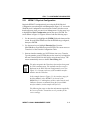
Begin the WPIM-T1 configuration by accessing the WAN Physical
Configuration screen through Local Management (Figure 2-1). Access the
WAN Physical Configuration screen from the Feature Selection screen
that first appears when you enter Local Management. Use the arrow keys
to highlight the WAN Configuration option, then press ENTER. The
screen shown in Figure 2-1 appears. Proceed with the following steps:
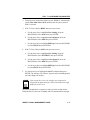
1. Use the arrow keys to highlight the [WPIM] field at the bottom of the
screen. Press the SPACEBAR to select the WPIM being configured,
then press ENTER.
2. Use the arrow keys to highlight Timeslot View. Press the
SPACEBAR to select New, then press ENTER. The cursor moves to
Timeslot #1 of the Timeslot Configuration Table.
3. Insert an interface number (see NOTE below) into every Timeslot.
Type the number, press ENTER, then use the arrow keys to highlight
the next Timeslot field. Exit this field by using the arrow keys. The
cursor automatically moves to the T1 Line Coding field.
NOTES
The value assigned to the Timeslots is the interface being used
for WAN communication. The available interface range is
displayed on the WAN Physical Configuration screen (see
Figure 2-1). You may insert any of the available interface
numbers into the Timeslots.
In the example shown in Figure 2-1, the interface range for
the MicroMMAC with a WPIM-T1 in slot one of the
BRIM-W6 is 2-25. Although any of these values may be used,
Cabletron Systems recommends using the first available
interface number (in this example interface #2).
The following four steps are based on information supplied by
the service provider. Consult the service provider for the
correct settings.
WPIM-T1 LOCAL MANAGEMENT GUIDE
2-11