1
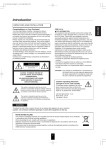
AX5505(EFDIS)cover_cover.qxp 2010-02-23 오후 2:03 페이지 1
OPERATING INSTRUCTIONS
MANUEL D'UTILISATION
BEDIENUNGSANLEITUNG
ISTRUZIONI PER L’USO
MANUAL DE INSTRUCCIONES
AX-5505
Stereo Integrated Amplifier
Amplificateur intégré stéréophonique
Stereo-Vollverstärker
Amplificatore lntegrato Stereo
Amplificador Integrado Estéreo
AX5505(G-Eng)100204_AX5505(Eng).qxp 2010-02-23 오후 2:04 페이지 2
Introduction
This symbol is intended to alert the user to the presence of
uninsulated "dangerous voltage" within the product's
enclosure that may be of sufficient magnitude to constitute
a risk of electric shock to persons.
CAUTION
: TO REDUCE THE RISK OF ELECTRIC
SHOCK, DO NOT REMOVE COVER (OR
BACK). NO USER-SERVICEABLE PARTS
INSIDE. REFER SERVICING TO
QUALIFIED SERVICE PERSONNEL.
This symbol is intended to alert the user to the presence of
important operating and maintenance (servicing)
instructions in the literature accompanying the appliance.
WARNING : TO REDUCE THE RISK OF FIRE OR ELECTRIC SHOCK, DO NOT EXPOSE THIS APPLIANCE TO RAIN OR MOISTURE.
Caution regarding installation
Note : For heat dispersal, do not install this unit in a confined space such as a bookcase or similar enclosure.
Do not block ventilation openings or stack other equipment on the top.
FOR YOUR SAFETY
EUROPE
AUSTRALIA
220 V
240 V
Units shipped to Australia are designed for operation on 240 V AC only.
To ensure safe operation, the three-pin plug supplied must be inserted only into a standard threepin power point which is effectively earthed through the normal household wiring. Extension cords
used with the equipment must be three-core and be correctly wired to provide connection to earth.
Improper extension cords are a major cause of fatalities. The fact that the equipment
operates satisfactorily does not imply that the power point is earthed and that the installation
is completely safe. For your safety, if in any doubt about the effective earthing of the power
point, consult a qualified electrician.
PAN-EUROPEAN UNIFIED VOLTAGE
All units are suitable for use on supplies 220-240 V AC.
CAUTION
Information for Users on Collection and Disposal of
Old Equipment and used Batteries
• Leave a space around the unit for sufficient ventilation.
• Avoid installation in extremely hot or cold locations, or in an area
that is exposed to direct sunlight or heating equipment.
• Keep the unit free from moisture, water, and dust.
• Do not let foreign objects in the unit.
• The ventilation should not be impeded by covering the ventilation
openings with items, such as newspapers, table-cloths, curtains,
etc.
• No naked flame sources, such as lighted candles, should be
placed on the unit.
• Please be care the environmental aspects of battery disposal.
• The unit shall not be exposed to dripping or splashing for use.
• No objects filled with liquids, such as vases, shall be placed on
the unit.
• Do not let insecticides, benzene, and thinner come in contact
with the set.
• Never disassemble or modify the unit in any way.
■Notes on the AC power cord and the wall outlet.
• The unit is not disconnected from the AC power source(mains)
as long as it is connected to the wall outlet, even if the unit has
been turned off.
• To completely disconnect this product from the mains,
disconnect the plug from the wall socket outlet.
• When setting up this product, make sure that the AC outlet you
are using is easily accessible.
• Disconnect the plug from the wall outlet when not using the unit
for long periods of time.
These symbols on the products, packaging, and/or
accompanying documents mean that used electrical and
electronic products and batteries should not be mixed
with general household waste. For proper treatment,
recovery and recycling of old products and used
batteries, please take them to applicable collection
points, in accordance with your national legislation.
By disposing of these products and batteries correctly,
you will help to save valuable resources and prevent any
potential negative effects on human health and the
environment which could otherwise arise from
inappropriate waste handling.
For more information about collection and recycling of
old products and batteries, please contact your local
municipality, your waste disposal service or the point of
sale where you purchased the items.
[Information on Disposal in other Countries outside the
European Union]
These symbols are only valid in the European Union. If
you wish to discard these items, please contact your
local authorities or dealer and ask for the correct method
of disposal.
Note for the battery symbol (bottom two symbol
examples):
The sign Pb below the symbol for batteries indicates that
this batteries contains lead.
2
ENGLISH
READ THIS BEFORE OPERATING YOUR UNIT
AX5505(G-Eng)100204_AX5505(Eng).qxp 2010-02-23 오후 2:04 페이지 3
ENGLISH
CONTENTS
Introduction
• READ THIS BEFORE OPERATING YOUR UNIT
System Connections
|
4
Front Panel Controls
|
6
DIGI LINK III System Remote Controls
|
• REMOTE CONTROL OPERATION RANGE
• LOADING BATTERIES
| 8
Operations
• LISTENING TO A PROGRAM SOURCE
• RECORDING
| 11
Troubleshooting Guide
Specifications
|
|
|
7
|
|
8
9
12
13
3
2
AX5505(G-Eng)100204_AX5505(Eng).qxp 2010-02-23 오후 2:04 페이지 4
• Do not connect the amplifier to the wall AC outlet when plugging and unplugging connection cords.
• Be sure to connect the white RCA pin cords to the L (left) and the red RCA pin cords to the R (right) jacks
when making connections.
• Make connections firmly and correctly. If not, it can cause loss of sound, noise or damage to the amplifier.
■CONNECTING AUDIO
COMPONENTS
■CONNECTING SYSTEM
CONTROL
• Connect this jack to the DIGI LINK jack of the
external Sherwood component that uses the
DIGI LINK II or III remote control system.
• The TAPE1/MD IN/OUT jacks may also be connected to
the LINE OUT/IN jacks of an additional MD recorder.
• The TAPE2 MONITOR IN/OUT jacks may also be
connected to the LINE OUT/IN jacks of an optional graphic
equalizer.
4
ENGLISH
System Connections
AX5505(G-Eng)100204_AX5505(Eng).qxp 2010-02-23 오후 2:04 페이지 5
ENGLISH
■AC INPUT CORD
Plug this cord into a wall AC outlet
■SWITCHED AC OUTLET
• This outlet is switched on (power on
mode) and off (standby mode)
according to power control as follows;
(Maximum total capacity is 100 W
(0.43A))
■CONNECTING SPEAKERS
Standby mode - switched AC outlet off
Power on mode - switched AC outlet on
■Connecting speaker wire
1. Strip away approx. 10 mm (3/8 inch) of
wire insulation, then twist the wire ends
tight.
2. Loosen by turning the speaker
terminal counter-clockwise.
3. Insert the bare part of the wire.
• This amplifier enables you to listen to two pairs of speakers
individually or in various combinations.
Connect your main speakers to the SPEAKER A terminals and
use the SPEAKER B terminals for the remote pair located
elsewhere in your home.
• Be sure to connect speakers firmly and correctly according to the
channel (left and right) and the polarity (+ and -).
• Do not let the bare speaker wires touch each other or any metal
part of this unit. This could damage this unit and/or the speakers.
• Never touch the speaker terminals while the AC input cord is
connected to the wall AC outlet. Doing so could result in electric
shocks.
Note : For safe amplifier operation, use the speakers with
impedance of over 8Ω when you use either SPEAKER A or
B terminals and use the speakers with impedance of over
16Ω when you use both SPEAKER A and B terminals.
5
4. Tighten by turning it clockwise.
AX5505(G-Eng)100204_AX5505(Eng).qxp 2010-02-23 오후 2:04 페이지 6
ENGLISH
Front Panel Controls
1. POWER SWITCH
8. BALANCE CONTROL KNOB
Press this switch to enter the power off or the standby
mode.
Adjust the stereo balance between left and right
speakers.
• The center position is the normal condition.
2. STANDBY INDICATOR
9. TONE DIRECT SWITCH
In the standby mode, this indicator lights up.
Press this switch to bypass the tone (bass and treble)
circuitry for pure sound.
3. SPEAKER SELECTOR A, B BUTTONS/
INDICATORS
10. LOUDNESS SWITCH
Press the button to switch the desired speakers on
or off.
Press this switch to emphasize the sound of frequencies
that are difficult to hear at low volume levels.
• The frequency emphasis varies according to the volume
level at which you are listening.
4. INPUT SELECTOR BUTTONS/INDICATORS
Press the button to select the desired input source.
• When the TAPE 2 MONITOR indicator lights up, other
inputs cannot be heard from the speakers.
To listen to an input source other than TAPE 2 MONITOR,
be sure to set the TAPE 2 MONITOR button to off.
11. HEADPHONE JACK
Stereo headphones with a standard 1/4 inch plug can be
plugged into this jack for private listening.
• When listening with headphones, turn off both
SPEAKER SELECTOR A and B buttons.
5. VOLUME CONTROL KNOB
Adjust the volume to a comfortable listening level.
12. REMOTE SENSOR
This receives the signals from the system remote control
unit.
6. BASS CONTROL KNOB
Adjust the low-frequency tone.
• The center position is the flat (normal) condition.
7. TREBLE CONTROL KNOB
Adjust the high-frequency tone.
• The center position is the flat (normal) condition.
6
AX5505(G-Eng)100204_AX5505(Eng).qxp 2010-02-23 오후 2:04 페이지 7
ENGLISH
DIGI LINK III System Remote Controls
• You can remotely control not only this amplifier but also Sherwood compatible components bearing the DIGI
LINK II or III logo.
• For system remote control operation, first make the DIGI LINK connections.
• In the DIGI LINK III remote control system, if pressing PLAY, etc. on CD player or tape deck, CD or TAPE 2
MONITOR is selected automatically without selecting the input source and then PLAY, etc. starts.
■Notes :
• Some functions for CD player or tape deck may not be available.
• For details about functions, refer to the operating instructions of each component.
7
AX5505(G-Eng)100204_AX5505(Eng).qxp 2010-02-23 오후 2:04 페이지 8
ENGLISH
REMOTE CONTROL OPERATION RANGE
• Use the remote control unit within a range of about
7 meters (23 feet) and angles of up to 30 degrees
aiming at the remote sensor.
LOADING BATTERIES
1. Remove the cover.
2. Load two batteries matching the polarity.
2× 1.5V
R 6/ SUM-3 / AA
• Remove the batteries when they are not used for
a long time.
• Do not use the rechargeable batteries (Ni-Cd
type).
8
AX5505(G-Eng)100204_AX5505(Eng).qxp 2010-02-23 오후 2:04 페이지 9
Operations
ENGLISH
LISTENING TO A PROGRAM SOURCE
2. Switch the desired speakers on.
Before operation
• Enter the standby mode.
or
• The STANDBY indicator lights up.
This means that the amplifier is not disconnected from
the AC mains and a small amount of current is
retained to support the memorized contents and
operation readiness.
• To switch the power off, push the POWER switch
again, then the power is cut off and the STANDBY
indicator goes off.
• Then the corresponding SPEAKER indicator lights up
and the sound can be heard the speakers connected
to "SPEAKER A" or (and) "SPEAKER B" terminals.
• When using headphones for private listening, press
both SPEAKER SELECTOR A and B buttons to
switch the speakers off.
■Note : For safe amplifier operation, be sure to check
impedance of the speakers connected. (Refer
to “CONNECTING SPEAKERS” on page 5)
1. In the standby mode, turn the power on.
3. Select the desired input source.
or
• Each time the POWER button on the remote control is
pressed, the amplifier is turned on to enter the
operating mode or off to enter the standby mode.
• In the standby mode, if the INPUT SELECTOR button
is pressed, the amplifier is turned on automatically and
the desired input is selected.
• Then the corresponding indicator lights up.
• When the TAPE 2 MONITOR button is set to on so that the
TAPE 2 MONITOR indicator lights up, other inputs can not
be heard from the speakers.
To listen to an input source other than TAPE 2 MONITOR,
be sure to set the TAPE 2 MONITOR button to off.
■SYSTEM POWER ON/OFF
• If the POWER switch of Sherwood component
connected by the DIGI LINK II or III is kept pushed
and its AC input cord is plugged in the switched AC
outlet, each time the amplifier becomes the standby or
the operating mode, its power is turned off or on.
• Under the same conditions, if its AC input cord is not
plugged only in the switched AC outlet, when the
amplifier becomes the standby mode, only its display
is off (meaning that a small amount of current is
retained for operation readiness, etc.)
■TAPE MONITOR function
You can connect either a tape deck or a graphic
equalizer to the amplifier’s TAPE 2 MONITOR jacks.
Only when you listen to the component connected to
these jacks, set the TAPE 2 MONITOR button to on.
If you connect a 3-head tape deck, you can listen to the
sound being recorded during recording, not the source
sound.
For further details, refer to the operating instructions of
the component connected.
9
AX5505(G-Eng)100204_AX5505(Eng).qxp 2010-02-23 오후 2:04 페이지 10
4. Operate the selected component for playback.
9. To listen to a program source without the tone
ENGLISH
effect.
5. Adjust the volume to a comfortable listening
level.
• You can listen to pure sound that bypasses the
tone circuitry.
• To cancel the tone direct function, press this
switch again.
or
10. To mute the sound temporarily.
6. Adjust the tone (bass and treble).
■Note : Extreme settings at high volume may
damage your speakers.
7. Adjust the stereo balance between left and
• To resume the previous sound level, press this
button again.
11. To listen with the headphones.
right
speakers.
8. To emphasize the sound of frequencies that are
• Ensure that both SPEAKER SELECTOR A and B
buttons are set to off.
■Note
• Be careful not to set the volume too high when
using headphones.
difficult to hear at low volume levels.
• To cancel the loudness effect, press this switch again.
10
AX5505(G-Eng)100204_AX5505(Eng).qxp 2010-02-23 오후 2:04 페이지 11
RECORDING
ENGLISH
• The volume and tone (bass, treble) settings, etc. have no effect on the recording signals.
Recording with TAPE 1/MD
Recording with TAPE 2 MONITOR
1. Select the desired input as recording source
1. Select the desired input as recording source
except for TAPE 1/MD and TAPE 2 MONITOR.
except for TAPE 2 MONITOR.
or
or
2. Set the TAPE 2 MONITOR button to on.
• Be sure that the TAPE 2 MONITOR indicator
goes off.
2. Start recording on the tape deck or the MD
recorder connected to TAPE 1/MD.
or
3. Start play on the desired input.
3. Stat recording on the tape deck connected to
TAPE 2 MONITOR.
4. Start play on the desired input.
• When the TAPE 1/MD is selected as recording
sources, dubbing will start from TAPE 1/MD to
TAPE 2 MONITOR.
• It is not possible to dub from TAPE 2 MONITOR to
TAPE 1/MD.
• For tape monitor function, refer to "TAPE
MONITOR function" on page 9.
11
AX5505(G-Eng)100204_AX5505(Eng).qxp 2010-02-23 오후 2:04 페이지 12
If your unit should not perform as expected, consult the table below to see if the problem can be corrected
before seeking help from your dealer or our service organization.
PROBLEM
POSSIBLE CAUSE
REMEDY
No power
• The AC input cord is disconnected
• Poor connection at AC wall outlet or the outlet
is inactive.
• Connect the cord securely.
• Check the outlet using a lamp or
another appliance.
No sound
• Speaker cords are disconnected.
• Both SPEAKER SELECTOR A and B buttons
are set to off.
• The volume is adjusted too low.
• The MUTE button on the remote control is
pressed to ON.
• Incorrect selection of input source.
• Check the speaker connections.
• Switch the desired speakers on.
• Incorrect connections between the
components.
No recording
• Incorrect connections.
• Incorrect operation of the tape deck (or MD
recorder).
12
• Adjust the volume.
• Press the MUTE button to cancel the
muting effect.
• Select the desired input source
correctly.
• Make connections correctly.
• Make connections correctly.
• Operate the tape deck (or MD
recorder) correctly.
ENGLISH
Troubleshooting Guide
AX5505(G-Eng)100204_AX5505(Eng).qxp 2010-02-23 오후 2:04 페이지 13
ENGLISH
Specifications
• Power output, 8 Ω, THD 0.3 %, 40 Hz~20 kHz
|
2 X 100 W
• Total harmonic distortion, 8 Ω, 100 W, 1 kHz
|
0.02 %
• Intermodulation distortion
60 Hz : 7 kHz = 4 : 1 SMPTE, 8 Ω, 100 W
|
0.05 %
• Input sensitivity, 47 kΩ
PHONO (MM)
|
3.0 mV
CD, TUNER, TAPE
|
200 mV
• Phono input overload, THD 0.5 %, 1 kHz
|
110 mV
• Signal to noise ratio, unweighted
PHONO (MM)
|
80 dB
CD, TUNER, TAPE
|
95 dB
• Frequency response
PHONO (MM), RIAA, 40 Hz~20 kHz
|
±1 dB
CD, TUNER, TAPE, 10 Hz~70 kHz
|
+0 dB, -3 dB
• Crosstalk, 1 kHz, 50 W
TAPE to CD
|
75 dB
CD to TAPE
|
75 dB
• Bass/Treble control, 100 Hz/10 kHz
|
±10 dB
• Loudness contour, 100 Hz/10 kHz
|
+6 dB / +3 dB
■GENERAL
• Power supply
|
230 V~50 Hz
• Power consumption
|
190 W
• AC outlet
Switched
|
TOTAL 100 W(0.43A) max.
• Dimensions (W X H X D, including protruding parts)
• Weight (Net)
|
8.75 kg (19.3 lbs)
|
440 X 145 X 403 mm (17-3/8 X 5-3/4 X 15-7/8 inches)
Note : Design and specifications are subject to change without notice for improvements.
13
AX5505(EFDIS)cover_cover.qxp 2010-02-23 오후 2:03 페이지 2
AX-5505
Stereo Integrated Amplifier
Amplificateur intégré stéréophonique
Stereo-Vollverstärker
Amplificatore lntegrato Stereo
Amplificador Integrado Estéreo
5707-00000-355-0S