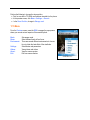
1
GSM/VoWLAN Dual-Mode Phone
User Manual
Your new WIhipi-2300 dual-mode phone is a communication product based on MicrosoftTM
Windows Mobile 5.0® technology. To experience the optimum performance of your phone,
please read this user manual thoroughly.
Similar to the operation of computer equipment, the WIhipi-2300 will perform best when enough memory is
present to run all programs. Running multiple programs at the same time may affect the response time of
the device. If the device starts to react slowly, try rebooting the phone to return it to its optimum
performance.
In the event that the contents of this manual are not consistent with menu options on the phone, please
follow the prompts provided on the phone.
Some services described within this manual may not be supported by all networks. For clarification on
services or functions accessible from this phone, please contact your network operator or service provider.
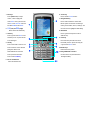
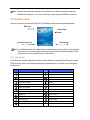
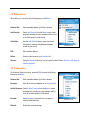
6. Camera key
1 Side keys
Press to activate Camera function.
Press up/down briefly to adjust
volume, or mute a ringing tone.
6
On the Home screen, press and hold
side UP to show Quick list. Press and
hold Side DOWN to enter Notes.
2
names, phone numbers, menus, an settings. Also
moves the cursor to highlight text while editing.
8. Back/Delete
Perform the function indicated by
Press to go back to the previous screen or
3 Home key
Press to go back to the Home screen
to lock the keypad.
4 Talk key
Press to dial number or receive a call.
Press to answer a second call while
placing first caller on hold.
Switch between two active calls.
Press to enter menu/item or confirm action.
Move it upward or downward to scroll through
1
LSK (Left) and RSK (Right)
wherever you are. Or press and hold
7. Navigation/OK key
2
3
4
5
7
delete an entry.
9. Power key
Press and hold to power the device on/off.
8
9
10
Press briefly to end or reject an incoming call
or go back to the Home screen.
10. Number keys
Enter numbers and symbols.
11. Charger/USB Cable connector
Press to perform hold function.
Use the connector to synchronize data or
Press to enter Call History.
recharge the battery.
5 Slot for T-FLASH card
Insert T-FLASH card here.
11
1. Security precautions
To ensure effective and secure use of your device, please read the following precautions carefully before
operation.
1.1 Exposure to Radio Frequency (RF) signals
Your wireless phone is a radio transmitter and receiver. It is designed and manufactured not to exceed the
emission limits for exposure to radio frequency (RF) energy set by the Federal Communications
Commission of the U.S. Government. These limits are part of comprehensive guidelines that establish
permitted levels of RF energy for the general population.
1.2 Precautions while talking on your phone
Keep a minimum distance of 2.5cm from your phone to your body when in use. Install only accessories that
are provided with your purchase or that are authorized by the manufacturer. Otherwise, the upper limit of
radio frequency leakage prescribed may be exceeded.
1.3 Compatibility of radio frequency interference
Electronic devices without a well-designed shield or those whose radio compatibility has not yet been
configured may experience interference caused by your phone.
1.4 In public
Some public places, such as hospitals, health resorts, or other medical facilities, post signage prohibiting
cell phone usage. Heed such warnings and power off your phone in designated public places.
1.5 Safety in aircraft
Federal aviation regulations stipulate that cell phone usage is not allowed on board aircraft or during flights.
Using cellular equipment on board an airplane can cause interference to aircraft navigation systems and/or
networks. Follow all in-air flight instructions for powering off cellular and other electronic devices while on
board aircraft. It is against the law of most countries to use cellular equipment while on board an airplane.
1.6 Pacemakers
The Health Industry Manufacturers Association recommends that a minimum separation of six inches be
maintained between a handheld wireless phone and a pacemaker to avoid potential interference with the
pacemaker. These recommendations are consistent with the independent research by and
recommendations of Wireless Technology Research.
Persons with pacemakers:
•
•
•
Should always keep the phone more than six inches from their pacemaker when the phone is
turned ON.
Should not carry the phone in a breast pocket.
Should use the ear opposite the pacemaker to minimize the potential for interference. If you have
any reason to suspect that interference is taking place, turn your phone OFF immediately.
1.7 Hearing aids
Some digital wireless phones may interfere with some hearing aids. In the event of such interference, you
may want to consult your service provider, or call the customer service line to discuss alternatives.
1.8 Other medical devices
Other personal medical devices not specified in this user manual may experience external RF energy
interference if not adequately shielded. Consult the manufacturer of your medical device to obtain the
proper information regarding external RF energy. Turn your phone OFF in health care facilities where
regulations are posted in designated areas. Hospitals or health care facilities may use equipment sensitive
to external RF energy.
1.9 Road safety
When using any cellular device while operating vehicles or heavy machinery, caution is advised. Handsfree devices are recommended. In some states or countries, using cellular devices while operating a
vehicle is against the law.
1.10 Explosive environment
When in any area with a potentially explosive environment, or where flammable materials are present,
cellular devices should be turned off and the user should obey all signs and instructions. Electrical sparks in
such areas may cause fire or an explosion, resulting in bodily injury or even death. Users are advised not to
use the equipment at refueling areas, such as service or gas stations. Users are reminded of the need to
observe restrictions on the use of radio equipment in fuel depots, chemical plants, or where blasting
operations are in progress. Areas with a potentially explosive environment are often, but not always, clearly
marked. These include fueling areas, below deck on boats, fuel or chemical transfer or storage facilities,
and areas where the air contains chemicals or particles, such as grain, dust, or metal powders.
1.11 Batteries
Any contact of the battery’s exposed electrodes with a conductor, such as jewelry or keys, may cause
damage to possessions or bodily injury.
1.12 Electromagnetic radiation
Your phone fully complies with the standards related to wireless irradiation enacted by the authority of the
State and International Health Association. These limitations are part of the comprehensive regulations and
constitute public wireless irradiation permission standards. These standards are developed and formed
after long-term intensive scientific research by independent scientific organizations such s ICNIRP
(International Commission on Non-Ionizing Radiation Protection). These standards contain a large surplus
to ensure the safety of all and take the variable factors of various measurement conditions in consideration.
1.13 Other precautions
The phone is comprised of precise electronic circuits, magnets and a battery system. Caution is advised
when handling the components, particularly with regard to the following:
¾
¾
¾
¾
¾
¾
¾
¾
¾
¾
¾
¾
¾
¾
Keep the phone and its accessories away from liquid or humidity.
Keep the phone away from extreme temperatures.
Keep metal objects (i.e., coins or key coils) away from the phone to avoid short circuits.
The vibration function of the phone may move the phone, so do not put the phone near a flame or a lit
cigar or cigarette.
Avoid dropping or severe knocking of the phone to prevent damage.
Keep the device away from computer disks, credit cards, traveling cards, or other magnetic objects,
otherwise the message stored in the magnetic disk or credit card may be affected.
Do not place you phone or battery in an environment exceeding 60°C, for example, on an automobile
dashboard, window, or behind a glass plate penetrated by the sunshine.
Do not remove the battery while the phone is in the power on state or booting up state.
Do not discard the battery in fire.
Do not place the phone battery in the mouth. Swallowed electrolytes may be poisonous. Should
ingestion occur, contact a physician or emergency medical facility immediately.
Do not attempt to disassemble the phone or other accessories.
The built-in battery must only be changed by a professional service engineer. If it is displaced with a
battery error, an explosion may occur. Be sure to handle the used battery according to manufacturer’s
instructions.
Usage of batteries or chargers not designed by the manufacturer may pose a potential risk.
Manufacturer’s accessories are recommended and available for your device.
Heat is generated by prolonged usage of the headphones and by prolonged charging of the cellular
device.
¾ A moist or anti-static cloth may be used to wipe or clean the phone. Do not use a dry cloth that attracts
static electricity to avoid damage to the phone. Do not use a chemical reagent or a cleanser
containing abrasives to avoid damage to the phone’s casing.
¾ Please do not keep the state of having no battery in the battery compartment or outage; otherwise,
some data may be initialized.
¾ The metal material contained in the phone may cause you in hyper susceptibility, which depends on
your physique or health status.
¾ Since that parts such as liquid crystal display and pick-up head belong to fragile parts, please carefully
keep them such that the phone may not be impacted or squeezed.
¾ Do not engage the camera’s flash component directly in the line of sight. A safe distance should be
maintained.
2. Overview of your phone
In this section, you will learn how to install the battery, the SIM card, the T-FLASH card, and how to charge
the battery.
2.1 Installing the SIM card
The SIM (Subscriber Identification Module) card contains a computer chip that stores your personal number,
phone book, and other services provided by your cellular service provider.
To insert a SIM card:
1. Press on the battery release latch and slide the battery cover downward to open.
2. Remove the battery by lifting it up from both sides of the bottom edge.
3. Lift up the SIM metal socket.
4. Insert the SIM card with the gold-plated contact area on the card facing down. Push the metal socket
down to lock into place.
2.1.2 PIN and PUK code
PIN code: A Personal Identification Number (PIN) is provided with the purchases of your SIM card. You
can prevent other people from using your SIM card without your permission by using the PIN protection
function included with the phone. However, once you have enabled the PIN protection function, you will
need to enter your PIN each time you turn on your phone. Entering the wrong PIN three times will lock your
SIM card automatically. No one will be able to view data or access functions on the SIM card.
PUK code: When the SIM card is locked, only the device’s PUK (PIN Unblocking Key) code can unlock it.
If you enter an incorrect PUK code ten times consecutively, the SIM card will be locked permanently.
Usually, the PUK code is accompanies the SIM card at time of purchase. If you have lost your PUK code or
the PUK code was not provided with the SIM card at time of purchase, contact your network service
provider.
2.2 Installing the T-FLASH card
Use only the T-FLASH (Secure Digital) card in your Smart phone. You can install the T-FLASH Card to
store images, video clips, music, and other data on your phone.
To insert a T-FLASH card:
1. Follow the instructions provided in Section 2.1 for removing the back cover and battery.
2. Slide the T-FLASH card into the holder, with the gold-plated contact area facing down.
3. Push the card down and slide the metal latch over the T-FLASH card to secure it into place.
2.3 Battery information
2.3.1 Installing the Battery
1. Insert the battery by aligning the exposed copper part of the battery pack with the protruding copper
conductor, and then gently push the bottom of the battery into place.
2. Slide the cover on the phone.
2.3.2 Charging the Battery
When the battery is drained below normal working value, the screen displays an empty battery icon and
sound an alert. Charge the battery immediately upon notice to avoid losing data saved to the phone. If
proper action is not taken to recharge the battery, the phone will automatically shutdown after the battery
life is depleted.
The phone contains a rechargeable lithium battery. The phone is designed to use only manufacturerspecified original chargers and batteries, to ensure the longevity of the phone.
¾ Insert the charger plug into the USB charger port carefully.
¾ When charging in the power off status of the phone, connect the USB charger to the external power
source, and the battery icon in the phone screen will begin flickering. If charging in the switch-on status
of the phone, the display screen will show a notice of “charging now”. The phone can still be used
while charging.
¾ Before the device’s first use, charge the battery by using the accessory charger for a full 8-10 hours.
Charging fully will ensure that the battery reaches its best performance after two or three times of full
charge and discharge cycles.
¾ When the battery is fully charged, the battery indicator icon will stop flickering. If the phone is powered
off, the display will show “charging is completed!”
¾ Disconnect the connections between the charger and the phone when charging has completed.
Note: The accessory USB data cable has the charging function too in connecting the phone and the
computer. However, because the voltage provided by the USB port of the computer cannot meet
the charging requirements of the phone completely, using USB data cable to charge the battery
will affect the longevity of the battery. We advise you to charge the battery by using the battery
charger.
2.4 Power on/off
Press the Power key for several seconds to power on/off your phone. When no SIM card is installed, a
prompt will appear on the display.
Note: When the phone has been powered on for the first time, you will be prompted to setup basic
information for the phone, i.e., time zone, date, time, power up password, E-Mail account, etc.
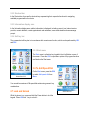
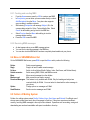
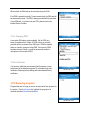
2.5 The Home screen
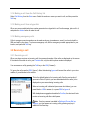
Power on your phone and wait until it fully boots. This displays the Home screen as illustrated below.
Status bar
Shortcut bar
Function key
Information display area
Note: Icons illustrated in this User’s Manual are for explanatory purposes only. Some icons introduced
here may not be the same as those presented in your phone due to firmware upgrades. Follow
the prompts and icons provided with your cellular device.
2.5.1 Indicator bar
In the Status bar, the device displays the status of various indicators, including battery life, signal strength,
GPRS and many others. The following table provides a brief description of icons that can be displayed in
the Status bar.
Icon
Meaning
Meaning
Icon
New E-mail or text message (SMS)
Radio off
New voice call
Missing SIM
New instant message
Faulty SIM
Voice call
Sync error
Voice call in progress
Roaming
Ringer off
Wi-Fi on
Data call in progress
Wi-Fi connected
Call forwarded
Wi-Fi data call
Call on hold
GPRS available
Missed call
GPRS connected
Battery level
Numeric
Low battery alert
Signal strength
No battery, or faulty battery
Radio connected, or no signal
Battery charging/Data cable connected
2.5.2 Shortcut bar
In the Shortcut bar, there are five shortcut keys representing their respective functions for navigating
available programs within the device.
2.5.3 Information display area
In the Information display area, relative information is displayed, including name of your Internet service
provider, current date/time, recent appointments and reminders, scene mode status and new message
prompt.
2.5.4 Soft key bar
The command at soft key bar is in accordance with current menu function, which can be performed by LSK
and RSK.
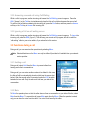
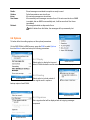
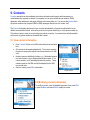
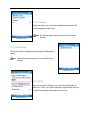
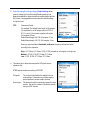
2.5.5 Start menu
The Start menu is a function key located in the in left bottom corner of
the screen. Press the LSK to open Menu options. All program functions
are listed on the Start menu.
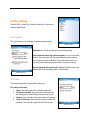
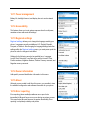
2.6 To Add Speed Dial
Screen Shot 2.5.5
On the Start menu, press the RSK
to select Add speed dial from
Menu.
You can add a maximum of 99 speed dial entries using numeric key
combinations.
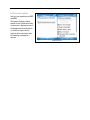
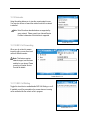
2.7 Lock and Unlock
While the phone is on, press and hold the Power button to lock the
keypad. Press LSK then * key to unlock it.
Screen Shot 2.6
3. Basic functions
3.1 Making a Call
The phone provides a variety of methods to place a call for your convenience.
3.1.1 Making a call from the Home screen
When the Home screen is displayed, press the numbers you wish to dial on the keypad, then press the
Talk key to make the call. Press the Back button if you need to backspace over a digit to correct the
number to be dialed. As you enter a phone number, your phone searches Contacts, Call History, Speed
Dial lists, and your SIM card to find a matching number. Matching names and numbers will be displayed.
When you see the name of the person you want to call (or the entire number) displayed, select it, and press
the Talk key.
3.1.2 Making a call from Contacts
To make a call by Contact name: From the Home screen, press the RSK ("Contacts") or select Contacts
from the Start menu. If there are numerous contacts listed, you can enter the first few letters of the desired
contact's name to perform a search. Select the name you want to call and press the Talk key. The phone
number that has been specified as the default phone number for that contact will be dialed.
To change the default number for a Contact: From the Home screen, press the RSK ("Contacts") or
select Contacts from the Start menu. Select the contact whose default phone number you want to change,
and then press the Right or Left navigational button to change the default number. The abbreviation at the
right side of the list indicates the default number. For example, if you change “w” to “m”, the default
number changes from Work phone (w) to Mobile phone (m).
To make a call from an open Contact card: From the Home screen, press the RSK ("Contacts") or select
Contacts from the Start menu. Select the desired contact, and then press the Action button to display all
the information for that contact. Select the number you want to call, then press the Talk key.
For more information about Contact list abbreviations and Contact cards, please see Chapter 8.
3.1.3 Making a call using a recently dialed number
From the Home screen, press the Talk key to display a list of recently dialed names/numbers. Select the
item you want to dial, and then press the Talk key again.
3.1.4 Making a call from the Call History list
Select Call History from the Start menu. Select the number or name you want to call, and then press the
Talk key.
3.1.5 Making a call from a hyperlink
When you see an underlined phone number presented as a hyperlink in an E-mail message, just scroll to it,
and press the Action button to make the call.
3.1.6 Making emergency calls
Calls to emergency service numbers can be made under any circumstances, even if you have locked the
SIM card and/or your phone. To place an emergency call, dial the emergency number appropriate for your
location, and press the Talk key.
3.2 Receiving a call
3.2.1 Receiving a call
When you phone receives an incoming call, the name and number of the caller are displayed on the screen.
If the name of the caller is not in your Contacts list, only the caller's phone number is displayed.
You can answer a call by pressing the Talk key or the LSK (“Answer”).
To ignore the call, press the RSK (“Ignore”). Note that selecting Ignore will connect the caller to your voice
mailbox, if you subscribe to this service.
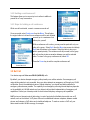
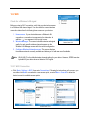
This is the default behavior for incoming calls. See the next section if
you want a Photo ID (which you have associated with the caller) to be
displayed on your screen during incoming calls.
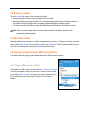
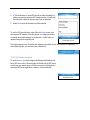
When an incoming call is detected (see screen shot below), you can
press Send or LSK to answer it, or press RSK to Ignore it.
With headphones engaged and enabled in Profiles, the device will autoreceive an incoming call after a brief pause.
Screen Shot 3.2.1
Note: If any key answer is enabled in Settings>Phone>Dial up
settings, you can answer an incoming call by pressing any key in
addition to the Send key.
3.2.2 Answering a second call using Call Waiting
While a call is in progress, another incoming call causes the Call Waiting screen to appear. Press the
LSK (“Answer”) or the Talk key to simultaneously place the first call on hold and answer the second call.
To end the first call before answering the incoming call, press the End button, and then press the Answer
soft key or the Talk key to Answer the incoming call.
3.2.3 Ignoring a Call on call waiting screen
While a call is in progress, another incoming call causes the Call Waiting screen to appear. To Ignore the
incoming call, press the RSK (“Ignore”). This will keep your current call in progress, but will connect the
“call waiting” caller to your voice mailbox, if you subscribe to this service.
3.3 Functions during a call
During a call, you can execute other operations by selecting Menu.
Note: Selected functions on the Menu can only be utilized if provided or if available from your network
service provider.
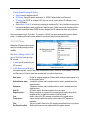
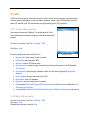
3.3.1 Holding a call
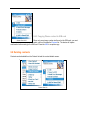
During a call, select Hold from the Menu to prevent callers from
hearing each other’s conversations.
During a call, you can enter another number to be dialed. In this case,
the first call will be automatically placed on hold (see the screen shot
below). After the second caller is connected, press the LSK to switch
between the two calls. Only the active call can hear your side of the
conversation.
Screen Shot 3.3.1
3.3.2 Mute
To Mute the speaker phone so that the caller does not hear a conversation on your side of the line, select
Mute from the Menu. To resume the call, press Mute again from the Menu. When the speaker is muted,
only you can hear the voice from the caller. Your voice is not heard by the caller.
3.3.3 Speakerphone On
Turn on the speaker then it will help lift the voice from this side for you to listen clearly within noisy
surroundings.
3.3.4 Conference call
Conference call, or three-way calling, is supported with your cellular phone. Please refer to Section 3.4.2
Holding a Conference Call for details.
3.3.5 Contacts
During a call (or a conference call), select Contacts from the Menu to view details of the contact list. You
may also perform other functions with the contact list from the Menu.
3.3.6 Viewing Calendar
Viewing the Calendar also allows you to schedule appointments or set reminders.
3.3.7 Call History
Call History allows you to view a list of Received Calls, Missed Calls or Dialed Calls. You can also place
calls from each of these lists or delete entries.
3.4 Dealing with multiple calls
While a call is in progress, the device will prompt you that another incoming call is present. Should you
choose the answer the call, you will be able to switch between both calls or you can join both calls into one
conversation. You can also add a third call with the original two for a three-party conference call where all
parties can participate in the discussion. A conference call with your cellular device consists of a maximum
of six individual calls.
Conference call features are dependent on availability from your network service provider and enabling the
settings within your device.
3.4.1 Switching a call
Should you receive a second incoming call while a call is in progress, you can press the LSK to receive the
second caller, which places the initial caller on hold. The initial caller will not be able to hear the second
caller’s conversation. Select Switch to return to the initial call and place the second call on hold. The
second caller will be unable to hear the initial caller’s conversation. You also have the option to Hang Up
both callers.
3.4.2 Holding a conference call
This feature allows you to connect up to six callers in addition to
yourself for a 7-way conversation.
3.4.3 Steps for holding a call conference
While one call is activated, connect or answer a second call.
Once connected, select Conference from the Menu. This will place
the original caller on hold and form a conference call for each initiated
new call, up to a maximum of six
callers plus yourself.
Screen Shot 3.4.2
While a conference call is active, you may need to speak with only one
caller in the group. Select Split from the Menu (see screen shot below).
Split lists all members in the session. Select the caller to whom you
wish to speak privately. The conference call will proceed, but the group
will not hear the private conversation between you and the selected
caller. To return to the group conference call, select OK.
Press the Power key to end the complete conference call.
Screen Shot 3.4.3
3.5 Net Call
Your device supports Voice over WLAN (VoWLAN) calls.
By default, your device attempts emergency calls primarily over cellular networks. If an emergency call
using cellular networks is not successful, then your device attempts an emergency call through your WLAN
call provider. Due to the established nature of cellular telephony, you should use cellular networks for
emergency calls wherever possible. The capability for an emergency call using Internet telephony depends
on the availability of a WLAN network and your Internet call provider's implementation of emergency call
capabilities. Contact your Internet provider to check Internet telephony emergency call capabilities.
VoIP (voice over Internet protocol) technology is a set of protocols that facilitate phone calls over an IP
network, such as the Internet. VoIP phone calls can be established between computers, between mobile
phones, and between a VoIP device and a traditional telephone. To make or receive a VoIP call, your
device must be within WLAN coverage, for example.
Before you can make net calls, you need to create a connection profile and a SIP phone profile. When the
profile is set, you can initiate a net call from all applications where a regular voice call can be placed.
To place a VoIP Call
•
From the Home screen, press #, and then enter phone number.
•
Press Talk to initiate the call.
Please see Section 12.2 Wi-Fi for instructions on how to set up a Wi-Fi connection, and how to create a
SIP phone number.
Net call within call history
When you want to initiate a call through WLAN from the Call History menu, you must select the number
first, and then click the RSK to select WLAN Dial. If the number has a # prefix, you can click the Green
key to initiate a Net call.
3.6 ActiveSync
3.6.1 Using ActiveSync
Your device supports synchronization with your PC via USB cable and Microsoft® ActiveSync®. When the
cable is connected, ActiveSync automatically compares data on the PC and synchronizes with the phone.
3.6.2 Installing ActiveSync
Microsoft® ActiveSync® is pre-installed on your cellular device. The companion CD that came with the
purchase of your cellular device can be used to install Microsoft® ActiveSync® on your PC.
3.6.3 Synchronizing data with PC
By default, Contacts, Schedule, and items in Microsoft Outlook® will be all copied to the cellular device. All
information contained in the phone can be viewed on either the PC or the phone once synchronization has
taken place.
4. Internet Explorer
4.1 Pocket Internet Explorer
Using Pocket Internet Explorer (IE), you can connect your smart phone to the Internet or applications based
on network connections. Your smart phone supports connecting to Internet via a common data call,
browsing the Internet with support of GPRS based on a GSM network, and connecting to high-speed
WLAN (Wireless Local Area Network) access. Deploying any of these powerful functions keeps you
connected to the whole word at any given time.
To connect your smart phone to a network with IE, you will need to:
•
•
•
Make sure that your SIM card supports IE or contact your Internet service provider for confirmation.
Order data operating services or GPRS services from your Internet service provider.
Ensure proper setup of IE on your phone.
Note: WAP access depends on availability from your Internet service provider and proper settings
enabled on your cellular device.
Please consult with your Internet service provider for detailed information.
4.2 Starting Internet Explorer
The first time Internet Explorer is launched, three helpful websites are
presented as your Favorites. Select Go to browse any of these sites.
You can also select the Address bar from the Menu to enter a
website address and browse. Press the LSK (Go) to connect to the
website. While browsing websites, you can go back to any page by
pressing Back. Press the Power key to disconnect from Internet and
exit the browser.
Screen Shot 4.2
4.3 Offline menu
When offline, you can select from following items on the Menu:
Address Bar:
Enter a website address you’d like to browse.
Add Favorite:
Select Add Favorite from the Menu to save a web
page link, including its name, address and the name
of the folder where it will be saved.
Add Folder:
Use the Add Folder feature to make it easy and
convenient to manage miscellaneous websites
stored on your phone.
Screen Shot 4.3
Edit:
Edit a website address.
Delete:
Delete an item saved in your Favorites list.
Options:
Using the Options feature you can set up the browser. Refer to Section 4.4 Setting up
Internet Explorer.
4.4 Online menu
When Internet Explorer is online, press the RSK to select the following
items from the Menu:
Address Bar:
Enter a website address you’d like to browse.
Favorites:
Save all your favorite websites in the Favorites list.
Add to Favorites: Select Add to Favorites from the Menu to save a
web page link, including its name, address and the
name of the folder where it will be saved.
Forward:
Select Forward to proceed to the next page in
recently visited websites.
Refresh:
Reload the current web page.
Screen Shot 4.4a
History:
Recently visited pages are stored in History. You
can select a website to return visit from this list.
View:
Select a view mode for browsing pages.
Zoom:
Select a resolution for displaying web pages.
Tools:
From the Tools menu (see the following screen
shot), you can send a web address via the Send
Link via E-Mail option. You can also view the
Properties of the current page or select from
various browser options. To setup the browser,
please refer to Section 4.4 Setting Up Internet
Explorer.
Screen Shot 4.4b
4.5 Setting up Internet Explorer
Select Functions from the Menu in Internet Explorer to set up options
for the browser.
Screen Shot 4.5
4.5.1 General
Select Options from the menu, and then select General, Connections
or Memory to explore settings for each respective option.
Screen Shot 4.5.1
4.5.2 Connections
Select Connections from Options (see the screen shot below) to
change the way the device connects to the Internet.
Using the auto-detect settings will automatically select the proper way of
connecting according to the web site.
Screen Shot 4.5.2
4.5.3 Memory
Select Memory from Options (see screen shot below) to view memory
status of the network. Press the RSK to clean out Temporary Files,
Cookies, and History.
Screen Shot 4.5.3
5. Tasks
Tasks recorded and assigned from the Task function in Microsoft Outlook® on your PC will be stored and
updated via ActiveSync®.
5.1 Synchronizing Tasks on PC
To synchronize Microsoft Outlook’s Task entries from your PC to your
phone, launch ActiveSync® .
Connect the PC to your phone with the USB cable. In default mode, the
system will automatically synchronize task detail to Task.
5.2 Creating a Task on your phone
Screen Shot 5.1
Select Task from the main Menu. Enter details for the task record and press OK. Press the LSK to
activate the task.
Note:
To make changes to the schedule or a set priority, you must synchronize your phone with
your PC and set them in Microsoft Outlook® on PC.
5.3 Menu at Tasks
When you have entered Tasks, press the RSK to open the Menu for
options (see the screen shot below) to perform additional functions,
such as:
Beam Task:
Send selected task to other storage devices by
infrared transfer.
Delete Task:
Delete the selected task.
Sort By:
Sort tasks by several categories.
Filter:
Filter tasks in various states.
Screen Shot 5.3
6. Windows Media
The built-in Windows Media Player® can play audio/video files stored on the phone or on a memory card.
6.1 Playing a file
Press the LSK to enter the main interface of the Windows Media
Player, whose default interface is its library. Different types of files are
placed in specified folders. Select the file you want to play. Press
Back to enter the playing screen. To view the play list, click Now
Playing.
6.1.1 Button operations
Pause:
Back to the beginning:
Jump to next file:
Adjusting volume:
Press OK to pause the current file
Screen Shot 6.1
playing.
Press << while playing a file.
Press >> while playing a file.
Press volume Up/Down or Side keys to turn the volume up/down.
6.1.2 Menu at Player
Press the RSK to open the Menu.
Screen Shot 6.1.2
Library:
Play/Pause:
Stop:
Shuffle/Repeat:
current play list.
Full screen:
Options:
Properties:
About:
All media files are stored in the Library.
Play or pause current file.
Stop playing current file.
Play files randomly or repeat playing a file in the
Play video files in full screen mode.
Media Player settings.
Show details of current file.
View version information.
6.2 Now Playing
Enter the Now Playing screen from the main player interface. The Now
Playing list displays the files currently playing and pending.
Select from the Menu to use the following functions:
Library:
Move up:
Move down:
Remove from play list:
Shuffle/Repeat:
Clear Now playing:
Error details:
Properties:
Choose a file to play from the library.
Move the selected file up in the play list
order.
Move the selected file down in the play
list order.
Screen Shot 6.2
Delete the selected file from the play list,
but the file is still saved in the media library.
Play the files in the play list randomly/repeatedly.
Deletes all files from the current play list, but the files are still saved in the
media library.
Display error information about the selected file.
Display detailed information about the currently selected file.
6.3 Library screen
For this phone, all audio and video files are saved in the media Library
(see the screen shot below). You can view and choose the files from the
media library and add them to the play list for playing.
Screen Shot 6.3a
In Library or folders, press the RSK to
open the Menu (see screen shot
below). Select from the options
displayed for the desired function.
Screen Shot 6.3b
6.3.1 Update Library
To see newly added files before playing, you must update the
Library. Select Update Library from the Menu to perform an auto
search for new files (see screen shot below). Search results will be
placed in their respective library folders.
6.3.2 Playing directly in Library
You can directly select and play files stored in the media Library.
Screen Shot 6.3.1
6.3.3 Add files to play list
Only added to play list on playing can the files in Media Library be
played with Windows Media Player.
If you need to add a new file existing in Library to play list, you have to
find out the file in the library folder, select it, click Menu > Queue up
(see the screen shot below) and then you can add it to the Now
Playing list.
Screen Shot 6.3.3a
If you focus on a media library, select Add to play list from the Menu
(see the screen shot below) and then you can add all files in that folder
to Now Playing list.
6.3.4 Delete file in Media Library
Screen Shot 6.3.3b
Move focus onto files you’d like to delete, select Delete from Library, then the file will be deleted from both
media library and your phone.
6.4 Player settings
Press the RSK to select Options from the main Menu to set up the
Windows Media Player.
6.4.1 Playback
This option allows you to set display time stamp and play modes.
Screen Shot 6.4
Show time as: Set the time display format of the file playing.
Pause playback while using another programs: If you do not use this
function, the media player will continue playing when other programs
are running (except the call function). If you enable this function, then
the media player pauses playing when other programs are running.
Resume playback after a phone call: Enabling this function allows the
media player to continue playing after a call has ended.
Screen Shot 6.4.1
6.4.2 Video
This setting changes the viewing mode for video play.
Play video in full screen
• “Never” sets playing video files in Windows mode only.
• “Only when oversized” plays video files in full screen only
when the resolution of files is larger than that of the screen.
• “Always” plays video files in full screen mode in all instances.
• “Scale to fit window” plays videos by zooming out when the
resolution of the video file is larger than that of the screen.
Screen Shot 6.4.2
6.4.3 Network
Depending on your Internet connection, you can change the
connection speed to obtain better video and audio output.
6.4.4 Library
Here you can choose whether to enable player in Media Library.
6.4.5 Skins
Change the appearance of the Windows Media Player interface.
Screen Shot 6.4.3
6.4.6 Buttons
Redefine button functions in the Windows Media Player interface.
Hover over a function button you want to redefine, select Assign from Menu and follow the prompts.
Select Reset on Menu to restore default settings.
6.5 Audio/Video supported formats
Windows Media video format: wma, wmv
Moving Screen shot Experts Group (MPEG): mp3
7. Calendar
With the Calendar feature, you can view important dates, such as anniversaries and holidays and set
events for special reminders.
7.1 Viewing calendar
Enter Calendar, press the LSK to switch among day, week and month views.
7.2 Creating a date
From the Calendar screen, press the RSK, select Create to add a new
date. Make changes as needed to each option prompted.
Screen Shot 7.2
7.3 Calendar settings
From the Calendar settings screen, select an item then press the RSK
to change settings.
Screen Shot 7.3
8. Messaging (SMS, E-Mail and MMS)
You can create, send, and receive E-Mail and SMS messages through
Inbox synchronization or by connecting to your E-mail server. You can
then view all of the messages from the Inbox on your cellular phone.
8.1 SMS service
SMS service is provided by your Internet Service Provider, which
serves for transfer of short text messages between mobile phone
users.
The first time you send an SMS, check that the SMS Center number
has been added. You can consult your ISP for local SMS center
numbers.
Screen Shot 8
8.1.1 Creating and sending SMS messages
With SMS services, all received SMS messages will be listed on the
screen. Press LSK to create a new SMS.
Screen Shot 8.1.1a
In the To field, you can directly
enter the recipient’s number or
you can select Add Recipient
from the Menu. Your cellular
device also supports sending by
group, enabling multi-recipients to
receive SMS messages.
After entering recipients, use the
navigation keys to move the
cursor to the SMS edit area.
Selecting Quick Text from the
Screen Shot 8.1.1b
Menu will list several options for
pre-typed text (see screen shot below). Make a selection, and then
press the LSK to insert it into the edit area. Notice the word count and
total word capacity is displayed on the left.
After editing the SMS message, press the LSK to send it to the recipient.
The sent messages will be saved in the Sent folder in default mode.
Screen Shot 8.1.1c
8.1.2 Viewing SMS
On the SMS list screen, select the SMS you want to view and press OK. Press the LSK to reply to sender.
Press the RSK to open the Menu and select other options available for this SMS message.
8.2 Outlook E-Mail
Your new cellular phone supports sending and receiving E-Mail, as well as synchronizing Outlook E-Mail
from a PC.
The first time Outlook is used on your new cellular phone, an E-Mail account must be set up and the
network must be configured. Select Settings from the Menu to perform these steps.
•
•
•
From the Outlook screen, press the LSK to create an E-Mail account.
Enter the address of a recipient, or click Menu > Add Recipient to add a single recipient or add
multiple recipients.
Enter Subject.
•
•
•
After entering recipients and subject, use the navigation keys to enter the message edit area.
After editing your E-Mail, press the LSK to send it to the recipient list.
In default mode, all sent messages are saved in the Sent folder.
8.3 MMS
MMS is a multimedia information transferring operation proposed by CMCC, which can transfer multimedia
information including text, screen shots, and audio files. MMS operation supports instant multimedia
transfer from point-to-point, phone-to-Internet or Internet-to-phone.
Note: All MMS settings have been pre-configured and most likely will not need additional changes.
8.3.1 Creating and sending MMS
•
•
•
•
•
From the Home screen, press the LSK to create a new MMS.
In Recipients, you can enter a phone number directly or select
Add Recipients from the Menu. Your phone also supports
group sending to multiple recipients.
After entering Recipients and message Subject, fill in the
corresponding content for Video, Text and Audio files. Select
Cancel to abort editing and go back to the MMS box.
Select Preview from the Menu after editing to view the
message before sending.
Press the LSK to send the MMS.
Screen Shot 8.3.1
8.3.2 Receiving MMS messages
•
•
•
An alert appears when a new MMS message arrives.
You can load or view this message in the MMS box.
You can also view the MMS after it has been completely downloaded onto your phone.
8.4 Menu in SMS/MMS/Email list
On the SMS/MMS/E-Mail screen, press RSK to open the Menu and to perform the following:
Delete:
Reply:
Folders:
Switch accounts:
Move:
Mark as read:
Download Messages:
Option:
Send/Receive:
Delete current message.
Reply to all and Forward current message.
Switch to other folders (Drafts, Outbox, Inbox, Sent Items, and Deleted Items).
Switch among SMS, E-Mail, and MMS accounts.
Move current message into other folders.
Mark current item as read or unread.
This feature is only available with E-Mail. Only the heading and subject are
received initially for E-Mail. You must select to download the entire message to
your phone.
Change options on messages or E-Mail.
Send or receive messages and E-Mail.
8.5 Folders of Mailing System
Folders of a mailing system contain Drafts, Outbox, Inbox, Sent Items and Deleted. For efficient use of
storage space, please clear termly the old messages in Sent box. If the phone experience insufficient
memory, receiving MMS messages is the only function allowed. Operations such as sending, saving and
downloading are rendered unavailable until space is available or freed up.
Drafts:
Outbox:
Inbox:
Sent items:
Deleted:
Stored messages considered incomplete or ready to send.
Failed transmissions are stored here.
All received messages are stored here.
All successfully sent messages are stored here. If the auto save function of MMS
is enabled, after an MMS is successfully sent, it will be saved into Sent items
immediately.
All messages deleted are disposed of here.
NOTE: If deleted from this folder, the messages will be permanently lost.
8.6 Options
To better utilize the mailing system, set the optional parameters.
On the SMS, E-Mail or MMS screens, press the RSK to select Options
from the Menu to select and set up the following parameters.
8.6.1 Display
Screen Shot 8.6
Select option to display the time and
date in E-Mail information and the manner in which it is displayed.
8.6.2 Sending
Screen Shot 8.6.1
Select option to include content of
the original email in replies or
backup copies of sent E-Mail.
8.6.3 Signatures
Screen Shot 8.6.2
Set a signature that will be displayed with all outgoing messages
composed.
Screen Shot 8.6.3
8.6.4 Account options
Here you can respectively set SMS
and MMS.
The items in Settings includes:
whether to use Unicode which help
correct errors in displaying content
of messages sent from this phone
or, whether to require service
center to deliver send report after
its forwarding a message to a
recipient.
Screen Shot 8.6.4
8.6.5 New account
You can set up an E-Mail account in order to send/receive E-Mail on your cellular phone. This phone
supports POP3/IMAP4. Set up an account by following these steps.
Screen Shot 8.6.5
8.6.6 Export SIM Message
This feature helps you download messages saved on your SIM card.
9. Contacts
Contacts assimilate an online address book where information about people and businesses you
communicate with regularly are stored. For example, you can store multiple phone numbers, E-Mail
addresses, street addresses, web pages, birthday, anniversary date, etc. You can use the Contact list to
dial phone numbers and compose E-Mail or SMS messages directly from the “contact card”.
The Contact list displays the names of your contacts alphabetically, along with an abbreviation for the
default communication method, such as the person's work phone number (w) or home phone number (h).
This makes it easy to reach the contact using the method you prefer. Your smart phone will automatically
set the work (w) phone number as the default dial number.
9.1 View contact information
•
•
•
•
Enter Contact, Entries on the SIM card and the phone are listed
here.
All contacts are arranged alphabetically. The contacts saved to
the phone’s memory are ranked before those saved on the SIM
card.
Number types are identified by letters, e.g., if the default number
is a work number, a (w) is displayed behind the number. If it is
a home number, an (h) is displayed behind the number. Those
numbers saved on the SIM card will be displayed with a SIM
icon beside them.
Select a contact, press OK to view details.
Screen Shot 9.1
9.2 Modifying contact information
To modify a contact, enter the detailed information, then press RSK
to open the Menu and select Edit to modify the record.
Screen Shot 9.2
9.3 Creating a contact
From the Contact list screen, press LSK to Create (See the screen
shot 9.3). Set up a new contact record on the phone by filling in the
blanks, item by item, then press LSK to complete the setup. This new
record is now added to your Contact list.
To enter an extension number or an International call number, you
might enter a pause after dialing the main number. To enter a pause,
select Insert pause from the Menu to insert “P” between main number
and its extension number. If you want to increase the pause time,
insert multiple “P’s” in between the number and the extension.
Screen Shot 9.3
To manually enter a number, select Insert wait from the Menu.
It is also possible to add a contact from a number enclosed within a
Message/E-Mail Message, or Call History.
9.4 Creating a contact on SIM card
To create a contact record on a SIM card, press the RSK on the
Contact list screen. Select Create a SIM contact from the Menu to
begin the new record.
Generally, records saved on SIM cards will only record the contact’s
name and a unique number, which is dependent on the types and
function of the SIM card itself.
Screen Shot 9.4
Please consult Internet service operator for details.
9.5 Creating a speed dial to a contact
1- or 2-digit speed dialing can be assigned to your phone for frequently
dialed numbers. For single-digit speed dialing, press and hold the
speed dial to initiate a call. For double-digit speed dialing, press the first
digit, then press and hold the second digit to initiate the call.
Screen Shot 9.5
9.6 Finding a contact
From the Contact list screen, locate a contact as follows:
• Pressing navigation up/down scrolls through the list of contacts;
• Pressing number keys queries the device for all records containing the series of numbers pressed, i.e.,
the contact including the letters and/or a numbers pressed displays the matching contact.
• To locate a record on the SIM card, enter the SIM password and the device will locate the contact.
Note: When you press number keys to locate contacts recorded to the phone, the device only
compares the default number.
9.7 Beaming contacts
Beaming contacts from one device to another is supported by your phone. To beam one contact to another
device, select Beam Contacts from the Menu option in the Contact list. Aim the infrared interface on your
phone to the receiving device, then press Beam to begin the transfer.
9.8 Copying contacts between SIM card and Phone
Your device supports copying contact details between the SIM card and the phone.
9.8.1 Copying SIM contacts to Phone
Enter details of a SIM contact, and then click Menu > Save to Contacts.
You will be prompted to save it as a new item, or add it in other records.
If you select to Save as new, it will open new contacts details for you to
fill in the blank name and phone type. Press the LSK to insert the
number.
Screen Shot 9.8.1
9.8.2 Copying Phone contact to SIM card
Since only one primary number is allowed on the SIM card, you must
select one from the detailed Contact list. The device will require
confirmation before saving to the SIM card. Press the LSK to complete copy.
Screen Shot 9.8.2
9.9 Deleting contacts
Contacts can be deleted from the Contact list and the contact details screen.
Screen Shot 9.9
10. ActiveSync
Before synchronization can begin, Active Sync 3.7 or above must be installed on your desktop or notebook
PC. (ActiveSync comes pre-installed on your cellular device.) Use the Companion CD that came with your
device, or install ActiveSync for free by downloading the software from Microsoft's web site at
http://www.microsoft.com/windowsmobile.
10.1 Using ActiveSync
10.1.1 Synchronize with a PC
• After installation of the ActiveSync software, use the USB cable to connect the phone and the PC.
• Follow the on-screen instructions to establish the relationship between the PC and the phone.
The synchronization process will start automatically when the relationship has been established.
Outlook contacts, schedules, tasks, E-Mails, etc. will be synchronized to the phone.
• In the ActiveSync function screen, select “Synchronization” to start the synchronization process
and select “Stop” to end the synchronization process.
Note: In default mode, ActiveSync will not synchronize all Outlook information. Related options must
be set before all data will be synchronized.
10.1.2 ActiveSync Server
Before synchronizing information with a server, make sure all the requested server authentication
information is correct, such as Username, Password, and the name of the Microsoft Mobile
Information Server.
To set up ActiveSync Server
• From the ActiveSync screen, select Menu > Options > Server settings > Connect.
• In Username, enter your Microsoft Exchange user name.
• In Password, enter your Microsoft Exchange password.
• In Domain, enter the name of the domain of your Exchange server (if required).
• In Server name, enter the name of mobile information server you want to connect to.
• Press OK to finish setup.
• Press the Start soft key to synchronize.
Note: After a partnership has been set up between phone and PC, a long-distance connection with the
server may also be available.
10.2 Synchronizing information
10.2.1 Synchronizing the inbox
When you synchronize mail stored in the inbox on the computer or stored on the server, the system only
synchronizes mail received in the last three days, and only synchronizes the initial 500 bytes for each mail.
To view all contents of each mail, you must download the complete E-Mail.
Mail stored in the phone and on the computer is synchronized. If you delete an email in the phone or on the
computer, the phone or the computer will delete this email automatically in the next synchronization
process.
To synchronize the other files in Outlook and mail stored in customized folders, you must select and
highlight these folders in the phone.
Note: SMS and MMS cannot be synchronized.
10.2.2 Synchronizing the schedules
You can synchronize schedules stored in the phone with those stored in Outlook or Mobile Information
Server on the PC.
In default mode, only the schedules stored in the past two weeks and the future schedules will be
synchronized.
10.2.3 Synchronize the contacts
All contacts are synchronized in the default mode.
Once the synchronization process is complete, contacts created or deleted from either the phone or the PC
will be correspondingly created or deleted from the PC or the phone.
10.2.4 Install software to the phone
Install software on your phone by using ActiveSync function on the PC. Follow these steps.
•
•
•
Establish a connection between the phone and the PC by using ActiveSync.
Run setup file in the computer.
Select the setup location in the phone and begin to install the software. If the Memory card has
been inserted into the phone, the system will alert you to choose the storage location.
11. Call history
The cellular device’s Call History records information such as phone
number or call time of dialed calls, answered calls, and missed calls.
Different icons are assigned to identify different record types. The
following icons indicate the corresponding type of entry to the Call
History:
Dialed calls
Answered calls
Missed calls
Note: Where a number already stores in your Contacts list
appears in the Call History, its corresponding name
and/or number will be displayed.
Screen Shot 11
11.1 Viewing Call history
In the Call History list, highlight a record. Press OK to view the details.
11.2 Saving number
In the Call History list, highlight an item. Press the LSK to save the
record. Enter information of the contact to complete the record.
Screen Shot 11.1
11.3 Locating a contact
To view all details for a contact in the Call History, select Find contact
from the Menu. If no number or name matches exist, a prompt will be
displayed.
Screen Shot 11.3
11.4 Viewing timers
With Call Timers, you can view the accumulative time of the last call,
all calls, incoming calls, outgoing calls, calls while roaming and data
calls.
Select Reset Timers from the Menu to clear out all time records. All
timers will start at 00:00 except for “current accumulative time.”
Screen Shot 11.4
11.5 Deleting list
On the Call History screen, select Delete from Menu to delete the highlighted record or select Delete List
to delete the whole record list.
11.6 Filter
On the Call History screen, specify the type for contacts you want to
view, i.e., Missed Calls, Incoming Calls, Outgoing Calls.
Click Menu > Filter and then you can filter call records by category:
Missed Calls, Incoming Calls, or Outgoing Calls.
11.7 Net call within Call History
When you want to initiate a call through WLAN from the Call History
menu, you must select the number first, and then click the RSK to
select WLAN Dial. If the number has a # prefix, you can click the
Green key to initiate a Net call.
Screen Shot 11.6
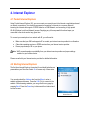
12. Settings
In Settings, you can make changes to the device defaults.
Select Settings from the main Menu. Select More… to go to see more
options.
12.1 Phone
Select Phone from the Settings
menu to view options available.
Screen Shot 12
12.1.1 Call Barring
Screen Shot 12.1
You can block selective incoming or outgoing calls based on different
conditions. A restricted password is required to utilize this feature, and
the restricted password must be acquired from your service provider.
Note:
If an incorrect restricted password is entered 3 times consecutively, the Call Barring function
will be locked and unusable.
Note:
The Call Barring feature requires network support for proper use.
12.1.2 Call Forwarding
Based on conditional criteria, you can redirect incoming calls to optional
phone numbers (see screen shot 12.1.2).
Note: This function needs network support, and has been enabled
on your phone. Please consult your Internet Service Provider for
details.
Screen Shot 12.1.2
12.1.3 Call Options
In Call Options, using the check box will enable the Any key answer
feature or Show SIM contacts saved in the Contacts list. You may
also setup Voicemail and your SMS center with this set of options.
12.1.4 Call waiting
Enabling the Call Waiting feature
alerts you that another call is
coming in while on a current call.
Screen Shot 12.1.3
Screen Shot 12.1.4
12.1.5 Caller ID
Decide to hide or display the
show your number to others, or
contacts currently in your Contacts
incoming caller’s phone number,
only show your number to those
list.
Screen Shot 12.1.5
12.1.6 Channels
Using this function, you can receive a broadcast information list with
whose languages can also be set.
Screen Shot 12.1.6
Note: This function requires support from your Internet Service
Provider.
12.1.7 Fixed Dialing
Clicking this check box toggles between enabling and disabling fixed
dialing.
Note: This function requires support from your Internet Service
Provider.
Screen Shot 12.1.7
12.1.8 IP Call
Here you can set IP code that once you choose to dial a number by
means of IP, find IP call on Menu and dial the original number, then you
can add IP code ahead of the number you are to dial.
Screen Shot 12.1.8
12.1.9 Networks
Using this setting allows you to view the current network in use.
You may also choose or search the method in which the network
is selected.
Note: Not all functions described above are supported by
every network. Please consult your Internet Service
Provider to determine if this function is supported.
Screen Shot 12.1.9
12.1.10 WiFi Call Forwarding
When you do not wish to answer
incoming calls, you can direct such
calls to a different number.
Note: This feature requires
network support, and has been
enabled on your phone. Please
consult your Internet Service
Provider for details.
Screen Shot 12.1.10
12.1.11 WiFi Call Waiting
Toggle this check box to enable/disable WiFi Call Waiting on or off.
If enabled, you will be prompted on the screen when an incoming
call is received while the current call is in progress.
Screen Shot 12.1.11
12.2 WiFi
Check for a Wireless LAN signal
Before you start a Wi-Fi connection, verify that your device has access
to a Wireless LAN channel signal. You can check the current wireless
connection status from the following three screens on your device.
1. Home screen: If your device discovers a Wireless LAN
connection, a connection icon appears in the status bar. In
addition, a icon appears in the top-right corner.
2. Wireless Manager: The current connection status and signal
Screen Shot 12.2
quality for each specific wireless channel appears on the
Wireless LAN Manager screen with the current configuration.
3. Configure Wireless Networks screen: This screen displays
the wireless networks currently available and allows you to add new ones if available.
Note: WLAN (Wi-Fi) is the default wireless channel setting for your device. However, GPRS launches
by default if your device does not detect a Wi-Fi signal.
12.2.1 Wi-Fi Connection
• Click Start > Settings > Wi-Fi, then enter Connections. Following the instructions on the screen, you
can either click New to connected to a new access point, or select Menu > Scan AP to allow the
device to scan for available access points.
Screen Shot 12.2.1
Change Name/AP Setting/IP Setting
•
•
•
•
Name: Name for wireless network.
AP Setting: Setup AP-related parameters, i.e., ESSID, Authentication, and Password.
IP Setting: Set TCP/IP for wireless LAN. User can choose to auto-retrieve IP Address or use a
static IP Address.
Select Menu > Scan AP to starts auto-scanning for available APs. A list of available access points
is presented displaying each access point’s signal strength. Select from the list of available APs to
complete connection setup. ESSID has been assigned and IP address has been auto-retrieved.
This device supports up to 16 profiles. To connect to a WLAN, the device automatically uses the default
profile. If a default profile has not been defined, the phone will select the best signal profile.
12.2.2 SIP Phone
Before the SIP phone feature can be
used, the following settings must be
enabled.
Click Start > Settings > Wi-Fi > SIP
phone. Click New to set up a new
SIP account.
1. In Name specify a name for your
SIP accounrt.
Screen Shot 12.2.2-1&2
2. In SIP phone account fill in the
information required, such as User name, Authentication Name, Password, Server address, Port, Proxy,
and Proxy port, all of which have been provided with your phone at purchase.
User name:
Chosen or assigned sequence of letters and/or numbers, when logging on at
the sip registrar serve.
Authentication name: A sequence of letters and/or numbers which is used to authenticate at the
registrar server.
Password:
A sequence of letters and/or numbers which is used to authenticate at the
registrar server.
User ID:
An chosen alias or form name similar to the user name.
Register server:
Simply a computer in a network that contains the information about which
computer where any particular member of staff is located.
Prot:
Used to listen to the SIP message arrived/sent to the register server.
Proxy server:
A proxy server supplies the service to find routes for SIP requests or
responses.
Port:
The port is used to listen to the SIP message arrived/sent to the proxy server.
Sip Service Lookup: Queries which services are supplied within the register domain.
3. Voice Encoding/Decoding settings (Codec Setting) allows
users to change the Voice Encoding/Decoding settings and
Network bandwidth to obtain the best voice performance with the
SIP phone. It is suggested that users retain the default settings
for optimum use.
FPP:
Frames per Packet
For example: The default frame length is 80 samples
(10 ms) based on an 8K sample rate, so if FPP of
G.711 is set to 2, that means a packet will contain
160 samples (20 ms).
Default frame length of G.729: 80 samples, 10 ms
Default frame length of G.723: 240 samples, 30ms
Screen Shot 12.2.2-3
When you select a different bandwidth preference, the phone will use the Codec
according to the sequence:
High: G.711Ulaw, G.711Alaw, G.729, G.723 (currently do not support on the phone)
Medium: G.729, G.723,G.711Ulaw, G.711Alaw
Low: G.723, G.729, G.711Ulaw, G.711Alaw
4. This setting is for advanced users and/or SIP phone service
operators only.
DTMF payload number according to RFC2833
Call prefix:
Server type:
The content in this field will be added in front of
number dialed. Some service providers require
special prefixes to access certain services.
The phone will perform special processes for some
servers. We use the content of this field to identify
the type of SIP servers.
Screen Shot 12.2.2-4
5. STUN allows setup for some SIP service providers. Enabling this
setting can solve some known NAT transport issues. Comply with
the information offered by the service provider as standard.
6. Select Done when all information has been entered.
To use the SIP phone function, press # from the Home screen, then
enter another SIP number of a mobile phone, or a telephone number
covered by the wireless network. In this scenario, a SIM Card is not
needed to support the originating call.
Screen Shot 12.2.2-5
This device supports up to 16 profiles, but requires one profile to be set as the default for registration. To
use a different profile, you must set it as the default first.
12.2.3 SIP phone scenarios
To use Scenarios, you must configure the Wireless LAN settings and
set up SIP account first. This associates the WLAN with the SIP phone
so that once your device enters a WLAN environment it will trigger the
associated SIP phone registration in order to use these features.
Screen Shot 12.2.3
12.3 VPN
A VPN connection helps you to securely connect to servers via the Internet, such as a corporate network.
Ask your network administrator for your user name, password, domain name, TCP/IP settings, and host
name or IP address of the VPN server before you begin setting up your VPN connection.
12.3.1 Create a VPN connection
Every network connection is different. You should gather all of the
relevant information or network settings you need before starting this
process.
From the Home screen, click Start > Settings > VPN.
Click Menu > Add.
Enter the following information, and click Done.
Screen Shot 12.3.1
•
In Description, enter a name for the connection.
•
In VPN type, select the type of VPN.
•
In Server, enter the VPN server name.
•
In Connects from, select the type of network from which you will connect to the VPN (typically
The Internet).
•
In Connects to, select the type of network to which you will connect (typically My Corporate
Network).
•
In User name, enter your user name for the VPN.
•
In Password, enter your password.
•
In Domain, enter the domain name, if required.
•
If you selected IPSec in VPN type, in IPSec authentication, select the type of authentication: PreShared Key or Certificate.
•
If you selected Pre-Shared Key in IPSec authentication, in IPSec Pre-shared key, enter the key.
12.3.2 Edit a VPN connection
From the Home screen, click Start > Settings > VPN.
Click Menu > Edit.
Changed any information, and click Done.
12.3.3 Delete a VPN connection
From the Home screen, click Start > Settings > VPN.
Click Menu > Delete.
Click Yes, and click Done.
12.4 Sounds
Select Sounds from the Settings menu to enter the system sound
settings. Choose from the options to change the audio prompts for
different sound events.
12.5 Profiles
With Profiles, you can set up
different sound schemes to
coincide with different
environmental surroundings or events.
Screen Shot 12.4
Screen Shot 12.5
12.6 Home screen
Settings for the Home screen can be set for layout, color scheme,
background image, and phone and time intervals.
Note:
Image files to be set as background wallpaper must
be in GIF, JPG or BMP format.
Screen Shot 12.6
12.7 Clock & Alarm
Adjust various settings for the clock or alarm here.
12.7.1 Date and time
Set the local time zone and
display mode of the system date
and time here.
Screen Shot 12.7
Screen Shot 12.7.1
12.7.2 Alarm
Set the alarm and activate it here. You will be alerted when the
alarm setting occurs.
Screen Shot 12.7.2
12.8 Connections
External device settings are found here, i.e., beam, Bluetooth, gprs,
proxy and VPN.
Screen Shot 12.8
12.8.1 Wireless Manager
Wireless Manager allows you to manage and view the status of
GPRS/UMTS or Wireless LAN connections. You can use the device’s
Power Save Mode to make optimal use of the battery under the WLAN
networking environment, view a variety of data related to the current
configuration and signal quality, and increase network security. To run a
Wireless LAN on your device, access to broadband Internet and an
access point or router that emits WLAN signals is required. If you do not
have access to broadband Internet, consult your ISP before you try to
run this utility. However, the availability and range of your device’s
WLAN signal depends on the number, infrastructure, and other objects
through which the signal passes.
Note:
Screen Shot 12.8.1
To activate a second-generation network like GPRS on your device and communicate with
other devices on the network, you must have a SIM or USIM card installed on your device.
12.8.2 Beam
Via an infrared interface on this phone, you can enable transfer and
send data to other infrared storage devices.
12.8.3 Various settings of network connections
Screen Shot 12.8.2
This phone allows connections to both the Internet and WAP. Therefore,
you are provided with various means of connecting to a network,
including dial-up, GPRS, proxy and VPN. Additional connection
schemes can be added for the various means of connection or
modifications to the existing schemes can be performed.
Note: Factory settings for this device should suffice for network connections. If you modify
connection schemes, restore factory settings by selecting the Reset option.
12.8.4 Advanced
From the Internet connections screen, select Advanced. Here you are able to make advanced
modifications on Internet connection options.
Note: Factory settings for this device should suffice for network
connections. If you modify connection schemes, restore
factory settings by selecting the Reset option.
12.9 Security
Screen Shot 12.8.4
12.9.1 Enable phone lock
Screen Shot 12.9
The device has an optional phone
locking function that engages a
locking mechanism on the phone
after the device sits idle for a period
of time. A password will be required
to use the phone again. Refer to
screen shot 12.9.1 for Password
Settings.
Screen Shot 12.9.1
12.9.2 Using SIM PIN
Your SIM card is provided with a PIN (personal identification number). To protect your SIM card from use
by others without permission, select the Enable SIM PIN option. Once this feature is enabled, the PIN will
be required every time the phone powers on. If the PIN is entered incorrectly 3 times consecutively, the
SIM card will lock automatically and no access will be permitted to the SIM card data or any applications
stored on the SIM card.
When locked, the SIM card can be unlocked only by the PUK.
If the PUK is entered incorrectly 7 times consecutively, the SIM card will
be permanently locked. The PUK is always provided with the purchase
of your SIM card. If you have lost your PUK, please contact your
Internet Service Provider.
12.9.3 Changing PIN2
A secondary PIN feature is also available. Set the PIN2 as a
series of numbers with 4-8 digits. A PUK2 code is not normally
provided with the purchase of your SIM card. A PUK2 is required
when you intend to change a locked PIN2. If an incorrect PUK2
has been entered 10 times, you will be permanently unable to
use options on that require a PIN2.
Screen Shot 12.9.2
12.9.4 Certificates
Your phone’s certificates are necessary files that ensure normal
performance of the installed programs. Do not delete the phone’s
certificates. Restoring factory settings will restore deleted factory
certificates.
Screen Shot 12.9.3
12.10 Removing programs
Programs that are no longer in use can be removed to free up space for
the system. From the Program list, highlight the program to be
removed and select Delete from the Menu.
Screen Shot 12.9.4
12.11 Power management
Battery life, backlight time out, and display time out can be viewed
here.
12.12 Accessibility
This feature allows you to set system response time for multi-press,
reminder volume and smart dial settings.
12.13 Regional settings
Screen Shot 12.11
Regional settings allows you to change the language used by your
phone. Languages currently available are U.S. English, Español,
Français, or Deutsch. After changing the language settings and other
settings within the Regional settings menu, you must power cycle the
phone in order for changes to take effect.
Settings for the following can also be specified here: Language,
Locale, Short Date style, Long Date style, and the format of Time,
Positive numbers, Negative numbers, Positive Currency amounts, and
Negative currency amounts.
Screen Shot 12.12
12.14 Owner information
Add specific personal identification information in this menu.
12.15 About
Although you are unable to edit from this screen, you are able to view
the essential configuration and software information for your phone.
12.16 Error reporting
Error reporting (when enabled) enables an error report to be
transmitted to Microsoft as an error occurs during any sytem process.
This report helps Microsoft improve the system functionality. Error
reporting is completely voluntary and private.
Screen Shot 12.13
12.17 Boot settings
Enable/Disable the Power on/off music.
12.18 Format user partition
Enter “1234” in the blank then press OK to restore factory settings.
Note: Please use this function with care and backup all files
before resetting.
Note: The manufacturer cannot be responsible for loss of
information caused user format using this function.
Screen Shot 12.18
13. Games
13.1 Bubble Breaker
Overview of Bubble Breaker
Bubble Breaker is easy to learn, yet difficult to master. The objective is
to align same color bubbles to form large blocks of bubbles before
bursting them. The more bubbles you have in the block before they are
burst, the greater number of points you will receive.
Start Bubble Breaker
To start Bubble Breaker, click Start > Games > Bubble Breaker.
To burst a bubble, the bubble must be connected to other similar
bubbles on the playing board. If you select a bubble that is connected,
those connected bubbles will be highlighted and a new bubble will pop
up, displaying that block's potential bubble points. Click your selection
again to burst the bubbles.
Screen Shot 13.1
Breaker Bonus
If you manage to leave fewer than five bubbles on the board, you will be rewarded with more points at the
conclusion of the game.
Undo
Moves in Bubble Breaker can be undone. To Undo the last move you made, Select Menu > Undo Move.
Set Bubble Breaker options
Bubble Breaker allows you to change your playing experience.
•
•
•
Click Menu > Options to select from the following:
Play Sounds. Toggles games sounds on or off.
Guest Mode. Enables guests to play without affecting the statistics.
13.2 Solitaire
Play Solitaire
• To open Solitaire, from the Home screen, click Start > Games >
Solitaire.
• To deal the cards, click Menu > New Game.
Move cards
A number or character is displayed above each card stack.
1. On the keypad, press the number or character above the card
you want to move, and then press the number or character
above the stack to where you want to move the card.
2. To move a card up to one of the four stacks in the right-hand
corner of the screen, press the number above the card in the
lower stack, and then press Navigation up.
Screen Shot 13.2
• To undo a move, click Menu > Undo.
• Build the suit stacks at the top in ascending order, from Ace to King.
• You win the game when all cards are in their correlating suit stacks.
Playing solitaire
1. Move any aces on the seven stacks to the four card spaces at the top of the screen, and then make
any other available plays.
2. When you have made all available plays, click Draw to turn over cards.
Note: The top card that is face up on the deck is always available for play.
14. Voice notes
Your phone can be used to record voice memos or voice notes.
14.1 Recording a voice note
After entering Voice note feature, press the LSK (record) to start
recording. You will press the LSK (stop) again to stop recording.
14.2 Playing voice note
Highlight the recoring in Voice note you wish to be played. Press OK
or select Play from the Menu to play this recording.
Screen Shot 14.1
15. Pictures & Videos
Pictures stored in the phone or on the memory card can be viewed with your handset. You can select a
picture as your phone’s wallpaper from the Home screen. You can also send pictures and videos to other
mobile phone users whose device supports this feature.
15.1 Pictures & Videos preview
After you enter Pictures & Videos, a thumbnail view of all stored pictures is presented.
1 Press the LSK to view the picture currently highlighted or use your navigation keys to highlighted a
different picture.
2 On the Preview screen, use the navigation keys to preview
previous/next picture in the rotation.
15.2 Functions in Pictures & Videos list
From the thumbnail view, press the RSK to activate the popup Menu.
From the popup Menu, you can perform the following operations:
Send:
Send pictures to other devices by means of MSS or
E-Mail.
Beam:
Transfer pictures to other devices by means of
Screen Shot 15.2
infrared transmission.
Save to Contact: Set a picture as an icon representing a specified
contact. The picture is displayed each time the
Contact is called.
Delete:
Delete a picture or pictures.
Edit:
Edit a picture or pictures.
Play Slide Show: View all pictures as a slide show
Folders:
View pictures stored in other folders on the phone.
Options:
Select different views options of pictures stored on the phone.
15.3 Preview function
Select one picture from the list and press the LSK to preview it on the
screen.
Now press the LSK to send this picture to other devices. If you press
the RSK you can:
Zoom:
Play slide show:
Use as Home screen:
Beam Picture:
Edit:
Save:
Properties:
Options:
Zoom in or out to view the picture more closely.
View all pictures as a slide show.
Set pictures as wallpaper on the Home screen.
Send pictures to other devices by means of
Screen Shot 15.3
wireless infrared.
Edit pictures stored on the device.
Save pictures.
View picture properties like file name, size, etc.
Select different views options of pictures stored on the phone.
16. Accessories
16.1 Calculator
The Calculator feature allows simple arithmetic, including addition,
subtraction, multiplication, and division.
From the Calculator screen, enter digits with the keypad, repeatedly
press #, or move navigation keys to select the operators you desire.
Press * to enter a decimal point. Press Back or the LSK (Clear) to
clear the entry or result.
16.2 Download agent
Screen Shot 16.1
The Download Agent allows easy access to the status of files being downloaded from a network.
16.3 IME_Setting
The IME_Setting allows alteration of various properties for input methods used on your phone.
16.4 Modem link
When your phone has been connected to a PC, this feature turns your phone into an external modem,
enabling wireless net surfing on the PC.
16.4.1 Using Beam
Install infrared Modem driver: Select IrCOMM from Connection options in Modem Link, and then press
the RSK to activate it. Aim the infrared interface on you phone toward that of the PC. The Windows OS will
automatically search for the proper driver to install.
After installation is finished, one new modem appears in “Phone and Modem options” on the Control Panel,
which indicates that the IrModem driver has been correctly installed.
Approach dialing to use infrared modem connection: Select IrCOMM from the Connection options in
Modem connection and press the RSK to activate it. Aim the infrared interface on your phone to that of
PC, and dial to connect to the Internet from the PC.
Note: Each time you dial, you will need to activate the Modem for it to connect normally.
16.4.2 Using USB connection
Install USB modem driver to PC: From the Connection screen,
select Modem Connection > USB to activate the setting, then connect
phone to PC with USB cable and the Windows OS will automatically
search for the correct driver to install.
After installation is complete, one new modem appears in Phone and
Modem options on Control Panel. This indicates that the USB Modem
driver has been correctly installed.
Approach to dialing to use USB Modem connection: From the
Connection screen, select Modem Connection > USB, then press the
RSK to activate it. Connect the phone to PC with the USB cable, run
USB Modem application, enter CMNET in APN and click DIAL. The PC
will automatically connect to Internet.
Screen Shot 16.4.2b
Screen Shot 16.4.2a
17. Camera
17.1 Cautions in using Camera
• The camera included with your phone is produced and assembled with superior and high precision
technologies. However, you should pay particular care when shooting pictures in dimly lit areas to
avoid the amount of impurities (e.g., white lines, bright dots, dim dots, etc.).
• Fingerprints, debris or oil present on the lens may result in difficulties in focusing or obscurities in
picture quality. Before taking pictures, clean the lens with a lens tissue for optimal results.
• Exposure to high temperatures may result in extremely poor quality picture output.
• Exposure to sunlight may change colors of the built-in color filter which may lead to poor color quality
picture output.
• Excess motion while focusing may result in poor quality picture output.
• Do not aim directly into the sun or light source to avoid poor quality picture output.
• Use caution when taking pictures of copyrighted or restricted materials. Even though some pictures are
purely for personal use, laws with regard to photo reproduction may protect entertainment events and
similar scenarios. When in doubt, ask or look for posted signage.
• Use caution to protect others’ privacy while shooting pictures with your phone.
17.2 Shooting Photos
Enter the Camera mode by pressing the Camera key or selecting
Camera from the main Menu. Select Capture or press the Camera key
once more to shoot the picture in the frame. The captured picture will
be saved automatically by the system.
17.3 Shooting a video
This phone supports video recording. You need to change to its
shooting module when you prepare to shoot a video.
·Press RSK on preview screen, Choose Video from Mode in Menu to
switch to video mode. Now press OK key or shoot key to start shooting.
·Total length of video is determined by the capacity of memory.
Screen Shot 17.2
17.4 Where photos and video files are stored
By default, all photos and video files taken are saved to the phone. However, to ensure that there is always
enough space left for the system to run other applications, we suggest you save photos and videos to your
T-FLASH card.
Perform the following to change the store position:
• First, be sure that a T-FLASH card has been inserted into the phone.
• In the preview screen, click Menu > Settings > General.
• In the Store Position, change to Storage card.
17.5 Menu
From the Preview screen, press the RSK to engage the popup menu
where you can set various aspects of the camera options.
Mode:
Zoom:
Environment:
Settings:
Album:
About:
Exit:
Set camera mode.
Select different levels of lens focus.
There are several different environments to choose
from to obtain the best effect of the viewfinder.
Set attributes and parameters.
View pictures and videos.
View the camera version.
Exit from camera feature.
Screen Shot 17.5
18. Explorer
This feature enables you to manage system files. Please do not modify or delete original system files,
otherwise, the system may not operate properly.
19. JAVA
This phone supports JAVA applications.
Select Java from the Start menu.
By default, no Java application has been pre-installed on your phone.
You need to install new Java MIDlets by downloading applications (with
file extensions as jar, or jad) from the Internet.
After you have downloaded MIDlets from the Internet, follow the onscreen instructions to install.
All JAVA applications installed on this phone will be displayed on the
Java screen. Highlight the desired Java program and press OK to
launch the program.
Screen Shot 19
20. Pocket MSN
20.1 MSN Messenger
MSN Messenger is an instant message-receiving/sending system
developed by Microsoft®. With MSN Messenger, you can freely chat
with a single user or a group of friends. You will, however, need to apply
for an account at MSN, Hotmail, or Yahoo to use MSN Messenger.
20.1.1 Logging into MSN Messenger
Before you log in to use MSN Messenger, you must setup the MSN
account and password.
Screen Shot 20.1
On the MSN Sign In screen, press the LSK to sign in, then enter Sign
In screen (see screen shot 20.1.1).
After entering your E-Mail address and password on this screen, press
the LSK to log in.
20.1.2 Sending messages
After logging onto MSN, select a recipient to send messages from your
Contacts list.
Screen Shot 20.1.1
20.1.3 Ending a chat
Choose End chat from the Menu to end current chat session.
20.1.4 Invite a contact to participate in a chat
You can invite others to chat with you while a chat session is currently in progress. Select Invite from the
Menu, press Select once you have highlighted the contact to bring him into the current chat session.
20.1.5 Blocking or canceling block against a contact
Sometimes it is desired to block a certain contact on your list. This will disable him from viewing your
online status or sending you an instant message.
From the Contact list, highlight the contact you want to block, then choose Block from the Menu. Repeat
these steps to block other contacts or select Cancel block to disable the blocking feature.
20.1.6 Deleting a contact
From the Contact list, highlight the contact you want to delete, and then select Delete from the Menu to
delete the contact from the list.
20.1.7 Changing your status
To change your online status, highlight your ID from the Contact list and press OK. A Status option list will
appear where you can select the appropriate status and press OK to modify your status.
Note: Your status can only be changed when you are logged in to Messenger.
20.1.8 Changing your ID
Highlight your ID in the Contact list, click Menu > Options to modify your sign-in name with another
account.
20.1.9 Signing out
From the Contact list, click Menu > Sign out. You will be prompted to confirm. Press OK to complete the
operation.
20.2 Hotmail
Using Hotmail, you can create or check your online web mail. To edit or send E-Mail, please refer to
related instructions for E-Mail in the mail system options.
20.3 MSN Mobile homepage
It will soon link to the homepage of MSN Mobile after entering this item.
21. Speed dial
Speed dialing is a convenient feature managed from this menu. To create a Speed Dial for your Contact
list, please read Sec 9.5 Creating speed dial to a contact.
H
H
Highlight the desired number from your Contact list and select Run from the Menu to dial.
22. Common problems and solutions
If you encountered problems while operating your device, the following troubleshooting tips may help
resolve the issue. If the problem persists, please contact your dealer or service operator.
Common
problems
Reasons
Network service operator does not
Fails to connect
provide such service, or you have
to network
not subscribed to the service.
using Internet
Incorrect configuration of Internet
Explorer
Explorer
SIM card is warped or damaged.
SIM card is not properly installed.
SIM card error
Poor signals
Fail to power on
Fail to make a
call
Fail to connect
to network
Metal surface of SIM card is
unclean.
Using your phone in places that
may result in a poor signal of your
phone, like surroundings of high
buildings, or in a basement where
radio waves become unreachable.
Using phone during the period of
busy communication, which may
results in a channel jam and
inability of communicating.
Using an excessively low battery.
Call barring service enabled.
SIM card invalid
Out of GSM service area
Poor signals
Fail to charge
The battery voltage in use is not in
the range specified by charger.
Using a non-standard charger
Improperly connected to the main
power.
Solutions
Consult network operator for
information about how to subscribe a
service.
Refer to Section. Getting
connected.
Consult your network operator.
Check SIM card. Change to a new
one if necessary.
Clean the metal surface with a clean
cloth or tissue.
Receive calls in places where a good
signal is available.
Avoid being within such a situation or
similar.
Charge it, or replace it with a new
one.
Disable it in Settings > Phone
Consult your network operator
Relocate your phone into service
area of network operator.
Relocate your phone to places with
strong signals, then try again.
Use batteries with proper voltage
range.
Use a charger designed for this type
of phone.
Check the connection in between.
23. Maintenance Guide
Should you experience problems using this phone, contact the dealer where it was purchased or refer to
the repair center specified. If the phone needs repair, you may send it to the local repair center (see the
certificate of three guarantees provided with the phone for specific repair network). If there is no local
repair center specified, delivery your phone and copy of purchasing invoice to the dealer for mailing of EMS.
Your phone is a product of superior design and artisanship and should be treated with care. The following
guidelines may help you maintain the warranty obligations with regard to the terms of Maintenance Clauses,
which can extend the useful life of your device.
Keep the phone and all its parts and accessories away from children.
Keep the phone dry. Precipitation, humidity, and liquids may contain minerals that can corrode electronic
circuits.
Do not use or store the phone in dusty areas as knock-down components may be damaged.
Do not store the phone in extreme temperatures. High temperatures can shorten the life of electronic
devices, damage batteries and warp or melt certain plastics components. Cold temperatures may result in
moisture forming inside the phone when temperatures rise, which may damage the electronic circuits.
Do not attempt to disassemble the phone’s casing. Nonprofessional handling of the phone may cause
damage and void the warranty.
Do not drop, knock or shake the phone to avoid damage to the internal circuitry.
Do not apply or clean the device with chemical products, detergents or scouring products.
Do not use paints on or in the phone. Blockage of sundries inside the knock-down components may affect
the normal operation of the device.
The abovementioned guidelines are applicable to your phone, batteries, charger and accessories. If you
experience difficulties with any of these components, contact the nearest qualified repair institution.