1
USE
The Life of the Kitchen?
AND
CARE
MANUAL
@
EPICURE
® RANGE
For Use With Models:
EGR30, ERD30, ERD60
Style
varies
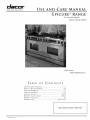
Model ERD60 Shown
TABLE
IMPORTANT
GETTING
OF
SAFETY INSTRUCTIONS
TO
KNOW YOURRANGE
SETTING UP YOUR
CONTENTS
1-3
4-5
6
7-1 3
14-1 9
20-21
22
.............................................
............................................
RANGE .........................................................
OPERATING
YOURRANGE
.....................................................
CAREANDCLEANING
.......................................................
BEFORE
YOUCALL FOR SERVICE ..........................................
WARRANTY
AND SERVICE ........................................................
WARRANTY
CARD ......................................................
BACK
COVER
Place Serial
Number
Label Here
To Our Valued Customer:
Congratulations
performance
on your purchase of the very latest in Dacor * products! Our unique combination of features, style and
make us The Life of the Kitchen =, and a great addition to your home.
In order to familiarize yourself with the controls, functions, and full potential of your new Distinctive Appliance, we
suggest that you thoroughly read this use and care manual, beginning with the Important
Safety Instructions
section.
All Dacor appliances are designed and manufactured with quality and pride, while working within the framework of our
company value. Should you ever experience a problem with your product, please first check the Before You Call for
Service section of this manual for guidance. It provides useful suggestions and remedies prior to calling for service.
Valuable customer input helps us to continuously
improve our products and services, so please feel free to contact
our Customer Service Team for assistance with any of your product support needs.
Dacor Customer Service Team
1440 Bridge Gate Drive
Diamond Bar, CA 91765
Telephone:
Fax:
(800) 793-0093
Hours of Operation:
Monday through Friday
6:00 A.M. to 5:00 P.M. Pacific Time
Web Site:
www.Dacor.com
(626) 403-3130
Thank you for choosing Dacor for your home. We are a company built by families for families and we are dedicated
to serving yours.
We are confident that your new Dacor product will deliver a high level of performance and
enjoyment for many years to come.
Sincerely,
The Dacor Customer Service Team
© 2008
bacor,
all rights
reser\,,_,4
Important
Installer:
ance.
Leave these instructions
Safety
with the appli-
Consumer:
Read this use and care manual completely before using this appliance.
Save it for future
reference. It contains important
use and care information. Keep your sales receipt or canceled check
in a safe place. Proof of original purchase date is
required for warranty service.
If you have any questions
Dacor Customer
call:
Service
(800) 793-0093
(U.S.A. and Canada)
Monday -- Friday 6:00 A.M. to 5:00 P.M. Pacific Time
Web site: www.Dacor.com
Have the complete model and serial number from
the product data label ready. To expose the label,
open the oven door and remove the inlet cooling
grill. Record these numbers below for easy access.
Instructions
Important Information About
Safety Instructions
The Important
Safety Instructions
and warnings in this manual are not meant to cover all possible problems and situations
that can occur. Use
common sense and caution when installing, maintaining or operating this or any other appliance.
Always contact the Dacor Customer Service Team
about problems or situations
that you do not understand.
Safety Symbols and Labels
Immediate hazards that WILL result in severe personal
injury or death.
Model Number
Serial Number
Hazards or unsafe practices that COULD result in severe
personal injury or death.
Date of Purchase
For service
page 22.
and warranty
information,
see
Since Dacor continualy improves the quality and
performance
of our products,
we may need to make
changes to the appliance without updating this
manual.
Hazards or unsafe practices that COULD result in minor
personal injury or property damage.
IMPORTANT: If you smell gas:
• Do not use or light any appliance.
• Do not touch any electrical switch or use any electrical devices including the telephone in your building.
• From a neighbor's phone, immediately call the gas supplier. Follow the gas supplier's instructions.
• If you cannot contact the gas supplier, call the fire department.
IMPORTANT: To avoid the possibility of explosion or fire, do not store or use combustible, flammable or explosive
vapors and liquids (such as gasoline) inside or in the vicinity of this or any other appliance. Also keep items that could
explode, such as aerosol cans away from the range. Do not store flammable or explosive materials in adjacent cabinets
or areas.
NEVER use this appliance as a space heater to heat or
warm the room. Doing so may result in carbon monoxide
poisoning and overheating of the appliance.
NEVER block or cover any slots, holes, or passages
anywhere inside the oven or on the outside of the range.
Doing so blocks airflow through the oven and cooktop
and may cause carbon monoxide poisoning or fire. See
the Getting to Know Your Range section for the location
of the various air holes (slots).
The burning of gas cooking fuel generates some
by-products that are on the list of substances which
are known by the State of California to cause cancer or
reproductive harm. California law requires businesses
to warn customers of potential exposure to such
substances. To minimize exposure to these substances,
always operate this unit according to the use and care
manual, ensuring you provide good ventilation when
cooking with gas.
READ AND SAVE
THESE INSTRUCTIONS
General Safety Precautions
To reduce the risk of fire, electric shock,
3recautions,
including the following:
serious
injury
• If you receive a damaged producL immediately contact
your dealer or builder. Do not install or use a damaged
appliance.
• Make sure that the range has been properly installed
and grounded by a qualified installer according to
the accompanying installation instructions. Have the
installer show you the location of the gas shut off valve
and the fuse or junction box so that you know where
and how to turn off the gas supply and power to the
range.
• Do not install, repair or replace any part of the range
unless specifically recommended in the literature
accompanying it. A q ualified service technician should
perform all other service.
• Before performing any type of service, make sure that
the gas supply and electrical power to the range is
turned off.
• Only use this range for cooking tasks expected of a
home appliance as outlined in this manual. This range
is not intended for commercial use.
• DO NOT TOUCH THE SURFACES OF THE RANGE
DURING OR IMMEDIATELYAFTER
USE. After use,
make sure these surfaces have had sufficient time to
cool before touching them.
• Make sure individuals who use the range are able to
operate it properly.
• Never allow anyone, including children to sit, stand or
climb on any part of the range. Doing so may cause
damage, serious injury or death. Do not leave children
alone or unattended in the area around the range. Do
not allow children to play with the controls, pull on the
handle or touch other parts of the range.
• Do not store items of interest to children on top of or
above the range. Children could be burned or injured
while climbing on the appliance.
• Do not attempt to use this appliance in the event of a
power failure. If a power failure occurs while operating
the cooktop, turn all control knobs to the OFF position.
• Do not tamper with the controls. Do not adjust or alter
any part of the range unless specifically instructed to
do so in these instructions.
• Do not cover the burners and grates with anything
except properly selected utensils. Decorative covers
may cause a fire hazard or damage to the cooktop if a
burner is accidentally turned on with the cover in place.
• Do not heat unopened food containers such as baby
food jars and cans. Pressure build up may cause the
container to burst and cause injury.
or death
when
using your
range,
follow
basic safety
• Keep flammable items, such as paper, cardboard
plastic and cloth away from the burners and other
hot surfaces. Do not allow pot holders to touch hot
surfaces or gas burners.
• Do not wear loose or hanging apparel while using
the range. Do not allow clothing to come into contact
with the range and surrounding areas during and
immediately after use.
• Do not use towels or bulky cloth as pot holders.
• Use only dry pot holders when removing food and
cookware from the cooktop or oven. Wet pot holders
can cause steam burns.
• Do not hang flammable or heat sensitive objects over
the range.
• if the range is near a window, do not use long curtains
as window treatment. The curtains could blow over the
cooktop and create a fire hazard.
• To avoid the possibility of fire, do not leave the range
unattended when in use.
• Clean the range thoroughly before operating it for the
first time.
• Clean and maintain the range regularly as instructed in
the Care and Cleaning section of this manual. Keep
the entire range, ventilation filters and range hoods
free of grease that could catch fire.
• Use cookware only for its intended purpose. Check
the manufacture's recommendations before use to
determine if a utensil is suitable for use with a range.
Certain types of glass, ceramic and earthenware
are not suitable for use with a range. Personal injury
or damage may result from the improper use of
cookware.
• Select cookware carefully. Use utensils of the proper
size material and construction for the particular type
of cooking being done. Utensils need to be large
enough to contain the desired quantity of food without
boil-overs or spill-overs. Choose pans with easy to
hold handles that will stay cool while cooking. Do not
use utensils with loose handles. Avoid using pans that
are too heavy to lift safely.
• Use extreme caution if adding water to food on a hot
cooktop or oven. The steam can cause serious burns
or scalds.
• Make sure that all the cooktop parts are dry before
lighting a burner.
• Turn the knobs to the OFF position prior to removing
them from the valve stems.
!ii !!ill
rrl
• Do not use the oven for storage
• Do not allow acids (citrus juices, tomato sauces, etc.)
to remain on the range'-s surfaces. The porcelain finish
may stain.
• Exercise caution when opening the oven door. Let hot
air or steam escape before looking or reaching into the
oven.
• Never use the cooktop surface as a cutting board.
• The cooktop should never be operated without the
knobs or trim rings in place.
• Do not try to remove heavy spills with a sharp object
such as a knife or metal spatula. Sharp objects may
scratch the range's surfaces.
• For your safety, do not use the oven to cook without
the convection filter(s) installed. When the filter is not
installed, the spinning fan blades at the back of the
oven are exposed.
• Do not expose the knobs or trim rings to direct flame,
hot utensils or other sources of heat.
• Do not line the oven with aluminum foil or other
• Do not allow food to sit in the oven for more than one
materials. These items can melt or burn up during
self-cleaning and cause permanent damage to the
oven.
hour before or after cooking. Eating spoiled food can
result in food poisoning.
• To prevent damage, remove the meat probe from the
oven when it is not being used.
• Non-stick coatings, when heated, can be harmful to
birds. Remove birds to a separate, well-ventilated
room during cooking.
• When deep fat frying:
0 Be certain that the pan is large enough to contain
the desired volume of food without overflow caused
by the bubbling of the fat. Never leave a deep fat
fryer unattended.
0 Avoid frying moist or frost-covered foods. Foods
with high water content may cause spattering or
spilling of the hot fat.
0 Heat fat slowly, and stir together any combination
of oils and fats prior to applying heat. Utilize a deep
fat frying thermometer to avoid heating the fat to
temperatures above the flash point.
TO REDUCE THE RISK OF INJURY TO PERSONS IN
THE EVENT OF A RANGE TOP GREASE FIRE:
a. SMOTHER FLAMES with a close-fitting lid, cookie
sheet or metal tray, then turn off the burner. BE
CAREFUL TO PREVENT BURNS. If the flames do not
go out immediately, EVACUATE AND CALL THE FIRE
DEPARTMENT.
b. NEVER PICK UP A FLAMING PAN - you may be
burned.
c. DO NOT USE WATER, including wet dish cloths or
towels - a violent steam explosion may result.
d. Use a fire extinguisher
ONLY if:
0 You have a Class ABC extinguisher, and you
already know how to operate it.
0 The fire is small and contained in the area where it
started.
The fire department is being called.
0 You can fight the fire with your back to an exit.
3
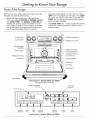
Parts of the Range
Before using your range, become familiar
features and control panel layout.
•
with the
Below the oven mode touch keys are three
touch keys labeled CANCEL • SECURE, LIGHT
and COOK TIME. The CANCEL • SECURE key
enables the user to cancel the selection of an
oven mode or Delay Timed program, or disable
the control panel by pressing and holding the
key for approximately
three (3) seconds.
•
Once the control panel is in the "secure"
mode,
"OFF" will be displayed on the clock. The LIGHT
key turns the interior oven light on and off. The
LIGHT key will remain functional
if the control
panel has been disabled.
•
The COOK TIME key is used to select the length
of time for a cooking process in delay timed
cooking mode.
L_
Control Panel
Self-Clean Instructions
EABCAZE_3E_Z3
Cool Air Slots
E_3EEIE_5_
Self-Clean Lock Latch
CCCCCCCCCCCCC)
Infrared Ceramic
Gas Broiler
Halogen Oven Light
Convection Element
Rack Support
m
u
Temperature Sensor
Convection Fan
Halogen Oven Light ........
I
Oven Rack
!
I
I
I'_1
I
I
J"
I
I
I
I
J
Convection Baffle
Bake Burner
Door Hinge
Door Gasket
Door Handle
Oven Features - Models ERD30 and ERD60
(Convection filter not shown)
Time and Temperature
Oven Mode
Electronic
Clock _
Set Keys X
BAKE
gZS 2
/
Indicators
ZZZ °
T_P
II
_
!
!
IOANOEL.SEOUREII
',GHTII COOKT,ME
It, lIIciKIISTO ME
MINUTE
TIMER #1
CLOCK
SET
STOP
TIME
MINUTE
TIMER #2
t
CANCEL
SECURE
Control Panel - Models ERD30 and ERD60
t
t
OVEN
LIGHT
COOK
TIME
IMPORTANT:
Clock functions are selected by pressing the
touch keys located below the clock display and
oven mode keys. Oven functions are chosen by
pressing the touch key for the desired mode.
Once a clock or oven function has been chosen,
a description
of the selection will flash in the
clock display area.
After choosing a clock function or oven mode, you
have six seconds to perform the next programming
step. If the next step is not completed
within six
(6) seconds, the program selection displayed on the
clock will disappear. Should this occur, just repeat
the initial function selection.
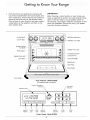
Control Panel
Cool Air Slots
Self-Clean
Instructions
Self-Clean
Lock Latch
Infrared Ceramic
Gas Broiler
Halogen
Oven Light
Rack Suppo_
Temperature
Halogen
Oven LightOven Rack
Sensor
Convection
Fan
Convection
Baffle
Bake Burner
Door Hinge
Door Gasket
Door Handle
Oven Features - Model EGR30
(Convection filter not shown)
Time and Temperature
Indicators
Electronic Clock
Set Keys X
Oven Mode
T P
!I
I
IoANoEL.sEooREll
,,GHT
II COOK
T,ME
I
t t t
L°K
IISTOFII,ME
II T'i2 I
MINUTE
TIMER #1
CLOCK
SET
STOP
TIME
MINUTE
TIMER #2
CANCEL
SECURE
Control Panel - Model EGR30
5
OVEN
LIGHT
COOK
TIME
Setting the Clock
ForProper Installation"
1.
Follow these two steps to set the correct
time of day:
.
1.
Press the CLOCK touch
flash on the display,
key. The time of day will
2.
Press the + or - key until the correct
day is displayed and release.
time
of
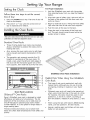
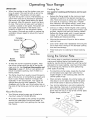
Installing the Oven Racks
Hold the GlideRack oven rack with the guides
fully extended away from you (see the diagram
below).
Align both sets of safety clips (right and left) on
the back of the guides with the oven rack supports as shown.
3.
Begin to slide the rack in, lifting the front safety
clips over the front of the oven rack supports.
4.
Push the rack all the way to the back.
s. Grasp
the rack in the center of the front and
pull. The rack should come forward while the
guides remain in place.
potholders to install and adjust the racks.
Standard Oven Racks
•
Three chrome-plated
oven racks are provided.
Always remember
to position the racks prior to
heating the oven.
•
Also, remove the oven racks prior to self-cleaning to prevent permanent
discoloration
of the
racks.
The porcelain rack supports provide five (5)
heights for positioning
of the oven racks. To
install a rack, align the left and right edges of
the rack with the horizontal
guide rails of the
rack supports, then slide the rack into the oven.
r_l
_o
GlideRack
-h
IIiw
_
iiI
--4
3
,_u
............
Oven
Gliderack
TM
Oven
Rack Installation
5
Helpful Hints When Using Your GlideRack
Oven Rack:
This type of rack works particularly
well with
heavier items, although you can use it during
any baking, broiling or roasting in your Dacor
oven.
I_'L
Gliderack oven racks will need to be spaced out
when using more than one in the oven at a time.
For instance, the racks should be used on rack
positions 1, 3 and 5 or 2 and 4, counting up
from the bottom, instead of using racks 2, 3 and
4.
Rack Locations
Oven Racks
Dacor's GlideRack oven rack is designed to install
effortlessly
and glide at a full extension.
The full
extension of the rack allows you to slide pizza on
and off the Dacor's optional pizza stone (model
number ABS20). ft is also great for large roasts in
large roasting pans.
The easy-slide action allows you to baste more
easily and check food temperatures
more safely and
quickly.
•
When using the rack with Dacor's ABS20 baking
stone, use rack position 1 for best results.
•
Heavier roasting pans and dishes will also cook
better on rack position 1.
About the Various Cooking Modes
Convection
Standard Bake (Selected Models Only)
the this
lower
element provides
the heat. Asmode,
in
In
combination
convection-radiant
Pure Convection
mode, the convection
fan
and baffle combine to circulate heated air evenly
throughout
the oven chamber. Temperatures
may be
set from 135°F to 555°F in 5°F increments.
Use this
[_
555°F
element
n standardprovides
bake conventional
mode, the bottom
bakingheat
heat.
Temperatures
may be set from 135°F to
in 5°F increments.
Use standard bake for
single
rack baking
mode for single
and roasting.
and roasting.
Standard Broil
TM
(ERD models only)
rack baking
Basic Oven Operation
available
PuretheConvection
T". Pure
our new today,
oven has
best cooking
system
Convection
is a total system approach to
cooking. Pure Convection
allows multi-rack
cooking while achieving even results from one rack to
another.
Follow these steps to operate
modes:
In Pure Convection
mode a third heating element,
encircling the convection fan, is located in the rear
of the oven chamber behind a baffle.
The convection
fan draws air from
chamber, then forces it across the
heating element. The heated air is
into the oven chamber through the
baffle.
•
multiple
The oven features an automatic
preiheat cycle that
rapidly brings the oven chamber up to temperature.
Simply by choosing a cooking mode and setting a
temperature,
the oven will automatically
perform
the pre-heat function.
Pre-heat operates in standard
bake, Pure Convection
and convection
bake modes.
There is no pre-heat cycle for the broil mode.
i_
•
rack baking,
Pre-Heat Cycle
The
heat infrared
in Broil mode.
ceramic The
gas broil
broiler
temperature
supplies the
is adjustable
from 135°F to the HI setting
(equivalent
to 555°F) for greater cooking flexibility.
Broiling is alw__[WAy_
performed
with the door closed.
Pure Convection
Bake
the oven
hot convection
directed back
convection
The baffle distributes
the heated air evenly to
ensure uniform results. It also separates the
food from the heat source and channels the air
evenly into the oven eliminating
any hot or cool
spots.
The convection
filter, in the back of the oven,
eliminates the transference
of flavors when
cooking entire meals and keeps the oven
cleaner.
the oven rack(s)
the various
oven
1.
Position
at the proper
height(s).
2.
Press the touch key for the mode of your choice.
The oven will beep once, the selected cooking
mode will flash, and ....
will be displayed.
3.
Press either the + or - key. The default
ature will be displayed.
4.
To adjust the default temperature
for baking,
press and hold the TIME • TEMP key. (Press
+ key to increase the temperature
setting, - to
decrease).
5.
"PRE" and "ON" and the selected cooking
mode will appear in the clock display. The oven
will begin to heat. If in a convection
mode,
the convection
fan will turn on. Also, the clock
display will change from the desired cooking
temperature
to the actual oven temperature,
starting with 135°1:. The temperature
display
will increase in 5°F increments
until the desired
temperature
is reached. The cooling fan will turn
on when the oven temperature
reaches 200°E
temper-
IMPORTANT:
Do not place food inside the oven
until the pre-heat cycle is complete (there is no preheat cycle in broil mode).
Continued,,,
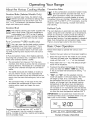
AIR FLOW
-"-'-'°
D._--IU
BAKE
l _-I.I-I I-I
_
.UU
ON
Temperatures
may be set from 135 ° to 555°F
in 5°F increments.
Use this mode for single rack
baking, multiple rack baking, roasting and preparation of complete meals.
I TIMER1
II
CLOCK
IIsToPTIMEll
TIMER2
Example of Display in Bake Mode
7
I
Basic Oven Operation
6.
Tips for All Baking Modes
(Cont.)
When the desired temperature
is attained, the
Preheat cycle is complete.
The clock will beep
once and "PRE" and "ON" will disappear from
the display. (From this time forward, the "ON"
display will cycle on and off with the heating elements). Carefully place the food onto the desired
rack(s) within the preheated oven.
7.
Dacor recommends
that you set the minute
timer to time the cooking process.
8.
When the time expires and/or the food is done
cooking, press the CANCEL
• SECURE
key to
turn off the oven.
•
Do not open the oven door frequently
during
baking. Look through the door window to check
the progress of baking whenever
possible.
•
Use the minute
•
Wait until the shortest recommended
baking
time before checking food. For baked goods, a
wooden pick placed in the center should come
clean when the food is done.
Bakeware Tips"
•
Cakes, quick breads, muffins and cookies should
be baked in shiny, reflective pans for light,
golden crusts.
•
Medium gauge aluminum
sheets with low sides
should be used when preparing
cookies, biscuits
and cream puffs.
•
Bake most frozen foods in their original foil containers placed on a flat cookie sheet. Follow the
package recommendations.
•
When using glass bakeware,
temperature
by 25°F, except
or yeast breads.
•
Follow the standard
and yeast breads.
Typically you can reduce standard temperature
by 25°F and cook for 10% less time. Baked
goods will have golden-brown
crusts with flaky
textures,
and meats will have crispy exteriors
with succulent juices sealed inside.
•
Avoid the use of old, darkened
•
Warped, dented, stainless steel and tin-coated
pans heat unevenly and will not give uniform
baking results.
To convert conventional
bake recipes to convection recipes, reduce temperature
by 25°F and
the cooking time by approximately
10%.
Tips for Pan Placement:
Convection
•
functions.
Use the pan size and type recommended
recipe to ensure best results.
There are two baking
convection
bake.
•
baking
Measure ingredients
carefully and follow tested
recipes for best baking results.
Baking Tips
•
to time
•
NOTE: Allowing the oven to completely
pre-heat
prior to placing food in the oven will avoid excessive
browning of the food. After the oven signals that
pre-heat is complete,
allow 3-5 more minutes for
the heat patterns to normalize
in the oven and then
place your food inside.
•
timers
modes:
Pure Convection
and
Bake Tips
As a general rule, a convection
mode will allow
preparation
of most foods at reduced temperatures for shorter periods of time, while also
producing superior results.
Some recipes, especially those that are homemade, may require adjustment
and testing when
converting
from standard to convection
modes.
If unsure how to convert a recipe, begin by preparing the recipe in bake mode. After achieving
acceptable results this way, follow the convection
guidelines listed. If the food is not prepared to
your satisfaction
during this first convection
trial,
adjust only one recipe variable at a time (such
as cooking time, rack position or temperature)
and repeat the convection
test. If necessary,
continue adjusting
one recipe variable at a time
until you achieve satisfactory
results.
recipe
by the
reduce the recipe
when baking pies
baking
time for pies
pans.
•
Place pans carefully on the oven racks. Turn
pans on the racks so that the long sides run left
to right, parallel to the door.
•
Adjustments
to recipe times and temperatures
need to be made when baking at high altitudes.
Consult a cookbook on high-altitude
cooking
or contact the Home Economics Department
at
your state university
for specific recommendations.
NOTE: For common baking problems refer to your
Dacor cookbook.
Your complimentary
cookbook was
packed with your range. If you did not receive your
cookbook,
please contact Dacor at (800) 793-0093
or at www.Dacor.com.
Multiple Rack Baking
•
When using a meat thermometer,
insert the
probe halfway into the center of the thickest
portion of the meat. For poultry, insert the thermometer probe between the body and leg into
the thickest part of the inner thigh. To ensure
an accurate reading, the tip of the probe should
not touch bone, fat or gristle. Check the meat
temperature
2/3 of the way through the recommended roasting time. After reading the meat
thermometer
once, insert it 1/2 inch further into
the meat, then take a second reading. If the
second temperature
registers below the first,
continue cooking the meat.
•
Remove meats from the oven when the thermometer registers 5°F to 10°F below the
desired temperature.
The meat will continue to
cook after removal.
•
Allow
The uniform air circulation provided by convection
cooking enables more oven capacity to be utilized.
Many foods, such as pizzas, cakes, cookies, biscuits,
muffins, rolls and frozen convenience
foods can be
successfully
prepared on either two or three racks at
the same time. Also, complete meals can be prepared by using multiple racks. See below for specific
recommendations.
Follow the steps in the Basic Oven Operation
section, to manually operate the oven, or refer to the
Delay Timed Cooking section below for automatic
operation.
MULTIPLE
Typically,
positions
RACK
BAKING
TIPS
when baking on two racks, use rack
1 and 4 or 2 and 4.
When adapting a single rack recipe to multiple
rack baking, it may be necessary to add to the
baking time. This is due to the extra amount of
food in the oven.
Roasting Tips
Roasting is a dry heat process. All baking modes can
be used to successfully
roast in your oven. However,
the convection
modes are recommended
to produce
meats that are deliciously
seared on the outside and
succulently juicy on the inside.
•
•
•
to stand
15 to 20 minutes
in order to make carving
after
easier.
•
If using a cooking bag, foil tent or other cover,
use convection
bake mode. Adjust the recipe
time and temperature
as well.
•
Roasting times always vary according to the
size, shape and quality of meats and poultry.
Less tender cuts of meat are best prepared in
bake mode and may require moist cooking techniques. Follow your favorite cookbook recipes.
Broiling Tips
Foods that are exceptional,
when prepared in a
convection
mode, include: beef, pork, ham, lamb,
turkey, chicken and cornish hens.
•
roasts
roasting
Broiling is a quick and flavorful way to prepare many
foods, including steaks, chicken, chops, hamburgers
and fish. Broiling is performed
with the oven door
completely
shut.
To convert conventional
bake recipes to convection recipes, reduce the temperature
by 25°F
and the cooking time by approximately
10%.
It is normal and necessary for some smoke to be
present to give the food a broiled flavor. The broil
temperature
may be adjusted in 5°F increments
from 135°F up to the maximum
setting of "HI".
The "HI"
setting is equivalent
to 555°F.
When using a roasting rack, always roast meats
fat side up in a shallow pan. Always use a pan
that fits the size of the food being prepared. The
broiler pan and grill that come with the oven can
be used in most cases. No basting is required
when the fat side is up. Do not add water to the
pan. It will cause a steamed effect.
Follow these steps to operate
broil mode:
Poultry should be placed breast side up on a rack
in a shallow pan that fits the size of the food.
Again, the broiler pan and grill that come with
the oven can be used. Brush poultry with melted
butter, margarine
or oil before and during roasting.
For convection
roasting, do not use pans with
tall sides. They interfere with the circulation
of
heated air over the food.
Reduce spatter by lining the bottom of the roasting pan with lightly crushed aluminum
foil.
the oven in standard
1.
Close the door tightly.
2.
Press the BROIL
3.
Press the TIME • TEMP + or - key and the
default temperature
setting "HI"
will be displayed.
4.
If a temperature
other than "HI"
is desired,
press the TIME • TEMP - key to reduce the
temperature.
Six seconds after setting the temperature, the "ON" indicator will light up in the
clock display, the broiler element will begin heating, and the cooling fan will turn on.
key.
Continued...
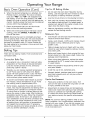
9
4.
Broiling Tips (Continued)
5.
Dacor recommends
that you set the minute
timer(s)
to time the broiling process.
6.
When the minute timer expires and/or the food
is cooked, press the CANCEL • SECURE key to
turn off the oven. The cooling fan will continue
to run for 30 to 45 minutes depending
upon the
length and temperature
of the broiling process.
from
• If cooking will not begin immediately, place only very
cold or frozen food into the oven. Most unfrozen foods
should never stand in the oven for more than two hours
before cooking begins.
Press the STOP TIME key, and "STOP"
appear in the clock display.
7.
Press the TIME • TEMP + key to enter the
time of day that you wish the oven to shut off.
"DELAY"
will be displayed.
8.
The oven will calculate
Delay Timed
-'°'-'° 5 H5
,_
OVEN STOP TIME
•
Remember that "COOK TIME" refers to the
length of the cooking cycle. It does not refer to
the start time.
•
The time required to pre-heat the oven must
be included in the cook time. Increase the cook
time about 8 to 12 minutes, depending
upon the
temperature
setting, to allow for pre-heat time.
•
Mode
Position oven rack(s)
at the proper
2.
Place the food onto the center
rack(s).
3.
Select the desired
Lure.
cooking
The broiler does not pre-heat in delay timed
mode, so you will not pre-maturely
brown foods.
NOTE = The gas broilers (ERD models only) are not
activated for pre-heat in the delay-time
cooking
mode, so pre-heat times are increased, but dishes
will not pre-maturely
brown.
To use Delay Timed Cooking:
1.
Tips
Do not use foods containing
baking powder or
yeast in delay timed cooking. These foods will
not rise properly.
I T'MER1
II cLocK
IIsToPT,MEII
T,MER2
Display in Delayed Timed Cooking
Cooking
•
,
BAKE
"START
"Hold"
mode, the oven temperature
will be
maintained
at 150°F for a period of two hours.
"Hold"
mode can be cancelled by pressing the
CANCEL • SECURE touch key. The cooling fan
will continue to run depending
upon the length
and temperature
of the cooking process.
Delay timed cooking allows you to start and finish
a cooking cycle automatically.
It is especially useful
for preparing
meals in advance or cooking while you
are at work or play. Delay timed cooking can only be
used with standard bake (ERD models only), convection bake or Pure Convection
modes. It will not
function in broil mode.
TIMED
the correct
will
TIME."
After the "COOK TIME" has expired,
the clock will beep three times, and "Hold"
will
be displayed. If cooking in a convection
mode,
the convection
fan will also turn off. While in
one hour after completion of the cooking cycle. When
the tern perature drops below 140°F, bacteria can
develop.
u
50 minutes.
6.
, Do not allow foods to remain in the oven more than
-i-i
to 11 hours,
The oven can be set to start now or later in the
day. To start cooking now, do not perform any
more programming
steps. After six seconds
"PRE',
"ON" and "TIMED"
will appear in the
clock display, and the oven will begin heating.
After the COOK TIME has expired, the clock will
beep three times, and "Hold"
will be displayed.
The cooling fan will continue to run, depending
upon the length and temperature
of the cooking
process.
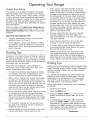
Delay Timed Cooking
• Avoid using foods that will spoil while waiting for the
cooking cycle to begin. Typical foods to avoid include
those containing eggs and dairy products, cream soups
and cooked or uncooked meats, poultry and fish.
5 minutes
5.
NOTE: For broiling and top grill tips refer to your
complimentary
Dacor cookbook.
DELAY
Press the COOK TIME key and "TIME"
will
appear in the clock display. Press the TIME •
TEMP + key to set the length of time that the
food will be cooked. The COOK TIME can be set
height(s).
of the oven
mode and tempera-
10
Minute Timers
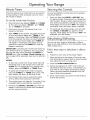
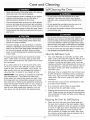
Securing the Controls
The clock features two timers that may be used for
timing cooking or other processes up to 11 hours,
50 minutes in length.
To avoid accidentally
the secure feature.
Press and hold the CANCEL • SECURE" key
for approximately
three seconds to disable the
control panel. Doing so allows cleaning the controls without accidentally
starting any functions.
Three beeps will sound and "OFF" will appear in
the display when the control panel is secured.
•
To re-activate
the control panel, push and hold
the CANCEL • SECURE key again for three
seconds. Three beeps will sound and "OFF" will
disappear from the display.
Press the touch key labeled TIMER 1 or TIMER
2. The clock will display "00=00",
and "TIMER
1", or "TIMER
2" will flash.
Press the + key until the desired
played on the clock.
.
.
time
is dis-
After TIMER I has expired, the clock will sound
off with one second beeps and "TIMER
1" will
appear in the display. After the TIMER 2 minute
timer has expired, the clock will sound alternating one and two second beeps and "TIMER
2"
will appear in the display. The beeper can be
silenced by pressing the TIMER key while the
beeper is sounding.
Dehydrating/Defrosting
You can use your range to dehydrate
or defrost
foods at low heat settings in Pure Convection
mode
(ERD models only).
IMPORTANT:
Canceling the minute timer does not
turn off the oven if it is operating.
You must manually shut the oven off by pressing the CANCEL •
SECURE key. (See the Delay Timed Cooking section on page 10 for automatic
oven turn on and turn
Follow these steps to dehydrate or defrost
foods"
1.
Position
2.
Place the food onto the center of the oven rack.
(For dehydrating,
prepare food as recommended
then place food onto a drying rack).
3.
Press the PURE CONVECTION
4.
Set the temperature
to 135°F. (the minimum
temperature
that can be set). To dehydrate
you
may have to use a higher temperature
setting.
Follow the recommended
temperature
for the
type of food being prepared.
5.
Dacor recommends
you set the minute
to time the process.
off).
NOTES"
1. To view the current time of day rather than the
remaining time on the minute timer, press the
CLOCK key. To change back to a minute timer
display, press the TIMER 1 or TIMER 2 key.
2.
To cancel the minute timer while in progress,
press the TIMER 1 or TIMER 2 key twice. The
clock display will return to the time of day.
3.
The minute timers may be used at the same
time as delay timed cooking or self-clean.
4.
The minute timers will beep for 2 minutes (if not
cancelled) before automatically
shutting off.
5.
Pressing the CANCEL • SECURE key when the
beeper is sounding will cancel both the beeper
and the cooking function.
the oven on activate
•
To use the minute timer function:
.
turning
11
an oven rack at the proper
height.
key.
timer(s)
Cooktop Operation
Lighting a Burner
• To avoid the chance of fire, explosion or carbon
monoxide poisoni ng, do not attempt to use your range
without the burners completely and properly assembled
(see page 17). The burner rings spread the flame
evenly around the outside of the burner. The burner
rings must be propedy seated for proper burner lighting
and operation.
• NEVER cover any slots or holes anywhere on the
range. Doing so blocks air flow through the range and
may cause carbon monoxide poisoning. Keep all the
slots clear of grease and grime.
• To avoid burns and scalding, always turn pan handles
to a position where they cannot be easily hit. Also,
handles should not extend over adjacent burners.
Always set utensils gently onto the grates and center
them so that they are well-balanced.
• In the interest of safety, always light the burner before
putting the cooking utensil on the grate. Turn the
burner knob to the off position before removing the
utensil. Always check the position of the control knobs
to make sure the range is off when you are finished
cooking.
• Do not drag cookware across the grates. Sliding may
damage the finish. Lift utensils to reposition them. Do
not drop them on the grate.
, Cookware with rough bottoms can cause permanent
damage to the coated surfaces on the grates.
• Do not turn the knob farther than the HIGH position
until lit. Doing so may result in a burst of flame that
could cause burns or damage to the surrounding area.
• To avoid burns or fire hazard, reduce the flame level
if it extends beyond the bottom of the utensil. A flame
that extends up the sides of the utensil is potentially
dangerous.
• Do not touch any part of the burner while the igniter is
sparking. An electrical shock could result.
• Never light the burners with a match or other open
flame.
I
_.
• If the gas does not ignite after four seconds or if the
flame goes out and gas escapes, turn the knob to the
OFF position. Open a window and allow at least five
minutes for the gas to dissipate. Repeat the lighting
procedure.
r. /
For overall safety and best performance,
select the
correct cooking utensil for the food being cooked.
Improperly
selected cooking utensils will not cook
evenly or efficiently.
There are icons and lights on the control housing
to identify the burner controlled
by each knob. The
burner being controlled
is indicated by a blue indicator light, while the adjacent burner is illustrated
by
a flame icon. The knobs are grouped on the left or
right to help indicate the burner controlled.
Use cookware
1.
To light a burner, press in on the corresponding control knob and turn it immediately
counterclockwise
to the HIGH position (large flame
icon). As you turn the knob, the igniters system
will spark until the flame ignites. The igniters will
stop sparking when ignition occurs.
2.
Once the burner is lit, set the flame height to the
desired level by rotating the control knob further
counterclockwise,
then place the utensil on the
grate. The thickness of the flame level indicator
around the knob indicates the flame setting.
Selecting the Cookware
that:
•
Has flat,
smooth
•
Is well balanced.
•
Has tight fitting
steam in.
bottoms.
lids to keep heat, odors and
v
I
\
IMPORTANT:
Avoid spills as much as possible.
The porcelain surfaces of the grates, spill trays and
burner caps are acid-resistant
but not acid-proof.
Some foods can cause permanent
damage if allowed
to remain on porcelain surfaces.
12
IMPORTANT:
Cooking Tips
When the cooktop is cool the igniters may continue to spark if the control knob is set to the
LOW position. The igniters will stop sparking when the burner is warm. The tendency to
spark when cold can be reduced by operating
the burner at a higher flame setting for about
60 seconds. After 60 seconds, lower the flame
to cook. The burner will also warm up faster if
a utensil is placed on the grate. The igniter will
also spark automatically
if the flame is distorted by a draft or by the household ventilation system. Eliminate any drafts or reduce the
ventilation
blower speed to reduce this type of
problem.
For superior
energy:
Porcelain-....._
Base
_
Burner /
•
Use low or medium flame heights when cooking
in utensils that are poor conductors
of heat, such
as glass, ceramic and cast iron cooking vessels.
Reduce the flame height until it covers approximately 1/3 of the utensil diameter to ensure
even heating and reduce scorching.
•
Minimize the amount
cooking times.
•
Use a timer rather than repeatedly
removing the
lid to check food. Doing so will decrease cooking
time and save energy.
•
Thaw foods prior to cooking
time.
of liquid or fat to reduce
to reduce
cooking
Using the Simmer Plate
Ignitor
Burner
Assembly
To keep the burners operating
properly, keep
the burner igniters and the rest of the burner
clean and dry. See Cooktop Disassembly
and
Cleaning
on page 17. Dirty or wet igniters will
result in constant sparking, even if there is a
flame present.
The simmer plate is specifically
designed for simmering and holding food at the lowest safe temperature.
Use the simmer plate only with the burner
adjusted to its lowest setting. Use the simmer plate
for simmering
only. Remove it when performing
other types of cooking.
The flame should burn evenly around the perimeter of the burner. A normal flame is steady and
blue in color. Foreign material in the gas line,
especially in new construction,
may cause an
orange flame during initial operation.
This will
disappear with further use. Small yellow tips on
the ends of the flames are normal when using LP
gas.
About the Burners
Your Epicure range burners are all rated
maximum
output of 15,000 BTU/HR.
and to save
Reduce the flame height to the minimum
level
necessary to perform the desired cooking process. Food cooks just as quickly at a gentle boil
as it does at a vigorous, rolling boil. A higher
than necessary boil wastes energy, cooks away
moisture and causes flavor and nutrients
loss.
Brass
Burner Ring
performance
•
Burner _
BurnerJ
cooking
at a
•
To install the simmer plate, locate the five feet
on the bottom and align them with the five
longest fingers on the cooktop grate. Set the
simmer plate on top.
•
When correctly installed, the simmer plate will
rest about 1/2 inch above the top of the grate
and will be locked in place to prevent turning.
•
Your simmer plate has a non-stick coating for
easy cleaning. Take care in using abrasives on
the non-stick coating because it can scratch.
Some wear will occur on top of the simmer plate
fingers during normal use.
Simmer
Plate
Grate
All burners are sealed to the cooktop by gaskets
around the underside of the burner bases, to
prevent liquids spills from getting into the cooktop chassis.
\
13
Stabilizer
Feet
"
i
rIC "'[!can ing
: :: :¸!
:: ::
:
Self-Cleaning the Oven
• clean only the parts of the range listed n this manual.
Clean them 0nly in the manner specified;
, Do not line the oven with aluminum foil or other
To avoid dangerous fumes or damage t0 y0ur range,s
surfaces and accessories; use only the types of
cleaning solutions specified n this manual,
materials_ These items can melt or burn during a
selFclean cycle, causing permanent damage to the
oVenl
' DO not operate the oven lights When the Oven iS in
selFclean model in the self-Clean model
, To avoid electrical shock or burns turn off the burners
and
oven and make sure that all paAs are c0ol before
cleaning. DO NOT turn the burners on during cleaning.
• DO not use a steam €leaner to clean the rangel steam
Could
penetrate the electrical components and cause a
short circuit:
,
Do not touch the outside surfaces of the oven during
the Self-Clean cycle,
...............
;
DO not leave the oven racks in the oven dudng the
self-clean cYCle, Doing so will affect their abi!itY to s!ide
in and out easily. !f the racks are accidently !eft in the:
oven
during self-clean, polish rack edge s with a soapy
steel
wool pad;then apply a small amoun t of vegetable
• Do not try to remove heavy spills w th a sharp object
• To prevent damage, dono t us e abrasive or corrosive
cleaners or applicators such as stee! w0o! or scouring
pads, on any part of the range unless instructed to do
sO. Use only a spongel soft clot h fibrous or plastic
brush, Or nylon cleaning pad for cleaning the surfaces
of your range.
,
oil to !he edges SOthat the racks will slide more easi!y I
DO not try!0 force the door open after it is !ocked You
may damage the automatic door latch. ...............................
About the Self-Clean Cycle
•
To keep the range looking and operating its best,
clean it after every use. Also, wipe up spills that
occur while cooking quickly. Be careful not to touch
any hot areas.
Your oven features an automatic
pyrolytic self-
clean cycle to eliminate the need for difficult and
time-consuming
manual scrubbing of interior
surfaces. During the self-clean cycle, the oven
reaches extremely
high temperatures
to burn off
soil and deposits. A powder ash residue is left in
the bottom of the oven after completion of the
self-clean cycle.
If you allow spills to sit on hot burner parts, they
will burn on and be very difficult to clean. Certain
types of food, such as tomatoes,
citrus juices, vinegar, alcohol and milk can damage the finishes if
you allow them to stand for any length of time.
•
IMPORTANT:
The cooktop isexposed to extremely
high temperatures. The grates are under high
stresswhen hot utensilsare placed on them. Also,
the range parts are occasionallyexposed to acidic
food spill-overs.
These severe operating conditions,
cause the porcelain enamel parts on your range to
undergo a change in appearance over time. If you
care for and clean these parts carefully, you will
slow down, but not eliminate,
the aging process.
Self-clean time is variable from two to four hours
to offer flexibility
in handling various conditions.
The 2-hour cycle normally handles a moderately
soiled oven. The 4-hour cycle is for heavy soil
conditions.
•
The self-clean cycle can also be delayed
at a later time if desired.
to start
It is normal for some smoke to be emitted
during the first few self-clean cycles.
Popping sounds are normal during the self-clean
cycle. These sounds are caused by the expansion
and contraction
of metal surfaces during heat-up
and cool-down.
Preparing the Oven for Self-Cleaning
1. Clean soil from the oven front frame area and
the oven door outside of the door gasket. Cleaning the door gasket by hand can cause it to bend
or move. A tight door seal is essential for proper
baking and self-cleaning.
Rinse surfaces well
with a solution of vinegar and water, then wipe
dry. Heavily soiled areas may be cleaned with a
non-scratching
scouring pad.
14
.
Remove the broiler pan, all cookware,
utensils
and other loose items from the oven chamber.
Also, remove all oven racks to prevent them
from permanently
discoloring.
You may leave
the convection
filter in place during self-clean
to loosen stubborn particles,
but it will discolor.
However, if discolored,
its filtering capabilities
will not be harmed. See page 16 for convection
filter removal if you want to prevent discoloration.
3.
Wipe up excess grease and other food spills with
a damp cloth to minimize smoke and increase
the efficiency during self-clean.
4.
Turn on kitchen fans or vents to help remove
odors during the cycle.
About 50
reach the
cycle can
CANCEL
Complete all the steps
the oven to self-clean.
2.
Close the oven door completely.
3.
Press the SELF-CLEAN
key. The oven will beep
once, "CLEAN"
will flash, and "- -:- -" will be
displayed.
4.
5.
6.
7.
listed above for preparing
9.
When the interior oven temperature
falls below
390°F, the door latch will release and "LOCK"
will disappear from the clock display. Do not
select any cooking function until the oven door is
unlocked.
before
To delay the self-clean start to a more convenient time, press the STOP TIME key. Then,
press the TIME • TEMP + key to set the time
of day for the cycle to be complete.
"DELAY
TIMED"
will appear in the clock display. You can
delay the cycle up to 11 hours and 50 minutes.
the oven racks and convection
cooking
Self-Cleaning
Increase the self-clean time up to 4 hours
(depending
upon the amount of oven soil) by
holding the TIME • TEMP + key.
NOTE: If delay timed mode has been set, the "ON"
display and the oven heat will not turn on until the
programmed
time has been reached.
After completion
of the self-clean cycle, the oven
will stop heating and the "ON" and "CLEAN"
indicators will disappear from the clock display.
Press the CANCEL • SECURE key.
11. Re-install
Press the TIME • TEMP + key and the default
time of "2:00"
hours will be displayed.
Approximately
30 to 60 seconds after selecting SELF-CLEAN,
the automatic
door latch will
lock the door. "LOCK"
and "ON" will appear in
the clock display. The oven will begin heating.
The "ON" indicator will cycle on and off with the
burner.
8.
10. Open the door. After ensuring that the oven has
cooled sufficiently
to be safe, use a damp cloth
or sponge to wipe out the powder residue found
in the bottom of the oven. If white spots remain
in the oven, remove them with a non-scratch
scouring pad before using the oven again. These
spots are normally salt that cannot be removed
by a self-clean cycle.
Self-Clean Feature Operation
1.
to 60 minutes is required for the oven to
self-clean temperature.
The self-clean
be stopped at any time by pressing
• SECURE.
filter
in the oven.
Tips
•
If any soil remains in the oven after completion
of a self-clean cycle, repeat the cycle if desired.
Increase the cleaning time during future cycles.
•
Clean the oven regularly to prevent excessive soil build-up. Regular use will increase the
efficiency of the self-clean cycle and reduce the
amount of smoke and odors generated.
•
Self-clean in the cooler evening hours after
cooking is complete and when electricity
rates
are lower.
Manual Cleaning
Control Panel
To avoid accidentally
cleaning the control
ture (see Securing
•
IMPORTANT:
If the door is not closed completely,
the automatic
door latch will not be able to lock the
door when the self-clean mode is selected. In this
case, "DOOR"
will flash in the clock display, press
the CANCEL • SECURE key to clear self-clean and
wait approximately
1 minute. Repeat the self-clean
steps from the beginning,
being certain to close the
door completely.
If you need to unlock the door,
turn off the self-clean cycle by pressing the CANCEL
• SECURE key. After approximately
1 minute,
"LOCK"
will disappear from the clock display and
the door will unlock.
turning the oven on while
panel, activate the secure feathe Controls on page 11.)
Clean the control panel with a solution of mild
detergent
and warm water. DO NOT USE ABRASIVE CLEANERS OR SCRUBBERS. THEY WILL
PERMANENTLY DAMAGE THE FINISH.
pletely with a soft, lint-free cloth.
Dry com-
Door Handle and Control Housing
•
15
Clean the door handle and control panel housing
with a solution of mild detergent
and hot water.
Rinse and dry with a soft cloth. DO NOT USE
ABRASIVE CLEANERS OR SCRUBBERS. THEY
WILL PERMANENTLY DAMAGE THE FINISH.
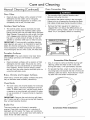
Oven Convection
Manual Cleaning (Continued)
Door Glass
The ConVection filter is made of stainless steel:
Remove it only when it is cool.
Clean all glass surfaces with a solution of mild
detergent
and hot water. Use a mild glass
cleaner to remove fingerprints
or smears. Dry
completely
with a soft, lint-free cloth.
i' Re'install the filter before €ooking i_ the oven again
Failure to do so will expose the convection fan blade
that rotates at high speed during convection modesl
Stainless Steel Surfaces
•
Filter
•
The control panel, door(s) bullnose and side
panels are covered with stainless steel. Clean
these surfaces with the provided Decor Stainless
Steel Cleaner. Rinse and dry with a soft, lint-free
cloth. Alway_5 wipe stainless steel surfaces with
the grain. A small amount of baby oil may be
applied to stainless steel tops to restore lustre.
Remove the filter regularly for cleaning. A
clogged filter will reduce the effectiveness
of
convection
cooking modes, Soak it in hot soapy
water. Dry it completely
before re-installing.
IMPORTANT:
If commercially
available stainless
steel cleaners are used, it is important
to read the
labels for chlorine compounds.
Chlorine is a corrosive substance.
If these compounds
are present,
rinse thoroughly
and dry with a soft, lint-free cloth.
Porcelain Surfaces
IMPORTANT:
and cooktop
enamel.
The oven interior inner door liners
spill trays are finished in porcelain
Convection
Clean porcelain surfaces with a solution of mild
detergent
and hot water. Rinse and dry with a
soft cloth. Do not use abrasives or commercial
oven cleaners. Always remove excess grease
and soil from the oven interior and door prior to
using the self-clean cycle.
Brass, Chrome and Copper Surfaces
Filter Removal
•
Also, it is best to remove the filter during selfcleaning. When the filter is left in the oven
during self-clean,
it will permanently
discolor.
•
To reinstall the filter, orient it so that the two
mounting tabs are towards the rear of the oven
chamber, open end down. Hook the two mounting tabs over the center horizontal
bar.
Clean brass, chrome and copper surfaces the same
way as stainless steel surfaces (see above).
Oven Racks
The oven racks are chrome-plated.
For everyday
cleaning, apply a solution of detergent
and hot
water. To clean heavy soil, use the rough side of
a sponge or a scouring pad with plenty of water,
or use a solution of 1 cup ammonia to 2 gallons
of water.
IMPORTANT:
Remove the racks during self-cleaning. If racks are left in the oven during self-cleaning,
they will permanently
discolor.
Broiler Pan
The oven broiler pan is finished in porcelain
enamel. Clean both components
in a solution of
detergent
and hot water. For heavy soil conditions,
use a scouring pad such as steel wool with plenty of
water. Rinse well after cleaning.
Convection
16
Filter Installation
I
1
.
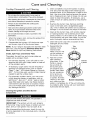
Cooktop Disassembly and Cleaning
• Do not clean the cooktop grates, burner parts or
simmer plate in a dishwasher. They will be damaged.
• After cleaning the burners, reassemble all of the burner
parts before attempting to operate the cooktop.
• Always dry and reassemble the cooktop parts
completely before use.
.
• Take care when cleaning around the control valve
stems. If you get moisture inside the holes in the
chassis, damage to the range can occur.
.
• Do not soak the knobs in water or put them in the
dishwasher.
1.
When the range is cool, remove
the top of the cooktop.
the grates
from
2.
Disassemble
the burners:
Lift the burner caps
and burner rings off of the burner bases.
.
.
NOTE: If your range is equipped with stainless steel
spill trays, see the cleaning Stainless
Steel Surfaces section for spill tray cleaning instructions.
Grates,
Spill Trays
and Simmer
•
•
•
plate are
.
TM
For extremely
stubborn stains, you may use a
mildly abrasive cleaner or applicator, such as
Soft Scrub
Bon Ami
S.O.S. _) pads or other
soap-filled
steel wool pads. Use these cleaners
with extreme care and only on occasion. Extensive use of these types of abrasives will eventually damage the finish.
and Other Burner
fragile and can crack or break:
IMPORTANT:
The igniters will not work properly
if the burner rings, burner bases or igniters are not
clean. Dirty or wet igniters may not spark at all.
After disassembling
or grime deposited
the igniters.
Reassemble
the
in the
order.
of mild
Tabs
5 places
Test the burners
,
'
,
'
Notches
5 places
clicking is still presBurner Assembly
ent, make sure the
igniter is completely
dry. If the unit still exhibits problems after drying, call your local Dacor
Authorized
Service Agent.
TM,
Cleaning the Igniters
Components
Clean the burner caps with a solution
detergent
and hot water.
after reassembling them. If the
flame is uneven,
be sure that all
the burner parts
are properly positioned, then check
for any remaining
dirt or grime on
the burner parts
or igniter. If erratic
If necessary, tough stains may be removed by
applying full-strength
sprays such as Simple
Green
Ajax
All-Purpose
Cleaner or Formula
409 TM, TO minimize wear, use the mildest cleaner
needed to get the surface clean.
TM,
Clean all the burner rings, with window cleaner
or rubbing alcohol. Use a cleaning brush with
plastic bristles or a firm tooth brush. When done,
rinse the parts well with clean water. Dry all the
parts thoroughly
before re-assembling
them.
Make sure you line
up the notches on
the burner rings.
For everyday cleaning, use a soft cloth or nonabrasive pad with warm soapy water to clean all
of the porcelain parts.
TM,
Examine the burner rings. Remove anything
stuck in the holes with a straightened
paper
clip, wire or needle. Be careful not to scratch or
damage it. Do not distort the shape of the holes.
cooktop
reverse
Plate
The grates, the spill tray and simmer
coated with a porcelain finish.
Clean completely
around the igniter, including
over and under the edge of the metal top and
porcelain base. A firm toothbrush
is ideal for this
task. Use care while cleaning because the porcelain is fragile and can crack or break. Do not use
water to clean the igniters, ff necessary, use a
small amount of rubbing alcohol to help dissolve
grime.
the burners, check for any dirt
on the individual
parts, including
17
Manual Cleaning (Continued)
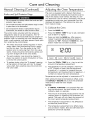
Adjusting the Oven Temperature
The oven is equipped with a feature that allows
you to calibrate the temperature
inside the oven to
match the display value without the help of a service technician.
Due to various conditions,
the actual
temperature
inside may vary somewhat
from the
displayed temperature.
The setting may also vary
from mode to mode.
Knobs and Spill Protector Rings
DO notoperate the C00ktop without the knobs and spill
protect0r rings in placel
, Do not soak the knobs and spill protector rings in water
or place them in the dishwasher,
'
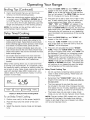
To Calibrate the Oven"
not expose the knobs or Spill protect0r dngs to
direct flame, hot utensils or other sources of heal
1.
The control knobs provided with the range are
designed for ease of use and longevity. The "D"
shaped design of the knob shaft ensures proper orientation when re-installing
the knob. Beneath each
knob, a spill protector ring helps prevent liquid spills
from entering the control panel.
•
.
.
Press the BAKE key.
Press the TIME • TEMP
ture of 500°F or higher.
Press and hold the BAKE key. After approximately 5 seconds the temperature
display is
replaced by "OO". Release the BAKE key. Calibration mode has now been accessed.
The knobs should be washed regularly in warm,
soapy water. Hand dishwashing
liquid is excellent for this task. Turn the knobs to the "OFF"
position prior to removing them from the valve
stems. Knobs should be removed by gently pulling them straight off of the valve shafts.
•
The spill protector rings should be cleaned in
place. Use caution to avoid introduction
of moisture into the control panel.
•
To replace knobs, align the"D-shaped"
opening
at the bottom of the knob with the "D-shaped"
valve shaft, then carefully press the knob onto
the valve shaft.
+ key to set a tempera-
,-.-,
'-"-'
1-!
1.2.NN
I T'MER1
II oLooK
IISTOPT'MEII
T,MER2
I
4.
Press the TIME • TEMP + or - key to set the
amount of temperature
adjustment.
5.
The temperature
can be changed a maximum
of 35°F higher or lower. Set the adjustment
to positive (+) numbers to increase the oven
temperature;
set the adjustment
to negative (-)
numbers to reduce the oven temperature.
Temperatures
can be adjusted
in increments
of 5°E
After setting the desired temperature
offset, press
the CANCEL • SECURE key to exit the calibration
mode and to reset the clock display.
NOTES:
18
•
If CANCEL • SECURE is not pressed after setting the adjustment,
the clock display will automatically reset in 6 seconds.
•
The amount of temperature
adjustment
may be
changed again by repeating the calibration
procedure. The oven will only retain the amount of
the most recent temperature
adjustment.
•
The temperature
adjustment
an electrical power failure.
•
The temperature
adjustment
only affects bake
and convection
modes. Broil and self-clean temperatures cannot be adjusted.
is not affected
by
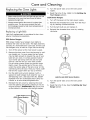
Replacing the Oven Lights
Make certain that the oven and light bulb are cool and
that power to the oven has been turned off before
replacing the light bulb.
5.
Turn the power
supply.
6.
Reset the time of day, (Refer to the Setting
Your Range section).
EGR Series
at the main power
2.
Remove the threaded lens cover from
ing by rotating counterclockwise.
3.
Pull the light
4.
Reinstall the threaded
clockwise.
Replacing a Light Bulb
Up
Ranges:
1. Turn off the power
° Always ensure that the lens cover is in place when
using the oven. The lens cover protects the bulb
from breakage caused by high oven temperatures or
mechanical shock.
Light bulb replacement
is considered
eowner maintenance
operation.
back on at the main power
bulb out and replace
supply.
the hous-
it.
lens cover by rotating
to be a hom-
ERD Series Ranges:
ERD range models have halogen oven lights to
enhance the view into the oven. The light assembly
consists of a removable
lens cover and 10-watt 120
Vac halogen
bulb, as well as a light fixture
1. Turn off the power
2.
at the main
4.
supply.
Remove the lens cover from the housing by pulling straight out. In some cases the lens cover
may be tight enough to require the use of your
light lens pry stick. It comes packed inside of
your broiler pan along with the use and care
manual. Use the lens pry stick with caution.
Do not cause uneven stress on the lens cover.
Gently insert the pointed
under the center edge of
side facing the oven door.
the lens for support then
3.
power
housing.
end of the pry stick
the lens cover on the
Hold your hand under
pry out to remove.
Pull the light bulb out and replace it with a
special 10-watt halogen bulb rated for use in a
self-cleaning
oven. Use Dacor Part No. 86364
available from any authorized
Dacor parts distributor
or at www,everythingdacor.com.
Light Socket (EGR Series Models)
.
Reinstall the lens cover by aligning the cover
over the opening and gently pressing it into its
original position. IMPORTANT:
Be sure to line
up the cutout in the lens with the light socket.
6.
Light Socket .---.-...
(ERD Series Models)
19
Turn the power
supply.
back on at the main power
Reset the time of day. See the Setting
Range section.
Up Your
II
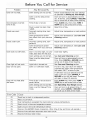
Problem Solution Guide
Before you call for service, please review the chart below. If a failure code appears on the display, the oven
will beep continuously.
Press the CANCEL • SECURE key to clear the beeps. The oven will not heat after it
displays a failure code. In this case, call a qualified appliance technician to repair the oven.
Nothing
works.
Igniters
Range not connected
cal power.
do not spark.
Turn on power at circuit breaker or fuse
box. Check for tripped breaker or blown
fuse.
Power outage.
Contact
Wet or dirty
Gas supply
Flame is distorted,
very large.
yellow
or
Works
above.
Clean and dry igniter and burner assembly according to Care and Cleaning
section.
(no clicking
See Igniters
do not spark
Clean and dry according
Cleaning
section.
off.
Make sure the gas supply
on position.
interrupted.
Contact
gas company.
Low gas pressure.
Contact
tested.
gas company
Air intake
Remove
obstructions.
holes obstructed.
above.
to Care and
valve is in the
to have pressure
Burner parts are dirty or
clogged.
Clean and dry according
Cleaning
section.
Burner parts are not properly
positioned.
Make sure burner is assembled according
to the Setting Up Your Range section.
Range set up to use a different
type of gas (natural or LP) or
set up for different
altitude.
Have a qualified service technician check
to make sure that the range is set up for
the type of gas and the correct altitude.
Gas regulator
fa u Ity.
Igniter continues to spark
(click) after flame ignites.
power company.
See Nothing
igniter.
Gas is turned
goes out at low set-
to unit.
igniter.
Igniter not working
sound).
Wet or dirty
Burner
ting.
Have oven connected to a properly sized
electrical power supply by a qualified
technician.
Power is off.
Power not supplied
No flame.
to electri-
Burner
is not installed
or
is cold.
Have a qualified service
the gas regulator.
Wet or dirty
technician
check
Burners may continue to spark for up to
60 seconds when cold and set to low. See
Operating
information
Flame distorted
to Care and
by air draft.
igniter.
Burner
parts wet or dirty.
Burner
tioned.
parts not properly
Power supply polarity is
reversed or not properly
grounded.
2O
posi-
Your Range section
on how to minimize,
Minimize any air drafts around
top. Close nearby windows.
for more
the cook-
Clean and dry according
Cleaning
section.
to Care and
Clean and dry according
Cleaning
section.
to Care and
Make sure burner is assembled according
to the Setting Up Your Range section.
Have a licensed electrician
trical connections.
check the elec-
Before
Oven will not heat.
Clock displays
time of day.
You Call for Service
Oven settings
incorrect
Oven does not self-clean.
and clock settings
up Your Range.
Oven will turn on automatically
at time
set. If desired, press CANCEL • SECURE
key to cancel out of delay timed cooking.
Time
Press CLOCK key, then press TIME •
TEMP key to set correct time of day.
of day is not set.
has been inter-
Incorrect
cooking
pe ratu re.
Foods under-cook.
Follow mode selection
as specified in Setting
Oven is set for delay timed
cooking.
Power supply
rupted.
Foods over-cook.
are not correct.
time,
tem-
Reset time of day.
Adjust
time,
temperature
or rack position.
Oven temperature
calibration differs from your previous
oven.
Adjust oven temperature.
Cleaning
section.
See Care and
Incorrect
cooking
pe ratu re.
Adjust
or rack position.
time,
tem-
time,
temperature
Oven temperature
calibration differs from your previous
oven.
Adjust oven temperature.
Cleaning
section.
Door is not shut tight, so automatic door latch will not lock.
Close door tightly.
Oven settings
See Care and Cleaning
are not correct.
See Care and
section.
Oven is set for delay timed
cleaning.
Oven will turn on automatically
at set
time. Press CANCEL • SECURE key to
cancel out of delay timed cleaning.
Oven light will not work.
Light bulb is burned
out.
See Care and Cleaning
Door will not open.
Oven is in self-clean
mode.
If oven is hot, door latch will release
automatically
when oven temperature
falls below 390°F at end of cycle.
section.
If self-clean was just selected and the
oven is still cool, press CANCEL •
SECURE to turn off self-clean.
The door
will open in about
Oven will not heat after
self-clean.
30 seconds.
Time of day is not set due to
power failure.
Press CLOCK key, then press TIME •
TEMP key to set correct time of day.
Oven settings
See Operating
are not correct.
Oven is set for Delayed
mode.
Time
Your Range
Oven will turn on at present time. If
desired, press CANCEL • SECURE button
to cancel out of delay timed
F0
Touch key is stuck
in a depressed
F1
Relay circuit
F2
Oven temperature
F3
Short circuit
in the oven temperature
sensor.
F4
Open circuit
in the oven temperature
sensor.
F6
Failure
F7
Failure of the self-clean
F8
Failure of the door latch motor.
section.
mode
position.
failure.
exceeded
the clean/cooking
in the EEPROM check comparison.
automatic
runaway
(Only time of day and timer
door latch circuit.
21
temperature.
will operate.)
Product Maintenance
OUTSIDE
THE FIFTY STATES
THE DISTRICT
OF COLUMBIA
Do not perform any maintenance
other than that
instructed
in the Care and Cleaning
section of this
manual. A qualified service technician
should perform all other service.
LIMITED
Before you obtain service, please review the Before
You Call for Service section on page 20. If you
have performed
the checks in the Problem
Solution Guide and the problem has not yet been
remedied,
please visit our web site or contact our
Customer Service Team for a listing of Dacor authorized service agents. Prior to requesting
service, it
is helpful to be familiar with the warranty terms and
conditions on this page.
us through
our web
What Is Not Covered
Customer
Service calls to educate the customer
proper use and care of the product.
•
Failure of the product when used for commercial,
business, rental or any application
other than for
residential
consumer use.
•
Replacement
of house fuses or fuse boxes or
resetting of circuit breakers.
•
Damage to the product caused by accident,
flood or other acts of God.
•
Breakage, discoloration
or damage to glass,
metal surfaces, plastic components,
trim, paint
or other cosmetic finish, caused by improper
usage or care, abuse or neglect.
Service:
Tel: (800) 793-0093
Fax: (626) 403-3130
Business Hours: 6:00
A.M.
You may also write
us at:
-
5:00
P.M. Pacific Time
Dacor Customer Service
1440 Bridge Gate Drive
Diamond Bar, CA 91765
If you need anything
clarified,
just
let us know.
What Is Covered
OF WARRANTIES:
DACOR
WITHIN
THE FIFTY STATES OF THE U.S.A.,
DISTRICT
OF COLUMBIA
AND CANADA*:
If your DACOR product fails to function within one
year of the original date of purchase, due to a defect
in material or workmanship,
DACOR will remedy the
defect without charge to you or subsequent
users.
The owner must provide proof of purchase upon
request, and have the appliance accessible for service.
approved
fire,
Some states do not allow limitations
on how long
an implied warranty
lasts, or do not allow the exclusion or limitation
of inconsequential
damages, so
the above limitations
or exclusions
may not apply
to you. This warranty gives you specific legal rights,
and you may also have other rights that vary from
state to state.
THE
FULL ONE-YEAR WARRANTY
*Warranty
is null and void if non-UL
uct is transported
from the U.S.
in the
THE REMEDIES PROVIDED FOR IN THE ABOVE
EXPRESS WARRANTIES ARE THE SOLE AND EXCLUSIVE REMEDIES. THEREFORE, NO OTHER EXPRESS
WARRANTIES ARE MADE, AND OUTSIDE THE FIFTY
STATES OF THE UNITED STATES, THE DISTRICT
OF COLUMBIA AND CANADA, ALL IMPLIED WARRANTIES, INCLUDING
BUT NOT LIMITED TO, ANY
IMPLIED WARRANTY OF MERCHANTABILITY
OR
FITNESS FOR A PARTICULAR USE OR PURPOSE, ARE
LIMITED IN DURATION TO ONE YEAR FROM THE
DATE OF ORIGINAL PURCHASE. IN NO EVENT SHALL
DACOR BE LIABLE FOR INCIDENTAL EXPENSE OR
CONSEQUENTIAL
DAMAGES. NO WARRANTIES,
EXPRESS OR IMPLIED, ARE MADE TO ANY BUYER
FOR RESALE.
At Dacor, we befieve that our quality of service
equals that of our product. Should your experience
with our service network or product be different,
please contact our Customer Service Team and
share your encounter
with us. We will do our utmost
to resolve the situation for you and deliver on our
Dacor promise.
CERTIFICATE
RANGES
•
site at:
www. Dacor.com
Dacor
FIRST YEAR WARRANTY
If your DACOR product fails to function within one
year of the original date of purchase, due to a defect
in material or workmanship,
DACOR will furnish a
new part, F.O.B. factory to replace the defective
part. All delivery, installation,
and labor costs are
the responsibility
of the purchaser. The owner must
provide proof of purchase, upon request, and have
the appliance accessible for service.
Getting Help
Contact
OF THE U.S.A.,
AND CANADA:
prod-
22
23
24
fold here
NO POSTAGE
NECESSARY
IF MAILED
IN THE
UNITED STATES
BUSINESS REPLY MAIL
FIRST-CLASSMAIL
PERMITNO.4507
DIAMONDBARCA
POSTAGEWILL BE PAIDBYADDRESSEE
DACOR INC.
ATTN: WARRANTY PROCESSING DEPT
1440 BRIDGE GATE DR STE 200
PO BOX 6532
DIAMOND BAR CA 91765-9861
I1,1,,,,,111,,,I,I1,,,I,1,1,1,,I,,I,,11,,,,,111,,I,I
IMPORTANT:
Yourwarrantywill not be activateduntilyou activateitonlineor returnthis form to Dacor.If you havepurchasedmore
than one Dacorproduct,pleasereturnall forms in one envelopeor activatethewarrantyfor eachproductonline.
Pleaserest assuredthat underno conditionswill Dacorsellyour nameor anyof theinformationon this form for mailinglist purposes.We
are very gratefulthat you havechosen Dacorproductsfor yourhomeand do notconsiderthe saleof such informationto be a properway
of expressingour gratitude!
Owner'sName:
First
Last (Please Print or Type)
Middle
Street:
City:
State:
PurchaseDate:
Email:
Zip:
Telephone:
Dealer:
City:
State:
Zip:
Yourwillingnessto take a few secondsto fill in thesectionbelowwill be sincerelyappreciated.Thankyou.
1. Howwereyou first exposedto Dacorproducts?(Pleasecheckone only,)
[] A. T.V.CookingShow
[] F Builder
[] B. Magazine
[] G. Architect/Designer
[] C. ApplianceDealerShowroom
[] H. AnotherDacorOwner
[] D, KitchenDealerShowroom
[] I, ModelHome
[] E. HomeShow
[] J. Other
2. Wheredid you buyyour Dacorappliances?
[] A. ApplianceDealer
[] B. KitchenDealer
[]
[]
D.
E.
Builder
Other
3. Forwhat purposewas the productpurchased?
[] A. Replacementonly
[] B. PartofaRemodel
[]
[]
C.
D.
NewHome
Other
4. Whatis yourhouseholdincome?
[] A. Under$75,000
[] B. $75,000-$100,000
[] C. $100,000-$150,000
[]
[]
[]
D. $150,000-$200,000
E. $200,000-$250,000
F. OverS250,000
[]
C.
BuilderSupplier
5. Whatotherbrandsof appliancesdo you havein your kitchen?
A. Cooktop
C. Dishwasher
B. Oven
D. Refrigerator
6. Wouldyou buyor recommendanotherDacorproduct?
[] Yes
Comments:
=_I
"5
°I
[] No
Thankyou very muchfor your assistance.Theinformationyou have
providedwill be extremelyvaluablein helpingus planfor the future
and givingyouthe supportyou deserve.
PlaceSerialNumberLabel Here
Web site:
Corporate
www.Dacor.com
phone:
(800) 793-0093