1
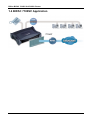
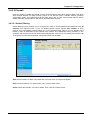
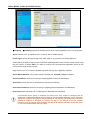
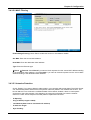
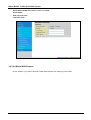
BIPAC 7100SV
VoIP ADSL Modem/Router
with Single Ethernet Port
User Manual
Table of Contents
Chapter 1 ............................................................................... 1
INTRODUCTION ................................................................................................... 1
1.1 An Overview of BIPAC 7100SV ..................................................................................1
1.2 Package Contents .......................................................................................................2
1.3 BIPAC 7100SV Features.............................................................................................2
1.4 BIPAC 7100SV Application .........................................................................................4
Chapter 2 ............................................................................... 5
USING BILLION VOIP ADSL MODEM/ROUTER ...................................................... 5
2.1 Cautions for Using Billion VoIP ADSL Modem/Router ................................................5
2.2 The Front LEDs ...........................................................................................................5
2.3 The Rear Ports............................................................................................................6
2.4 Cabling ........................................................................................................................6
Chapter 3 ............................................................................... 7
CONFIGURATION ................................................................................................. 7
3.1 Before Configuration ...................................................................................................7
3.2 Factory Default Settings ............................................................................................14
3.2.1 Password ............................................................................................................15
3.2.2 LAN and WAN Port Addresses ...........................................................................15
3.3 Information from ISP .................................................................................................15
3.4 Configuring with Web Browser ..................................................................................16
3.4.1 Status..................................................................................................................17
3.4.1.1 Status – ADSL Status................................................................................................18
3.4.1.1.1 ADSL Status – WAN Status .............................................................................................. 18
3.4.1.1.2 ADSL Status – ATM Status ............................................................................................... 19
3.4.1.2 Status – LAN Status ..................................................................................................19
3.4.1.2.1 LAN Status – TCP Status .................................................................................................. 20
3.4.1.3 Status- PPP Status....................................................................................................20
3.4.1.4 Status- Learned MAC Table ......................................................................................21
3.4.1.5 Routing Table ............................................................................................................22
3.4.1.6 System Log................................................................................................................22
3.4.1.7 Security Logs.............................................................................................................23
3.4.2 Quick Start ..........................................................................................................24
3.4.2.1 ADSL Quick Start ......................................................................................................24
3.4.2.2 VoIP Quick Start ........................................................................................................24
3.4.3 Configuration.......................................................................................................25
3.4.3.1 WAN ..........................................................................................................................25
3.4.3.2 LAN............................................................................................................................29
3.4.3.3 VoIP...........................................................................................................................30
3.4.3.3.1 General Configuration ....................................................................................................... 31
3.4.3.3.2 Phone Book ....................................................................................................................... 33
3.4.3.3.3 Dial Plan ............................................................................................................................ 35
3.4.3.3.4 Call Feature ....................................................................................................................... 36
3.4.3.3.5 Advanced Telephony Settings........................................................................................... 37
3.4.3.3.6 Ring Tone .......................................................................................................................... 40
3.4.3.3.7 Timer.................................................................................................................................. 41
3.4.3.4 System.......................................................................................................................42
3.4.3.4.1 Password ........................................................................................................................... 43
3.4.3.4.2 Time Zone.......................................................................................................................... 44
i
Billion BIPAC 7100SV VoIP ADSL Router
3.4.3.4.3 Upgrade ............................................................................................................................. 45
3.4.3.4.4 Factory Setting .................................................................................................................. 45
3.4.3.4.5 Restart ............................................................................................................................... 46
3.4.3.5 Firewall ......................................................................................................................47
3.4.3.5.1 Packet Filtering .................................................................................................................. 47
3.4.3.5.2 MAC Filtering ..................................................................................................................... 49
3.4.3.5.3 Intrusion Detection............................................................................................................. 49
3.4.3.5.4 Block WAN Request .......................................................................................................... 50
3.4.3.6 Virtual Server.............................................................................................................51
3.4.3.7 Advanced...................................................................................................................52
3.4.3.7.1 ADSL ................................................................................................................................. 52
3.4.3.7.2 DNS ................................................................................................................................... 53
3.4.3.7.3 Dynamic DNS .................................................................................................................... 54
3.4.3.7.4 NAT.................................................................................................................................... 55
3.4.3.7.5 RIP..................................................................................................................................... 57
3.4.3.7.6 Static Route ....................................................................................................................... 58
3.4.3.7.7 MISC Configuration ........................................................................................................... 59
3.4.3.7.8 Diagnostic Test .................................................................................................................. 60
3.4.4 Save Config ........................................................................................................62
Chapter 4 ............................................................................. 63
TROUBLESHOOTING .......................................................................................... 63
Problems Starting Up the ADSL Router ....................................................................................63
Problems with the WAN Interface ............................................................................................63
Problems with the LAN Interface .............................................................................................63
Problems Connecting to a Remote Node or ISP..........................................................................63
APPENDIX............................................................................ 64
PRODUCT SUPPORT AND CONTACT INFORMATION ............................................... 64
ii
Chapter 1
Introduction
1.1 An Overview of BIPAC 7100SV
BIPAC 7100SV VoIP ADSL Modem/Router provides a high-speed Ethernet port for high-speed Internet
browsing. It can support downstream transmission rates of up to 8Mbps and upstream transmission rates
of up to 1024Kbps. It is compliant with Multi-Mode standard (ANSI T1.413, Issue 2; G.dmt (G.992.1);
G.lite (G992.2); G.hs (G994.1)).
The product supports PPPoA (RFC 2364 – PPP (Point-to-Point Protocol) over ATM Adaptation Layer 5),
RFC 1483 encapsulation over ATM (bridged or routed), PPP over Ethernet (RFC 2516), and IPoA
(RFC1577) to establish a connection with ISP. The product also supports VC-based and LLC-based
multiplexing.
It is the perfect solution to connect a small group of PCs to a high-speed broadband Internet connection.
Multi-users can have high-speed Internet access simultaneously.
This product also serves as an Internet firewall, protecting your network from being accessed by outside
users. Not only provide the natural firewall function (Network Address Translation, NAT), it also provides
rich firewall features to secure user’s network. All incoming data packets are monitored and filtered.
Besides, it can also be configured to block internal users from accessing to the Internet.
The product provides two levels of security support. First, it masks LAN users’ IP addresses which are
invisible to outside users on the Internet, making it much more difficult for a hacker to target a machine on
your network. Secondly, it can block and redirect certain ports to limit the services that outside users can
access. For example, to ensure that games and other Internet applications will run properly, user can
open some specific ports for outside users to access internal services in network.
Integrated DHCP (Dynamic Host Control Protocol) services, client and server, allow multiple users to get
their IP addresses automatically on boot up from the product. Simply set local machines as a DHCP
client to accept a dynamically assigned IP address from DHCP server and reboot. Each time local
machine is powered up; the router will recognize it and assign an IP address to instantly connect it to the
LAN.
For advanced users, Virtual Service function allows the product to provide limited visibility to local
machines with specific services for outside users. An ISP (Internet Service Providers) provided IP
address can be set to the product and then specific services can be rerouted to specific computers on the
local network. For instance, a dedicated web server can be connected to the Internet via the product and
then incoming requests for HTML that are received by the product can be rerouted to the dedicated local
web server, even though the server now has a different IP address. In this example, the product is on the
Internet and vulnerable to attacks, but the server is protected.
Virtual Server can also be used to re-task services to multiple servers. For instance, the product can be
set to allow separated FTP, Web, and Multiplayer game servers to share the same Internet-visible IP
address while still protecting the servers and LAN users from hackers.
BIPAC 7100SV serves as a Public Switched Telephone Network (PSTN) handset-to-Ethernet adaptor
that enables traditional telephone devices to operate as Internet Protocol (IP) devices. It is the interface
1
Billion BIPAC 7100SV VoIP ADSL Router
between the PSTN world and the IP world acting as a residential gateway, eventually providing Internet
Telephony capability. Cost savings and ease of developing and integrating new services motivate most of
the interest in Internet telephony. Internet telephony integrates a variety of services provided by the
current Internet and the PSTN infrastructure.
BIPAC 7100SV extracts the maximum benefit from Voice over IP (VoIP) technology. It interfaces analog
telephones with IP-based telephony networks. The integration of VoIP technology and ADSL
Modem/Router is undoubtedly the most economic and practical solution to modern society.
1.2 Package Contents
1.
Billion BIPAC 7100SV VoIP ADSL Modem/Router
2.
One CD-ROM containing online manual
3.
One Quick Start Guide
4.
One RJ-11 ADSL/telephone cable
5.
One CAT-5 straight LAN cable
6.
One power adapter (12V DC 1.2A)
1.3 BIPAC 7100SV Features
BIPAC 7100SV ADSL Modem/Router provides the following features:
ADSL Multi-Mode Standard: Supports downstream transmission rates of up to 8Mbps and
upstream transmission rates of up to 1024Kbps. It is compliant with Multi-Mode standard (ANSI
T1.413, Issue 2; G.dmt (G.992.1); G.lite (G992.2); G.hs (G994.1)).
Multi-Protocol to Establish A Connection: Supports PPPoA (RFC 2364 - PPP over ATM
Adaptation Layer 5), RFC 1483 encapsulation over ATM (bridged or routed), PPP over Ethernet
(RFC 2516) and IPoA (RFC1577) to establish a connection with ISP. The product also supports VCbased and LLC-based multiplexing.
Quick Installation Wizard: Supports a WEB GUI page to install this device quickly. With this wizard,
an end user can enter the information easily which they from the ISP, then surf the Internet
immediately.
Universal Plug and Play (UPnP) and UPnP NAT Traversal: This protocol is used to enable
simple and robust connectivity among stand-alone devices and PCs from many different vendors. It
makes network simple and affordable for users. UPnP architecture leverages TCP/IP and the Web
to enable seamless proximity networking in addition to control and data transfer among networked
devices. With this feature enabled, users can now connect to Net meeting or MSN Messenger
seamlessly.
Network Address Translation (NAT): Allows multi-users to access outside resource such as
Internet simultaneously with one IP address/one Internet access account. Besides, many application
layer gateway (ALG) are supported such as web browser, ICQ, FTP, Telnet, E-mail, News, Ping and
others.
Domain Name System (DNS) relay: Provides an easy way to map the domain name (a friendly
name for user such as www.yahoo.com) and IP address. When local machine sets its DNS server
with this router’s IP address. Then every DNS conversion request packet from the PC to this router
will be forwarded to the real DNS in outside network. After the router gets the reply, then forwards it
back to the PC.
2
Chapter 1 Introduction
Dynamic Domain Name System (DDNS): The Dynamic DNS service allows you to alias a dynamic
IP address to a static hostname. This dynamic IP address is the WAN IP address. For example, to
use the service, you must first apply an account from this free Web server http://www.dyndns.org/.
There are more than 5 DDNS servers supported.
PPP over Ethernet (PPPoE): Provides embedded PPPoE client function to establish a connection.
Users can get greater access speed without changing the operation concept, sharing the same ISP
account and paying for one access account. No PPPoE client software is required for local
computer. The Automatic Reconnect and Disconnect Timeout (Idle Timer) functions are provided,
too.
Virtual Server: User can specify some services to be visible from outside users. The router can
detect incoming service request and forward it to the specific local computer to handle it. For
example, user can assign a PC in LAN acting as WEB server inside and expose it to the outside
network. Outside user can browse inside web server directly while it is protected by NAT. A DMZ
host setting is also provided to a local computer exposed to the outside network, Internet.
Firewall: Supports SOHO firewall with NAT technology. Automatically detects and blocks the Denial
of Service (DoS) attack. Packet filtering is also supported. The hacker’s attack will be recorded
associated with timestamp in the security logging area. More firewall features will be added
continually, please visit our web site to download latest firmware.
Dynamic Host Control Protocol (DHCP) client and server: In the WAN site, the DHCP client can
get an IP address from the Internet Server Provider (ISP) automatically. In the LAN site, the DHCP
server can allocate multiple clients IP addresses and distribute them including IP address, subnet
mask as well as DNS IP address to local computers. It provides an easy way to manage the local IP
network.
Rich Packet Filtering: Not only filter the packet based on IP address, but also based on Port
numbers and MAC address. It will increase the performance in LAN and WAN, also provide a
higher-level security control
SNTP: An easy way to get the network real time information from an SNTP server.
Web based GUI: Supports web based GUI for configuration and management. It is user-friendly
and comes with on-line help. It also supports remote management capability for remote users to
configure and manage this product.
3
Billion BIPAC 7100SV VoIP ADSL Router
1.4 BIPAC 7100SV Application
4
Chapter 2
Using Billion VoIP ADSL Modem/Router
2.1 Cautions for Using Billion VoIP ADSL Modem/Router
Do not place the router under high humidity and high temperature.
Do not use the same power source for the device with other equipment.
Do not open or repair the case yourself. If the device is too hot, turn off the power
immediately and have a qualified serviceman repair it.
Avoid using this product and all accessories outdoors.
Place the product on the stable surface.
Only use the power adapter that comes with the package.
2.2 The Front LEDs
LED
5
Meaning
PWR
Lit green when power adapter is connected.
SYS
When flash, it indicates that the device is working properly.
Phone
Lit green when the phone is off hook.
LAN
Lit green when the LAN link is connected.
ADSL
When lit, it indicates that the ADSL (Line) port is connected to the DSLAM
and working properly.
Billion BIPAC 7100SV VoIP ADSL Router
2.3 The Rear Ports
LED
Meaning
Power Switch
A Power ON/OFF switch
Power Jack
Connect the supplied power adapter to this jack.
Reset
Press it to restore the factory default setting back.
VoIP
Connect RJ-11 cable to this port when connecting to an analog phone
set.
LAN
(RJ-45
connector)
LINE
(RJ-11
connector)
Connect the supplied Ethernet cable to this port when connecting to a
NIC (Network Interface card) in PC.
Connect an UTP Ethernet cable to this port when connecting to a LAN
such as an office or home network.
Connect the supplied RJ-11 cable to this port when connecting to the
ADSL
2.4 Cabling
The most common problem associated with Ethernet is bad cabling or ADSL line. Make sure that all
connected devices are turned on. On the front of the product is a bank of LEDs. As a first check, please
verify that the PWR, LAN and ADSL LEDs are lit and SYS LED is blinking. If they are not, verify that you
are using the proper cables.
So long as the cables are connected and the LEDs are lit normally, follow “Chapter 3 Configuration”
below to modify the network settings.
6
Chapter 3
Configuration
BIPAC 7100SV can be configured with your Web browser. The web browser is included as a standard
application in following operation systems, UNIX, Linux, Mac OS, Windows 95/98/NT/2000/Me/XP, etc.
The product provides a very easy and user-friendly interface for configuration.
3.1 Before Configuration
This section describes the configuration required by LAN-attached PCs that communicate with BIPAC
7100SV, either to configure the device, or for network access. These PCs must have an Ethernet
interface installed properly, be connected to BIPAC 7100SV either directly or through a hub, and have
TCP/IP installed and configured to obtain an IP address through a DHCP server or a fixed IP address
which must be in the same subnet of BIPAC 7100SV. The default IP address of router is 192.168.1.254
and subnet mask is 255.255.255.0. The best and easy way is to configure the PC to get an IP address
from BIPAC 7100SV.
Please follow the steps below for PC’s network environment installation. Before taking the first step,
please check your PC’s network components. If your PC connects the ADSL Modem/Router through
Ethernet port, the TCP/IP protocol stack and Ethernet network adapter must be installed. If not, please
refer to MS Windows relative manuals.
Any TCP/IP capable workstation can be used to communicate with or through
BIPAC 7100SV. To configure other types of workstations, please consult the
manufacturer’s documentation.
Configuring PC in Windows XP
1. Go to Start / Control Panel (in
Classic View). In the Control Panel,
double-click on Network
Connections.
2. Double-click Local Area Connection.
7
Billion BIPAC 7100SV VoIP ADSL Router
3. In the Local Area Connection
Status window, click Properties.
4. Select Internet Protocol (TCP/IP)
and click Properties.
8
Chapter 3 Configuration
5. Select the Obtain an IP address
automatically and the Obtain DNS
server address automatically radio
buttons.
6. Click OK to finish the configuration.
Configuring PC in Windows 2000
1.
Go to Start / Settings / Control
Panel. In the Control Panel, doubleclick on Network and Dial-up
Connections.
2.
Double-click Local Area Connection.
9
Billion BIPAC 7100SV VoIP ADSL Router
3.
In the Local Area Connection
Status window, click Properties.
4.
Select Internet Protocol (TCP/IP)
and click Properties.
10
Chapter 3 Configuration
5.
Select the Obtain an IP address
automatically and the Obtain DNS
server address automatically radio
buttons.
6.
Click OK to finish the configuration.
Configuring PC in Windows 95/98/ME
1. Go to Start / Settings / Control
Panel. In the Control Panel, doubleclick on Network and choose the
Configuration tab.
2. Select TCP / IP -> NE2000
Compatible, or the name of your
Network Interface Card (NIC) in your
PC.
3. Click Properties.
11
Billion BIPAC 7100SV VoIP ADSL Router
4. Select the IP Address tab. In this
page, click the Obtain an IP address
automatically radio button.
5. Then select the DNS Configuration
tab.
6. Select the Disable DNS radio button
and click OK to finish the configuration.
12
Chapter 3 Configuration
Configuring PC in Windows NT4.0
1.
Go to Start / Settings / Control
Panel. In the Control Panel, doubleclick on Network and choose the
Protocols tab.
2.
Select TCP/IP Protocol and click
Properties.
13
Billion BIPAC 7100SV VoIP ADSL Router
3.
Select the Obtain an IP address
from a DHCP server radio button
and click OK.
3.2 Factory Default Settings
Before you configure this device, you need to know the following default settings.
1. Web Configuration
Password: There are two levels of password protection, Administrator Level and User Level.
Administrator Level
User Name
Password
admin
password
user
password
User Level
2. Device IP Network settings in LAN site
IP Address: 192.168.1.254
Subnet Mask: 255.255.255.0
3. ISP setting in WAN site
Virtual Circuit 0: 1483 Routed IP LLC
4. DHCP server
DHCP server is enabled.
IP address pool from IP Address: 192.168.1.100 to IP Address: 192.168.1.199
14
Chapter 3 Configuration
3.2.1 Password
The default username and password are admin and password respectively.
If you ever forget the password to log in, you may press the RESET button up to 2
seconds to restore the factory default settings.
3.2.2 LAN and WAN Port Addresses
The parameters of LAN and WAN ports are pre-set in the factory. The default values are shown below.
LAN Port
IP address
Subnet Mask
DHCP server function
IP
addresses
for
distribution to PCs
192.168.1.254
255.255.255.0
Enabled
100 IP addresses continuing from
192.168.1.100 through 192.168.1.199
(Actually, it can supports up to 253 users.)
WAN Port
Obtain an IP address
automatically. ISP assigns
this IP address.
3.3 Information from ISP
Before configuring this device, you have to check with your ISP (Internet Service Provider) what kind of
service is provided such as PPPoE, PPPoA, RFC1483, IPoA, or PPTP-to-PPPoA Relaying.
Gather the information as illustrated in the following table and keep it for reference.
VPI/VCI, VC-based/LLC-based multiplexing, Username, Password, Service
PPPoE
Name, and Domain Name System (DNS) IP address (it can be
automatically assigned by your ISP when you connect or be set manually).
VPI/VCI, VC-based/LLC-based multiplexing, Username, Password, and
PPPoA
Domain Name System (DNS) IP address (it can be automatically assigned
by your ISP when you connect or be set manually).
RFC1483 Bridged
VPI/VCI, VC-based/LLC-based multiplexing to use Bridged Mode.
VPI/VCI, VC-based/LLC-based multiplexing, IP address, Subnet mask,
RFC1483 Routed
Gateway address, and Domain Name System (DNS) IP address (it is fixed
IP address).
15
Billion BIPAC 7100SV VoIP ADSL Router
VPI/VCI, VC-based/LLC-based multiplexing, IP address, Subnet mask,
IPoA
Gateway address, and Domain Name System (DNS) IP address (it is fixed
IP address).
3.4 Configuring with Web Browser
The ADSL Modem/Router can be configured with your Web browser. The web browser is included as a
standard application in following operation systems, UNIX, Linux, Mac OS, Windows
95/98/NT/2000/Me/XP, etc. The product provides a very easy and user-friendly interface for configuration.
Open the web browser, enter the local port IP address of the ADSL Router, which default at
192.168.1.254, and click “Go” to get the login page.
There are two levels of password protection. The first level is for administrator and the second one is for
user.
If you want to configure the device with administrator level, type admin in the username field and
password in the password field. Then, click “OK” to log in. You can modify these passwords for security
and management purpose.
16
Chapter 3 Configuration
At the configuration homepage, the left navigation pane where bookmarks are provided links you directly
to the desired setup page, including:
Status (ADSL Status, LAN Status, PPP Status, Learned MAC Table, Routing Table, System Log,
Security Log)
Quick Start
Configuration (WAN, LAN, VoIP, System, Firewall, Virtual Server, Advanced)
3.4.1 Status
The Status section provides and contains many items including device H/W and S/W information, LAN,
WAN, Port status and all defined interfaces. It also provides useful information for users to review the
status of device.
17
Billion BIPAC 7100SV VoIP ADSL Router
3.4.1.1 Status – ADSL Status
Displays the status of your ADSL connection. It will refresh every two seconds.
3.4.1.1.1 ADSL Status – WAN Status
18
Chapter 3 Configuration
3.4.1.1.2 ADSL Status – ATM Status
3.4.1.2 Status – LAN Status
Displays the status of your Local Area Network (LAN) connection.
19
Billion BIPAC 7100SV VoIP ADSL Router
3.4.1.2.1 LAN Status – TCP Status
3.4.1.3 Status- PPP Status
Displays the status of your PPP connection. It will refresh every ten seconds.
20
Chapter 3 Configuration
3.4.1.4 Status- Learned MAC Table
Aging Timeout: Enter the time period for the router to memorize MAC addresses.
21
Billion BIPAC 7100SV VoIP ADSL Router
3.4.1.5 Routing Table
Display the current routing paths of BIPAC 7100SV.
3.4.1.6 System Log
Display the system logs cumulated till the present time. You can trace the historical information through
this function.
22
Chapter 3 Configuration
3.4.1.7 Security Logs
Display the information of security logs. If hacker attacks your sever, he will be isolated by the firewall
function and the router will record related information. Hence, you know where the hacker comes from.
23
Billion BIPAC 7100SV VoIP ADSL Router
3.4.2 Quick Start
If you use this device to access the Internet through the ISP, this web page is enough for you to configure
this router to access the Internet and enable VoIP service without a problem.
3.4.2.1 ADSL Quick Start
Please check Chapter 3.3 (Information from the ISP), then enter the proper values into this web page,
click the Apply button and then click the Save Config button to save all of the configuration parameters
to FLASH. After the router reboot, you may check the Status web page to check whether the router is
connected to the ISP or not. In most cases, you can access the Internet immediately. If not, please refer
to the sections below for more information.
3.4.2.2 VoIP Quick Start
If you have a VoIP SIP account, you may configure it to enable this service. Please refer to the sections
(VoIP configuration) below for more information.
24
Chapter 3 Configuration
3.4.3 Configuration
When you click this item, you get following sub-items to configure BIPAC 7100SV.
LAN, WAN, Firewall, System, VPN, Virtual Server, Advanced and Help
3.4.3.1 WAN
The screens below contain settings for the WAN interface toward Internet.
Select Adapter
25
Billion BIPAC 7100SV VoIP ADSL Router
Select the item of PVCs you want to configure. Then, press the Submit button.
26
Chapter 3 Configuration
Virtual Circuit
Virtual Circuit: Enable/Disable the settings of this VC.
Bridge: If you set this device to be bridge mode, select Enable; if not, please select Disable.
IGMP: You can Enable or Disable this function.
Encapsulation: There are eleven ways ─ PPPoE VC-Mux, PPPoE LLC, PPPoE None, PPPoA VC-Mux,
PPPoA LLC, 1483 Bridged IP VC-Mux, 1483 Bridged IP LLC, 1483 Routed IP VC-Mux, 1483 Routed IP
LLC, Classical IP over ATM, Native ATM ─ for the device to have a public IP address and then to access
27
Billion BIPAC 7100SV VoIP ADSL Router
Internet. You have to check with your ISP about which way is adopted.VPI: Consult the telephone
company to get the Virtual Path Identifier (VPI) number. The default value is 0.
ATM
VPI: Consult the telephone company to get the Virtual Path Identifier (VPI) number. The default value is 0.
VCI: Consult the telephone company to get the Virtual Channel Identifier (VCI) number. The default value
is 32.
Service Category: Select UBR or CBR.
DHCP Client
DHCP Client: Check to enable the DHCP client function if you want the device to get an IP address
automatically from your ISP.
Host Name: Enter the name of your work group.
MAC Spoofing
MAC Spoofing: The MAC Spoofing is for solving the scenario when the ISP only recognizing the
specified MAC address.
Static IP Settings
IP Address: Enter the information provided by your ISP.
Subnet Mask: Enter the information provided by your ISP.
Default Gateway: Enter the gateway address provided by your ISP.
PPP
If your encapsulation is set to be PPPoE or PPPoA, the following fields must be entered.
Service Name: This item is for identification purpose. If it is required, your ISP will provide you the
information. Maximum input is 31 alphanumeric characters.
Username: Enter the username provided by your ISP.
Password: Enter the password provided by your ISP.
Disconnect Timeout seconds: Auto-disconnect the ADSL Router when there is no activity on the
line for a predetermined period of time. You can input any number from 0 to 32767. The default value is 0
seconds.
MRU: Maximum Receive Unit indicates the peer of PPP connection the maximum size of the PPP
information field this device can be received. The default value is 1492 and is used in the beginning of the
PPP negotiation. In the normal negotiation, the peer will accept this MRU and will not send packet with
information field larger than this value.
MTU: Maximum Transmission Unit indicates the network stack of any packet is larger than this value will
be fragmented before the transmission. During the PPP negotiation, the peer of the PPP connection will
28
Chapter 3 Configuration
indicate its MRU and will be accepted. The actual MTU of the PPP connection will be set to the smaller
one of MTU and the peer’s MRU. The default value is 1492.
MSS: Maximum Segment Size is the largest size of data that TCP will send in a single IP packet. When a
connection is established between LAN client and a host in the WAN side, the LAN client and the WAN
host will indicate their MSS during the TCP connection handshake. The default value is 1492.
Authentication: Default at “Auto”.
Automatic Reconnect: Check to enable this device to automatically re-establish the PPPoE session
when disconnected by ISP.
3.4.3.2 LAN
This screen contains settings for LAN interface attached to the LAN port.
Device IP Address
IP Address: Default at 192.168.1.254.
This is the device IP address in LAN site. If you plan to change it to another IP address to a different
range of IP subnet. Please make sure your PC is also located at the same IP subnet. Otherwise, you may
not be able to access the router.
Subnet Mask: Default at 255.255.255.0.
DHCP Server
DHCP Server: Check DHCP Server to enable the router to distribute IP Addresses, subnet mask and
DNS setting to computers. Hence, the following fields will be activated. If you do not check this selection,
29
Billion BIPAC 7100SV VoIP ADSL Router
remember to specify a static IP address, subnet Mask, and DNS setting for each of your local computers.
Be careful not to assign the same IP address to different computers.
DHCP address pool selection: Auto or User Defined. If select the AUTO, router will assign an IP
address back to PC’s IP request. If User Defined, please specify the IP pool range.
User Defined Start Address: Enter the start address of this local IP network address pool. The pool is a
piece of continuous IP address segment. The default value is 192.168.1.100.
User Defined End Address: Enter the last address of this local IP network address pool that you want
the DHCP server to assign IP addresses to. The default value is 192.168.1.199.
With this case, the DHCP pool is from 192.168.1.100 to 192.168.1.199. Therefore, the local computer will
get an IP address located at this range randomly.
Lease Time: Set the lease time you required.
User Mode: There are two selections, Single User and Multi-User, for this setting.
3.4.3.3 VoIP
This chapter describes the settings for the VoIP module. This will create telephone-like services in the
Internet. Most of VoIP services are free when surfing the Internet. When you finish all the settings you
need, remember to click on “SAVE CONFIG” button on the right-down corner to activate your settings.
The “RESTART” button is for you to reboot the device.
This page shows the software version you are using for the VoIP ADSL Router.
30
Chapter 3 Configuration
3.4.3.3.1 General Configuration
This screen contains some basic settings for the VoIP Module.
SIP: Enable/Disable to use SIP (Session Initiation Protocol) as VoIP call signaling protocol. You need to
enable SIP in order to make or receive SIP calls.
SIP Registration: Enable/Disable to register a SIP account in the SIP server (refer Service Provider
section below) or not.
Local SIP Port: Enter the local SIP port, which the device uses to listen incoming requests. (Range from
5000 to 65535, default value is 5060)
Start Media Port: It is known as RTP (Real-time Transport Protocol) port, provide the base value from
the media (RTP) ports that are assigned for various endpoints and the different call sessions that may
exist within an end-point. (Range from 5000 to 65535, default value is 5000)
Interface To Use: Select the PVC line which you uses to connect to the Internet.
Service Provider To Use: Select your service provider or click on “Update Service Provider” to do the
configuration. Details are illustrated below.
Login Account To Use: Select login account you want to use or click on “Update User Login Account”
for more configuration. Details are illustrated below.
31
Billion BIPAC 7100SV VoIP ADSL Router
This screen contains registration-related settings for getting VoIP services from SIP service provider.
Service Provider List: This section allows you to select the service provider. When the selection is done,
respective parameters below are automatically displayed.
New Service Provider: You can add new service provider manually.
Registration Interval: specify the re-registration interval in seconds.
Authentication Method: specify the authentication method, currently only MD5 is supported.
Registrar Address: indicate the IP address of SIP registrar server in which VoIP Router register for SIP
account.
Registrar Port: SIP registrar would listen to register requests from VoIP device through this port.
Proxy Address: indicate the IP address of SIP proxy server.
Proxy Port: specify the port of the SIP proxy server on which it will listen for messages.
Outbound Proxy Address: indicate the SIP outbound proxy server IP address. This parameter is very
useful when VoIP device is behind a NAT.
Outbound Proxy Port: specify the port of the SIP outbound proxy on which it will listen for messages.
Service Provider Action: There are four actions the VoIP Module provides for the configuration of SIP
Service Provider. They are: List current service provider rules, add, edit, and delete.
32
Chapter 3 Configuration
Login Account List: Select the correct accounts that you want to use.
New Account Name: If you want to modify or add new account and need to enter new account name.
UserID: Enter your registration ID given by SIP Registrar Server
Password: Enter the Password for authentication with the registrar
AuthUserID: same as UserID
DisplayName: Insert the display name you prefer and it would appear on the CallerID
Login Action: Choose action “Display” ”Add” ”Edit” or “Delete” to modify the Login Account.
3.4.3.3.2 Phone Book
This section is for you to establish personal phone book for speed dial. For example, you can press the
prefix “#0” to inform VoIP device dialing the VoIP number according to entry 0 on the phone book.
33
Billion BIPAC 7100SV VoIP ADSL Router
Speed Dial: The VoIP ADSL Router provides 10 entries from 0 to 9. When you dial “#0” mapping to entry
0 in the phone book.
Abstract Description: indicate the purpose or useful information for this entry.
Remote UserID: Enter the UserID you want to contact. Refer UserID to VoIP -> Configuration -> UserID.
IP Address / Domain: indicate remote user’s IP address or domain name if this remote user does not
register in the SIP server. If remote user is registered in the SIP server, this field is related to the SIP
server’s IP / Domain name.
Here are some examples:
Scenario 1
If your friend Tim gives you a SIP URL as sip: [email protected] then you can enter the Phone book
as: Remote UserID: 89755
IP Address / Domain: 192.246.69.223
Scenario 2
If your friend Felix gives you a SIP URL as sip: [email protected] then you can enter the Phone book as:
Remote UserID: felix
IP Address / Domain: iptel.org
Scenario 3
34
Chapter 3 Configuration
If your friend Greg gives you an IP address "192.246.56.56" only, then you can enter the Phone book as:
Remote UserID: (leave blank, don't fill anything)
IP Address / Domain: 192.246.56.56
3.4.3.3.3 Dial Plan
This section allows you to set-up rules for your dialing actions.
Working Service Provider: This section allows you to select the service provider. When the selection is
done, respective parameters below are automatically displayed.
35
Billion BIPAC 7100SV VoIP ADSL Router
Rule Number: You can establish multiple rules for the dial plan. Enter the rule number you would like to
edit or delete.
Prefix: This is the actual dial plan prefix string to be stored. In case of no prefix, the string NULL must be
stored.
Prefix Timer: This is the Inter-Digit timer value in milliseconds to be used for the above prefix.
Not Allowed First Digits: Enter the first digits that are not allowed range from 0-9 separating by commas.
Long_NumDigits: Enter the number of digits after the prefix. This will be applied to Long_Timer.
Long_Timer: This value is in milliseconds. It will be applied for Long_NumDigits. When time expires, the
VoIP Router will start processing the dial string you have entered.
Short_NumDigits: Enter the number of digits after the prefix. This will be applied to Short_Timer.
Short_Timer: This value is in milliseconds. It will be applied for Short_NumDigits. When time expires, the
VoIP Router will start processing the dial string you have entered.
Suffix: The VoIP Router will start processing the dial string you have entered when pressing the suffix.
Dial Plan Action: There are various actions to choose for the specific rule.
Dial Plan Rule Action: You can edit or delete the rules by selecting actions here. The action will be
applied to the Rule Number you have chosen.
Service Provider Dial Plan Rules Table: This table lists the values have been set up for the selected
service provider.
Submit: Click on the button to make your settings effective. If you would like your settings being
permanent, click SAVE CONFIG.
3.4.3.3.4 Call Feature
This screen contains settings for configuring the call features.
36
Chapter 3 Configuration
CallForwarding:
CallForwarding Unconditionally: VoIP device will forward all incoming call to the forwarding number.
CallForwarding On Busy: VoIP device will forward all incoming call to the forwarding number when
user is already on the phone talking to someone else.
CallForwarding On No Answer: VoIP device will forward all incoming call to the forwarding number
when user is unavailable to pick up the phone.
Call Forwarding Number: specify the number to be used when user enables any type of call forwarding.
Call Waiting: Enable/Disable the call waiting feature.
Call Return: Enable/Disable the call return feature.
3.4.3.3.5 Advanced Telephony Settings
This section is for you to do some advanced settings to the VoIP ADSL Router.
37
Billion BIPAC 7100SV VoIP ADSL Router
Configure Caller ID info:
Modulation: This is Caller ID Modulation (Bell 202.V23). You can select between CID_BELL202 and
CID_V23.
Delay: Delay , in milliseconds , between the end of the first ring and beginning of the CID
transmission.
FSK AMP 0: FSK (Frequency-Shift Keying) is a method of transmitting digital signals. Logic 0 (low)
frequency & logic 1(high) frequency are in an analog form. The VoIP device will convert them to FSK
for transmission purpose. Here you can set-up amplitude of logic 0 frequency.
FSK AMP1: Amplitude of logic 1(high) frequency
38
Chapter 3 Configuration
Configure VAD: VAD (Voice Activity Detection) is a function to detect voice activity during one
conversation. It is to efficiently utilize the bandwidth by not transmitting “empty” voice packets when both
sides remain silent. In the meantime, a comfort noise could be generated (occupied little bandwidth).
Disable VAD: No VAD function
Enable VAD with Comfort Noise: a comfort noise will be generated (CNG)
Enable VAD with Standard SID: VAD will be done with standard SID (Security Identifier).
Enable VAD and Suppress SID: When silence is detected, the VoIP device will not send any
packets to the network and the transmission of packets will be paused until voice is detected again
Configure Echo Cancellation: Four options are available including disable echo cancellation, enable
echo cancellation, enable echo cancellation with NLP, enable echo cancellation with CNG_NLP.
Start Attenuation: Setting the Start Attenuation timer.
Max Attenuation: Setting the Max Attenuation timer.
Echo Cancellation Tail Length: Setting the Tail Length.
Configure DTMF Relay: DTMF (Dual Tone Multi Frequency).
None: selecting none for sending DTMF tone in original audio form.
RFC 2833: sending voice with RTP packets
Configure Hook Flash Time: This parameter specifies the maximum time in mSec of Hook flash. For a
Hook flash to be detected , there should be an on-hook followd by an off-hook within “ Hook Flash Max
Time” mSec.
Configure Debounce Time: There are two parameters to be configured here.
OnOffDebounce Time: A delay in mSec before informing on an off-hook event to ensure it is not a
spike. If during that time an on-hook event is received , the two events will be ignored. If 0 , no
debounce will be done.
OffOnDebounce Time: A delay in mSec before informing on an on-hook event to ensure it is not a
spike. If during that time an off-hook event is received , the two events will be ignored. If “Hook
Flash Max Time” is configured , it MUST be more than OffOnDebounce. If it is 0 , no debounce
will be done.
Codec Preference: Set the priority of voice compression in terms of voice codec for outgoing message
and indication of incoming message accompanied with codec preference information. Priority 1 owns the
top priority.
G.711U / G.711A: G.711U and G.711A are the basic non-compressed encoder/decoder technique.
You can have very good sound quality but 64kbps bandwidth is needed.
G.729A: Using G.729A to encoder/decoder voice information into a single packet reduces the
bandwidth consumption (8kbps only) while you still can have good sound quality.
39
Billion BIPAC 7100SV VoIP ADSL Router
Note: Codec priority is selected using a drop-down box. If two codec types are assigned the same
priority, then the priority is assigned in the order as G711U > G711A > G729 in the decreasing order of
priority. For example, if the user selects 1, 2, 2, for G711U, G711A, and G729A respectively, the
application will assign priority as 1, 2, and 3 for G711U, G711A, and G729A respectively
3.4.3.3.6 Ring Tone
This screen contains settings for pattern-creation of various ring tones.
Country Specific Ring & Tones: The VoIP ADSL Router provides default parameters of ring tones
according to different countries. You can select one country you prefer or where you located in.
Working Country: This selection is a drop-down box, which allows user to select the country for
which the VoIP device must work. When a country is selected, the country parameters are
automatically displayed. New country can be added and defined by user.
New Country: a text-field where you can enter the new country to add or modify some existing string.
Please also refer below about Ring Tone Action to add, display, edit, or delete.
Ring Parameters: Defined by five fields, Frequency, On Time1, Off Time1, On Time2, Off Time2.
Frequency is given in hertz. Time is given in milliseconds.
Dial Tone: Defined by six fields, Frequency1, Frequency2, On Time1, Off Time1, On Time2, Off Time2.
Frequency is given in hertz. Time is given in milliseconds.
Busy Tone: Defined by six fields, Frequency1, Frequency2, On Time1, Off Time1, On Time2, Off Time2.
Frequency is given in hertz. Time is given in milliseconds.
40
Chapter 3 Configuration
RingBack Tone: Defined by six fields, Frequency1, Frequency2, On Time1, Off Time1, On Time2, Off
Time2. Frequency is given in hertz. Time is given in milliseconds.
CallWaiting Tone: Defined by six fields, Frequency1, Frequency2, On Time1, Off Time1, On Time2, Off
Time2. Frequency is given in hertz. Time is given in milliseconds.
Alerting Tone: Defined by six fields, Frequency1, Frequency2, On Time1, Off Time1, On Time2, Off
Time2. Frequency is given in hertz. Time is given in milliseconds.
Congestion Tone: Defined by six fields, Frequency1, Frequency2, On Time1, Off Time1, On Time2, Off
Time2. Frequency is given in hertz. Time is given in milliseconds.
Recall Tone: Defined by five fields, Frequency1, Frequency2, On Time1, Off Time1, Duration. Frequency
is given in hertz. Time and Duration are given in milliseconds.
Stutter Dial Tone: Defined by five fields, Frequency1, Frequency2, On Time1, Off Time1, Duration.
Frequency is given in hertz. Time and Duration are given in milliseconds.
Ring Tone Action: a drop-down selection (Display, Add, Edit, Delete country)
Display -> display the selected country in the working country field after clicking submit button.
Add -> add a new country after clicking submit button according to the value that appears in the
New Country field. This field must not be empty.
Edit -> rewrite the selected country (working country field) with current parameters after clicking
submit button. The New Country field is optional and need to be filled only when the country code
also has to be changed.
Delete -> delete the selected country (working country field) from the country list.
3.4.3.3.7 Timer
You can configure various Timers that work at system level. All the values here are given in seconds.
41
Billion BIPAC 7100SV VoIP ADSL Router
Predial Timeout: indicate the time period through which the dial tone is heard once the phone is lifted off
the hook. At the end of this period, if no digits have been pressed, VoIP device will start playing fast-busy
tone.
Alert Timeout: indicate the time for which VoIP device will play the ring when an incoming call has
arrived and phone is on-hook. After this time period, the VoIP device will stop the ring automatically and
reject the incoming call.
Disconnect Timeout: indicate the time for which the fast-busy tone is played once a call has been
disconnected by remote end. At the end of this time, the Warble tone will be played until the user hangs
up the phone.
RingBack Timeout: Indicate the time period for which the VoIP device will wait while the ring back tone
is been played for the final response from the other end point once an outgoing call has been made and
the initial response has been received.
Call Progress Timeout: indicate the time period for which VoIP device will wait for initial response from
the other end point once an outgoing call has been made.
Call Waiting Timeout: indicate the time period for which the call-waiting tone will be played when an
incoming call arrives in the connected state.
Call Forward No Ans Timeout: indicate the time period for which the call will be forwarded when no
answered by anyone. This timer is applicable when “call forward on no answer” is enabled.
3.4.3.4 System
There are five items under the System section: Password, Time Zone, Upgrade, Factory Setting and
Restart.
42
Chapter 3 Configuration
3.4.3.4.1 Password
In factory setting, the default password is password, and that for user is also password. You can change
the default password to ensure that someone cannot adjust your settings without your permission. Every
time you change your password, please record the password and keep it at a safe place.
Please note that the minimum input for password is 8 alphanumeric characters long. Since it is case
sensitive, be sure that you remember whether a letter is in upper or lower case and make sure that your
Caps Lock is off. Moreover, please do not use the sign “&” in the passwords.
43
Billion BIPAC 7100SV VoIP ADSL Router
3.4.3.4.2 Time Zone
BIPAC 7100SV does not have a real time clock on board; instead, it uses the simple network time
protocol (SNTP) to get the current time from the SNTP server in outside network. Please choose your
local time zone and click Submit. You will get the correct time information after you really establish a
connection to Internet. The current time of selected time zone will be shown in the Status – System
window.
Automatically adjust clock for daylight saving changes: It is optional for different time zone area.
SNTP Server IP Address: Specify the IP address if you want to use your familiar SNTP server.
44
Chapter 3 Configuration
3.4.3.4.3 Upgrade
To upgrade the firmware of BIPAC 7100SV, you should download or copy the firmware to your local
environment first. Press the “Browse…” button to specify the path of the firmware file. Then, click
“Upgrade” to start upgrading. When the procedure is completed, BIPAC 7100SV will reset automatically
to make the new firmware work.
3.4.3.4.4 Factory Setting
If for any reason, you have to reset this router back to factory default settings, be careful that the current
settings will be lost and the settings are reset back to its default value. The factory default values is
detailed in the section 3.2 ‘‘Factory Default Settings’’.
45
Billion BIPAC 7100SV VoIP ADSL Router
3.4.3.4.5 Restart
In case the router stops responding correctly or in some other way stops functioning, you can perform the
restart. Your setting won’t be changed. Performing the restart, click on the Submit button.
46
Chapter 3 Configuration
3.4.3.5 Firewall
User can decide to enable this firewall function including Packet Filter, Block Hacker Attack, and Block
WAN request features for better security control or not. But be noted, it wastes network processor
computation power. The performance will be lower about 10% to 15%. More firewall features will be
added continually, please visit our web site to download latest firmware.
3.4.3.5.1 Packet Filtering
Packet filtering function enables you to configure your router to check specified internal/external user (IP
address) from Internet access, or you can disable specific service request (Port number) to /from
Internet. This configuration program allows you to set up different filter rules up to 6 for different users
based on their IP addresses or their network Port number. The relationship among all filters is “or”
operation, which means the device checks these different filter rules one by one, stating from the first rule.
As long as one of the rules is satisfied, the specified action will be taken.
Add: Click this button to add a new packet filter rule. After click, next figure will appear.
Edit: Check the Rule No. you want to edit. Then, click the “Edit” button.
Delete: Check the Rule No. you want to delete. Then, click the “Delete” button.
47
Billion BIPAC 7100SV VoIP ADSL Router
Outgoing
Incoming: Determine whether the rule is for outgoing packets or for incoming packets.
Active: Choose “Yes” to enable the rule, or choose “No” to disable the rule.
Packet Type: Specify the packet type (TCP, UDP, ICMP or any) that the rule will be applied to.
Select TCP if you want to scope for the connection-based application service on the remote server using
the port number. Or select UDP if you want to scope for the connectionless application service on the
remote server using the port number.
Log: Choose “Yes” if you want to generate logs when the filer rule is applied to a packet.
Action When Matched: If any packet matches this filter rule, Forward or Drop this packet.
Source IP Address: Enter the incoming or outgoing packet’s source IP address(es).
Source Port: Check the TCP or UDP packet’s source port number(s).
Destination IP Address: Enter the incoming or outgoing packet’s destination IP address(es).
Destination Port: Check the TCP or UDP packet’s destination port number(s).
If the DHCP server option is enabled, you have to be very careful in assigning the IP
addresses of filtered private IP range in order to avoid conflicts because you do not know
which PC in LAN is assigned to which IP address. The easiest and safest way is that the
filtered IP address is assigned to specific PC that is not allowed to access outside
resource such as Internet. You configure the filtered IP address manually to this PC, but it
is still in the same subnet with the router.
48
Chapter 3 Configuration
3.4.3.5.2 MAC Filtering
Enable Bridge Filtering: Check Yes to enable this function or check No to disable.
Src MAC: Enter the source MAC address.
Dest MAC: Enter the destination MAC address.
Type: Enter the Ethernet type.
Block
Forward: Check Block if you want to block requests from the source MAC address sending
to the destination MAC address. Check Forward if you want to forward requests from the source MAC
address sending to the destination MAC address.
3.4.3.5.3 Intrusion Detection
Check “Enable” if you want to detect invader sneak in your computer without permitted .The ADSL Router
can automatically detect and block the DoS (Denial of Service) attack if user enables this function. This
kind of attack is not to achieve the confidential data of this network; instead, it aims to crush specific
equipment or the entire network. If this happens, the users will not be able to access the network
resources. There are few samples of hacker patterns implemented as below.
-
IP Spoofing
-
Ping of Death (Length > 65535)
-
Land Attack (Same source / destination IP address)
-
IP with zero length
-
Sync flooding
49
Billion BIPAC 7100SV VoIP ADSL Router
-
Smurf Attack (ICMP Echo with x.x.x.0 or x.x.x.255)
-
Snork Attack
-
UDP port loop-back
-
TCP NULL scan
3.4.3.5.4 Block WAN Request
Check “Enable” if you want to exclude outside PING request from reaching on this router.
50
Chapter 3 Configuration
3.4.3.6 Virtual Server
Being a natural Internet firewall, the ADSL Router protects your network from being accessed by outside
users. When it needs to allow outside users to access internal servers, e.g. Web server, FTP server, Email server or News server, this product can act as a virtual server. You can set up a local server with
specific port number that stands for the service, e.g. Web (80), FTP (21), Telnet (23), SMTP (25), POP3
(110), DNS (53), ECHO (7), NNTP (119). When an incoming access request to the router for specified
port is received, it will be forwarded to the corresponding internal server.
51
Billion BIPAC 7100SV VoIP ADSL Router
For example, if you set the Public Port number 21 (FTP) to be mapped to the IP Address 192.168.1.100,
then all the ftp requests from outside users will be forwarded to the local server with IP address of
192.168.1.100.
Public Port (from) & Port (To): Enter the public port number & range you want to configure.
Port Type: Select TCP if you want to scope for the connection-based application service on the remote
server using the port number. Or select UDP if you want to scope for the connectionless application
service on the remote server using the port number.
Host IP Address: Enter the IP address of certain internal server to which requests from the specified port
is forwarded.
3.4.3.7 Advanced
There are eight items under the Advanced section: ADSL,DNS. Dynamic DNS, NAT. RIP. Static Routing,
MISC Configuration and Diagnostic Test.
3.4.3.7.1 ADSL
Trellis: Default at Enabled.
Handshake Protocol: Default at Autosense – G.dmt first. You can also choose other protocols, such as
Autosense – T1.413 first, G.dmt/G.lite, T1.413, G.dmt, G.lite.
Wiring Selection: Default at Tip/Ring. Select Auto or A/A1 if necessary.
52
Chapter 3 Configuration
3.4.3.7.2 DNS
A Domain Name System (DNS) contains a mapping table for domain name and IP address. In the
Internet, every host has a unique and friendly name such as www.yahoo.com and IP address. The IP
address is so hard to remember that you may just enter the friendly name www.yahoo.com and then the
DNS will convert it to its equivalent IP address.
You can obtain Domain Name System (DNS) IP address automatically if ISP provides it when you logon.
Or your ISP may provide you with an IP address of DNS. If this is the case, you must enter the DNS IP
address.
53
Billion BIPAC 7100SV VoIP ADSL Router
3.4.3.7.3 Dynamic DNS
With Dynamic DNS service, a domain name can be translated into a dynamic IP address, which is often
issued by ISP for dial-up service. A local server, such as Web server, Email server or FTP server, can
then be easily accessed without knowing the changing IP address.
54
Chapter 3 Configuration
Check the “Enable” button to access the Dynamic DNS service. You may sign up Dynamic DNS service
at http://www.dyndns.orgT and there you can also register domain names.
Host: Enter one domain name you have registered.
User Name: Enter the username used for sign-up.
Password: Enter the password used for sign-up.
Period: Set the time period for the Router to exchange information with the DDNS server. In addition to
update periodically according to this period setting, BIPAC 7100SV will take the same action
automatically whenever the assigned IP changes
3.4.3.7.4 NAT
The NAT Configuration page allows the user to set the configuration for the Network Address
Translation.
Dynamic NAPT: It provides dynamic Network Address Translation capability between LAN and multiple
WAN connections, and the LAN traffic is routed to appropriate WAN connections based-on the
destination IP addresses and Rout Table. This eliminates the need for the static NAT session
configuration between multiple LAN clients and multiple WAN connections.
NAT (Static): This option maps single WAN IP address to the local PC IP address. It is peer-to-peer
mapping, one-to-one. For each WAN interface, only one local PC IP address can be associated with each
WAN interface. Click the link Session Name Configuration to add the session name for WAN interface.
NAPT (Static): This option maps the single WAN IP address to many local PCs IP addresses, one-tomany. It is the multiple-mapping mechanism. For each WAN interface, more than one local PC can be
associated with one WAN interface. Click the Session Name Configuration to add the session name for
WAN interface.
55
Billion BIPAC 7100SV VoIP ADSL Router
Session Name: Enter the desired session name.
User’s IP: Allows the user to assign the IP address to map the corresponding NAT/NAPT sessions.
Session Name status will be displayed at the middle of this page to show the corresponding Session
Name with its IP address.
Click Session Name Configuration, the following screen displays.
Session Name: Enter the desired session name.
Interface: This field allows the user to choose specific WAN interface (PVC or PPP Session) for NAT
session.
NAT allows only one entry (User IP) per session, NAPT allows many entries (User IPs) per session.
Select Add or Delete and then press the Submit button to add or delete any NAT session name setting
to/from the following table.
Go back to the previous page, NAT Configuration, to continue further settings.
56
Chapter 3 Configuration
3.4.3.7.5 RIP
RIP: Default is Disabled.
Border Gateway: Default is Enabled.
Supply Interval seconds: The default value is 30 seconds.
Expire Timeout seconds: The default value is 180 seconds.
Garbage Timeout seconds: The default value is 120 seconds.
57
Billion BIPAC 7100SV VoIP ADSL Router
3.4.3.7.6 Static Route
If you have another router with a LAN-to-LAN connection, you may create a static routing on the router
that is the gateway to Internet.
Add: Click this button to add a new static routing. When you click this button, the next figure appears.
58
Chapter 3 Configuration
Delete: Check the item you want to delete. Then, click the “Delete” button.
Destination / Subnet Mask / Gateway Address: Fill in these fields required by this Static Routing
function.
3.4.3.7.7 MISC Configuration
HTTP server access: Default at Restricted.
HTTP server port: Default at 80.
FTP server: Default at Enabled.
TFTP server: Default at Disabled.
DMZ: Regarding the DMZ Host, it is a local computer exposed to the Internet. Therefore, an incoming
packet will be checked by NAT algorithms in the ADSL Router, then passed to the DMZ host when the
packet is not sent by hacker or not limited by the virtual server list.
DMZ HOST IP: Enter the IP address of the DMZ host.
DHCP Relay: Default at DHCP Server.
DHCP Target IP: Default is 0.0.0.0
IGMP Proxy: Default at Disabled.
PPP Half Bridge: Default at Disabled.
PPP reconnect on WAN access: Default at Disabled. Select Enabled if you want to automatically reestablish the PPPoE/PPPoA session when disconnected by ISP.
59
Billion BIPAC 7100SV VoIP ADSL Router
3.4.3.7.8 Diagnostic Test
As soon as you enter the test program, all tests will run automatically to diagnose the connection status of
the device.
Checking LAN Connection
Testing Ethernet LAN connection
This test passes if the Ethernet LAN interface is working properly.
Checking ADSL Connection
Testing ADSL Synchronization
This test checks your DSL modem to see if it can successfully negotiate and establish a DSL connection
with your service provider's central office equipments. The test returns PASS if a DSL connection is
established.
If this test returns FAIL, please try the test again a few minutes after this test is completed. Since your
DSL modem need a couple of seconds to a few minutes to establish the DSL connection depending on
your phone line quality. If this test returns FAIL, make sure your phone line is connected to your DSL
modem securely, and also check with your service provider to see if your service is activated.
If this test returns FAIL, all other tests will be skipped.
Checking Circuit 0 for Network Connection
Test ATM OAM Segment Loop Back
60
Chapter 3 Configuration
This test sends ATM OAM F5 Segment loop back request cells to the central office equipments through
your DSL connection. This test will pass if response cell is received. Since your service provider might not
support this test, your DSL modem could still work even if this test fails.
If this test fails consistently and your DSL modem seems not working, check to make sure the VPI and
VCI are configured correctly.
This test returns FAIL if the DSL synchronization test failed.
Test ATM OAM End-to-End Loop Back
This test sends ATM OAM F5 End-to-End loop back request cells to the central office equipments
through your DSL connection. This test returns PASS if response cell is received. Since your service
provider might not support this test, your DSL modem could still work even if this test fails.
If this test return FAIL consistently and your DSL modem seems not working, check to make sure the VPI
and VCI are configured correctly.
This test returns SKIPPED if the DSL synchronization test failed.
Test Ethernet connect to ATM
This test returns PASS if the ATM AAL5 module is loaded correctly in your DSL modem. If this test
returns FAIL, an internal error has occurred.
This test returns SKIPPED if the DSL synchronization does not return PASS.
Test IP connect to PPP
This test returns PASS if your DSL modem has been assigned a valid IP address by your service
provider through DHCP or your DSL modem is assigned a valid IP address statically.
If this test returns FAIL, run this test again a few minutes after this test is completed. If this test returns
FAIL consistently and DHCP client is turned on in your DSL modem, check with your service provider. If
this test returns FAIL consistently and your DSL modem is statically assigned an IP address, make sure
the IP address is the correct one assigned by your service provider.
This test returns SKIPPED if “Ethernet connect to AAL5” test does not return PASS.
Test Internet connection
This test returns PASS if the gateway can be reached through ping request. The gateway is assigned by
your service provider, or obtained from your service provider by PPP negotiation or DHCP negotiation.
If this test returns FAIL, run this test again a few minutes after this test is completed. If this test returns
FAIL consistently and your DSL modem seems not working, check to make sure your statically assigned
IP address is configured correctly or DHCP client is turned on with the current VC.
This test returns SKIPPED if "IP connect to PPP" or "IP connect to Ethernet" test does not return PASS.
61
3.4.4 Save Config
Click the Submit button to write settings to flash. Then, the system will reboot for changes to take effect.
62
Chapter 4
Troubleshooting
If the ADSL Router is not functioning properly, you can refer first to this chapter for simple troubleshooting
before contacting your service provider. This could save your time and effort but if the symptoms persist, then
consult your service provider.
Problems Starting Up the ADSL Router
Problem
None of the LEDs are on
when you turn on the
ADSL Router.
Corrective Action
Check the connection between the adapter and the ADSL Router.
If the error persists, you may have a hardware problem. In this
case, you should contact technical support.
Problems with the WAN Interface
Problem
Initialization of the PVC
connection failed.
Corrective Action
Ensure that the cable is connected properly from the ADSL port to
the wall jack. The ADSL SYN LED on the front panel of the ADSL
Router should be on. Check that your VPI, VCI, type of
encapsulation and type of multiplexing settings are the same as
what you collected from your telephone company and ISP.
Reboot the ADSL Router. If you still have problems, you may need
to verify these variables with the telephone company and/or ISP.
Problems with the LAN Interface
Problem
Can’t ping any station on
the LAN.
Corrective Action
Check the LAN LNK LED on the front panel. The LED should be
on for a port that has a station connected. If it is off, check the
cables between your ADSL Router and the station.
Verify that the IP address and the subnet mask are consistent
between the ADSL Router and the workstations.
Problems Connecting to a Remote Node or ISP
Problem
Can’t connect to ISP.
63
Corrective Action
Check section 3.4.1.3 “Status – PPP status” to verify the line
status.
APPENDIX
Product Support and Contact Information
Most problems can be solved by referring to the Troubleshooting section in the User’s Manual. If you cannot
resolve the problem with the Troubleshooting chapter, please contact the dealer where you purchased this
product.
Contact Billion
AUSTRALIA
http://www.billion.com.au/
©2004 Billion Electric Co., Ltd. PC Range P/L. All Rights Reserved.
WORLDWIDE
http://www.billion.com/
64