1
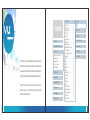
USER MANUAL
www.vutelepresence.com
Vu TelePresence Inc. 626 W. New Castle St. Zelienople, PA 16063 l
Phone: 1-888-99-VUMENOW
Telepresence for Everyone
Configuring Vu
Contents
Item Checklist
3
Unpacking & Handling Precautions
4
Connecting the Dots
4
Bandwidth with anyone, anywhere without moving an inch. It provides a suite
Media Control Unit/Codec Wiring
Keyboard Connection
Speaker Connection
Microphone Connection
Video Camera Setup
4
4
4
4
5
of features encompassing VirtualFacets™ Compression Technology, Multi Party
Calibrate Touchpad
5
Basic Operations
6
Room Lighting Guidelines
7
Camera Positioning
7
Furnishing Guidelines
8
Network Connectivity
8
®
The Vu TelePresence system delivers HD Quality Video Conferencing on Low
Conferencing, PC Sharing & Collaboration and Worldwide Vu TelePoint Access.
Please go through this owner's manual to familiarize yourself with this
product. We have also listed some primary safety information to provide
assistance in maintaining your device.
1
Vu bootscreen
Network settings
Network diagnostics
User setting
Time setting
Account manager
H.323 account
Standalone account
Standalone advance settings
SIP account settings
SIP account advance settings
User interface
Contacts
Favorites
Call log
Add contact
Settings
Network settings
User settings
Diagnostics
Diagnostics
Archives
Connect to support
Background images
The notification button
Turn off button
Calling a contact
9
9
9
10
10
11
11
12
12
13
13
14
14
15
15
15
16
16
17
18
18
19
20
20
21
21
22
22
Start Vu’ing
23
Vu call
23
Vu tech specs
24
Hardware
25
Viewing the Remote Control
26
Cleaning and Care
27
Safety: General
27
Product picture
28
2
Unpacking & Handling Precautions
Items Checklist
The following steps should be kept in mind while unpacking and assembling the whole unit:
• All the warnings and handling precautions should be followed strictly.
• Avoid placing the unit on any kind of unstable platform, stand or table that may fall, causing serious injuries as well as damage to the unit.
• The unit should only be operated from the kind of power source specified on the appropriate label by the manufacturer. (AC 110/220 V)
Check whether all the following items have been included before starting.
If anything is missing, please contact your sales representative.
Media Control Unit/Codec
Speaker
Microphone
Wireless Keyboard
Connecting the Dots
®
Now that we have established which parts comprise the Vu TelePresence unit, let's begin wiring it up!
Starting your system
Video Camera & Remote
720p HD Ready or 1080p Full HD
3
Cables
HDMI Cable
FireWire Cable
Power Cable
RCA Cable
Media Control Unit/Codec Wiring:
Connect the power cord to the MCU
Codec as shown.
Speaker Connection:
Connect the power and auxiliary
cable. The auxiliary cable goes
into the Microphone.
Keyboard Connection:
Connect the Vu wireless keyboard
USB dongle to the MCU Codec
as shown.
Microphone Connection:
Connect the Vu microphone to
the MCU Codec as shown using
the USB cable.
4
Video Camera Setup:
Basic Operations:
• The 1080p HD camera has several connection options, please choose
the HDMI connection cable to the Codec and connect the power cable to the
power jack. The 1080p camera will be connected to the MCU Codec via
To start the basic operations:
HDMI cable only, for HD quality conference.
• The 720p camera derives it’s power from the FireWire port
(1394 interface) located on the rear side of MCU Codec.
1080p Camera
720p Camera
1
Switch on the power button to
the [I] position, to power up the
codec.
3
Switch on the speaker by
using the ON-OFF switch.
The speaker can be muted
via the mute sound button.
2
Connect the microphone to the
speaker via a standard jack
(1/8 inch). The microphone
connects to the codec via a
USB cable. The microphone can
be muted by pressing the switch
on the right panel of the
microphone.
4
Rotate/pan the video camera
to your desired angle using
the remote. You can also zoom
in/out via the same remote
as per your requirement.
Calibrate Touchpad
The touchpad with its buttons is a pointing device that controls the navigation of the cursor on the monitor screen.
It provides basically the same functions as a desktop mouse.
Moving the Cursor:
Scrolling:
Place your finger in the center of the touchpad
and slide in a direction to move the cursor.
On the touchpad, slide your finger up or down on the
right side to scroll a window up or down simultaneously.
Slide Finger
Forward
Slide Finger
Right
Slide Finger
Left
Slide Finger
Backward
5
Scroll Up
HOME
Scroll Down
Note: The Wireless keyboard features a sleep mode which
powers down the unit to reduce battery consumption after a
certain amount of idle time. You can resume working by pressing
the ID Fn Link key IDLinkFn located at the bottom left hand side.
6
Room Lighting Guidelines:
®
The Vu TelePresence system will give optimal results when the room is brightly lit with balanced lighting scheme, making sure that the people seated are
clearly visible. Make sure the camera is never pointed at a window; this will mask the features of the subject to the caller on the other end.
The following points need to be kept in mind while setting up the room for an optimal TelePresence experience:
•
•
•
•
•
Lighting is crucial. The background should be brighter than the foreground.
Soften the light.
Eliminate the unwanted glare from reflections.
Color adjustments.
Background adjustments.
Camera Positioning
Furnishing Guidelines
It is recommended that special attention is given while purchasing furniture and
accessories for the Vu TelePresence® system.
The conference table should be “U” shaped or semi-circular having round edges.
The material should be 2'' thick wooden ply with cream colored laminate. The
table should be 8' long and 2' deep, so that the placement is approx. 5' to 5 ½'
from the TV. The conference table should also have the provision for electric
supply, internet connectivity, and VoIP phone.
The chief purpose of these furnishing guidelines is to provide the illusion of a
continuous table, enabling the participants to experience their clients' presence
in the same room.
Position the camera and display unit for optimal eye contact using the
wizard provided under Settings.
For optimal eye contact mount the camera on the centre of the upper
frame of your monitor screen. Rotate the camera upward or downward, left
or right for the best possible angle of view.
Network Connectivity
Vu TelePresence® is designed to work at very low bandwidths (700 kbps upstream and downstream for a point to point session) for 720p HD quality. It is
important that the user identifies the proper network setup and tweaks the connection for successfully running a meeting. Choosing the right ISP (Internet
Service Provider) is crucial for optimal product use.
ISPs should be selected based upon the settings a particular provider implements along with the kind of router and cable/DSL modem, the user has in order
to avoid any kind of connection issues.
For example, if the user faces poor video quality, network connectivity having more consistent bandwidth is preferred. In such cases, leased line speeds serve
the best quality. In addition, check your firewall configuration as firewalls tend to introduce latencies for real-time audio-video traffic. Having a public IP is
preferred though not mandatory.
7
8
Configuring Vu
Configuring Vu
Vu boot screen:
Network diagnostics:
Power on the Codec to get the Vu logo screen
Select the type of network and click on the next button
BRING FOCUS TO A CONNECTED WORLD
User settings:
Network settings:
Click on the network type drop-down to select the type of IP address.
Type in connection name and click on the apply button.
Type in the System name ( Vu name), System number ( Vu number),System
password, Bandwidth assigned to Vu. If you like to use the Vu server click on the
yes button, if click on the no button followed by typing the signaling server you
ought to use.
Note: Clicking on ‘Yes’ changes the color to blue
likewise clicking on ‘No’ changes the color to red.
9
10
Configuring Vu
Configuring Vu
Time settings:
H.323 account:
Configure the time zone, date and time and click on the submit button.
Based on the type of account(s) selected in the Account manager screen, you
would need to configure the accounts accordingly.
The screen shows the configuration information that needs to be filled in for
the H.323 protocol.
Standalone account:
If you have selected the Standalone account, enter the details of the account.
Account manager:
On the account manager screen select the type of accounts to be
configured and click on the next button.
11
The concept of Zone is similar to that of defining a group in which you could
include the Vu unit(s) that would be a part of the group.
If this is the first Vu in the group then the member address needs to be left
blank however the following Vu units in the group would have the IP address of
any Vu units in the same group.
12
Configuring Vu
Configuring Vu
Standalone advance settings:
SIP account advance settings:
In the advanced settings confirm the zone creation and authenticate the
information by typing in the Admin password.
On the Advanced screen, configure the SIP registration information with
outbound proxy, Port number, Username and the type of communication and
then click on the apply button.
SIP account settings:
13
User interface:
On the user interface screen, Vu menu along with Vu details are seen
Type in SIP account details and click on the apply button.
The Vu menu comprises of Home, Settings, Notifications and Shutdown button.
Additional SIP account information can be obtained after SIP registration with a
SIP service provider.
IP address, Vu Number and Vu Name are displayed in Vu details.
Clicking on the Home button displays 'Contact', 'Favorites', 'Call log' and 'Add
contact' tabs.
14
Configuring Vu
Configuring Vu
Contacts:
Add Contact:
Clicking on the contact tab will display the contact list, “green” telephonic icon
seen against the Contact name symbolizes that the Vu is online and likewise
“red” for offline Vu units.
To add a contact click on the add contact tab, enter the contact details and
click on the Add button.
To edit the contact details, click on the pencil icon, to delete the contact click
on the trash bin.
Favorites:
To add a contact in the favorite list, click on the Yes to favorite in contact details.
Call Log:
Call logs would display the 'Missed', 'Dialed' and 'Received' calls.
15
Settings:
This lists the Account Manager, Network settings, User settings, Diagnostics,
Time settings, Archives, Connect to support and Background images.
Account Manager: Using account manager you could set accounts for XMPP,
H.323, SIP and Standalone signaling modes for an account.
16
Configuring Vu
Configuring Vu
Network settings:
User settings:
IP protocol details of the connection are entered in this section. It has the
capability to add more than one connection, this helps the unit to change
networks as and when required.
Maximum allowed bandwidth, auto accept calls and type of camera used are
some important settings that could be configured here.
Diagnostics:
Diagnostic Tools like ping and iperf could be executed here. Analyze network
displays the status of the connection between the Vu, Router and server.
17
18
Configuring Vu
Configuring Vu
Diagnostics:
Archives:
Tools like Ping and iperf could be executed here Analyze network displays the
status of the network on the parameters Cable connection, Available network,
Available internet, UDP availability, and type of NAT.
Recorded session(s) are listed here and can be played with the help of the
inbuilt player.
Connect to support:
Typing in the server IP and Port number (Provided by support) will help the
support engineers to remotely login to the Vu unit to analyze and fix the
reported issue.
19
20
Configuring Vu
Configuring Vu
Background images:
Turn Off button:
The Vu Unit’s background images can be changed by using the images
displayed in this section
Clicking on this button will display Shutdown\Restart \Lock button.
The notification button:
Notifies on any update which is available. The user can then choose to install the
updates.
21
Calling a contact:
Search a contact from contact list or favorites and click on the green colored
telephonic icon
22
Start Vu'ing
Vu Tech Specs
Vu call:
On connecting the contact, the active buttons on the screen are Self view,
Recording and End conference. Each participant window will have a statistics
button. Statistics displays the Upload and Download network utilization, Jitter,
Packet loss and the type of Codec used.
23
Technology:
Video Specifications/Video Resolutions & Format
Audio Standards & Protocols
• HD Wide
Bandprotocols
Codec n interoperability calls.
• Proprietary VirtualFacetsTM Compression Technology in Vu to Vu native mode. Industry
standard
• Audio Input/Output
• Maximum resolutions widescreen 16:9 aspect ratio all resolutions
• 1 x Mic In
progressive scanning
• 1 x Speaker Out
• All resolutions at 30 frames per second
Directory & Address Book
Audio Characteristics
• Up to 1000 local directory entries
• Missed Call Notification
• Received / Dialed Call Directory
• High Definition Audio
• Full duplex for natural conversations
• Echo Cancellation for echo-free calls
• Automatic Gain Control
• Automatic Noise Reduction
Directory
User Interface
• International Language Support
• Intuitive Graphical User Interface
24
Hardware
Viewing the Remote Control
Speaker (Optional):
Media Control Unit/Codec
• High End 8CH DAC & 2CH ADC Integrated USB Chipset
• Low Noise Class-D Digital Amplifier
• High Quality Speaker Drive: Left/Right 2” 8W x 2
Subwoofer 2 1/2” 12W x 1
• VirtualFacets™ Compression Technology
• Parallel Processing using Multi-Core Processors
• Multi-Party Conferencing
• Easy PC Screen Sharing across Microsoft Windows© XP/Vista/Windows7
• Recording and Archival of Video Sessions (stores up to 1500 hours of conferences)
• Built-in Presence Capabilities
ABC
DEF
1
2
3
GHI
JKL
MNO
4
5
6
PQRS
TUV
WXYZ
7
8
9
*
0
#
F1
F2
F3
ZOOM+
Zoom In Button: Adjusts the object to appear closer
ZOOM-
Zoom Out Button: Adjusts the object to appear further away
FOCUS+
Focusing Buttons: Adjusts the focus of the object
FOCUS-
Microphone
• Crisp, Clear Audio
• Full Duplex
• Acoustic Echo Cancellation
• Noise Cancellation
• 7 feet Pick up Range
25
SET PRESET
• 720p at 30fps
• FireWire HD Quality Camera
• Pan Tilt and 65 Degrees FOV
• 3.6x Optical Zoom
• Sensitivity: 1.5 Lux
• High Quality Lens
• Multi-Function Remote Controller
• 1080p/30fps or 720p/60fps
• HDMI Interface
• Pan Tilt and 55 Degrees FOV
• 10x Optical Zoom
• TV Mountable
• Min Sensitivity: 10 Lux
• Multi-Function Remote Controller
GHI
JKL
MNO
4
5
6
PQRS
TUV
WXYZ
7
8
9
*
0
#
SET PRESET RUN PRESET
CLEAR PRESET
ZOOM+
ZOOM-
FOCUS+
CLEAR PRESET
BLC -
BLC+
CONFIRM
Home Button: Returns to the pre-configured position of the camera
HOME
BCL ON
Camera - 1080p Full HD
3
Horizontal Rotate Buttons: Horizontally rotates the camera to either the left/right direction
• 123-key Keyboard
• Ergonomic Design
Camera - 720p HD Ready
DEF
2
FOCUS -
F4
Keyboard & Mouse
ABC
1
BCL OFF
HOME
Vertical Rotate Buttons: Adjusts the pitch of the camera to either the upward/downward direction
IRIS +
IRIS -
MENU
Menu Button: Flashes the menu option of the camera
1080p Full HD
Camera Remote
720p HD Ready
Camera Remote
26
Cleaning and Care
Product Picture
®
Although the Vu TelePresence system has been designed with the utmost craftsmanship; environmental factors may hinder the performance of the device. To
avoid any malfunction from the device, a number of precautions should be taken.
• Unplug the device unit from the electrical outlet before cleaning.
• Clean your device with a soft cloth dampened with water. Do not use liquid or aerosol cleaners, which may contain flammable substances.
• Do not use accessories not recommended by the manufacturers since they may be dangerous.
• Ensure that the contacts between the codec, speakers, microphone and camera are all properly aligned.
• Keep away the device unit from any dusty places to avoid damage to the components.
• Ensure that the cleaning of the camera lens is done periodically.
SAFETY: General
• Do not attempt to service the device yourself unless you are a trained service technician. Always follow installation instructions closely.
• If you use an extension power cable with your AC adapter, ensure that the total ampere rating of the products plugged in to the extension power cable does not
exceed the ampere rating of the extension cable.
• Do not push objects into air vents or openings of your device. Doing so can cause fire or electric shock by shorting out interior components.
• Keep your device away from radiators and heat sources. Also, do not block cooling vents. Avoid placing loose papers underneath your device; do not place your
device in a closed-in wall unit or on a bed, sofa, or rug.
• To help avoid the potential hazard of electric shock, do not connect or disconnect any cables or perform maintenance or reconfiguration of this product during an
electrical storm.
• Do not use your device during an electrical storm.
27
28
®
“With Vu TelePresence ,
the whole world is your office.”