1
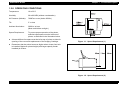
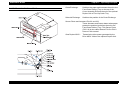
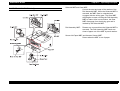
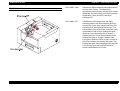
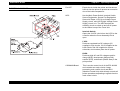
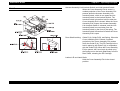
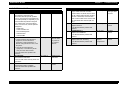
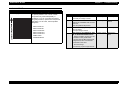
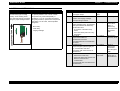
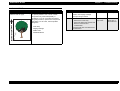
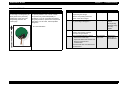
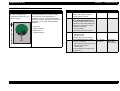
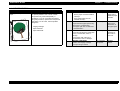
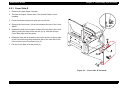
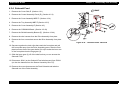
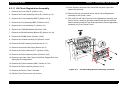
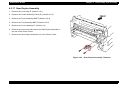
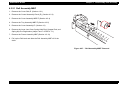
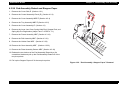
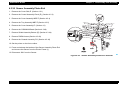
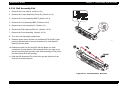
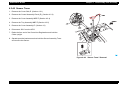
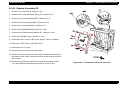
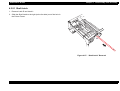
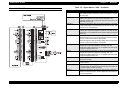
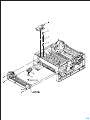
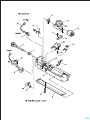
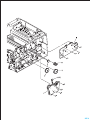
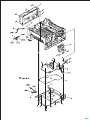
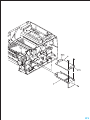
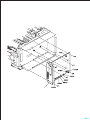
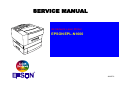
EPSON EPL-N1600
Chapter 4
Disassembly and Assembly
4.3.14 Chute Exchange
1. Remove the Cover Side,E. (Section 4.2.1)
2. Remove the Control Assembly Panel (E). (Section 4.2.3)
3. Remove the Cover Assembly MBF.E.(Section 4.2.4)
4. Remove the Tray Assembly MBF.E.(Section 4.2.5)
5. Remove the Cover Assembly,E. (Section 4.3)
6. Remove the Roll Assembly Exit Out.(Section 4.3.27)
7. Remove the Fuser Assembly.(Section 4.3.31)
8. Squeeze together the latch tabs of the left (right side of the printer)
Cap Chute Exchange and press the latch tabs out of the hole in the
Frame, and hold the Chute Exchange in the position.
9. Squeeze together the latch tabs of the right (left side of the printer)
Cap Chute Exchange and carefully pull the Chute Exchange away
from the Frame, together with the Caps Chute Exchange.
C H E C K
P O IN T
Rev. A
Figure 4-20. “Chute Exchange” Removal
Correctly direct the latch tabs of CAP CHUTE
EXCHANGE to a hole of the frame by viewing through
the gaps.
4-123