1
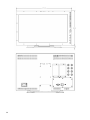
Rear Panel Features
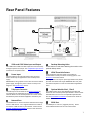
YPbPr and CVBS Video Input and Output
The V-MD173 has CVBS and YPbPr inputs and one active loopthrough output for each input. See Compatible Input Formats
for details on accepted formats.
Power Input
Connect 12VDC to the 4-pin XLR power input connector.
Power should only be supplied from the included power
supply.
IMPORTANT: If using a power source other than the included
power supply, damage may result. Please use the pin out
diagram in the Specifications section.
Tally Input Connector
The LED tally can be activated via the HD-15 connector by
connecting the corresponding pin to ground. A variety of
external devices can be used to perform the contact closure.
No additional power should be supplied to the HD-15 port.
Network Port
The Network Port is used to access the Network Control Page
for the V-MD monitor. Use a regular RJ45 Ethernet cable to
connect the V-MD monitor to your network. Please see the
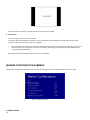
Network Configuration Submenu section of this manual for
further connection details.
Desktop Mounting Holes
These holes are used when attaching the monitor to the
optional desktop stand.
VESA 75mm Hole Pattern
VESA-standard 75 mm hole-patterns is provided to
accommodate a variety of custom mounting options. See
Dimensions for further details.
Warning: Please use only the square type VESA mount (which
fits inside the VESA Screw Length WARNING silkscreen) with
the 75mm hole pattern in order to avoid obstructing Module
Slot 2.
Optional Module Slot 1 / Slot 2
The V-MD monitor comes with Module Slots for Marshall
Electronics’ line of future proof Input Modules. Please contact
Marshall Electronics for a list of compatible Input Modules.
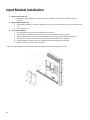
See the Input Module Installation instructions for details on
Module installation.
PROG Port
The PROG port is a Service / Upgrade port only. Please
contact Marshall Electronics for more information.
7